The ins and outs of keeping your AirPods free of grime and earwax.
Everybody needs to clean their AirPods of dirt and earwax to avoid damage to the earbuds, ear infections, or even sound issues.
However, AirPods are complex and fragile, and incorrectly cleaning them can result in irreparable damage.
In this article, we’ll explain how to safely and thoroughly clean AirPods, AirPods Pro, and AirPods Max, so read on!
How to Clean AirPods & AirPods Pro Exterior
To clean the exterior plastic of your AirPods or AirPods Pro, you’ll need a few materials:
- Soft, dry, lint-free cloth
- 70% isopropyl alcohol
- Cotton swab(s)
- Toothpick
- Soft-bristled Toothbrush
Here’s how to properly clean your AirPods:
- Lightly apply isopropyl alcohol to a cotton swab. Use it to wipe the exterior of your AirPods clean, avoiding the hole for the speaker mesh.
- Next, use the toothpick to remove debris from the parts that the cotton swab couldn’t reach, such as around the seams in the plastic.DO NOT apply too much pressure when using sharp objects like your toothpick. Aside from possible scratches, your AirPods’ speaker mesh is delicate and easily breakable.
- Use a soft-bristled toothbrush to clean the remaining debris in dirty areas.
- Finish it up with a wipe using the lint-free cloth. Wait at least half an hour for your AirPods to fully dry before putting them back in their case to avoid any moisture damage.
How to Clean AirPods & AirPods Pro Speaker Mesh
Cleaning the speaker mesh is a little more fiddly, though you’ll need fewer materials:
- Dry cotton swab(s)
- Soft-bristled toothbrush
Here’s what to do:
- Using a dry cotton swab, gently wipe around the speaker hole to pick up any loose dirt.
- Brush over the speaker with the soft toothbrush. This will loosen any smaller particles of dirt stuck in the hole or mesh. You can then remove them using the cotton swab.
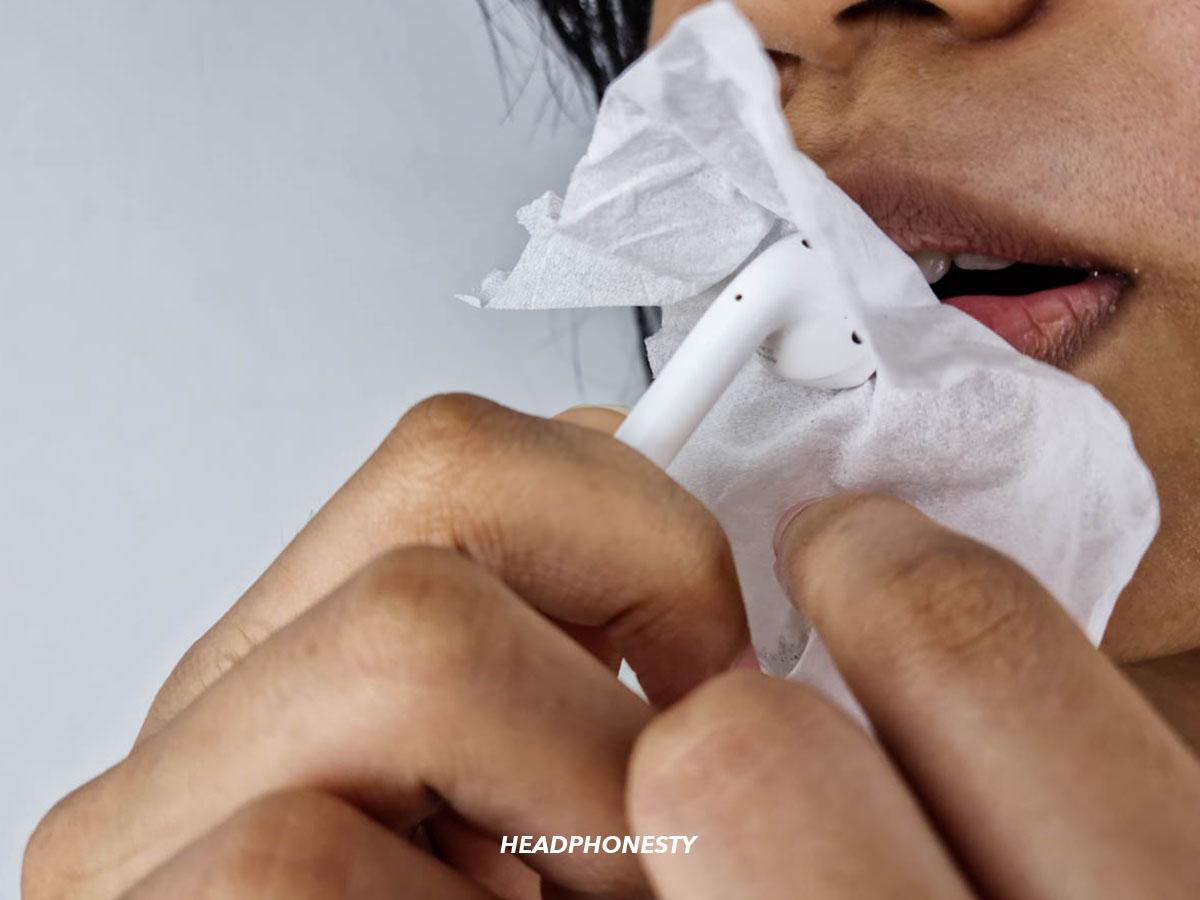
- For stubborn dirt, you can also try gently sucking the dirt out of the speaker mesh, covering the hole with a tissue to ensure you don’t inhale any dirt.

Sucking out stubborn dirt from the speaker mesh. While this can seem disgusting, many users swear by the method as it can clear the earwax melted into the AirPods. - You can repeat these steps until the cotton swab comes back clean. Make sure to replace the swab if the cotton wears thin to avoid poking at the speaker mesh with the plastic at the center.
How to Clean AirPods Pro Tips
Since AirPods Pro ear tips aren’t electronic components, you can clean them using a simple soapy water solution and a lint-free cloth:
- Remove the ear tips from your AirPods Pro by holding the earbud between thumb and forefinger and gently pulling the ear tip free.
- Wipe off the surface dirt with the lint-free cloth.
- Rinse the ear tips in a solution of soap and water.
- Dry them thoroughly with the cloth, then leave them to dry.
Check out our article on cleaning AirPods Pro for more details and troubleshooting tips.
How to Clean Your AirPods & AirPods Pro Charging Case
Cleaning your charging case can help fix charging issues and problems with resetting the AirPods. You’ll need:
- 70% isopropyl alcohol
- Cotton swab(s)
- Toothpick
- Lint-free cloth (or paper towel)
- Soft toothbrush
Here’s how to thoroughly clean your charging case:
- Lightly dampen a lint-free cloth with isopropyl alcohol and clean dirty areas on the outside of your charging case. Be careful to avoid getting any moisture inside the charging ports.
- Use the cotton swab to clean the inside of the charging case.
Don’t forget to clean around the charging pins where the stem of your AirPods would go.
- Dip the toothpick in isopropyl alcohol. Use it to clean dirty areas that the cotton swab couldn’t reach.
Be very careful when cleaning your AirPods case with a toothpick. Do not apply too much pressure to areas with electronic components.
- Clean any debris in the case’s charging port by carefully loosening the dirt using the toothbrush.
- Clean away any loose dirt with a cotton swab.
- Dry the case using a paper towel or dry lint-free cloth.
How to Clean AirPods Max
The steps for cleaning AirPods Max are pretty different from other AirPods models. These are the materials you’ll need:
- Water and liquid laundry detergent solution (5ml/1tsp of detergent to 250ml/1 cup of water)
- Soft, dry, lint-free cloth
Here’s what to do:
- Remove the earpads from the AirPods Max by pulling them off and set them aside.
- Use the dry cloth to wipe the headband and ear cups clean.
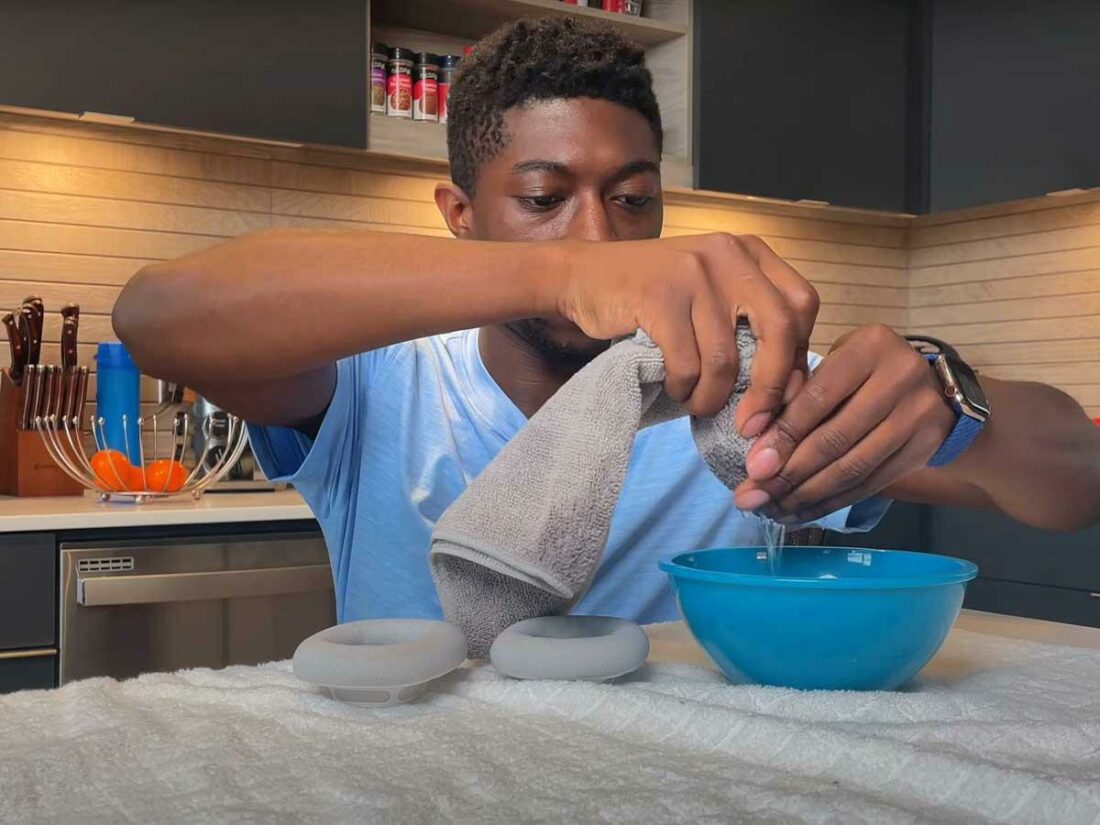
- Soak the cloth in the soapy water and use it to clean the earpads.We’d advise against soaking the ear pads directly, as soap/detergent can get absorbed into the cushions, potentially causing staining. It will also take them much longer to dry.

Soaking the lint-free cloth with soapy water (From: Youtube/Dayo Aworunse) - Wring out the cloth and wet it again with clean water. Use it to wipe the soap off your earpads.
Cleaning AirPods Max cushions (From: Youtube/Dayo Aworunse) - Use a dry cloth to wipe the water off, then leave the ear cushions to dry for at least half an hour before putting them back on the ear cups.
Wiping the AirPods Max cushions to dry (From: Youtube/Dayo Aworunse)


What Not to Do When Cleaning Your AirPods
There are a few things you should avoid when cleaning your AirPods to avoid damaging them:
- Using too much water: AirPods are not waterproof, so if you use too much water, you’ll cause permanent damage. At least 70% isopropyl alcohol is better, as it kills bacteria and evaporates without a trace.
- Using abrasive materials: Abrasive materials, such as metals, rough fabrics, and harsh cleaning agents like bleach, nail polish remover, and 90%+ alcohol, can cause scratches on the plastic body of your AirPods. Stick with soft materials like cotton swabs and microfiber cloths.
- Using Blu-tack: Many articles suggest using Blu-tack to pull dirt from inside AirPods speakers, but this method often pushes the dirt further into the speaker. The Blu-tack can also get stuck in the speaker mesh or even pull the mesh out of your AirPods.
- Using compressed air: The high pressure from compressed air can damage delicate parts of your AirPods and case, such as the speaker mesh and charging port.
- Not waiting for the AirPods to dry: Even if your AirPods look dry, there can still be traces of moisture you can’t see that can cause circuit damage or corrosion. You should always leave your AirPods to air dry completely before putting them in their case or using them.
Frequently Asked Questions
- How often should you clean your AirPods?
- Why is keeping your AirPods clean important?
- How waterproof are AirPods?
How often should you clean your AirPods?
You should clean your AirPods after every 72 hours of listening time to avoid an excessive buildup of dirt.
Wiping your AirPods down after each use will also prevent oil from building up on the surface, and keeping your ears clean will reduce the amount of wax entering your AirPods.
Why is keeping your AirPods clean important?
Keeping your AirPods clean is vital for both hygiene and sound quality. Especially if you share your earbuds, AirPods can quickly build up bacteria, resulting in potential ear infections.
On the other hand, dirt buildup can affect sound volume, resulting in muffled or unbalanced sound.
How waterproof are AirPods?
All models of AirPods, including AirPods Pro and AirPods Max, have an IPX rating of four, meaning they are moisture-resistant but not waterproof. They can survive light splashing, like rain or sweat, but not heavy exposure, such as in the shower or a swimming pool.
Do not for the love of all that good and decent suck on your airpod you will break the speaker inside if it…