Here’s how to clean your headphone jack and get rid of dust/lint, for a better listening experience, without damaging it.
No one can deny how frustrating headphones crackling, skipping, or static sounds are. It can even disrupt your daily life. But most of the time, your headphones aren’t the ones to blame for these issues — it’s the pesky dirt and dust on your headphone jack.
But don’t try to poke your headphone jack with the pointiest object you can find just yet! Your headphone jack can be more fragile than you think. One small mistake can damage it irreparably.
That’s why, today, we’ll give you the best ways on how to clean your headphone jack thoroughly without damaging it. Enjoy better connectivity and sound output quality within the hour.
Common Issues of a Dirty Headphone Jack
Most of us think our phones are well protected with a sturdy case. However, there’s currently no phone case that also protects the headphone jack. And since the headphone jack is an open port, it’s vulnerable to accumulating debris from the surroundings (e.g., pockets, bags, tables, drawers).
Cleaning your headphone jack may be another task you’d rather not make. Who has spare time for that, right? But believe us when we tell you that this is a task you’d preferably make than be faced with all the issues a dirty headphone jack can cause otherwise.
A dirty headphone jack can lead to a myriad of problems. Some common issues you may encounter include:
- Loose headphone jack: A clogged headphone jack can cause your headphones not to fit correctly. It’s a major inconvenience when you have to keep reconnecting, especially when you’re on the go.
- Stuck in headphone mode: Your phone may be in perpetual headphone mode even after disconnecting due to the dust/lint getting stuck inside the headphone jack.
- Audio problems: A dirty headphone jack can cause audio issues like static or muffled sound, or headphones that only work in one ear. This is because any dirt or oxidation prevents the headphone plug from establishing a proper connection with the jack.
How to Clean Your Headphone Jack
Cleaning your headphone jack may seem daunting at first, but it’ll actually take only a few minutes of your time.
General Rule of Thumb: Clean your headphone jack regularly, at least every 30-45 days.
Here are four foolproof ways to clean your headphone jack and keep it debris-free:
Using compressed air
The fastest and most effective method to get things out of the headphone jack is using compressed air. You can find compressed air cans in electronics stores under the cleaning and maintenance section. It cost a fair bit more, but it’s worth every penny.
What you’ll need:
- Compressed Air
- Nozzle
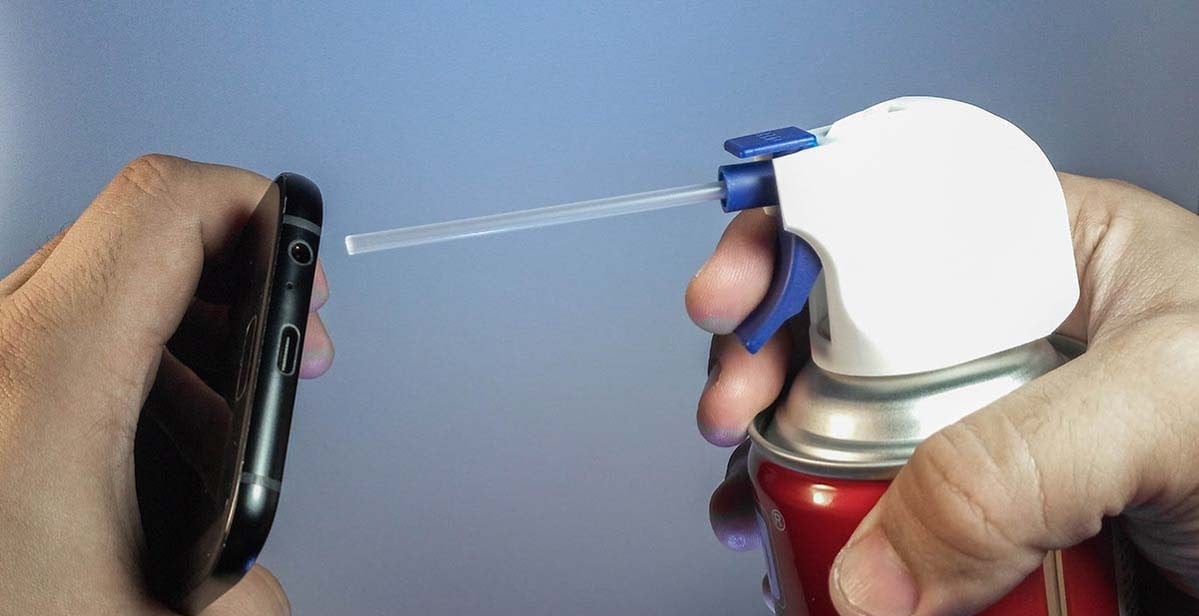
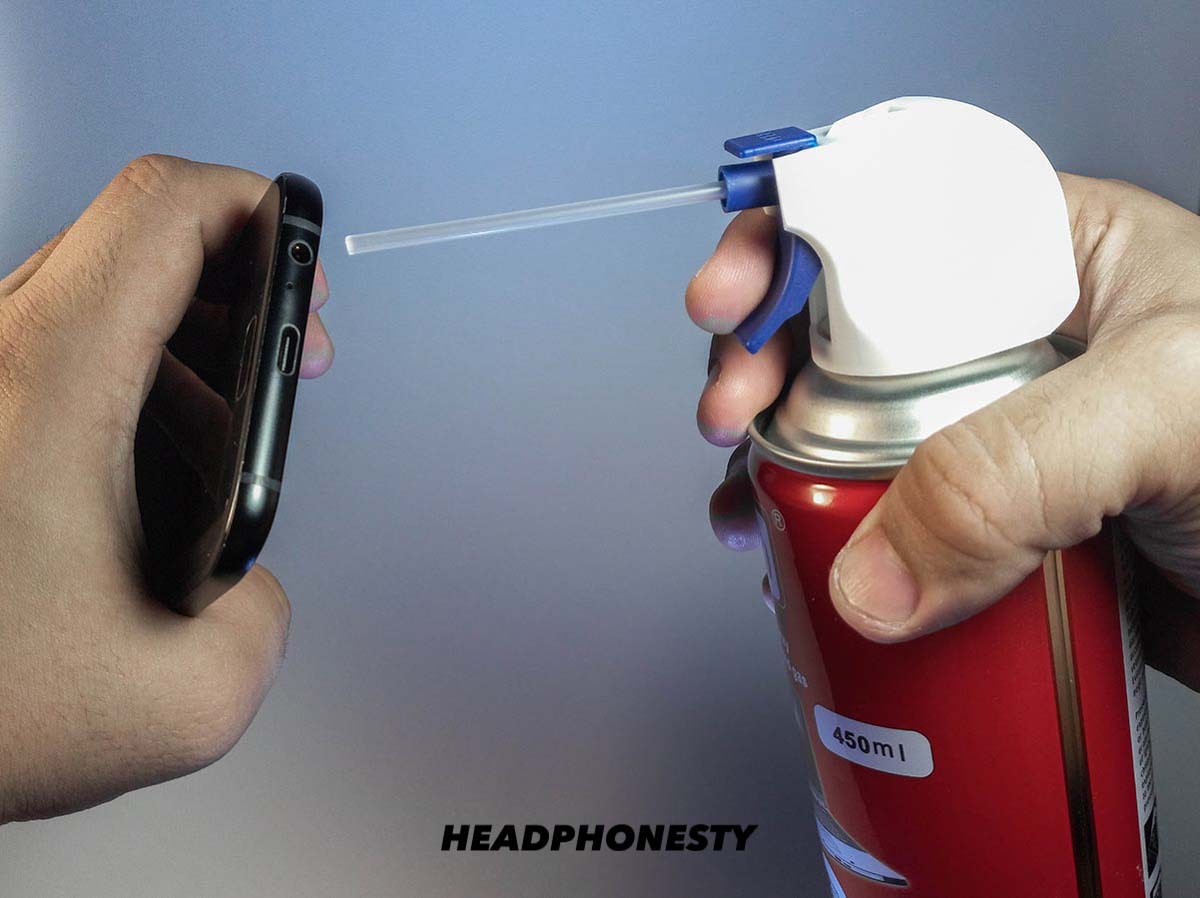
- Use a can of compressed air & point the nozzle at the headphone jack. Some compressed air cans come with thin tubes which can be used to direct the compressed air at the jack through the small opening.

Point compressed air nozzle to headphone jack - Release the air. Press the button at the side of the can to dispense the compressed air. A blast or two should loosen up most of the debris inside the jack to remove them.
- Repeat Steps 1 and 2 for two more times to ensure that your headphone jack is thoroughly cleaned.
Using cotton swabs
Compared to compressed air, cotton swabs are household items you’re more likely to have. If not, you can head over to the convenience stores to find them under the Health & Beauty section.
What you’ll need:
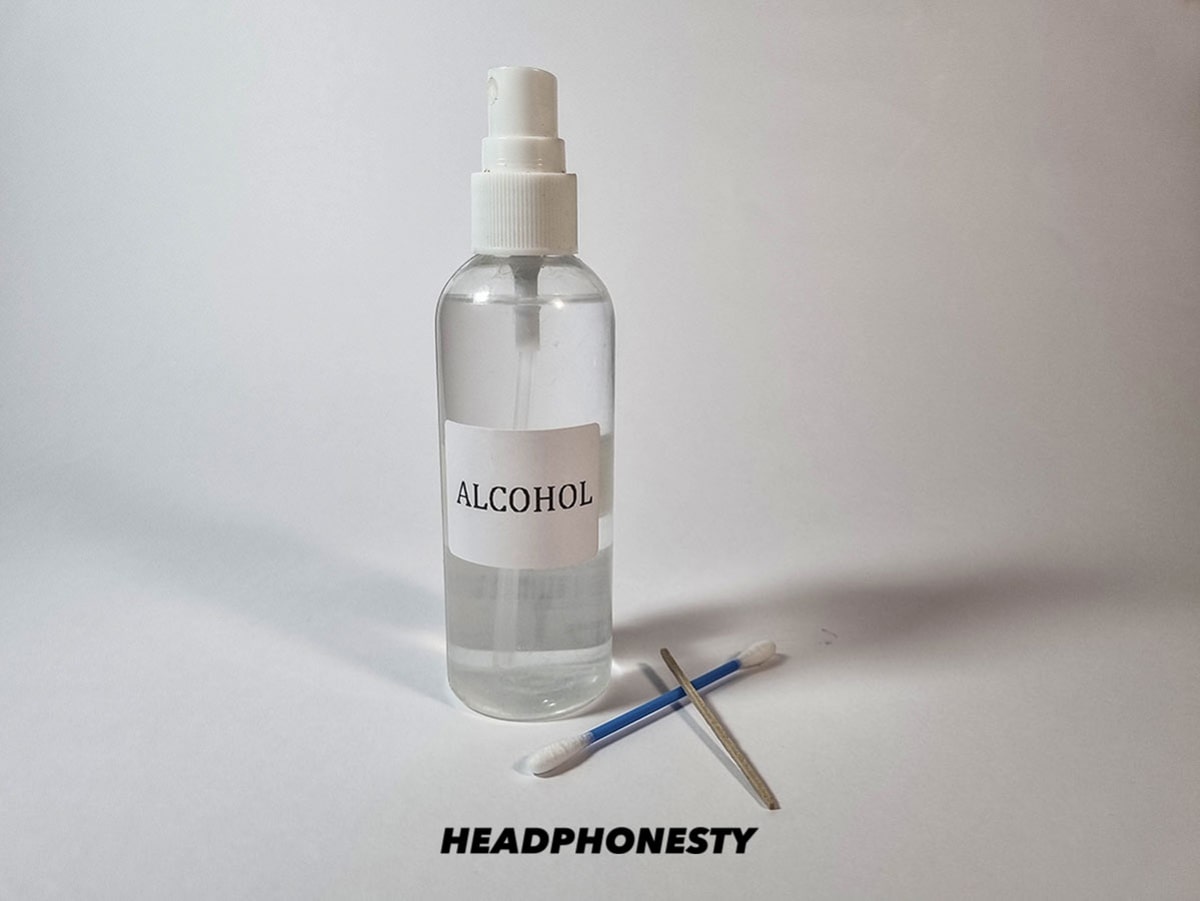
- Cotton swabs / Q-tip
- Rubbing Alcohol
- Prepare the cotton swabs / q-tip with some rubbing alcohol. Use swabs with thinner tips (less fluffy) as they’re easier to fit into the jack.

Alcohol, cotton bud, and a toothpick for cleaning the headphone jack - Remove the cotton on one side of the swab and leave only a small amount behind.
- Insert the cotton swab into your mobile device’s jack and move around the inside to remove any dirt or debris.
- Repeat step 3 with a lightly dampened cotton bud with rubbing alcohol.
- Remove the cotton swab and repeat with a dry one to remove excess moisture.
Using paperclip and tape
After putting your phone in your pocket, lint may be stuck on your Android/iphone headphone jack. The paperclip and tape method is best for tactfully removing these textile fibres without any damage caused.
Here’s how you get lint out of your headphone jack.
What you’ll need:
- Paperclip
- Clear Tape
- Q-tip
- Rubbing Alcohol
- Open and unbend a paperclip.
- Wrap a small piece of clear tape around the paperclip with the sticky side facing out. Make sure the tape is firmly in place.
- Press the paper clip tightly to the bottom of the jack and twist. Any lint or debris should stick to the tape when you pull out.
- Repeat the steps, checking regularly into the jack to make sure no debris is left.
- Clean the jack with a Q-tip lightly dampened in alcohol.

Cleaning with cotton buds

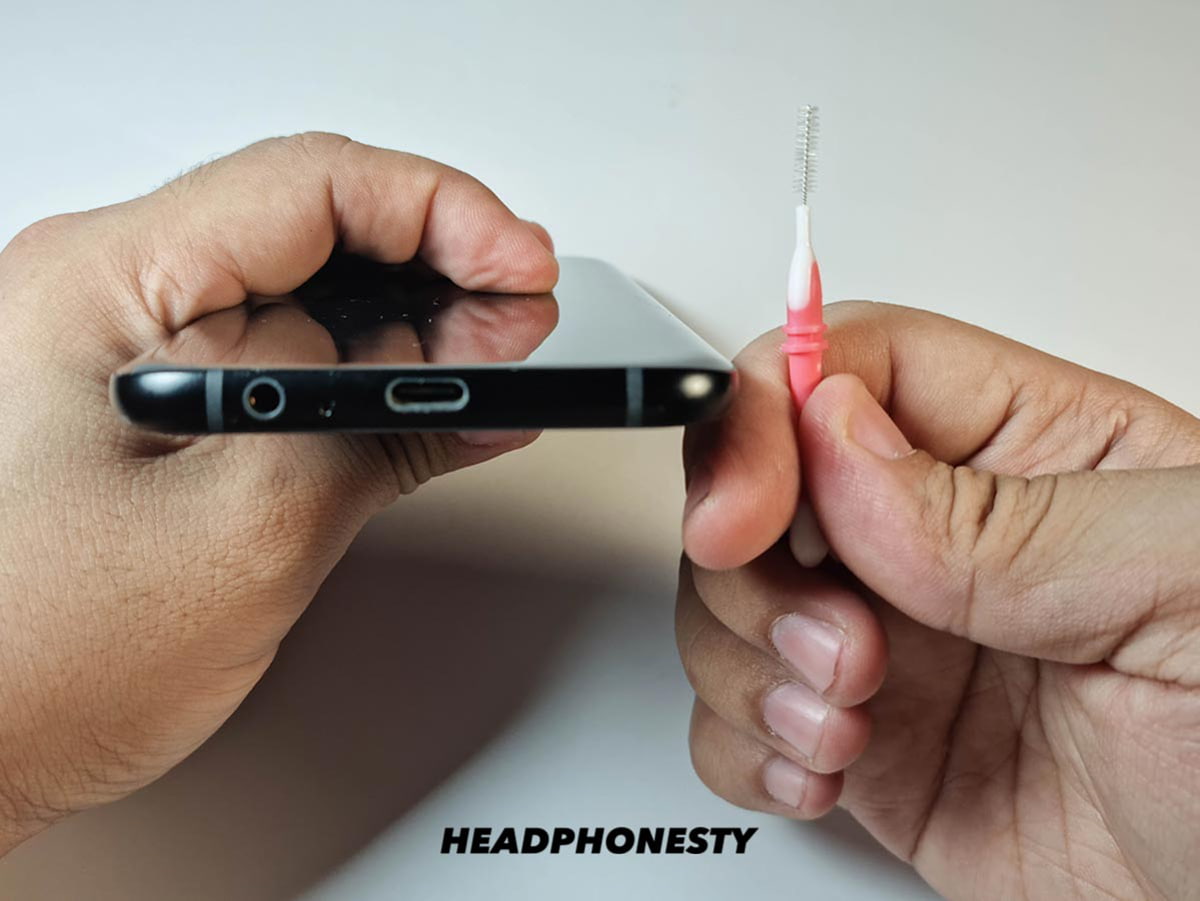
Using an interdental brush
Corrosion may occur when the metal coating in the headphone jack is worn out, exposing the copper circuitry. Due to the surrounding air and moisture, the copper oxidizes and rusts. Using an interdental brush is best for carefully cleaning corrosion in the headphone jack, without causing further damage.
What you’ll need:
- Interdental Toothbrush
- Rubbing Alcohol
- Get an interdental toothbrush (usually used to clean braces) from your nearest health & beauty provider.
Interdental Brush - Dip the brush in rubbing alcohol and gently tap it. Make sure it’s moist but not soaking wet.
- Insert the brush into the headphone jack with your device turned off. Move the brush in a circular motion.
- Repeat Step 3 a few times to make sure the jack is thoroughly clean.
How to Keep Your Headphone Jack Clean
As dust and lint accumulate easily, it’s every headphone owners’ duty to clean them regularly to maintain the longevity of your headphones and smart devices.
However, we understand not everyone has the time to do so. Thus, investing in a dust plug is your best alternative. They come in various sizes to plug into the headphone jack.

These dust plugs act as barriers against sand, grime, and water debris from infiltrating and ruining your smart device. It’s especially helpful if you’re on the move or regularly exposed to harsh environments.
Conclusion
A clean headphone jack goes a long way. With our simple solutions, you can now improve your audio experience without spending unnecessarily on a brand new headphone/gadget.
For more pro-cleaning tips, check out our definitive guide on how to clean your headphones.
Like our recommendations? Are there any other solutions you can think of? Tell us about them in the comments section below.
I tried the cotton swab, and it seemed like a terrible idea. It didn’t go in well, and it really felt like I would just add things in there. The paperclip with tape wrapped around it worked beautifully, though! Fixed my issues. Thanks!
I really don’t want to try these just in case I mess it up but I had a video playing and my headphones just stopped working and I tried another pair and the same outcome. If you have any advice to give me it would help.
Hey idiot, it literally gave you all the advice and you said you don’t want to do any of it abs then asked what to do? You are so dumb. For real.
so frustrating…I tried all of these recommendations and it just didn’t fix it…I know it’s not the headphones but it seems like if I twist the jack around it tries to connect. Any suggestions? Can ports be replaced?
Should I need to turn the volume way up to hear the receiver threw my headphones. Tryed 3 different sets of headphones if I remember it has always been this way.
I read some other sites with advice about cotton swabs that I was nervous about trying, but I have some tiny interdental brushes and rubbing alcohol and that did the trick!
Thank you so much!
I did the q-tip and rubbing alcohol method and it worked perfectly. thanks!