Learn how to swap out the battery of any Beats headphones with this handy DIY guide.
Beats have some of the most well-endorsed headphones by celebrities and athletes, which is among the reasons for their popularity. But they’re not exactly famous for their durability and lifespan. Chances are, if you’ve had Beats wireless headphones before, you may have busted the battery of a few pairs.
This could have led you to spend at least $59 and wait for 3-10 business days for each Beats battery repair. That’s ridiculous, considering you can get the replacement battery for as low as $10 on Amazon!
That’s why, in this guide, we’re going to show you how you can replace the faulty battery on your Beats headphones yourself. Let’s get right into it.
How to Check Your Beats’ Battery
A faulty battery is often indicated by its inability to store electricity and therefore can’t power up your Beats. But before you commit to replacing the battery, you should make sure that the problem doesn’t lie on other parts of your Beats.
You wouldn’t want to go to the hassle of replacing the battery only to find out that your headphones had a faulty charging cable, right?
If your headphones won’t charge after plugging them in, you can do several troubleshooting methods, including:
- Using a different charging cable
- Using another charging head/outlet
- Cleaning dust and debris in the charging port
- Doing a hard (factory) reset
However, if the methods above won’t work, chances are your Beats headphones have a faulty battery. You can confirm this by checking if battery levels have changed post-charging using your smart devices.
For this, you need to pair your Beats headphones to check their battery. Consult our guide on how to pair Beats headphones if you’re having connectivity issues.
Here’s how you can check your Beats’ battery on iOS, Mac, and Android devices.
On your iPhone, iPad, or iPod touch
Follow these steps to check your Beats headphones’ battery in iOS devices:
- Make sure that the Bluetooth on your iOS device is on.
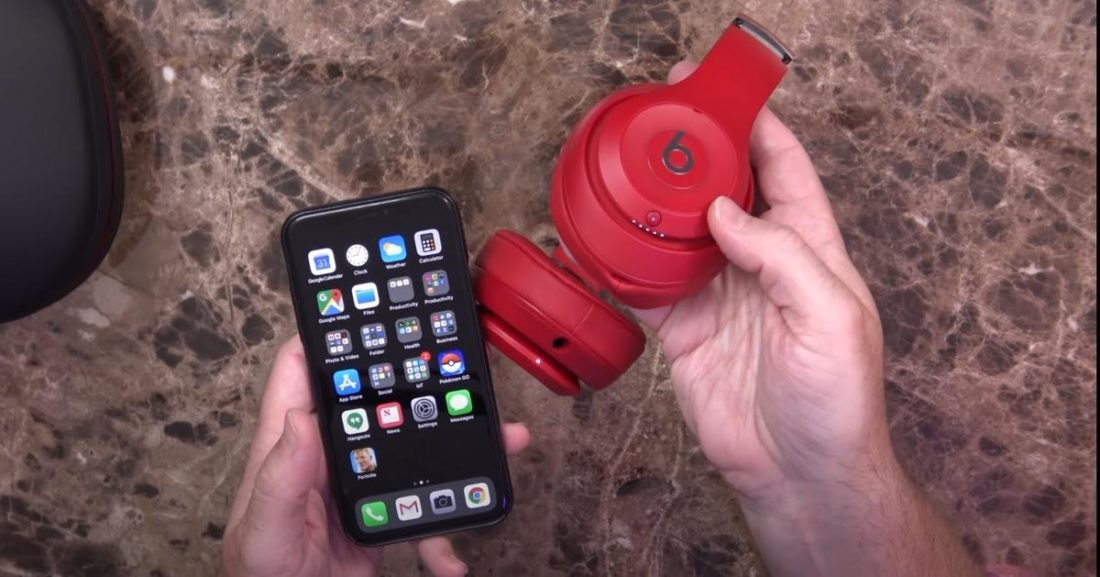
- If you’re using Beats earbuds, place the earbuds in the charging case and keep the lid open. If you’re using Beats headphones, turn them into pairing mode by holding the power button until the indicator light flashes white or blue.

Turn on the Beats headphones and get them into pairing mode. (From: YouTube/Jordan Keyes) - Hold your Beats headphones within 2 inches of your unlocked iOS device.
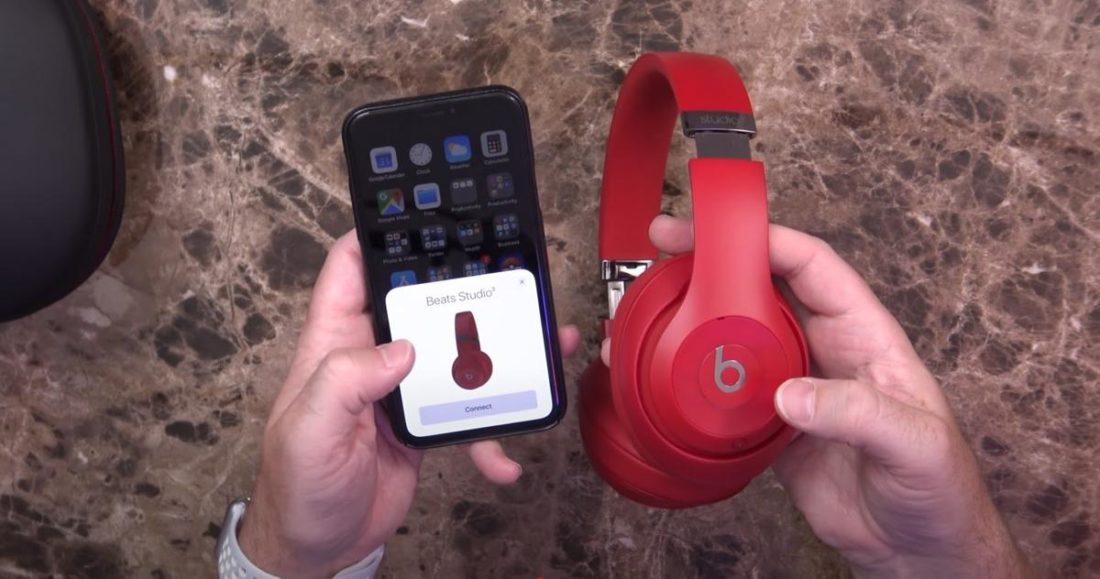
- Tap “Connect” on the pairing prompt.

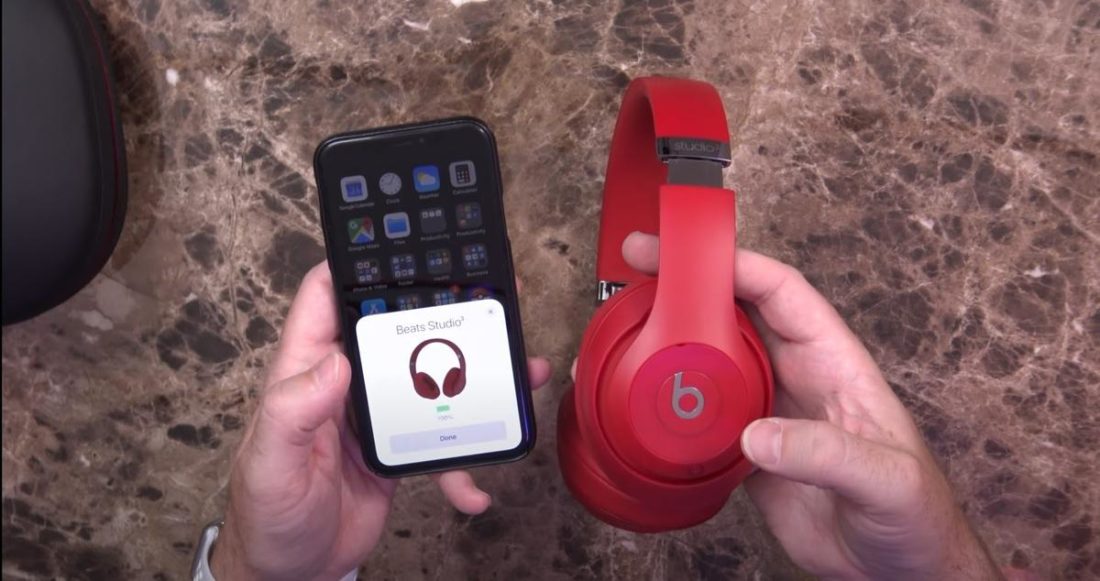
Connect your Beats to your iPhone through the prompt. (From: YouTube/Jordan Keyes) - A notification card that shows the battery level should pop up.

You should be able to see the battery percentage of your Beats. (From: YouTube/Jordan Keyes)
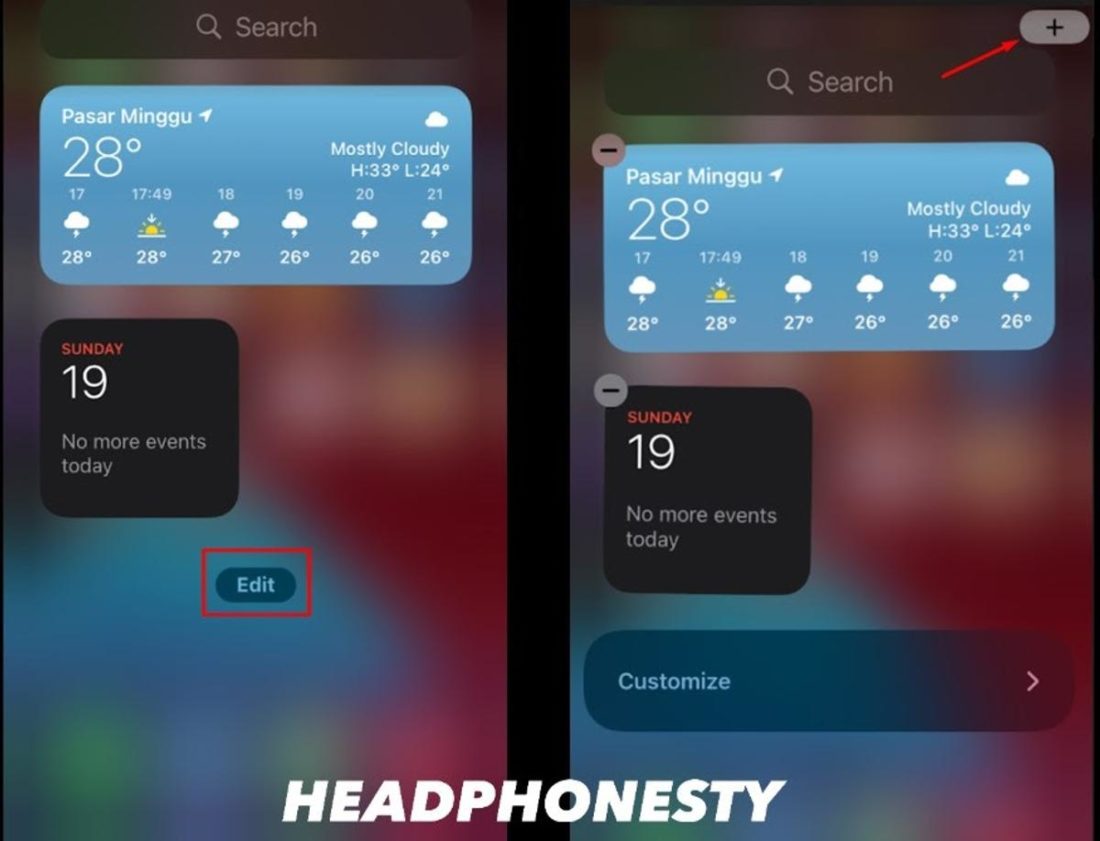
If you’ve already paired your iOS devices with your Beats headphones, you can use the battery widget to check for their battery level at a glance. Here’s how to do so:
- Go to your iOS device home page and swipe to the right to the widget page.
- Select Edit/Customize and tap the “+” button to a new widget.

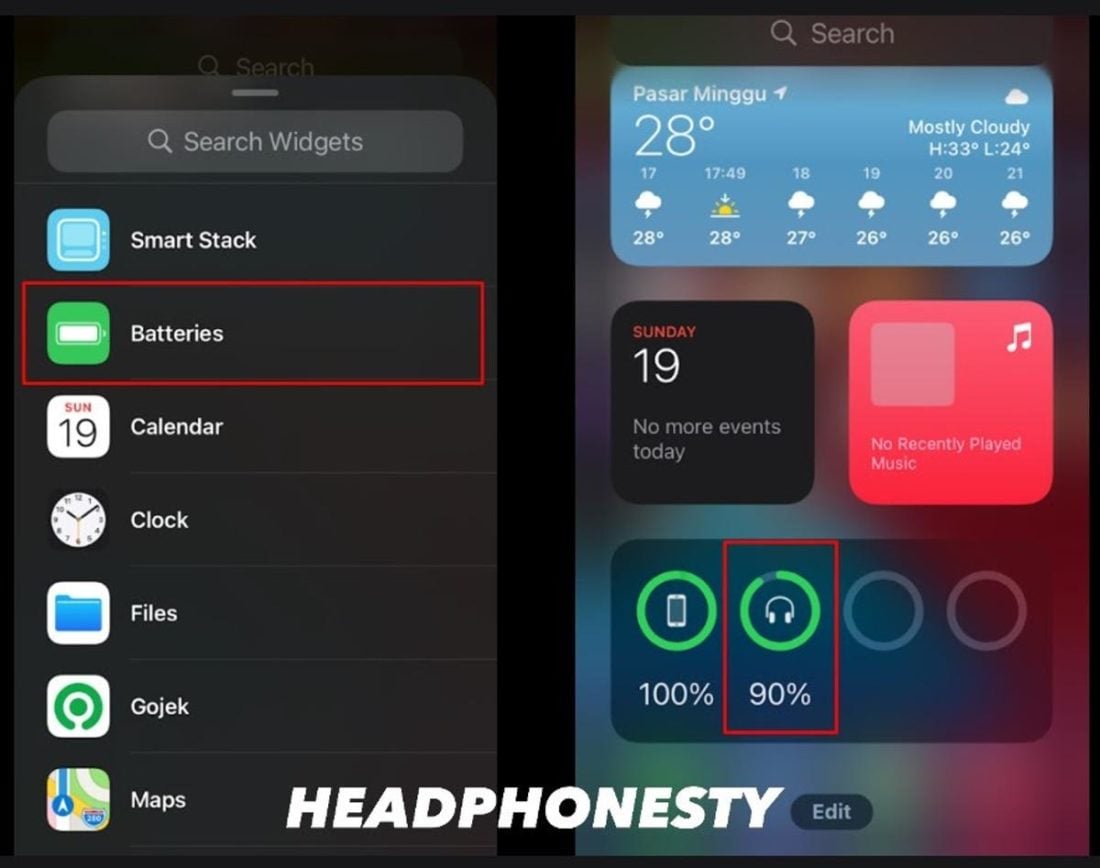
Add a new widget to see your Beats battery. - Scroll down until you find the battery widget.
- You can now see the battery level of your Beats device.

Check your Beats’ battery through iOS widget.
On your Mac
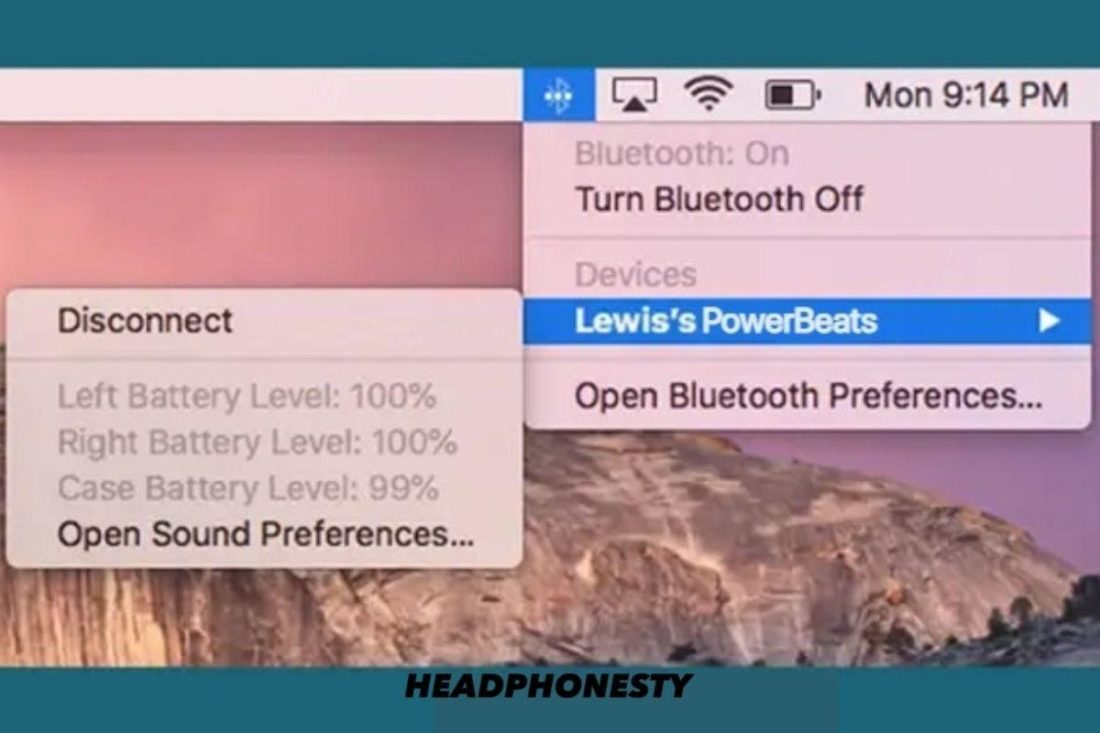
You can also check the battery level of your Beats headphones using macOS devices. Here’s how:
- Connect your Beats to your Macbook or iMac through Bluetooth.
- Click the Bluetooth option in the top-right corner of your macOS device.
- From there, click on your Beats headphones to show more options. You will see the battery percentage of your Beats in the pop-up tab.

Checking Beats’ battery level on Mac
On your Android device
Despite being owned by Apple, PowerBeats Pro is one of the best wireless earbuds for Android. So it only makes sense if you’re using Beats products on your Android.
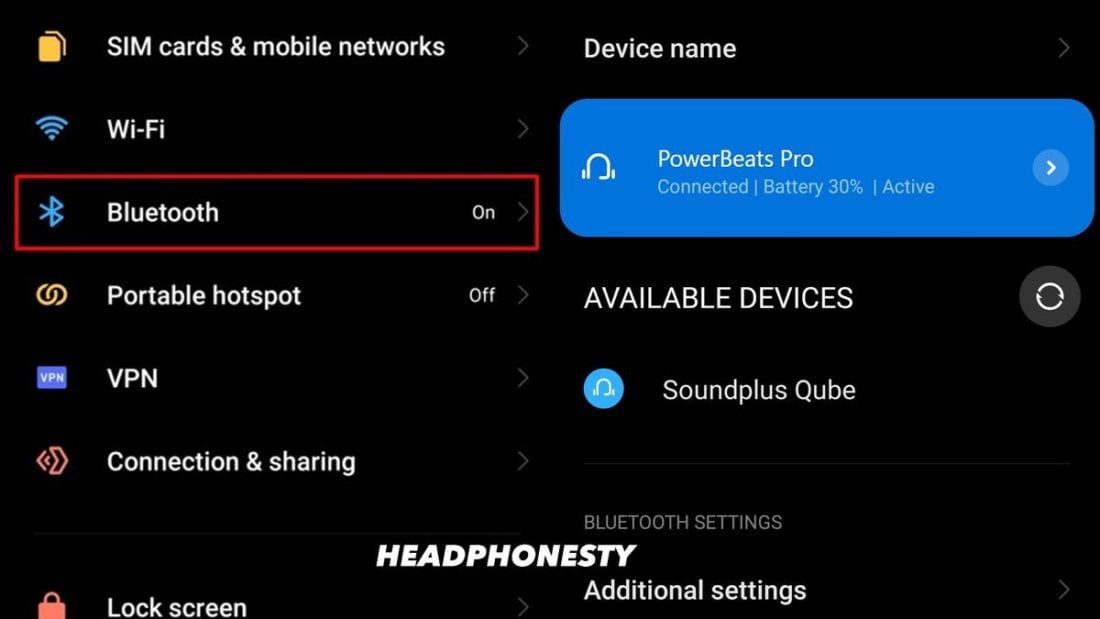
If you’re using your Beats with an Android device, you can follow these steps to check their battery life:
- Pair your Beats with your Android device.
- Open up the Settings menu, and navigate to the Bluetooth settings.
- You will see your Beats headphones along with their battery life.

Navigate to Bluetooth settings and find out your Beats’ battery.
Alternatively, you can download the Beats app for Android to check the battery level and access more options like active noise cancellation and transparency mode.
On your Windows PC
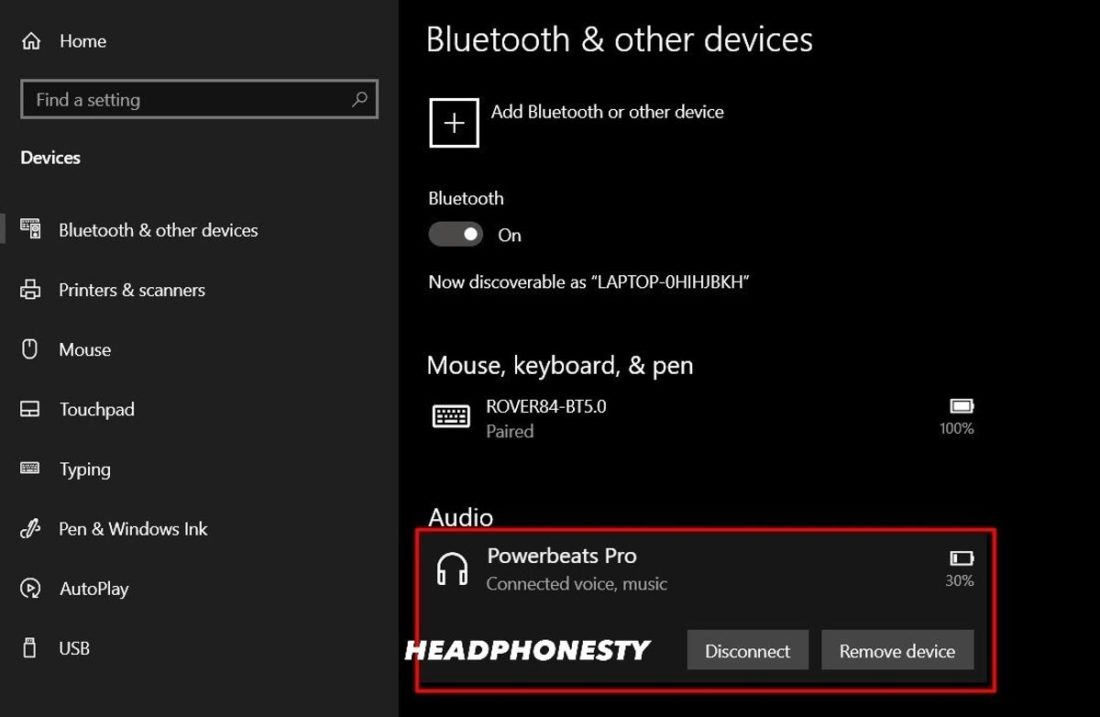
If you’re using your Beats on Windows PC, you can follow these steps to check their battery levels:
- Connect your Beats to your Windows PC.
- Go to Settings → Bluetooth & Other Devices.
- Under the Audio menu, you should see the name and battery percentage of your Beats.

Find the battery information under the Bluetooth menu.
If you have confirmed that your Beats have a faulty battery, you can start planning to replace it with a new one.
How to Replace the Battery of Powerbeats Pro
The PowerBeats Pro is one of the most popular workout earbuds in the market right now. But replacing its battery can be a bit tricky for beginners – but not impossible.
Follow this step-by-step guide to replace the faulty battery on your PowerBeats Pro:
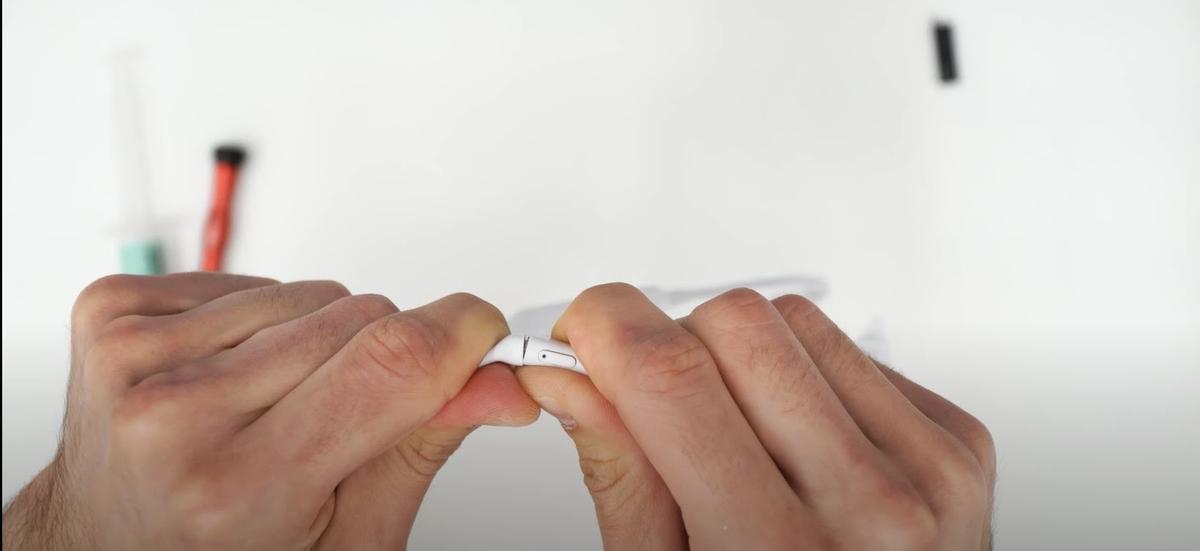
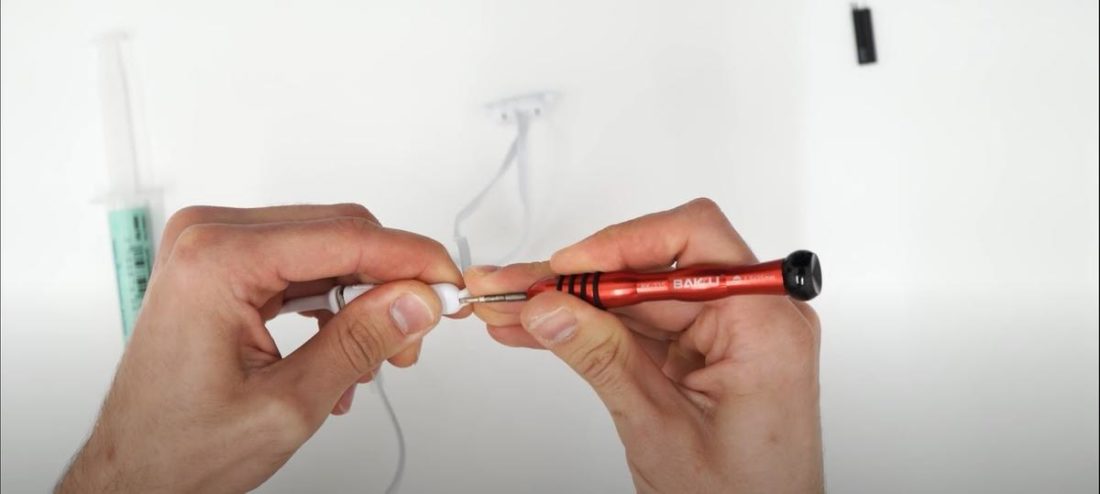
- Remove the plastic cover by making an incision along the seam.
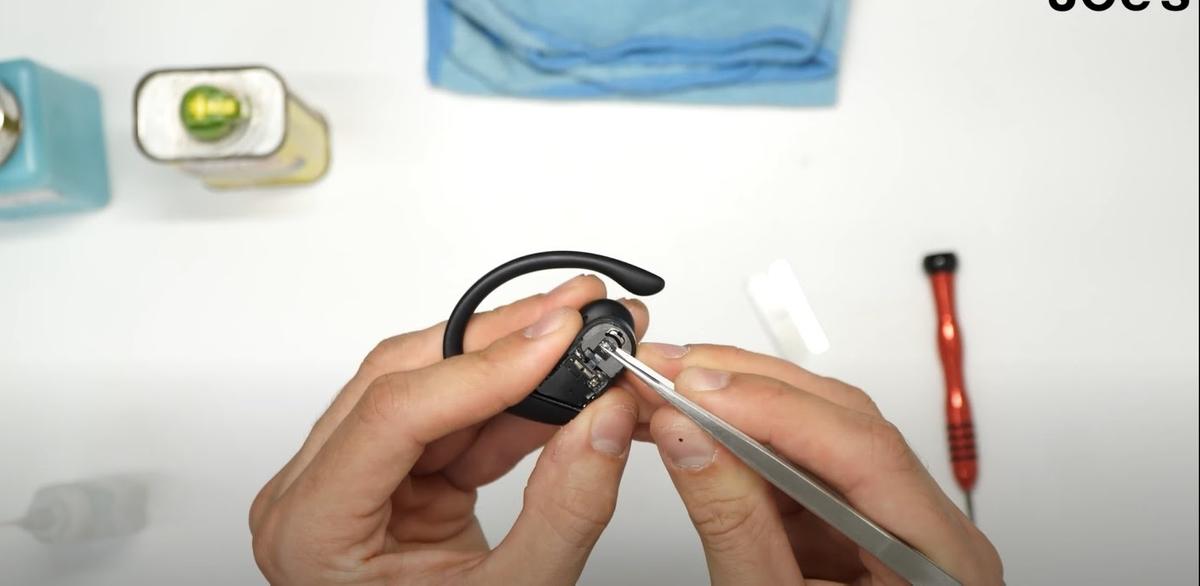
- Using a tweezer, remove the battery ribbon tab

Remove the battery ribbon under the PowerBeats’ cover. (From: YouTube/Joe’s Gaming & Electronics) - Loosen up the battery shield by prying it up using a flathead screwdriver.

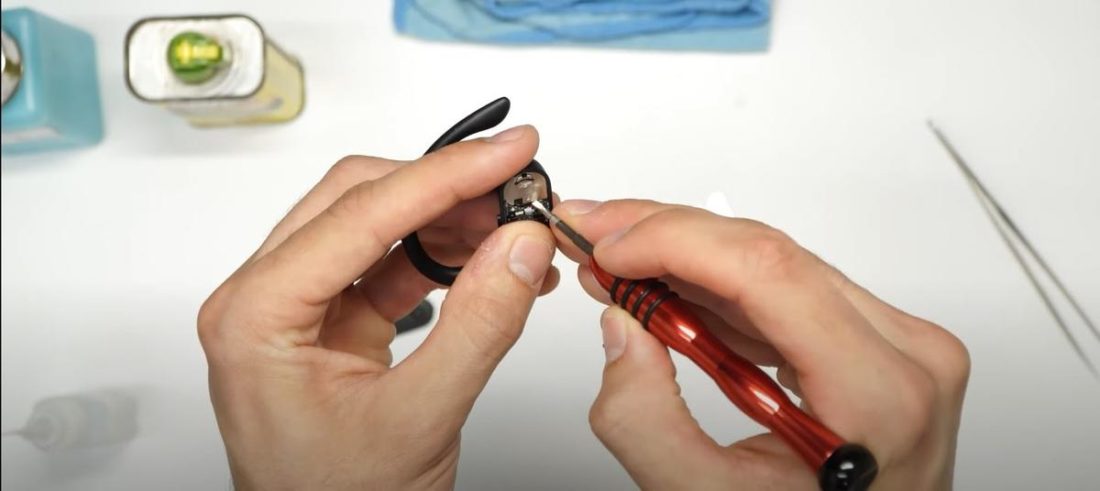
Loosen the battery shield under the cover. (From: YouTube/Joe’s Gaming & Electronics) - Pull back on the metal tab to remove the shield.

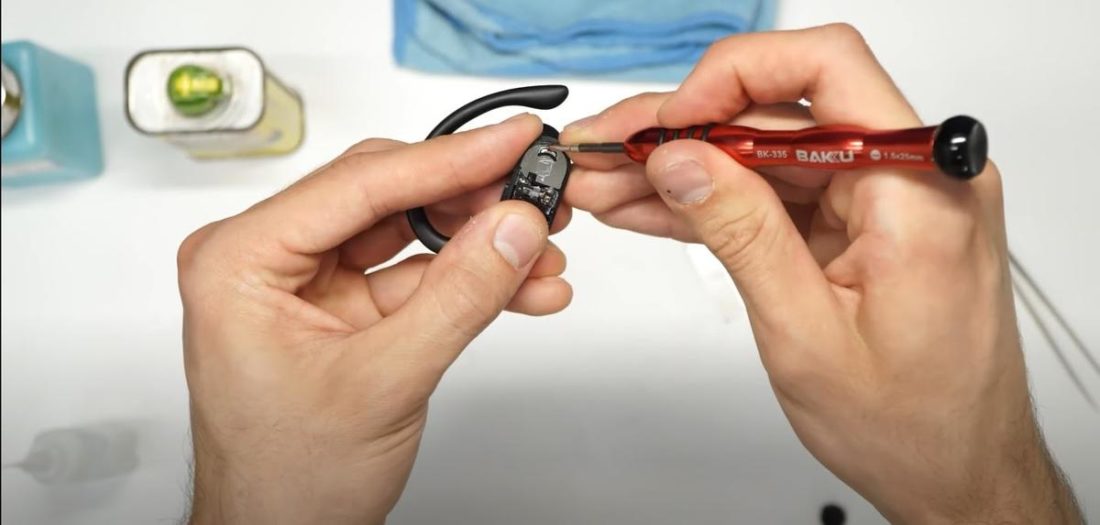
Remove the battery shield from the cover. (From: YouTube/Joe’s Gaming & Electronics) - Apply heat to soften up the glue covering the two battery connectors. Then, lift the adhesive using a flathead screwdriver.

Using flathead screwdriver to remove adhesive (From: YouTube/Joe’s Gaming & Electronics) - Remove the solder holding the battery connectors in place.

Remove the solders from the battery connectors. (From: YouTube/Joe’s Gaming & Electronics) - Lift the now desoldered battery using a prying tool.

Remove the battery. (From: YouTube/Joe’s Gaming & Electronics) - Put in the Powerbeats Pro’s replacement battery. Make sure that the green cable connects to the upper connection point.

Put in the replacement battery. (From: YouTube/Joe’s Gaming & Electronics) - Solder the replacement battery to the mainboard.

Solder the replacement battery. (From: YouTube/Joe’s Gaming & Electronics) - Re-attach the battery shield and apply superglue around the outer lines of the housing.

Put the housing back together using superglue. (From: YouTube/Joe’s Gaming & Electronics) - Place the cover back in place and wait for the glue to dry. This step is crucial, especially if you’re using your PowerBeats Pro as workout earbuds, to prevent sweat and moisture from getting inside the case.
If you’re having trouble during the replacement process, you can consult the video guide here: PowerBeats Pro Battery Replacement Tutorial.
How to Replace Battery of the Beats X
If you have a faulty battery in your Beats X, you can follow this step-by-step guide to change it:
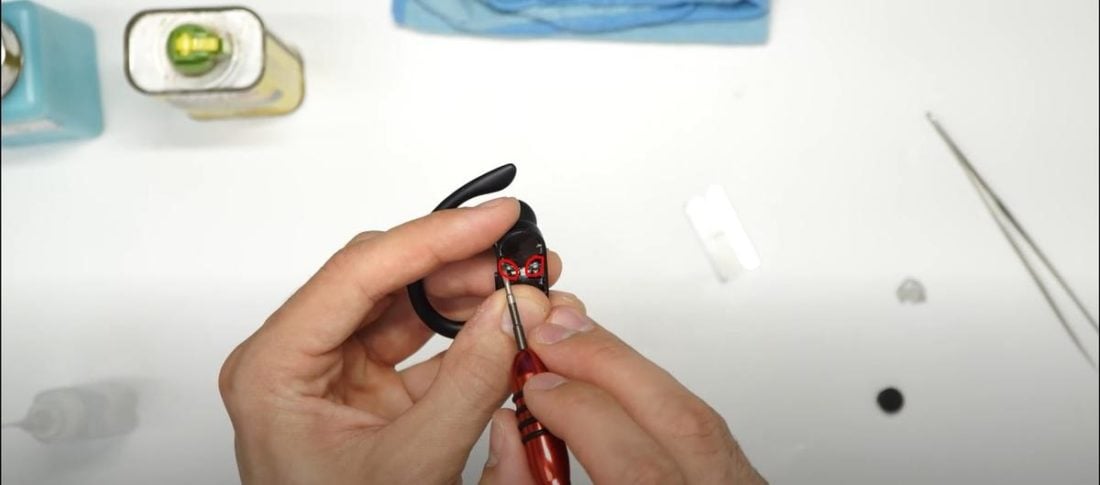
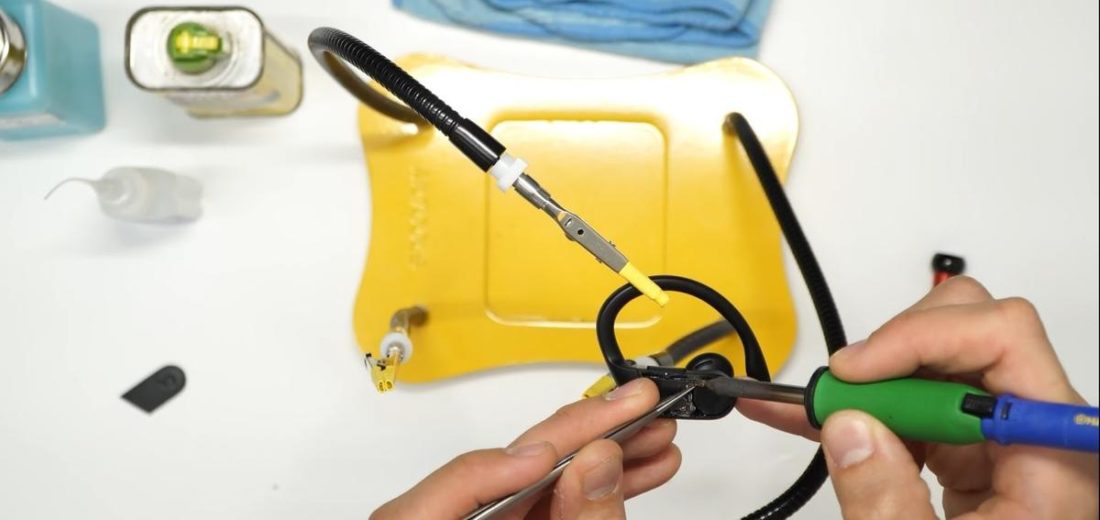
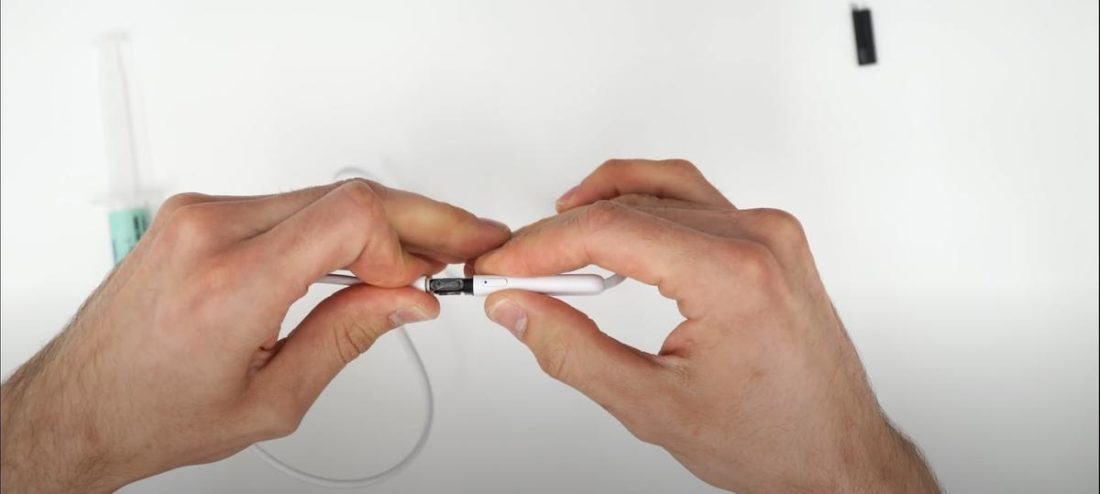
- Find the housing that contains the battery. It should be the one closer to the right earbud. Soften up the adhesive using a heat gun and remove the housing.

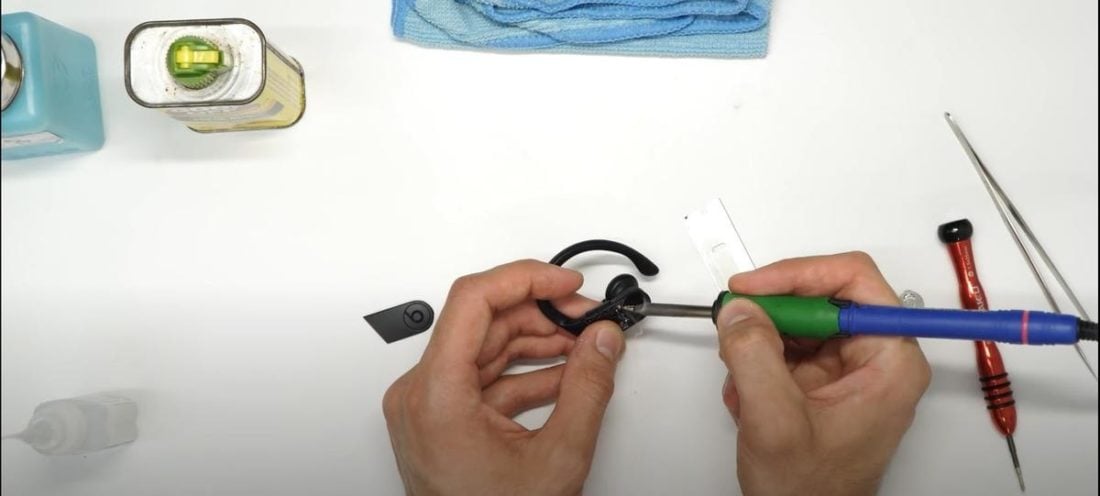
Remove the cable from the housing. (From: YouTube/Joe’s Gaming & Electronics) - Push the other end of the cable into the housing using a flathead screwdriver.

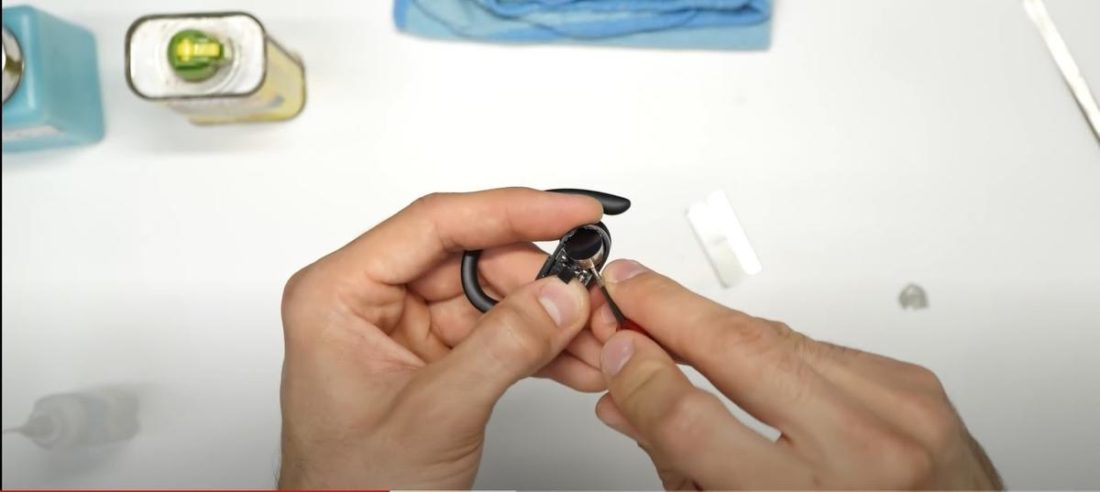
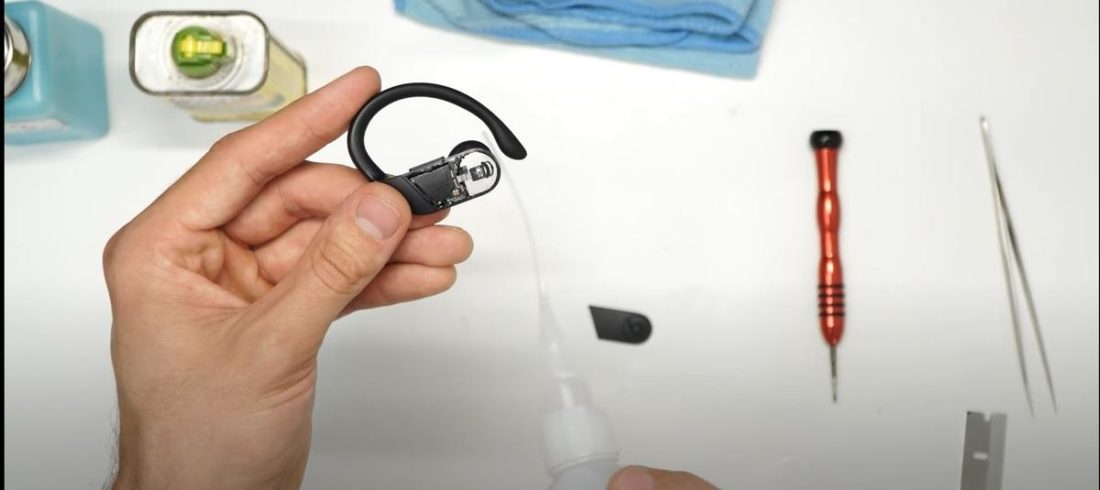
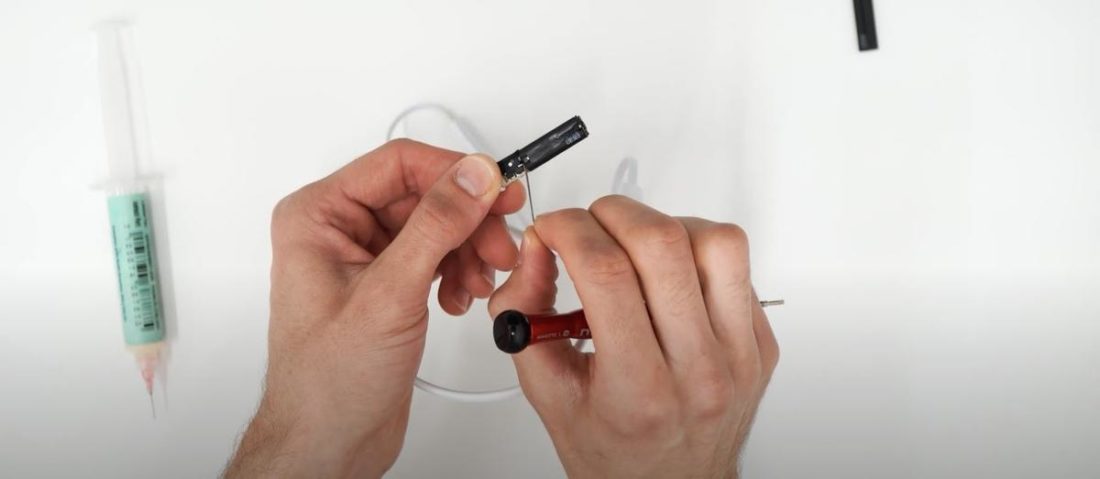
Push the cable on the other end of the housing into the housing. (From: YouTube/Joe’s Gaming & Electronics) - Pull out the internal components from inside the housing.
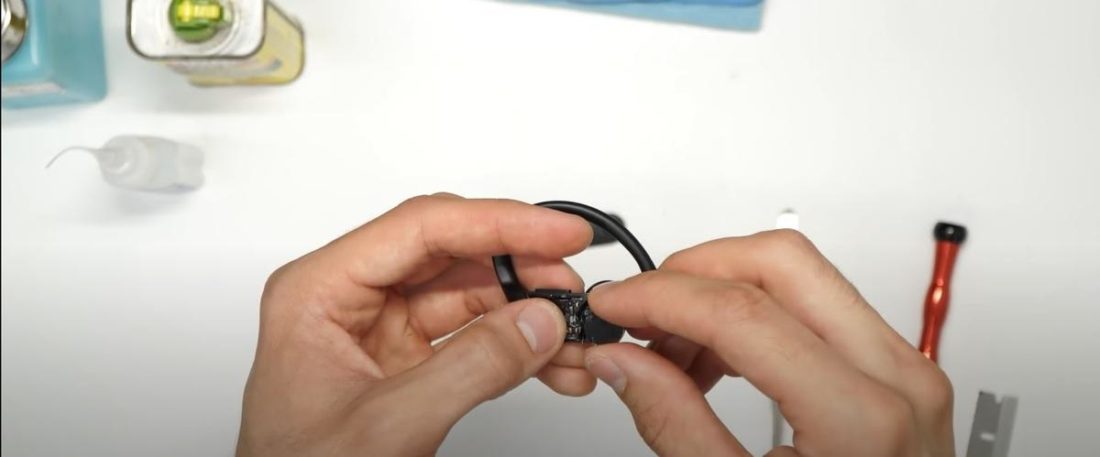
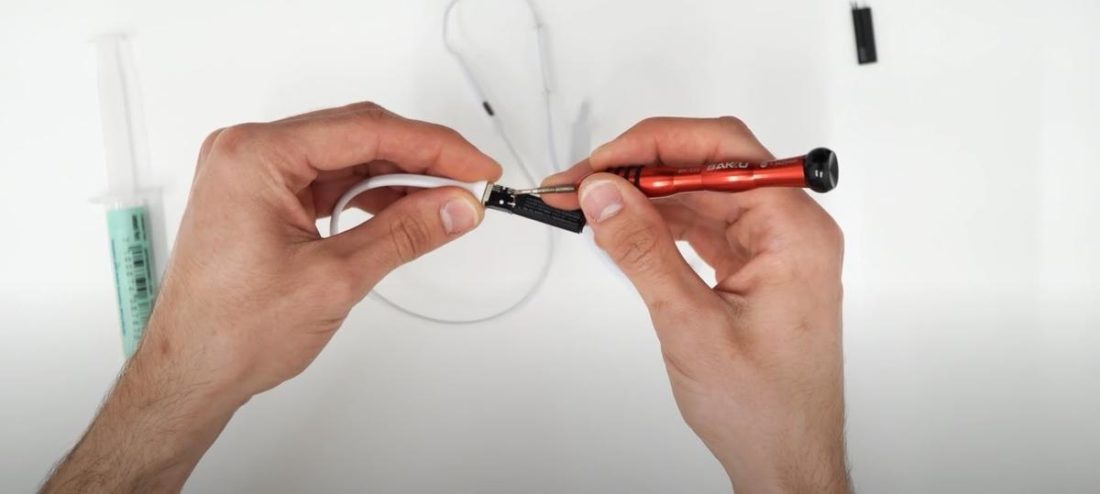
Pull out the internal components from the housing. (From: YouTube/Joe’s Gaming & Electronics) - Peel the cables attached to the battery away to prevent damage.

Peel the cable away from battery to avoid damage. (From: YouTube/Joe’s Gaming & Electronics) - Remove the black connection cover.
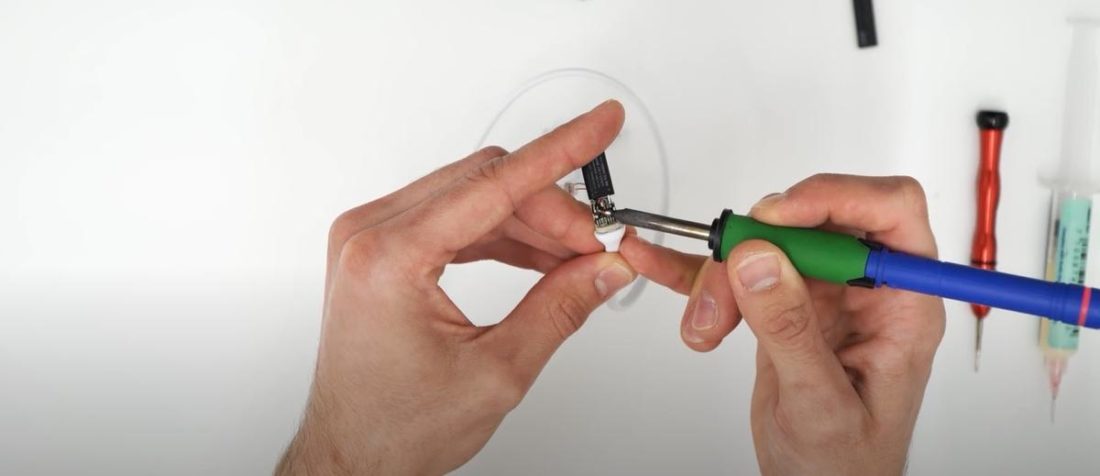
Take apart the black connection cover. (From: YouTube/Joe’s Gaming & Electronics) - Remove the battery by desoldering the black, white, and grey cable.

Remove the solder on the black, white, and grey cables. (From: YouTube/Joe’s Gaming & Electronics) https://www.youtube.com/watch?v=SMm00KVr9Pg - Replace the faulty battery with a new one by connecting it to the same cables.

Replace the faulty battery with a new one. (From: YouTube/Joe’s Gaming & Electronics) - Reassemble the Beats X, and you’ve successfully replaced the faulty battery.
If you’re having difficulty or issues with replacing your Beats X battery, consult the video guide here: Beats X Battery Replacement Tutorial.
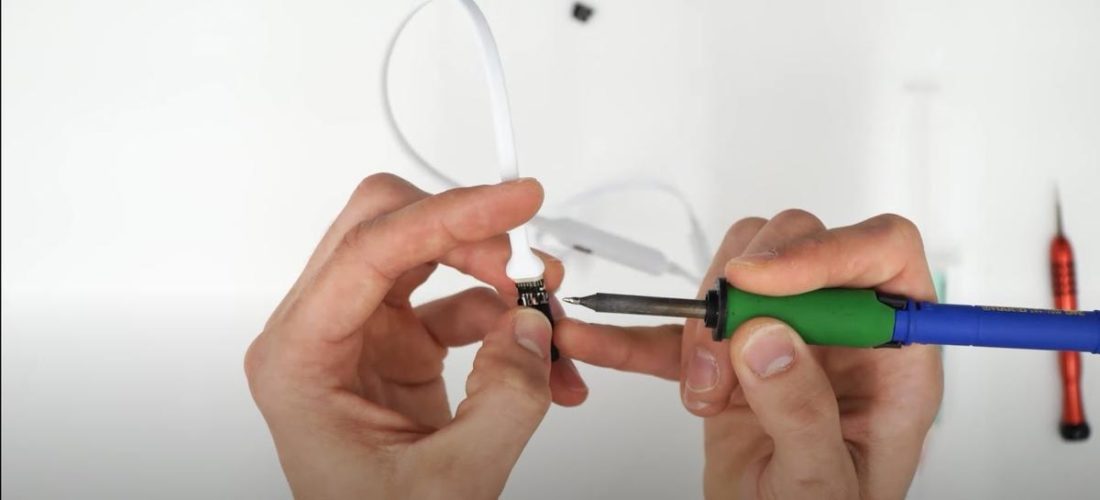
How to Replace the Battery of Beats Studio 2
The Beats Studio 2 is one of the easiest headphones to perform a battery swap. Here’s how to do it:
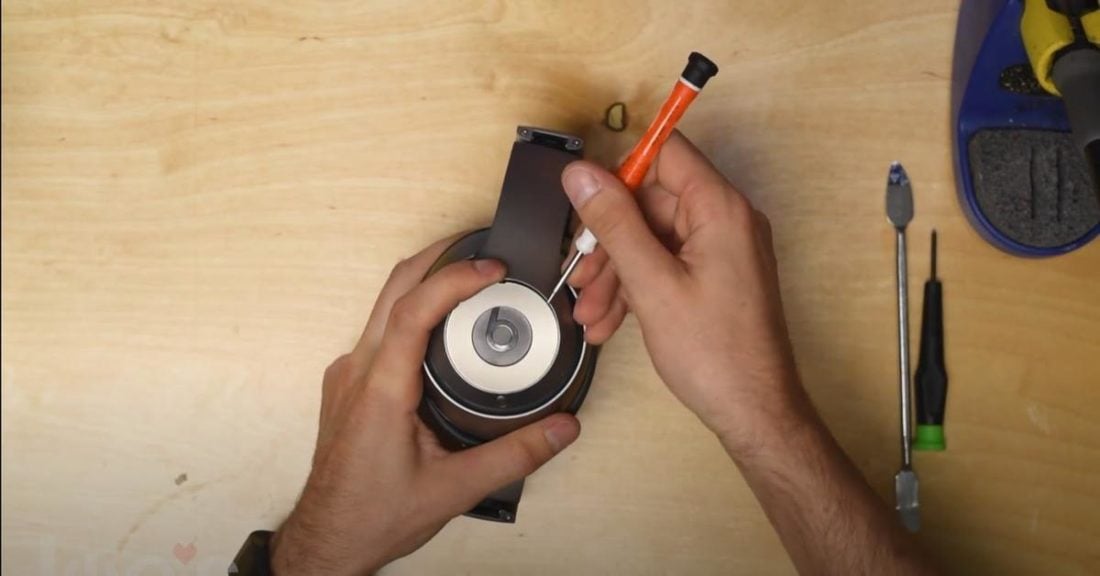
- Remove the center cap of the right ear cup by prying it up.

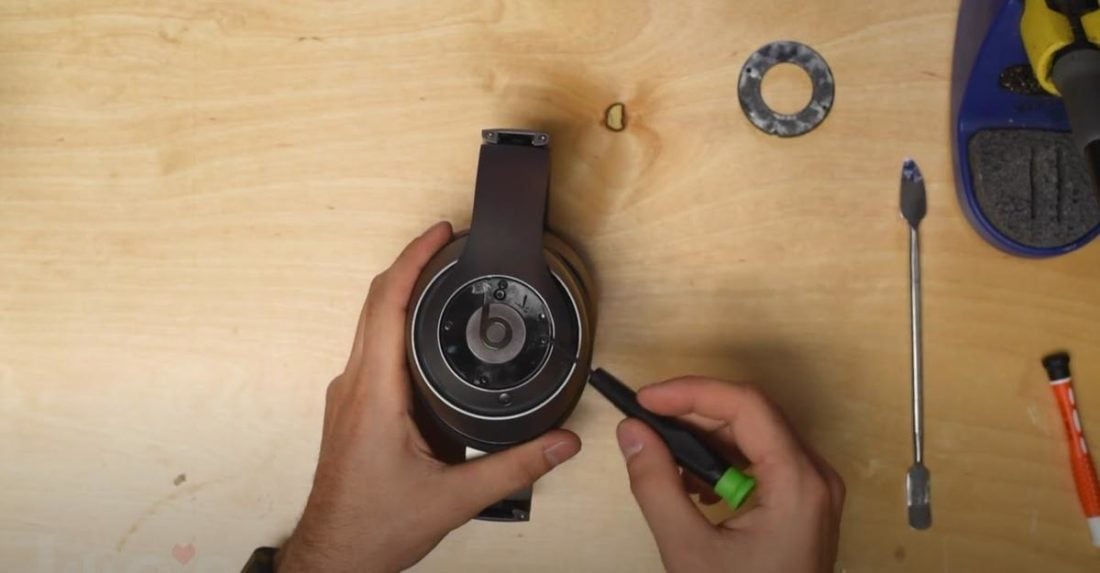
Remove the center piece to open the headphones. (From: YouTube/Joe’s Gaming & Electronics) - Undo the four screws holding the ear cup together.

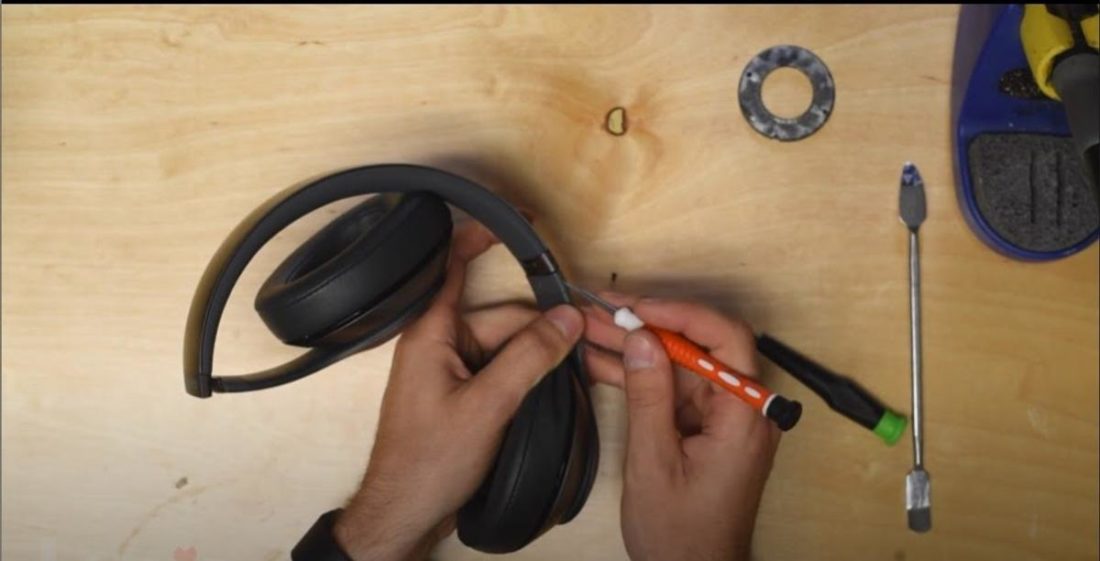
Unscrew the earcups to get inside the speaker. (From: YouTube/Joe’s Gaming & Electronics) - Remove the “R” tab and pull apart the plastic housing.

Remove headband clip to open the casing. (From: YouTube/Joe’s Gaming & Electronics) - Disconnect the battery cable from the mainboard.

Disconnect the battery from the mainboard. (From: YouTube/Joe’s Gaming & Electronics) - Pry up your faulty battery using a prying tool.

Pry up the battery from the adhesive. (From: YouTube/Joe’s Gaming & Electronics) - Replace the faulty battery with your Beats Studio 2 replacement battery and connect it to the mainboard.

Replace with new battery and put it in the original position. (From: YouTube/Joe’s Gaming & Electronics) - Reassemble your Beats Studio 2.
For a more detailed step-by-step guide, watch the video tutorial here: Beats Studio 2 Battery Replacement.
How to Replace the Battery of Beats Solo 2 and 3
The Beats Solo 2 and Solo 3 have nearly identical body structures. You can follow this guide to perform a battery swap on either one of them:
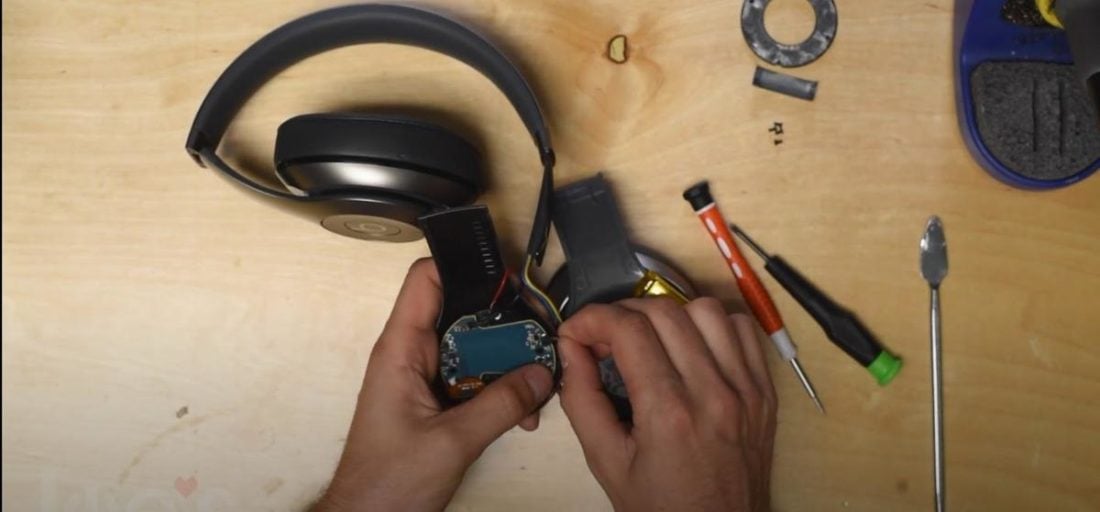
- Unclip the earcup housing using a prying tool.

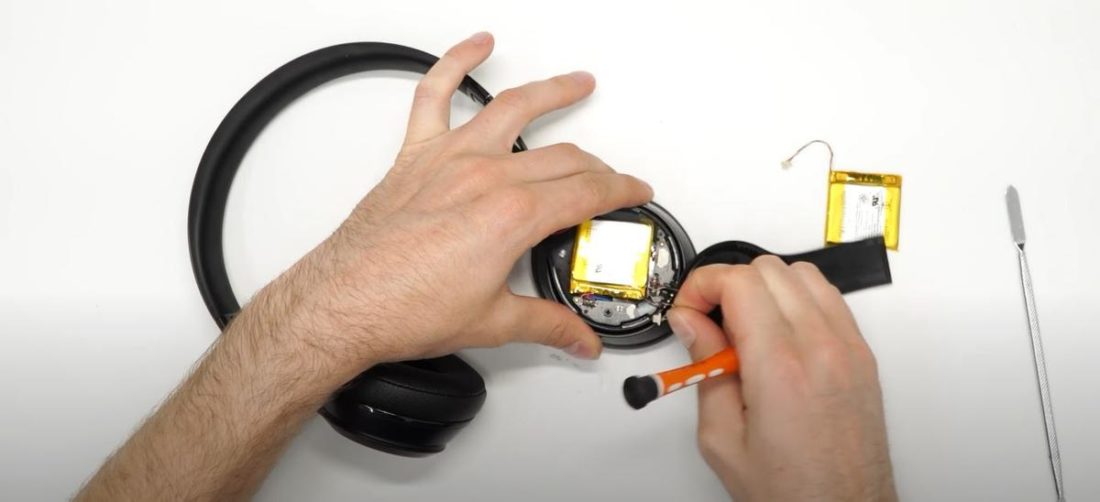
Open the housing by prying up the clips. (From: YouTube/Joe’s Gaming & Electronics) - Unplug the battery from the mainboard.

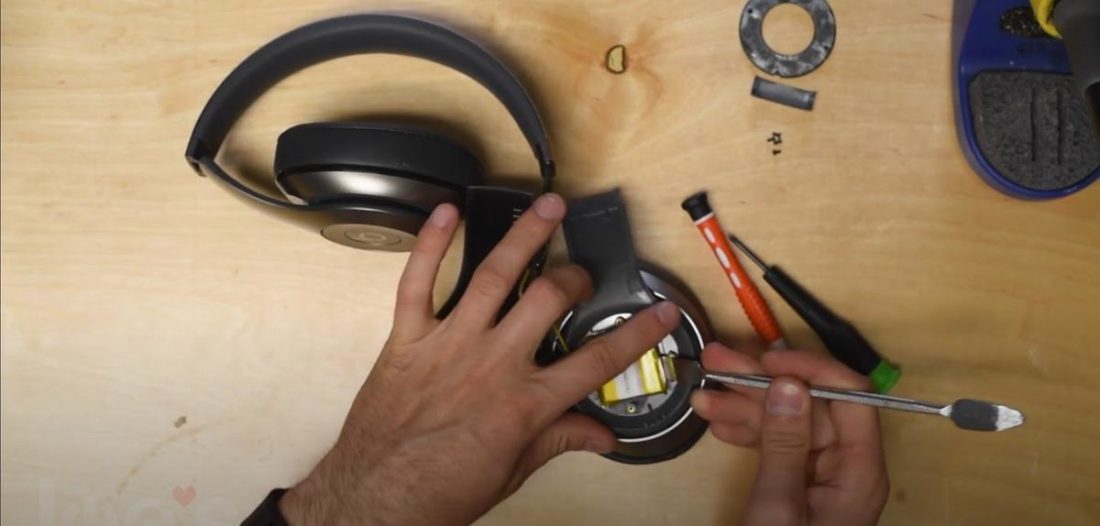
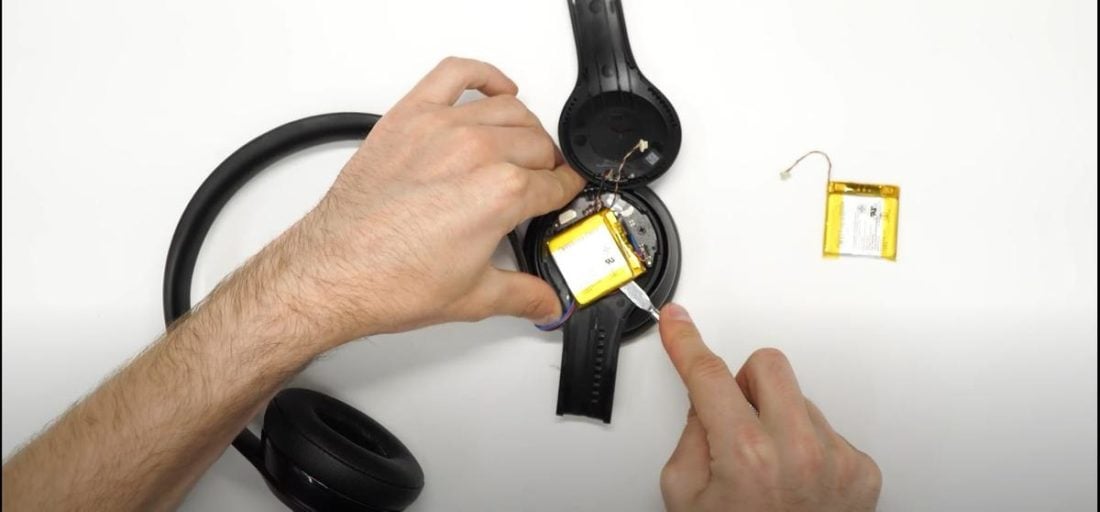
Unplug the battery from mainboard. (From: YouTube/Joe’s Gaming & Electronics) - Remove the battery with a prying tool.
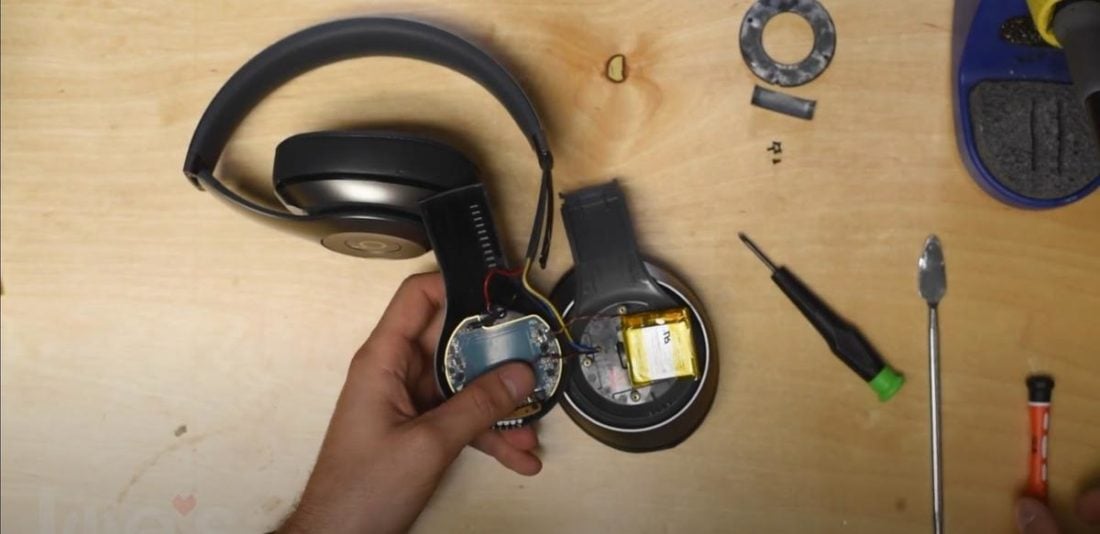
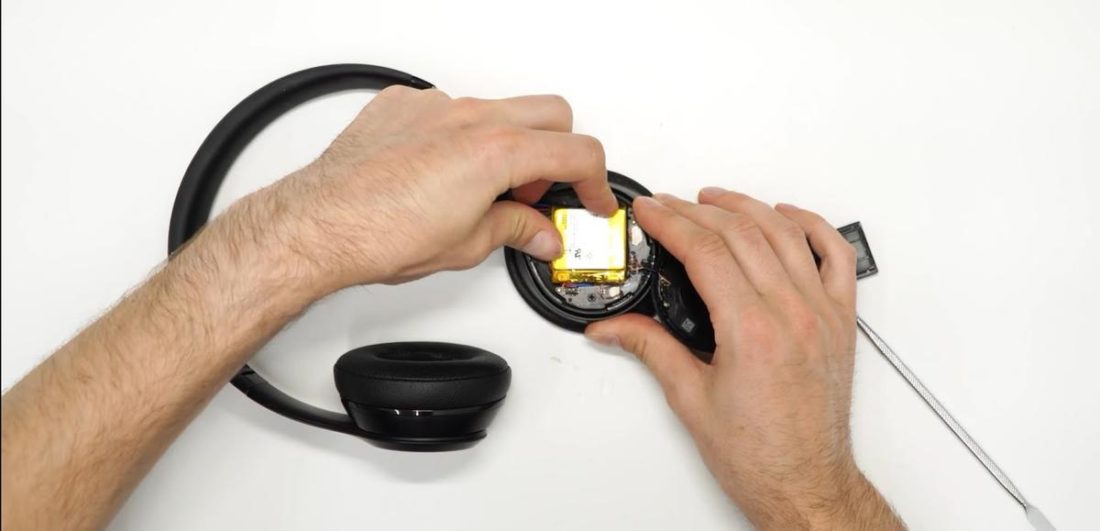
Pry up the faulty battery. (From: YouTube/Joe’s Gaming & Electronics) - Place your replacement battery and plug it into the mainboard.

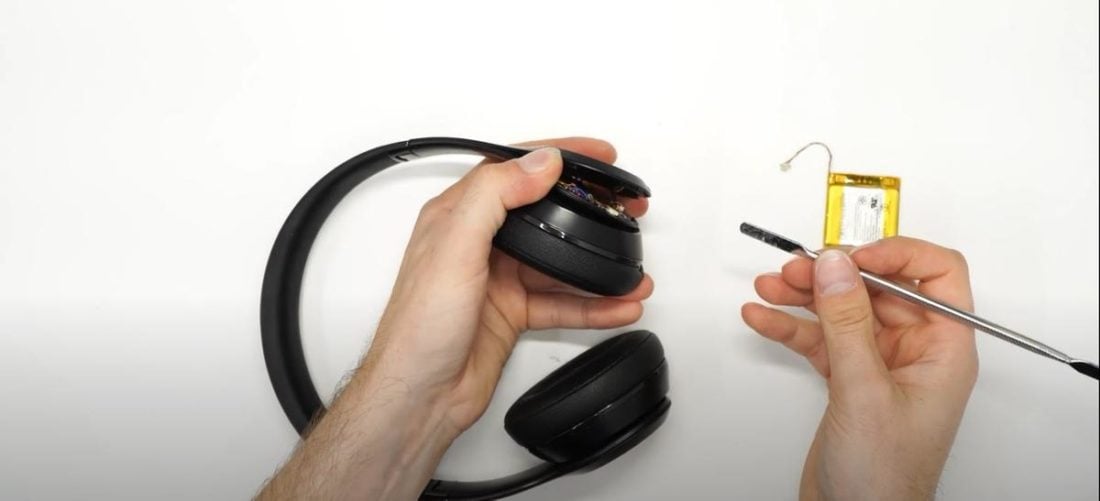
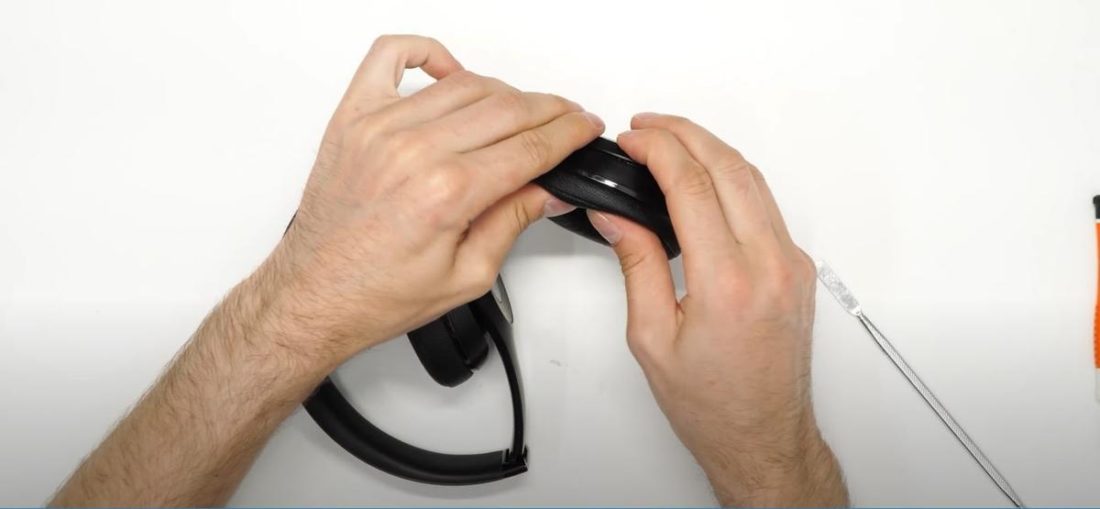
Plug in the replacement battery and put it in the original spot. (From: YouTube/Joe’s Gaming & Electronics) - Reassemble your Beats Solo 2 or 3.

Re-assemble the parts and make sure the case clips back in nicely. (From: YouTube/Joe’s Gaming & Electronics)
For a more intricate step-by-step guide or if you run into trouble during the process, watch the video tutorial on Beats Solo 2 and Solo 3 Battery Replacement.
How to Replace the Battery of Your First-Generation Beats Headphones
First-gen Beats headphones use two regular AAA batteries, so swapping them out should be easier than newer models. Follow these steps to do so:
- Find the left speaker of the headset. It’s the one that doesn’t have the power button.
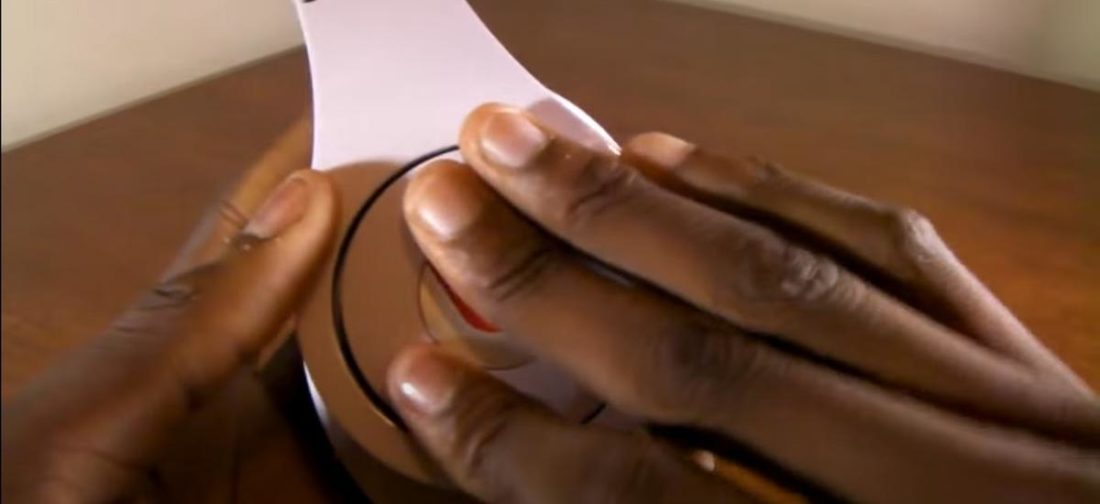
- Rotate the cover counterclockwise with your fingers to loosen and remove the battery cap.

Turn the left side cover counterclockwise. (From: YouTube/Marques Brownlee) - Carefully pull out the old batteries to avoid damaging the connectors.

Replace the battery with new ones. (From: YouTube/Marques Brownlee) - Put in your new batteries. Make sure that each battery is in the correct orientation.

Conclusion
Beats wireless headphones have gotten so far from their first generation. But with more advanced technology comes more challenging battery replacement methods.
With this guide, you can now replace the faulty battery on your Beats without having to spend too much time and money on service centers.
Do you have defective Beats headphones that we haven’t covered here? Let us know in the comments, and we’ll cover it in our future articles.
Beats 2 Solo battery plug was all glued in and unplugging battery ripped the whole insert apart bending metal prongs . Now wire doesn’t stay plugged on new battery.
Suggestions?