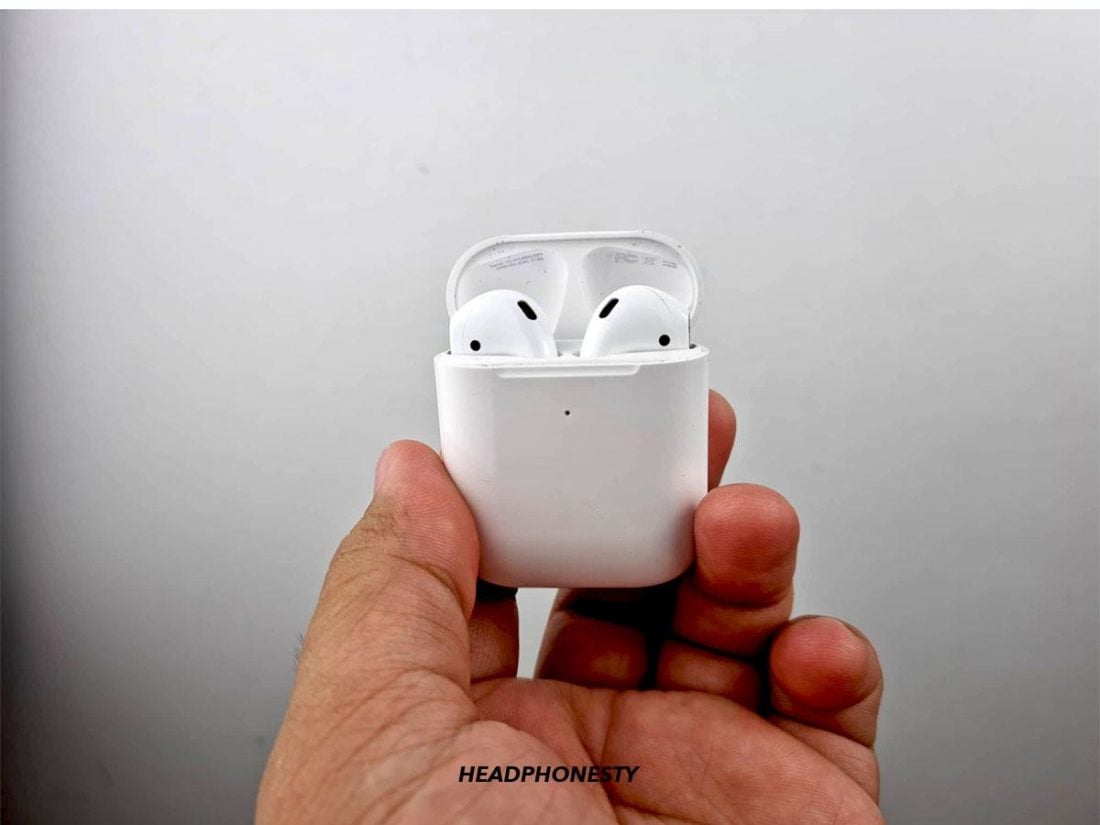
We’ve explored far and wide to find the best fixes for AirPods not connecting to MacBooks and iMacs.
AirPods and Macs are designed to work well together without any hassle, so it can be baffling when your Mac simply won’t recognize your AirPods.
There’s nothing worse than being unable to get through a phone call or meeting just because you’re stuck with using your Mac’s speakers because you can’t connect your AirPods.
Don’t give up on these devices just yet! We’ve compiled all the best possible fixes to help you quickly connect your AirPods to your Mac so you can go about your day. Let’s get right into it!
How to Know if It’s an AirPod or Mac Issue
Since AirPods and Macs are two equally advanced devices, it might not be immediately obvious which of them is responsible for the connectivity problems.
However, narrowing down which device caused the problem, can help you know where to focus your solutions on—and save you more time!
Here’s how you can find out if the connectivity issue lies with your AirPods or Mac.
- Pair your AirPods with another device (preferably a Mac). If your AirPods work on the other device, the problem is with your Mac, and you can follow these troubleshooting methods.
- Pair another set of AirPods (or other wireless earbuds) with your Mac. If the other pair of AirPods work with your Mac, the problem is probably in your AirPods, and you can try these methods instead.
Depending on your test results, you can try different fixes that are more specific to the cause. However, we recommend trying the fixes for both devices to leave no stone unturned.
AirPods Not Connecting to Mac: AirPod-Centric Solutions
If you’ve found out that the issue is with your AirPods, these are our tried-and-tested true solutions that will likely help connect your AirPods to your Mac.
- Reset your AirPods
- Clean your AirPods
- Update your AirPods’ firmware
- Make sure your AirPods have enough charge
Reset your AirPods
Resetting your AirPods basically means reverting them to the configuration they come with out of the box. If there was a software issue somewhere in your AirPods, this should fix it. Here’s how you can reset your AirPods:
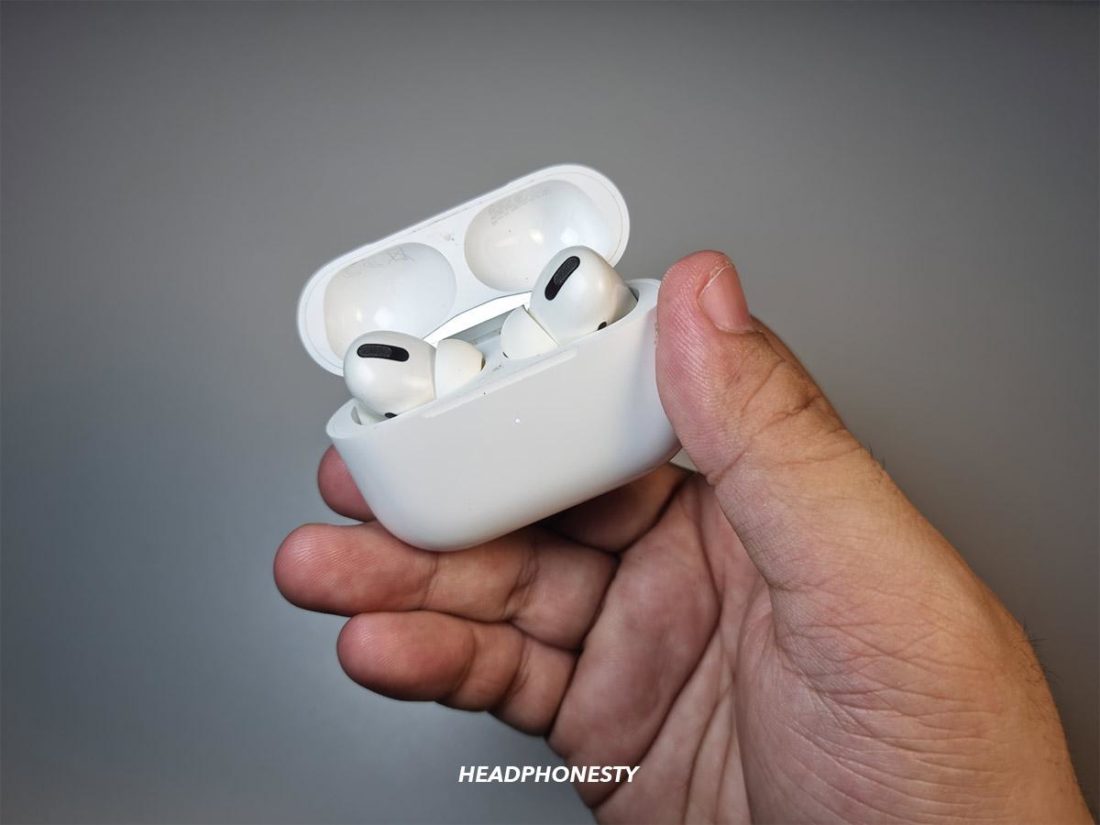
- Put your AirPods inside the charging case, and close the lid for at least 30 seconds. Then open the lid back up.

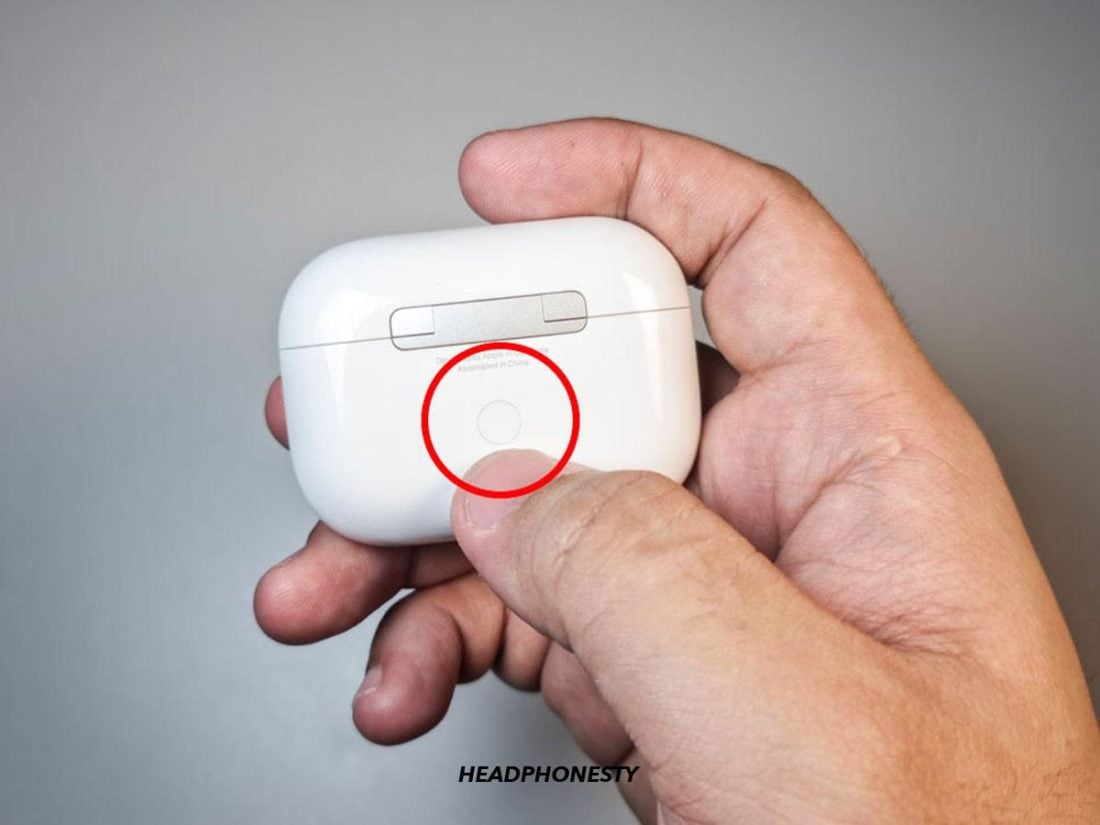
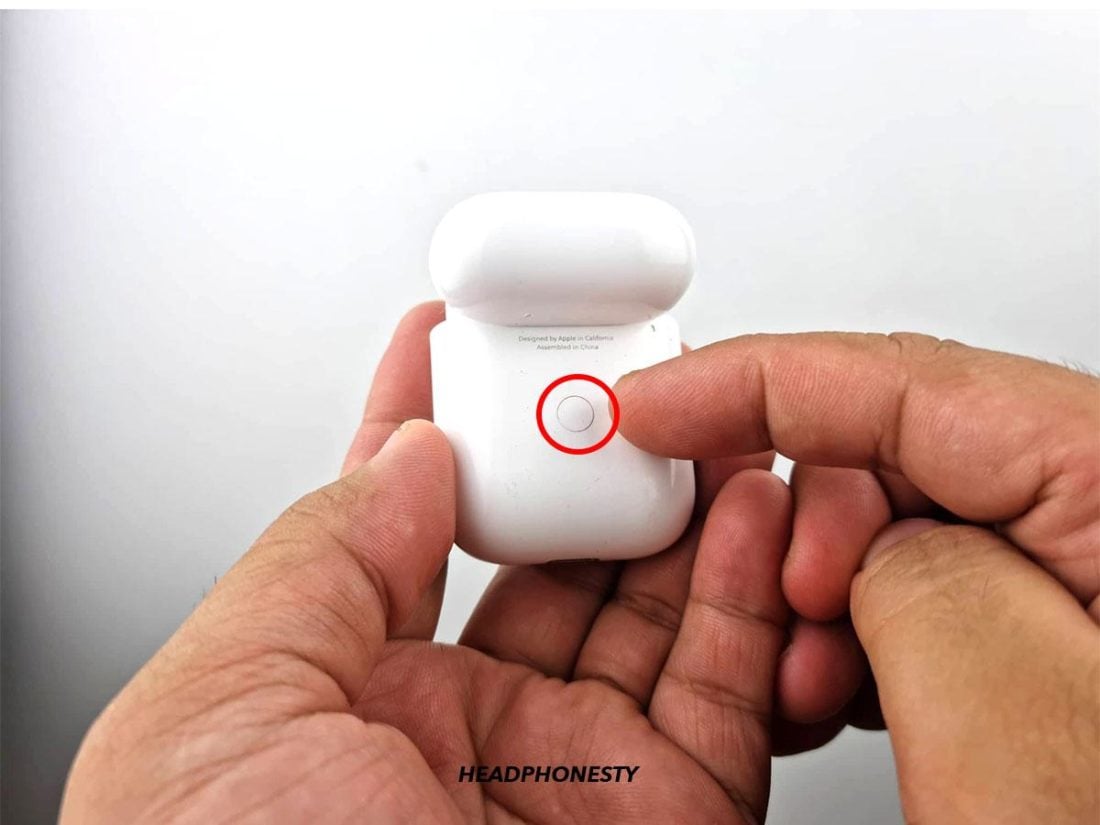
AirPods inside the open case - Locate the setup button at the back of the charging case.
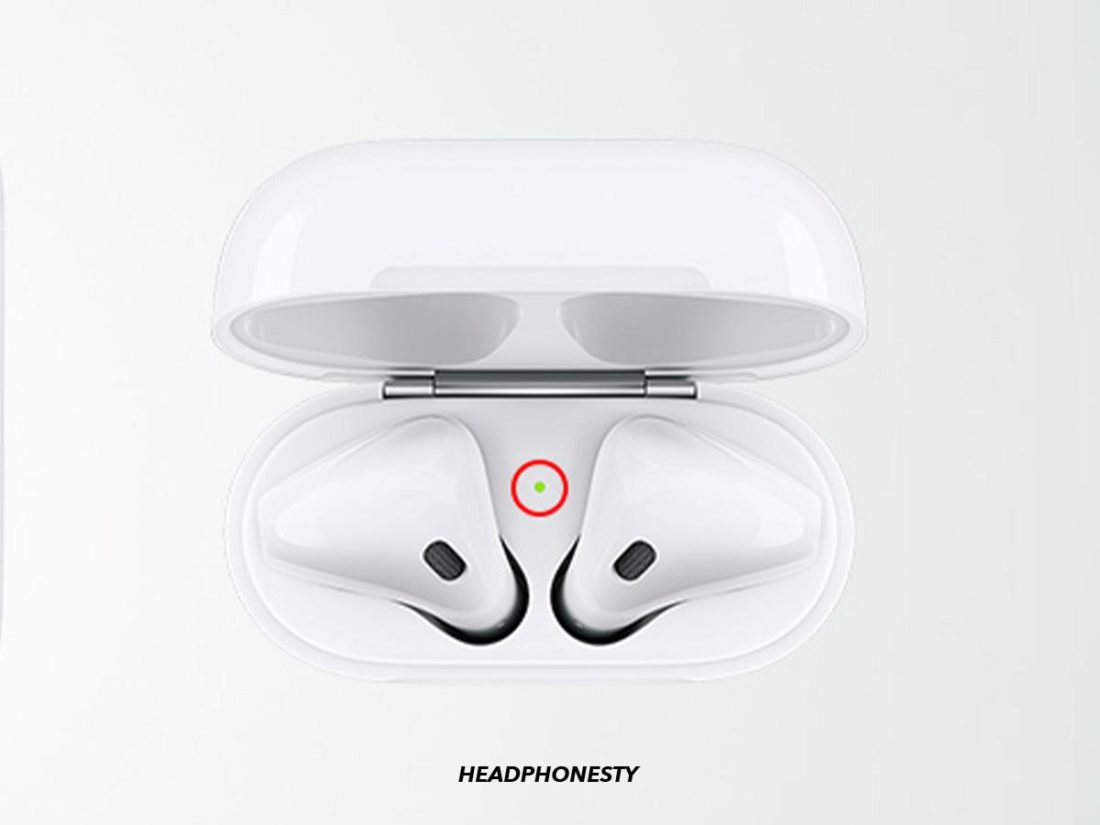
Look for the circular setup button on the charging case. - Press and hold the setup button for at least 15 seconds. The status light should change from flashing amber to white.
Keep pressing the setup button till the status light flashes white. - Close the lid; your AirPods are now fully reset.
Close the lid to complete the reset process.
Due to the different form factors, you can’t apply this method while attempting to reset AirPods Max. You can instead reset the AirPods Max by pressing and holding the Noise Control and Digital Crown buttons.
Clean the AirPods
In extreme scenarios, dirt and wax build-up can cause interference with the connection between your AirPods and Mac. Dirt on AirPods may not always be obvious, so take a closer look at the crevices for hints of the same.
Follow these steps to clean AirPods and improve their connectivity:
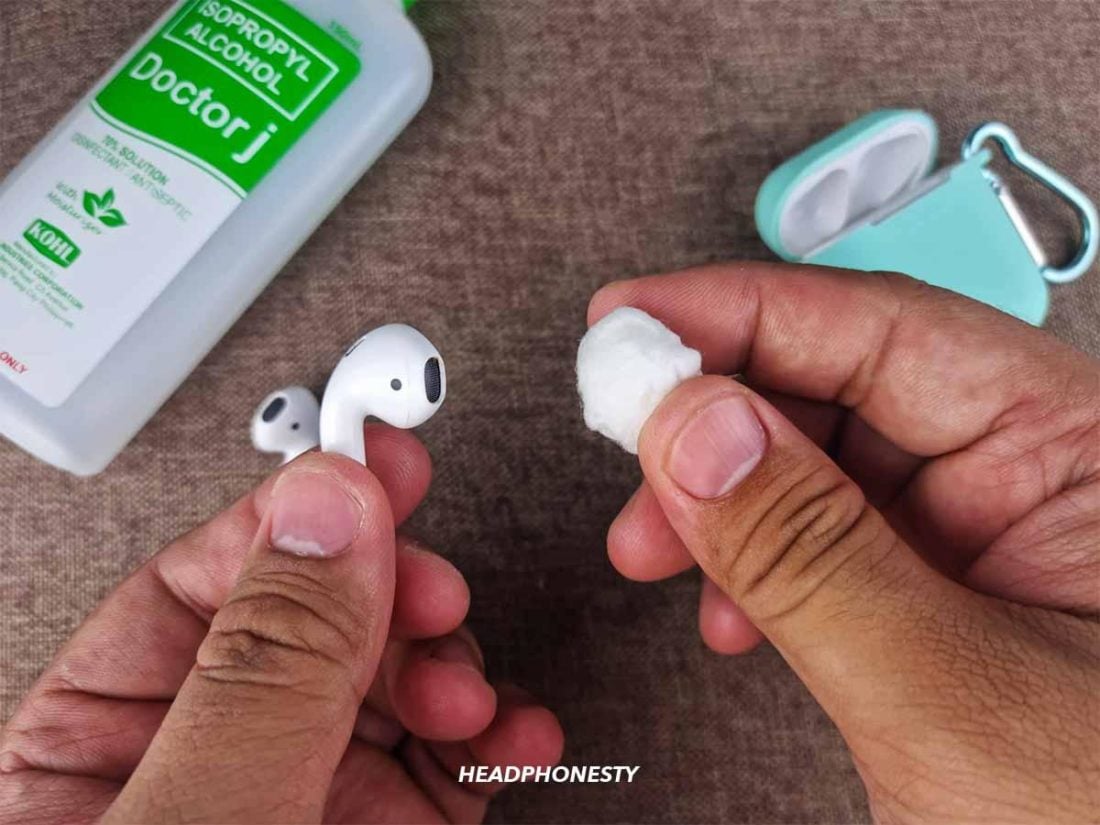
- Use a cotton ball damp with 70% isopropyl alcohol to wipe all the surface areas of your AirPods.
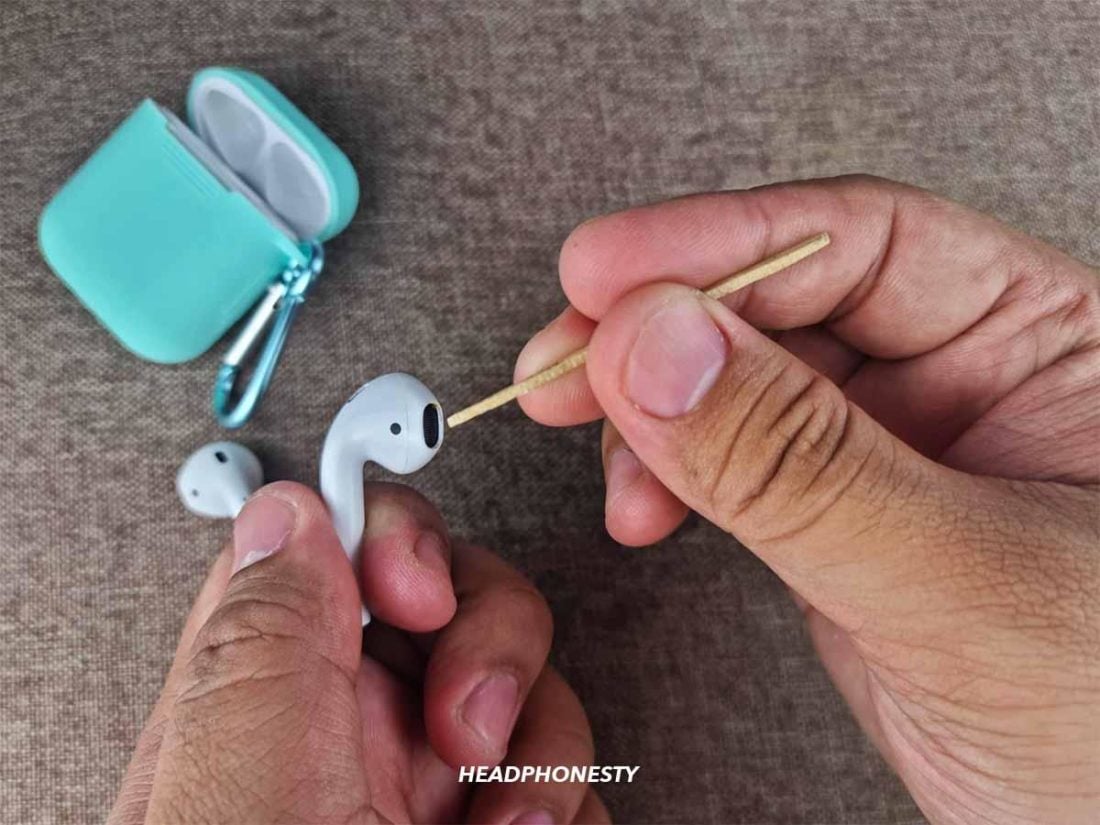
Wipe the outer surface of the AirPods with a cotton ball sprayed with isopropyl alcohol. - Then, using a toothpick, remove the stuck earwax or other dirt in the corners or hard-to-reach areas, like the speaker mesh. Be careful not to apply too much force while doing this.
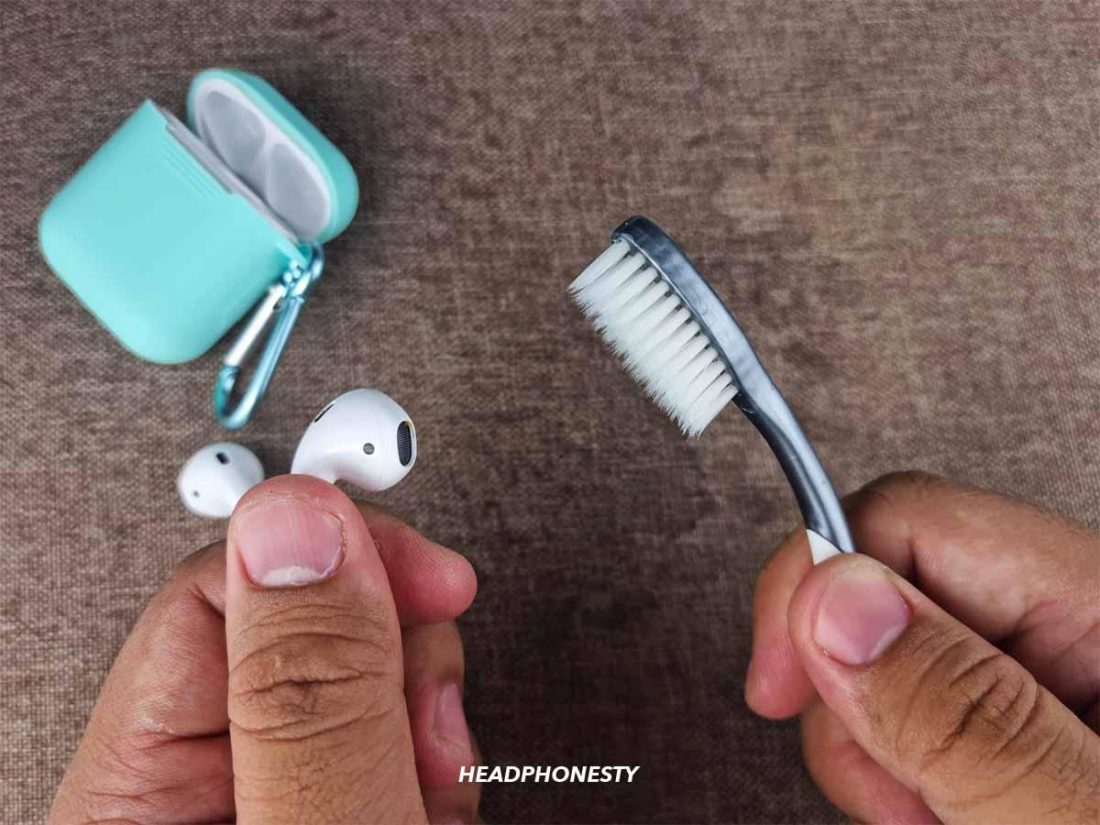
Use a toothpick to gently remove dirt from the speaker mesh. - Finally, use a toothbrush to remove the remaining debris,
Gently the remaining debris with a toothbrush. Finish it up by wiping the surface clean with a lint-free cloth.
Update your AirPods to the latest firmware
A pending firmware update can also cause your AirPods to not connect to your Mac. Firmware updates for AirPods don’t come out often, but they could still contribute to connectivity glitches.
Here’s how you can check your AirPods’ firmware version:
- Connect your AirPods to an iOS device.
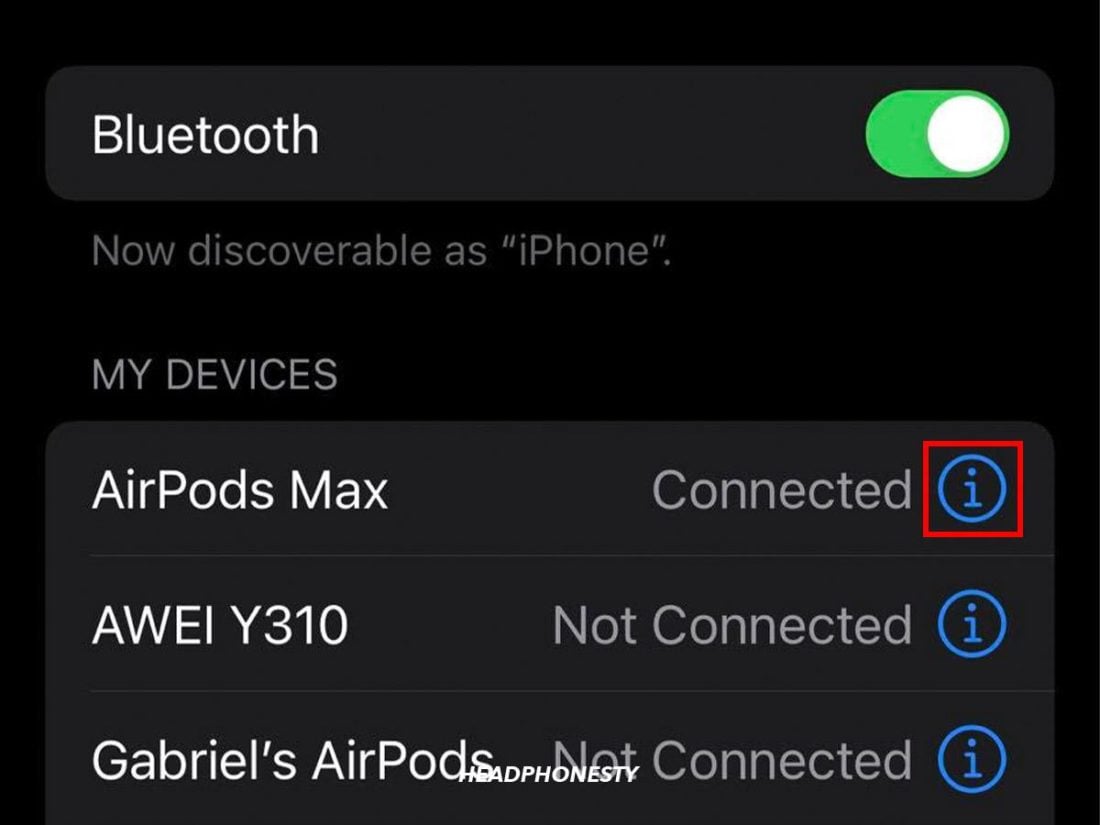
Bring your AirPods next to your iPhone. - Open your Settings app, and go to Bluetooth.
Head to Settings, then Bluetooth. - Find your AirPods in the devices list and tap the “i” icon next to your AirPods’ name.
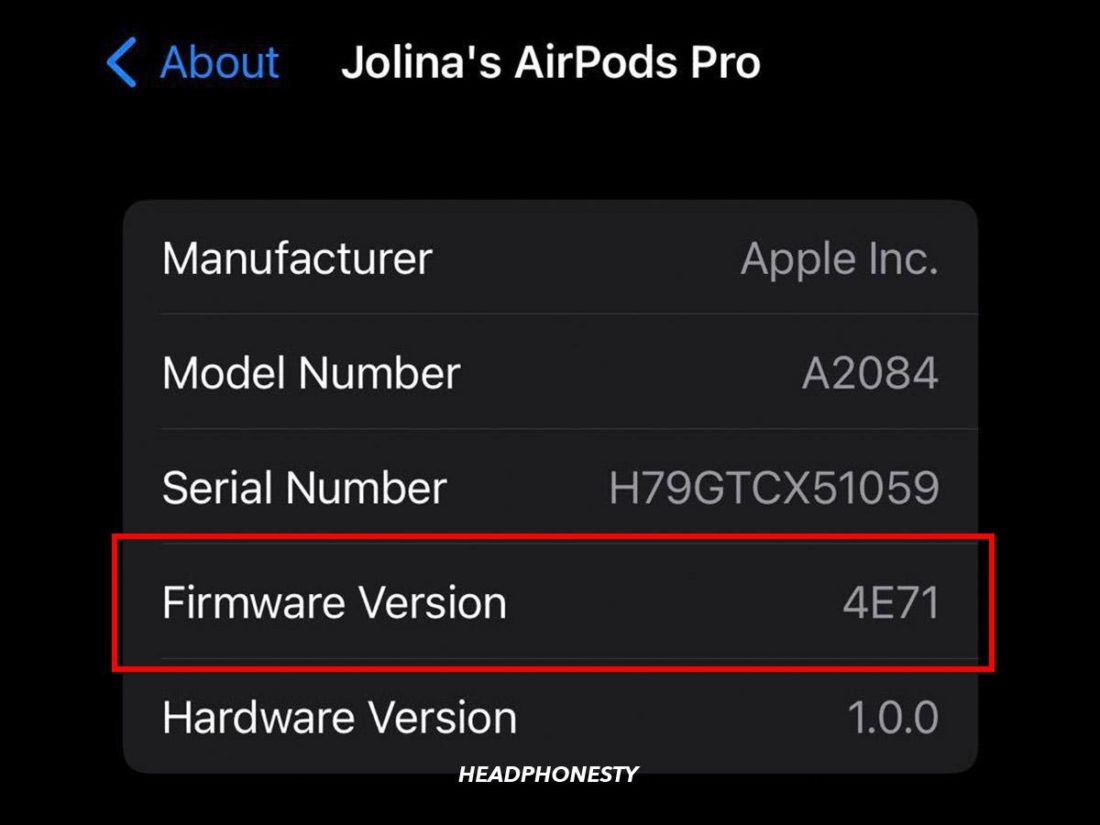
Tap the “i” button next to your AirPods’ name. - Check the Firmware Version column.
You’ll see the firmware version under the product specifications.

Apple automatically delivers AirPods firmware updates whenever you connect them to an iOS device. But if, for some reason, your AirPods don’t have the latest firmware, here’s how you can force a manual update:
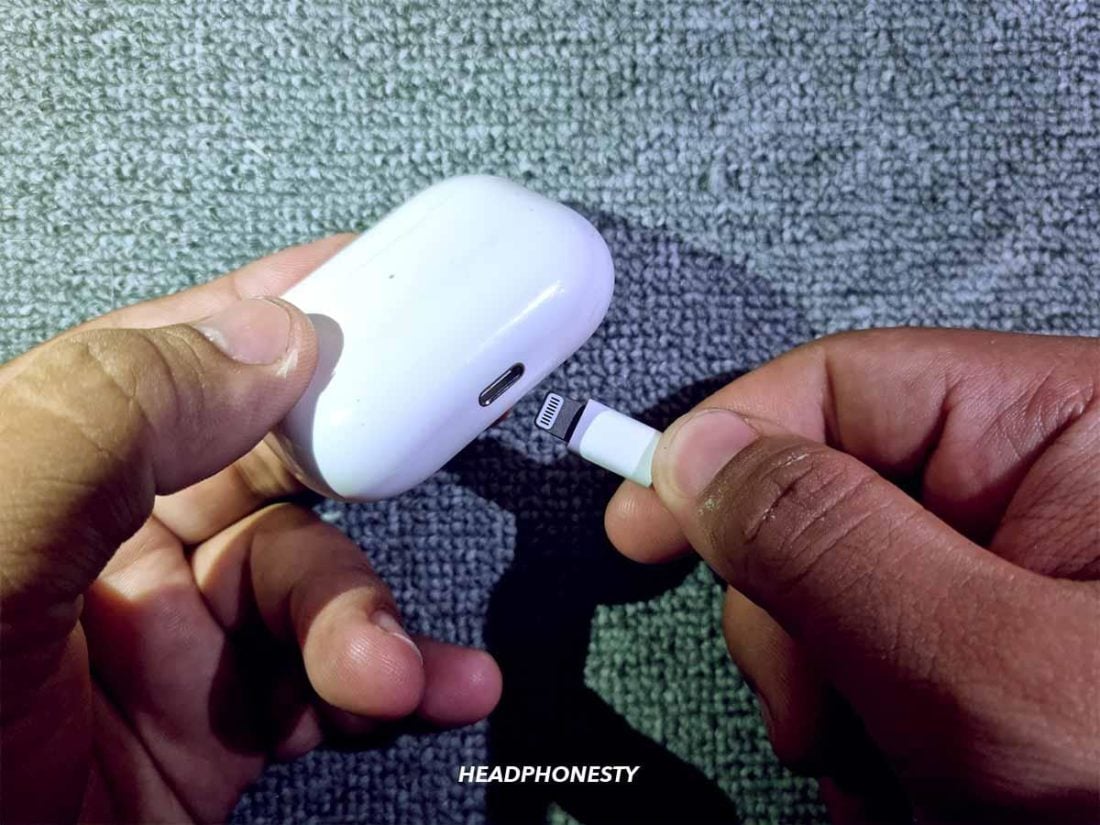
- Pair your AirPods with an iPhone or iPad with an active internet connection and play some audio for 3-4 minus (typically, one song)
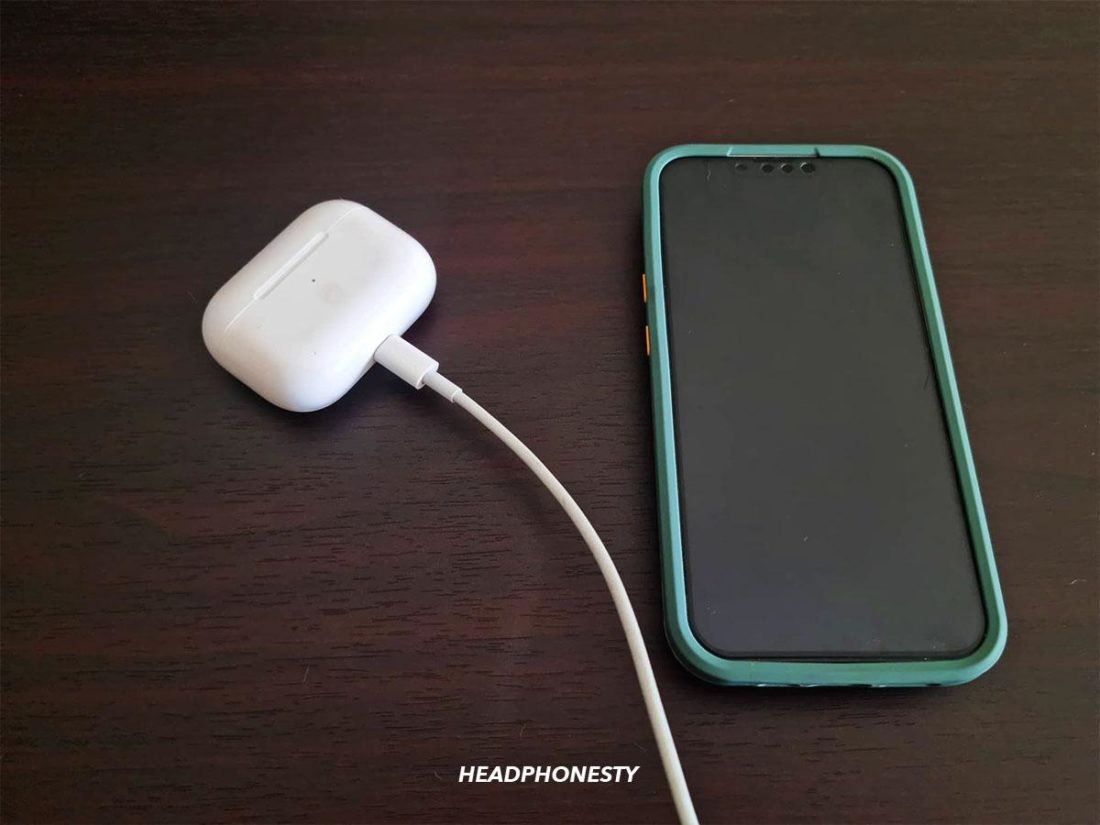
Connect your AirPods to an iOS device with a working internet connection. - Place your AirPods in the charging case, and charge the case through the Lightning port or your wireless charging mat.
Connect the charging case (with your AirPods inside) to a power source using the Lightning port. - Place your iPhone or iPad next to the AirPods case.
Keep your iOS device next to the AirPods case to allow the updates to be installed. - Wait for around 30 minutes, and check if the firmware has been updated.
Make sure your AirPods have enough charge
No matter how hard you try to solve the connection issue, you won’t find anything if your AirPods are just straight-up out of juice. Typically, your AirPods will work properly up until they run out of battery – but a loss in connection quality is quite common on Bluetooth devices.
To ensure this isn’t the case with your AirPods, you can check your AirPods’ battery life by pairing them with an iPhone. The pop-up notification will indicate how much battery the earbuds and the case have.
But if you don’t have an iPhone at hand, you can place them back in the charging case with the lid open. A green LED means that your AirPods are at full battery; an amber LED indicates that they’re not at 100% yet. No light means your AirPods are fully devoid of charge.
AirPods Not Connecting to Mac: Mac Solutions
If you’re sure the problem isn’t with your AirPods, there’s probably something off with the Bluetooth hardware or settings on your Mac. Here are several fixes that you can try:
- Update your Mac’s firmware
- Reset your Bluetooth module
- Disable other Bluetooth devices
- Establish a manual Bluetooth connection
- Sign in with your AppleID
- Set your AirPods as the default output device
Update your Mac’s firmware
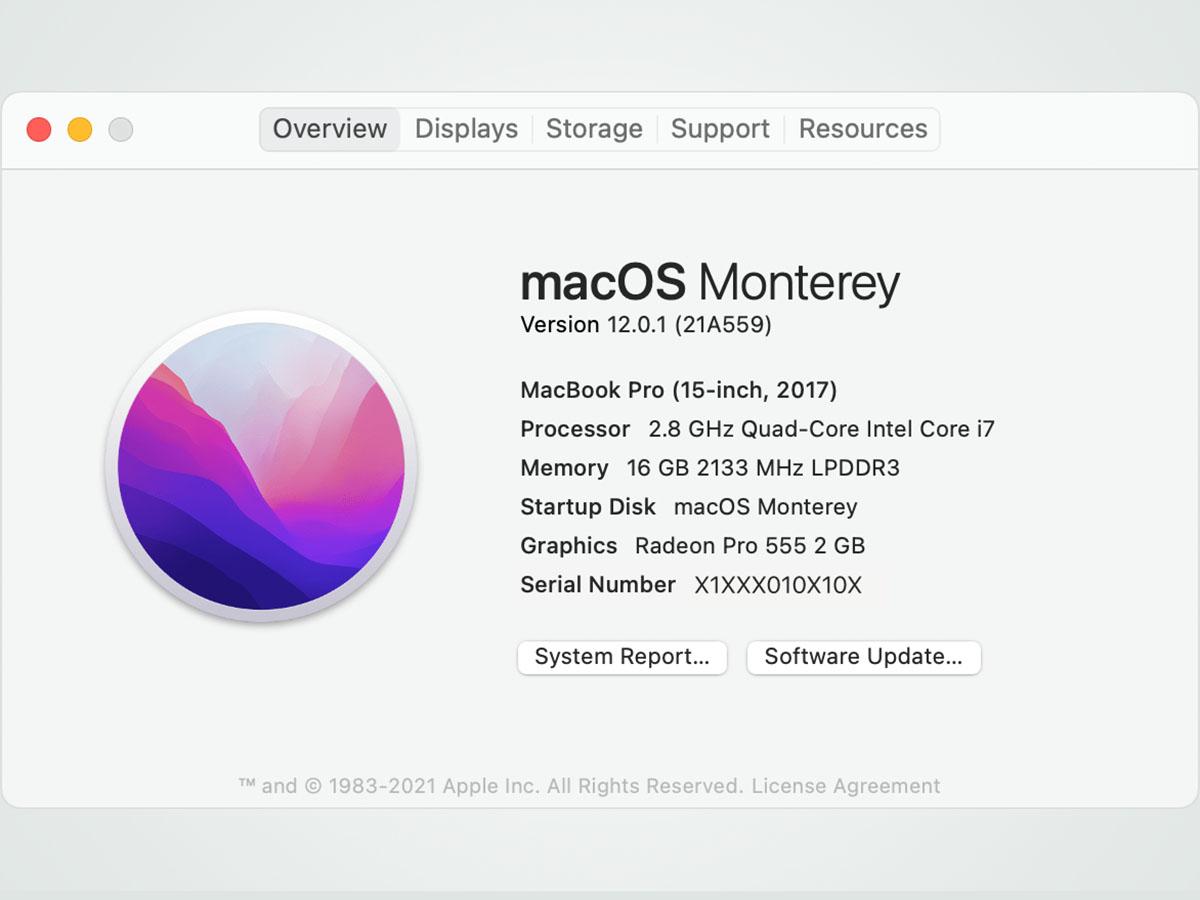
Not many are aware of this, but AirPods have a minimum system requirement to work with Mac devices. If you have an older Mac or haven’t updated your firmware in a few years, this is likely to be the main cause of your issue.
Depending on your AirPods’ version, you may have different system requirements:
- AirPods 1st Gen: macOS Sierra or later
- AirPods 2nd Gen: macOS Mojave 10.14.4 or later
- AirPods 3rd Gen: macOS Monterey 12.0 or later
- AirPods Pro: macOS Catalina 10.15.1 or later
- AirPods Max: macOS Big Sur 11.1 or later
To check your Mac’s current firmware, click the Apple menu > About this Mac. If you’re not using the minimum macOS version to use with your AirPods, you can go ahead and click Software Update to prompt a search for a newer version.
Reset your Bluetooth module
Since AirPods use Bluetooth connection, problems in your Mac’s Bluetooth module or configuration can also prevent them from connecting properly.
If you’ve had a lot of Bluetooth devices recently connected, or have messed with the settings a bit, you can try resetting your Mac’s Bluetooth module by following these steps:
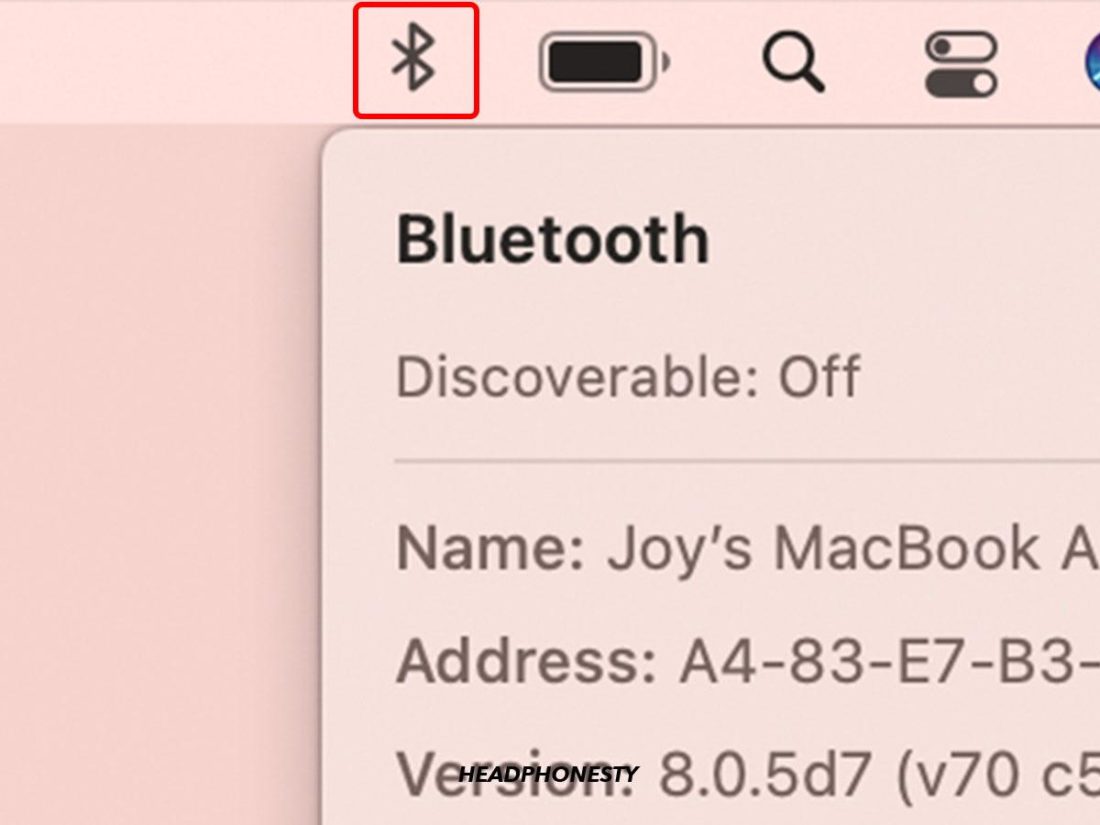
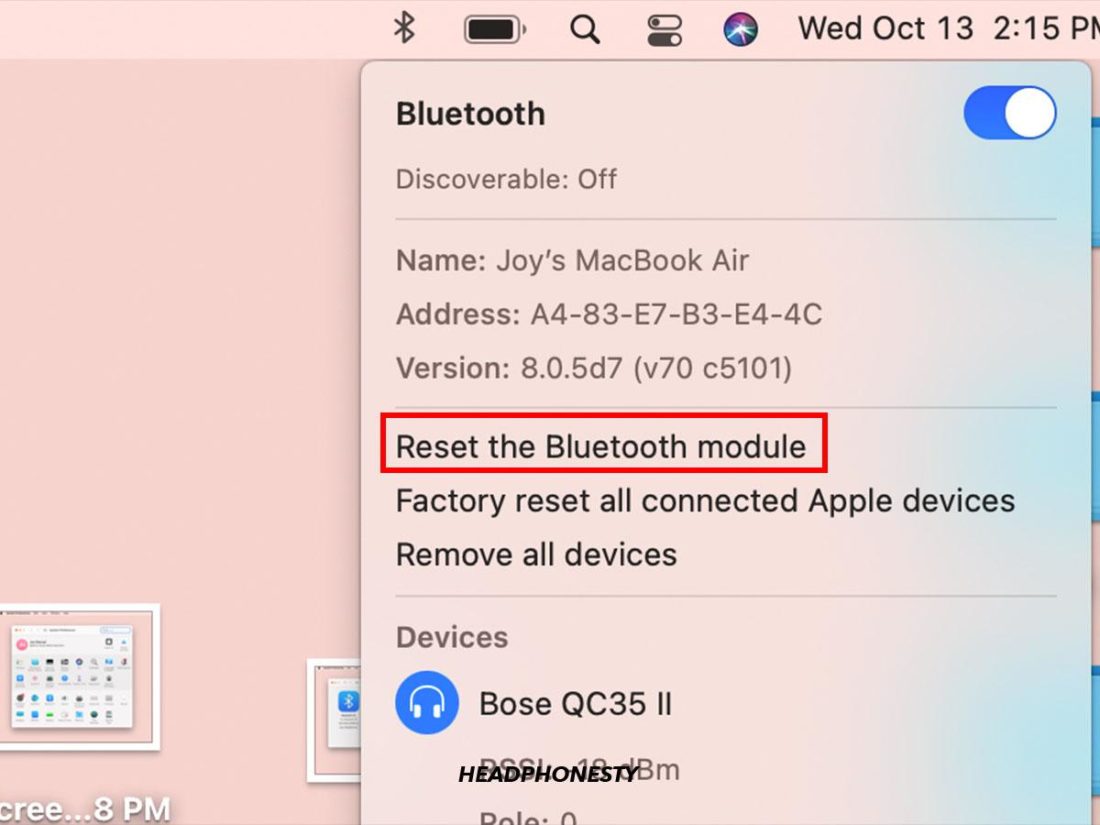
- Hold Option + Shift, and click on the Bluetooth icon on your status bar..
Click on the Bluetooth icon on your status bar. - Under the dropdown, hover on Debug and click on Reset the Bluetooth module.
Tap ‘Reset the Bluetooth module” option under dropdown. - Click OK on the confirmation pop-up and restart your Mac.
Starting from macOS Monterey and later, this option has been taken off the user interface – but you can still reset your Mac’s Bluetooth module through the terminal. This course of action is, however, not recommended for casual users.
Disable other Bluetooth devices
Interference with other Bluetooth devices may also cause your AirPods not connect properly to your Mac. In this scenario, your AirPods may also connect to another device instead of your Mac.
If you have multiple Bluetooth devices beaming signals around you, try disabling them to see if it solves your connection issue. You can also try disconnecting devices connected to your Mac by following these steps:
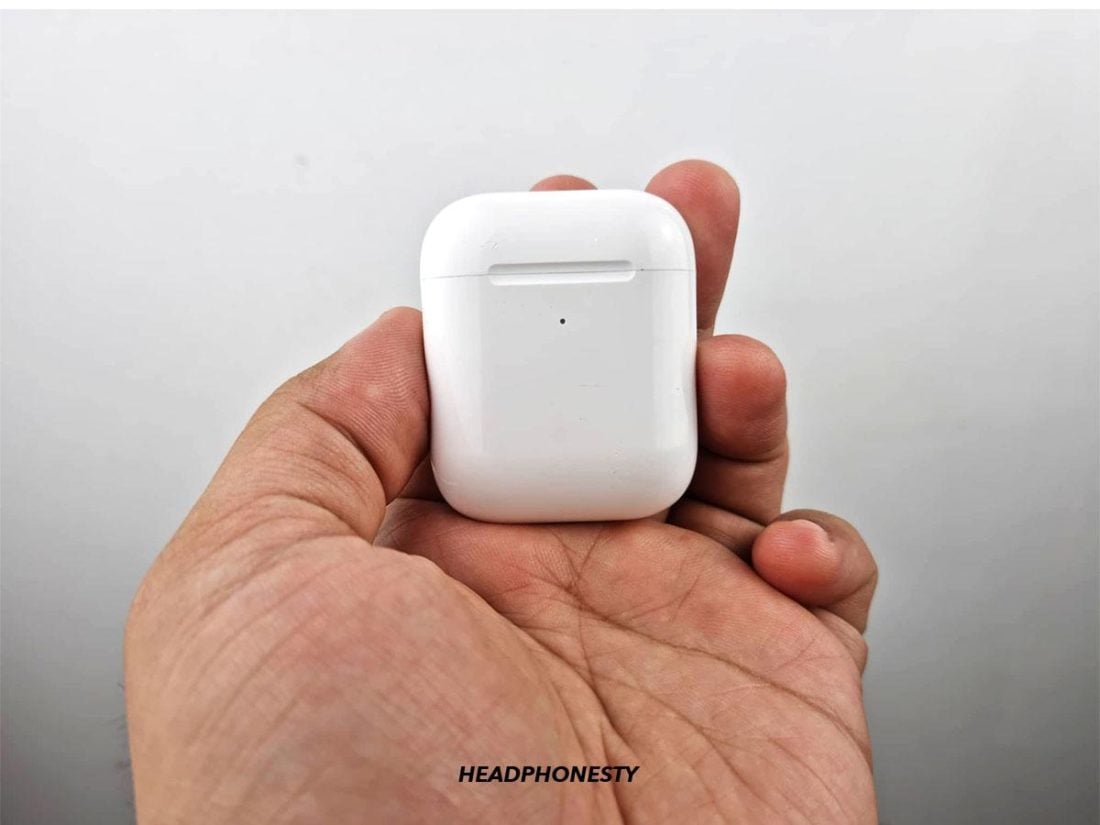
- Put your AirPods in the charging case and close the lid. Then, leave them inside for at least 30 seconds before opening the charging case’s lid.
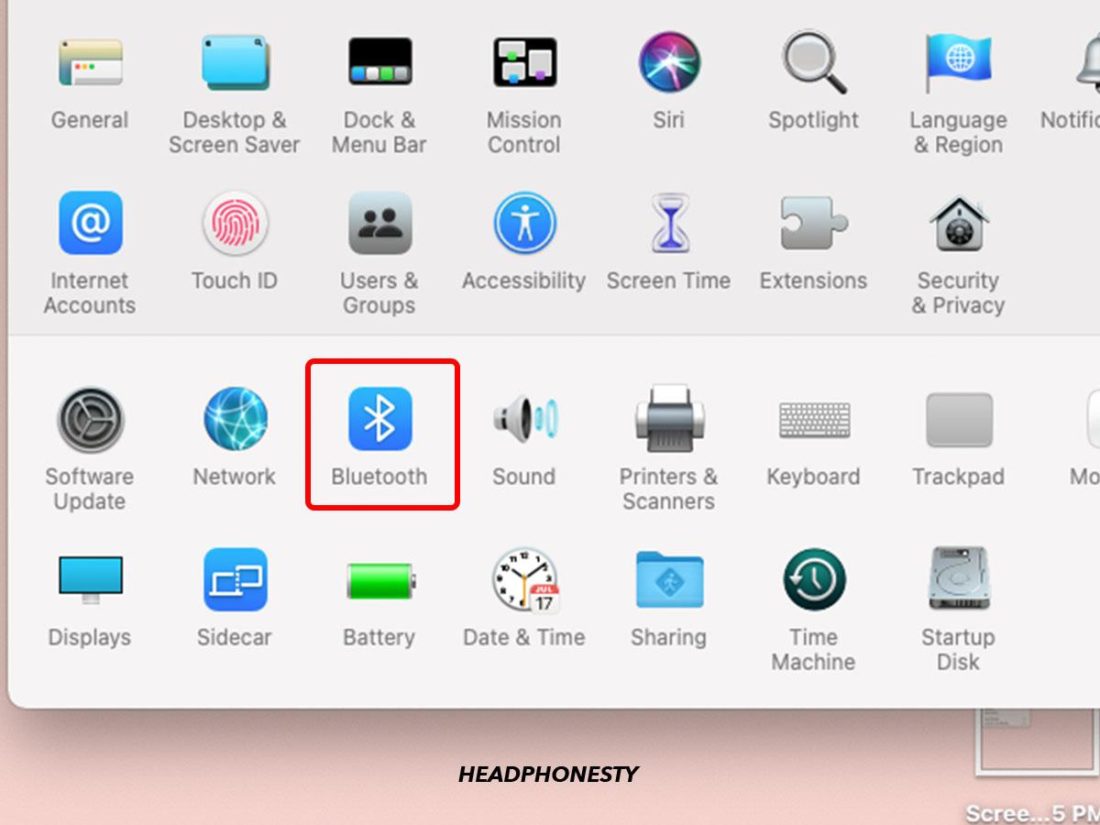
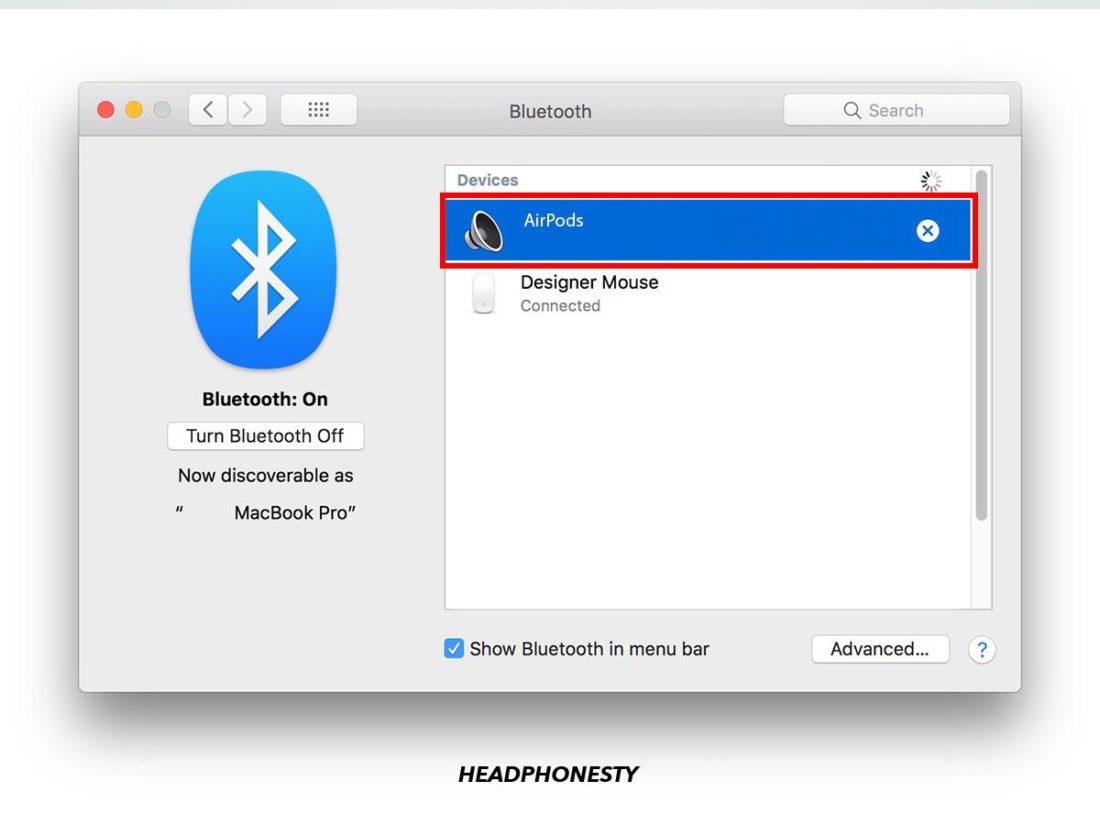
AirPods inside the case - On your Mac, go to System Preferences > Bluetooth.
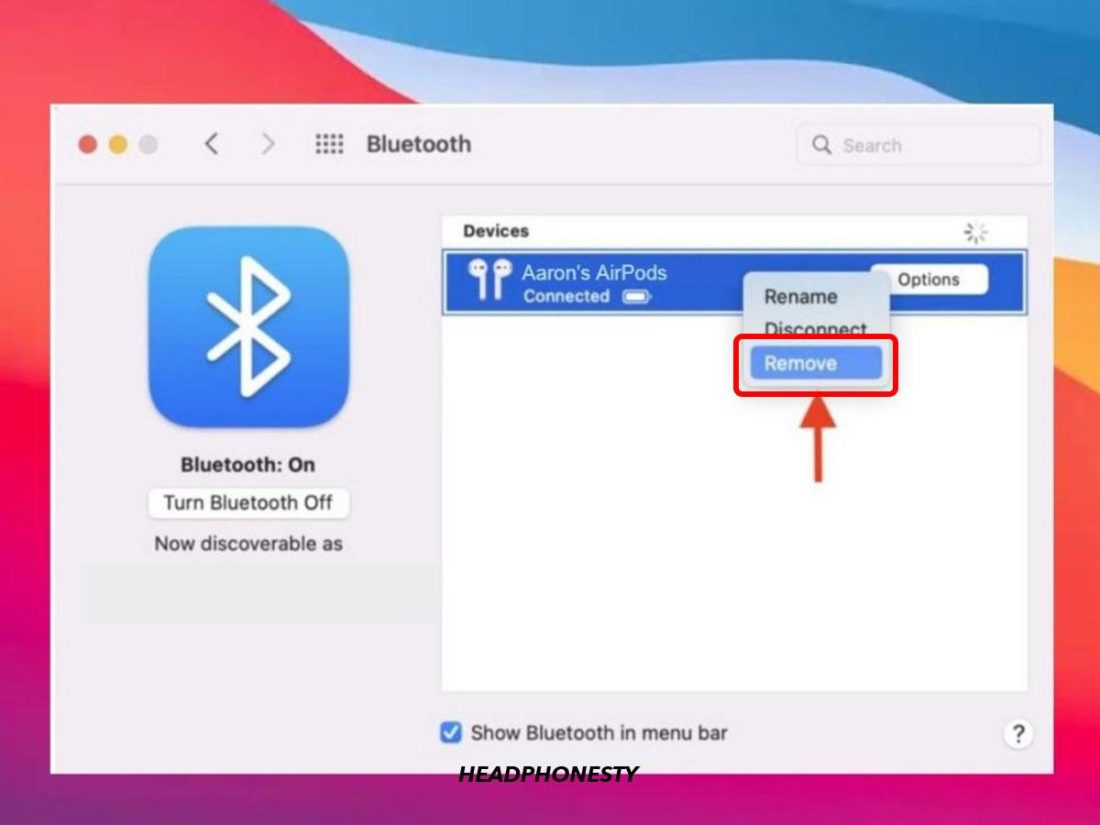
Going to Mac Bluetooth settings via System Preferences - Right-click (or Cmd + click) on your Bluetooth device name and click Remove.
Remove your AirPods from the list of devices. - Repeat the steps until you’ve disconnected all Bluetooth devices.
Establish a manual Bluetooth connection
There isn’t an automatic pairing system between Macs and AirPods. If that’s what you expected when pairing them up, you’ve likely nailed the real cause behind your AirPods not showing up on Mac.
To resolve this, you need to add your AirPods to your Mac manually. Here’s how to do it:
- Put your AirPods into pairing mode by opening the case with the AirPods in them and placing them beside your Mac. For best results, reset the AirPods.
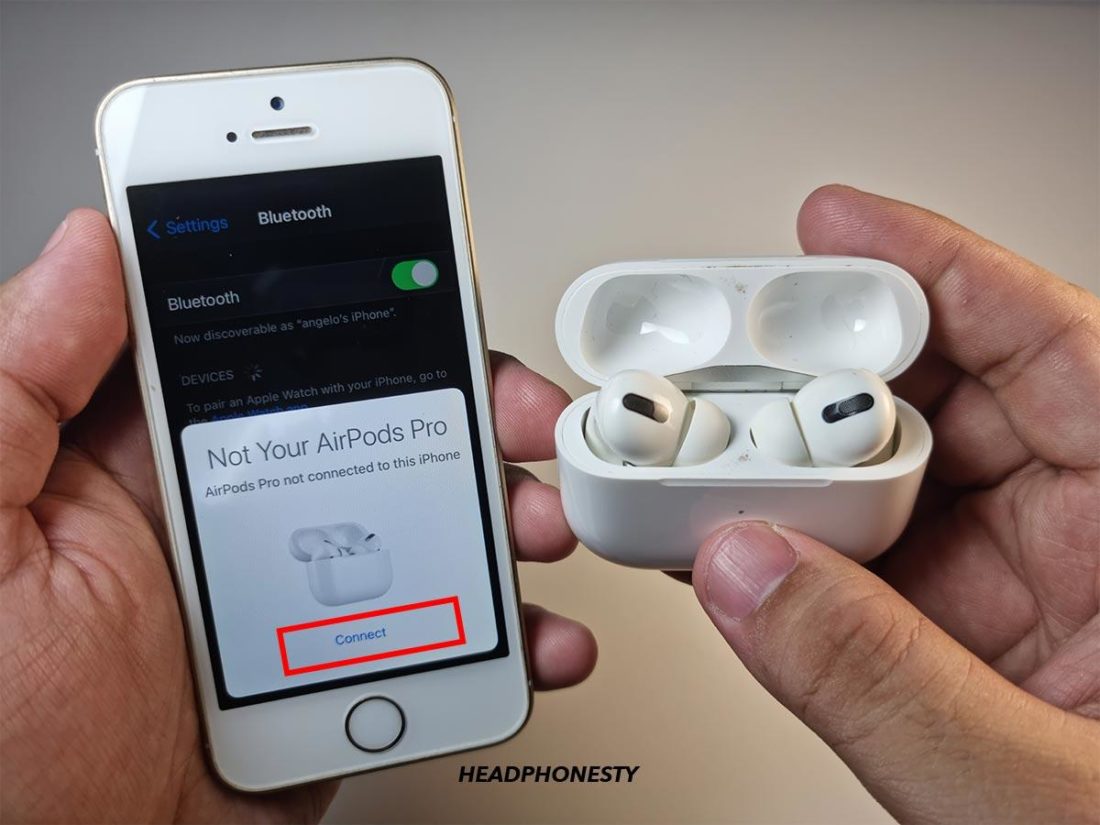
Holding AirPods with the case open - Open the Bluetooth settings in your Mac and see if your AirPods show up under the devices list. If you use the same AppleID, your AirPods should show up there.
List of Bluetooth devices on Mac - Hover on your AirPods’ name and click Connect.
Connecting to AirPods on Mac


If your AirPods don’t appear in the list of devices, follow these steps:
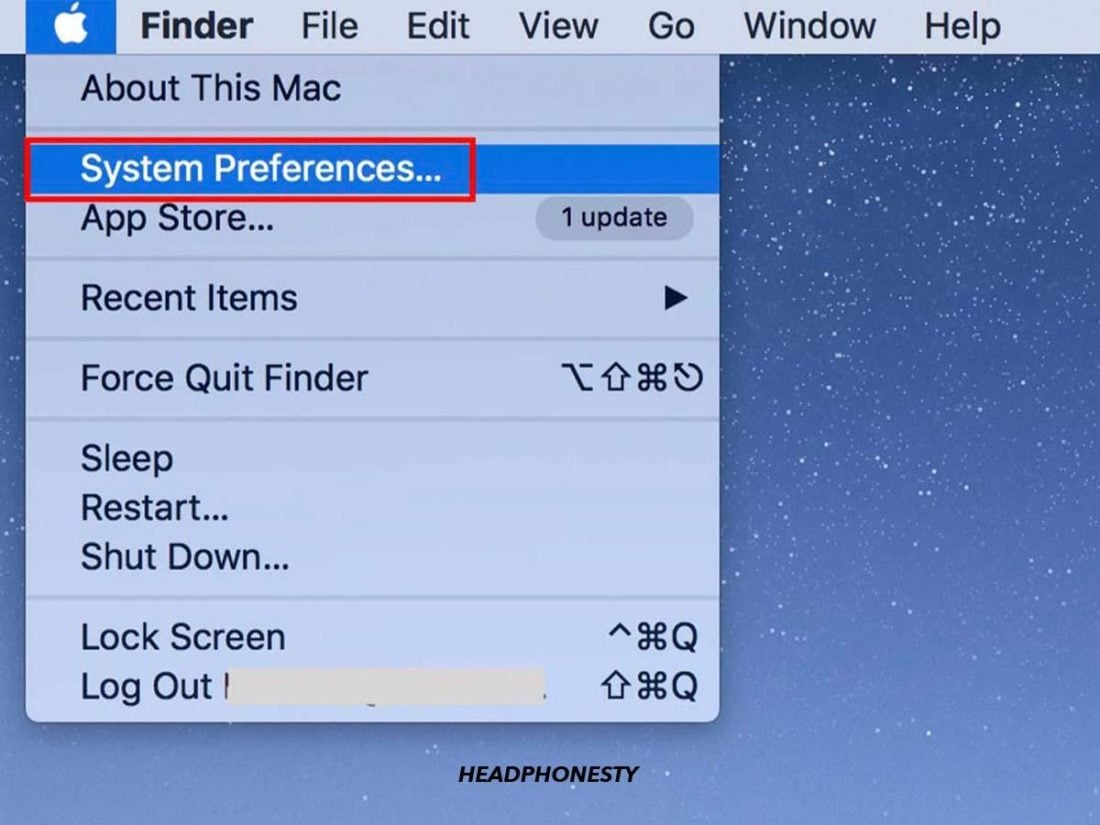
- Go to your Mac’s System Preferences.
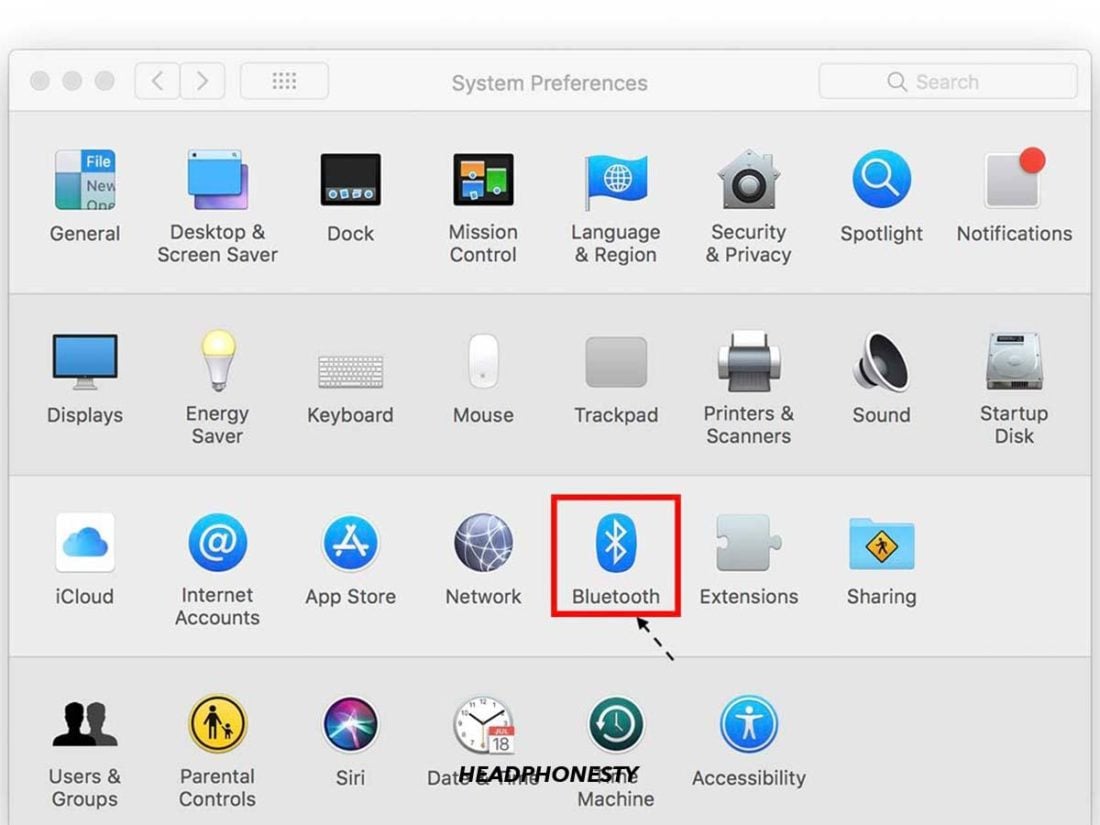
Going to Mac System Preferences tab - From the window that opens, click Bluetooth
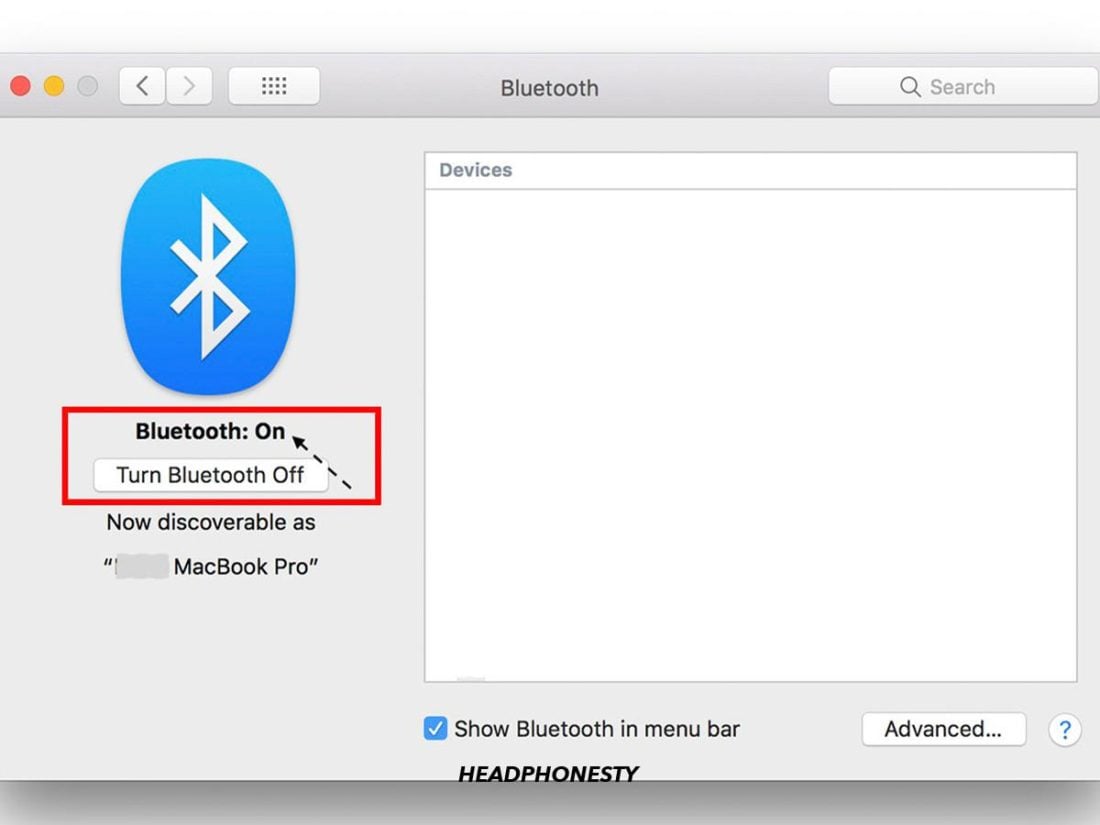
Selecting Bluetooth settings for Mac - Make sure the Bluetooth is turned on. If not, simply click the Turn Bluetooth On button.
Turning on Mac’s Bluetooth - Turn your AirPods to pairing mode by opening the case and pressing the setup button until the status light turns white.
Pressing the AirPods’ setup button - Wait for your AirPods to appear in the list of devices
Selecting AirPods on the list of devices - When it does, tap it and click Connect.
Confirming connection on AirPods with Mac

Sign in with your AppleID
If you previously paired your AirPods with other Apple devices like an iPhone or iPad, they will be registered to an AppleID. You can use the same iCloud account on your Mac to connect to your AirPods automatically.
You can check the AppleID on your Mac by clicking on the Apple menu > System Preferences > AppleID.
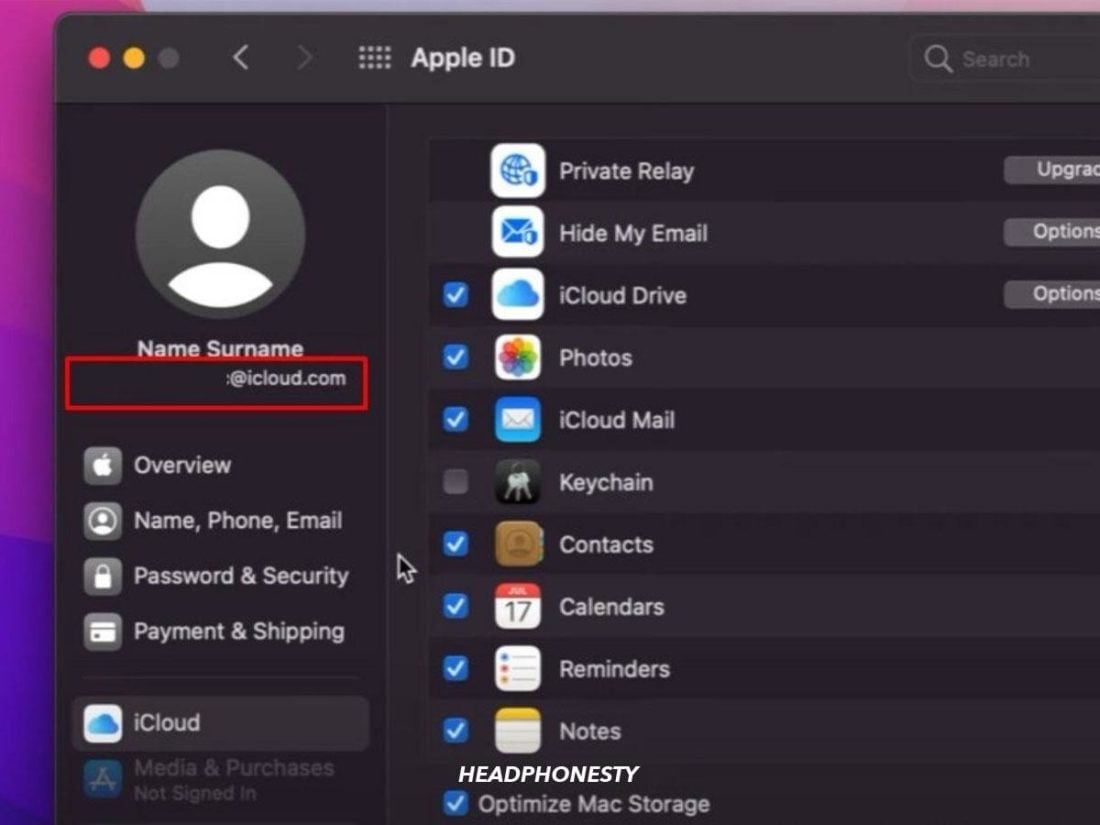
If you don’t have the same AppleID, you can sign out and back in with the relevant AppleID.
Set your AirPods as the default device
If you’ve recently connected other Bluetooth headphones to your Mac, they may still be the default playback device. In this case, you’ll need to manually set up your AirPods as the default playback device. Here’s how you can do it:
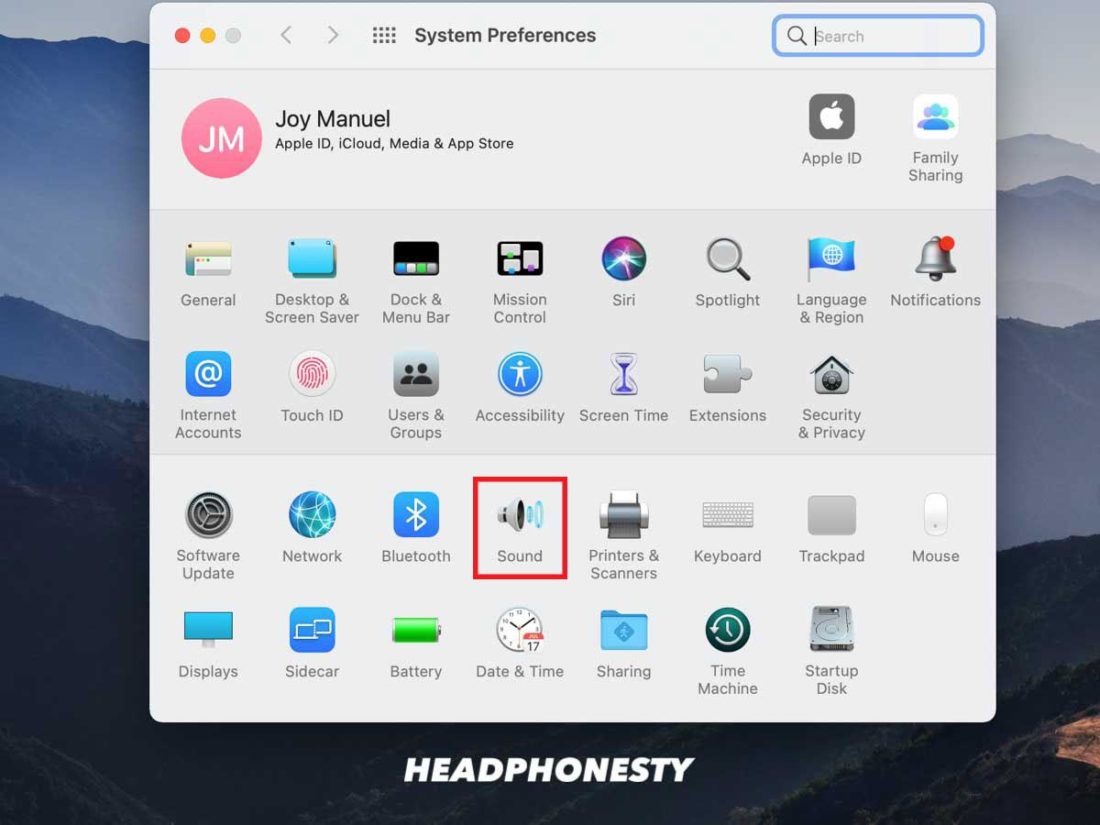
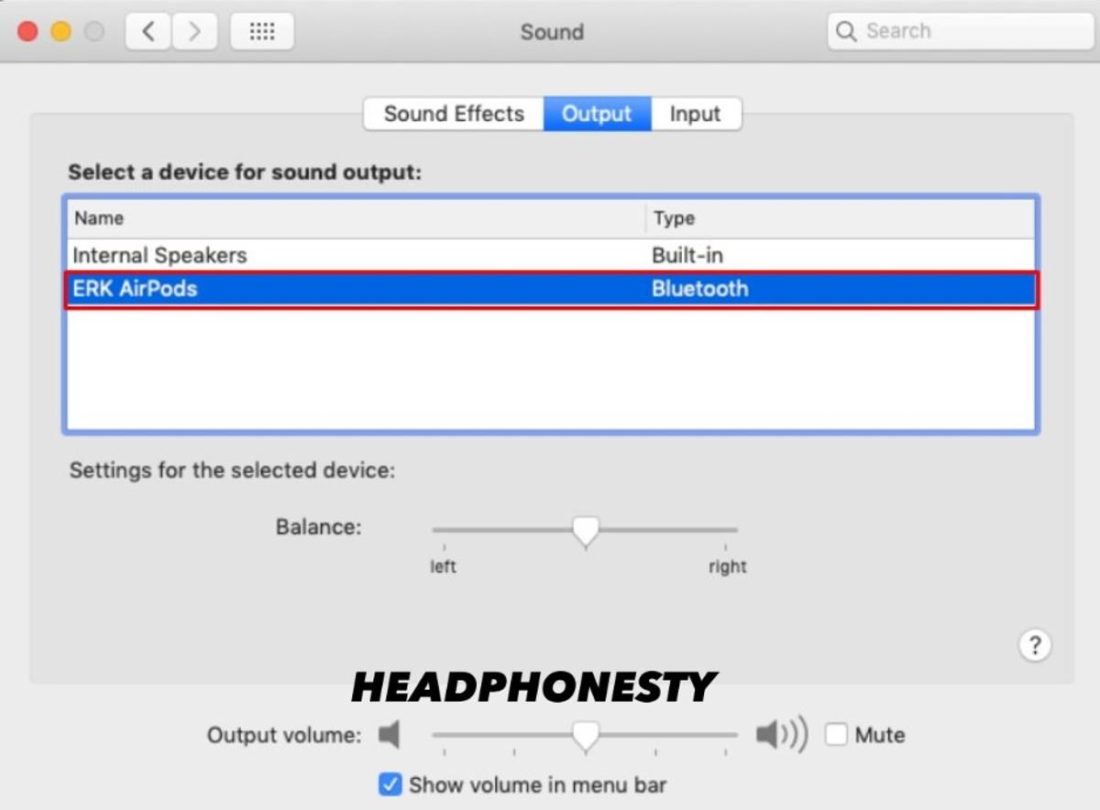
- Go to System Preferences > Sound. If you’re running macOS Big Sur, click on the capsule icons and select the arrow next to the speaker icon.
Click on ‘Sound’ under System Prerences. - Select the Output tab and click on your AirPods’ name on the devices list.

Select your AirPods as the output device.
By default, your Mac will automatically assign your AirPods as a sound output when you pair them. However, this may not be the case if you have multiple sound output devices connected to your Mac.
If All Else Fails, Contact Apple Support
You’re probably reading this because you’ve exhausted all the troubleshooting steps above, but none of them work. At this point, you may have to contact Apple customer support for their assistance. If you purchased your AirPods recently, you might also be viable for a replacement unit.
The best way to connect with a support agent is through Apple’s online chat feature since it only has about two minutes of waiting time to get a response. You could also try posting your issue on the official Apple discussion forum or unofficial platforms such as r/Apple and r/AirPods to get other users’ opinions on your specific concerns.
Conclusions
Given that Macs and AirPods are pretty compatible, you can resolve connection issues related to settings or firmware using at least one of the troubleshooting methods above.
However, since AirPods and Android devices don’t work together as flawlessly, some features will still not work in the AirPods-Android pairing. So, consider this before trying out any of these solutions to resolve connection problems.
We hope this solutions guide will have helped you solve your AirPods and Mac connection issue. Did you find other fixes that we haven’t listed here? Please let us know in the comments!