
Ditch the stress of tech setup with this easy guide to pairing AirPods with MacBook.
One of the best things about AirPods is how easily they pair with other devices within the Apple ecosystem, including MacBooks.
However, the initial setup can be confusing and overwhelming, especially for new users unfamiliar with the ins and outs of Apple devices.
Don’t worry; we’ve got you covered. Read on for a clear, step-by-step guide to simplify how you can connect your AirPods to your MacBook, ensuring a hassle-free user experience.
Step 1. Turn on Your Mac’s Bluetooth
You can connect your AirPods the same way you do with other Bluetooth devices. Here’s how:
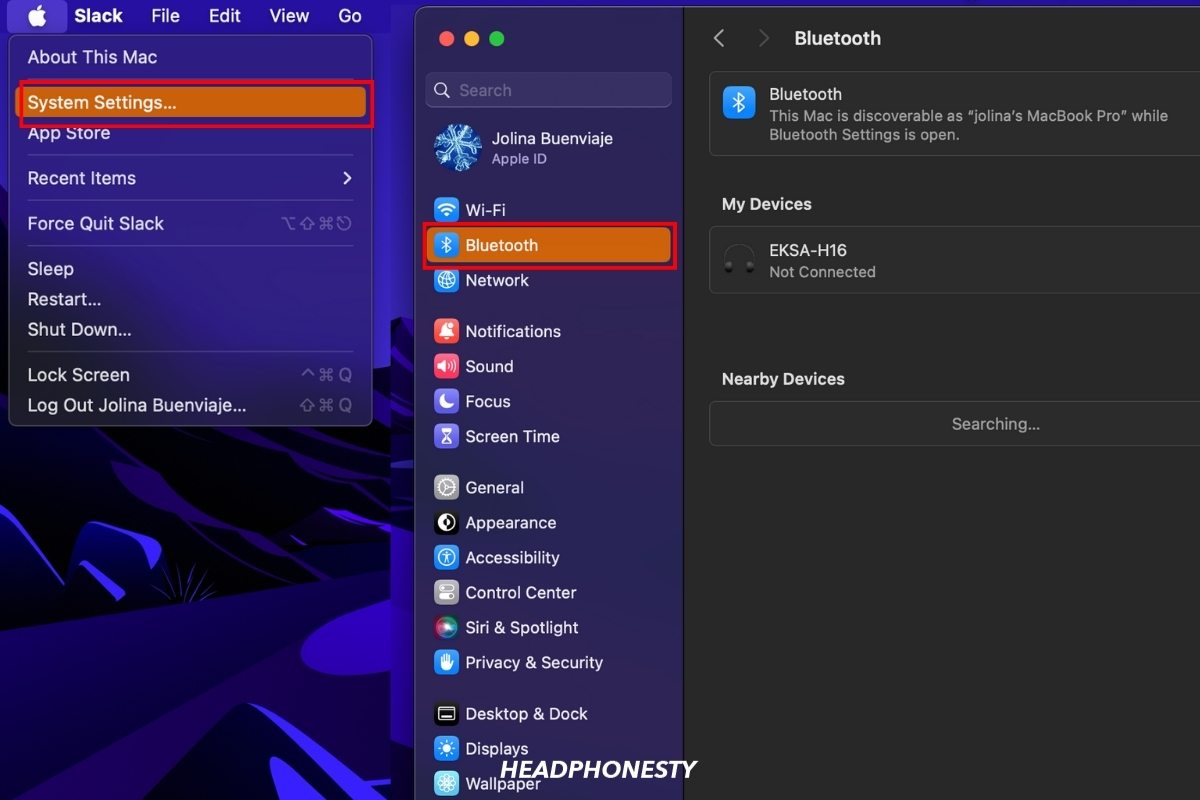
- On your Mac, access the Apple menu in the corner of your screen.

Apple icon - Select System Settings > Bluetooth.

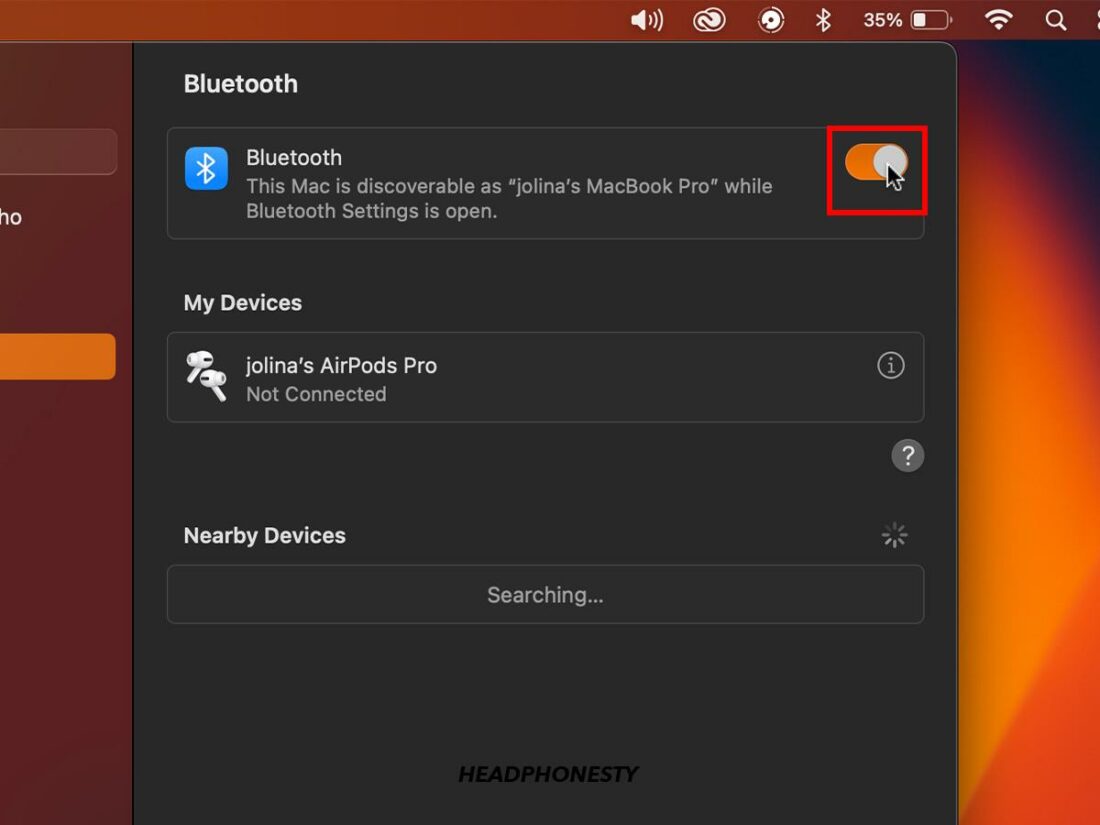
Accessing Mac Bluetooth settings - Click the toggle button to turn Bluetooth on.
Bluetooth toggle switch

Step 2. Make the AirPods Discoverable
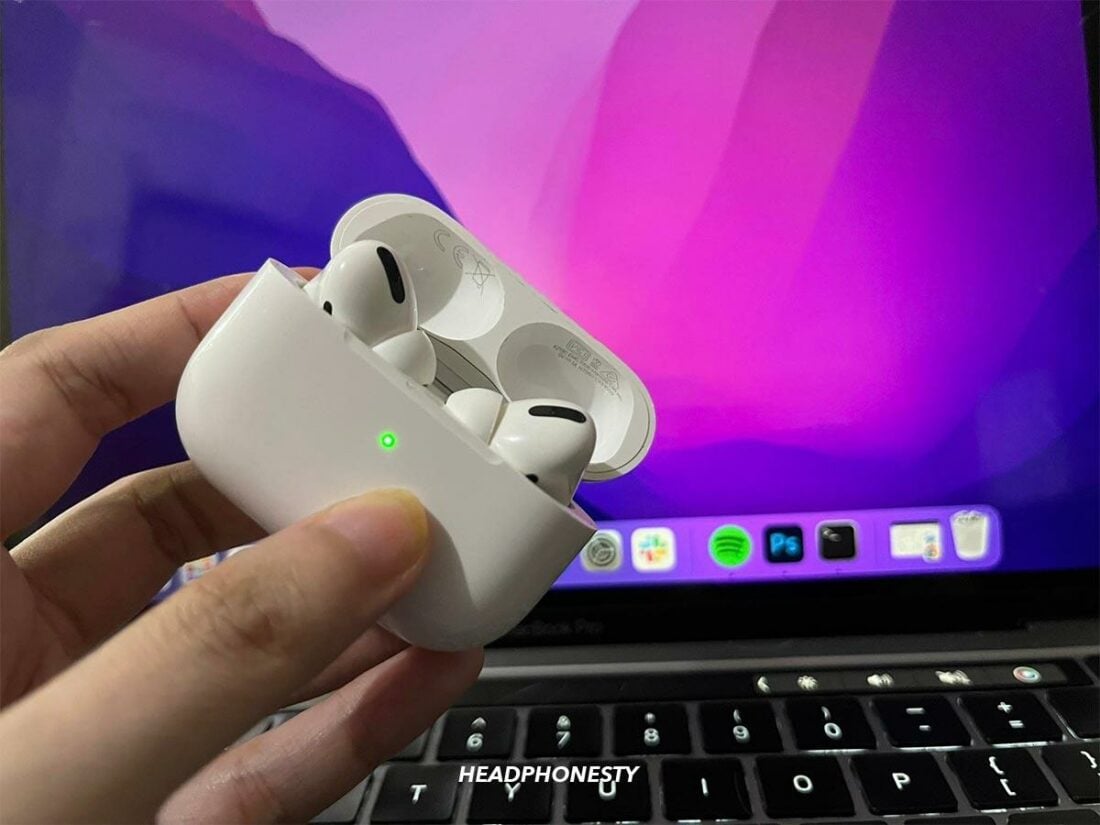
- Keep the AirPods in their charging case and open the lid.
Open AirPods Charger - Long-press the button on the back of the case. The status light will start to flash white.
Press the setup button
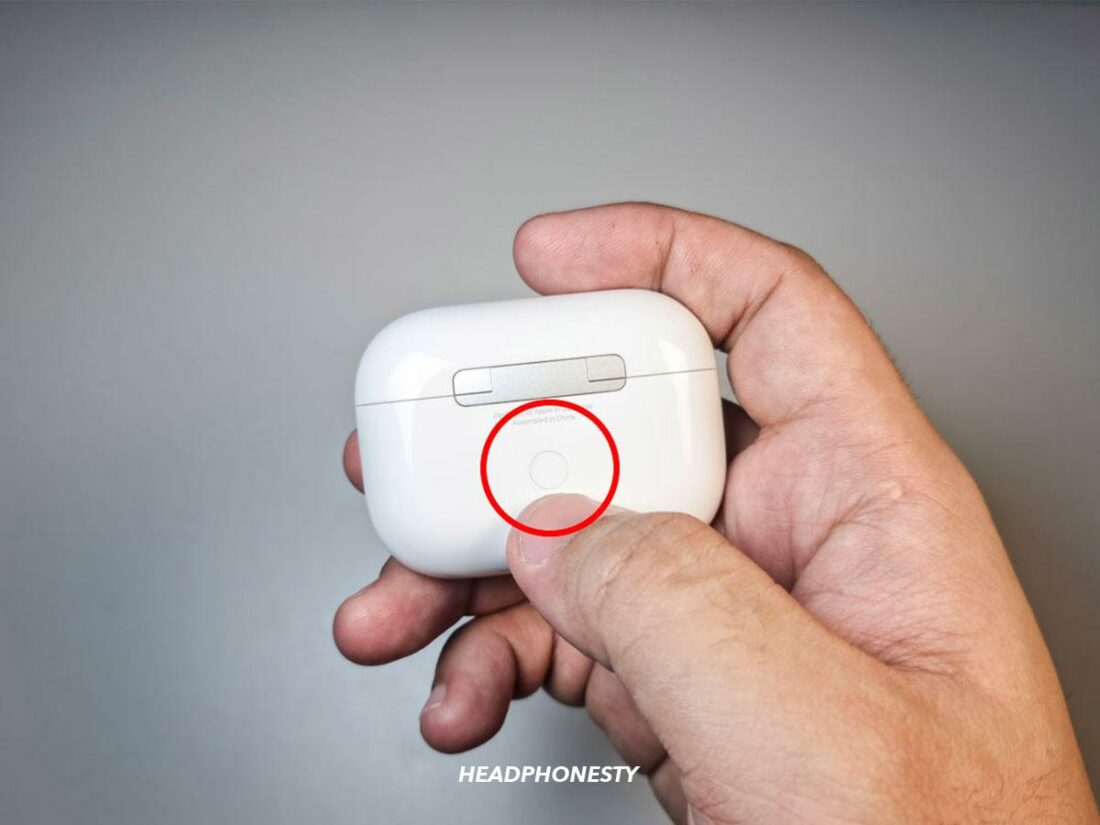
The status light for AirPods 1st and 2nd generation sits between the headphones inside the charging case. For AirPods 3rd generation and to connect AirPods Pro to Mac, look for the status light on the front of the case. On AirPods Max, the status light is on the right earphone.
Step 3. Select Your AirPods from the List of Devices
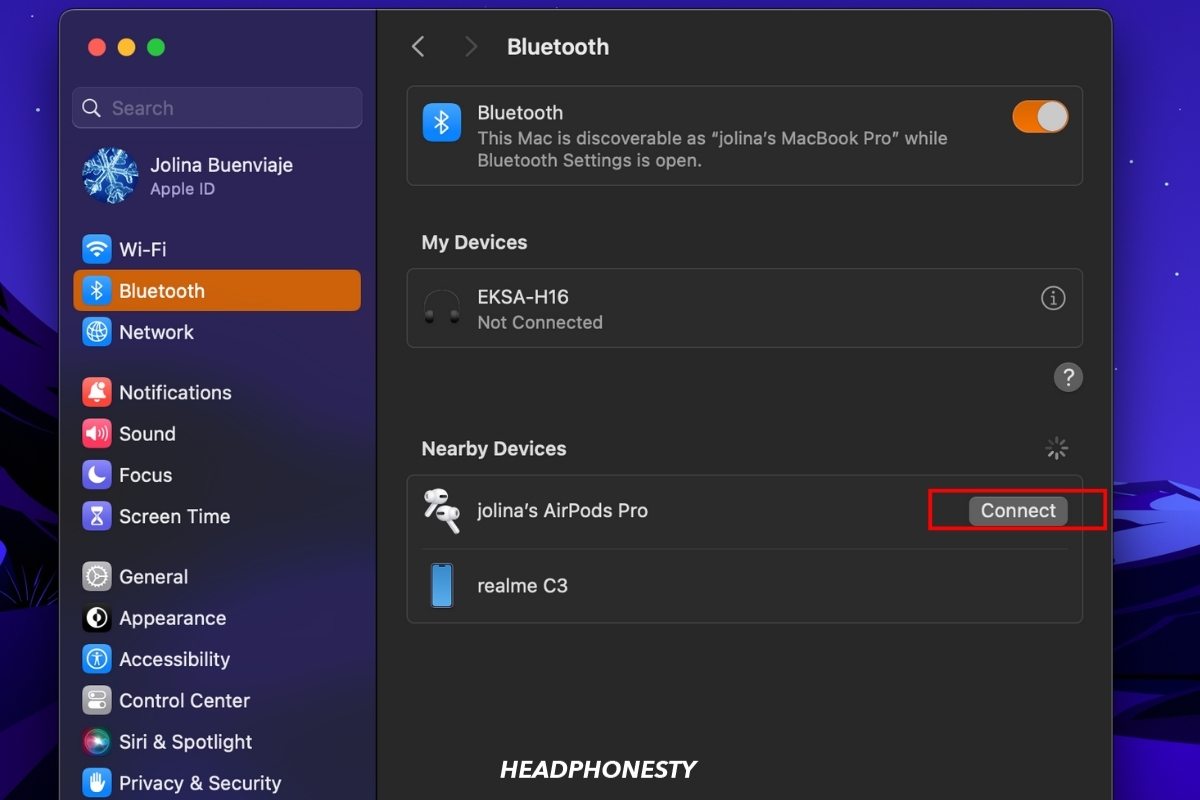
- Wait for your AirPods to appear under the Nearby Devices list.
- Once your AirPods appear, click on Connect.
Connecting to AirPods on Mac
What to Do if AirPods Are Not Connecting to Your MacBook
In spite of your best efforts, setup or connectivity issues may still come up occasionally.
Yet, simple solutions go a long way to ensuring that your AirPods and Mac function well together. Here are four things you can try:
- Reset your AirPods: Resetting your AirPods can fix most software problems. To do so, place your AirPods inside the case, close the lid, and press and hold the setup button until the status light flashes white. For more details, check out our complete guide on how to reset your AirPods.
- Clean your AirPods: Dirt can prevent your AirPods from establishing a solid connection with your charging case, so it’s a good idea to clean your AirPods regularly. For this, simply wipe your AirPods’ stem with a lint-free cloth, damp a Q-tip with some alcohol, and wipe your case including the charging pins inside it.
- Update your AirPods’ and Mac’s firmware: Apple releases updates to fix common issues, so double-check that your AirPods’ firmware is up-to-date by connecting your AirPods to your iPhone, going to your iOS’ Settings > Bluetooth> ‘i’ icon beside your AirPods’ name > Firmware Version.
- Reset your Bluetooth: If connectivity issues persist, resetting your Mac’s Bluetooth module might do the trick. On your keyboard, hold Option + Shift and click on the Bluetooth icon at the top-right corner of your screen. Click on Debug and select Reset the Bluetooth module.
3 Settings Hacks to Improve Your AirPods Experience on Mac
AirPods are a joy to use on iOS devices, but there are still things you can do to bring your audio experience to the next level. We have three fun hacks to get you started:
- How to change Mac audio output: This lets you switch between speakers and AirPods in a couple of clicks by going to System Settings then Sound. Under the Output tab, choose the desired output device from the list.
- How to turn on Spatial Audio on your Mac: With your AirPods connected to your Mac, click the Volume Control icon in the menu bar and select your AirPods from the list. You’ll see three options under Spatial Audio: Off, Fixed (Spatial Audio without head tracking), or Head Tracked (the sound follows the movement of your head). Select the one you want to enable.
- How to change noise control modes on AirPods from your Mac: To switch between the three noise control modes from your Mac, click the Volume Control icon in the menu bar, select your AirPods from the list, and click on Noise Cancellation, Transparency, or Off.
Frequently Asked Questions on Connecting AirPods to Mac
- Do all AirPods work on any MacBook?
- Why can’t my AirPods connect to my Mac?
- How do I get my AirPods to switch connection to my Mac automatically?
Do all AirPods work on any MacBook?
Apple recommends upgrading to certain versions of MacOS, depending on your AirPods model:
- AirPods (2nd generation) – macOS Mojave 10.14.4 or later
- AirPods (3rd generation) – macOS Monterey or later
- AirPods Pro (1st generation) – macOS Catalina 10.15.1 or later
- AirPods Pro (2nd generation) – the latest version of macOS
Why can’t my AirPods connect to my Mac?
Connection issues between AirPods and Mac could arise from outdated software, Bluetooth interference, or incorrect settings. Ensure that both devices are updated to the latest software, have Bluetooth activated, and are in close proximity to each other. Resetting Bluetooth or unpairing and re-pairing AirPods might also help.
Can you connect two AirPods to Mac?
Yes, you can connect two sets of AirPods to a Mac, although the process isn’t as straightforward as on an iPhone. To do this, check out our separate guide on how to connect two headphones to Mac.
thanks for such an great information.