A complete guide to switching even the most stubborn AirPods Pro tips.
Many users want to switch out the default AirPods Pro tips for a better fit.
But AirPods Pro’s ear tips differ from standard earbuds because they use a clip-in mechanism for extra security, so replacing them is different from standard earbuds.
Don’t worry; simply pulling the ear tips can usually do the trick. Read on as we explain how to safely remove and replace your ear tips, even when they’re stubborn, so you can find the best tip for you.
Step 1. Remove the Ear Tips
- Hold the AirPod by the seam on the head. This prevents your AirPods from splitting in half.
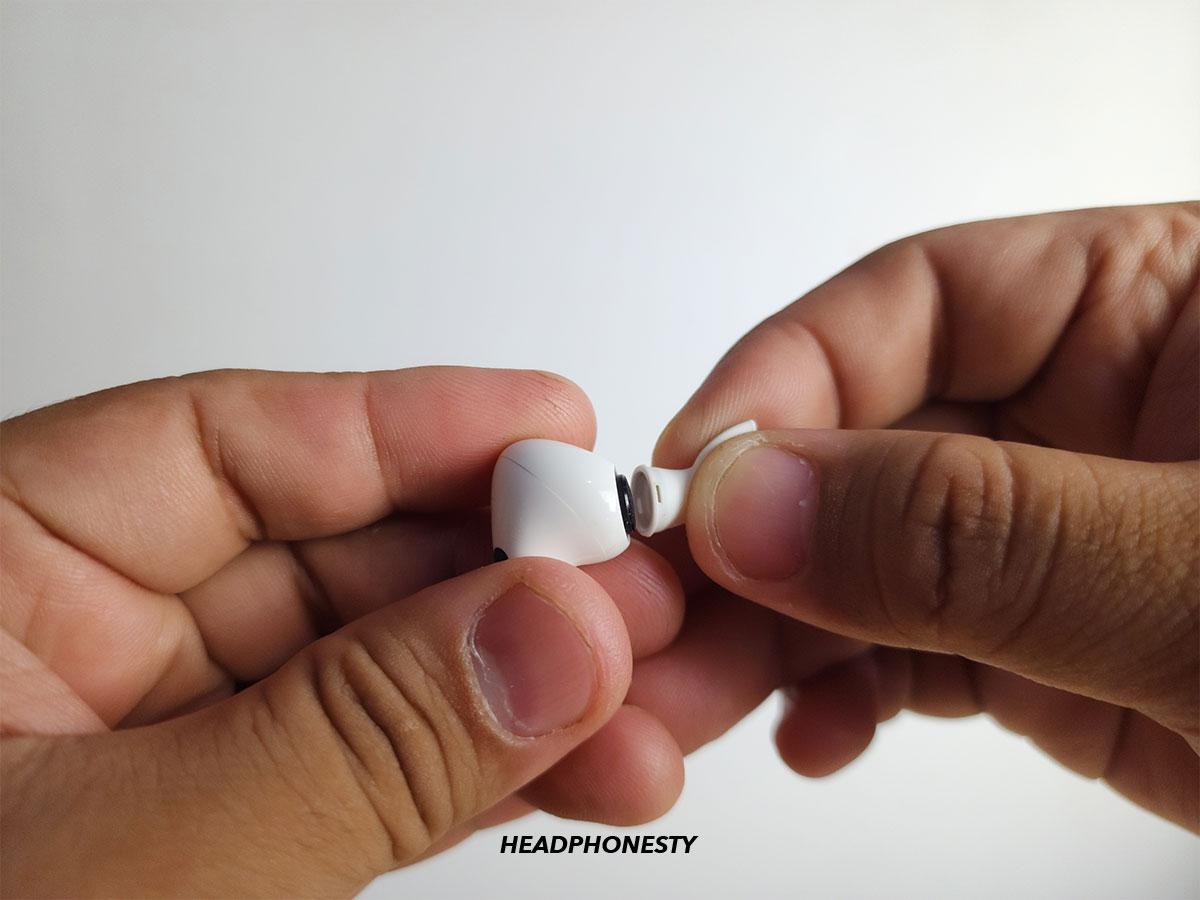
- Gently pull the existing ear tip off the AirPod by holding onto the base of the tip and pulling it straight off. If the ear tip is too slippery to get a proper hold, you can wrap it in a paper towel for extra grip.Make sure to hold on to the base. The soft part of the ear tip is made from silicone, which is more prone to tearing. On the other hand, the base is made from plastic – which is less likely to get damaged.
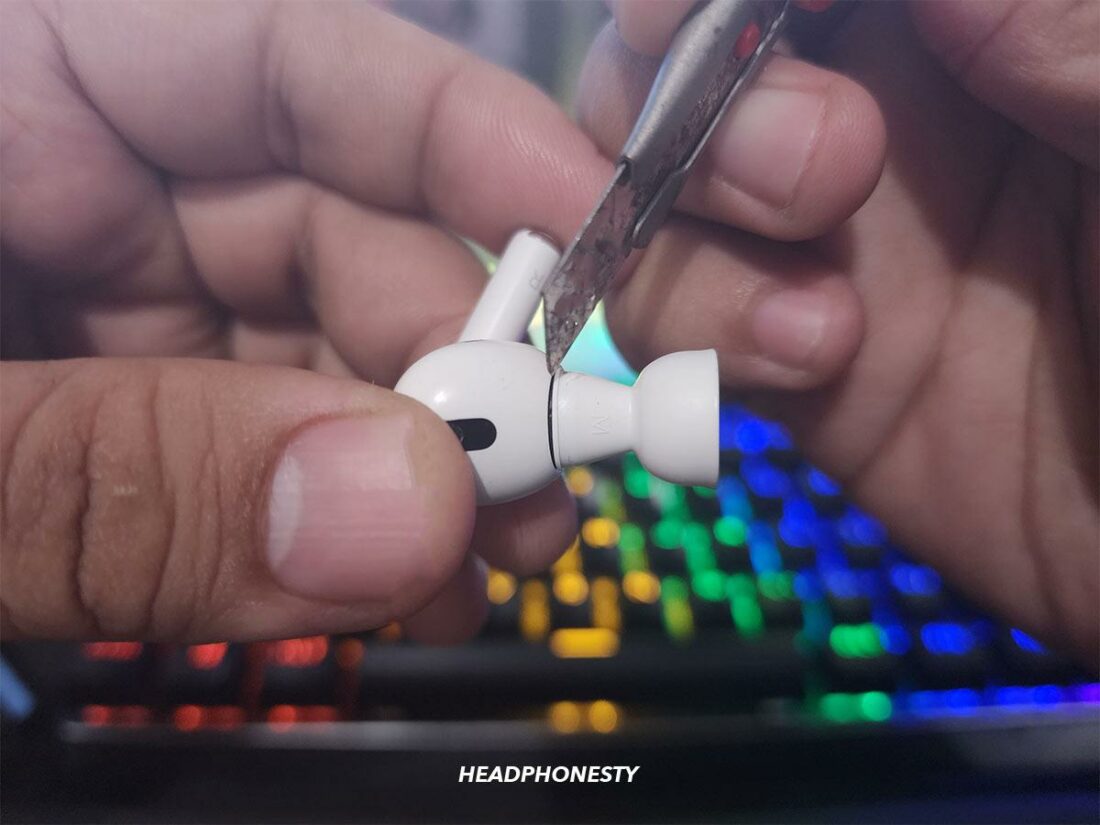
- If the ear tips don’t budge, they may be stuck to the base of the AirPods. Flip up the silicone part of the ear tip, firmly pull it away from the earbud until a small seam appears, and carefully run a thin knife (or a butter knife) around the opening. Only do this as a last resort, as any damage to the ear tips or earbuds is not covered under the warranty.
Use a cutter to remove the ear tips.
Step 2. Placing the New Ear Tip
- Take the new ear tip and align the indentation with the ridges on the AirPod.
- Gently press the ear tip onto the earbud until it clicks into place. AirPods Pro tips are ovular, not circular, so if they don’t go on, they might be misaligned. Make sure the ridges of the tips are lined up properly with the earbuds, then try again.
- Repeat the steps for the other AirPod.
How to Use the AirPods Ear Tip Fit Test to Find Your Perfect Fit
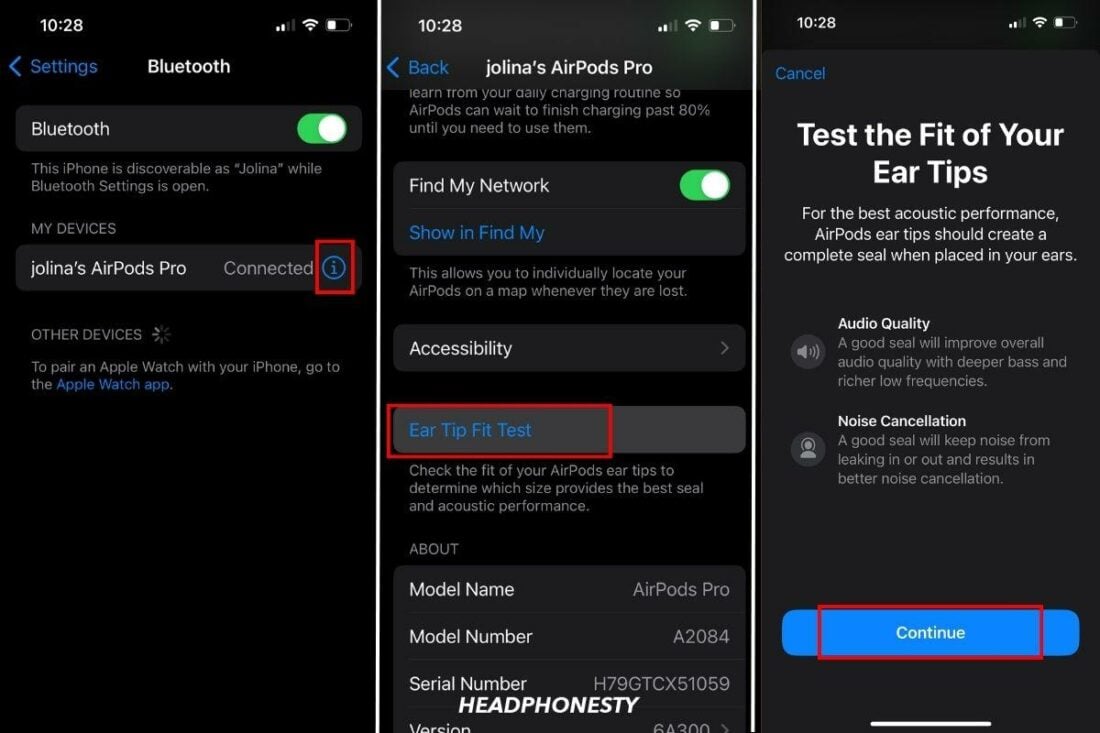
After replacing the ear tips, you can use a feature of your iOS device to run an Ear Tip Test to determine how well the ear tips fit you.
Here’s how you can use the Ear Tip Fit Test using an iPhone or iPad:

- Connect your AirPods Pro to your device and put them in your ears.If you experience problems connecting your AirPods, read our guide on fixing AirPods that won’t connect to your iPhone or iPad.
- Go to Settings, select Bluetooth, and tap the “i” button next to your AirPods Pro’s name.
- Select the Ear Tip Fit Test, then tap Continue.
- On the next screen, tap the Play button.
- Wait for the test to run, then check on the test result.
If your ear tip already has the best fit, you should have the “Good Seal” result. Otherwise, you’ll get the “Adjust or Try a Different Ear Tip” result. For the latter, try adjusting the position of your AirPods and rerunning the test. If the result remains the same, you should swap the ear tip for one of a different size.
AirPods Pro come with three ear tip sizes (small, medium, and large), whereas AirPods Pro 2 come with four (extra small, small, medium, and large). Make sure you try all of them to find the best sound isolation and fit for you.
Frequently Asked Questions
- Do AirPod Pros need ear tips?
- What are the best AirPod tips?
- Are damaged AirPods Pro ear tips covered under a warranty?
Do AirPod Pros need ear tips?
Technically, no, but practically yes. The AirPods will still function, but they’ll be uncomfortable and provide lower sound quality and worse noise cancellation.
Using AirPods Pro without ear tips can also damage the earbuds, as the ear tips help protect the speaker mesh from earwax and debris.
What are the best AirPod tips?
You can get AirPods Pro tips in many different materials, but most people will find memory foam tips like these to be the most comfortable. They also offer the best noise cancellation.
Are damaged AirPods Pro ear tips covered under a warranty?
AirPods Pro tips are covered under the same warranty as the earbuds themselves. However, the default warranty doesn’t cover accidental damage, only manufacturing defects. If you’ve damaged the tips yourself, they won’t be covered.

