
Learn whether AirPods can actually track you and how to disable the ‘AirPods Detected’ notification.
The integration of tracking features in Apple’s AirPods, using the ‘Find My’ network, is a great way to keep your precious earbuds from getting lost.
However, this technology raises concerns about privacy and unwarranted tracking, as the AirPods’ location can easily be identified through a map even when the owner is far away.
Luckily, Apple has created the AirPods tracking alert feature to let you know when there is an AirPod tracking you. Read on as we explain why these alerts occur and how you can address them.
Are AirPods Tracking You? ‘AirPods Detected Near You’ Alert, Explained
If you’re using devices from the Apple ecosystem, you’re probably familiar with the Find My app. The app lets you track your Apple devices, as well as other accessories and items you’ve attached an AirTag to.
However, the Find My network’s tracking capability raises privacy concerns. For instance, there have been cases of people using AirPods and AirTags to track people or property with ill intent.
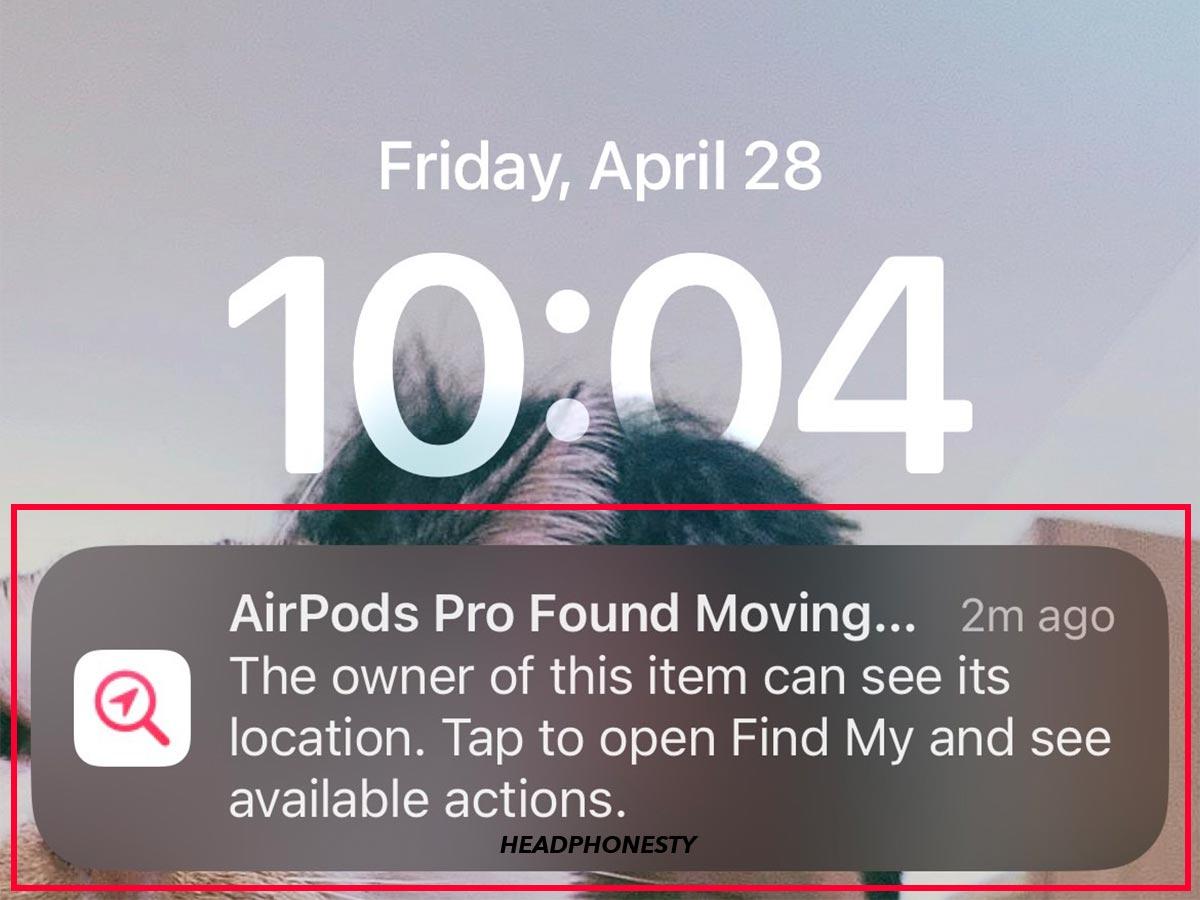
In response, Apple came up with measures to prevent unwanted tracking. Notably, if AirPods are separated from their owner and seen moving with you, you’ll receive a notification on your Apple device. These notifications are sent when:
- AirPods detected near you: If Find My notices that you’re staying near an unknown AirPod in the same place for a while.
- AirPods found moving with you: If Find My notices that unknown AirPods have been going in the same direction and location as you for a while.
What to Do When an Unknown AirPod Is Tracking You
Getting an alert that AirPods are moving with you when you don’t own AirPods can cause panic. However, it doesn’t necessarily mean that someone is tracking you. Your device may just detect AirPods that are nearby – like your roommate’s, a family member’s, or a friend’s.
But, to be sure, here’s what you can do when you receive this alert:
Find the AirPods
If you’re up for some detective work, you can try locating the AirPods in question by playing a sound:
- Tap on the Notification.
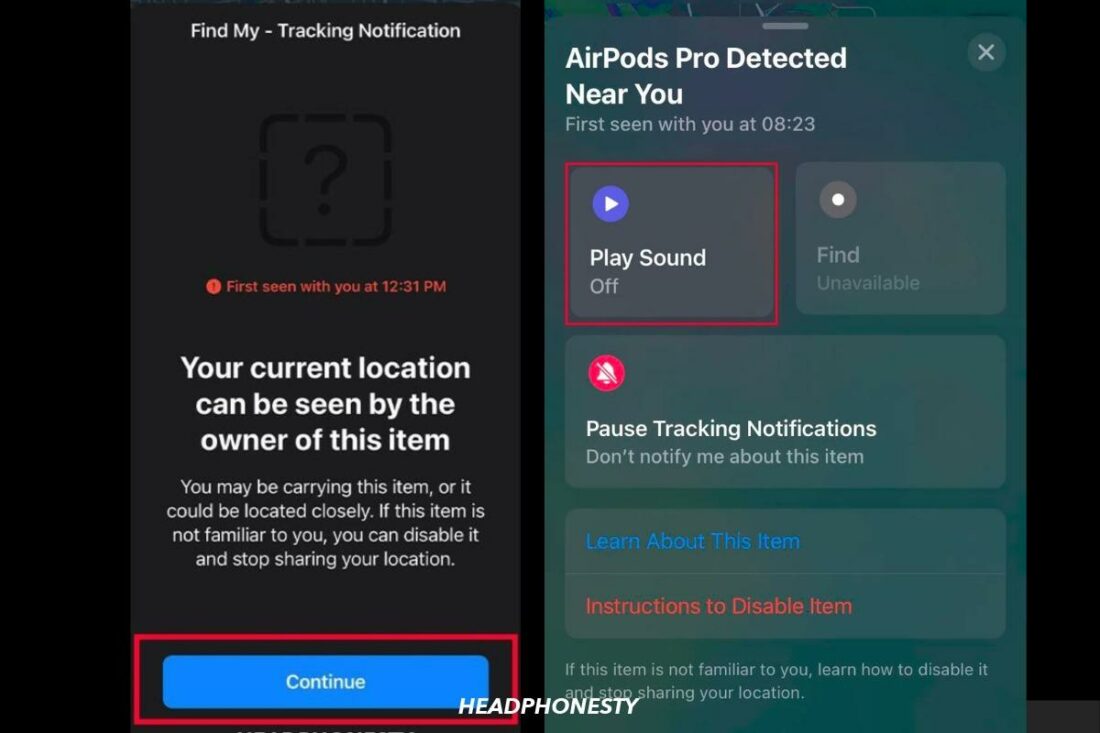
- Tap Continue.
- Select Play Sound.
- Move around as you follow the sound to locate the AirPods. Keep playing the sound until you find them.

Using the Play Sound feature to find the AirPods detected
Identify the owner of the AirPods
To know what to do next, you can try identifying the owner via the Find My app:
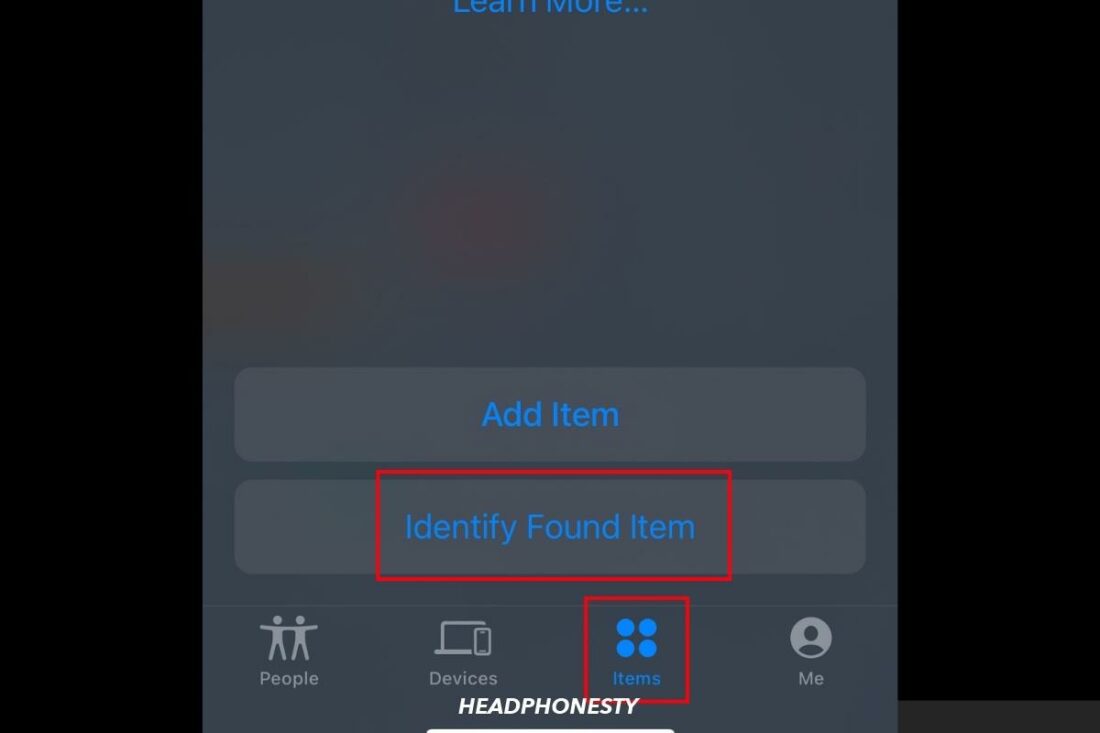
- Open the Find My app, then go to Items.
- Click on Identify Found Item.
Identifying the found item using the Find My app - If the owner has marked the AirPods as lost, you will see a message and information on how to contact the owner.
If the AirPods belong to a roommate or loved one, kindly ask them to reconnect them to their phone to prevent notifications from popping up on your device. The alerts should stop once they connect the AirPods to their device.
Disable the AirPods
If the AirPods in question don’t belong to anyone you know, you can attempt to disable them to prevent the owner from seeing your location:
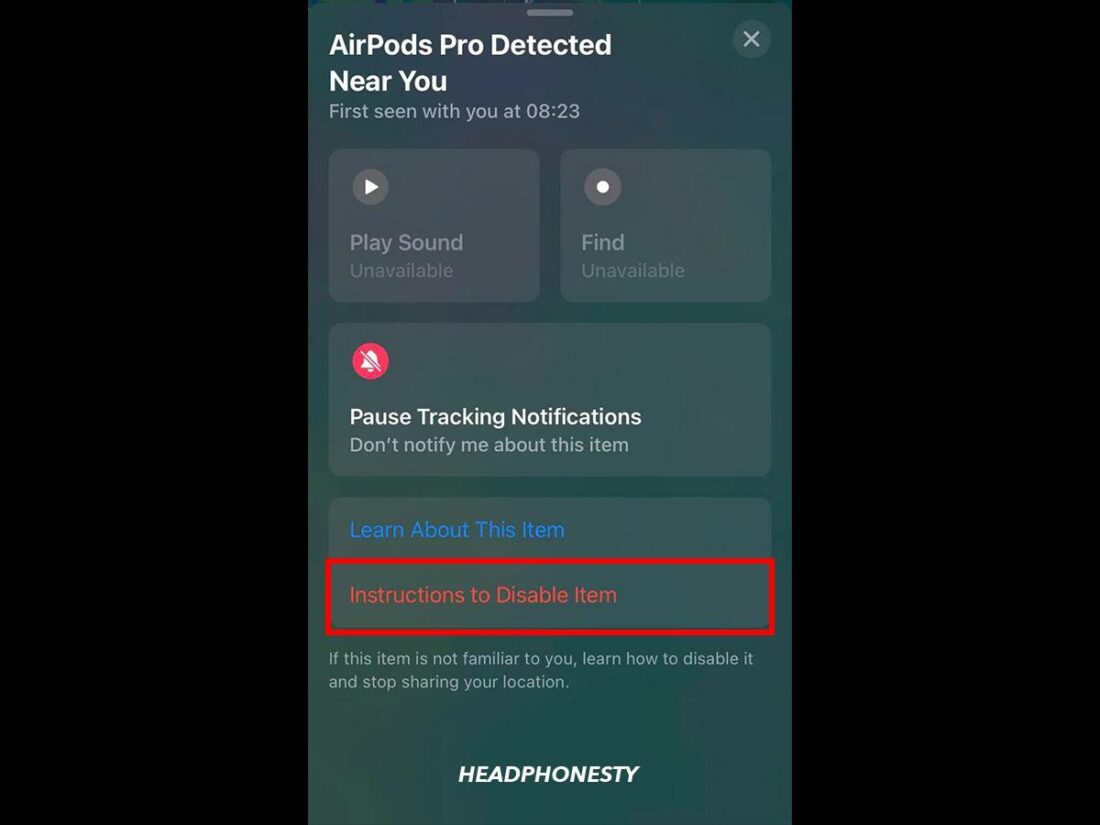
- Tap on the Notification.
- Scroll down on the screen and choose Instructions to Disable Item.

Click on Instructions to Disable Item. - Follow the on-screen instructions. This varies depending on the device. But, in my experience, it asked me to cover the AirPods’ vent and sensors using my fingers for a few seconds until it was disabled.
How to Turn Off ‘AirPods Detected’ Alerts From Your Own AirPods
Strangely, you might also receive ‘AirPods detected’ notifications even if the belong to you or a close family member.
You can turn off these notifications by tapping the alert and selecting Pause Safety Alerts.
However, if this becomes a regular occurrence, you should look into ways to disable these notifications for good. We’ve rounded up a few options below:
- Reset and reconnect your AirPods
- Disable Location Sharing
- Disable the ‘Notify When Left Behind’ feature
- Enable Family Sharing
Reset and reconnect your AirPods
Resetting your AirPods can fix most firmware and connectivity issues, including the repetitive ‘AirPods detected’ notifications. To reset your AirPods, follow these steps:
- Place your AirPods in the case, close the lid, and wait for at least 30 seconds.
- Go to Settings, then tap Bluetooth on your iOS device.
- Tap the “i” icon next to your AirPods.
- Select Forget This Device. Tap again to confirm your choice.
- Open the charging case lid and long-press the setup button located on the back of the AirPods case. The status light should change from amber to white.
- Enable Bluetooth on your iOS device, open your AirPods case near the device, and follow the on-screen instructions to reconnect.
Disable Location Sharing
Disabling Location Sharing stops your phone from sharing its GPS data and communicating with other devices, such as AirPods.
To disable the Location Sharing:
- Open Settings > Privacy & Security.
- Then, tap Location Services. Here, either turn off location access for specific apps or disable Location Services completely by switching it off. This stops all location tracking on your device.
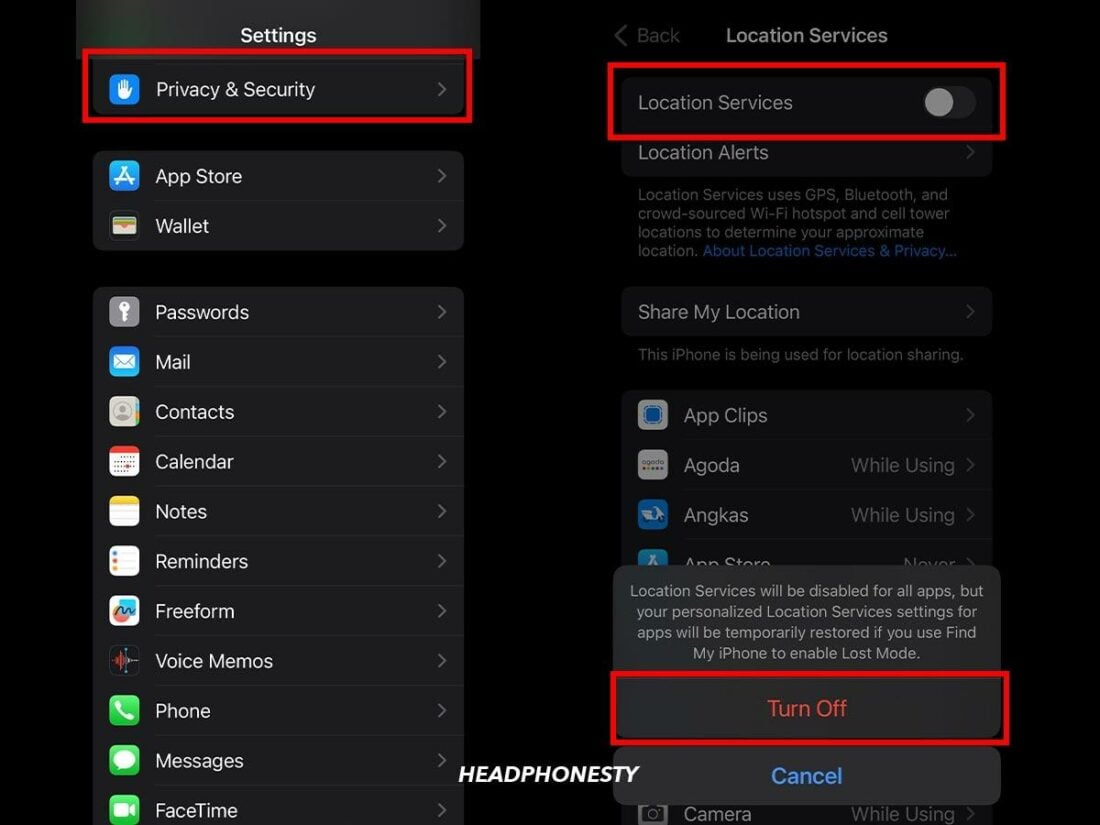
Steps on How to Disable Location Sharing.
Disable the ‘Notify When Left Behind’ feature
When you disable the Notify When Left Behind feature, your device will no longer alert you when it thinks you left your AirPods behind. Therefore, it’s likely that the ‘AirPods moving with you’ notifications will stop as well.
To disable the ‘Notify When Left Behind’ feature, follow these steps:
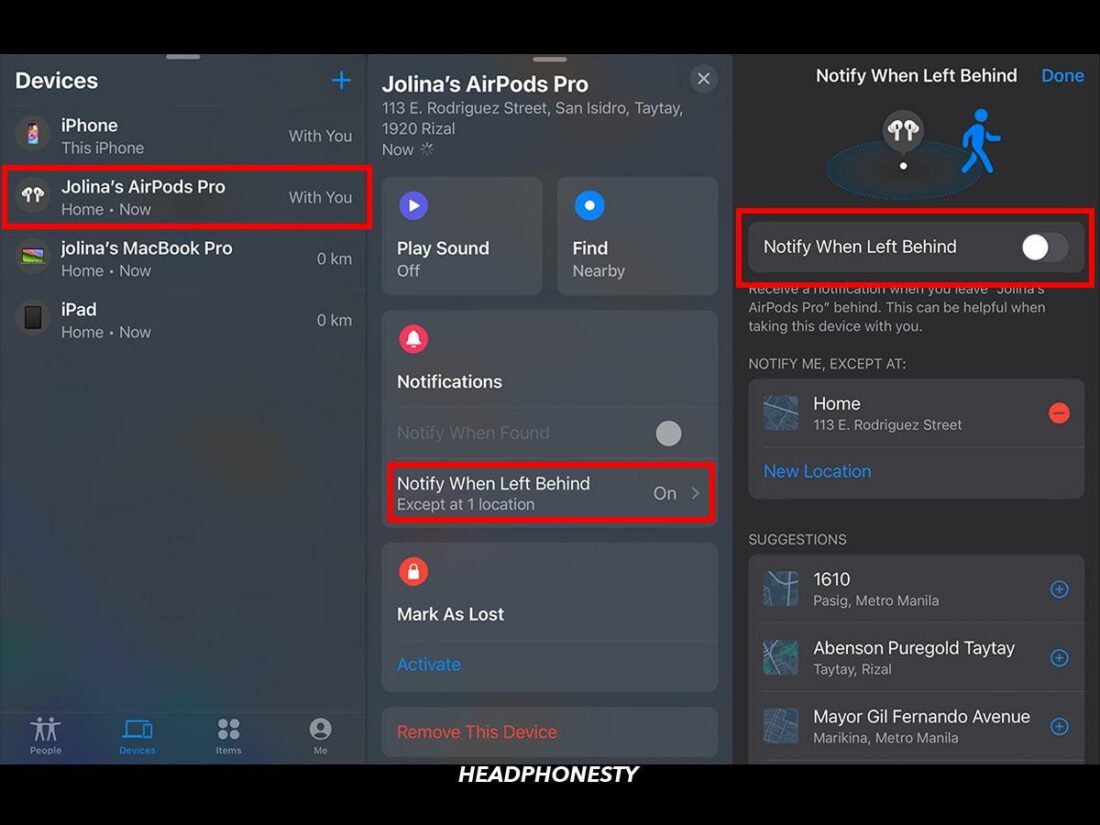
- Open the Find My app on your device and tap Devices from the toolbar at the bottom of the screen.
- Select your AirPods from the list, then swipe up to see available settings.
- In the Notifications section, tap on Notify When Left Behind.
- Tap the toggle to Off.
- Select Done from the top right corner.
Steps on How to Disable the ‘Notify When Left Behind’ feature.
Enable Family Sharing
Your Apple devices may get alerts for other family members’ devices, like AirPods, when you live within the same roof. Configuring your device to recognize them stops these alerts by identifying them as familiar, and not unknown or lost items.
Here’s a step-by-step guide to setting up Family Sharing:
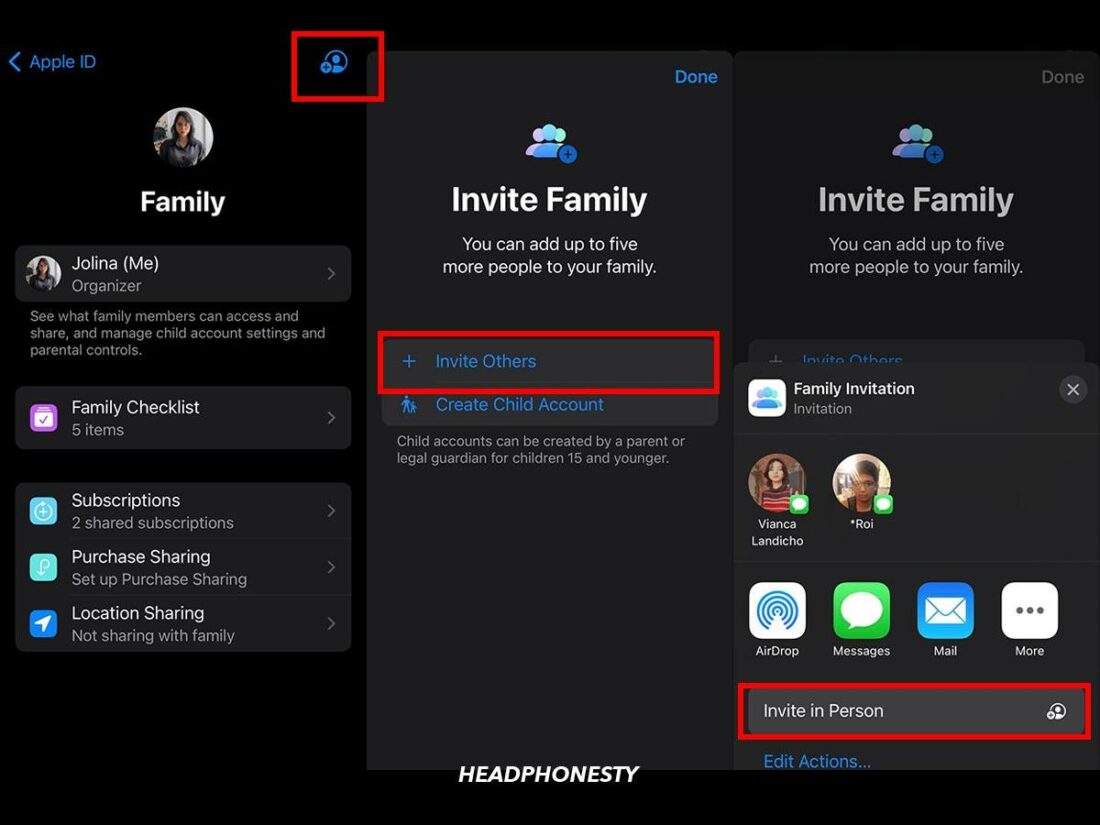
- Open Settings on your iPhone or iPad, tap your Apple ID, and select Family Sharing > Continue.
- In the Family Sharing settings, choose Invite Others > Invite in person, and have them sign in through your phone.
Steps on How to Enable Family Sharing. - Ensure each family member’s AirPods are linked to their respective Apple IDs.
- Check if this worked by going to Find My > People, then see if your invited family members and their devices are added to the list.
Frequently Asked Questions
- Can you be tracked through AirPods?
- How can you check if someone is tracking you using Apple devices?
- How can you check if AirPods are tracking you using Android devices?
- How far can AirPods be tracked?
Can you be tracked through AirPods?
Unfortunately, yes, you can be tracked through AirPods.
With iOS 15, AirPods can be tracked via the Find My network, enabling location tracking over long distances. This feature, while useful for finding lost AirPods, could potentially be misused for tracking individuals if AirPods are planted on them.
However, AirTags are more commonly used for such purposes due to their lower cost and discreetness.
How can you check if someone is tracking you using Apple devices?
To check if someone is tracking you using Apple devices, you simply need to enable a few settings:
- Turn on Location Services: Enable Location Services in your device settings by going to Settings > Privacy & Security > and toggling Location Services on.
- Enable Bluetooth: Activate Bluetooth in Settings.
- Configure Find My App for Tracking Notifications: In the Find My app, select the Me tab, then enable Customize Tracking Notifications under settings.
How can you check if AirPods are tracking you using Android devices?
Use Apple’s Tracker Detect app on your Android device to see if AirPods are tracking you.
How far can AirPods be tracked?
While their Bluetooth range is limited to 30 to 60 feet, there’s no limit on how far the AirPods should be for the owner to track or locate them on a map as long as they are still charged.
I received a notice that my son’s airpods are tracking my location!
How this happen?
And how can i disable that?