An in-depth guide on how to properly clean your earbuds without damaging them.
Many believe that a quick wipe is all it takes to maintain the cleanliness of their earbuds.
But wiping your earbuds will not remove bacteria and earwax buildup, especially in hard-to-reach areas, which can cause audio quality issues or ear infections.
Fear not! Deep cleaning your earbuds can still be simple. Keep reading as we discuss how you can do so using only a few household tools, like a cloth or brush and some rubbing alcohol.
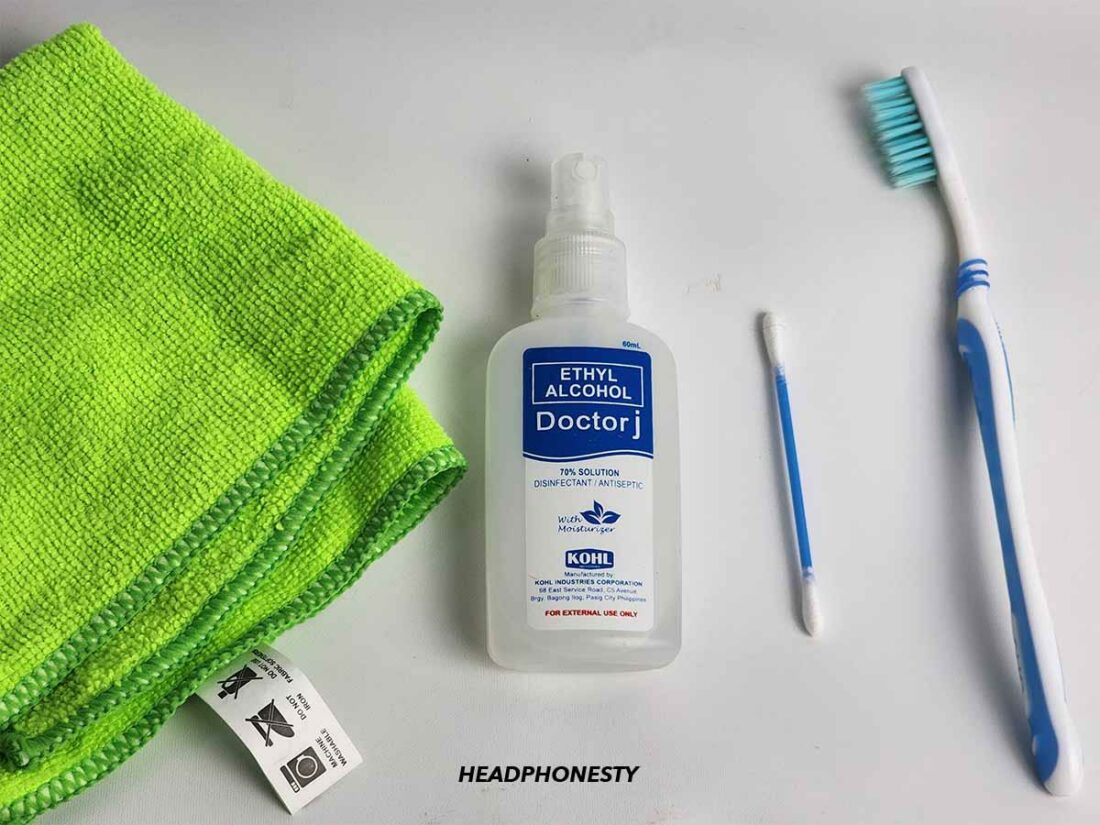
What You Need When Cleaning Earbuds
Some commonly recommended cleaning materials, like Blu-tack or compressed air, can damage your earbuds. So, we put different materials to the test and came up with a list of the safest tools to clean your earbuds below:
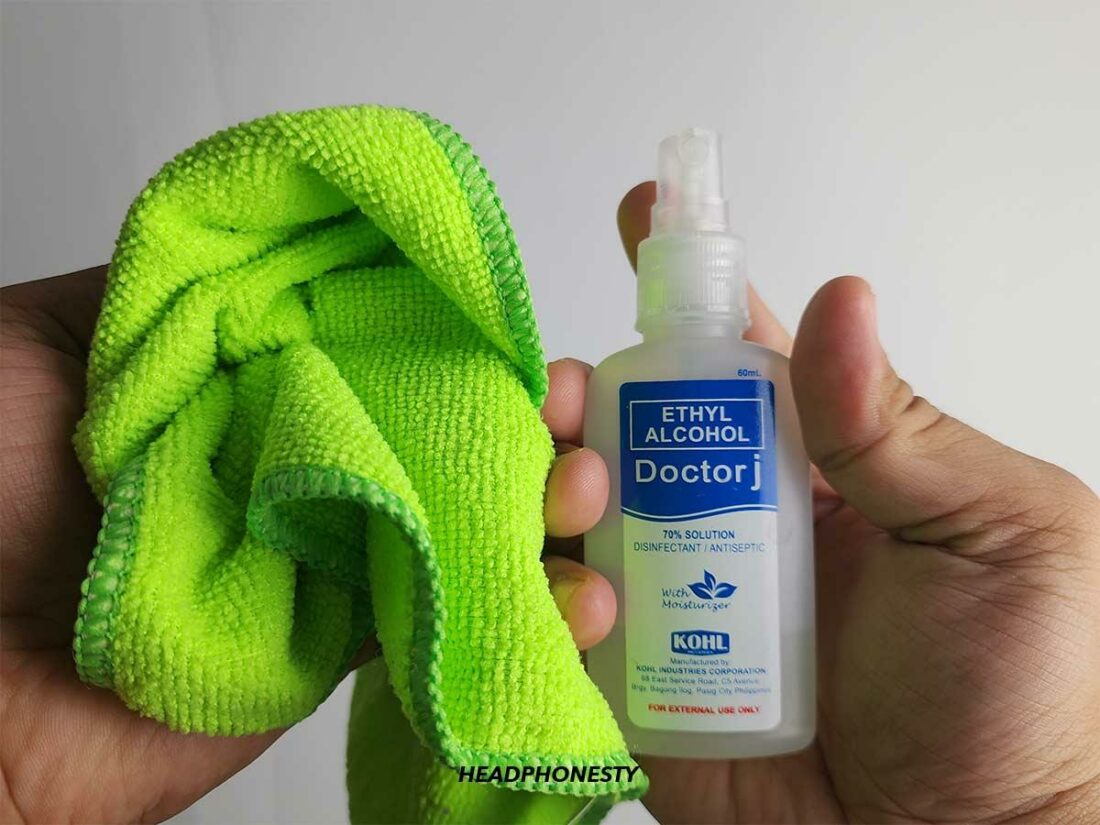
- A rubbing alcohol (preferably 70% isopropyl alcohol)
- A lint-free or microfiber cloth
- Cotton swabs (Q-tips)
- A toothbrush
- Interdental brush or toothpick (for tough spots)
- Hydrogen peroxide (3% formulation)
How to Clean Earbuds: Instructions
Cleaning your earbuds on a regular basis lowers your risk of ear infections and maintains their optimal performance. Luckily, it’s quite simple. Here’s how:
- Remove grime using rubbing alcohol
- Remove and clean the ear tips using hydrogen peroxide
- Remove debris and dried residue using a toothbrush
- Disinfect using rubbing alcohol
1. Remove grime using rubbing alcohol
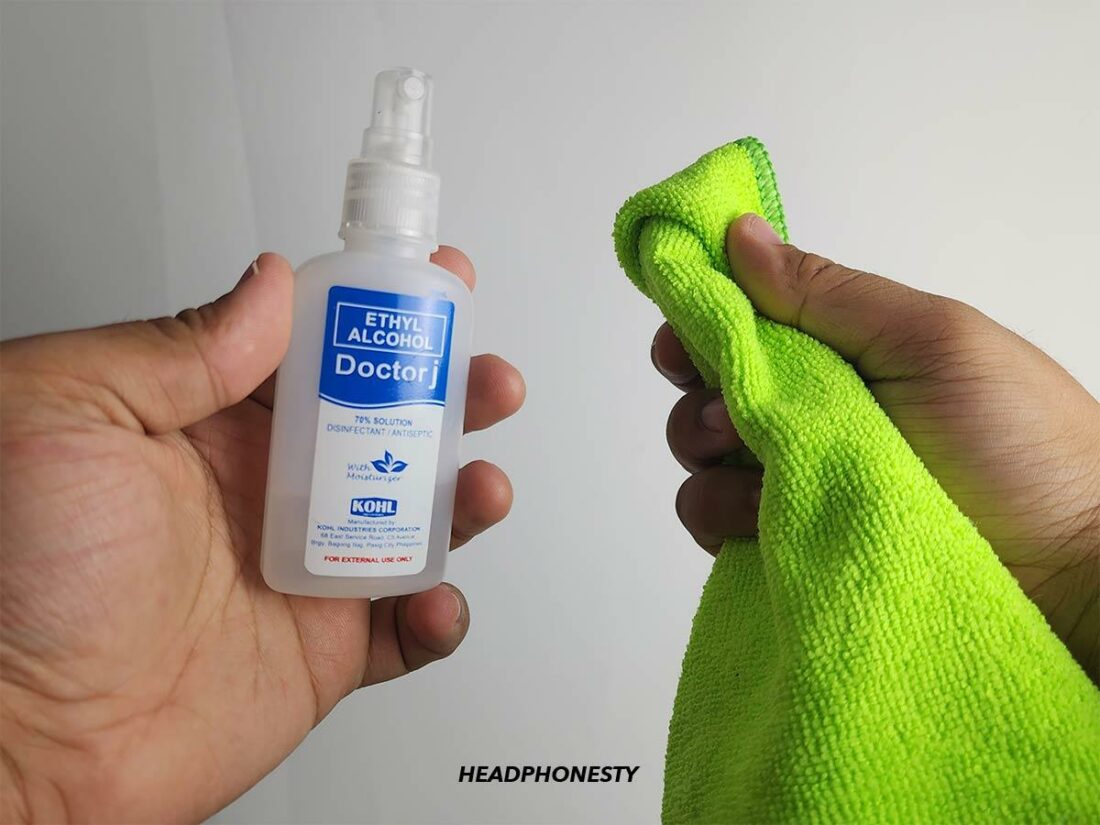
- Dampen a soft cloth with alcohol, making sure it’s damp but not overly wet. Then, wring out the cloth to remove any excess liquid.

Spraying alcohol to soft cloth. - Take the damp cloth and gently wipe away any grime or dirt from your earbuds. Make sure to avoid the mesh grill and any input jacks to prevent any alcohol from seeping through.
Wiping grime from earbuds.
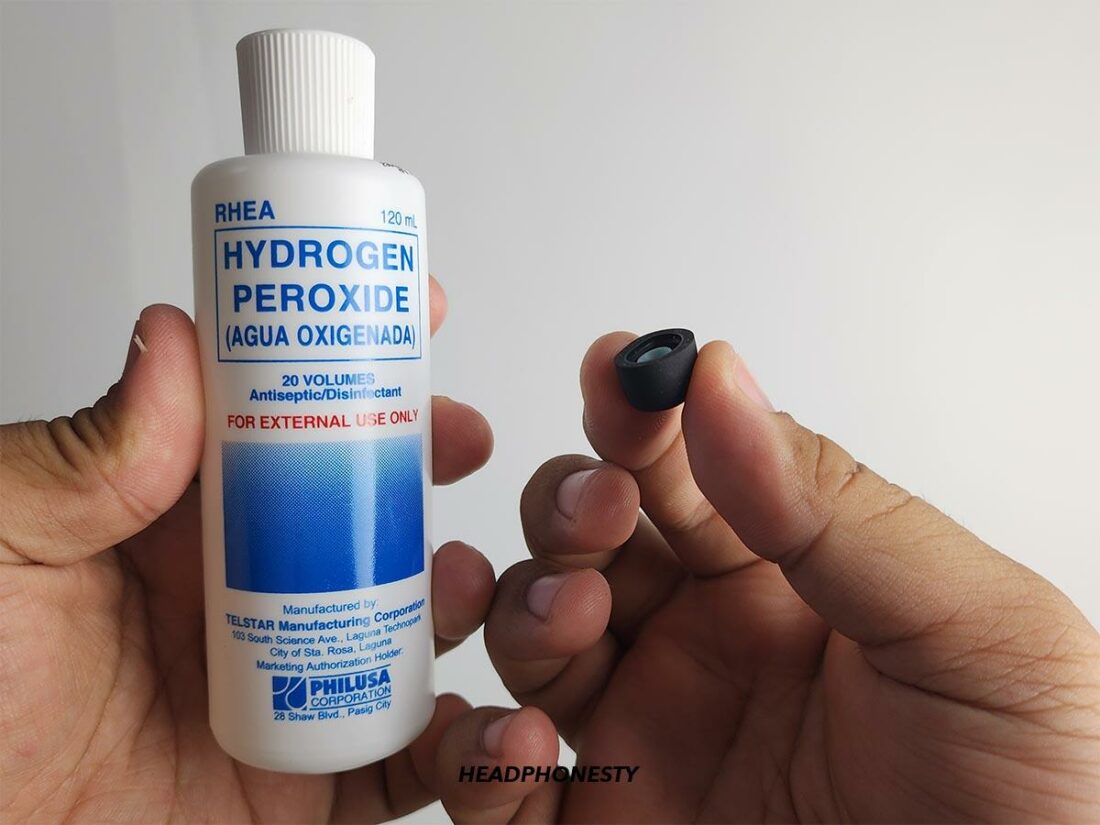
2. Remove and clean the ear tips using hydrogen peroxide
If your earbuds have detachable ear tips, follow the guidelines below. If not, you may move on to the next step.
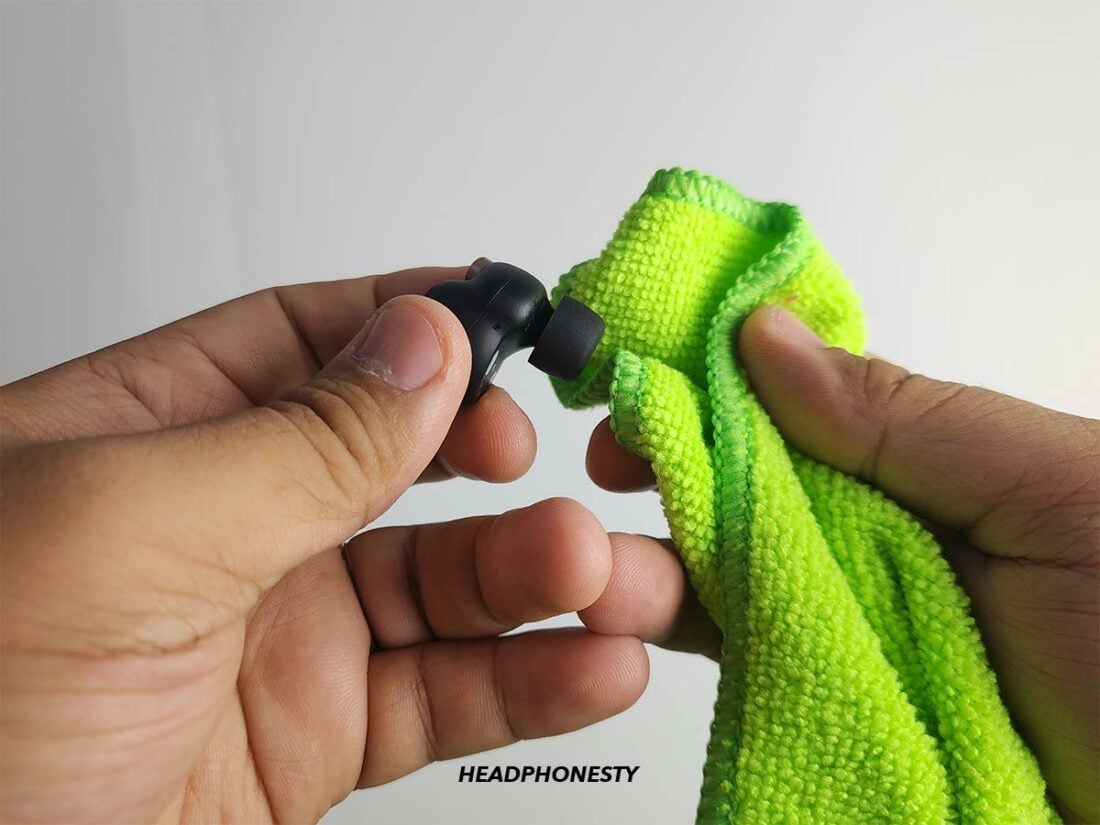
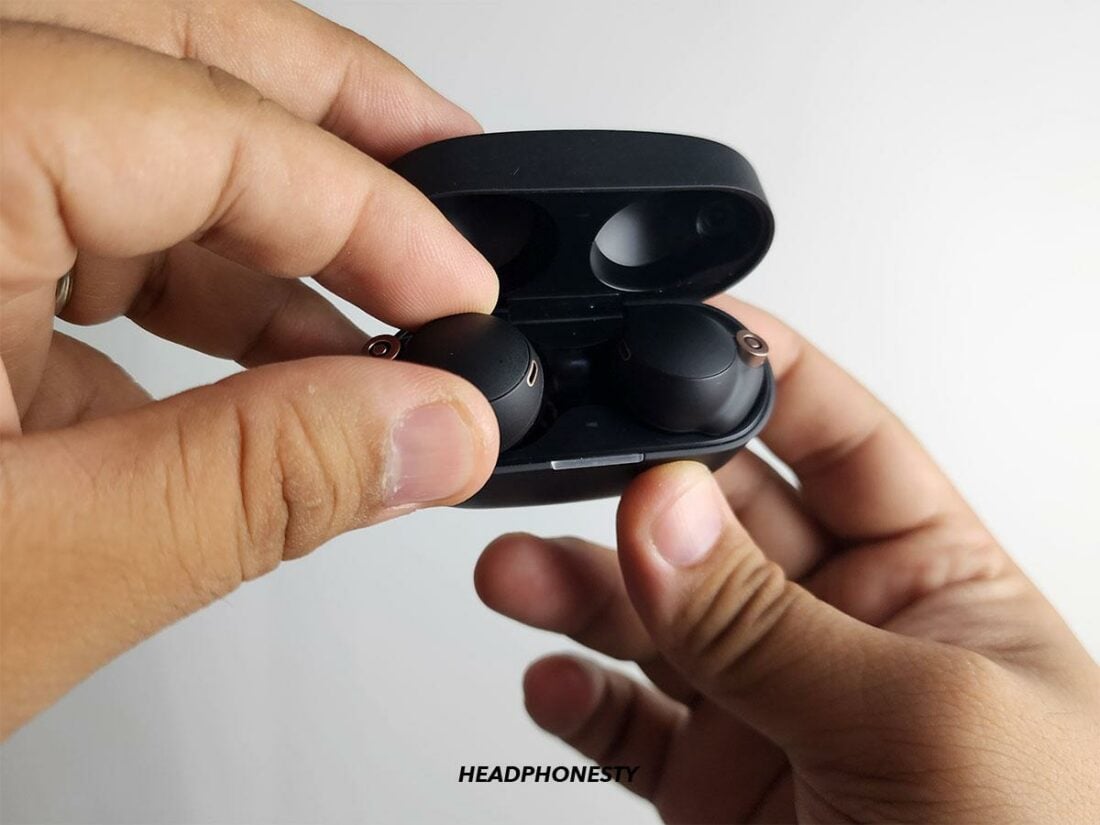
- Carefully detach the ear tips. This can usually be done by pinching, twisting, and pulling the ear tips.
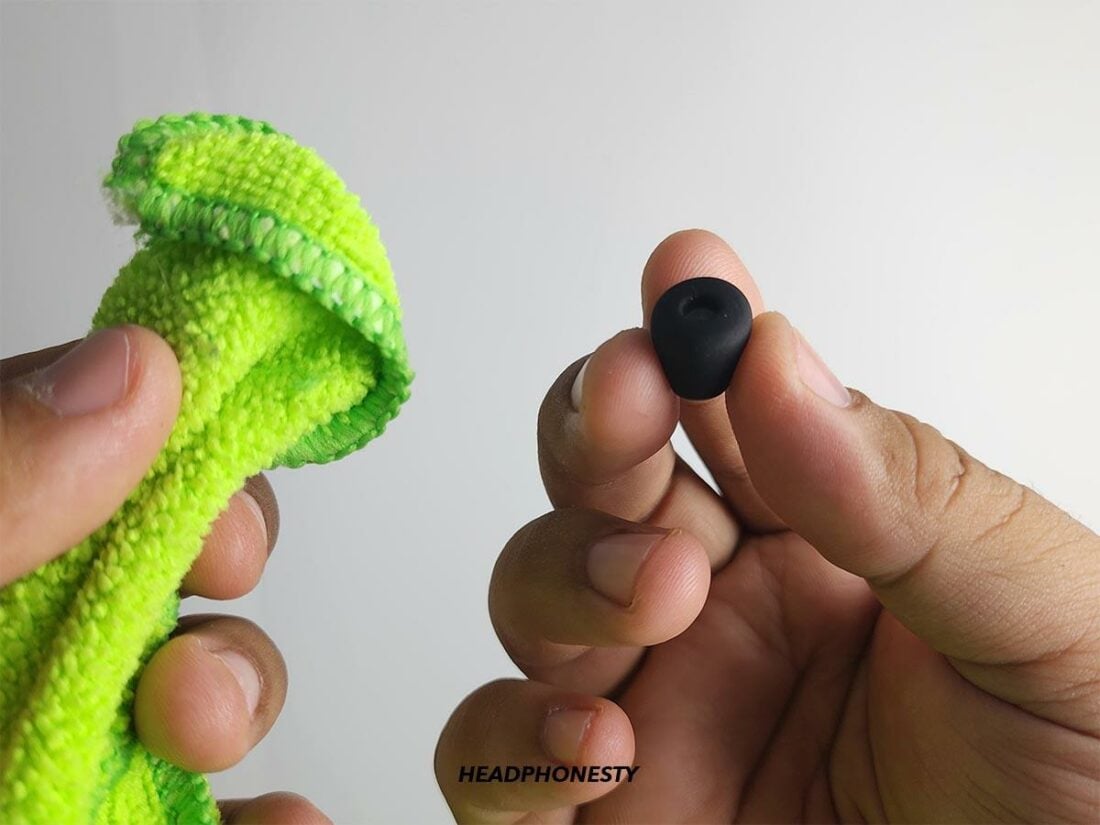
Detach the ear tips. - Soak them for about five minutes in hydrogen peroxide.
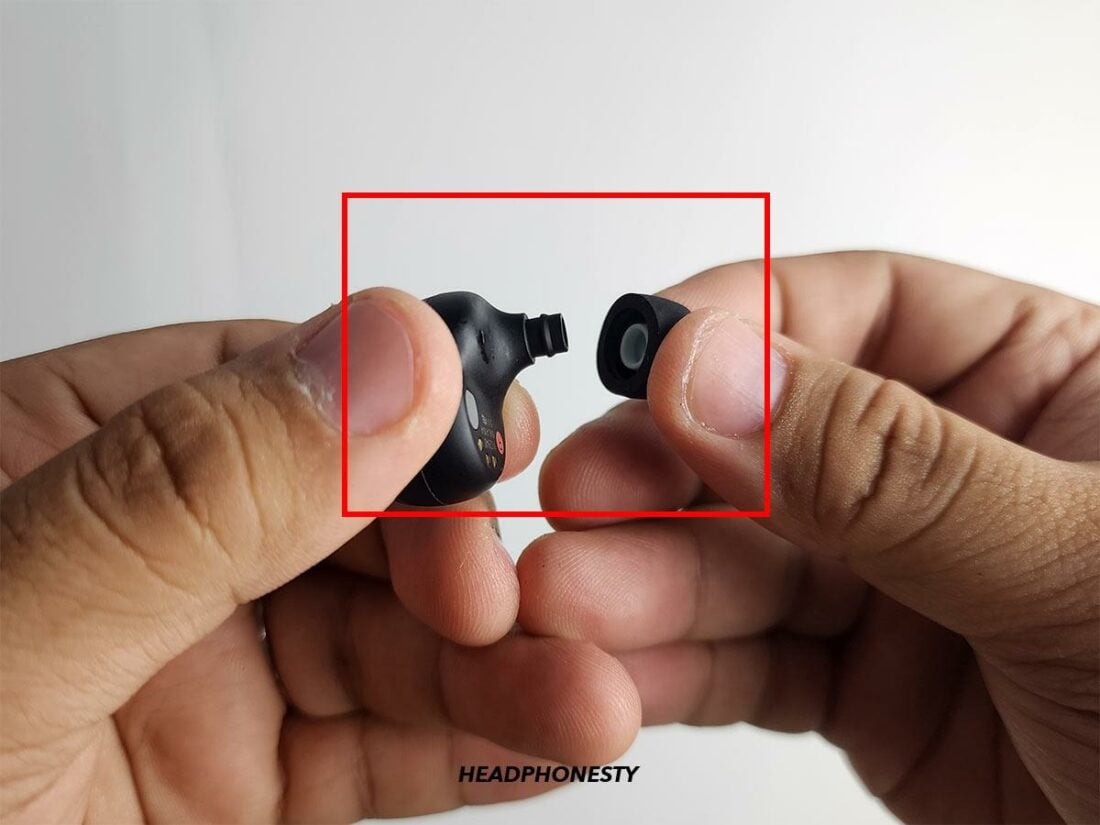
Use hydrogen peroxide to clean the ear tips. - After five minutes, grab a cloth and gently rub off any dirt or ear wax residue.
Wipe off any dirt or ear wax residue. - Make sure that the ear tips are completely dry before placing them back on your IEMs.
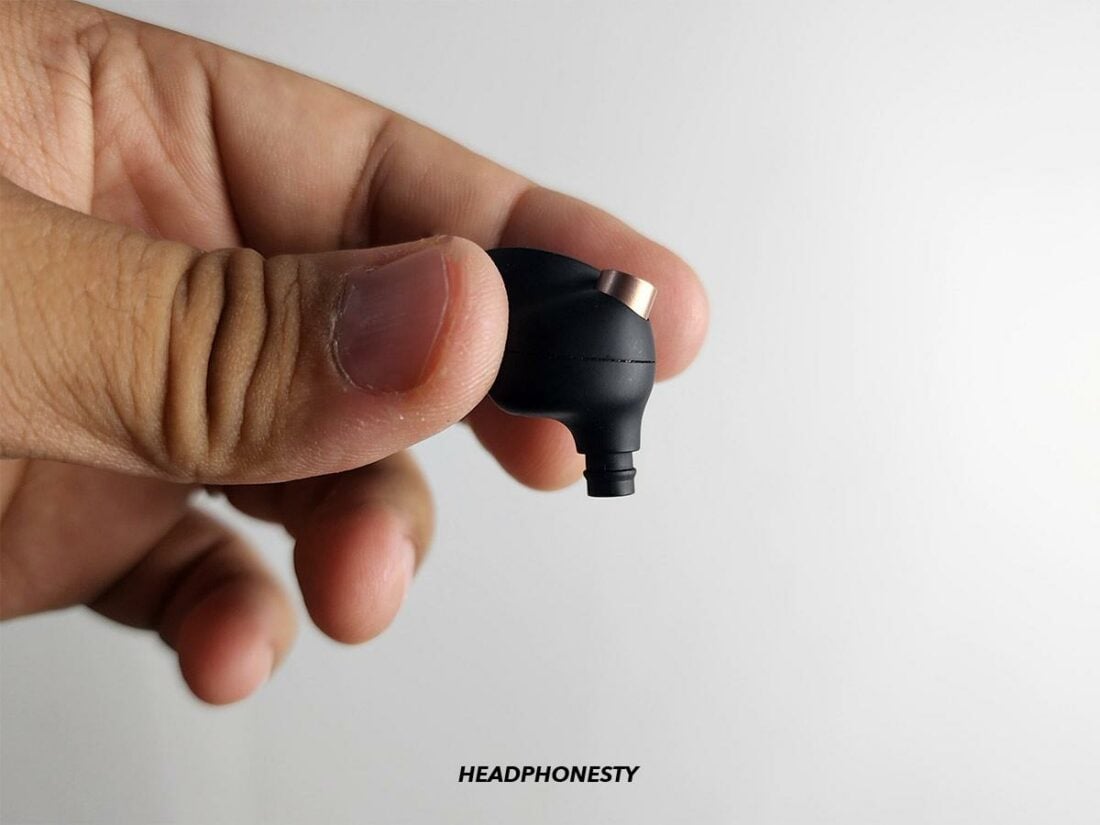
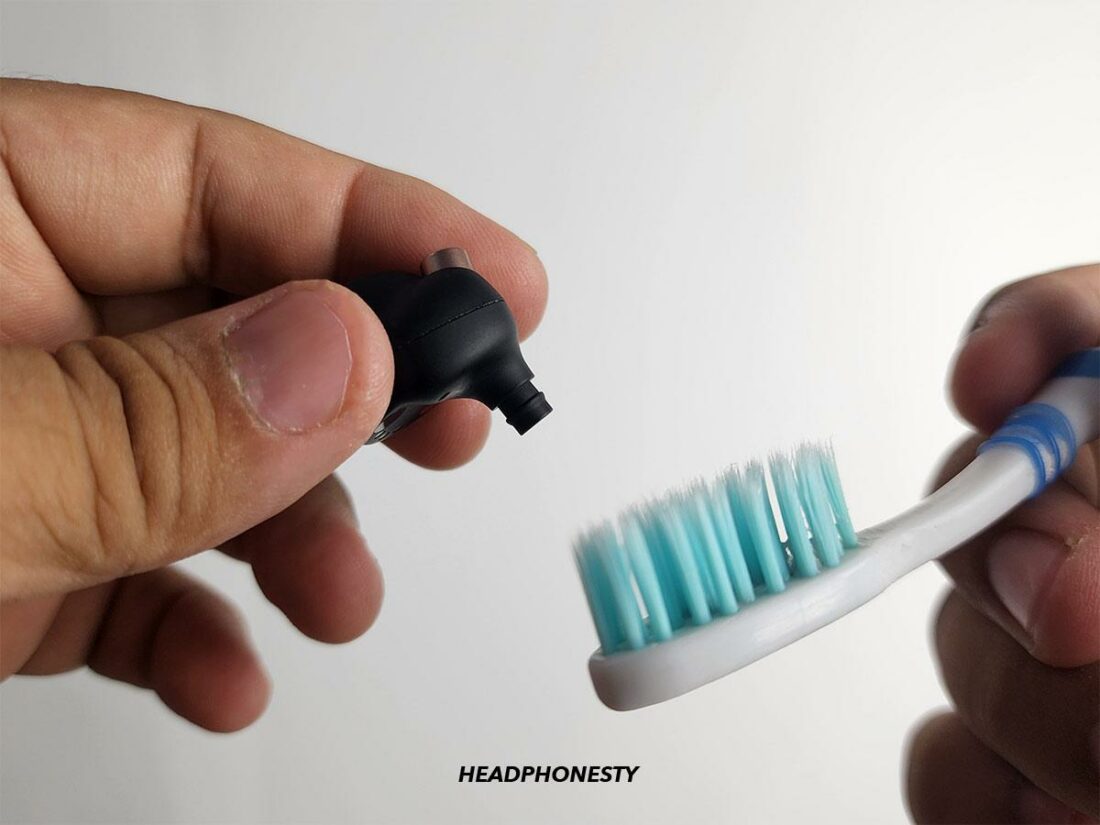
3. Remove debris and dried residue using a toothbrush
- Hold the earbuds with the speaker side facing down.
Earbuds with the speakers facing down. - Using a toothbrush, gently brush away particles from the earbuds’ mesh and edges.
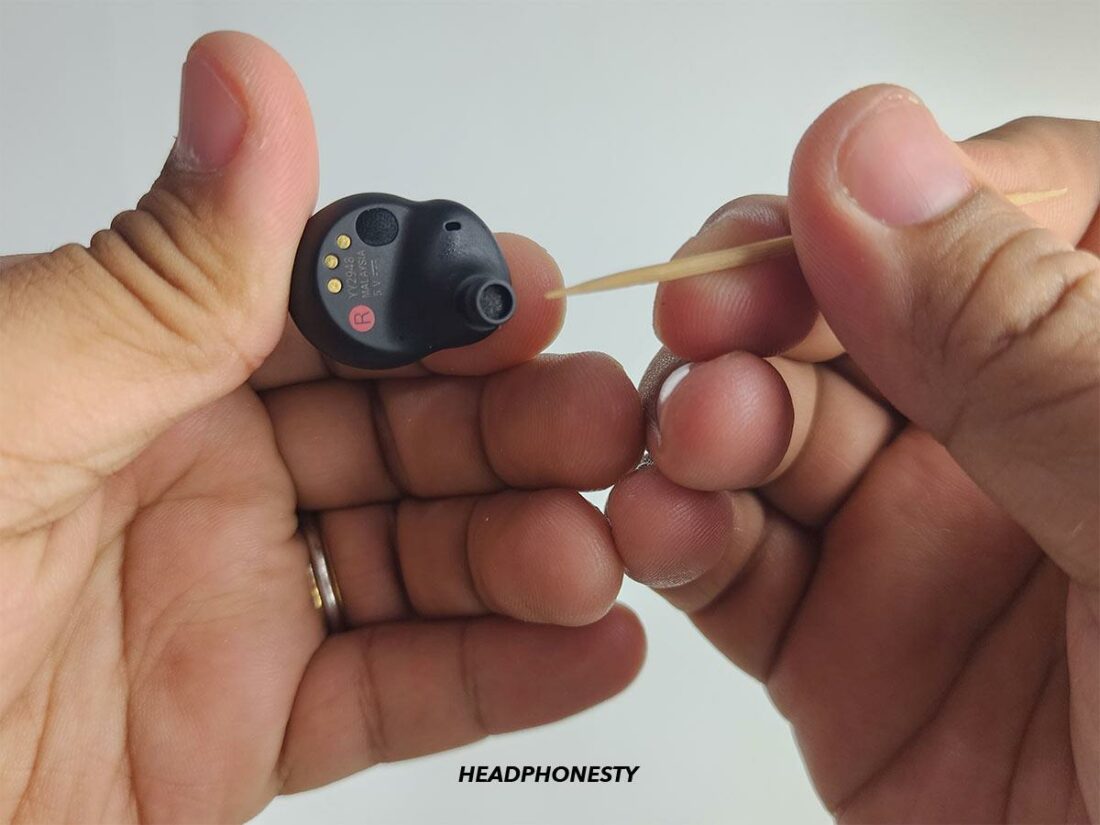
Use a toothbrush to clean the speaker mesh. - Use an interdental brush or toothpick for hard-to-reach spots, but be cautious with sharp objects to avoid damaging the mesh.
Gently use a toothpick to clean tough spots. - After cleaning, wipe away the debris with a dry, lint-free cloth.
Wipe with a dry, lint-free cloth.

4. Disinfect using rubbing alcohol
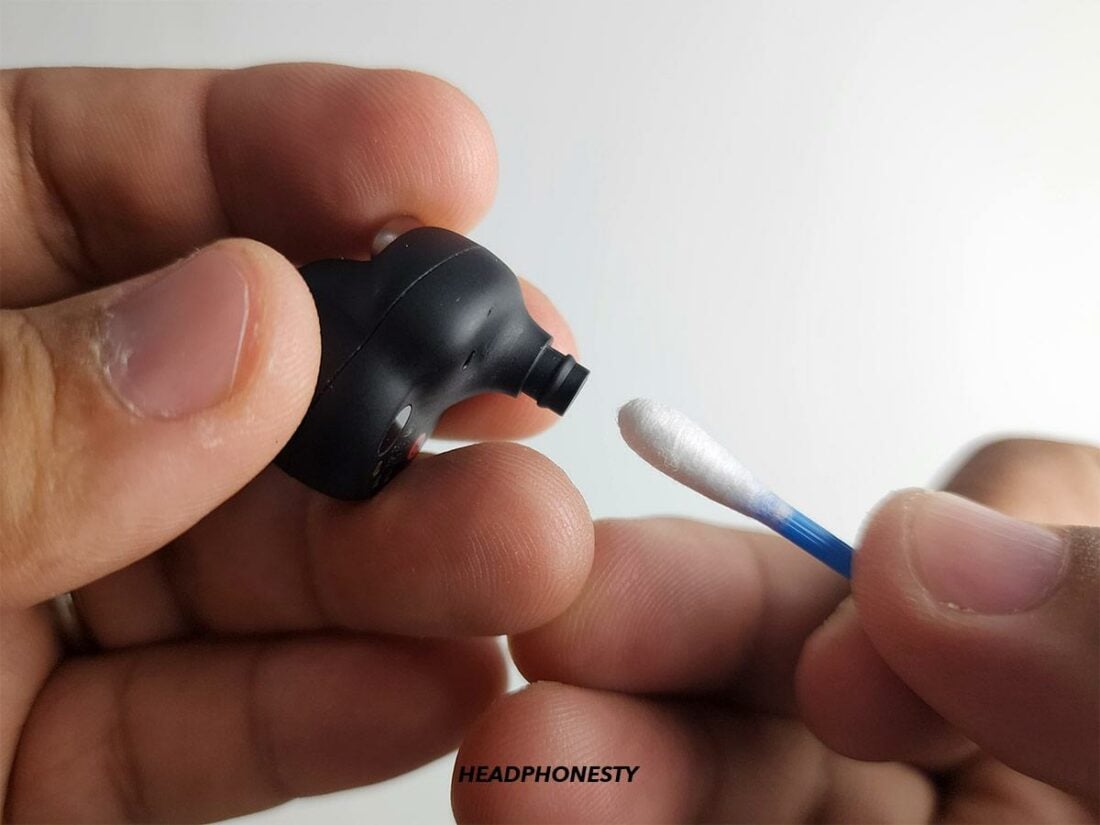
- Hold the earbuds with the speaker mesh facing downward, then gently clean them with a cotton swab lightly dampened with rubbing alcohol. The speaker mesh should be angled downwards to prevent moisture from flowing inside the earbuds’ electronics.
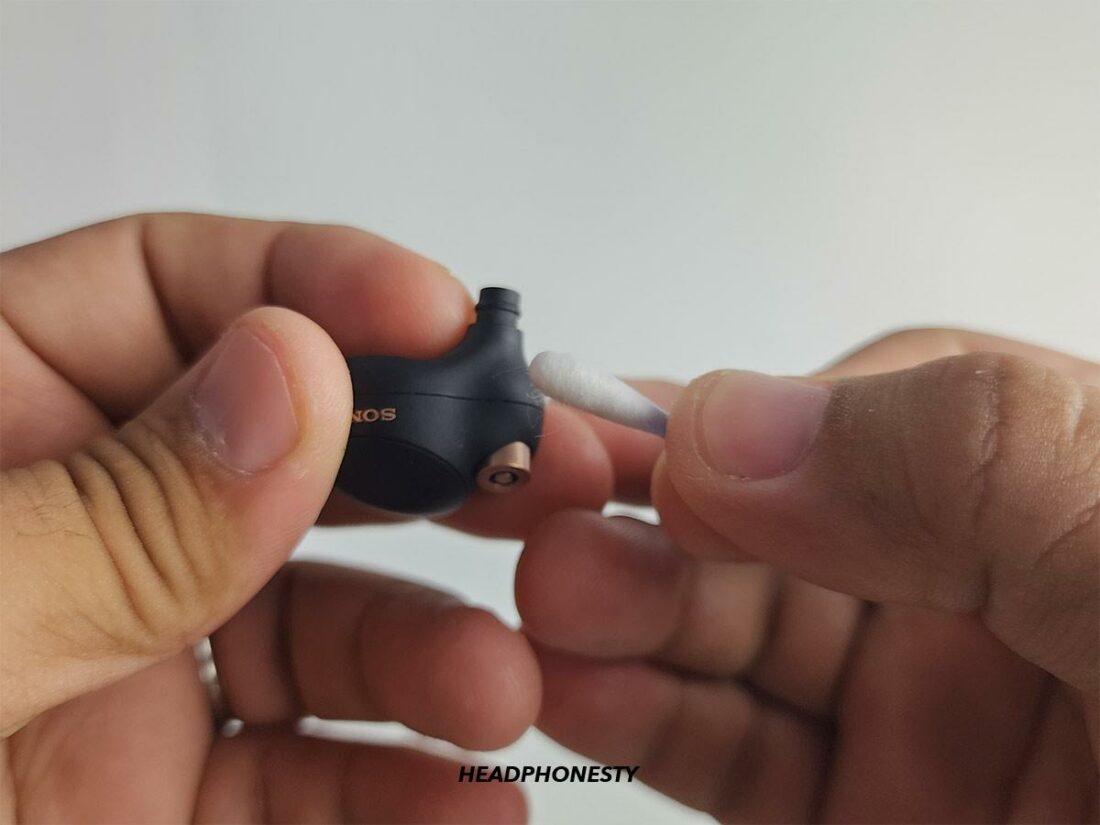
Clean the speaker mesh with a cotton swab. - Use another damp cotton swab to wipe around your earbuds’ shell/casing.
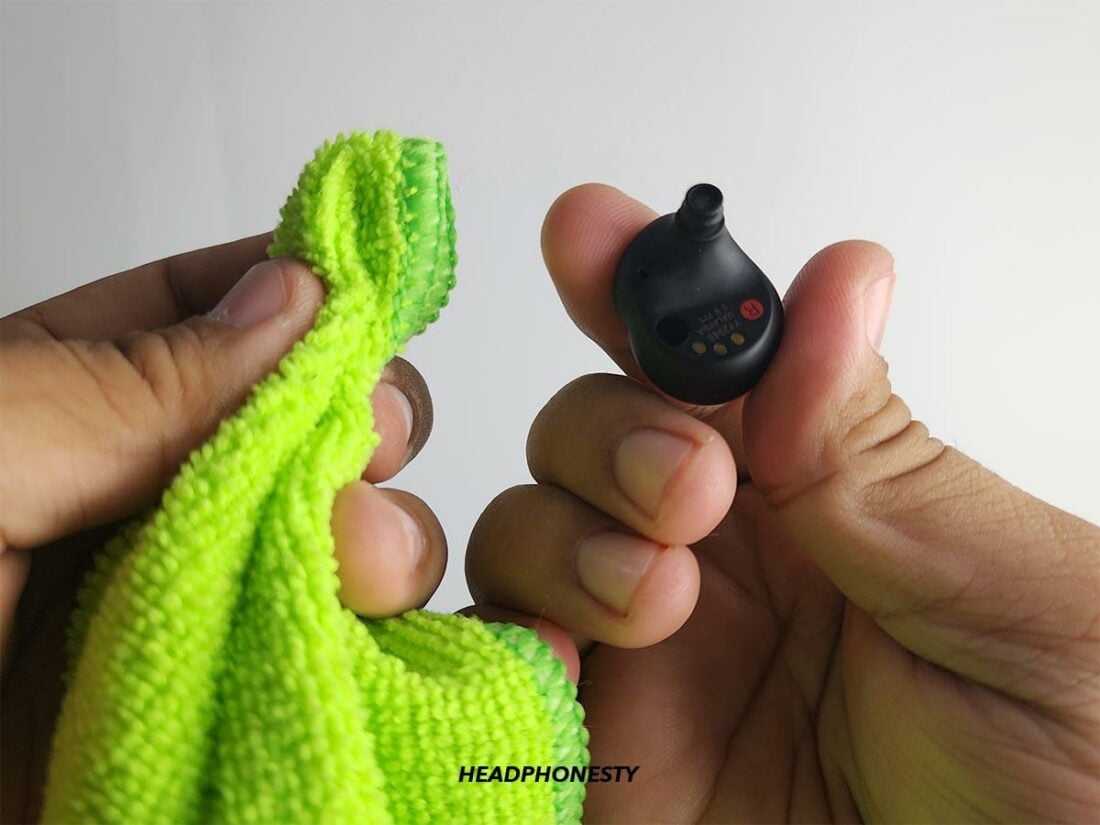
Use a cotton swab to wipe around the earbuds’ shell. - Finally, wipe your earbuds dry with a lint-free cloth.
Wipe earbuds dry with a lint-free cloth.
How to Clean Your Earbuds’ Case
An unclean earbuds case can prevent proper charging in addition to impairing hygiene and aesthetics. Here’s a step-by-step guide to effectively cleaning your earbuds’ case:
- Gather the necessary cleaning supplies: microfiber cloths, cotton swabs, isopropyl alcohol (70% or higher), and a soft-bristle brush.
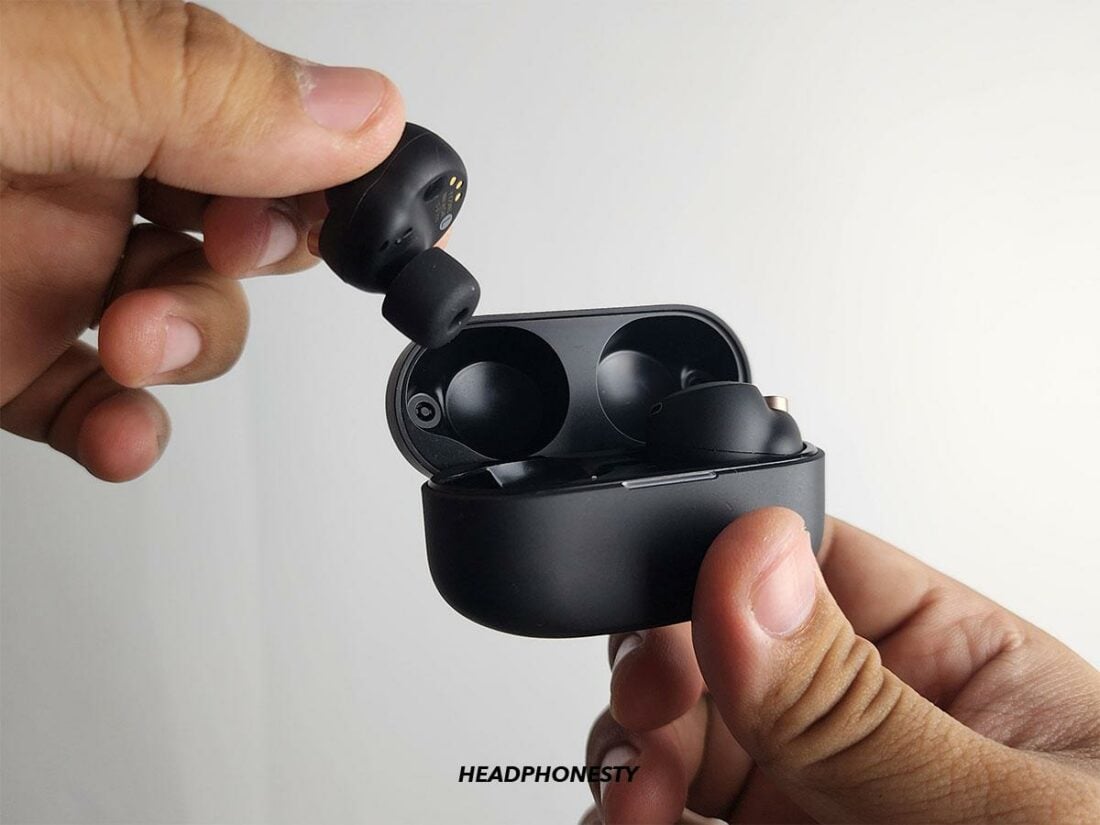
Materials to clean the earbuds’ case. - Take out the earbuds from the case and disconnect any charging cables. This will give you clear access to the case’s interior and exterior.
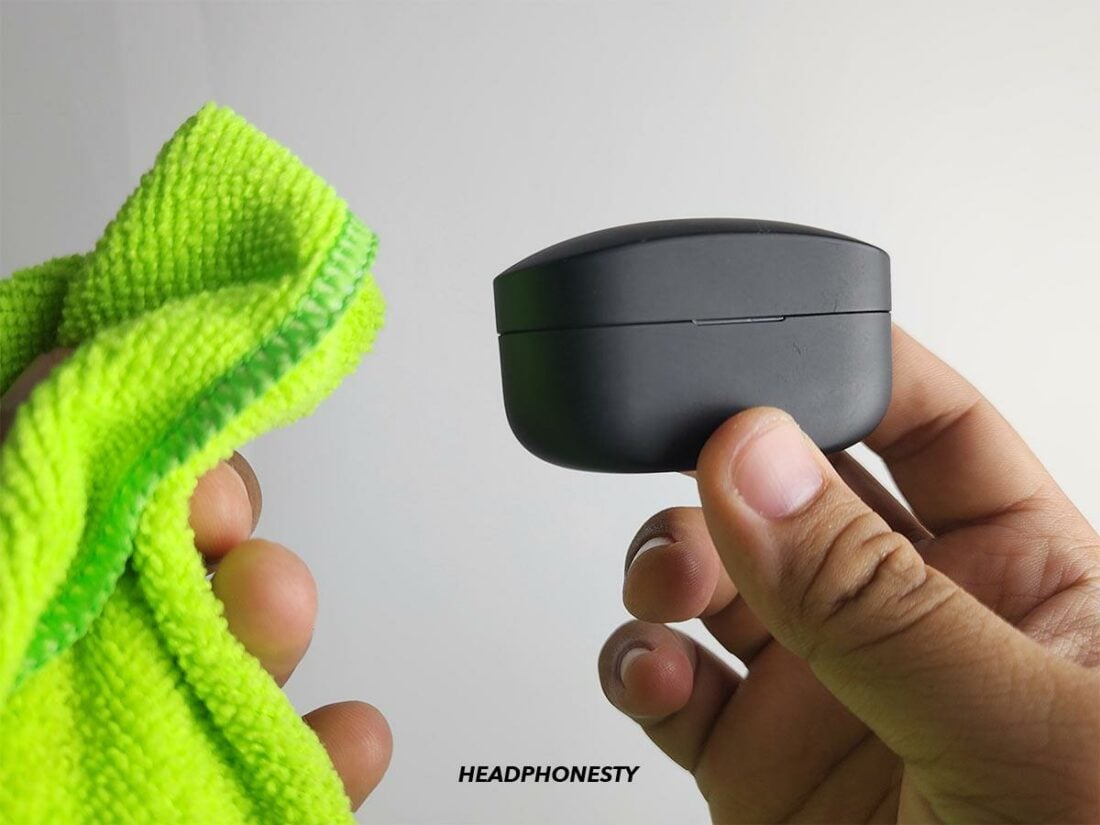
Remove the earbuds from the case. - Wipe the exterior surfaces of the earbuds’ case with a small damp microfiber cloth. This will remove surface-level dirt and grime. Pay extra attention to seams, corners, and areas around the charging port.
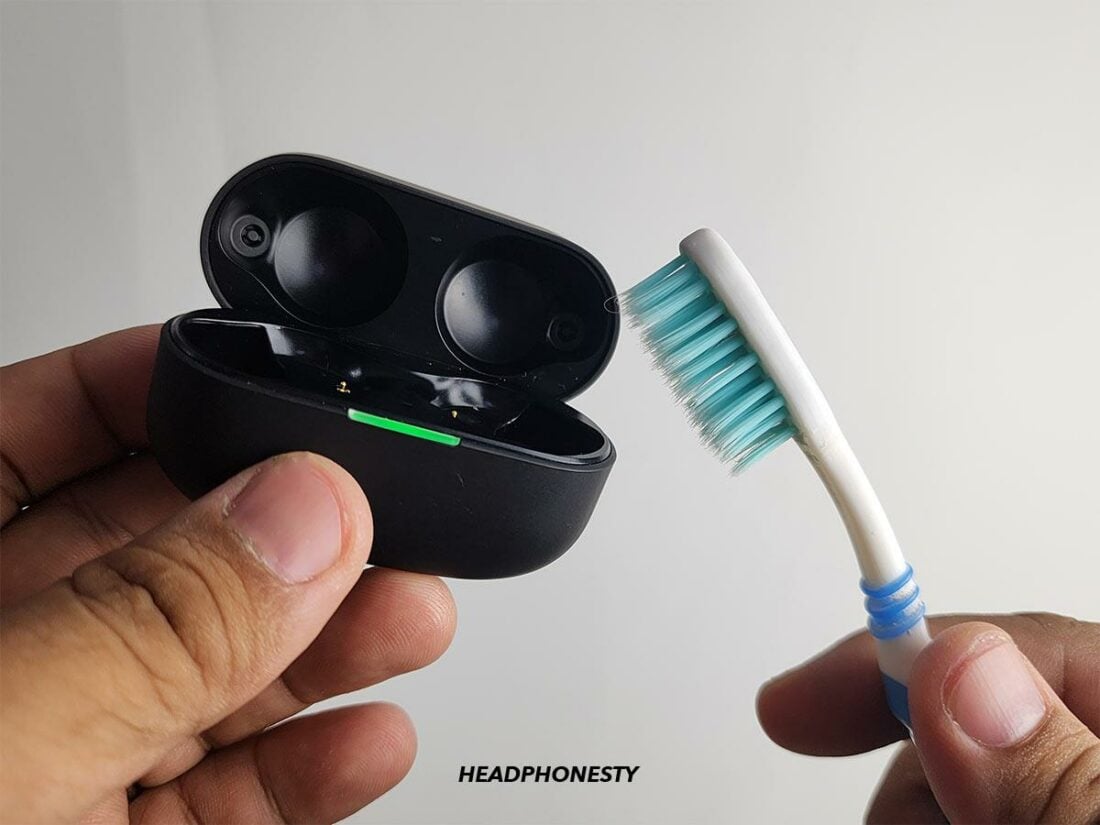
Wipe the exterior surfaces of the earbuds’ case. - Use a soft-bristle brush to remove any stubborn dirt or debris from the case’s interior and exterior. A brush can effectively dislodge particles that are difficult to reach with a cloth. If your earbuds have a deep-set interior that a toothbrush can’t reach, you can use a cotton swab.
Using a toothbrush to remove any stubborn dirt from the case’s interior and exterior. - Lightly dampen a microfiber cloth with isopropyl alcohol and wipe the exterior surfaces again. Remember not to oversaturate the cloth and avoid letting alcohol come into direct contact with any openings.
Lightly dampen a microfiber cloth with isopropyl alcohol. - After cleaning, allow the earbuds’ case to air dry completely before reinserting the earbuds. This prevents any moisture from entering the case and causing potential damage.
Allow the earbuds’ case to air dry completely. - Once the case is completely dry, reinsert the earbuds and connect any charging components. Make sure everything is securely in place.
Reinsert the earbuds inside the case.
Frequently Asked Questions
- How often should you clean your earbuds?
- How can I keep my earbuds clean for longer?
- What happens if you use dirty earbuds?
- Can you wash waterproof earbuds?
How often should you clean your earbuds?
As a general rule, you should clean your earbuds after 72 hours of use. While that may sound like a lot, it’s actually not.
Think of it this way: an average person’s safety threshold for listening to music is at eight hours per day (based on WHO safety standards). That would place your cleaning schedule at around every nine days.
How can I keep my earbuds clean for longer?
To keep earbuds clean for long periods of time, follow these tips:
- Maintain proper ear hygiene to slow down the wax buildup.
- Always place earbuds in the case when not in use, preventing dust and particles from accumulating.
- After listening, wipe them down with a soft cloth to remove any sweat or residue so that no wax or dirt is left behind while they are in the case.
What happens if you use dirty earbuds?
Using dirty earbuds can result in hygiene and health problems due to accumulated dirt and bacteria. This can cause ear infections, as the warm and moist ear canal is a perfect breeding ground for bacteria.
Moreover, the dirt buildup can block your earbuds’ speakers and sensors, causing muffled audio or disconnection issues.
Can you wash waterproof earbuds?
Waterproof earbuds can handle moisture and are suitable for water-exposed activities. Unlike regular earbuds, some are even supposed to be rinsed with distilled water after being used in salt water or pools to get rid of any chemicals or salt residue.
But, the safety of this process applies exclusively to earbuds with an IPX8 rating. Earbuds with lower ratings lack the necessary sealing and may be susceptible to damage when washed.
Clean every 72 hours