Here are our top troubleshooting tips for when your AirPods don’t automatically switch or connect between devices.
AirPods are designed to connect automatically to another Apple device whenever you play audio, or answer a call, while you’re connected with another.
However, some account, compatibility, or software issues can prevent this from happening.
If this happens to you, read on for the different ways to get your AirPods to automatically connect as you switch devices below!
1. Charge AirPods
AirPods with a low battery are prone to errors, especially with connectivity. This is because performance is reduced to conserve power.
Charging your AirPods will fix these issues, so it’s best to check this before trying the more complicated methods.
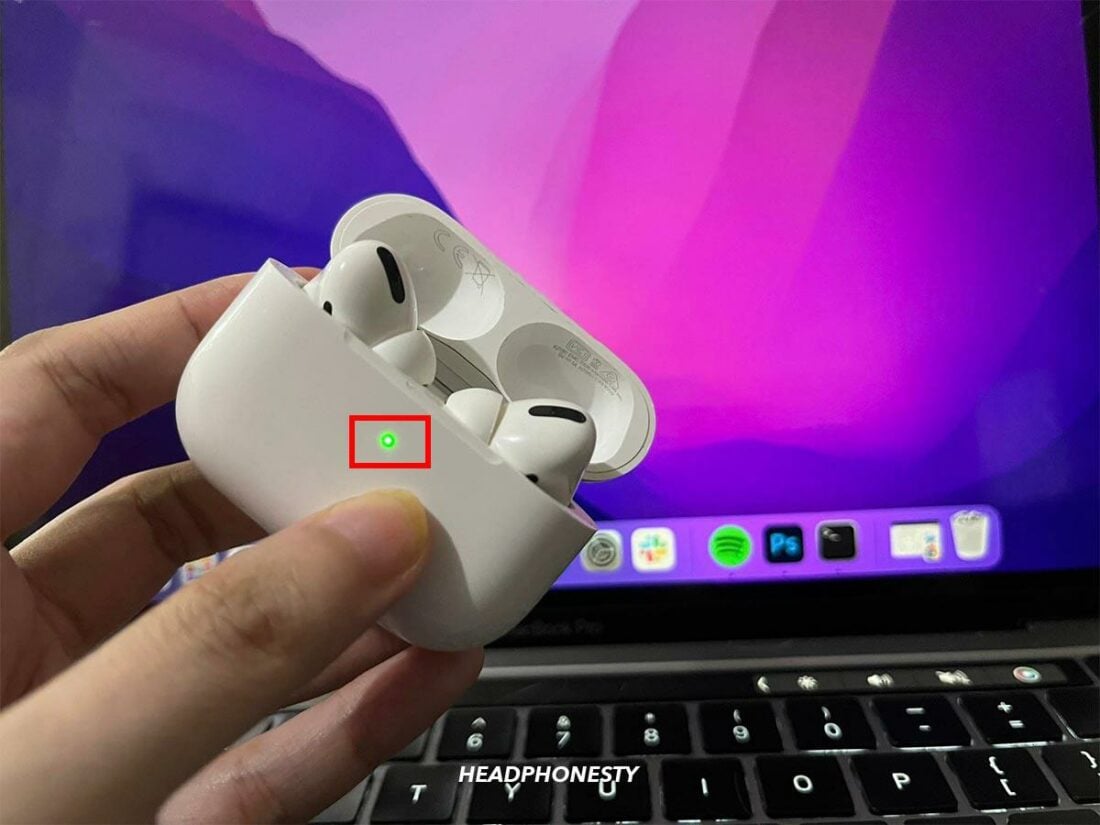
You can check the battery level on your AirPods by putting them in the charging case and opening the lid. The color of the LED indicator will show their level of charge:
- Green for full battery
- Amber for less than full
- No light if the AirPods are entirely out of charge
If the light isn’t green, you should charge your AirPods for about fifteen minutes and try to switch devices again.
2. Check AirPods Compatibility
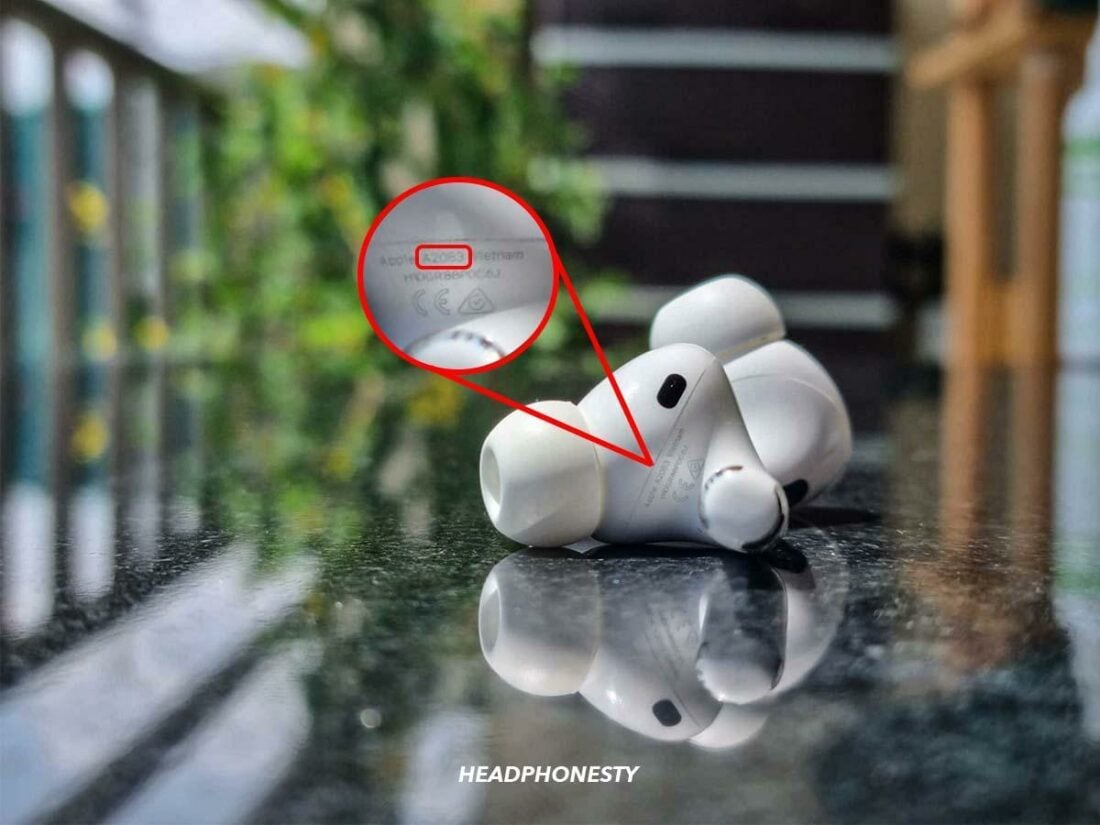
1st Generation AirPods don’t have automatic switching, so if you have models A1523 or A1722, then this is your issue.
You can find the model number of your AirPods by checking the first line of text on the underside of the right earbud’s head. If the number starts with A1, then your AirPods are 1st Gen and won’t have automatic switching.
3. Use the Same Apple ID Across Devices
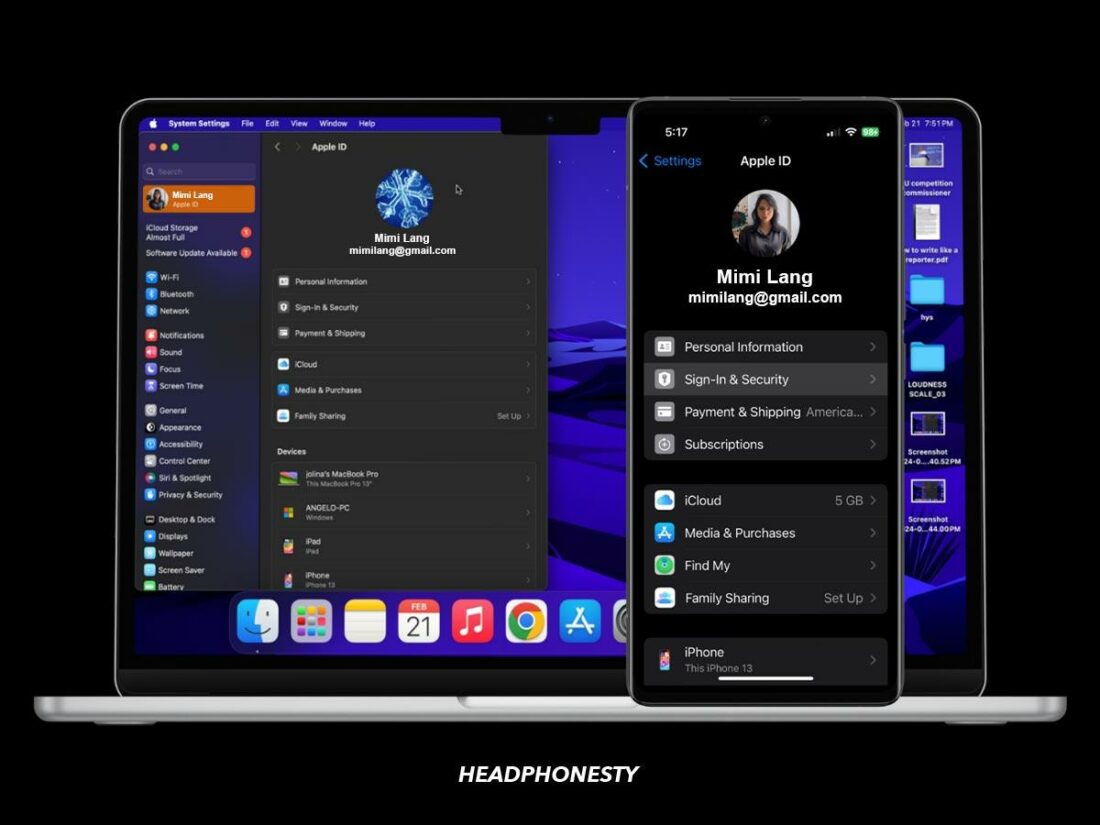
Your devices must use the same Apple ID for automatic switching. Otherwise, your AirPods will automatically switch to any device you’ve previously paired to, such as a friend’s phone or a work computer.
Here’s how to check your Apple ID:
- iPhone or iPad: Tap Settings > your name > Sign-In & Security. You can see the email address and phone numbers you used to sign in to your device.
- Mac: Click on the Apple menu > System Settings > your name > Sign-In & Security. Your details will be under Email & Phone Numbers.
If these details aren’t the same, automatic switching or connecting won’t work with your devices.
4. Enable Automatic Switching
Automatic switching should be automatically set up when you connect your AirPods to two devices with the same Apple ID.
However, this process sometimes has glitches that can prevent the feature from being set up. It’s also possible to accidentally turn automatic switching off. Manually enabling the function should fix this.
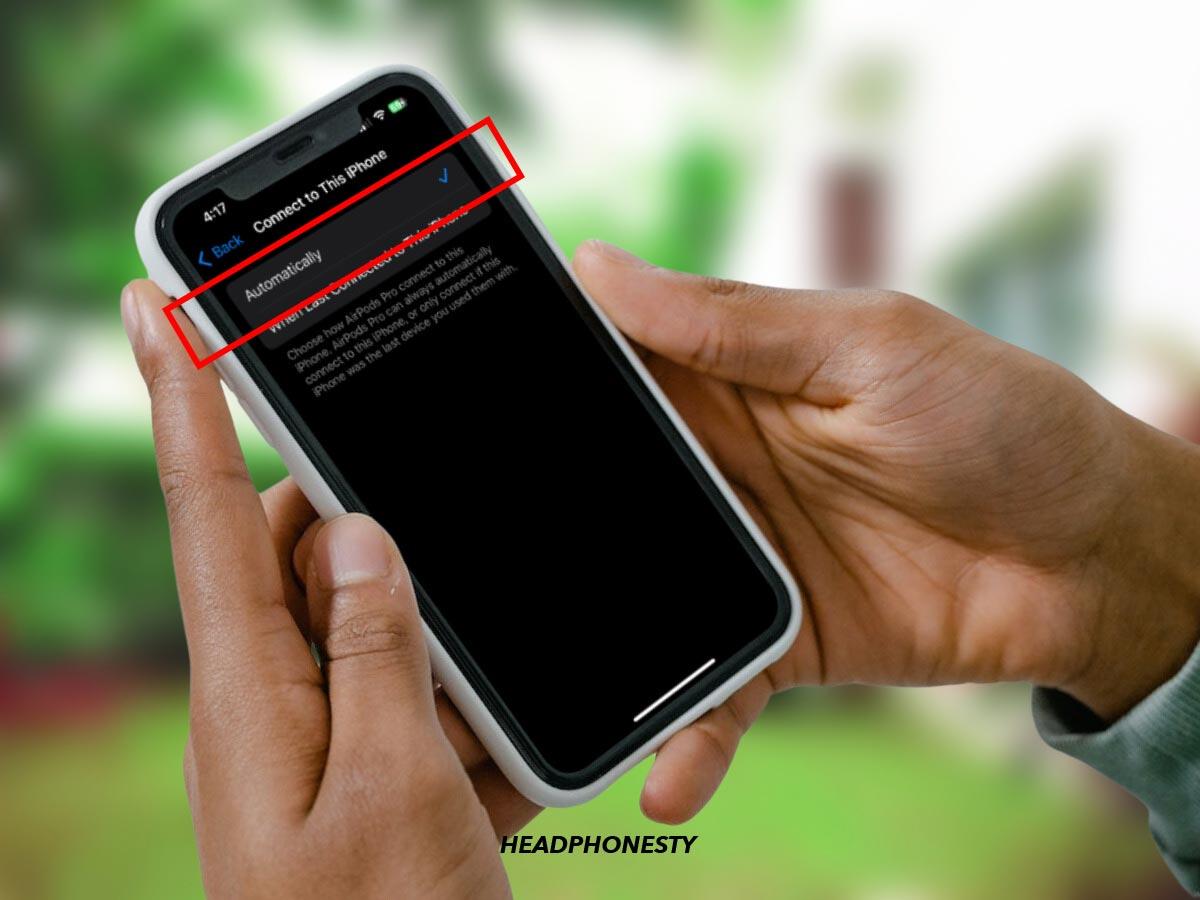
How to manually enable automatic switching on iPhone or iPad
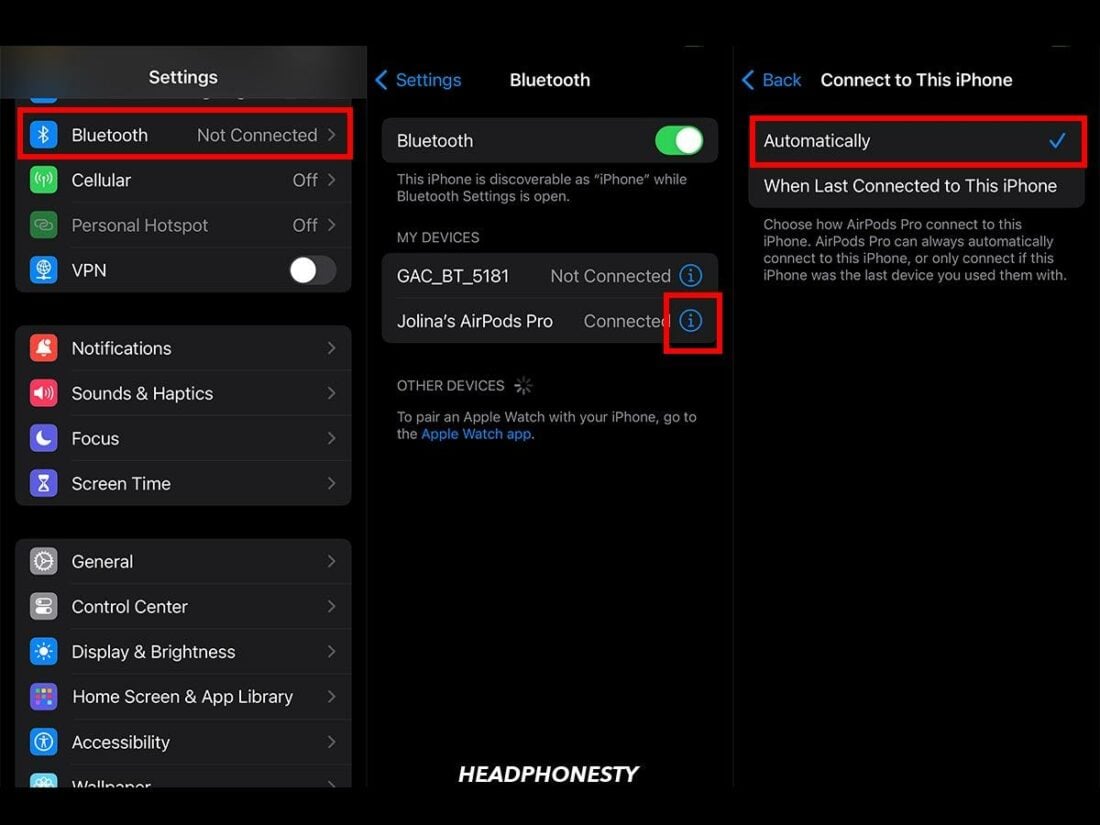
- Pair your AirPods with your iPhone/iPad.
- Open Settings > Bluetooth.
- Tap More Info (i) next to your AirPods.
- Tap Connect to This iPhone/iPad.
- Choose Automatically.
How to manually enable automatic switching on Mac
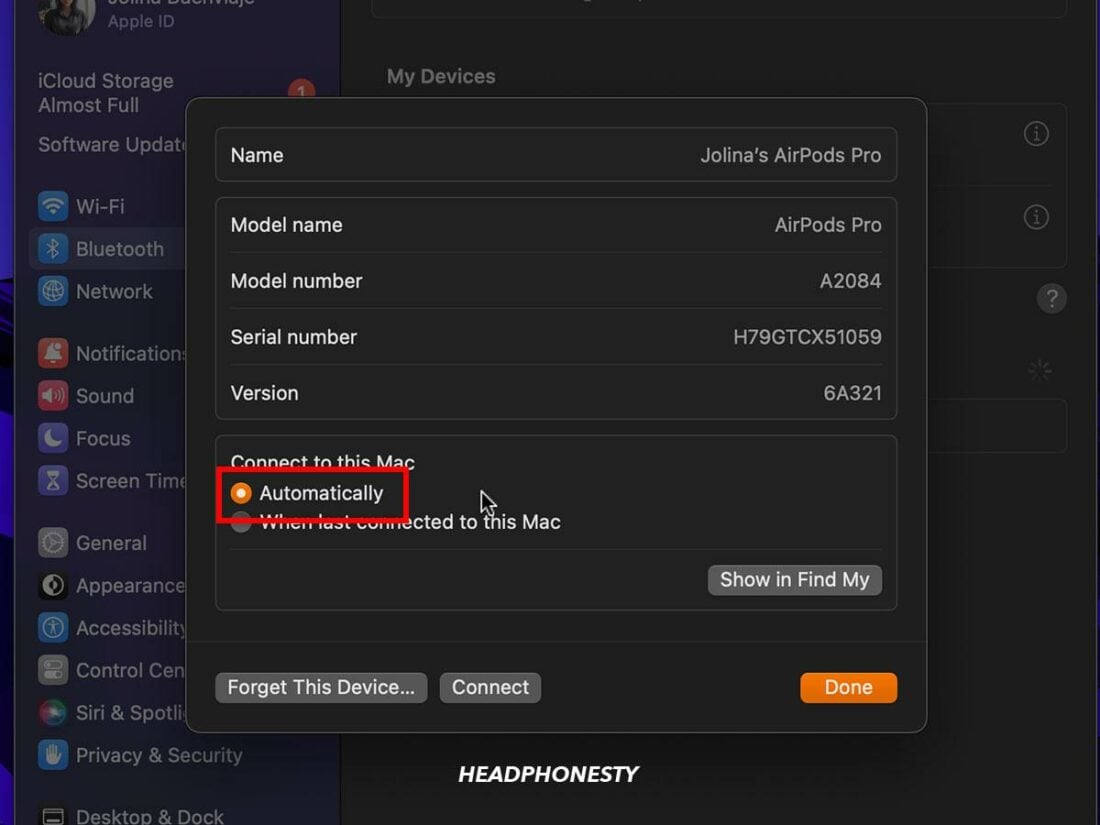
- Pair your AirPods with your Mac.
- Open Apple menu > System Settings > Bluetooth.
- Tap More Info (i) next to your AirPods.
- Choose Automatically under Connect to This Mac.
5. Check for Outdated OS
Operating system (OS) updates are released to fix glitches and bugs. If you’re running an outdated OS, you could have run into a bug that was fixed by a later update.
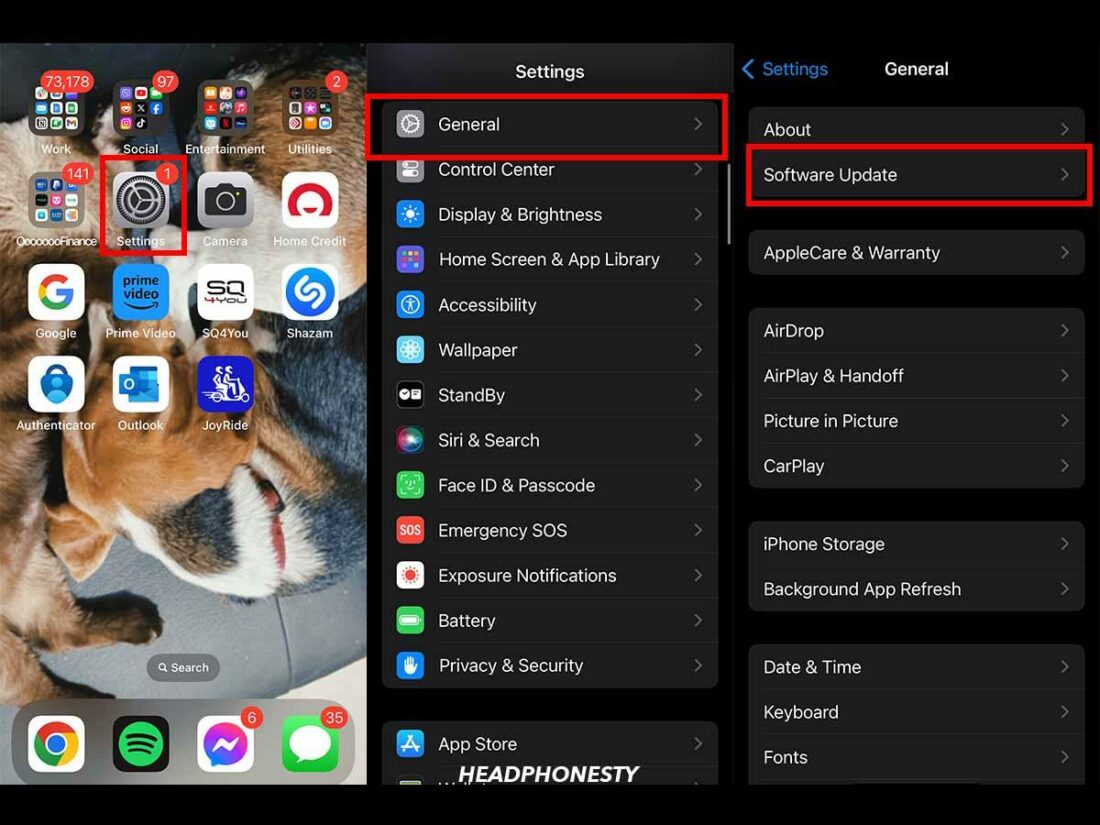
- iPhone or iPad: Open Settings and go to General > Software Update. This will show your current OS and whether an update is available. If one is available, you’ll see a button to upgrade. Tap on it, then choose Download and Install to update your device.

Check the General > Software Update menu to verify if you need to upgrade your iOS.
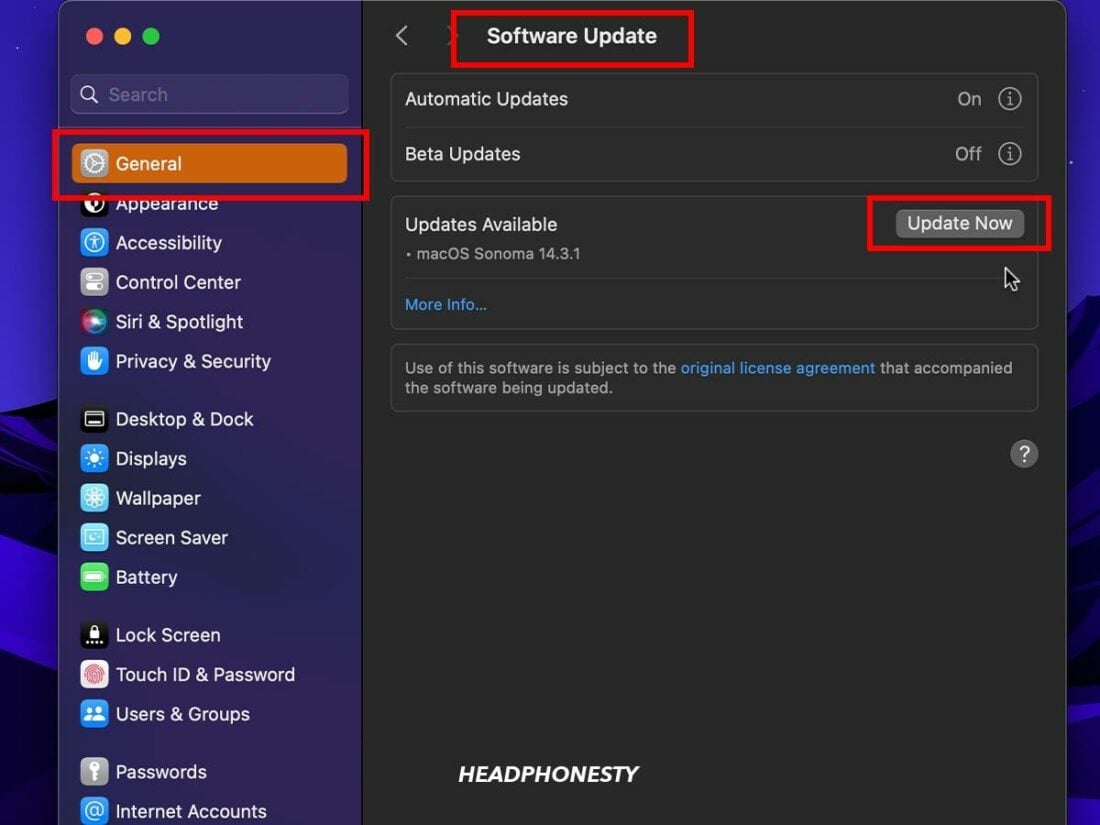
- Mac: Open the Apple menu and choose System Settings > General. Click on Software Update, and you can select Update Now to install recent updates.
Check the General > Software Update menu to verify if you need to upgrade your macOS.
6. Check for Outdated AirPods Firmware
Like OS updates, AirPods updates often fix bugs that cause connection issues. While your firmware should automatically upgrade, you’ll want to manually check to see if it was missed.
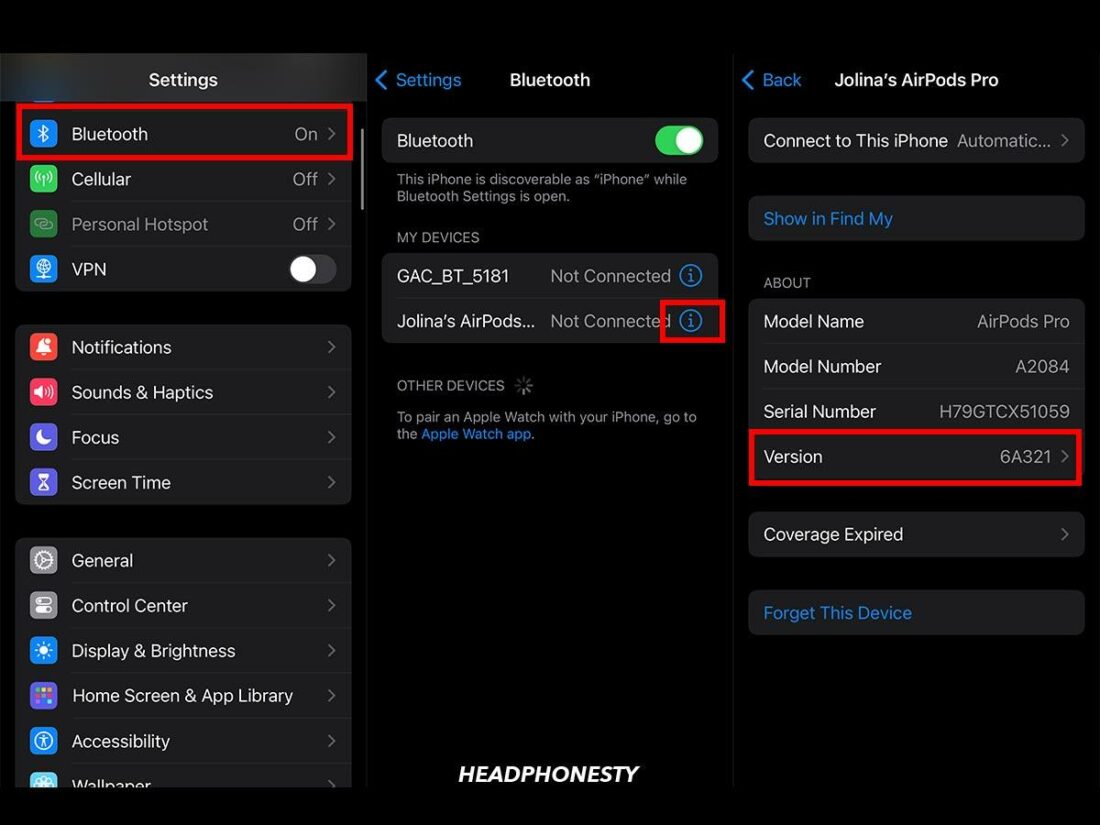
Here’s how to check your AirPods firmware on your iPhone:
- Connect your AirPods to your phone.
- Open Settings > Bluetooth.
- Tap More Info (i) next to your AirPods.
- Your firmware version will be displayed.
- Check the latest versions on Apple Support.
To update your firmware, you should put your AirPods in their charging case and plug it in. Ensure your iPhone or iPad has a strong internet connection, then place the AirPods near your device. Updates will be automatically installed.
7. Reset Your AirPods
Resetting your devices will restore their default settings, often clearing them of any bugs they have picked up.
Here’s how:
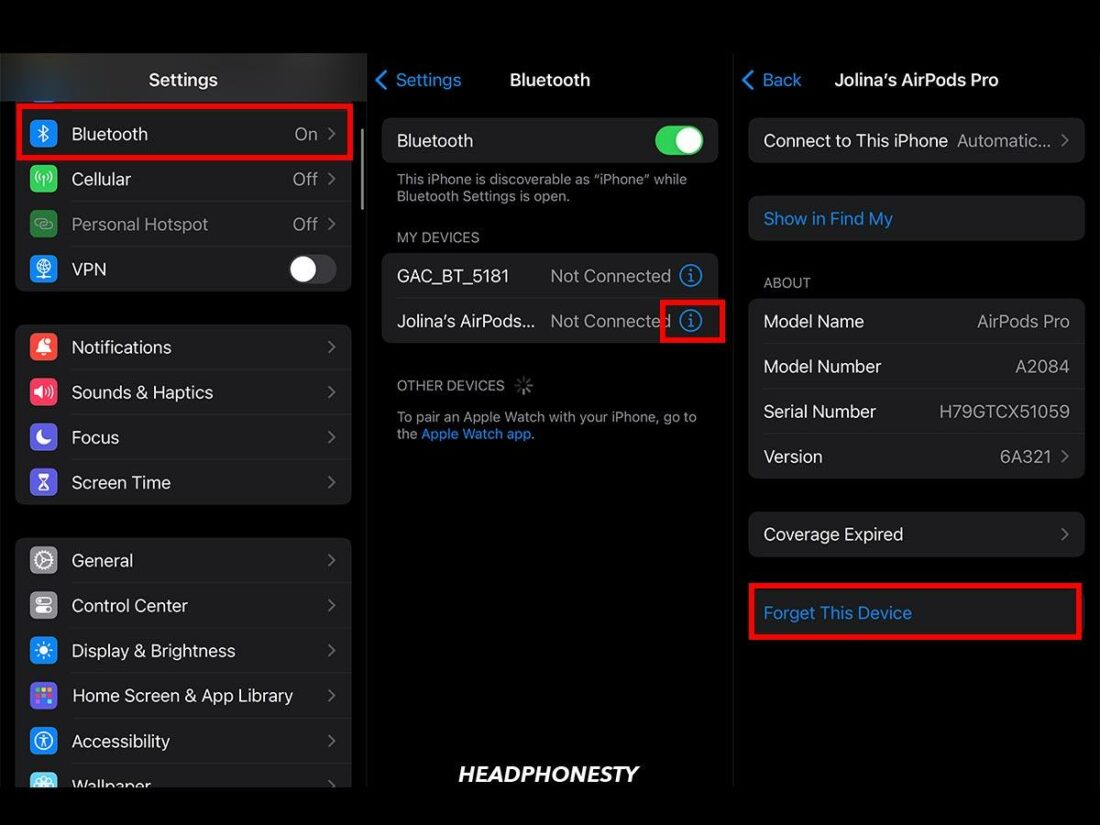
- Put your AirPods in their case and close the lid.
- Wait at least thirty seconds to ensure the earbuds are connected to the case.
- Go into your device’s Settings > Bluetooth.
- Tap the More Info (i) button next to your AirPods.
- Scroll down and choose Forget This Device from the bottom.
- Open the lid of the charging case, then hold down the setup button on the back for about fifteen seconds until the light flashes white. This indicates that your AirPods have been successfully reset.
Can AirPods Automatically Connect to Android?

Yes, when you’ve paired your AirPods to your Android phone, they should automatically connect when you take them out of the case, just like any other Bluetooth headphones.
However, automatic switching is an Apple-only feature and doesn’t work with Android phones.
If you’re having issues connecting AirPods to your Android, you should check that both devices are charged and that you’re using the proper connection method. You should also disconnect your AirPods from any Apple devices they might be prioritizing, then try resetting your phone and the earbuds.
Frequently Asked Questions
- Why don’t my AirPods automatically connect when I put them in my ears?
- Why don’t my AirPods automatically connect when I answer a call?
- Why are my AirPods disconnecting on phone calls?
Why don’t my AirPods automatically connect when I put them in my ears?
If your AirPods don’t automatically connect when you put them in your ears, you might have Automatic Ear Detection turned off. Go to Settings > Bluetooth, tap on the More Info (i) button next to your AirPods, and make sure that Automatic Ear Detection is enabled.
Why don’t my AirPods automatically connect when I answer a call?
AirPods often do not automatically connect when you answer calls because they aren’t set as the default audio output device for phone calls. Go to Settings > Accessibility > Touch > Call Audio Routing and choose Bluetooth to fix this problem.
Why are my AirPods disconnecting on phone calls?
If your AirPods usually work but disconnect during phone calls, you should try re-pairing them with your device, restarting your phone, and fully resetting the AirPods. If these options don’t work, you might need to reset your phone.
My AirPods work perfectly as long as I engage them manually. They don’t drop calls, fail to answer calls or any other function. They just will not automatically engage with my phone or iPad or change between the two. It is all done manually.
I do not use iMessage or iCloud and have a feeling that may be the reason.
Also, I went through your 7 steps long ago and I have 3 pairs of iPods which I use randomly.