If your AirPods are flashing white but not connecting, here’s what you can do about it.
AirPods flash white when they are entering pairing mode or attempting to connect to a nearby device.
Yet, they may sometimes fail to connect even when they’re flashing white for quite a while, signifying an underlying software issue.
Not to worry! Here’s a one-stop guide with all the possible fixes you can try if your AirPods are flashing white but not pairing. Read on!
- 1. Recharge the AirPods
- 2. Turn the Bluetooth Off and On
- 3. Reset Your AirPods
- 4. Clean the AirPods and the Case
- 5. Connect Your AirPods Individually
- 6. Restart Your Device
- 7. Reset Your Network Settings
- 8. Keep Your Device's Software Updated
- 9. Check if Your AirPods Are Fake
- 10. If All Else Fails, Visit an Apple Service Center
- Frequently Asked Questions
1. Recharge the AirPods
If your AirPods are running out of charge, they might not have enough power to connect to your device. For a reliable connection, ensure they have at least 50% battery. To achieve this, charge your AirPods for at least 15 minutes before use.
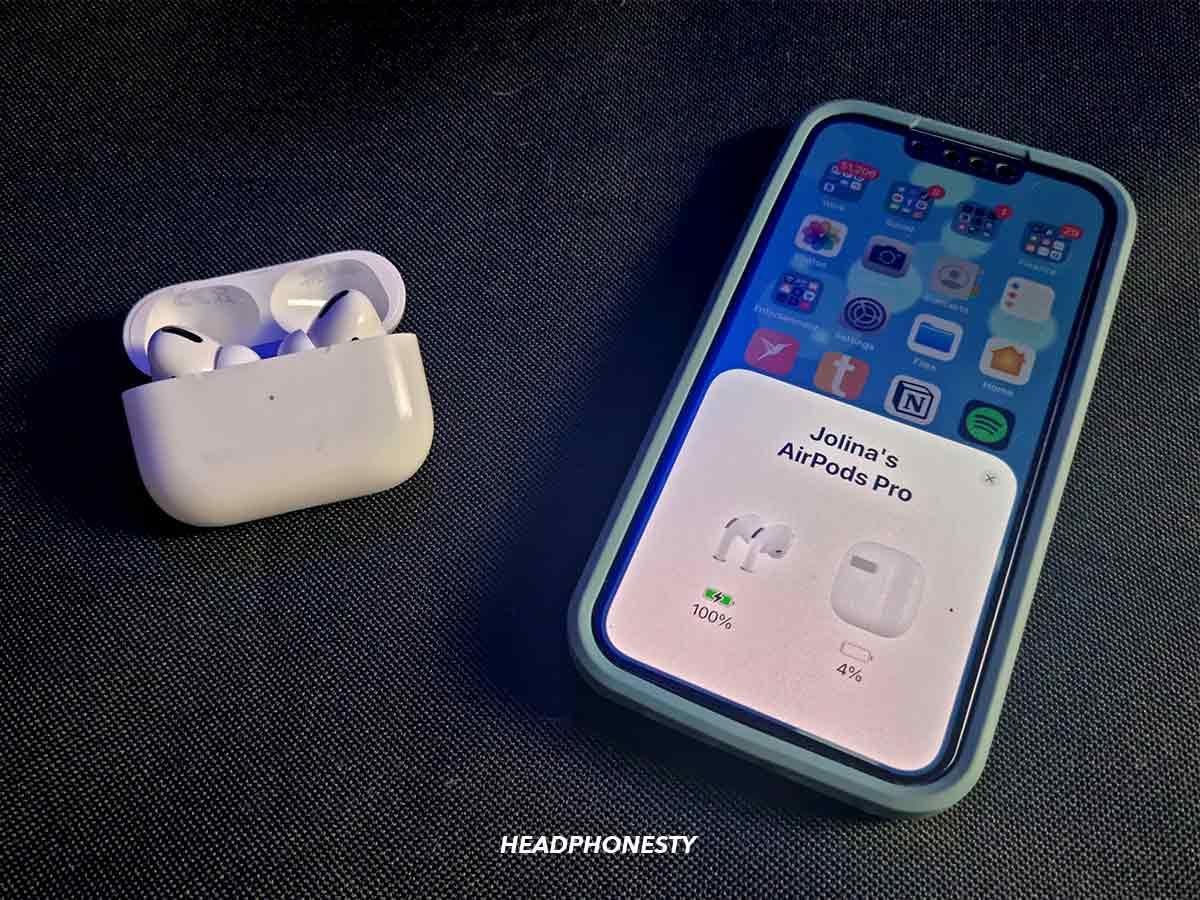
To check your AirPods’ battery:
- Activate Bluetooth on your device.
- Put the AirPods in their case for at least 30 seconds.
- Open the case while keeping the AirPods inside and place it near your iPhone. Your iPhone should show a prompt indicating the battery levels of the case and each AirPod.

AirPods battery level on Automatic pop-up feature.
2. Turn the Bluetooth Off and On
Your AirPods flash white when they’re ready to pair. However, if there are bugs in your device’s Bluetooth connection, they won’t connect. Toggling your Bluetooth off and on will make your device restart its pairing process and bypass whatever bug has stopped your AirPods from connecting initially.
To restart your Bluetooth on an iPhone, you should:
- Open the settings of your device, and locate the Bluetooth menu.
- Open the Bluetooth menu, and tap on the switch to toggle your Bluetooth off. Tap again to turn it back on.

Bluetooth toggle switch

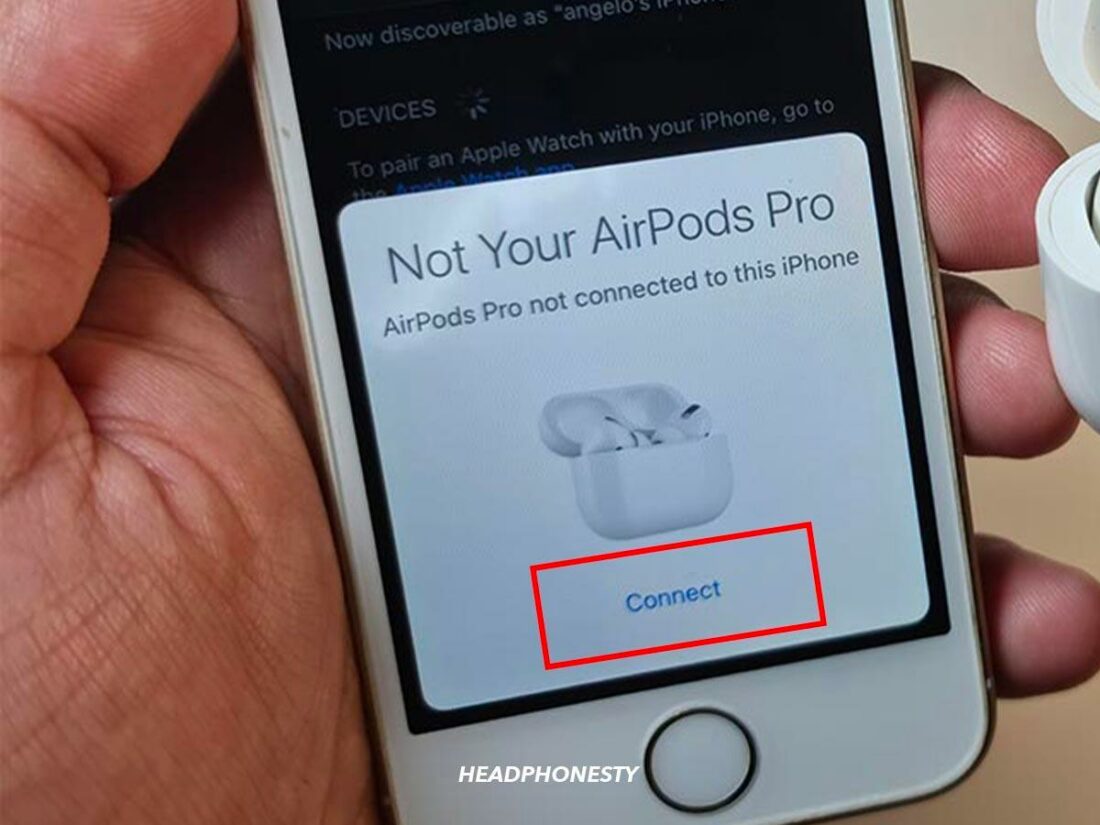
3. Reset Your AirPods
When your AirPods flash white but won’t connect, there might be software glitches that stop them from doing so. Resetting AirPods helps shake these off and gives your AirPods a fresh start.
To reset your AirPods, you should:
- Put your AirPods back in their case and close the lid.
- Go to your device’s Bluetooth settings and click the ‘i’ icon next to your AirPods in the list of connected devices.
- A pop-up menu will appear. Select ‘Forget Device’ and confirm. This will remove your AirPods from all the devices using the same Apple account.
- Open the lid of your charging case, then hold the setup button on the back for about fifteen seconds. The light will change from amber to white.
- Keep the lid open, and place the case next to your device. Hopefully, your AirPods will now connect!
4. Clean the AirPods and the Case
Dirt or grime on your AirPods or case can cause an obstruction between the connectors on your AirPods and the case, which can result in pairing issues. This problem happens when the case struggles to register that the AirPods are there.
To make sure that it’s not a physical obstruction that’s causing your AirPods to flash white but not connect, you should clean your AirPods. Here’s how:
- Dampen a cloth with 70% isopropyl alcohol.
- Use this cloth to gently wipe your AirPods and case, avoiding the speaker grill and other openings in the casing.
- Wet a Q-tip with rubbing alcohol and use it to clean the speaker grill and the charging connectors inside the case (where you place your AirPods).
5. Connect Your AirPods Individually
Some users have reported that they could fix the problem of AirPods flashing white but not connecting by pairing their AirPods one at a time. To do this, you should:
- Put just one AirPod in the case.
- Place the case next to your device and open the lid. The AirPod should connect to your device.
Connecting one AirPod at a time - Take the connected AirPod out of the case, and put the other. Repeat step two.
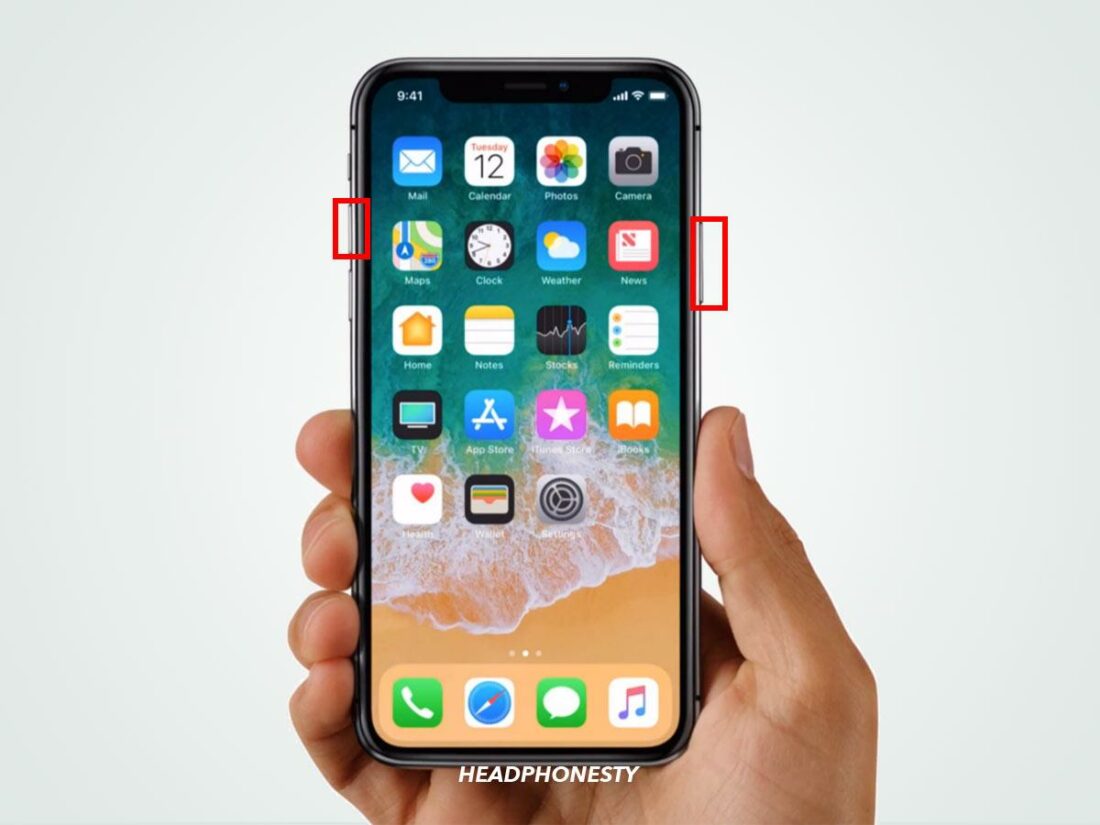
6. Restart Your Device
When you restart your device, it will reset parts of the system. This action can fix several bugs and glitches that might be causing your AirPods to have connection issues. To restart your device, you should:
- Press and hold the power button on your device until a power menu comes up.
Volume up button and power button - Select the Restart option.
- Wait for the device to restart, then sign in as usual.
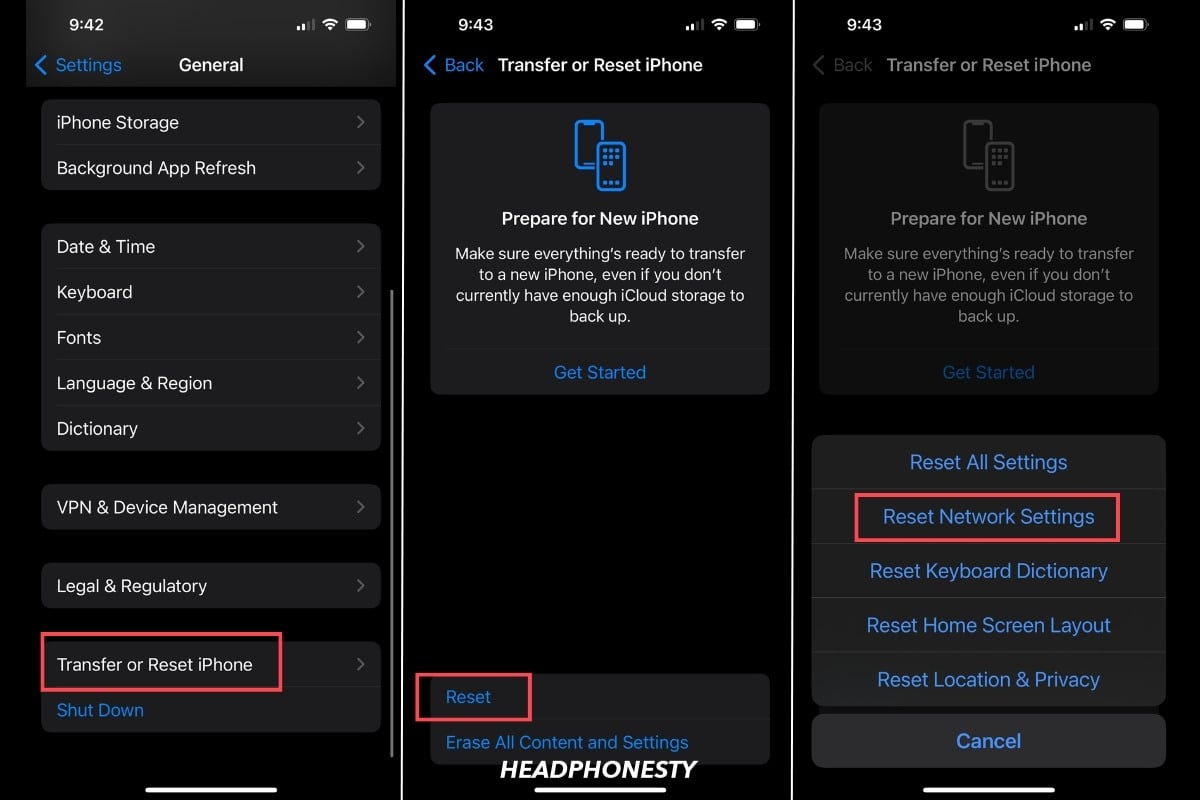
7. Reset Your Network Settings
Resetting the network on your device will make it forget all Bluetooth and WiFi connections. This forces your device and AirPods to restart their pairing process again and eliminate potential interferences from other wireless networks.
To reset your network, you should:
- Go to Settings > General.
- Scroll down and select Transfer or Reset iPhone > Reset > Reset Network Settings.

How to reset the Network Settings on iOS
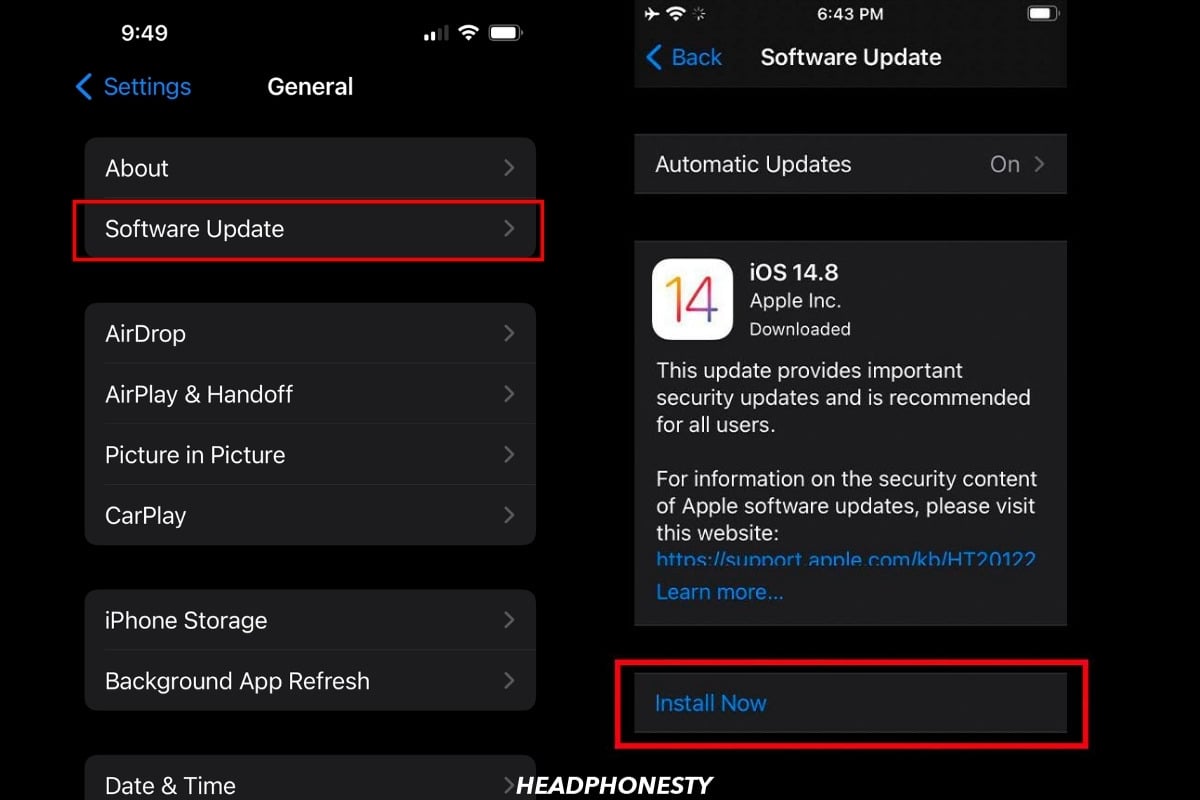
8. Keep Your Device’s Software Updated
Updates to your device’s software maintain their functionality, efficiency, and even your device’s connection stability.
Here’s how you can update your devices:
- Go to Settings > General.
- Select Software Update.
- This page will display what version of iOS your device is currently using and whether an update is available. From here, you can select the option to install the update.
Installing a software update on iOS
9. Check if Your AirPods Are Fake
If you purchased your AirPids outside of reputable sources, there is a possibility that they might be fake. Fake AirPods are usually of a much lower quality and may have an entirely different design. For one, your AirPods flashing white may mean something different for knock-offs.
A quick way to check if your AirPods are fake is using their serial number. To do this:
- Look for the serial number on the underside of your AirPods case’s lid.
- Once you’ve found the serial number, go to the Apple Coverage Check webpage.
- Enter your serial code. If the AirPods are authentic, you will get a page showing the details of the earbuds.
Service coverage results page for Authentic AirPods

10. If All Else Fails, Visit an Apple Service Center
If you’ve tried all the steps above and your AirPods still won’t connect but keep flashing white, you should visit an Apple Service Center. There, professionals can check your AirPods and either fix or replace them.
To help streamline the process, you can list the troubleshooting steps you’ve already tried and give them to the Apple techs. This information will help them rule out the more common causes of the problem. You could even send them this article!
Additionally, it would be a good idea to find and record your serial number before heading to the service center. The number will be needed when you hand over your AirPods, so having it on hand will speed up the process.
Frequently Asked Questions
What do the different lights mean on AirPods?
The lights on AirPods indicate their status: Green means fully charged, amber indicates less than one full charge remains, and no light means they’re off or the battery is dead. If the AirPods are in the case, the light shows the case’s charge status; if out, it shows the AirPods’.
Will Apple replace my AirPods if they keep flashing white?
Apple may replace AirPods that keep flashing white if they’re under warranty and the issue is due to a manufacturing defect. But, to be sure, it’s best to contact Apple Support or visit an Apple Store for an assessment.
How can I prevent this issue from happening in the future?
To prevent AirPods from flashing white without connecting, ensure they’re charged, keep them clean, reset the AirPods regularly, and avoid exposing them to extreme temperatures or moisture. Also, maintaining the latest firmware for both your AirPods and the connected device can help avoid connection issues.