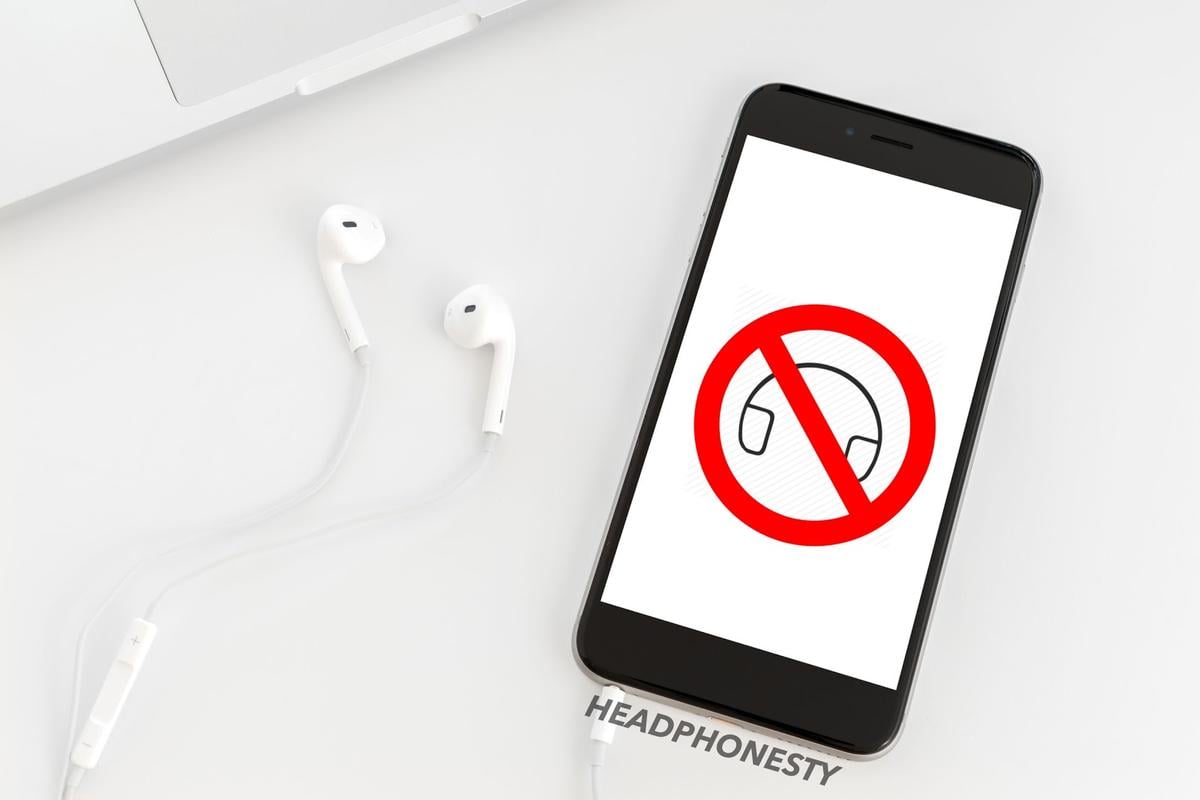
Learn what is causing your iPhone to be stuck in headphone mode and how to get out of it.
It’s a bizarre experience when there are no headphones connected to your device but your iPhone thinks otherwise.
When this happens, you won’t be able to play any audio or even have a proper phone call, as your iPhone is sending the audio to an imaginary device!
The good news is: you’re not the only one experiencing this. So, here’s a guide to help you figure out why your iPhone is in headphone mode and how to get it out of it. Let’s dive in!
Why Do iPhones Get Stuck in Headphone Mode?
iPhones tend to get stuck in headphone mode for various reasons. Some of these might include the following:
- Moisture or dust build-up on the headphone jack port.
- A software error caused by an app or an OS update.
- You disconnected the headphones/earphones while the phone was busy.
- Use of faulty or low-quality headphones (that could have caused some damage to the earphone port).
Unfortunately, this problem is not limited to older iPhone models with the 3.5mm port but also newer ones without it.
This is because your iPhone’s lightning port can also function as an audio port. You can use dongles and DACs to connect standard headphones with 3.5mm plug or lightning-jack compatible headphones.
So, despite the design, the lightning port can also be affected with the same problems as the 3.5mm port. The same reason may also cause your iPad to be stuck in headphone mode.
Your thoughts might be trailing toward using wireless headphones instead; to save yourself the issue of having your iPhone thinking that headphones are plugged in when they are not. Unfortunately, this problem happens with both wired and wireless/Bluetooth headphones.
The only way to narrow down the cause of this issue is to try out each solution one by one.
We have listed down some try-worthy solutions you can start with below.
Software Issues: Simple Software Fixes to Get iPhones Out of Headphone Mode
It is always recommended to rule out software issues that could be causing this glitch to make your iPhone think your headphones are plugged in.
Software fixes are generally reversible and do not require much technical knowledge before trying them out.
Let’s take a closer look at each one.
- Plug and unplug your headphones
- Enable and disable Airplane mode
- Restart your iPhone
- Change the iPhone’s audio output
- Reset your network settings
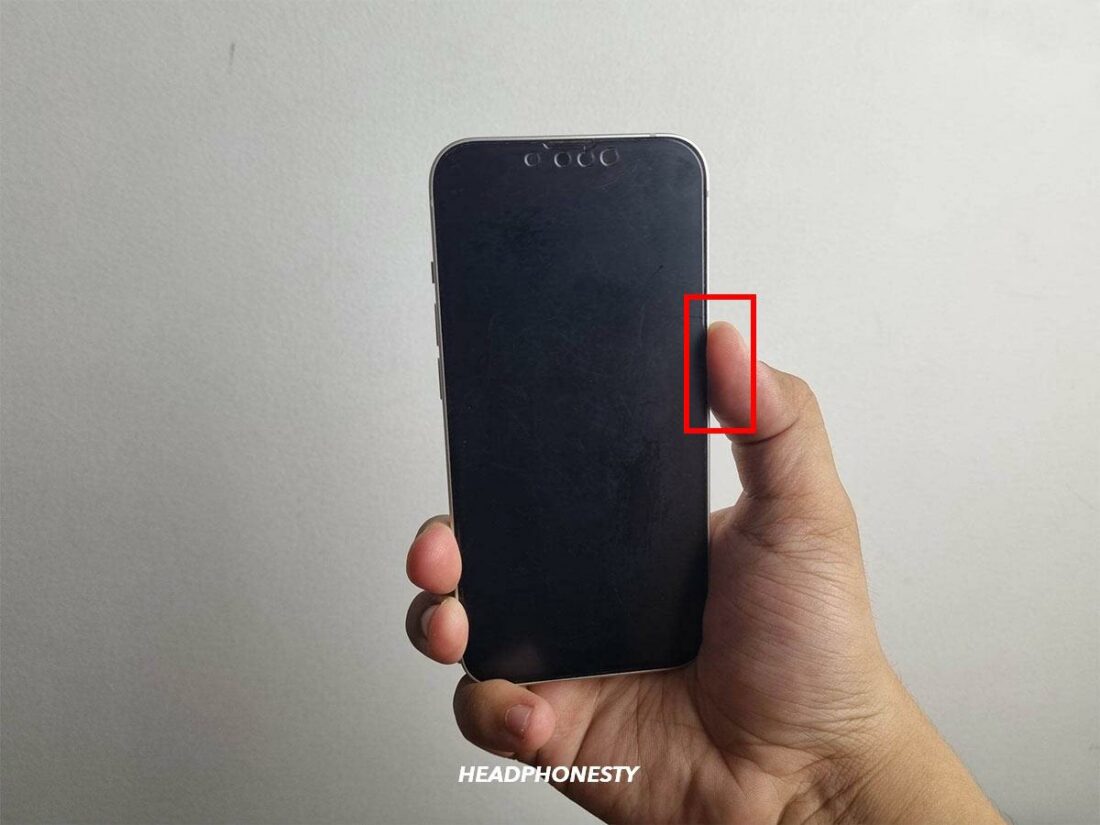
Plug and unplug your headphones
This method is the quickest and most obvious solution (if it works). All you need to do is to plug your headphones back into your iPhone. Then unplug it from your iPhone after a few seconds.
Phones “know” when a headphone is connected, via the circuit points in the 3.5mm or lightning port, when they make contact with the ones in the jack. As soon as this happens, the phone will run its default algorithms to instruct its software to relay audio to the headphones.
Hopefully, somewhere along this quick plug-and-unplug process, the software gets a reboot and can now correctly recognize if headphones are plugged in or not.
Enable and disable Airplane mode
Airplane Mode is a setting in smartphones and tablets that lets you quickly turn off cellular, voice, WiFi, and Bluetooth connections.
A quick enable and disable of Airplane mode is somewhat similar to restarting your iPhone but uses less time. Cellular, voice, WiFi, and Bluetooth connections will all be rebooted by enabling and disabling airplane mode.
This fix works best for Bluetooth headphones but is worth a shot even when using wired ones.
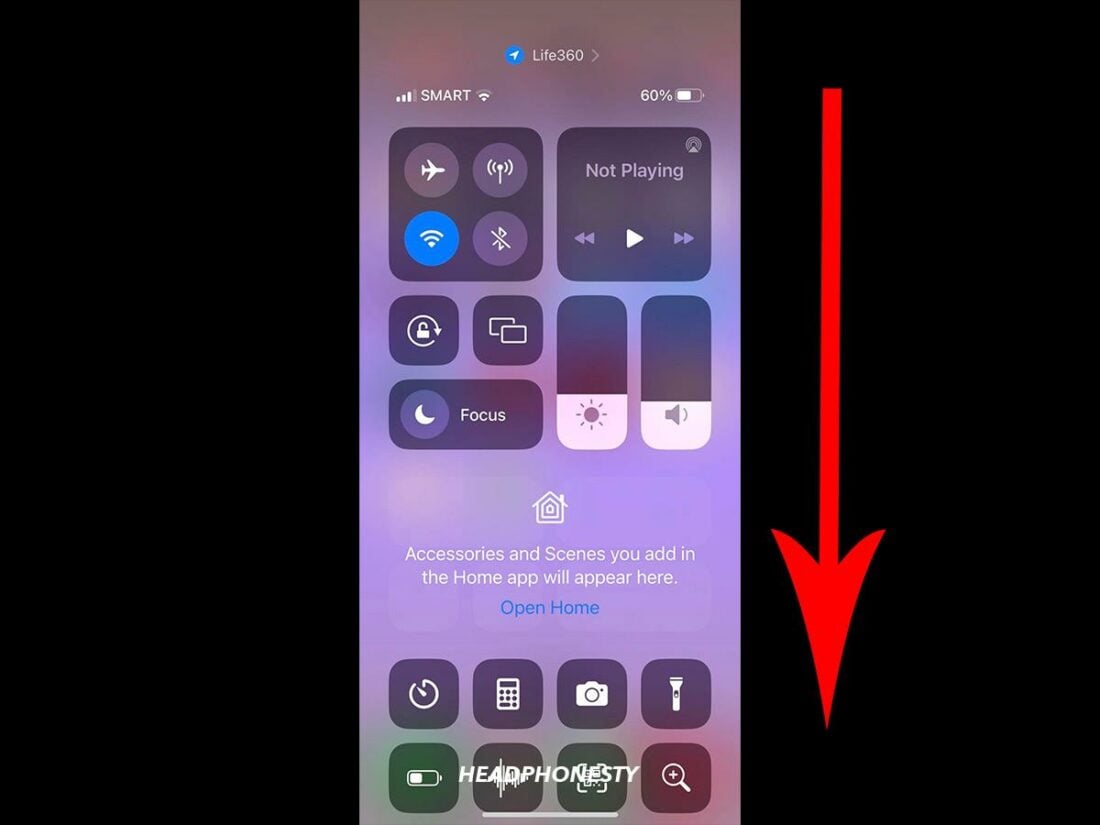
The quickest way to activate (and deactivate) Airplane Mode in iPhones is via the Control Panel.
For an iPhone X, 11, 12, 13, 14, or later:
- Swipe down from the top-right portion of the screen.

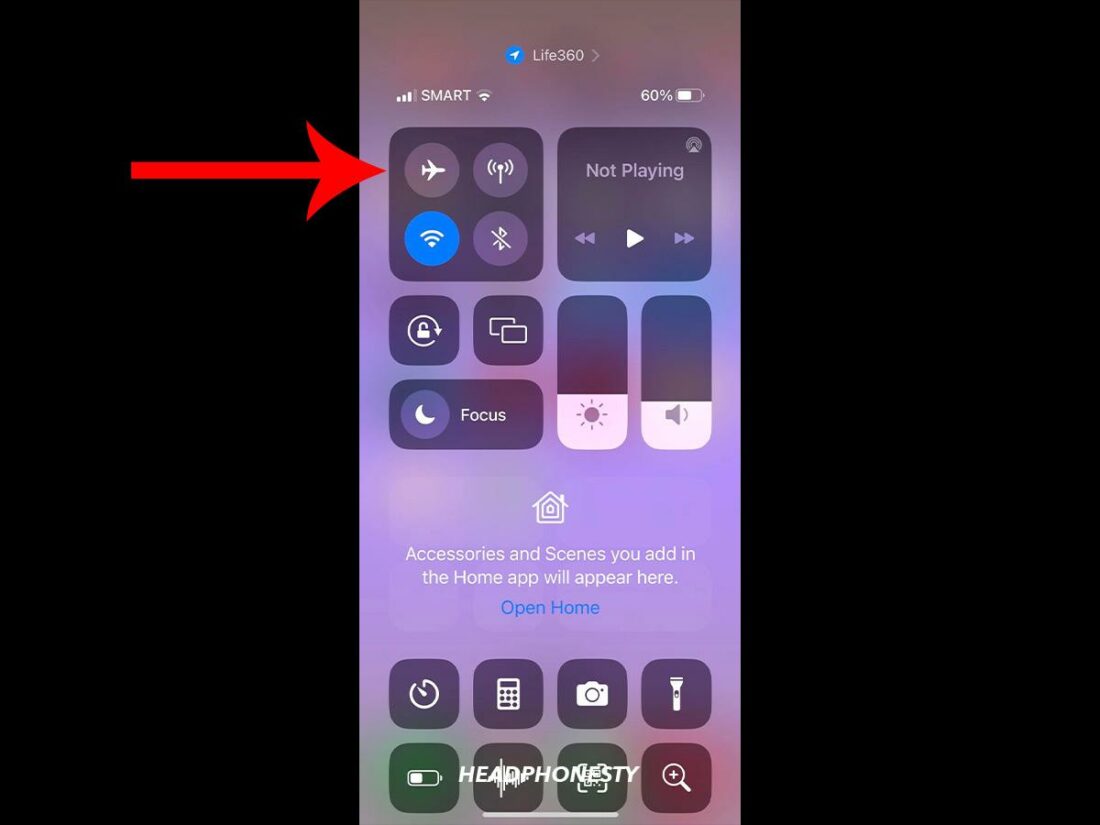
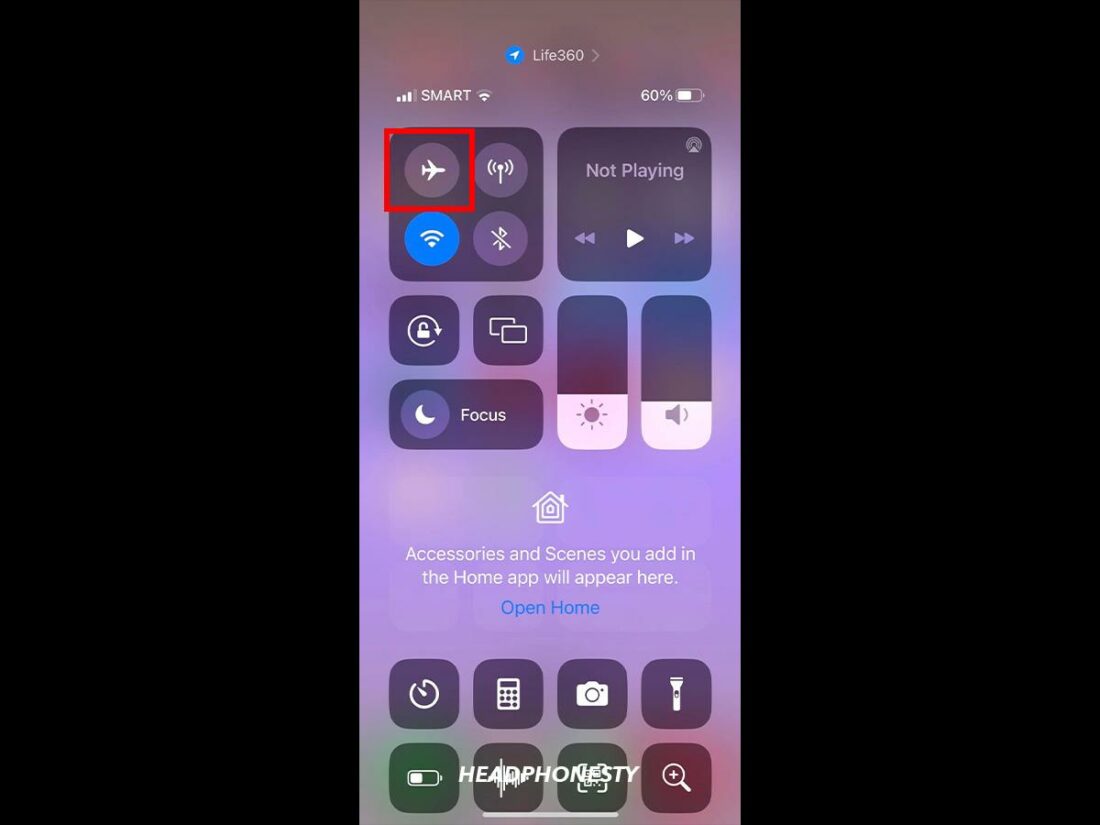
Swipe down from the top-right portion of the screen - You’ll see a button with an image of an airplane on it.
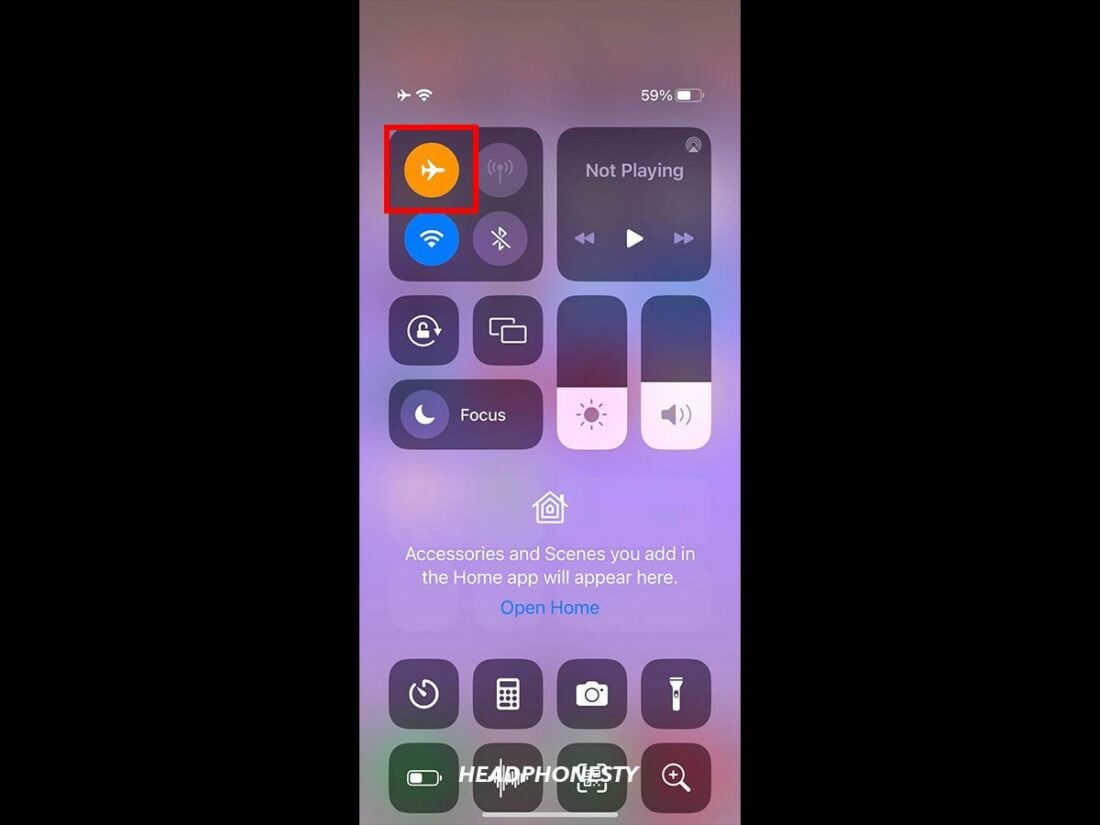
Airplane mode icon - Click on it once to turn it on.
Enable Airplane more - Click on it again after a few seconds to turn it off.
Turn off Airplane mode
For iPhone SE (2nd generation) or earlier:
- Swipe up from the bottom edge of the screen.
- You’ll see a button with an image of an airplane on it.
- Click on it once to turn it on.
- Click on it again after a few seconds to turn it off.
Restart your iPhone
Restarting your iPhone will reboot it to a fresh, clean slate. In a nutshell, it reboots your iPhone’s operating system and apps each time. Hopefully, this glitch will then be gone with the clean-up after restarting.
To restart your iPhone, simply follow these steps:
For an iPhone SE (2nd Generation), 6 or later:
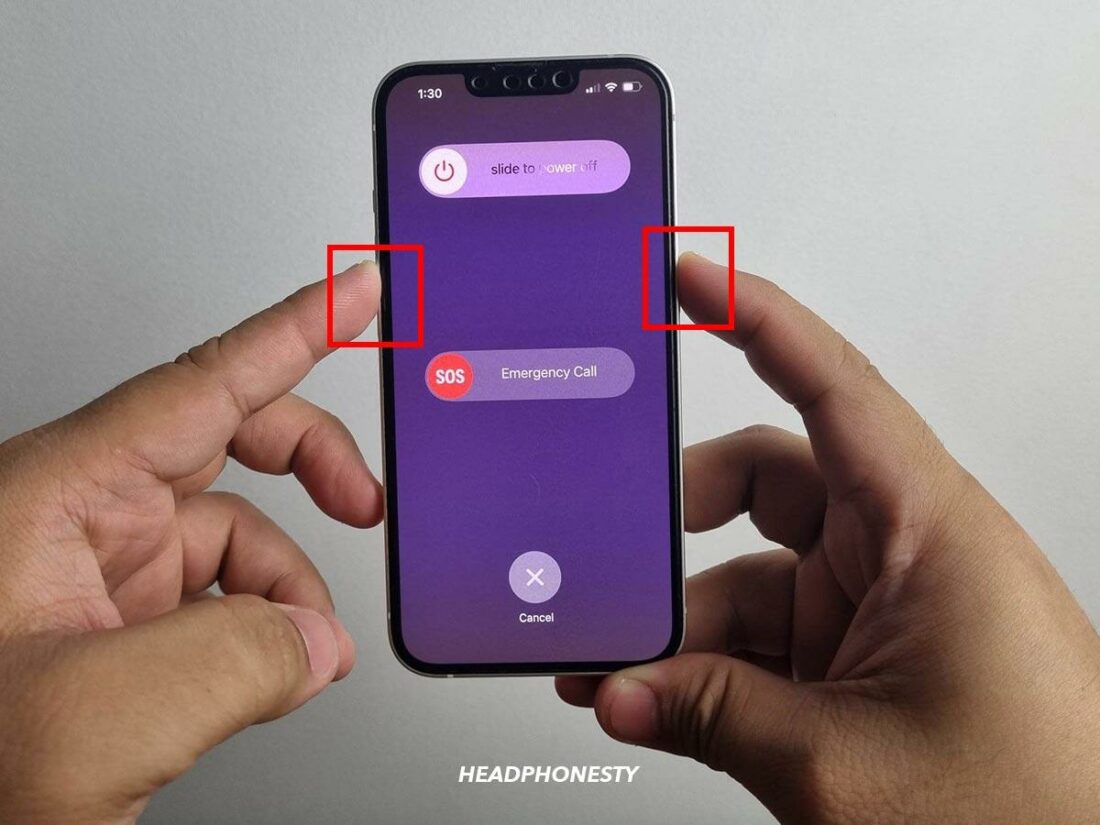
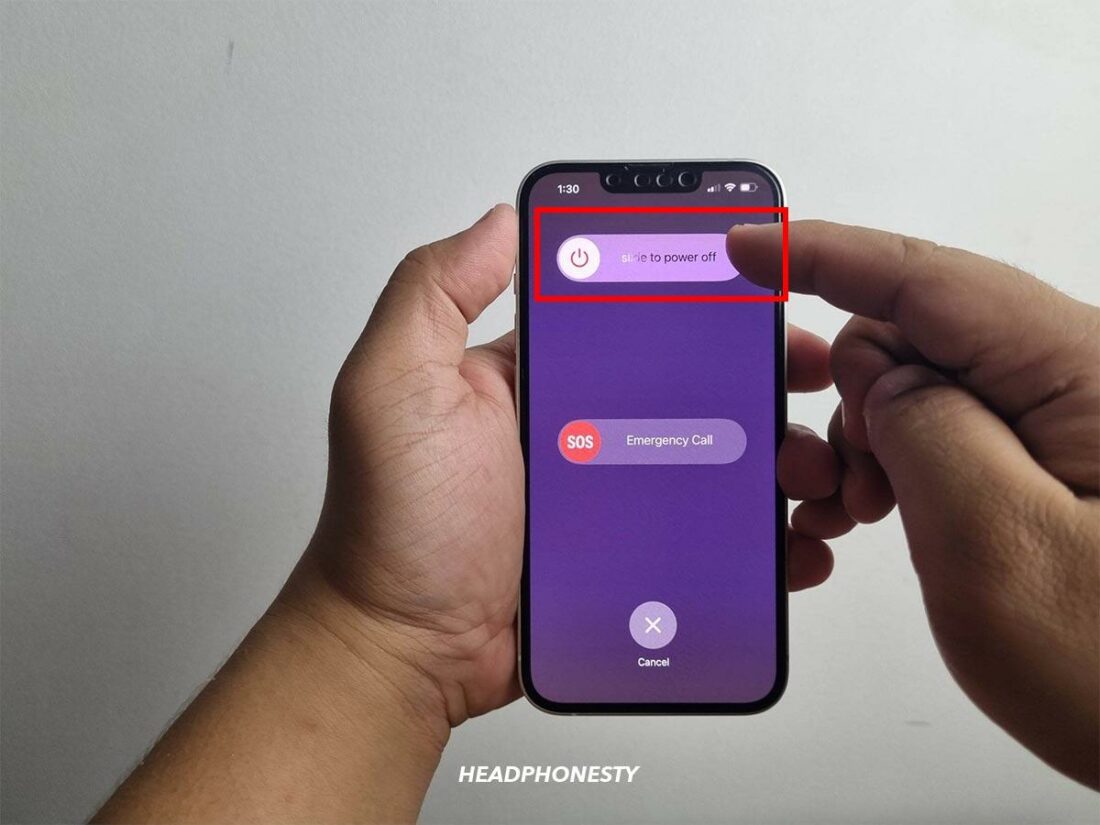
- Press and hold the volume button and side button until the power off slider pops up.
Press and hold the volume and side buttons - Drag the slider towards the Turn Off option.
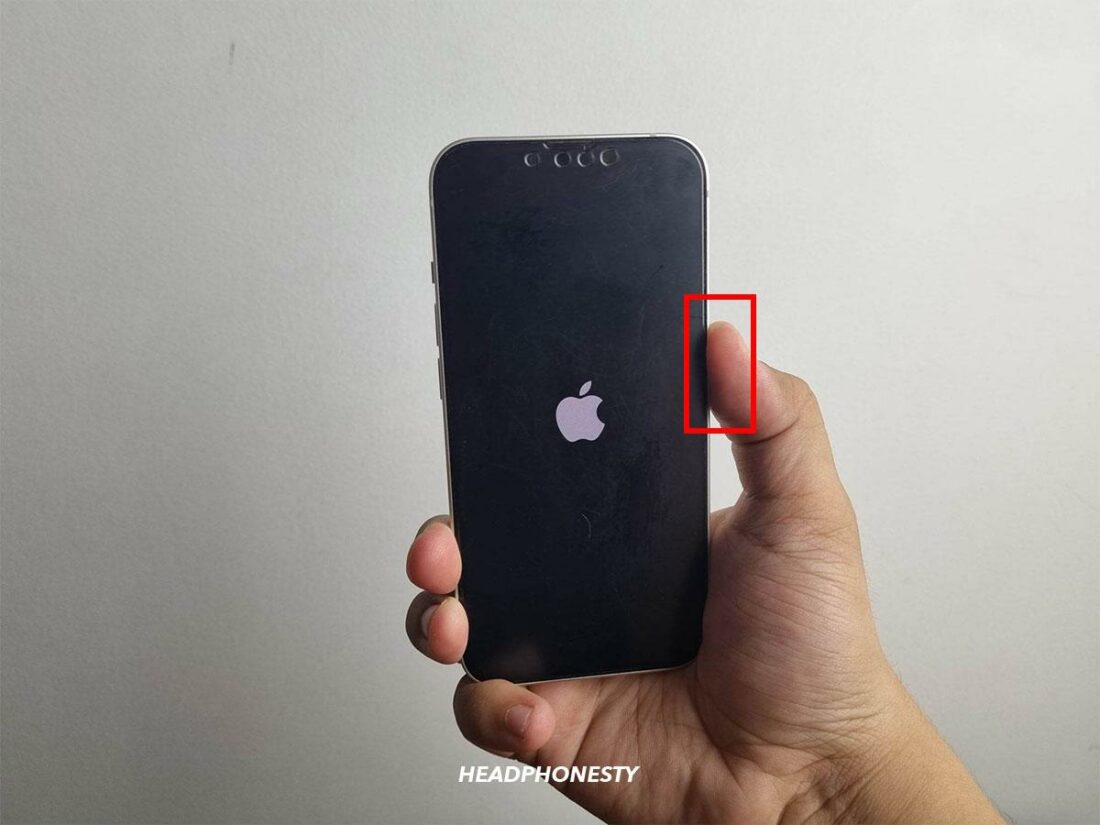
Turn off iOS - Wait a few seconds, then press and hold the side button again until you see the Apple logo to turn it back on.
Apple logo on iOS startup

For an iPhone SE (1st generation), 5, or earlier:
- Press and hold the button on the top-right part of the phone until the Power Off slider option appears.
- Drag the slider towards the Turn Off option.
- Press and hold the side button again until you see the Apple logo to turn it back on.
Change the iPhone’s audio output
Changing your iPhone’s audio output is the best temporary solution if you need a quick way to use it with its audio capability.
While it doesn’t get your iPhone out of headphone mode, it allows audio to be sent to other outputs, such as the iPhone’s speaker, instead of the supposedly connected headphones.
This way, you will still be able to use your iPhone for the time being while searching for a permanent fix.
Here’s how to change your audio output from your control panel:
For an iPhone X, 11, 12, 13, 14, or later:
- Swipe down from the top-right portion of the screen.
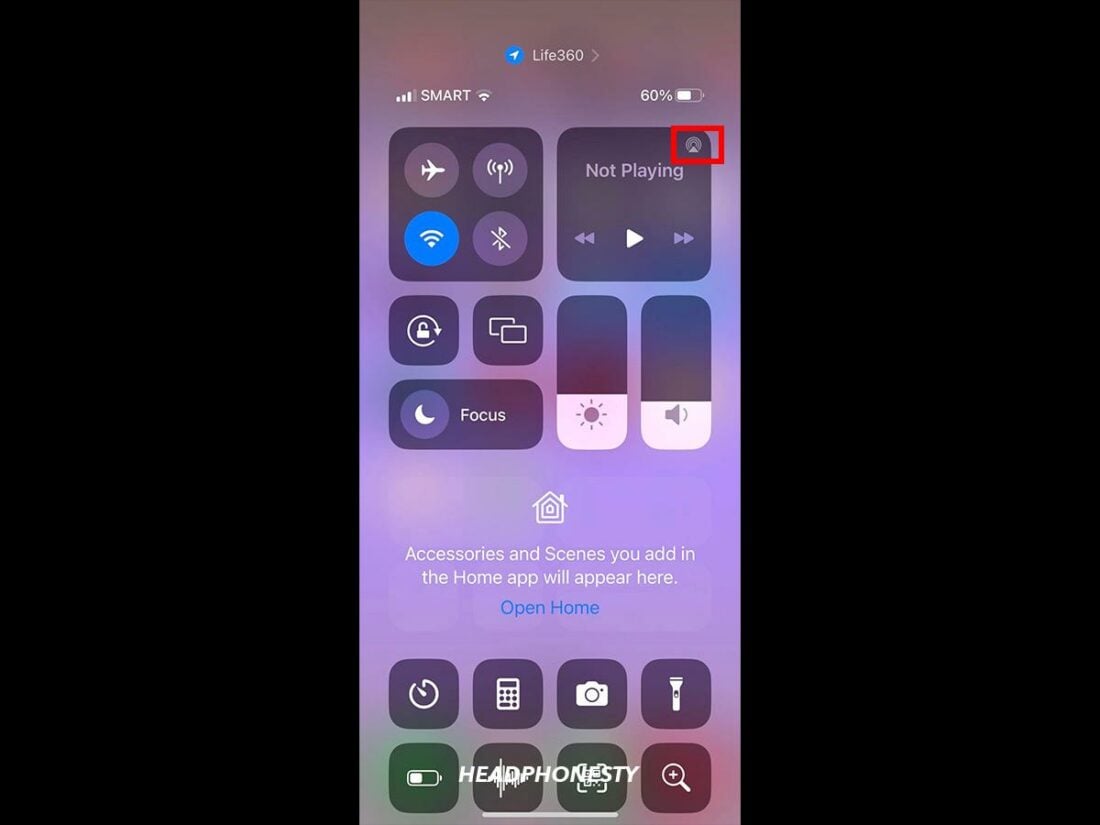
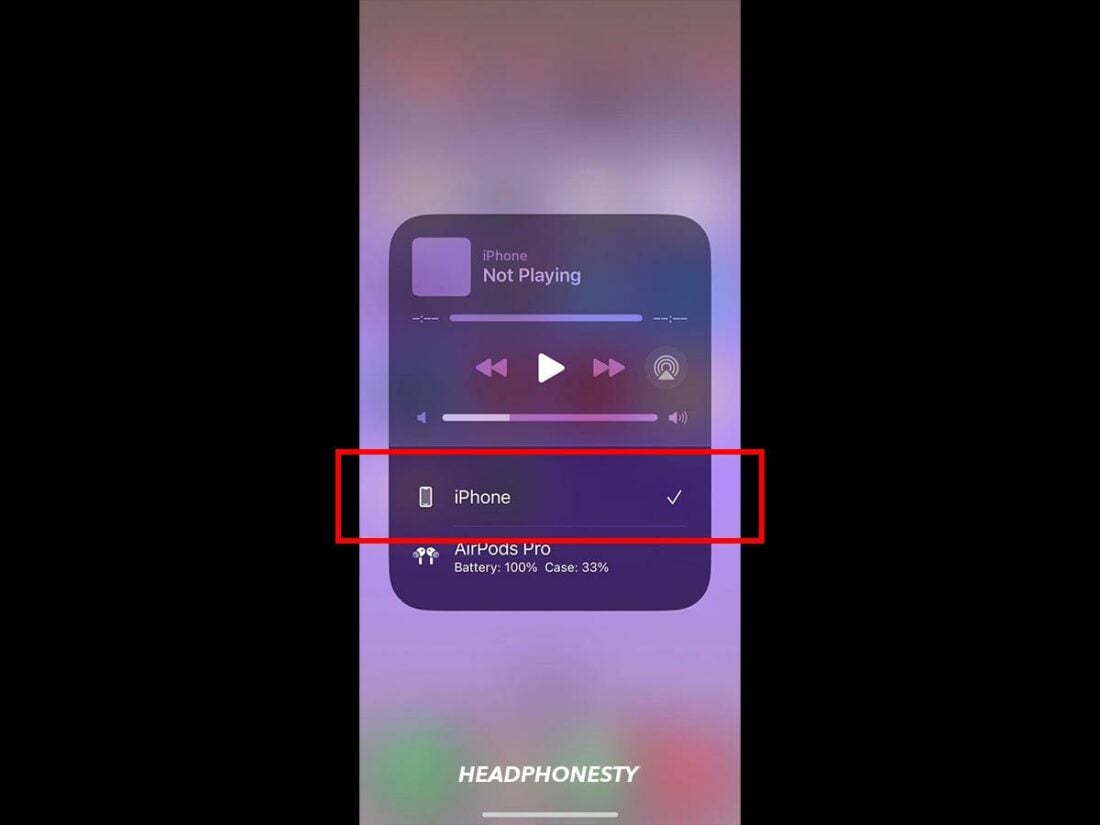
Open Control Center - You’ll see a small icon of three circles over a triangle at the top-right corner. This is the AirPlay icon.
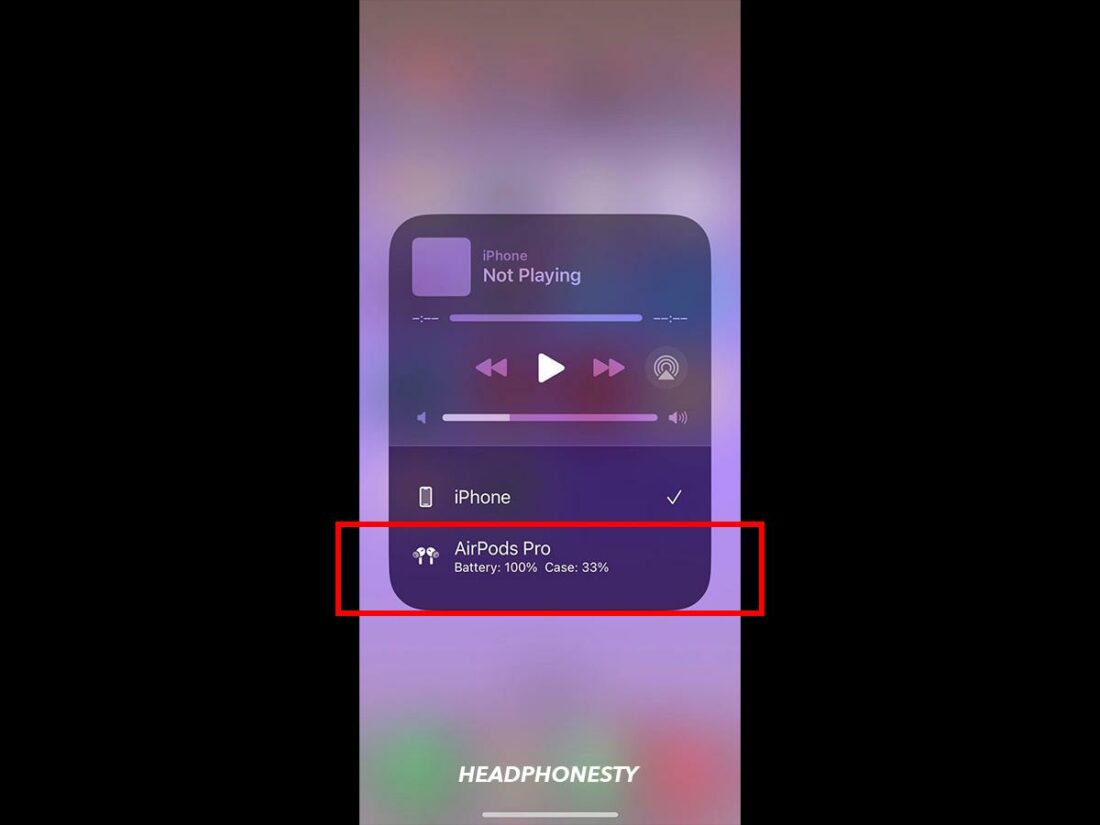
AirPlay icon - Click on it, and an audio output menu will pop up with the available audio output options.
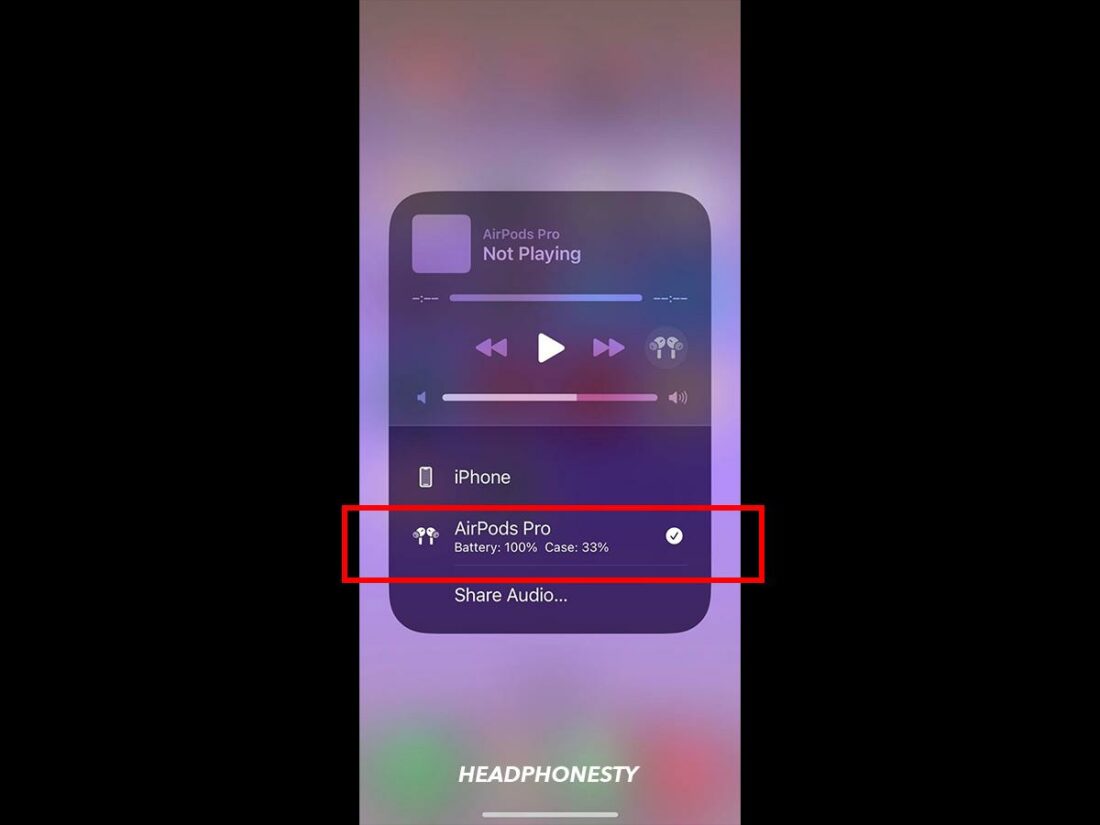
Audio output menu - The current output selected will have a white checkmark next to it.
iPhone speakers as current output on iOS - To change the audio output, click on the audio output device you wish to use.
Switching to a different audio output device - Once successfully changed, you will see the white checkmark beside the selected audio output device’s name.
White checkmark beside the selected audio output device’s name


For iPhone SE (2nd generation) or earlier:
- Swipe up from the bottom edge of the screen.
- You’ll see a small icon of three circles over a triangle at the top-right corner. This is the AirPlay icon.
- Click on it, and an audio output menu will pop up with the available audio output options.
- The current output selected will have a white checkmark next to it.
- To change the audio output, click on the audio output device you wish to use.
- Once successfully changed, you will see the white checkmark beside the selected audio output device’s name.
Reset your network settings
Last on the list of software fixes is to reset your iPhone’s network settings. Doing so will return the iPhone’s settings to their original default state, similar to when you first unbox it.
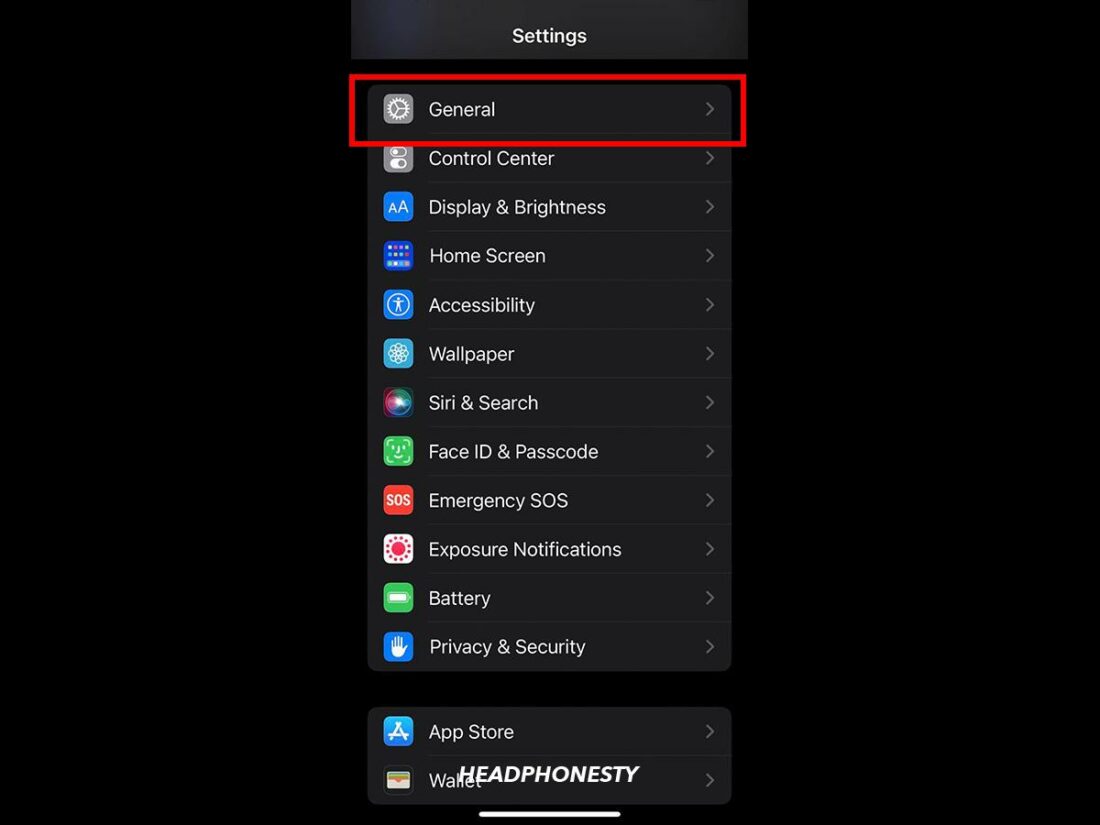
To reset your iOS Network Settings, follow these steps:
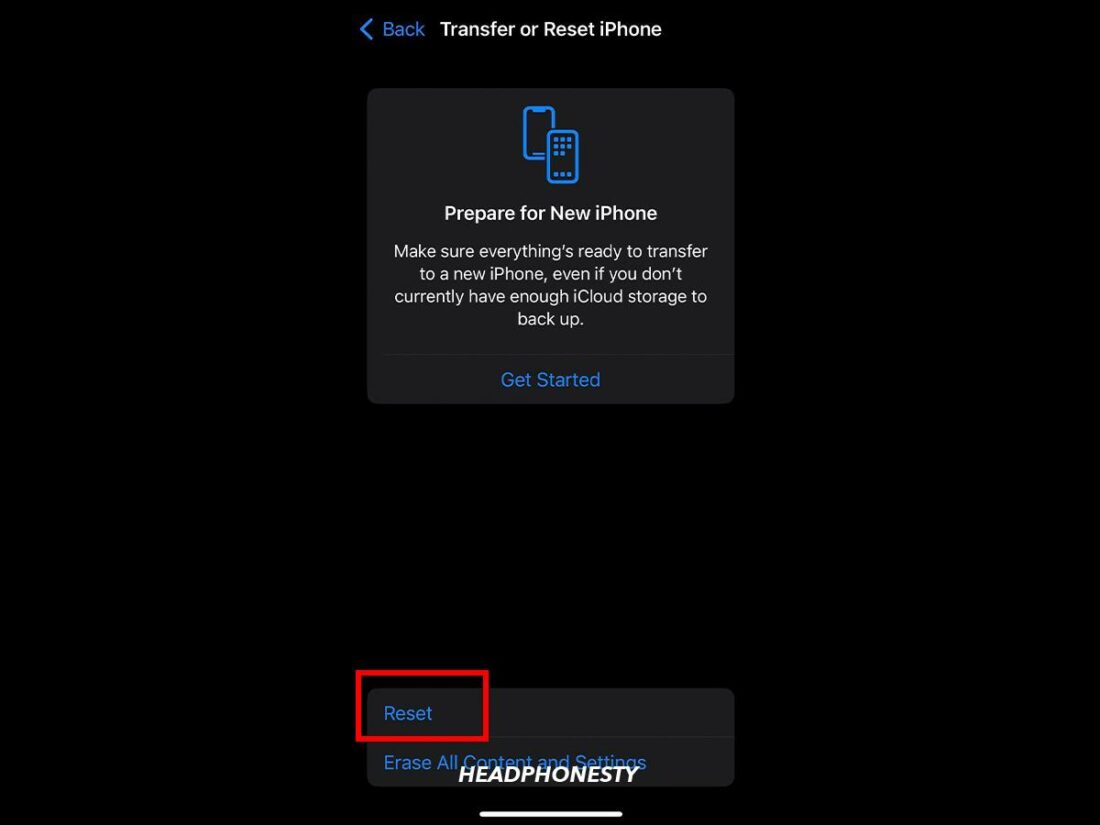
- On your iPhone, go to Settings > General.
iOS General settings - Select Transfer or Reset iPhone > Reset.
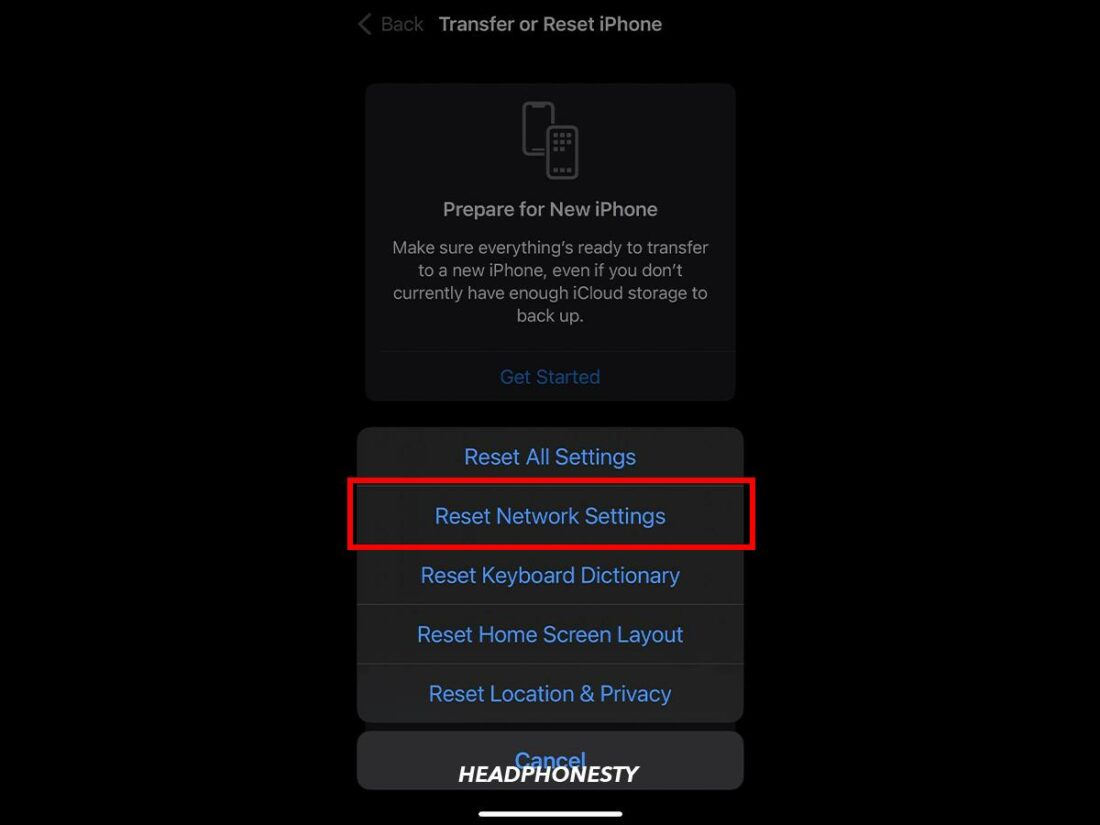
Select ‘Reset’ - Click Reset Network settings.
Resetting network settings on iPhone
Hardware Issues: Hardware Fixes to Get Your iPhone Out of Headphone Mode
If none of the above fixes worked, then perhaps it’s a hardware issue.
Let’s dive into how you might fix this and other headphone-mode-inducing problems.
- Remove any lint, debris, or dirt from the lightning port
- Check for water damage
- Wrap your headphones correctly
Remove any lint, debris, or dirt from the lightning port
Over time, the dirt build-up can harden and block the port, which might cause your iPhone to think it has plugged-in headphones.
The good news is that they can easily be cleaned and hopefully solve your iPhone’s misunderstanding with the ghost headphones.
Here are the tools you’ll need:
- Flashlight.
- Toothpick.
- A can of compressed air.
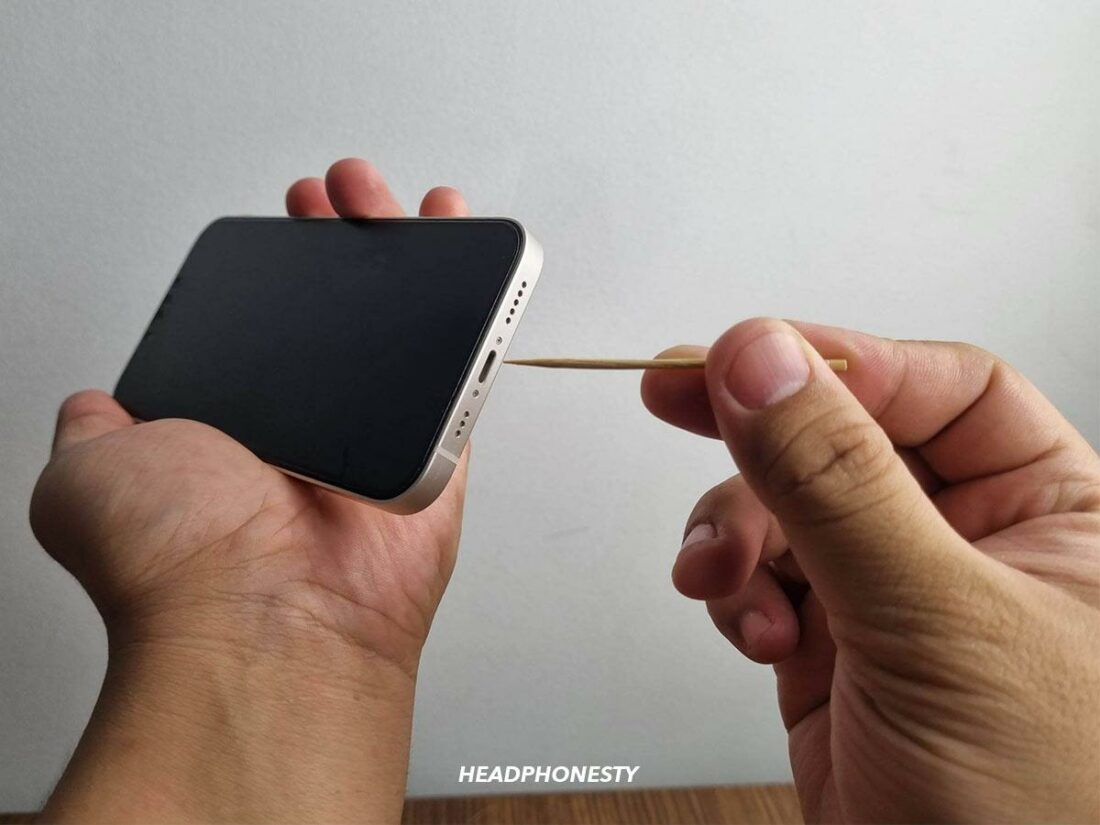
Follow these steps to clean the lightning port:
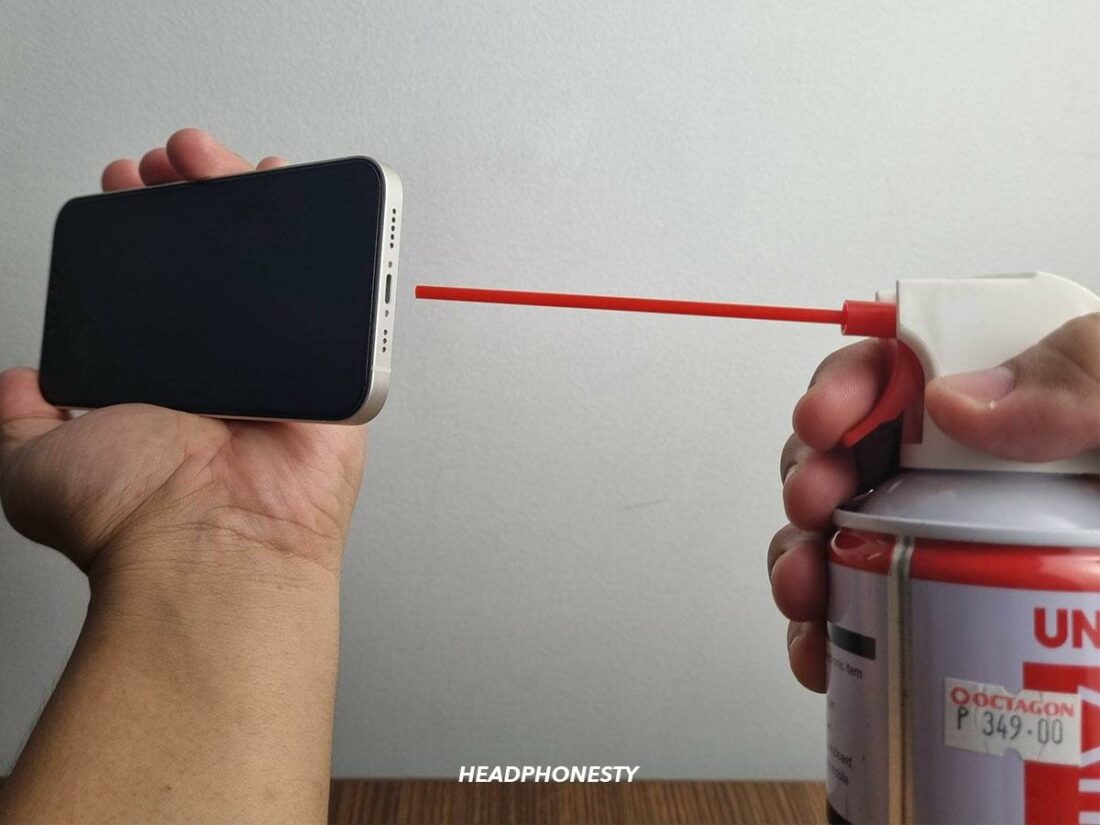
- Power off your iPhone before cleaning.
Power off your iPhone - Position the can of compressed air upright and release a few short, controlled bursts into the port. Keep compressed air can upright when releasing air into the port; otherwise, wet particles might be released into the port, possibly causing additional damage.
Using compressed air to clean audio port - Turn your iPhone on again and see if it works. If still not working, proceed to step 4 after powering it off.
Turn on iPhone - Gently insert the toothpick into the port and scrape it against the wall of the port. Proceed as gently as possible to prevent damaging any other delicate parts of electronics surrounding the lightning port. Any damage done at this point would highly likely be irreversible.
Use toothpick to clean the lightning port - After cleaning with the toothpick, release another burst of air into the port to remove any residual dirt.
Release another burst of air into the port to remove any residual dirt - Turn your iPhone on again to see if it’s working well now.
Turn on iPhone


What about iPhones that come with a 3.5mm headphone jack?
Dirt could also be accumulated in the 3.5mm headphone jack of older-model iPhones. Like those with lightning ports, you can also clean off the accumulated dirt within a few simple steps.
Check for water damage
Water damage in your headphone jack could also be why your iPhone thinks headphones are plugged in when they are not.
In the electronics world, water and electronics are always enemies. However, contrary to common beliefs, it is not water that would cause damage to electronics. Instead, it is the impurities and other minerals found in water.
The consequence of such exposure would usually be short-circuiting of your devices or corrosion of the materials in contact with the water.
When the materials in the headphone jack or lightning port corrode, this might lead to unwanted material build-up at the connector with the headphones. Thus, confusing the iPhone and causing it to believe that it has plugged-in headphones.
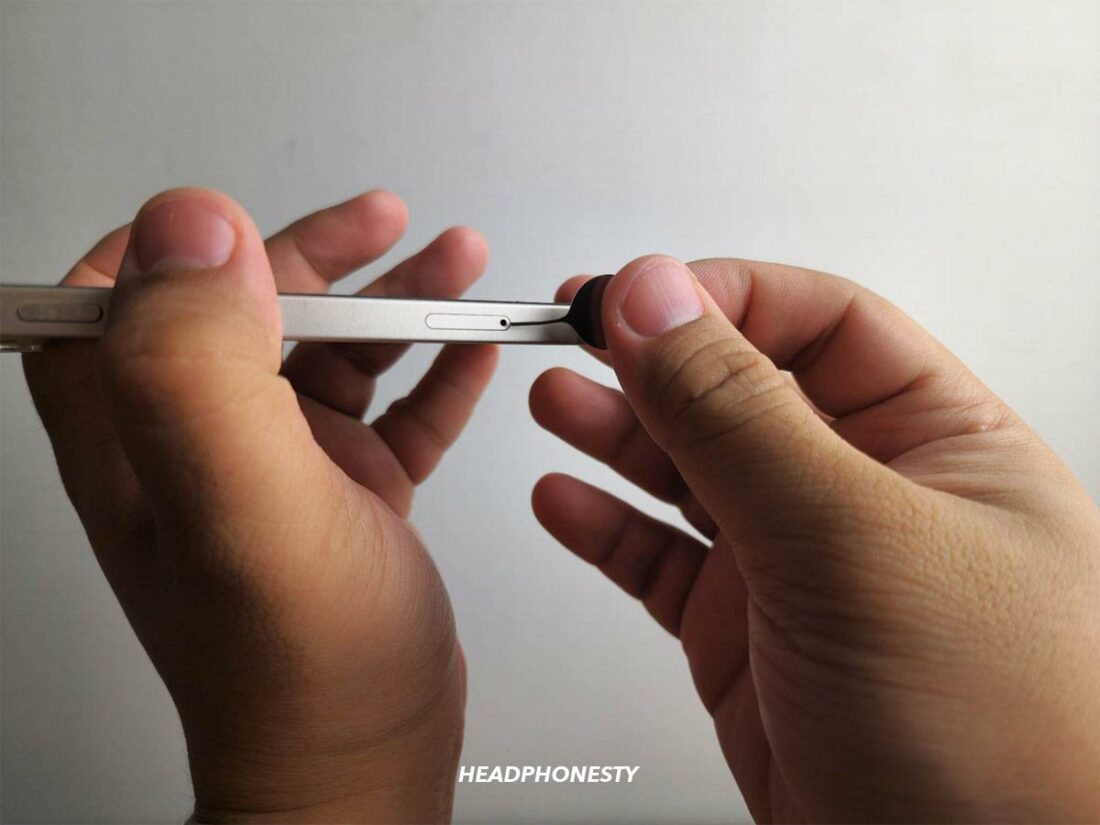
Fortunately, there’s a quick way to check:
- Using a sim ejector tool, pop out the SIM card tray.
Sim card ejector tool - Using a small flashlight or another light source, shine a light inside the SIM card slot to look for a red color from the slot.If you see red, that means the Liquid Contact Indicator (LCI) has been activated. It’s a mechanism within the iPhone that is triggered (turns red) when certain parts of the phone get in contact with liquids. It should appear white or silver if there is no damage.
Use flashlight to check for Liquid Contact Indicator (LCI)

At this point, you have two options, and the first is to take it to a repair center. Or you can go the DIY route and try the following tips to save your iPhone from water damage:
-
- First, unplug all cables and accessories from your iPhone. Only plug them back in when your iPhone is fully dry.
Unplug all cables and accessories from your iPhone - With the lightning connector pointing downwards, tap your iPhone gently against your palm to remove excess liquid stuck in your iPhone.
Tap your iPhone gently against your palm - Leave your iPhone in a dry area with good ventilation to air-dry.
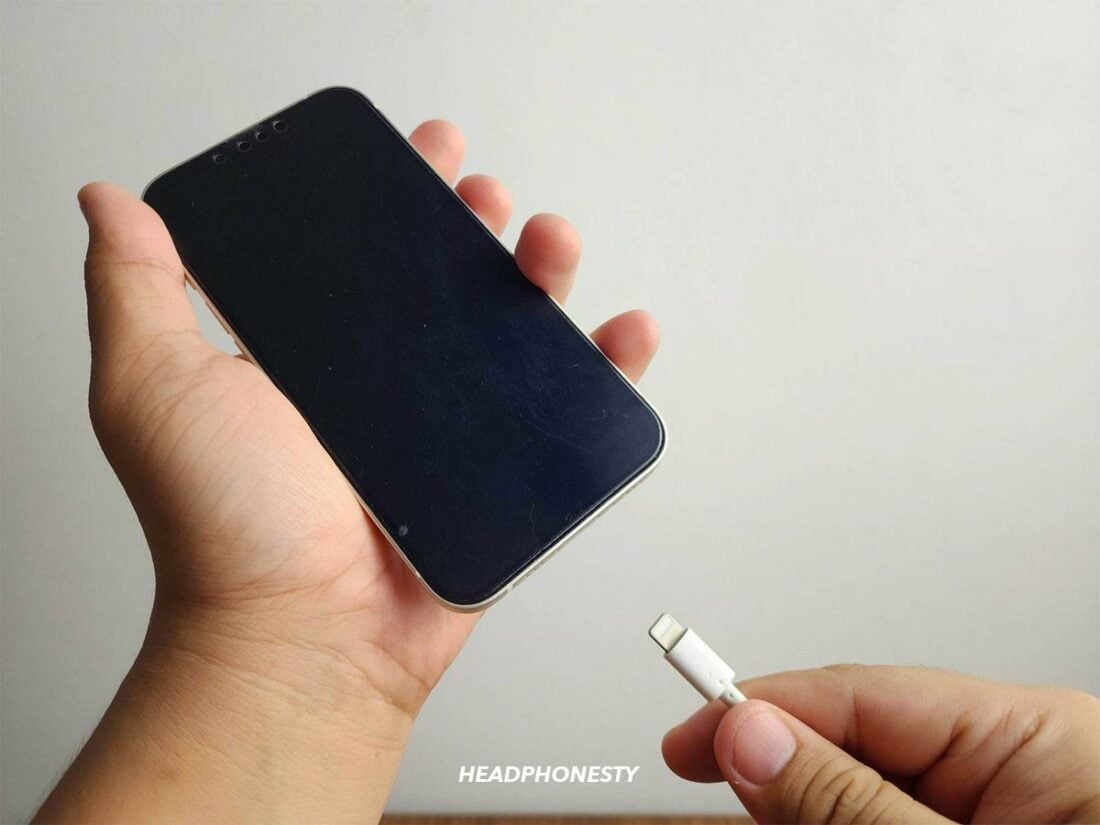
Leave your iPhone to dry - After at least 30 minutes of air-drying, try plugging in your headphones or your charging cable to see if the liquid alert comes up again.
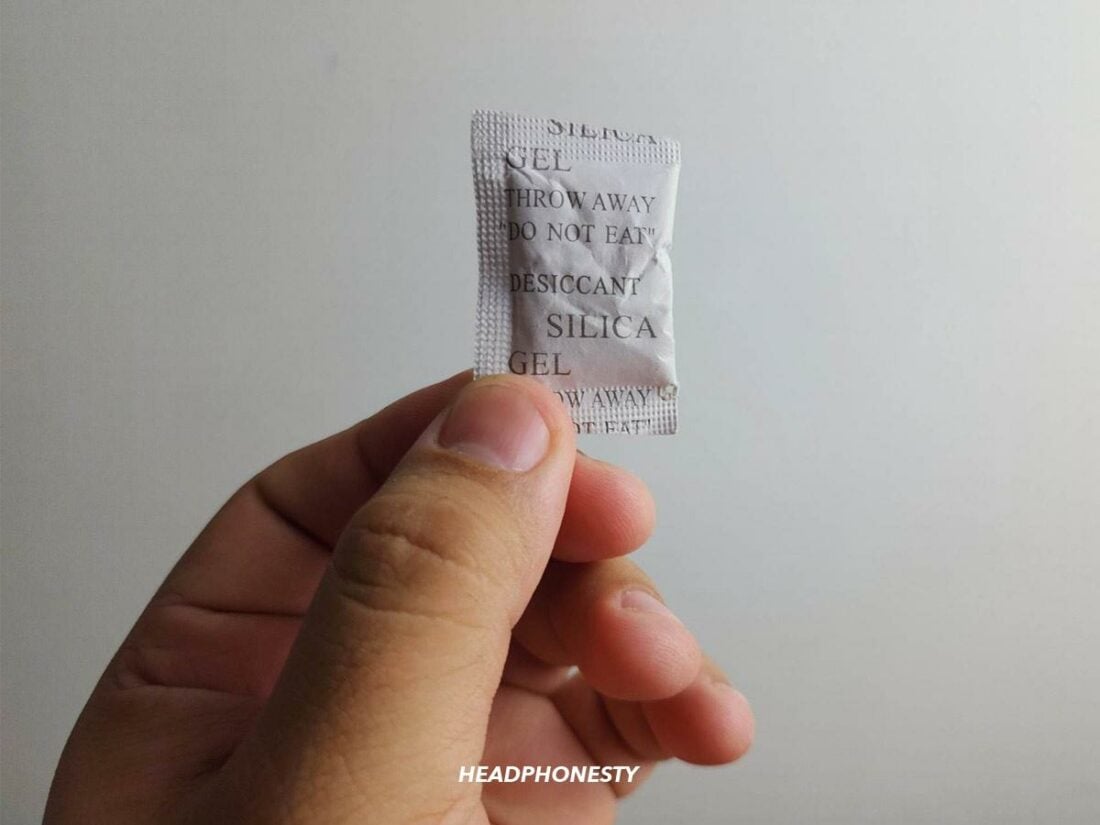
Plug in charging cable - If you wish to speed up the drying process, you can use silica gels (the small packets you find in boxes of shoes or medicine bottles). Do this by placing your iPhone in an airtight container with silica gels and leaving it for a few hours.
Silica Gel
- First, unplug all cables and accessories from your iPhone. Only plug them back in when your iPhone is fully dry.

Wrap your headphones correctly
Have you been coiling up your headphones wire while having it still plugged into your iPhone? Coiling up the wires is not an issue except when you’re coiling them without unplugging them from your iPhone.
The constant pull from your headphones wire coiled up will loosen the connection between your headphones and your iPhone’s motherboard.
When this happens, it increases the likelihood of damage that could lead to errors like getting your iPhone stuck in headphone mode.
It’s best to keep your headphones unplugged when not in use and stored in a protective case or pouch.
How to Get My iPhone Out of Headphone Mode if None of These Steps Work?
If you’ve run out of luck and can’t get out of headphone mode even after trying the steps above, then the next logical step is to take it to an Apple-recognized center for repairs.
Apple has support centers globally that you could reach out to for advice and booking of appointments.
As much as possible, always avoid third-party shops you’re not sure you can rely on or trust.
Conclusion
The next time you get your iPhone stuck in headphone mode, don’t panic. Whether the issue is hardware or software-related, there are plenty of ways to fix it.
By now, if you’ve followed some of the instructions outlined above, there’s a high chance that you’re no longer suffering headphone-mode troubles. Hopefully, we’ve helped you solve those problems, meaning your headphone issues are a thing of the past!
Did we help you get your phone out of headphone mode? What method did you use? If you have a unique way of getting an iPhone unstuck out of headphone mode, we’d love to hear about it. Let us know in the comments below!
I tried inserting the Q-tip into the headphone jack and it literally worked it two seconds. SO happy!
;( not for me
Thanks for the article. I utilized TunesKit iOS System Recovery to get off the headphone mode stuck issue.
Cleaning the jack worked for me too! There was hardly any dirt on the cotton bud but after a few careful twists, my phone went back to normal. Thank you.
Wow. I use the cotton wool Q-tip and my phone works normal immediately. Thanks for the guidelines. It is really helpful 100%
It really work with the first trial ✊🏿✊🏿✊🏿Thank for ur support ✅✅✅✅
I got drenched in rain. I thought it was due to moisture. I switched off and dried the iPhone the whole night. It worked. Thank you so much for the post.