
Your one-stop guide to resetting any Sony Bluetooth headphones.
In theory, minor issues with Sony headphones, like connection problems and buggy controls, can be solved with a quick factory reset. Ideally, this should be a 30-second task.
But the myriad of Sony headphones models and button configurations can make it difficult to figure out how to reset them.
Fortunately, you can reset most Sony headphones with a simple press-and-hold of the power buttons. And this article will cover this general resetting method as well as the model-specific procedures. Keep reading as we walk you through the step-by-step process of resetting nearly all Sony headphones below!
How to Reset Sony Headphones: General Guide
As mentioned earlier, Sony has a wide range of headphones models with different designs, buttons, and controls.
But, while Sony doesn’t have a universal resetting method that applies to all of their headphones, there is a general method for resetting that applies to most models, including the WH-1000XM5, WH-1000XM3, WH-XB910N, WHCH710N, and WH-CH720N.
Here’s how you can reset your Sony headphones to factory settings:
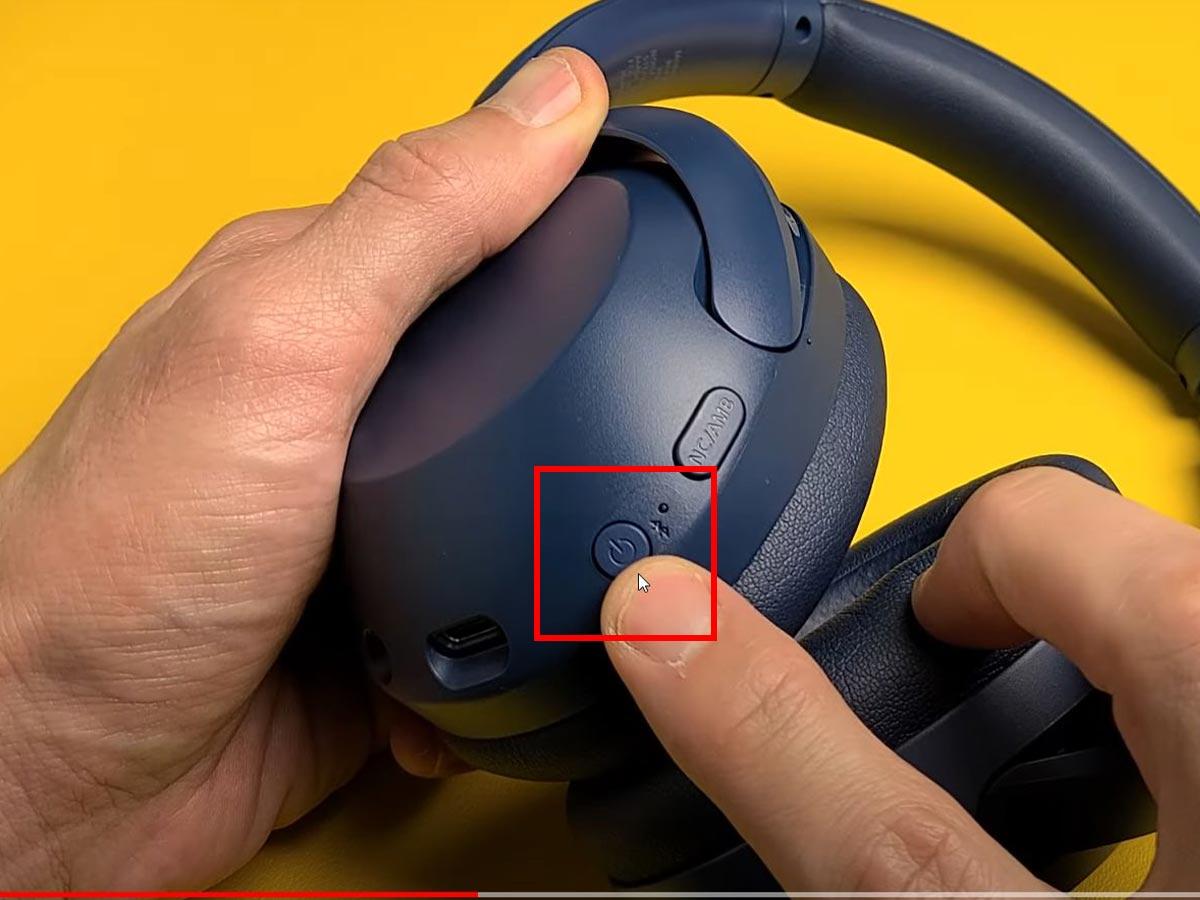
- Power off your headphones by holding the power button for about 3 seconds or until the indicator light turns off.

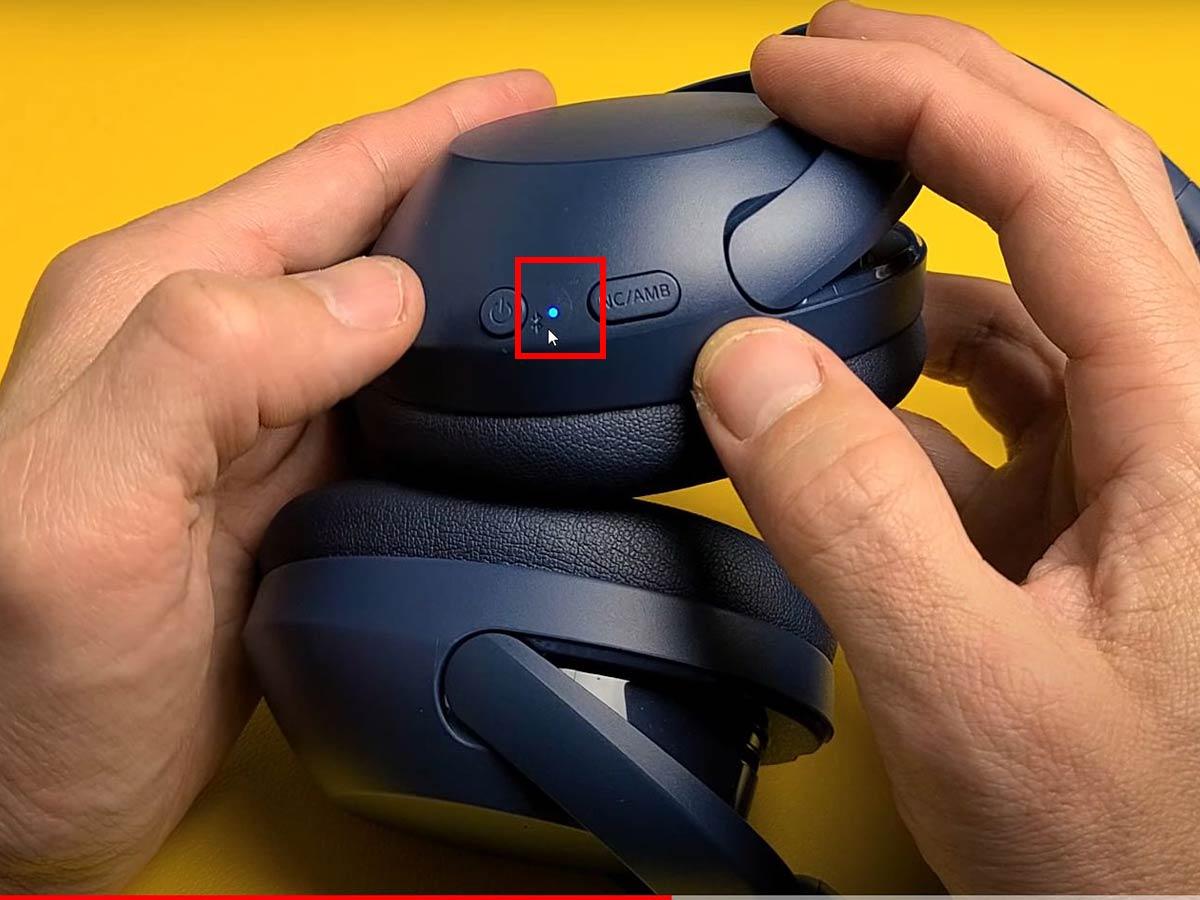
Turn off your headphones. (From: Youtube/WorldofTech) - Hold the power and noise-canceling buttons for about 10-15 seconds until the indicator light flashes blue four times.
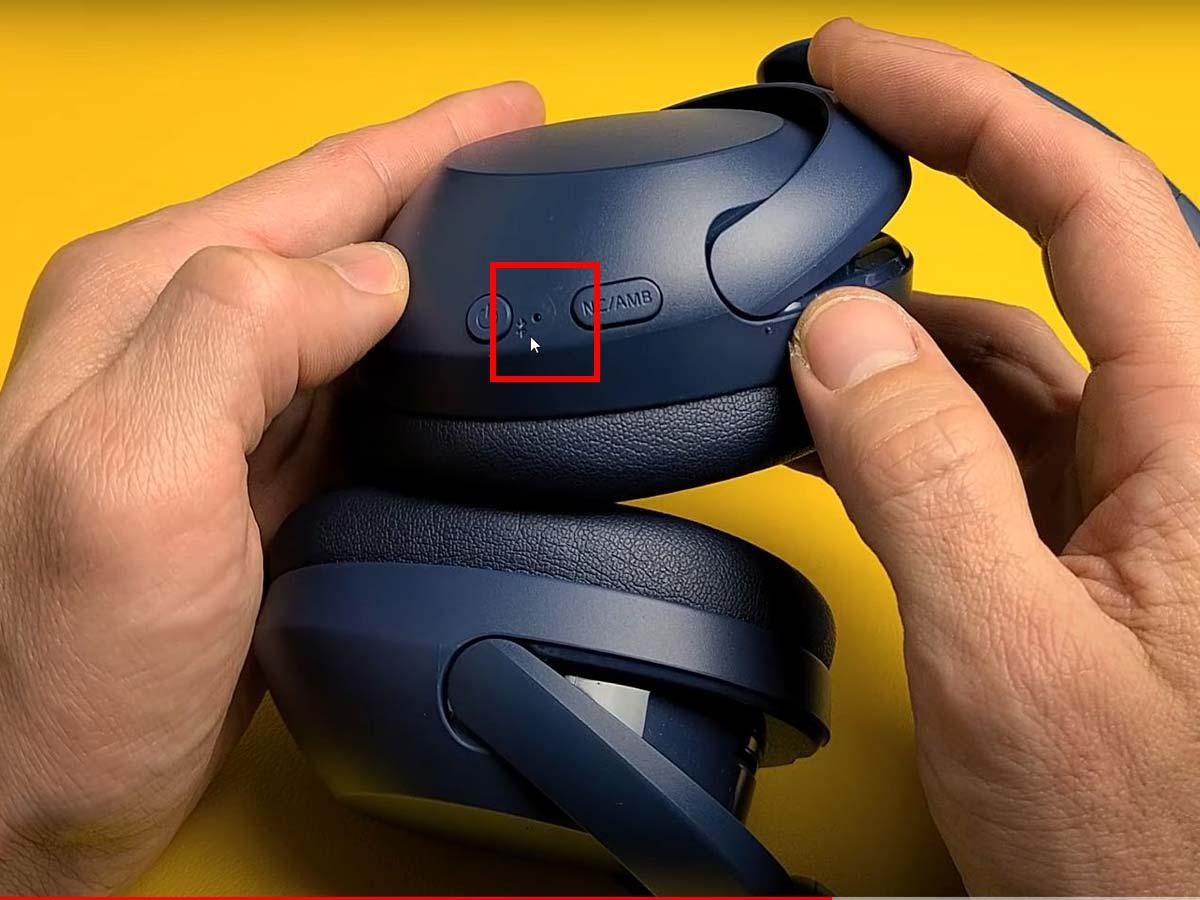
Resetting Sony headphones. (From: Youtube/ WorldofTech) - Once the indicator light stops blinking, let go of the buttons.
Indicator light stops blinking. (From: Youtube/ WorldofTech) - Re-connect your headphones to your device. They should now be restored to factory settings.
If you visit the Sony website, they have separate instructions for resetting and initializing the headphones. Their resetting instructions retain the pairing information and user settings and simply restart the headphones. The initialization process, on the other hand, restores the headphones’ factory settings.
The steps above are for initializing the headphones, as the approach covers all bases. Should you wish to just restart the headphones, do the same steps while the headphones are charging.
How to Reset Sony WH-1000XM4
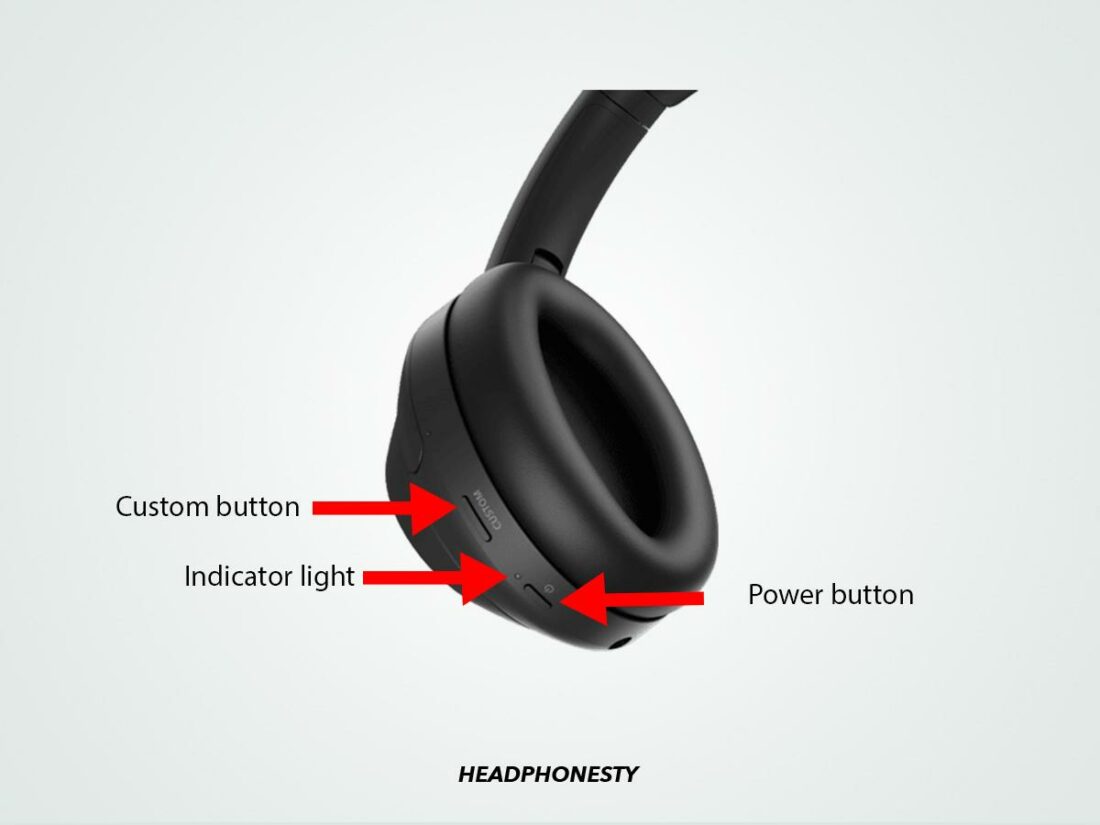
The Sony WH-1000XM4 have a slightly different button layout with the addition of the Custom button – which can confuse some users when it comes to resetting the headphones.
By default, the Custom button can be used to toggle between active noise cancellation (ANC) and ambient sound with a single press and optimize ANC performance with a long press. However, you can change its function to other actions, such as activating the voice assistant, from the Sony Headphones Connect app.
With that out of the way, here’s how you can reset the Sony WH-1000XM4:
- Power off the headphones by holding the power button on the left ear cup for about 2 seconds or until the indicator light turns off.
- Press and hold the Custom and the power buttons simultaneously for about 7 seconds until the indicator light flashes blue four times. This means your headphones have been reset.
- Let go of the buttons and wait for a few seconds.
- Power on your headphones and reconnect them to your device.
How to Reset Sony WH-CH510 and WH-CH520 Headphones
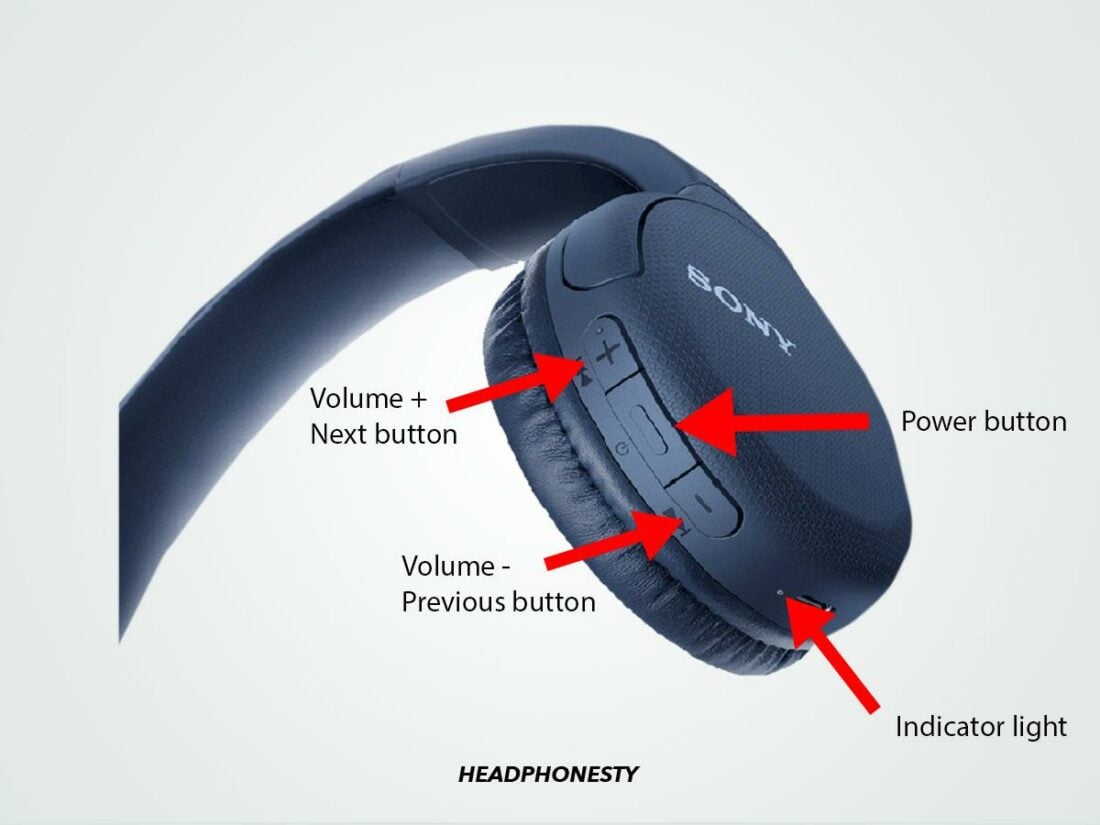
The WH-CH510 and WH-CH520 are excellent entry-level Bluetooth headphones with well-rounded features. But since they don’t have ANC or Custom buttons like Sony’s higher-end models, the reset methods for these models slightly differ from the ones that do.
Here’s how you can reset the Sony WH-CH510 and WH-CH520:
- Turn off the headphones by pressing the power button for about 2 seconds.
- Hold the power and volume down buttons simultaneously for about 10 seconds or until the indicator light flashes blue four times.
- Let go of the buttons and wait for a few seconds.
- Power on the headphones and re-pair them with your device.
How to Reset Sony MDR-1000X Headphones
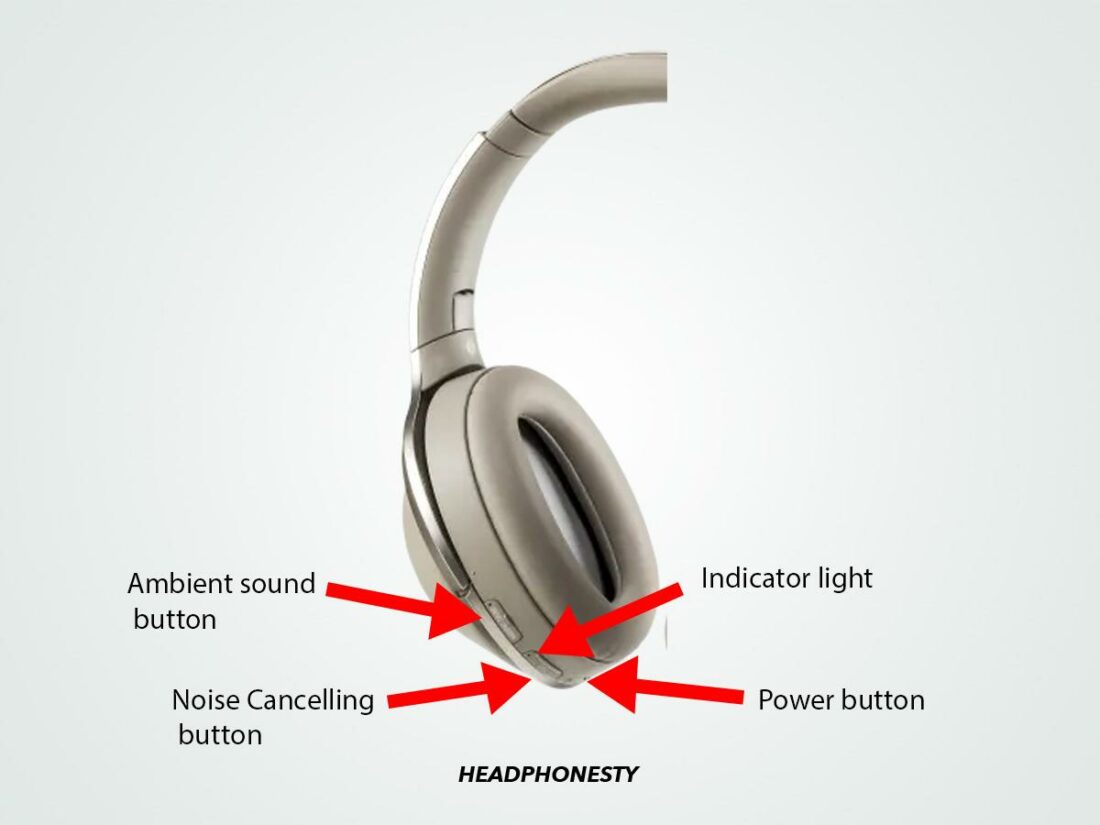
The Sony MDR-1000X headphones also have slightly different button combinations on the ear cups. They have dedicated buttons for both noise cancellation and ambient sound, which can confuse many people when it comes to resetting.
Here’s how you can reset the Sony MDR-1000X:
- Turn off the headphones by holding the power button for about 2 seconds.
- Press and hold the power button and the Ambient Sound button simultaneously for about 7 seconds or until the indicator light flashes blue four times. This indicates that the headphones have been reset.
- Release the buttons and wait for a few seconds.
- Power on the headphones and reconnect them to your device.
How to Reset Sony INZONE H7 and H9 Headphones
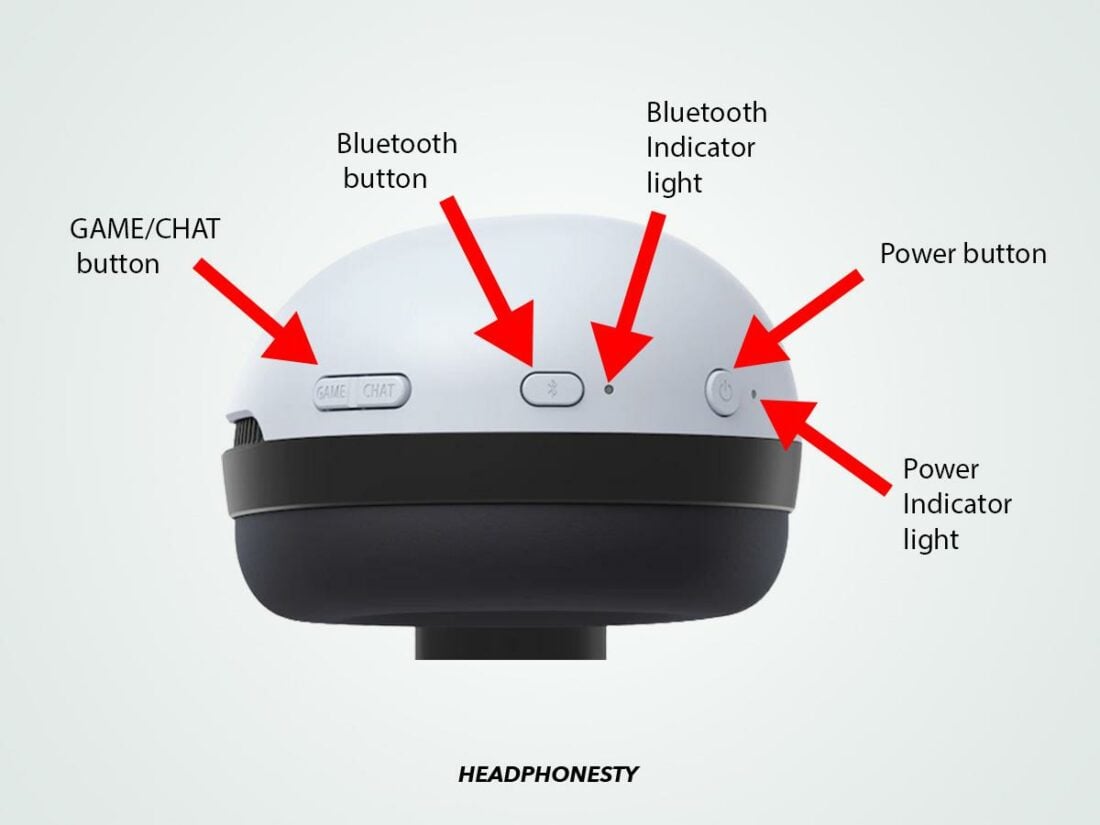
The Sony INZONE H7 and INZONE H9 are designed as gaming headphones, and thus the buttons and indicator lights are also slightly different from other Bluetooth headphones.
Here’s how you can reset the Sony INZONE H7 and H9:
- Turn off the headphones by pressing the power button for about 2 seconds. Make sure to unplug the USB-C cable as well.
- Press and hold the power and Bluetooth buttons for at least 10 seconds or until the indicator light flashes white four times. For INZONE H9, the indicator lights are located at the end of the headband on each ear cup. For Inzone H7, the indicator light is at the bottom of the right ear cup.
- Let go of the buttons and wait for a few seconds.
- Power on the headphones and reconnect to your device.
What to Do if Sony Headphones Won’t Reset
If the reset method above doesn’t work for your headphones, there may be an underlying issue that you need to address first. Here are some of the easy troubleshooting methods you can use if your Sony headphones won’t reset.
Recharge your headphones
The first thing you should cross off the list of potential causes is the power/battery issue. If you haven’t charged your headphones for a few days, then it’s highly likely that they’re low or out of battery. If there’s no battery, you won’t be able to reset your headphones.
In that case, you need to properly charge your headphones first before attempting to reset them.
Use an AC adapter plugged directly into a wall socket for about 3 hours to ensure your battery is properly topped off.
Avoid using the USB ports on your laptop or PC since they have sub-par power delivery. When your Sony headphones are charging, the indicator light should be a steady red color. If your headphones won’t take any power, check out our guide on fixing Bluetooth headphones not charging.
Bring them to Sony Customer Support for repair
If you still experience issues resetting your headphones even with a full battery, your unit may have hardware defects. In that case, your best option is to contact Sony’s customer support to ask for repairs or replacements.
Sony offers a limited one-year warranty for their headphones, starting from the purchase date. You’ll only need the proof of purchase, which comes in the box, to claim your warranty.
To contact Sony’s customer support, visit Sony’s customer support page, then select headphones. Next, you can select your preferred method of communication.
You can select to live chat, chat with an agent, a direct call to Sony, or wait for a customer service agent to call you.
DIY hardware repair
Given how much you may end up paying for out-of-warranty repairs, there’s an argument for doing a DIY hardware repair.
By doing so, you can get your headphones working without spending as much money. However, there is a degree of risk that you may damage other components, resulting in even more broken parts.
A Reddit user found that with daily use, the wires inside your headphones can move around and come into contact with the motherboard. Unfortunately, only about 60% of the motherboard is properly isolated. When the wires come into contact with the exposed motherboard, it can cause a shortage, causing the headphones to malfunction.
If you suspect that’s the case, you can peek inside the headphones and see if there’s any contact between the exposed motherboard and the wires. To do this, you’ll need some tools to help you:
- A plastic pry tool
- Small Phillips screwdriver
Here’s how to do it:
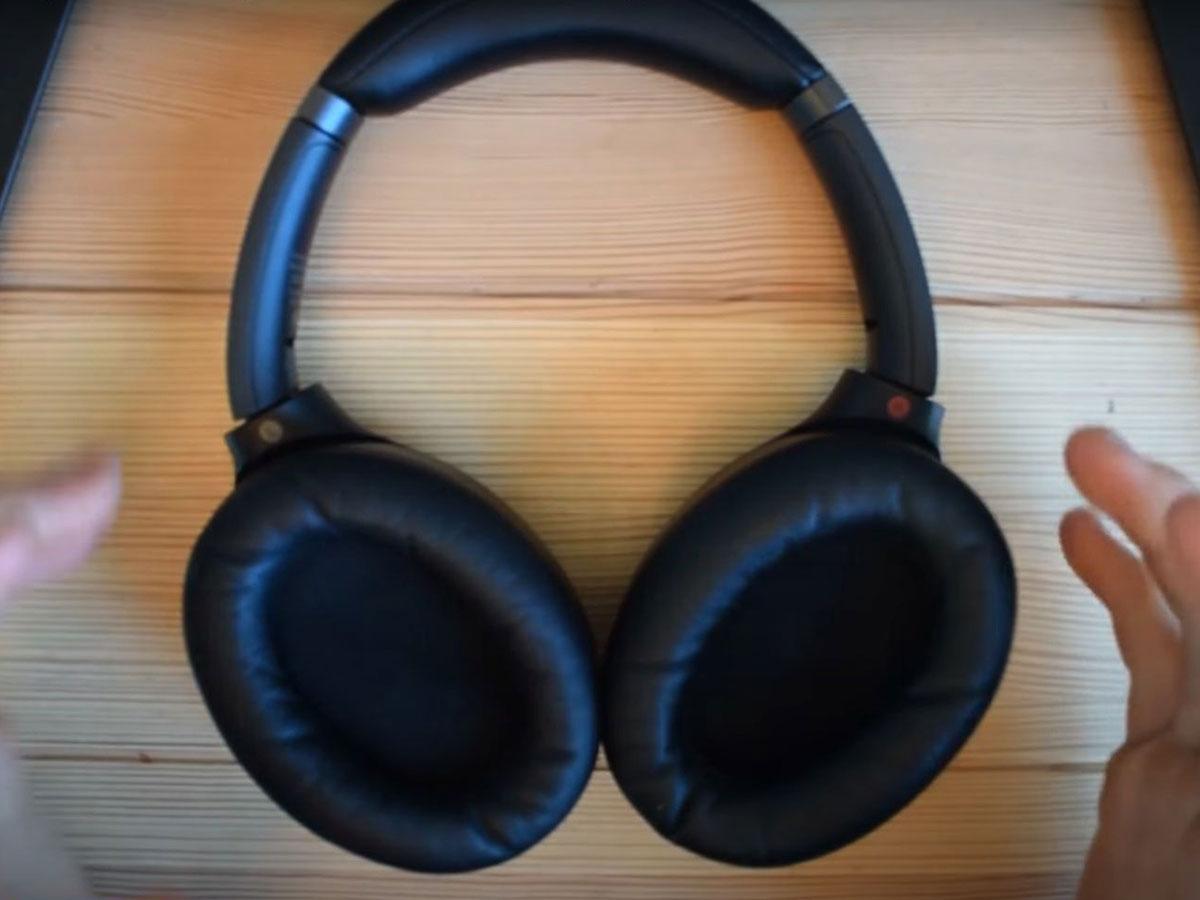
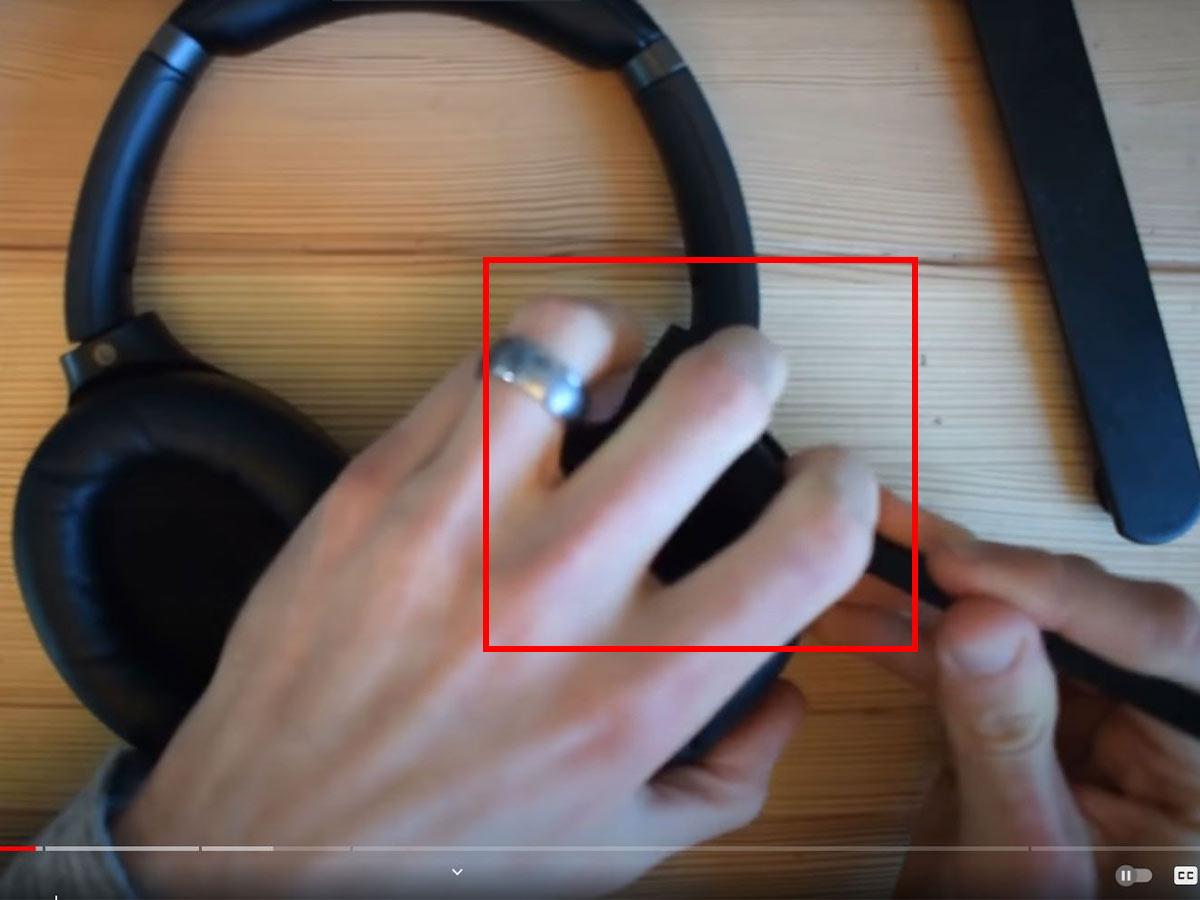
- Place your headphones on a flat surface with the earpads facing up.
Sony headphones on a flat surface with the ear pads up. (From: Youtube/Jon Tries to Fix Things) - Using a prying tool, remove the ear pads from the left ear cup (which should be on your right-hand side).
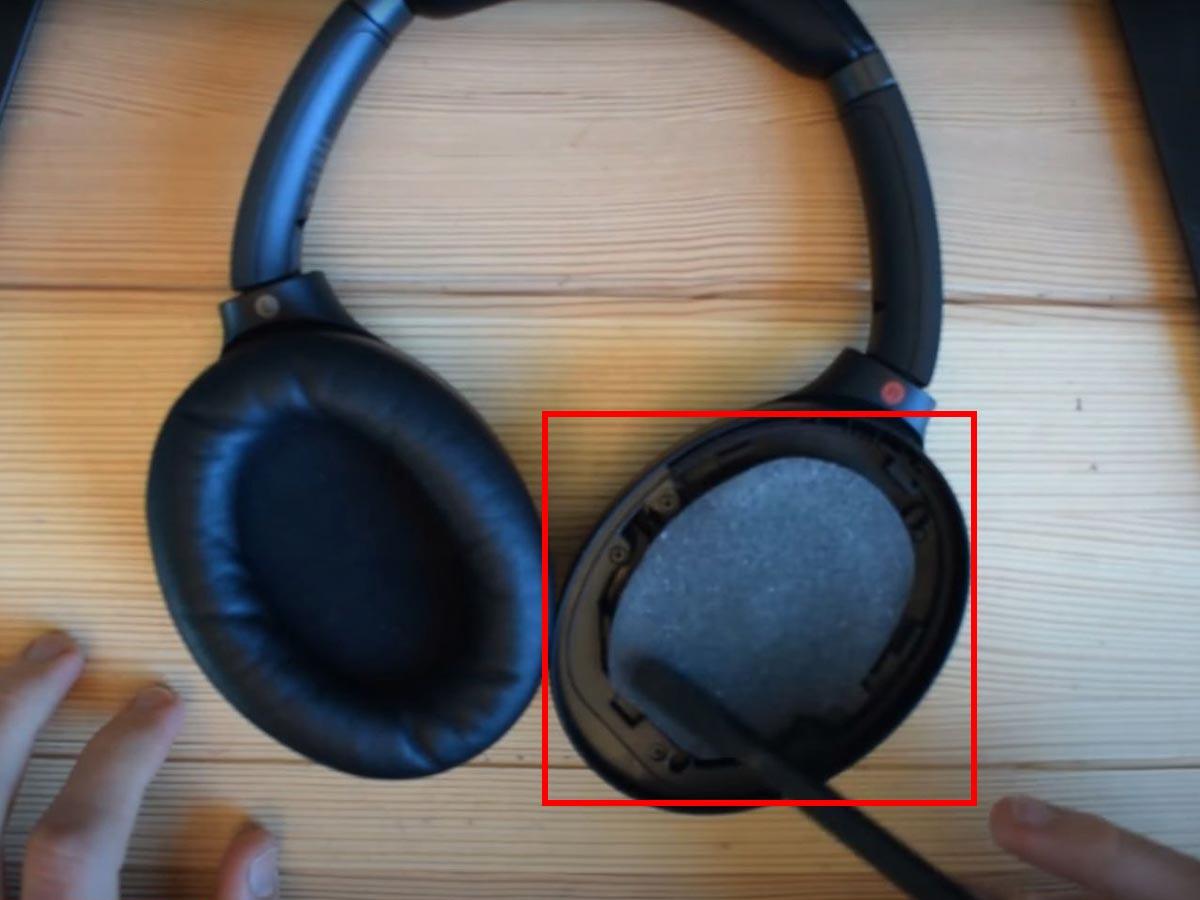
Remove the ear pads on left ear cup. (From: Youtube/ Jon Tries to Fix Things) - Remove the speaker cover mesh.
Removed mesh. (From: Youtube/ Jon Tries to Fix Things) - Remove four small screws holding the ear cup together.
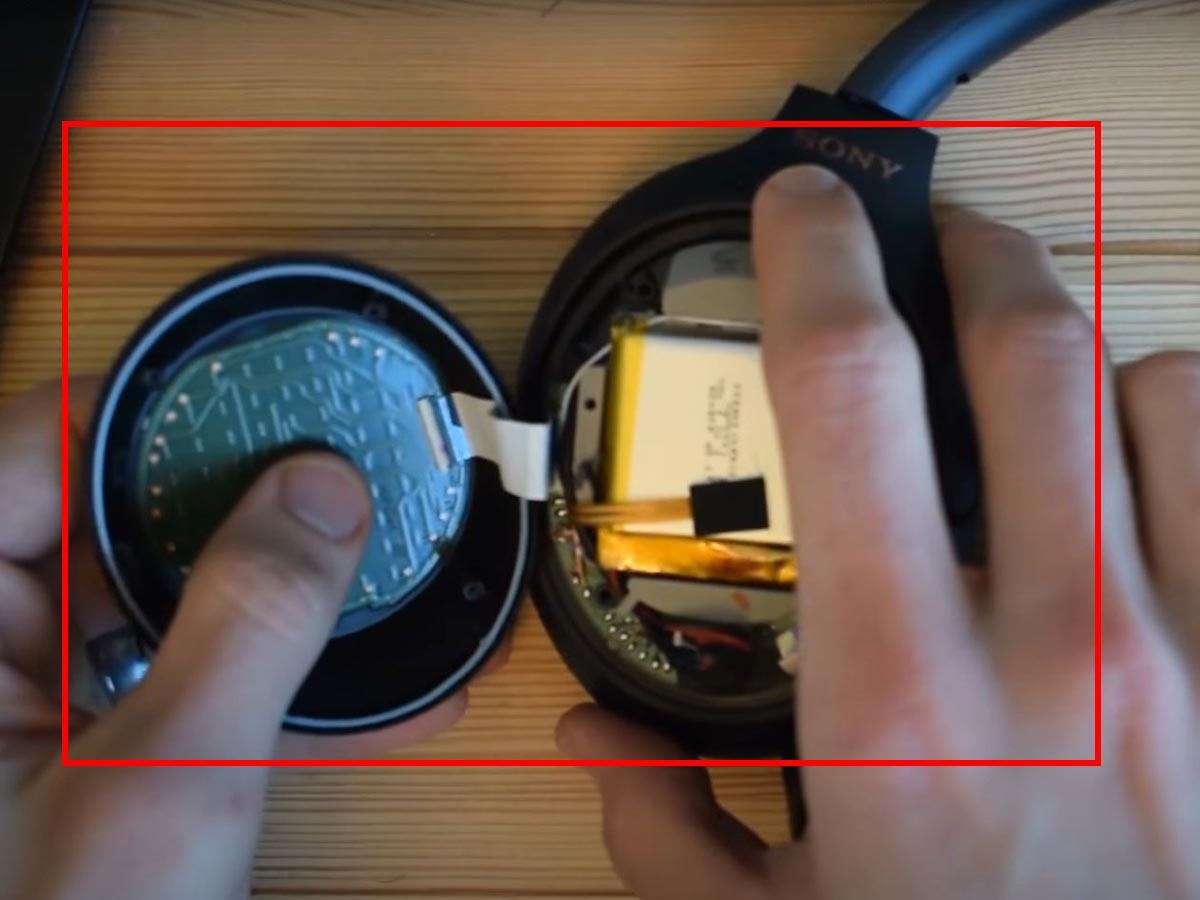
Removing screws. (From: Youtube/ Jon Tries to Fix Things) - Flip the headphones over, then take off the outer cover.
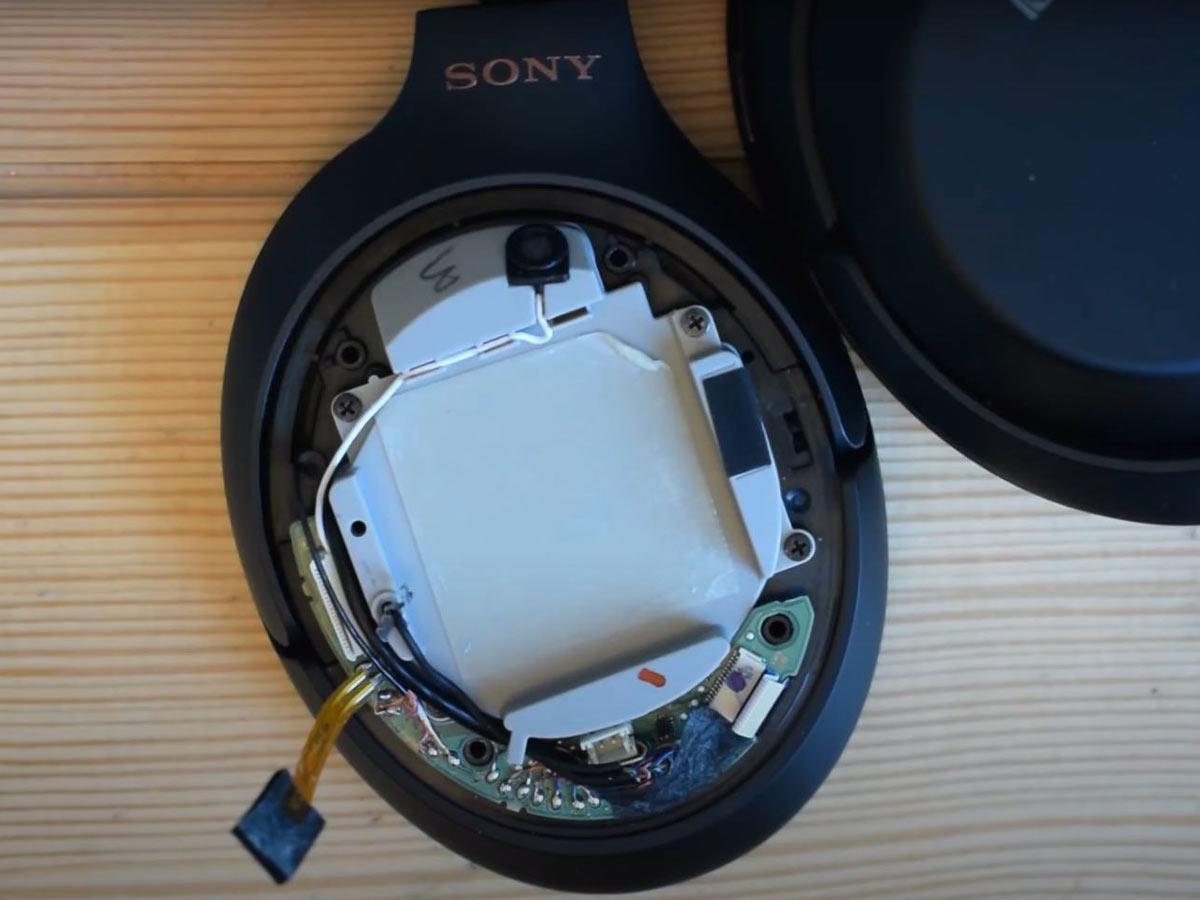
Removing outer cover. (From: Youtube/ Jon Tries to Fix Things) - Gently remove the touch panel connector.
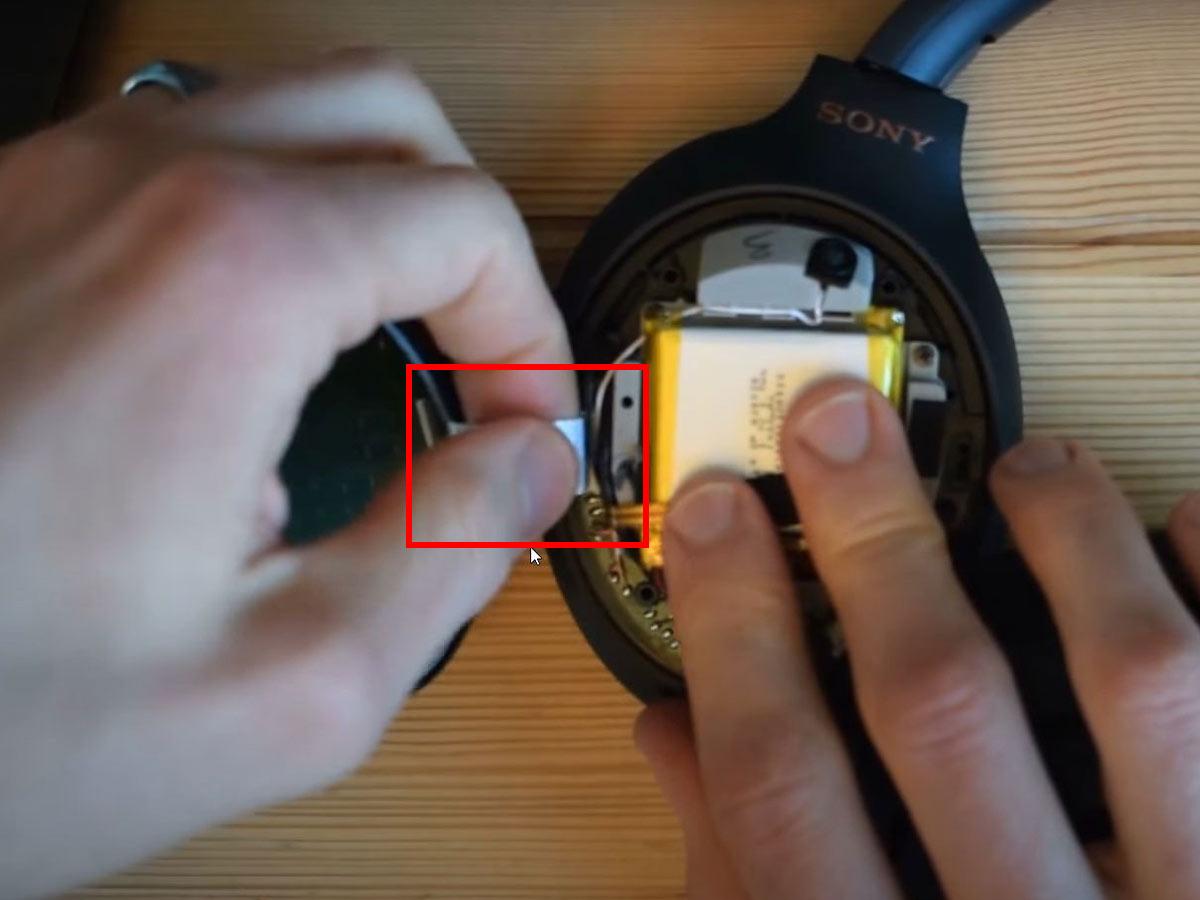
Touch panel connector. (From: Youtube/ Jon Tries to Fix Things) - Examine the wires and see if they are touching the exposed motherboard.
Examine the wires. (From: Youtube/ Jon Tries to Fix Things) - Lift up the wires, then cover the exposed motherboard with a piece of electrical tape.

Conclusion
After following the troubleshooting methods above, you can now reset your Sony headphones and get them working normally again. But if you ran into a dead-end, it may be time to claim your warranty or get your hands dirty with DIY repair work.
Did this guide help you to reset your Sony headphones? And if it didn’t, what Sony headphones do you have? We’d love to hear your thoughts in the comments!
Tengo unos auriculares Sony WH-CH510, el caso es que el led emite una luz roja que no se quita ni apagando el equipo, lo que hace que se descargue rápido la pila. A la hora de querer inicializarlo, no se restaura de fabrica. No se que hacer.