Learn how to connect Beats headphones to your iPhone and troubleshoot issues for a disruption-free listening journey.
Apple’s popular Beats headphones are known for their high-quality sound and smooth compatibility with iOS devices.
Despite this, there can still be occasional hiccups that take you away from enjoying your music. These issues can even prevent you from connecting your Beats headphones to your iPhone in the first place.
Not to worry, you can remedy these as long as you know the basics of connecting Beats headphones to an iPhone and some troubleshooting tips for when they won’t connect. This article will go through all that and more, so keep reading!
How to Connect Beats to iPhone
One key feature that makes easy connectivity possible with Beats headphones is their automatic pairing function. This uses the power of Bluetooth and the “Beats Proprietary Platform” processing chip, to instantly connect two paired devices, eliminating the need for a manual setup.
To connect your wireless Beats to your iPhone, check out the steps below:
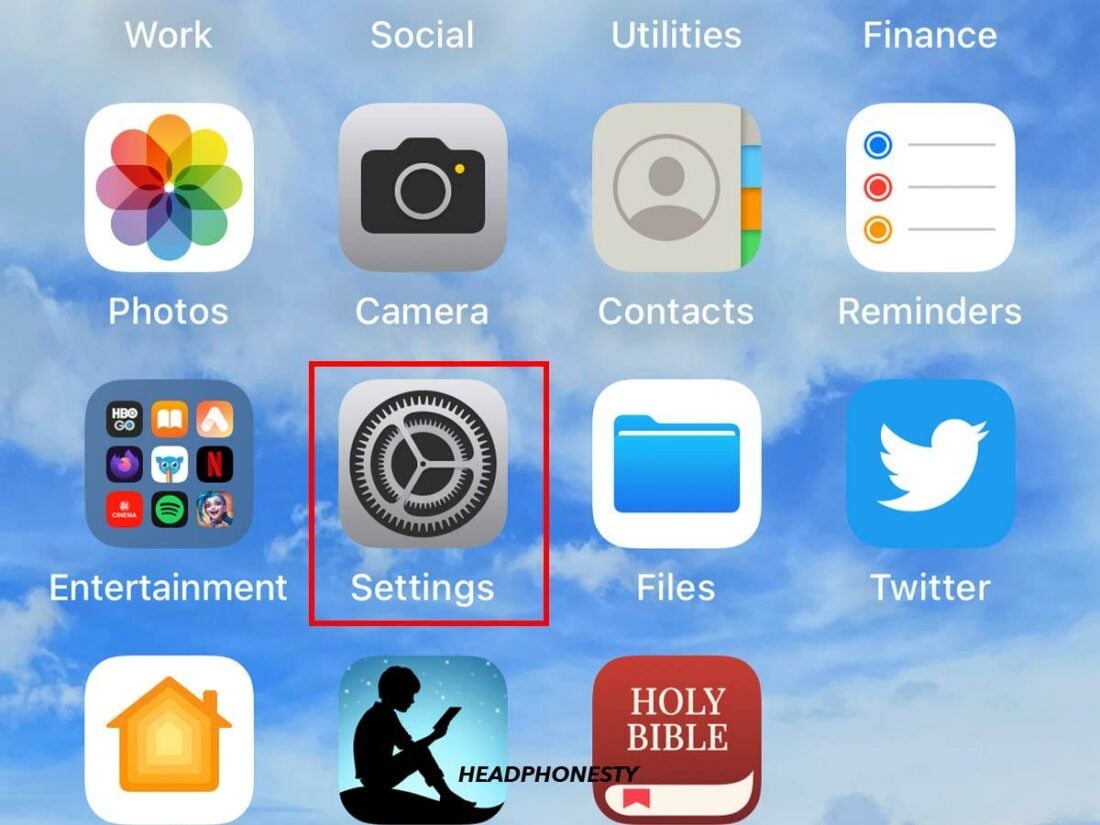
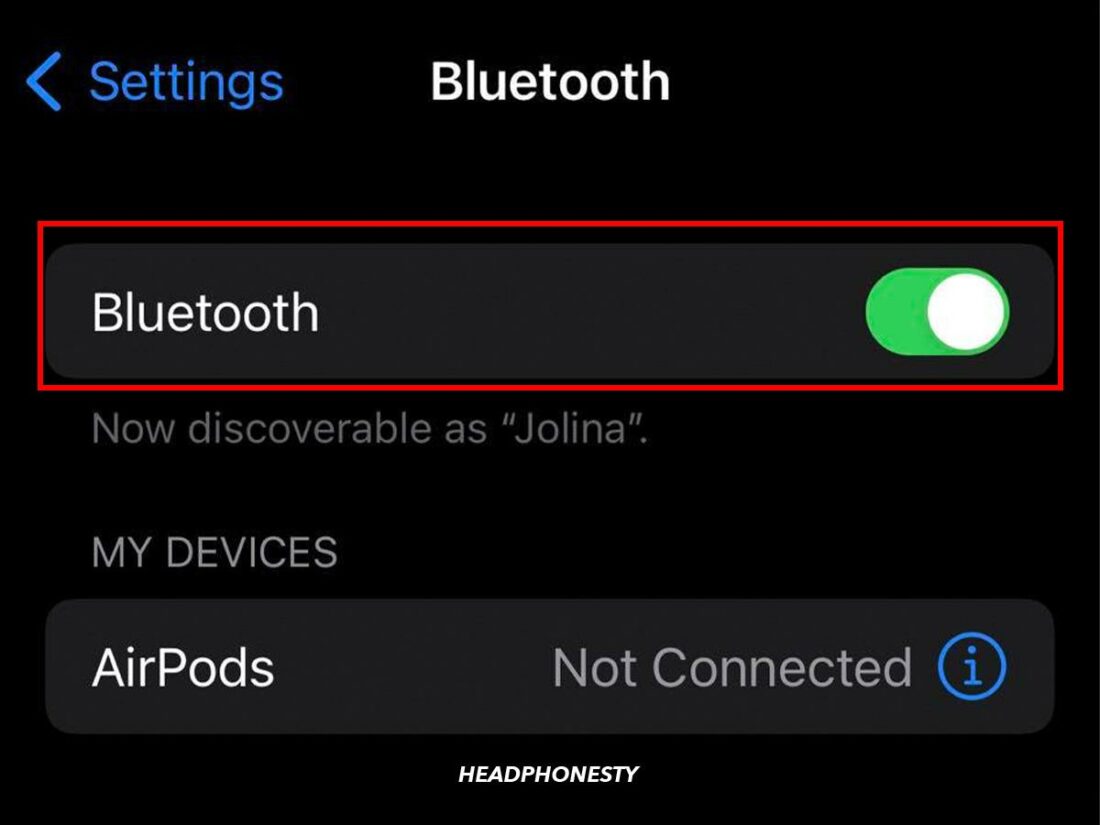
- Go to Settings and toggle Bluetooth on.

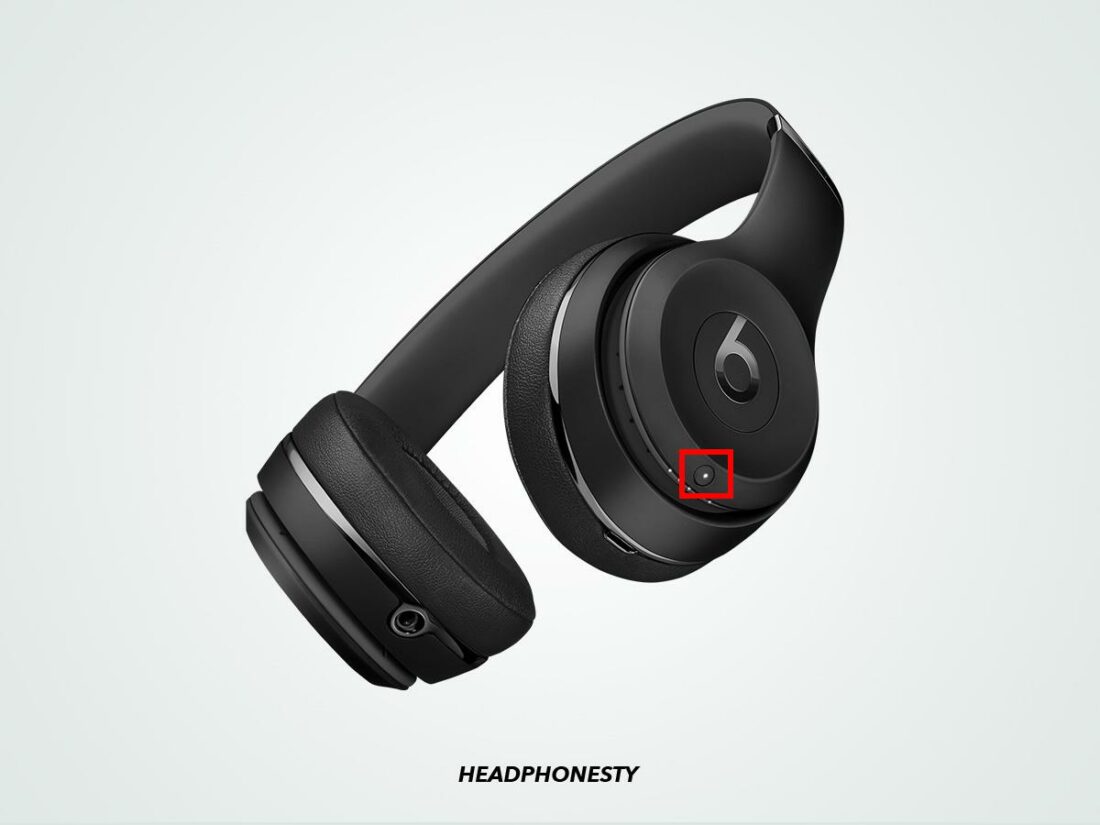
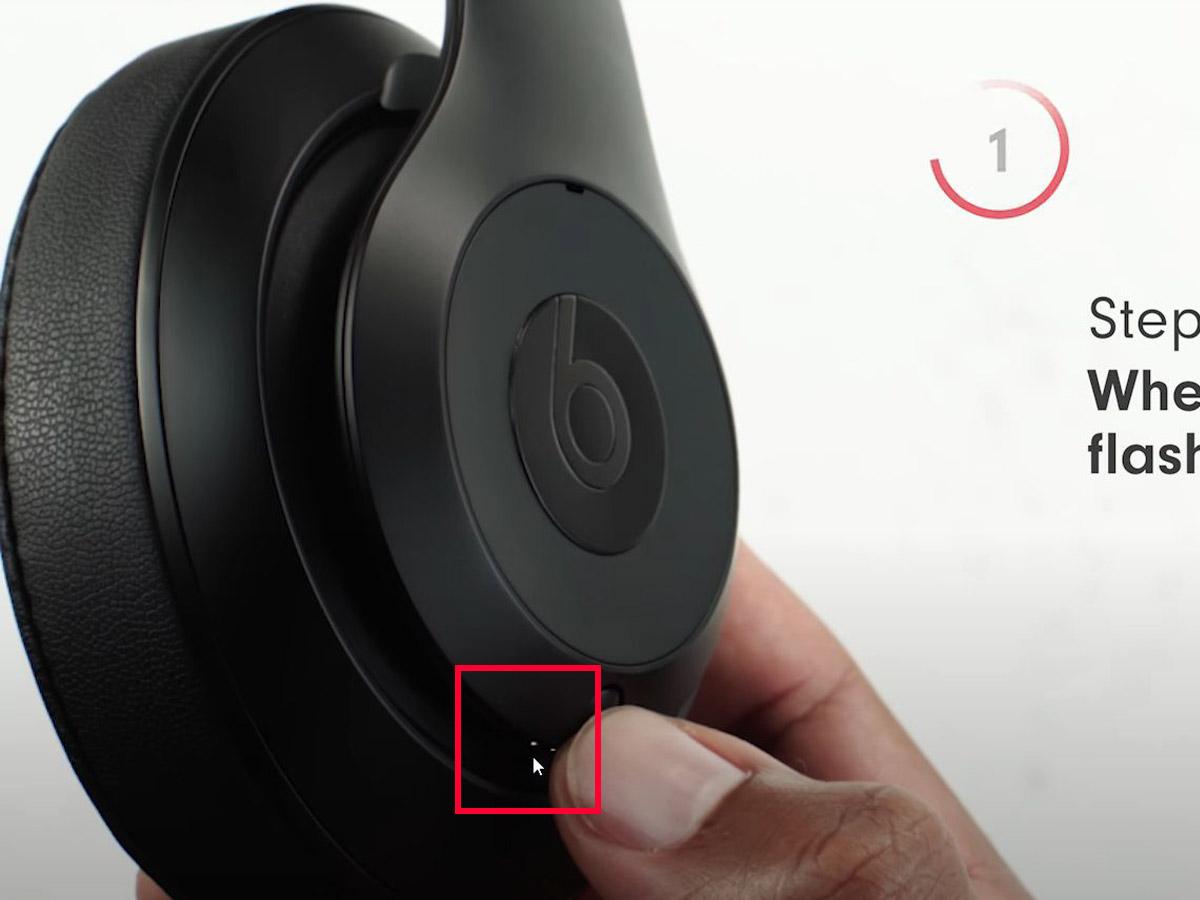
Toggle Bluetooth on. - Turn on your Beats device. If you’re using the Solo Pro headphones, simply unfold them. For other Beats devices, press the power button.
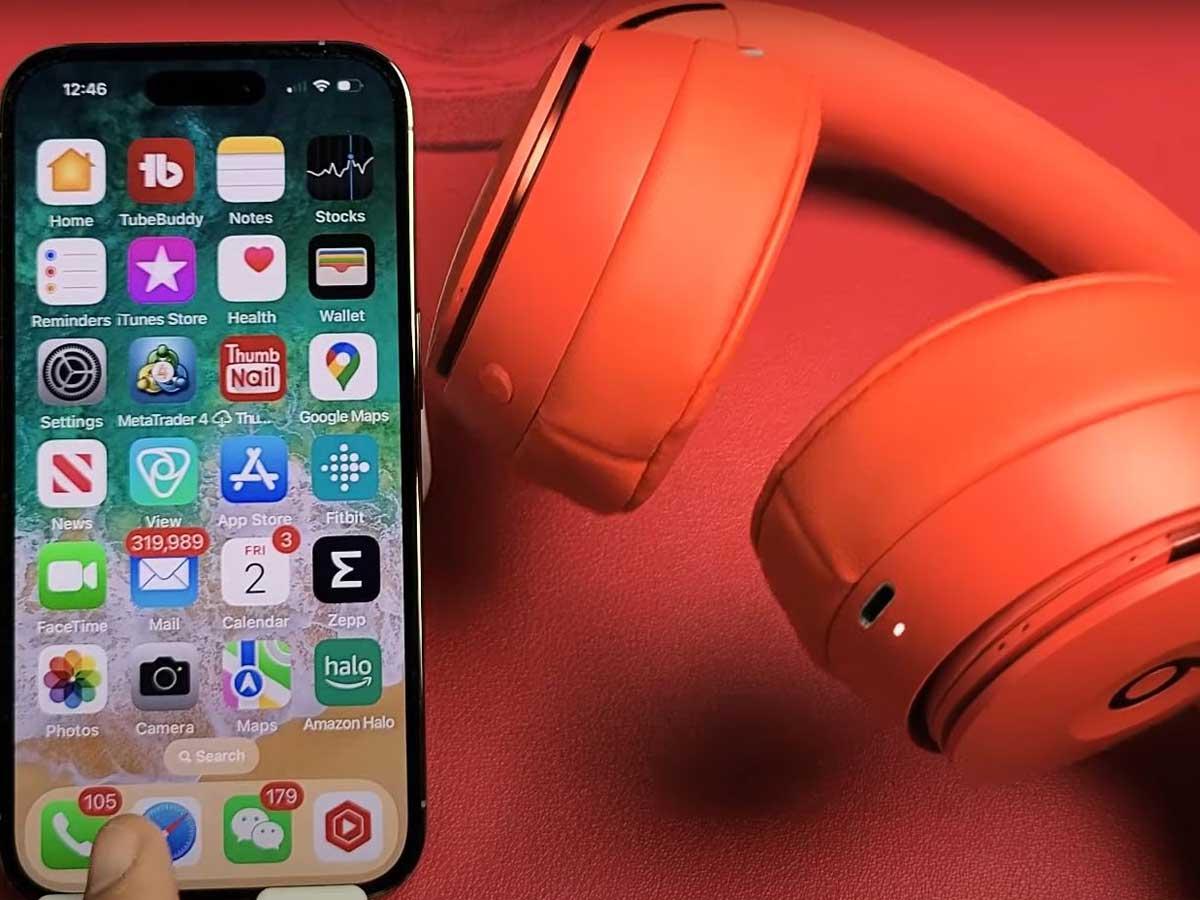
Close look at the Beats Solo3 Wireless’ power button. (From: Amazon) - Hold your Beats device within 2 inches of your unlocked iPhone.

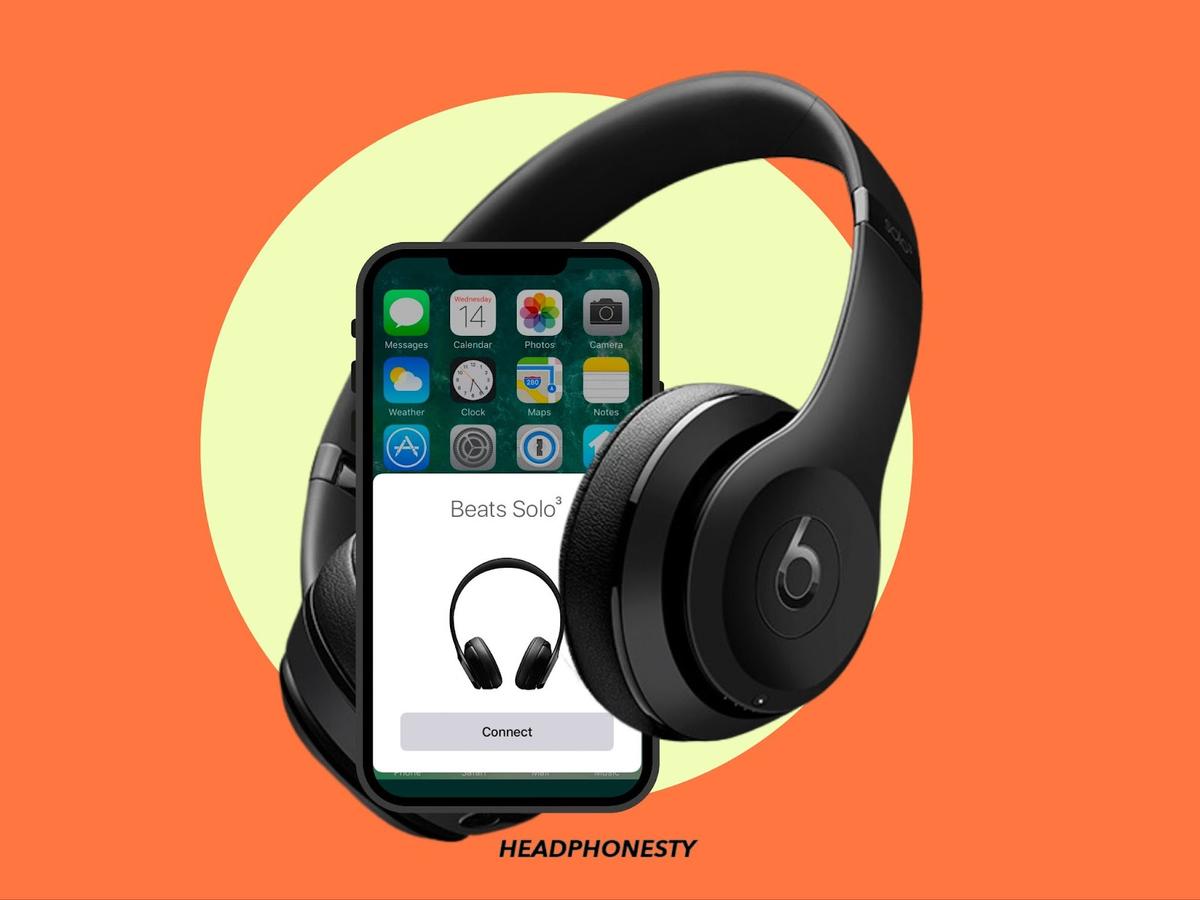
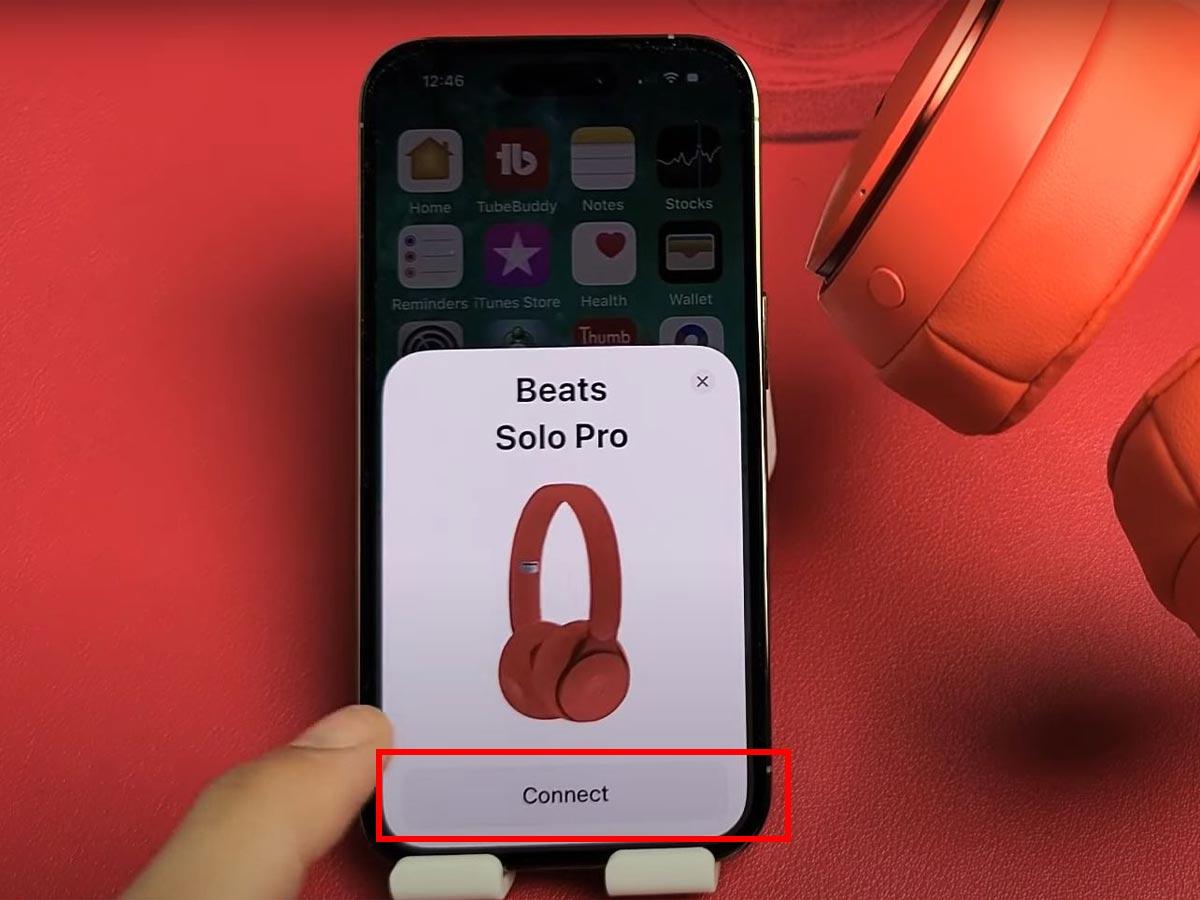
Hold your Beats device within 2 inches of your unlocked iPhone. (From: Youtube/WorldofTech) - When the pop-up notification appears, click Connect and follow the onscreen instructions (if any). If you don’t see a notification, press the power button for 5 seconds until the indicator light flashes to initiate pairing mode manually.
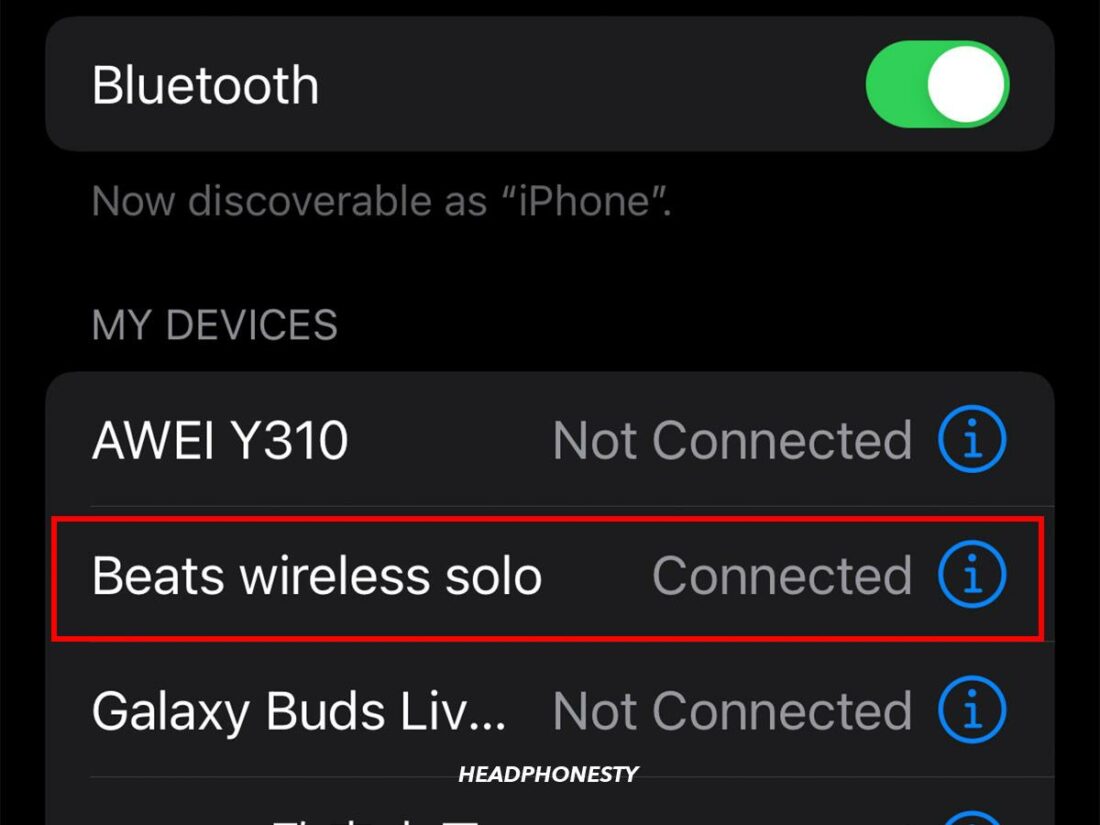
Pop-up notification. (From: Youtube/WorldofTech) - Check that your Beats device is listed as Connected under My Devices on the Bluetooth settings page.
Beats headphones connected to iPhone.


What to Do if Beats Won’t Connect to iPhone
It’s not uncommon to encounter issues when connecting your Beats headphones to an iPhone. Some of these problems can range from the Beats not appearing in the Bluetooth devices list to the Beats being visible but not connecting.
Such issues can be frustrating, but fortunately, there are ways to troubleshoot them. Here are three tried-and-tested solutions to address connection problems between your Beats and iPhone:
Connect Beats to iPhone manually
The initial setup process for Beats headphones typically involves an automatic connection to your iPhone. However, a manual connection is the next best alternative if this automatic process fails.
Instead of waiting for the connection pop-up notification, this method requires you to go through your iPhone’s Bluetooth settings and manually select your Beats headphones. Here’s a more detailed look at the entire process:
- Press your Beats’ power button to turn them on.
Press your Beats’ power button. (From: Amazon) - Go to Settings.
Open the iOS Settings. - Tap Bluetooth.
Go to Bluetooth. - Toggle the switch to turn Bluetooth on.
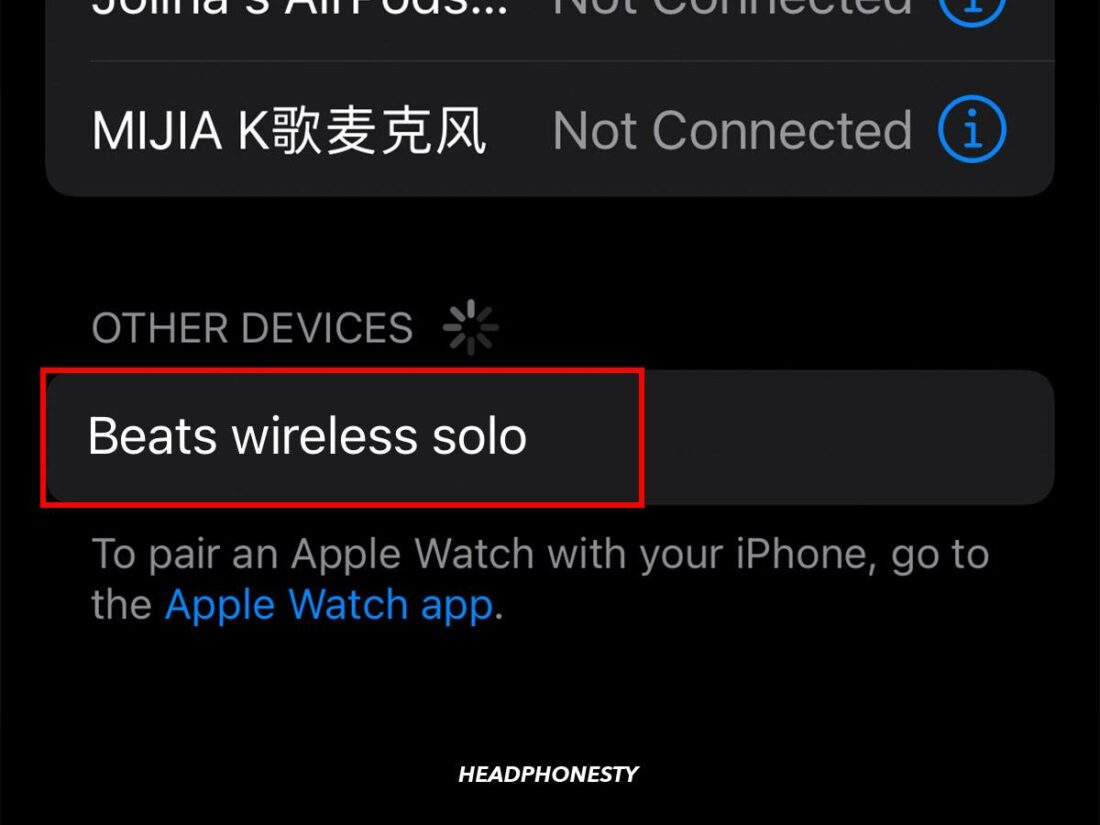
Turn on Bluetooth. - Tap on your Beats device under Other Devices.
Tap on your Beats device’ name.


Check your Beats headphones’ battery
Wireless headphones rely on ample battery power to maintain active and steady Bluetooth connections with other devices and perform audio functions.
As such, if your Beats’ battery levels are very low or drained, they’ll struggle to stay connected to your iPhone. This sometimes leads to frequent disconnections and audio stutters.
For good measure, keep your Beat’ battery level above 20% for a stable Bluetooth connection.
Additionally, if you think your Beats’ battery drains too fast or doesn’t charge as quick, third-party accessories may be the culprit. Generic charging blocks or cables cause more harm than good and can eventually deplete the charging capacity of your headphones’ battery.
That said, to ensure optimal battery health and prevent connection issues, follow these tips:
- Charge using a wall outlet, not a USB hub: Bus-powered USB hubs get power from the computers they’re connected to, making the charging process slower, especially if there are other devices connected to the hub. On the other hand, wall outlets provide more current, resulting in quicker and more efficient charging.
- Use a certified charger: Branded charging accessories have certifications, like Apple’s MFi Program, to ensure they meet your headphones’ voltage requirements and safety standards. This makes them less likely to malfunction or damage your device in the long run.
- Clean the charging port: Dust and debris can accumulate in the charging port, interfering with the charging process. To prevent this, you’ll want to keep the charging contacts clean by wiping them with a cotton swab slightly dampened with alcohol.
Reset your Beats headphones
If the above solutions haven’t worked for you, try resetting your Beats headphones. A reset reboots your device’s software, clearing up temporary bugs or glitches that affect how your Beats function. This can resolve a variety of issues, including connectivity problems.
Here’s what you need to do to reset your Beats headphones:
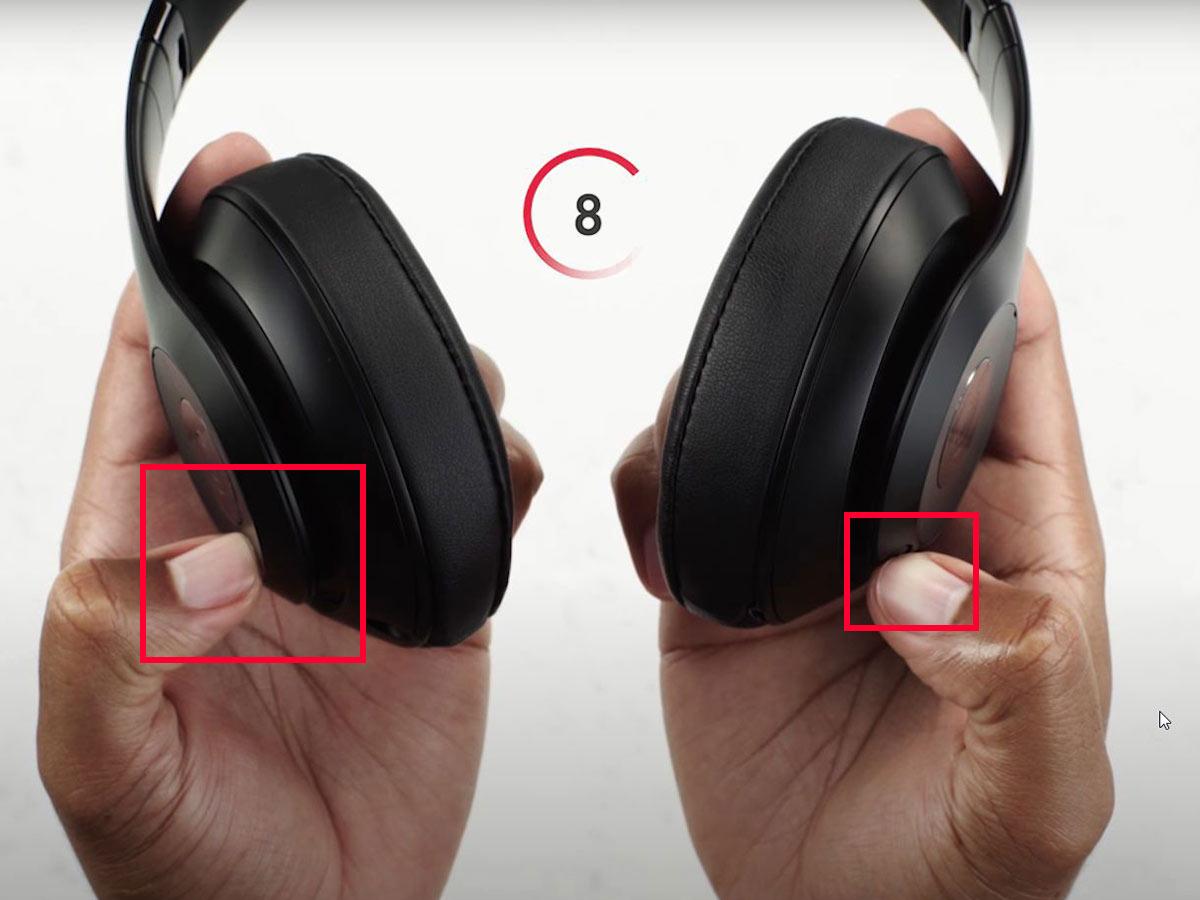
- Press the power and volume-down buttons for at least 10 seconds.
Holding down both the power and volume-down buttons. (From: YouTube/Beats by Dre) - Release the buttons when the Fuel Gauge flashes.The Fuel Gauge is a series of five LED lights that display battery levels and charging status. When these LEDs flash, it signifies a successful reset process.
Release the buttons. (From: From: YouTube/Beats by Dre)
FAQs on Connecting Beats to iPhone
Does Beats have an iPhone app?
No, there’s no Beats app available for iOS users. That’s because the features on the app are already integrated into the iOS system, offering a seamless experience for Beats owners using an iPhone or iPad.
However, there is a Beats app designed exclusively for Android devices, which offers a range of customization options for Beats earbuds and headphones.
These include changing the touch controls, renaming your device, and controlling noise cancellation and transparency. Such features are all already built-in when using your Beats with your iOS devices.
Can you pair two Beats on one iPhone at the same time?
Yes, you can pair two Beats headphones or earbuds to one iPhone simultaneously using Audio Sharing.
This feature connects two sets of compatible Beats headphones or AirPods to one iPhone or iPad, allowing you and a friend to listen to the same audio simultaneously. It’s especially useful when you want to share music or a movie without disturbing others around you.
For your reference, here’s an updated list of compatible Beats headphones that support Audio Sharing:
- Powerbeats
- Powerbeats Pro
- Powerbeats3 Wireless
- BeatsX
- Beats Fit Pro
- Beats Flex
- Beats Solo Pro
- Beats Solo3 Wireless
- Beats Studio3 Wireless
If you’d like to know how to use the Audio Sharing feature, follow these steps:
- Connect your Beats headphones to your iPhone or iPad.
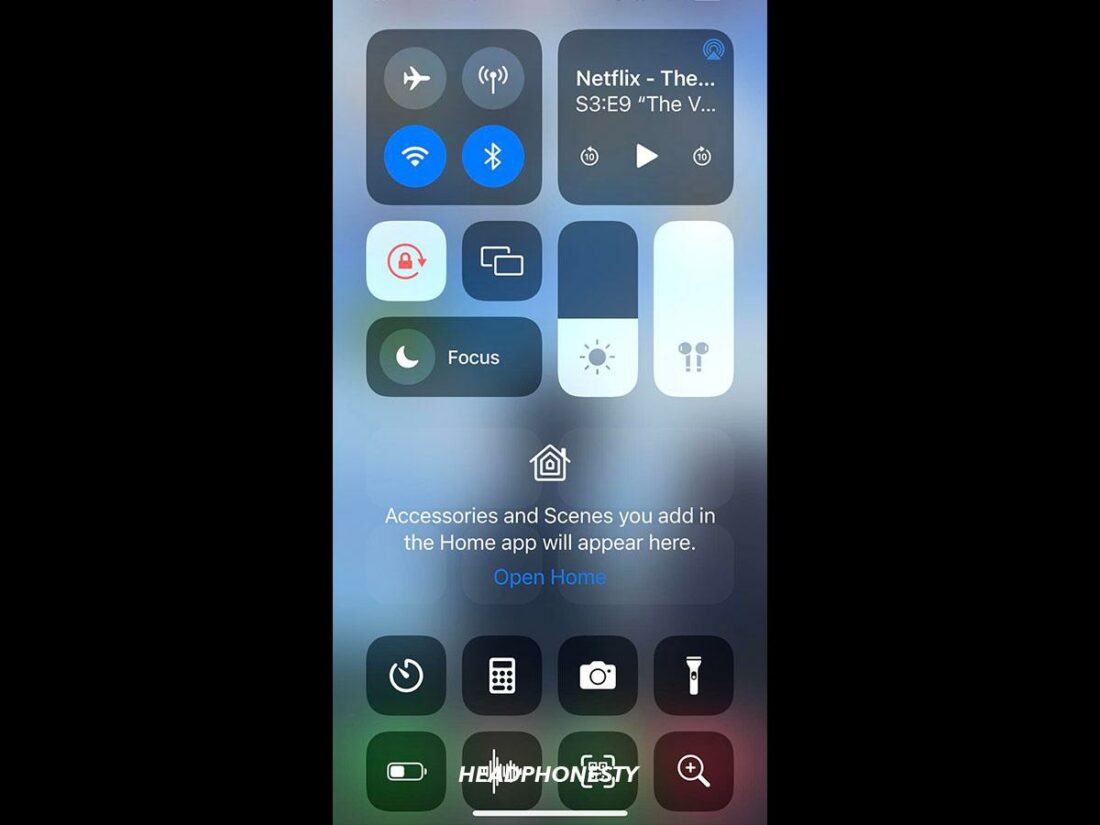
Tap on your Beats headphones’ name to connect. - Open the Control Center on your device.
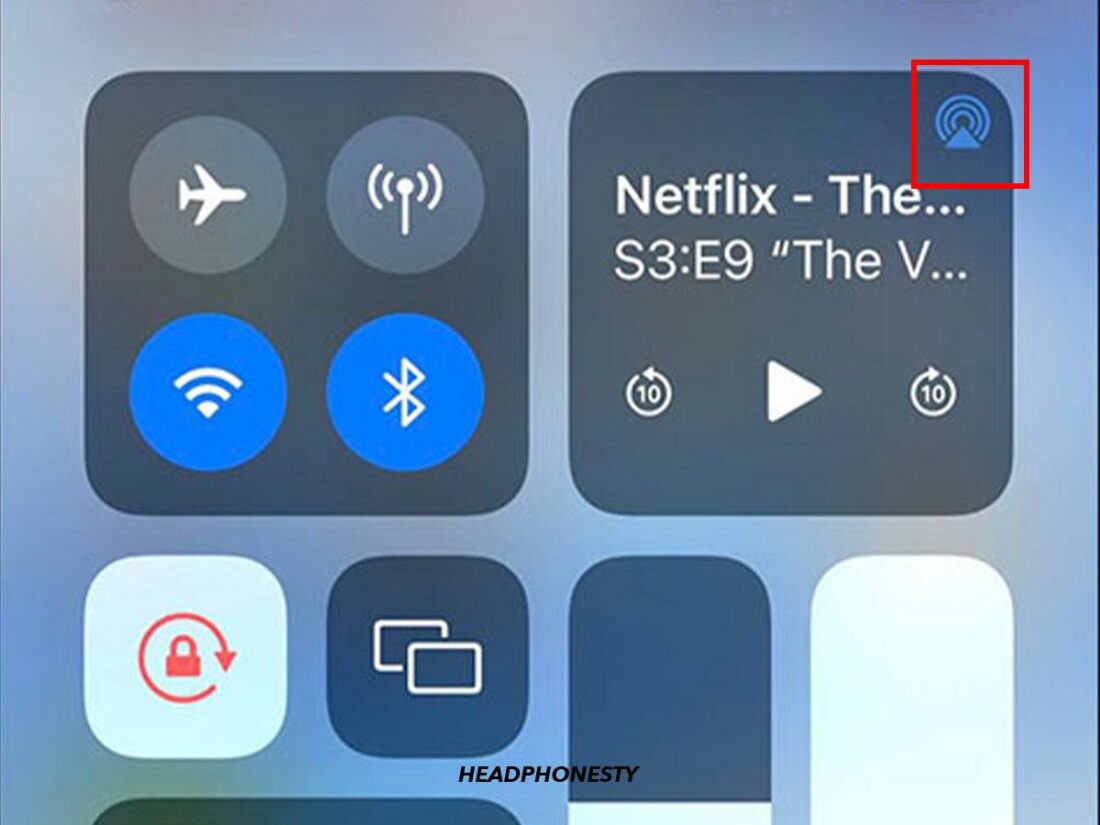
iOS Control Center. - Tap the AirPlay icon.
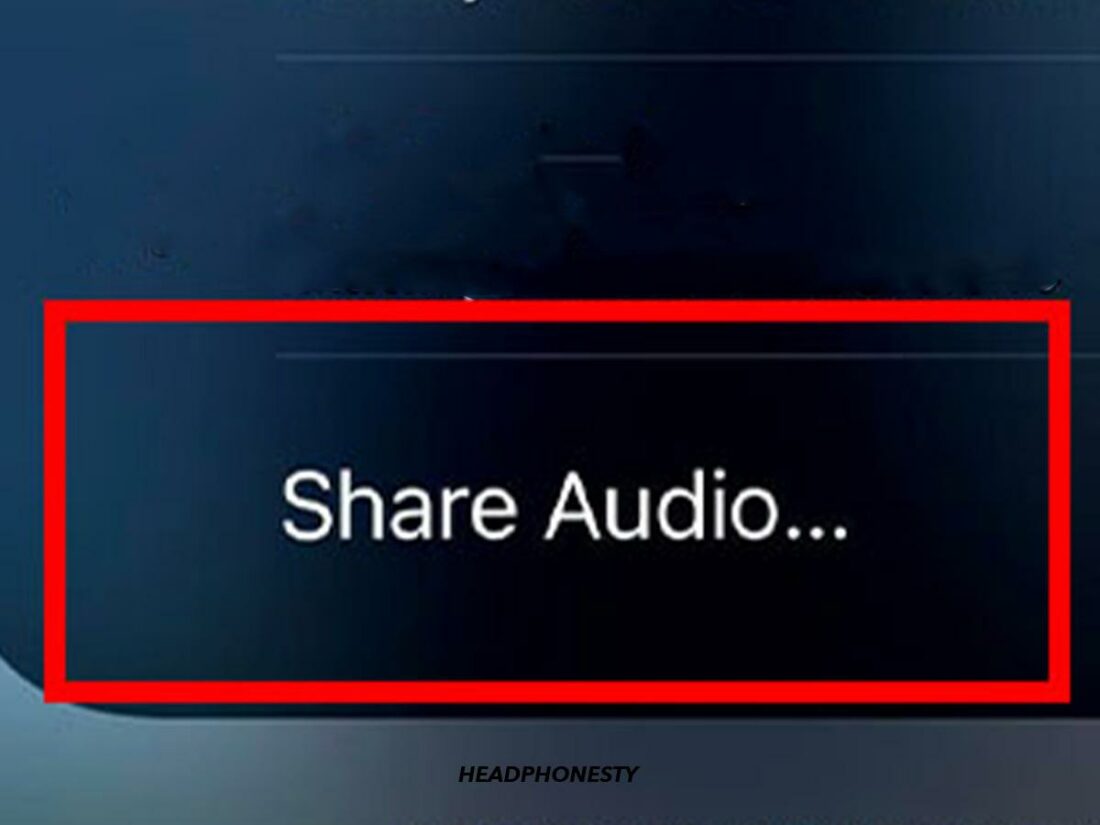
AirPlay icon. - Tap Share Audio.
Share Audio. - Initiate pairing mode on the second pair of Beats headphones. Place the second pair of Beats headphones close to your device and wait for the pop-up window to appear on your screen showing the device’s name.
Beats headphones placed near to an iPhone. (From: Youtube/WorldofTech) - Tap Connect to pair the second set of headphones or earbuds to your device.
Tap Connect to pair the 2nd Beats headphones. (From: Youtube/WorldofTech)


Conclusion
As you can see, having an optimal listening experience with your Beats headphones and iPhone is just a matter of knowing how to properly pair them and how to troubleshoot connectivity issues.
It also helps to know if there are extra features like Audio Sharing that can further enhance your listening sessions. Hopefully, you’re now enjoying your audio just the way you like it.
How’d you find this article? Did we cover everything you needed to know? Feel free to let us know if we missed anything or share your thoughts in the comments section below!