We break down some of the most common reasons why your Beats headphones or earbuds won’t connect to your device.
Beats headphones are known for being a stylish, premium brand available at affordable prices. As a subsidiary of Apple, they offer seamless integration and connection with other devices in the Apple ecosystem as well as Android devices.
However, some users report difficulties with connecting their Beats headphones, making them unusable.
This problem can be solved by understanding the root of your connection problem and applying the appropriate troubleshooting steps. We’ll explain these steps and go over everything you need to know in this article, so read on!
Beats Not Connecting Due to Dirty Contacts
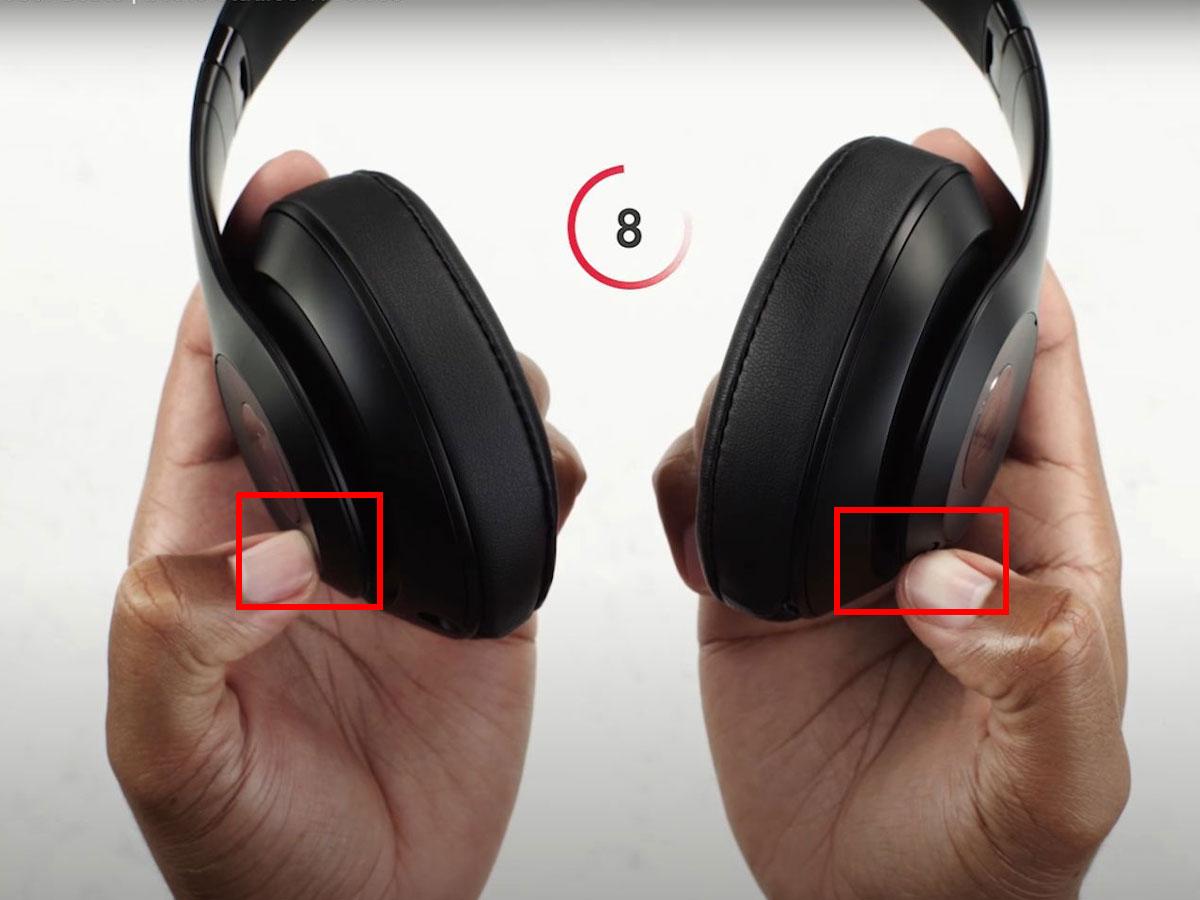
One common reason why Beats earbuds may not connect to other devices is the presence of dirt or debris on the contacts, located within the charging case and on the earbuds. These pins are what the earbuds use to interface with their charging case. They transfer power and data, and are used to detect when your Beats are charging.
If dirt or debris interferes with these contacts, your earbuds won’t be registered as being in their case when you try to connect them. This will mean that the connection process can’t even start, because your earbuds need to be in their case to enter pairing mode.
Cleaning the earbuds and the charging case contacts can help resolve this issue. Here’s what to do:
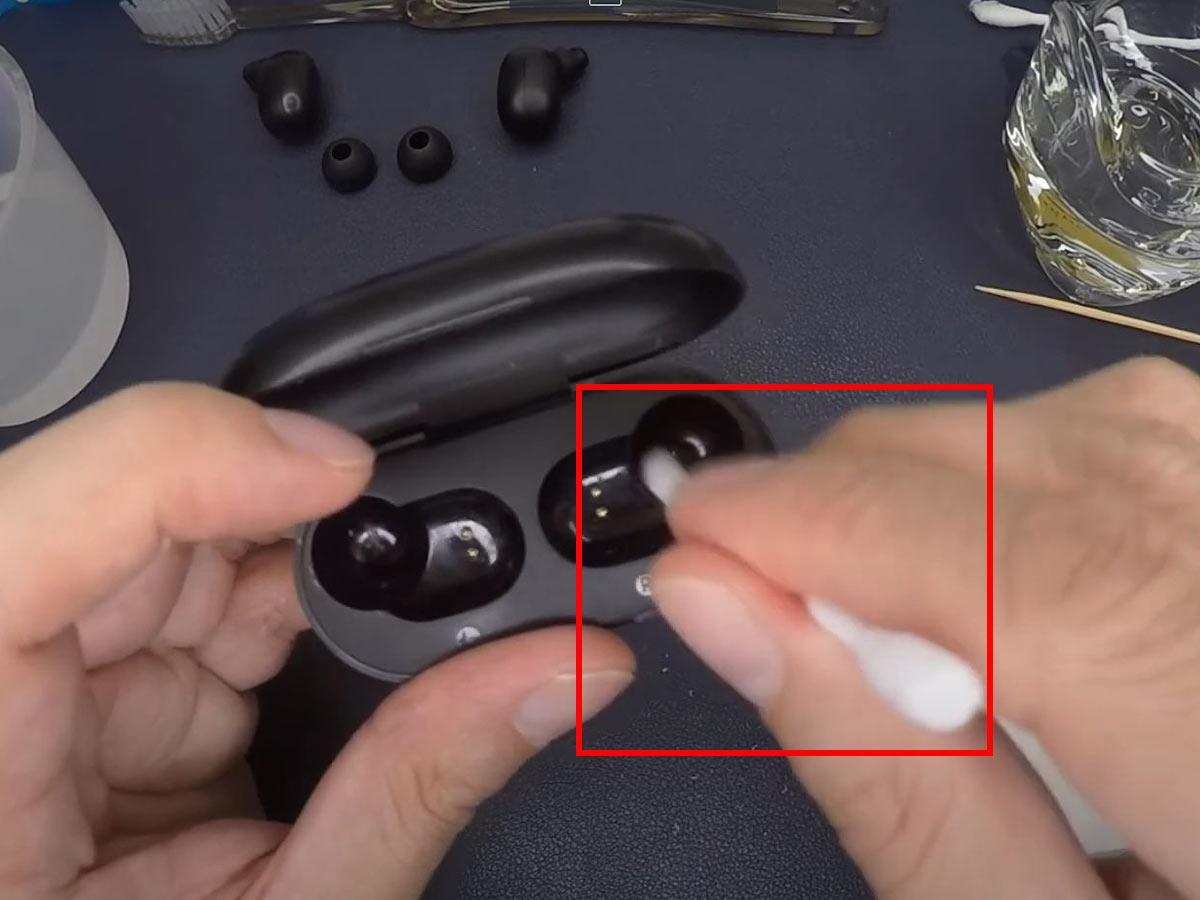
- Use a clean, dry cloth not prone to pilling– like a microfibre cloth– to wipe down the earbuds and remove most of the dirt around the contact pins.

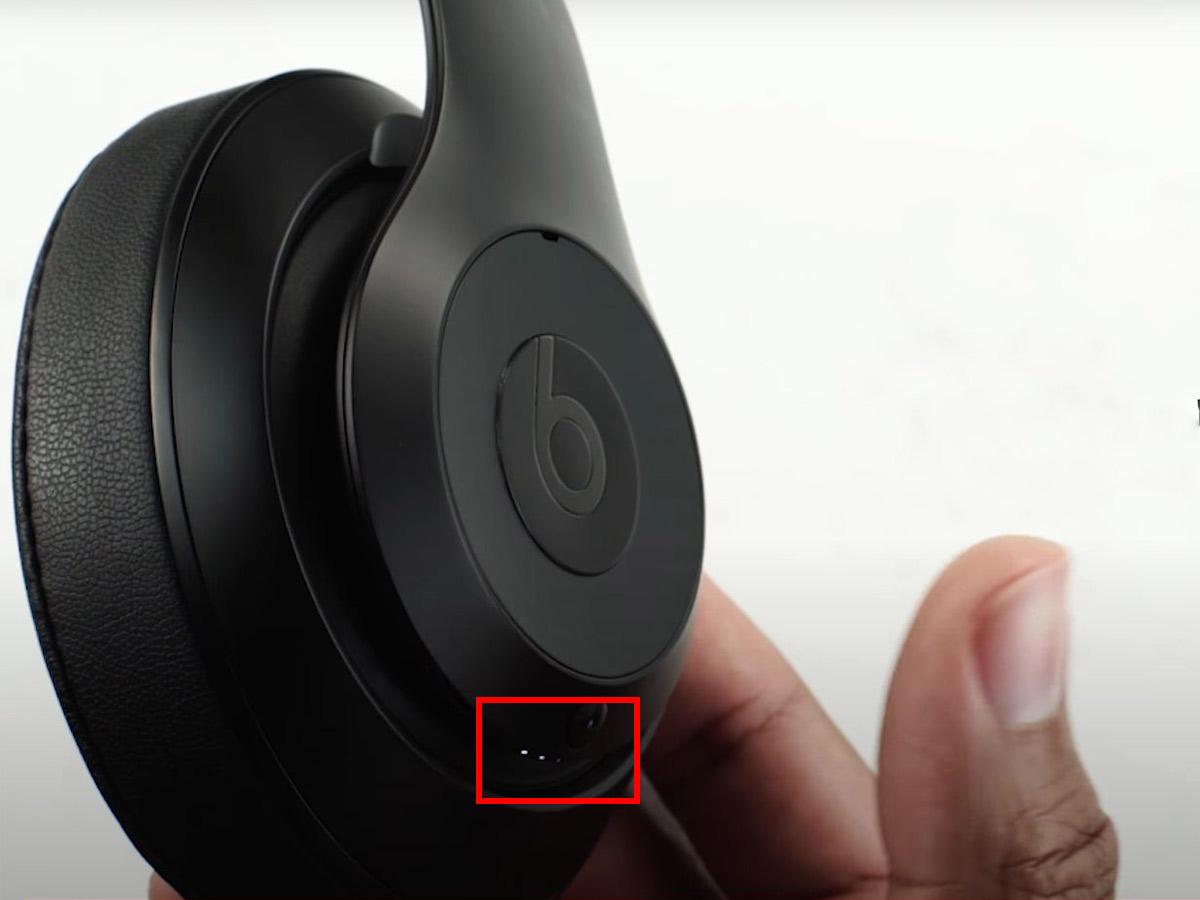
Use a clean, dry cloth to wipe down the earbuds. (From: Youtube/ying Newton) - Take a cotton swab and wipe down the pins on your earbuds, then the contacts inside of your charging case.
Use a cotton swab to wipe down the pins on your earbuds and charging case. (From: Youtube/ying Newton)

Beats Not Connecting Due to Pairing Mode Issues
Pairing your Beats earbuds or headphones with your device is needed to ensure a successful connection. This process occurs automatically with iOS devices, thanks to the seamless compatibility offered by the Apple ecosystem. You can simply put your earbuds in their case and open the lid, and the iOS device will detect the earbuds and automatically pair with them.
However, for other devices, manual pairing is sometimes required. To manually initiate pairing mode, follow these steps:
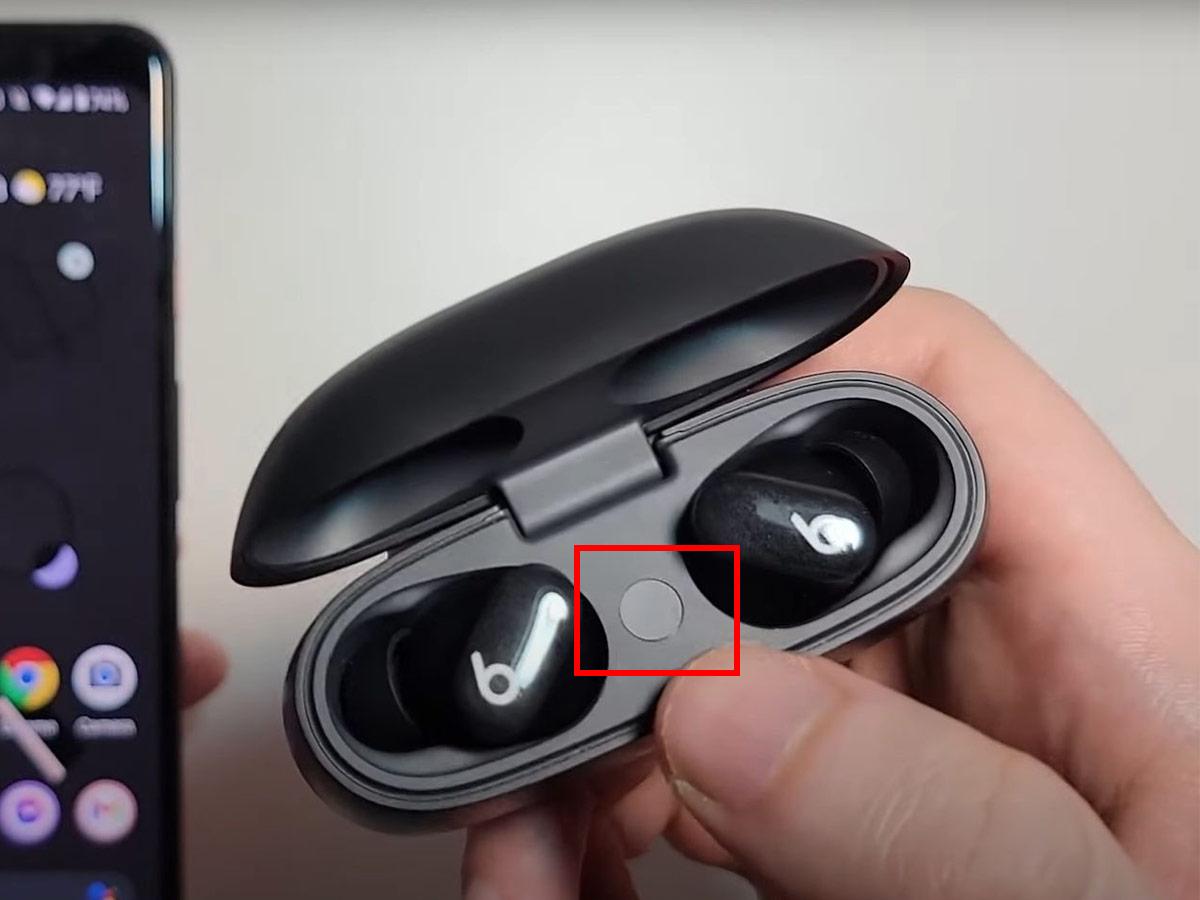
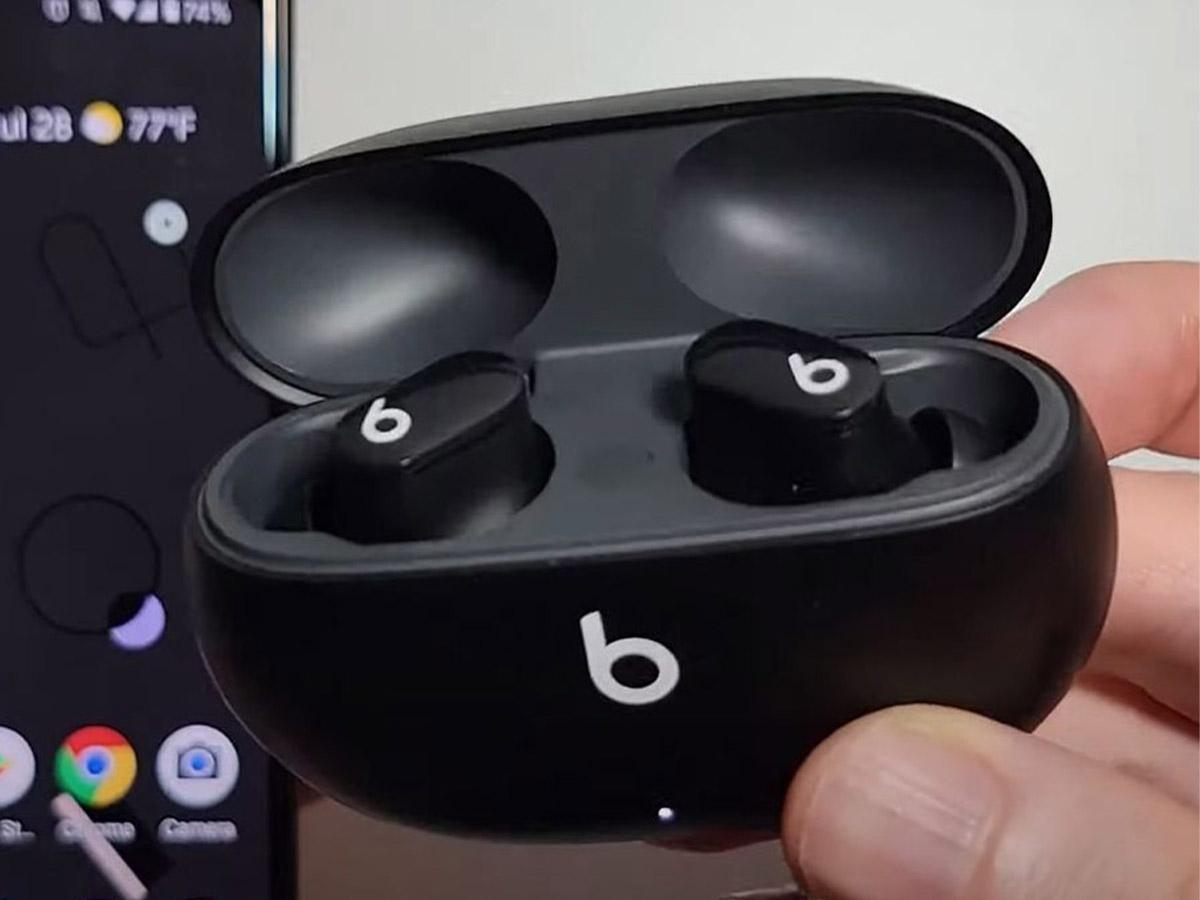
- Ensure the earbuds are in their case and the lid is open.
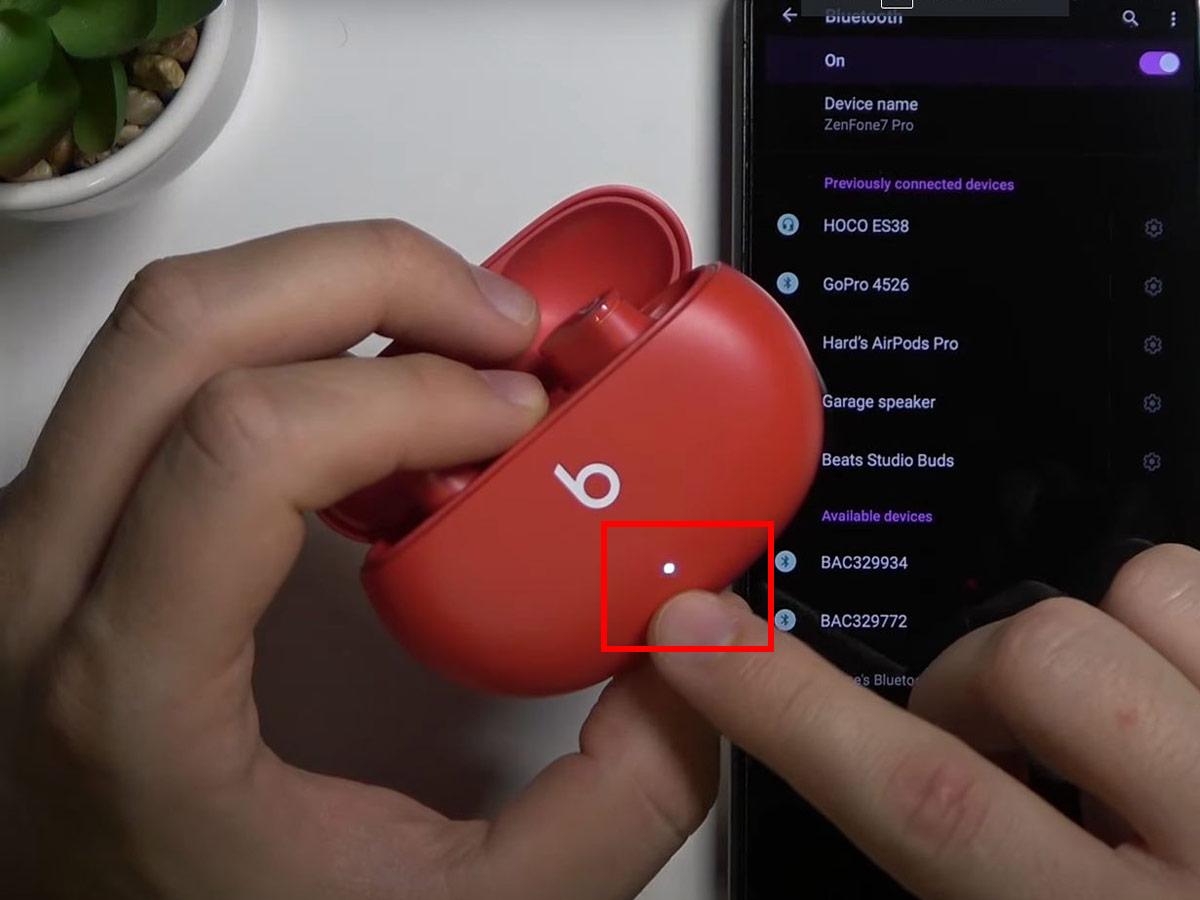
Beats Studio Buds inside the charging case. (From: Youtube/Tech Tips) - Press the setup button on the case until the LED blinks white to initiate pairing mode.
Press and hold the system button. (From: Youtube/Tech Tips)

Beats Not Connecting Due to Weak Bluetooth Connection
Bluetooth technology, while incredibly useful for wireless connections, is not without its limitations. These limitations can sometimes lead to a weak signal strength, which in turn can cause connectivity issues with your Beats earbuds or headphones.
By understanding the relevant factors and how they can impact Bluetooth connectivity, you can better resolve any issues you may encounter when trying to connect your Beats earbuds or headphones to other devices. Let’s delve into some of those factors and how they can be addressed.
Being out of range
Bluetooth 4 operates with a range of up to 10 meters, or 33 feet. Bluetooth 5 can reach 240 meters when unobstructed, but only 40 meters while indoors. If your Beats earbuds or headphones and the device they are trying to connect to are further apart than this, the Bluetooth signal may not be strong enough to establish a connection.
To resolve this, ensure that your Beats and the other device are within the appropriate range before attempting to connect.
Interference
Bluetooth operates on the 2.4GHz frequency, which is used by a variety of other devices, including Wi-Fi routers and microwaves. These devices can cause interference, weakening the Bluetooth signal.
Physical obstructions like walls or furniture also interfere with the signal. If you’ve ever left your device downstairs but kept your music playing over wireless earbuds, this is why your audio will start to cut out even when you’re within Bluetooth range.
To minimize interference, try reducing the number of potential sources of interference in the vicinity when using your Beats.
Low battery
The strength of a Bluetooth signal can be affected by the battery level of the devices involved in the connection. If your Beats or the device they are trying to connect to has a low battery, the Bluetooth signal may be weak, leading to connection issues.
To avoid this, ensure both devices are sufficiently charged before attempting to establish a Bluetooth connection.
Beats Not Connecting Due to Outdated Firmware
Firmware is the software embedded in your Beats that controls their functionality. Outdated firmware can negatively impact the performance of your Beats earbuds or headphones, including their ability to connect to other devices. Keeping your Beats firmware up to date might fix your problem.
Here’s a general overview on how to update the firmware of your Beats on iOS, Android, and Mac:
iOS
Beats headphones are automatically updated when connected to an iOS device and are charging. However, to make sure that you’re not missing out on an update, you can check your firmware version.
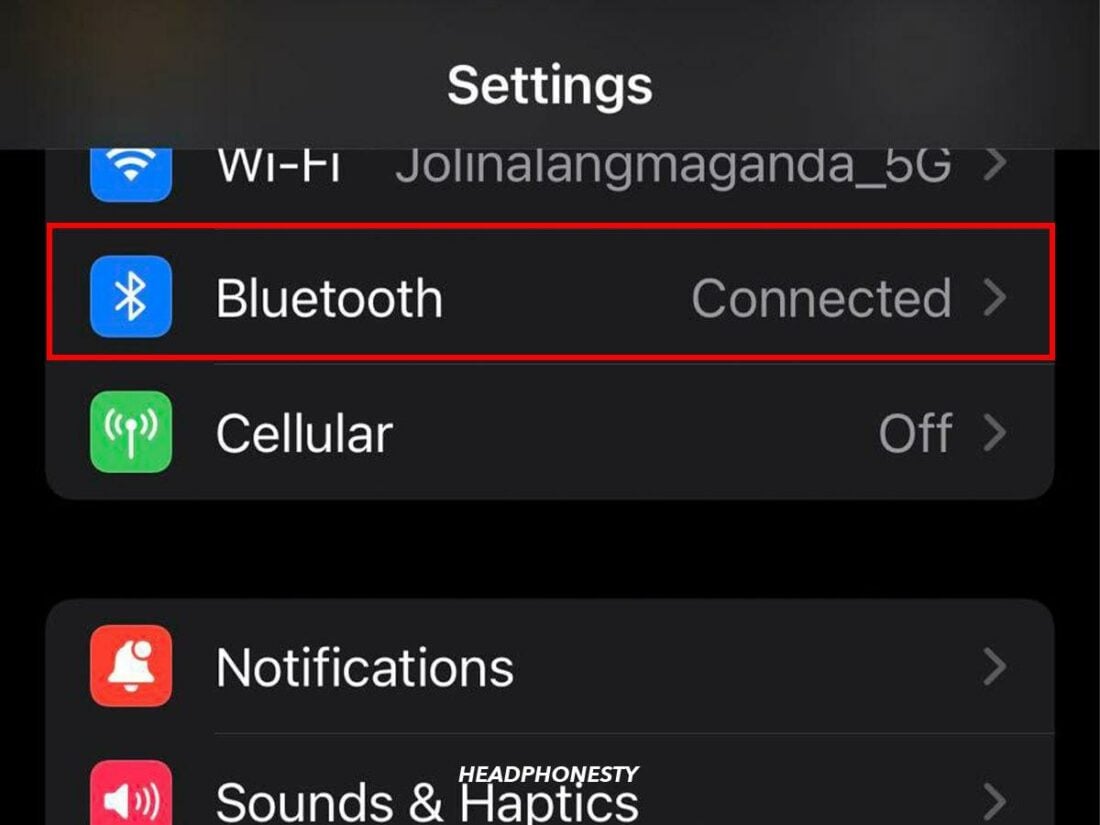
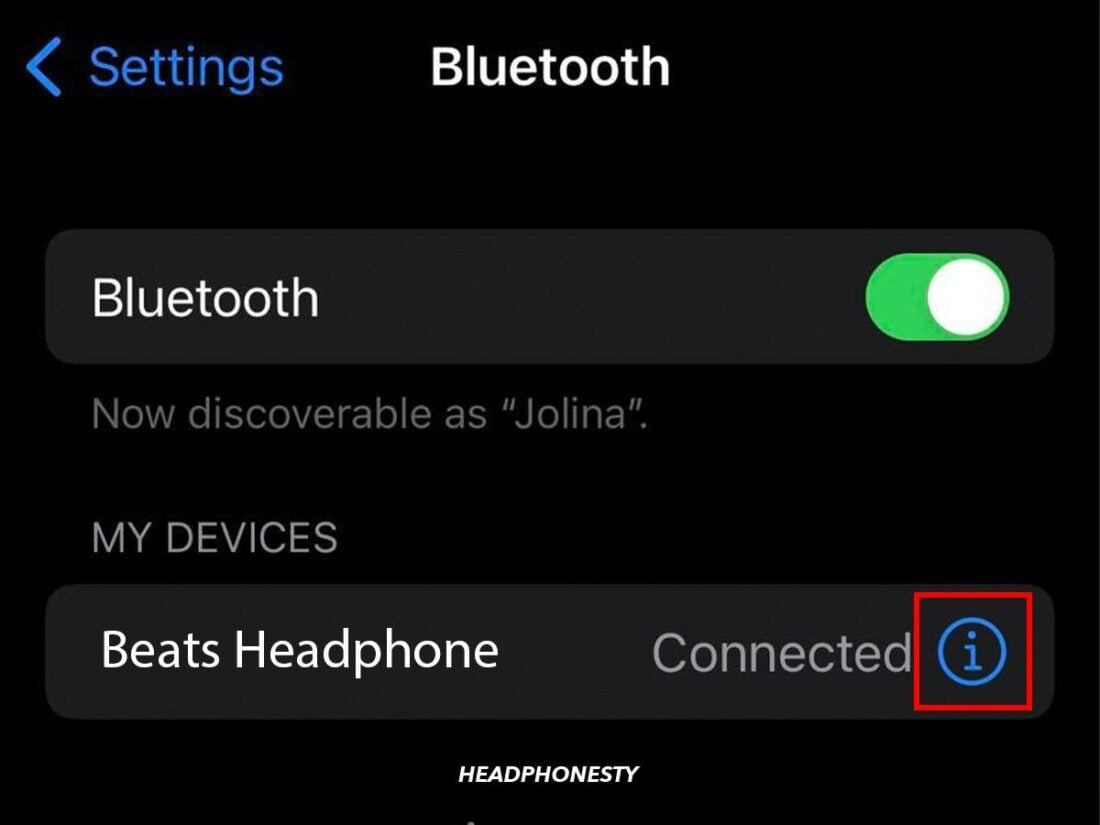
- Go to Settings, and select Bluetooth.

Select Bluetooth. - Tap the Info (i) button next to the name of your Beats.
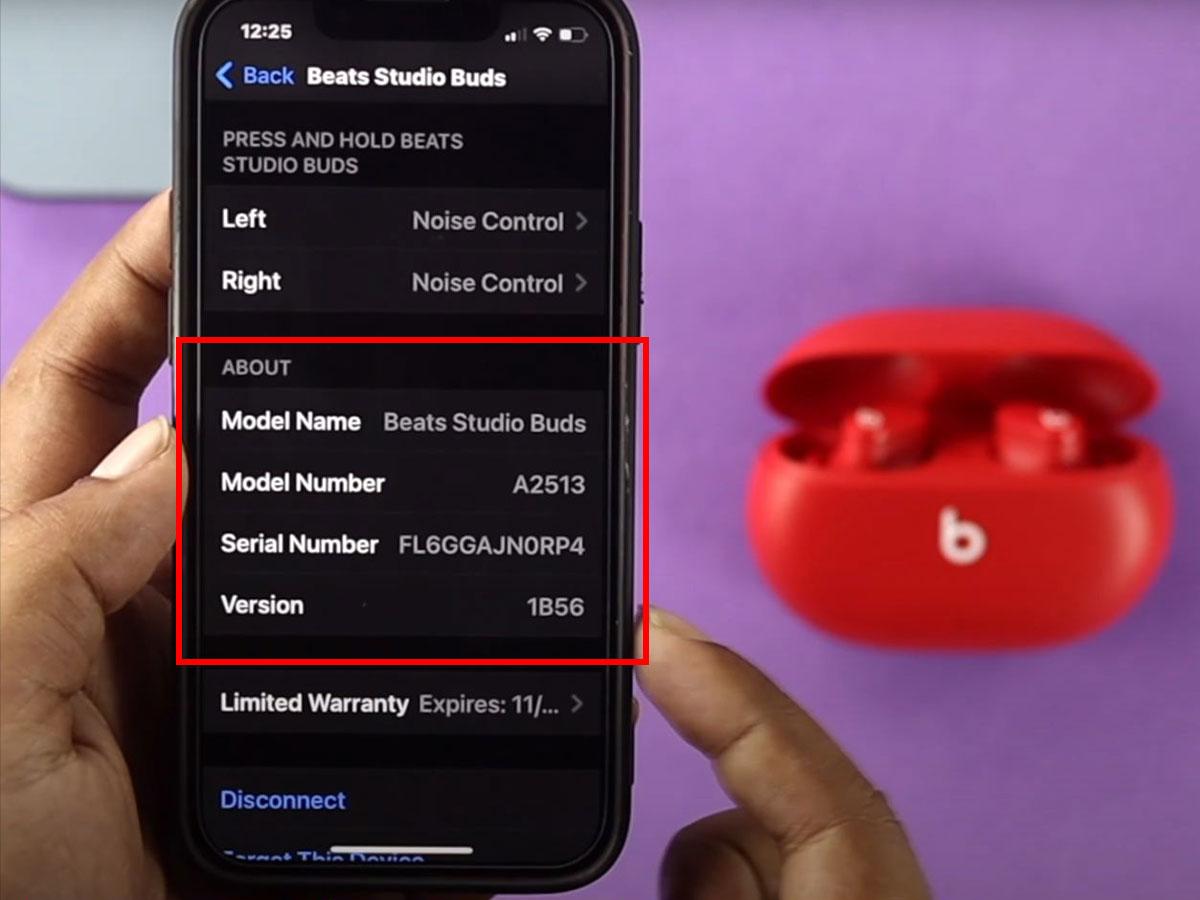
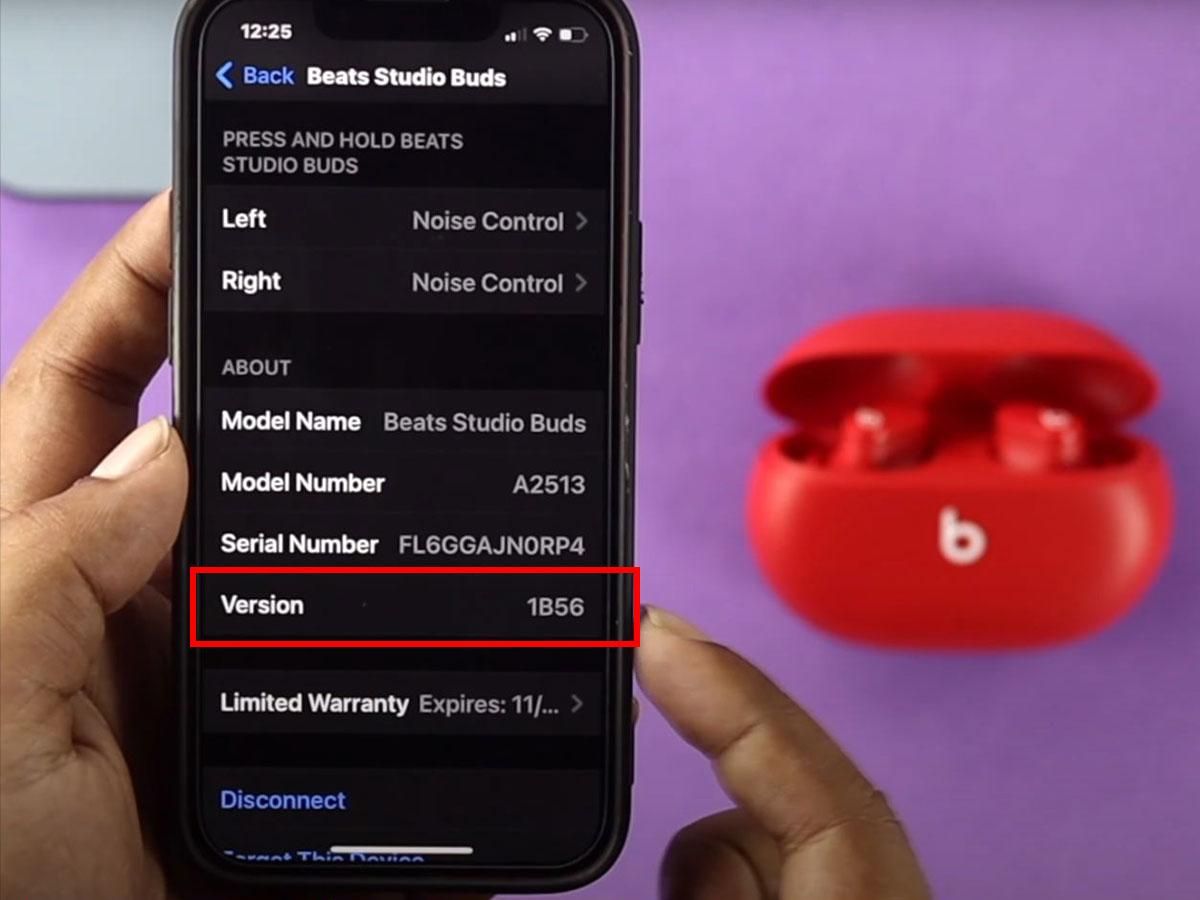
Tap on the Info button. - Scroll down to the About section to find the firmware version.
Scroll down to the About section. (From: Youtube/Fix369) - Check that this is the latest firmware version available for your headphones.
Bose headphone firmware version. (From: Youtube/Fix369)
Android
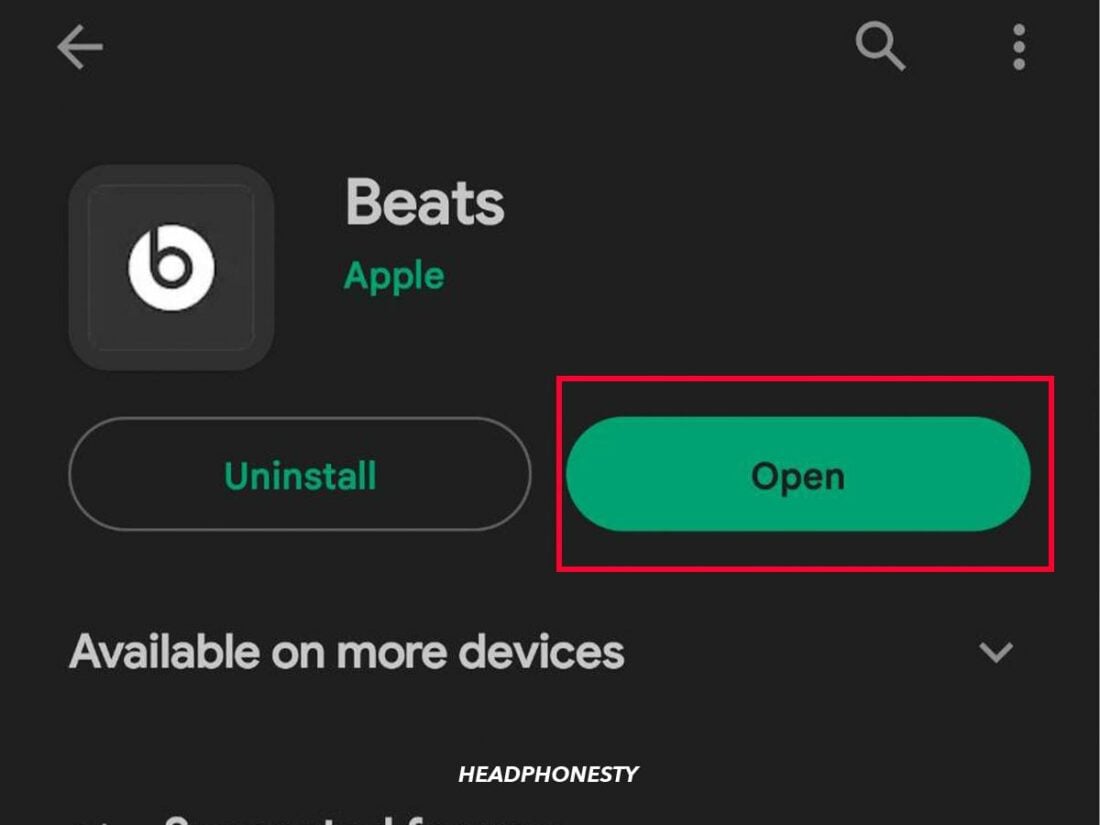
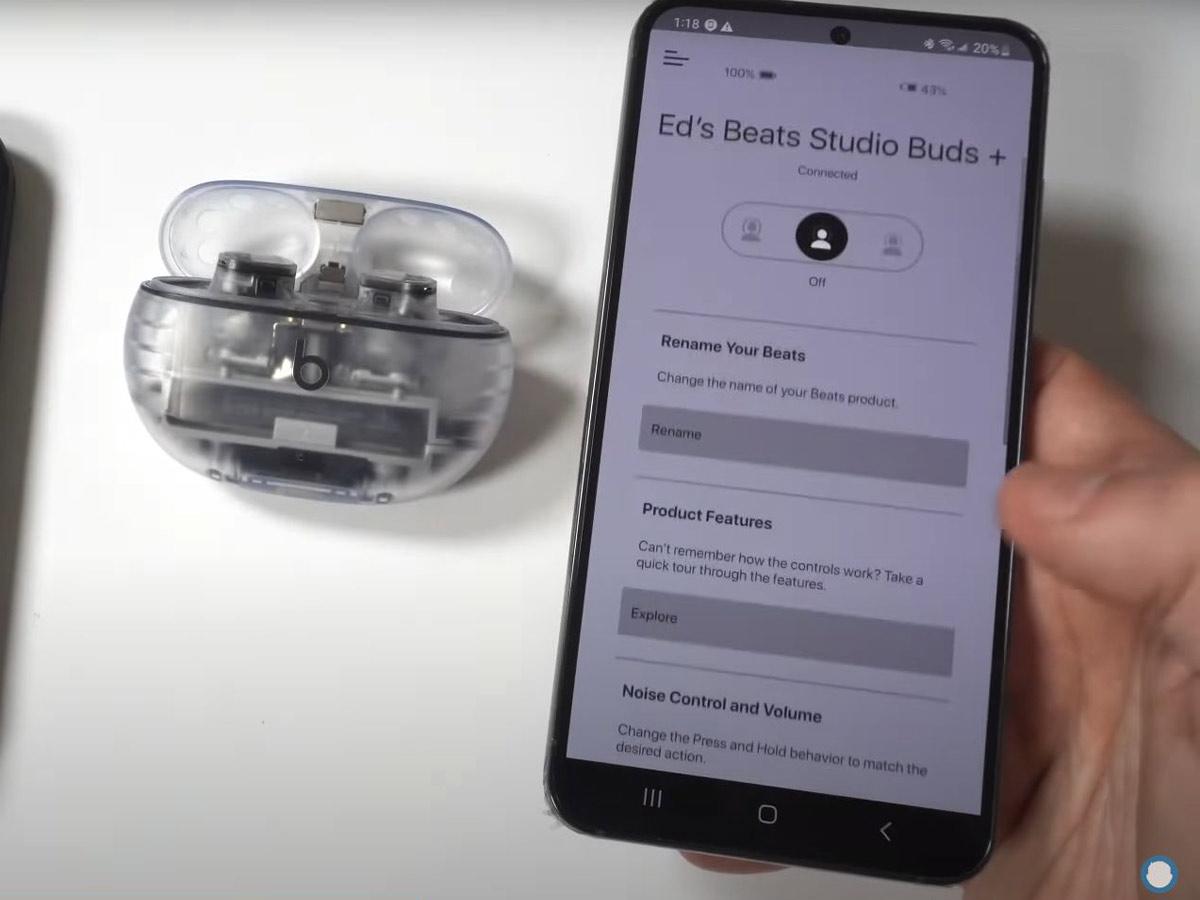
- Open the Beats app for Android.
Open Beats App. - Go to the Display page for your Beats headphones.
Go to the Display page. (From: Youtube/Fliptroniks) - If an update is available, there will be an Update button on this page. Tap it, and follow the onscreen instructions.
Mac
Beats updates are automatically downloaded and installed when your Beats are connected to your Mac and charging. However, you can check your firmware version to make sure you’re not missing an update.
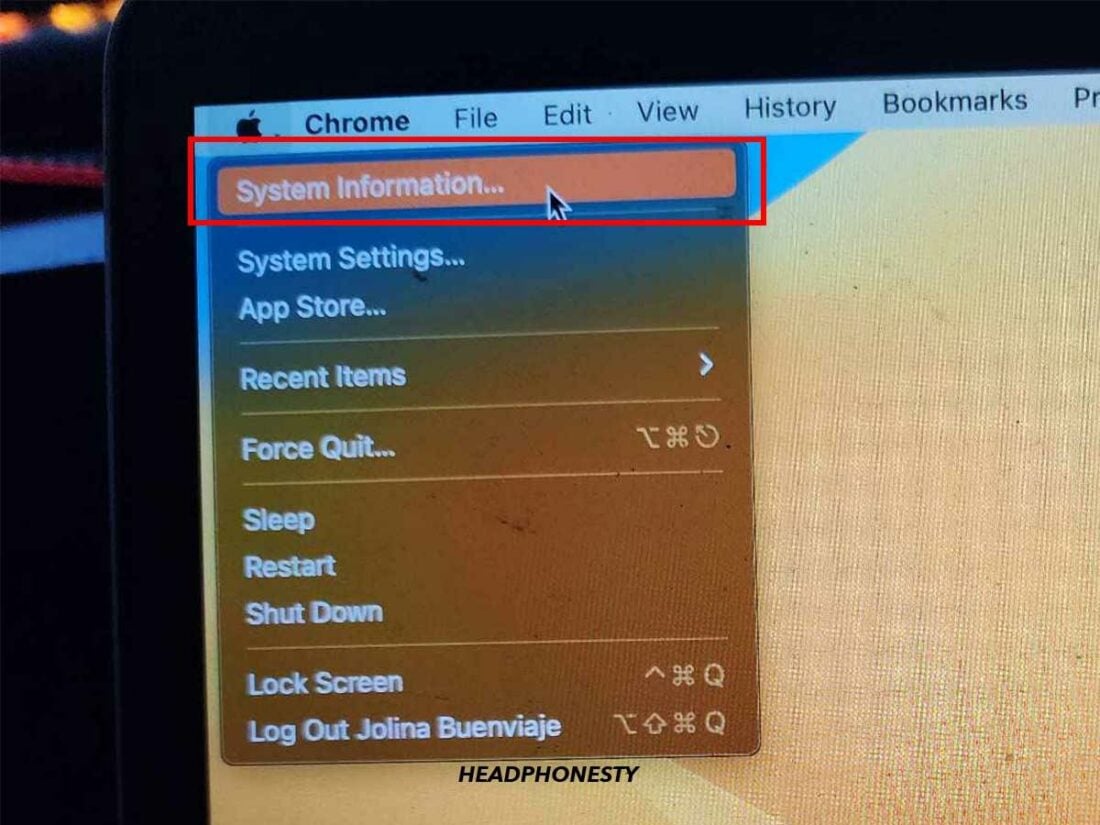
- Press the Option key and hold it down while clicking Apple menu > System Information.
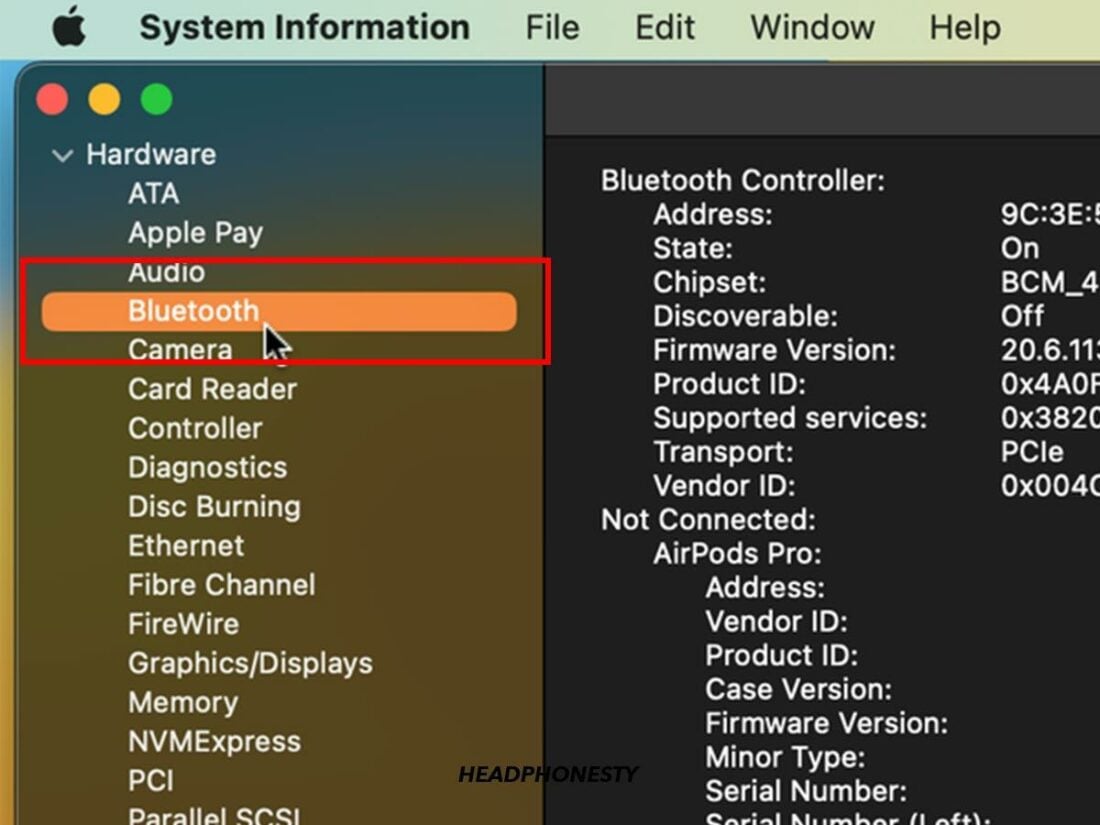
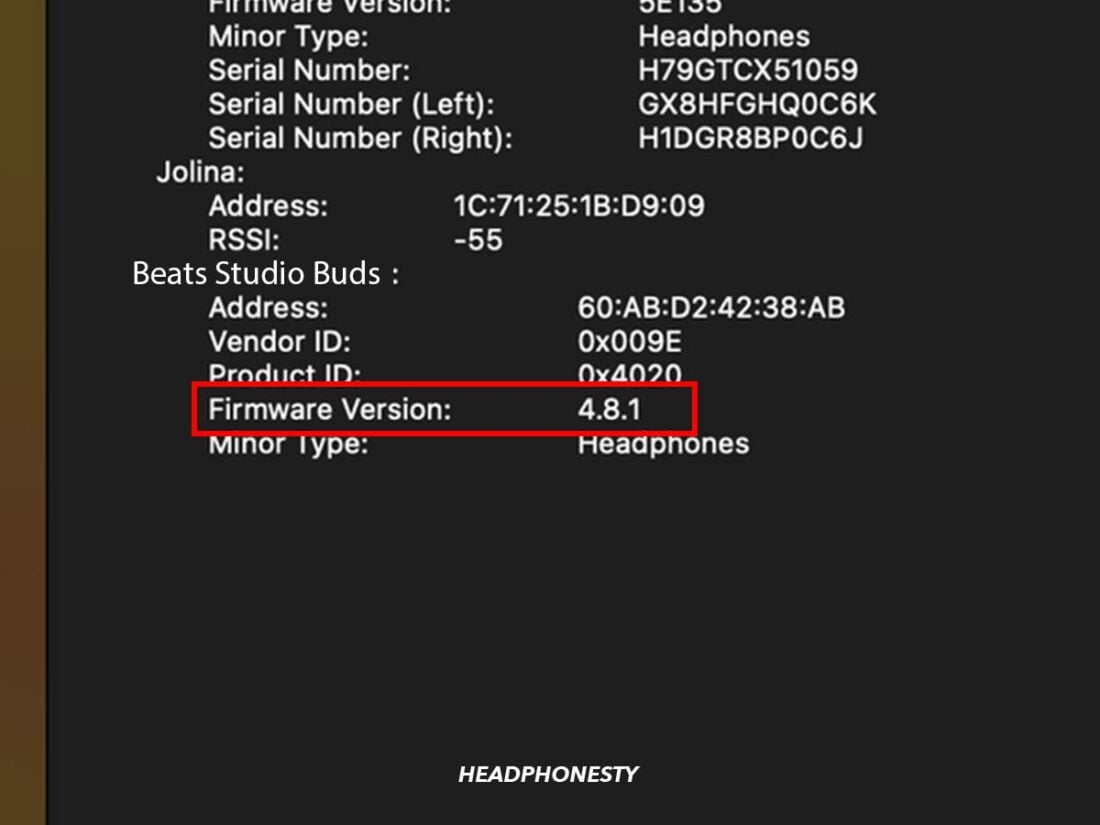
Select System Information. - Click Bluetooth, then look under your Beats for the firmware version.
Click Bluetooth. - Check that this is the latest firmware version available for your headphones.
Firmware version of Beats Studio Buds.
Beats Not Connecting Due to Interrupted Firmware Update
Firmware updates are downloaded and installed to your Beats when they’re charging. Unplugging your headphones or removing earbuds from their case while an update is being installed can interrupt the process, resulting in an incomplete installation. This can cause the Beats to malfunction and lead to connection issues.
One way to address interrupted firmware downloads is by performing a factory reset on your Beats. This will restore the device to its original factory settings, effectively erasing all information and settings on the device and allowing you to start fresh.
Resetting Beats headphones
The exact steps for resetting Beats headphones vary depending on the model. You can check out our article for more specific instructions on how to reset all Beats headphone models.
However, here’s a general overview of how to reset most Beats headphones:
- Press and hold the power and the volume down buttons for about 10 seconds.
Press and hold the power and volume down buttons.(From: Youtube/Beats by Dre) - When the Fuel Gauge flashes, release the buttons. Your headphones are now reset.
Indicator light flashing. (From: Youtube/Beats by Dre)
Resetting Beats earbuds
Again, the exact steps for resetting vary depending on the model of earbuds. You can use the aforementioned article on resetting Beats headphones to find the instructions you need for your model of earbuds.
Here’s a general overview for resetting Beats earbuds:
- Place both earbuds in the case and leave the case open.
Beats Studio Buds inside the charging case. (From: Youtube/Tech Tips) - Press and hold the system button inside the case for 15 seconds.
Press and hold the system button. (From: Youtube/Tech Tips) - When the LED indicator light flashes red and white, release the system button. The indicator light will continue to flash white, which means that your earbuds are reset and you can pair your earbuds with your device again.
Light indicator flashes red and white indicating that the reset is completed.(From: Youtube/HardReset.Info)

Conclusion
Now you know the troubleshooting steps you need to take to get your Beats headphones to pair with your device. Hopefully, your problem is solved, and you know what to do if this ever happens again.
Did you manage to fix your Beats? Did you find a method that we missed? Make sure to tell us in the comments below!
no I did not resolve my issue my power beats pro used to pair with a taotronics 5.0 tx and it just stopped pairing ?