
How to upgrade your audio experience with AirPods Pro touch controls.
You can use AirPods Pro to control your playback and ANC, answer or end calls, and activate Siri without having to hold your phone.
But for new users, these controls can get confusing, forcing you to access the functions on your device manually.
Fortunately, these controls are quick to learn if you have clear instructions, so let’s dive in!
- How to Control Audio Playback on AirPods Pro (2nd Generation)
- How to Use Siri on AirPods Pro (2nd Generation)
- How to Use ANC and Transparency on AirPods Pro (2nd Generation)
- How to Control Calls on AirPods Pro (2nd Generation)
- How to Control AirPods Pro (1st Generation)
- How to Customize the AirPods Pro Controls
How to Control Audio Playback on AirPods Pro (2nd Generation)
By squeezing or swiping the touch sensor on the stem of your AirPods Pro, you can control the playback of your audio.
- How to play/pause music
- How to fast forward or skip to the next track
- How to rewind or skip to the previous track
- How to adjust the volume
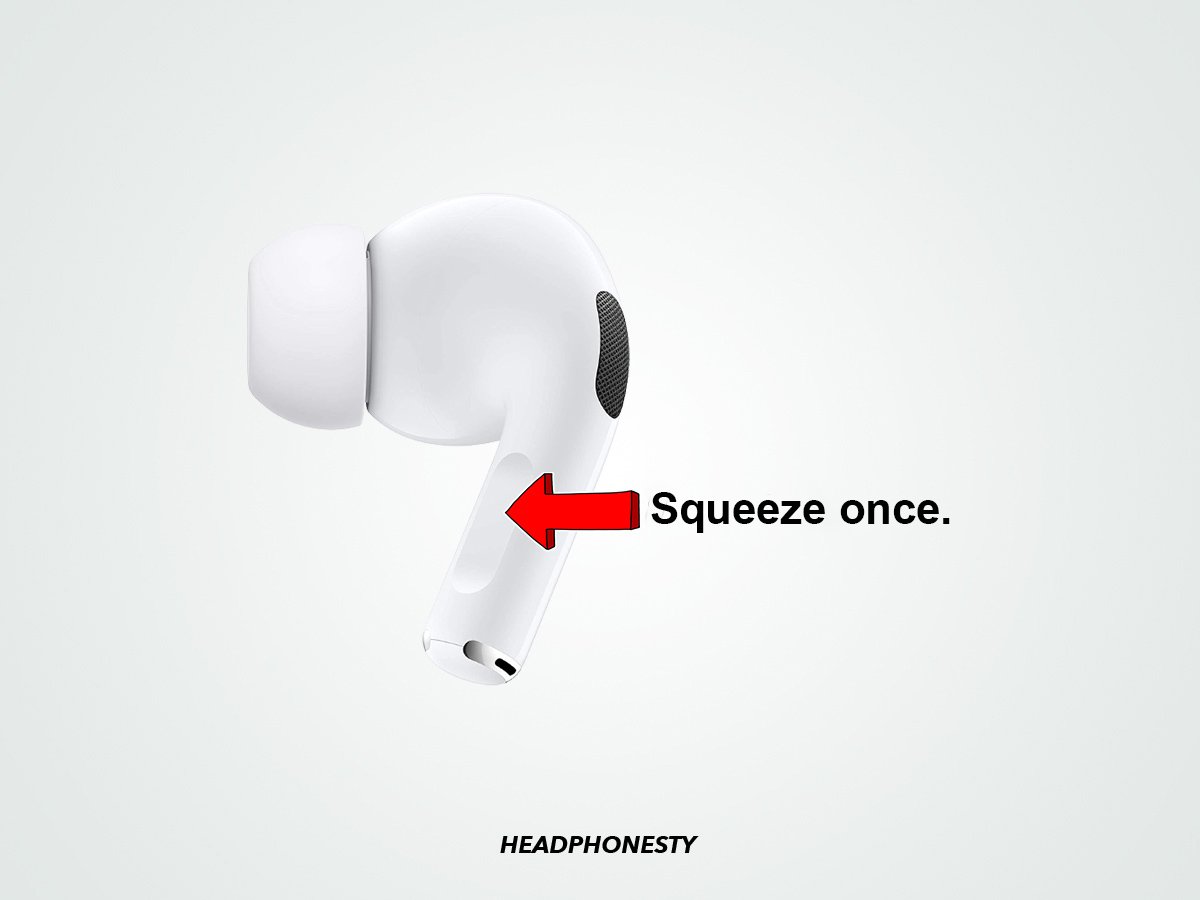
How to play/pause music
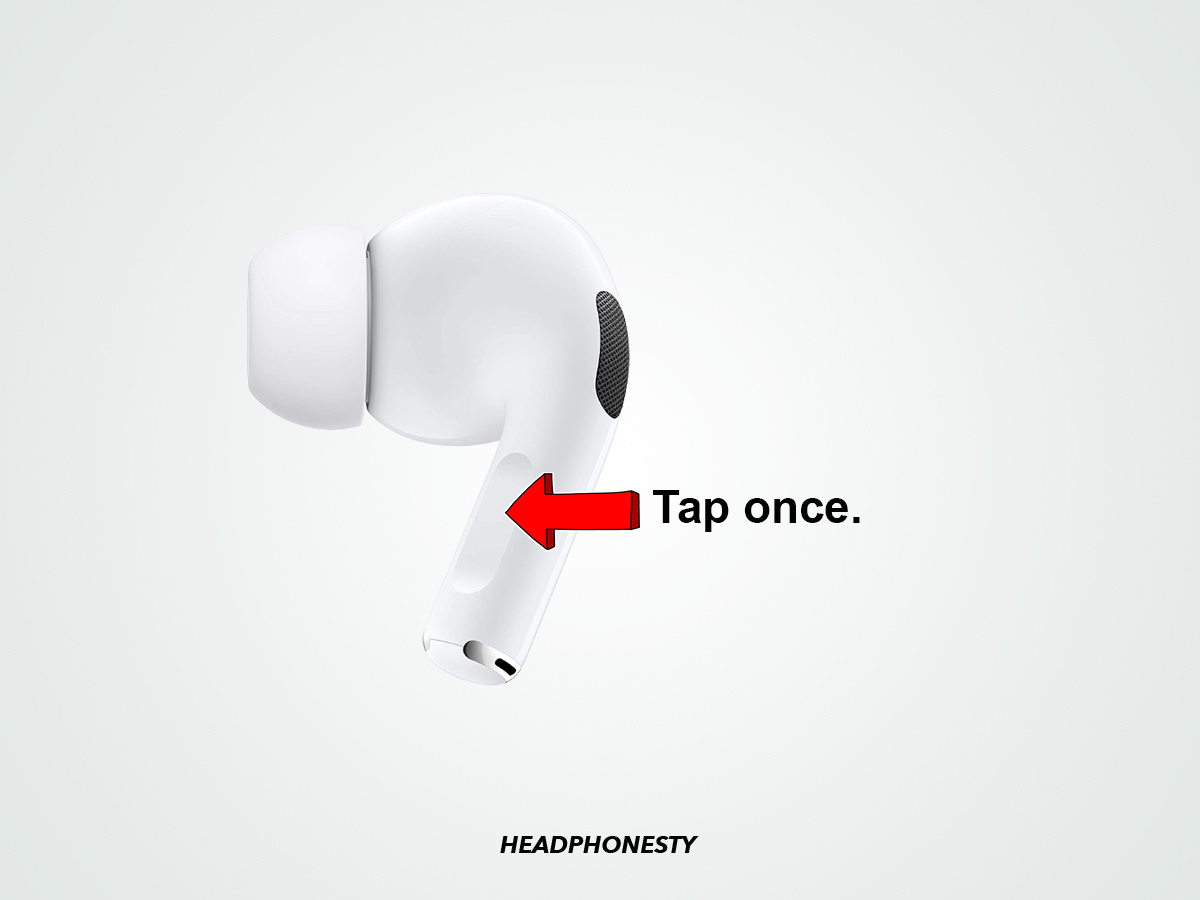
You can play and pause your audio by tapping the touch sensor once.
How to fast forward or skip to the next track

Double-tapping the touch sensor on your AirPods Pro will skip forward one track.
How to rewind or skip to the previous track
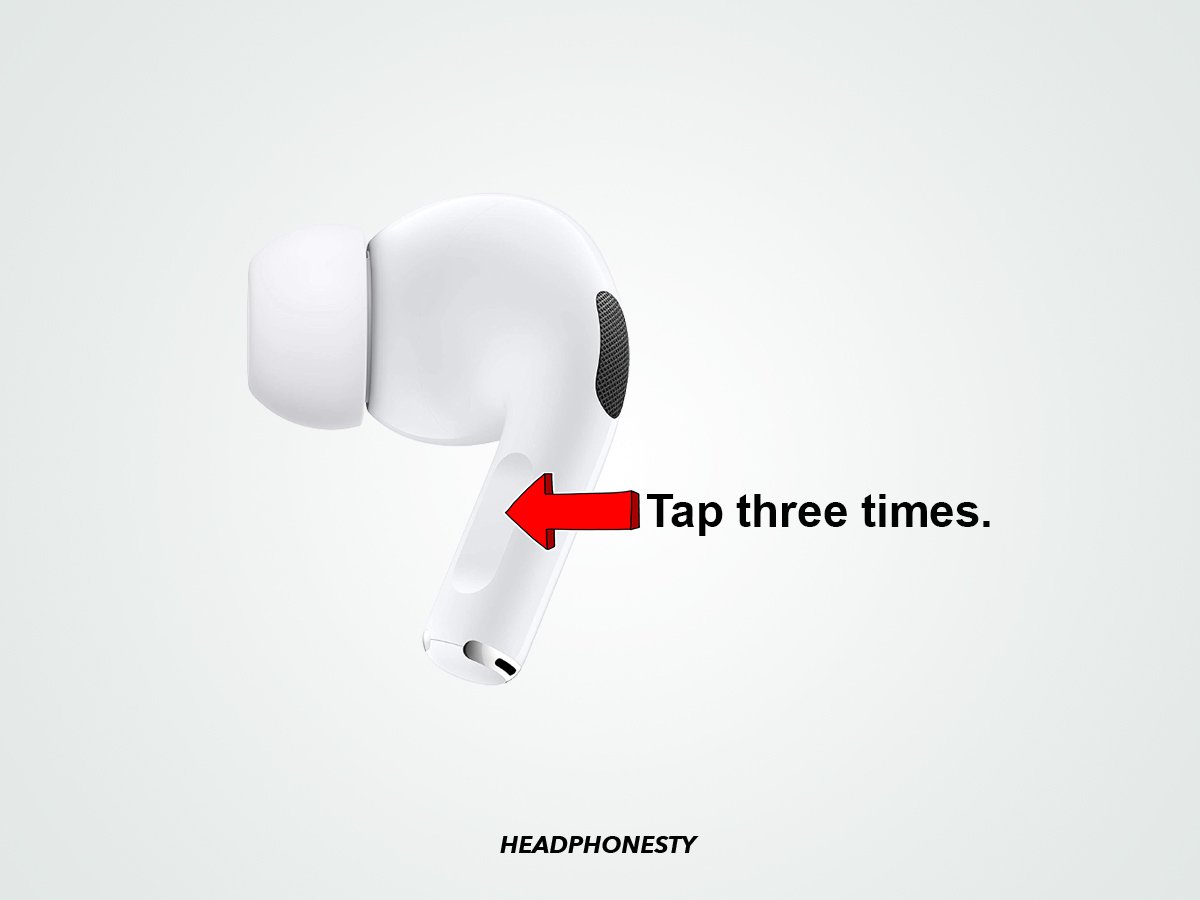
If you want to skip backward, you can tap the touch sensor three times.
How to adjust the volume
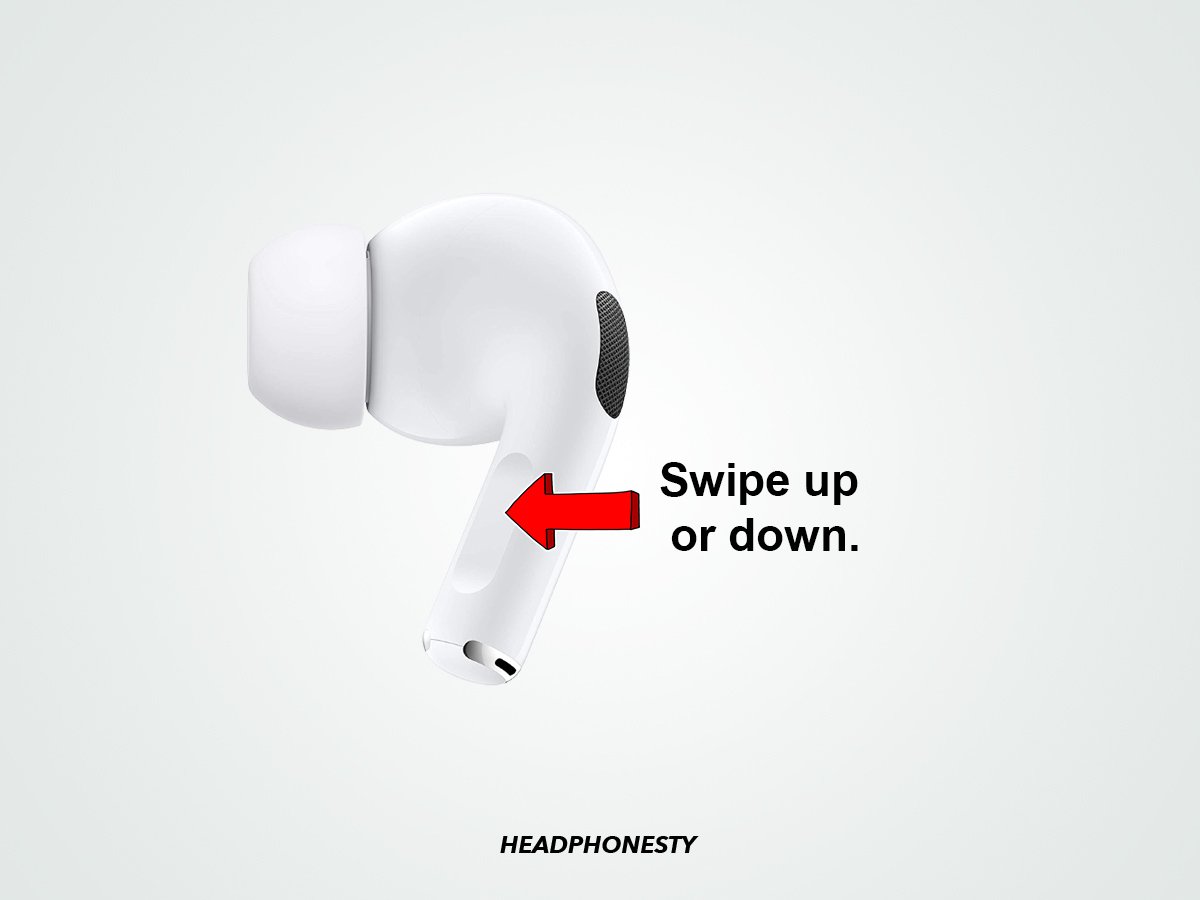
Swipe up or down on the touch sensor to increase or decrease your volume.
How to Use Siri on AirPods Pro (2nd Generation)

To use Siri on your AirPods Pro 2nd Gen, you can press and hold the touch sensor until you hear a chime signaling that you’ve alerted Siri. You can control the assistant with voice commands through the built-in mic on your AirPods Pro.
How to Use ANC and Transparency on AirPods Pro (2nd Generation)

By default, pressing and holding the touch sensor will switch between Active Noise Cancellation and Transparency Mode.
However, you can change the modes this command will switch between in your Settings by following the steps below.
How to Control Calls on AirPods Pro (2nd Generation)
With the AirPods Pro, you can decline an incoming call, end the current one, or answer a second one. Here’s how:
Answer and end calls
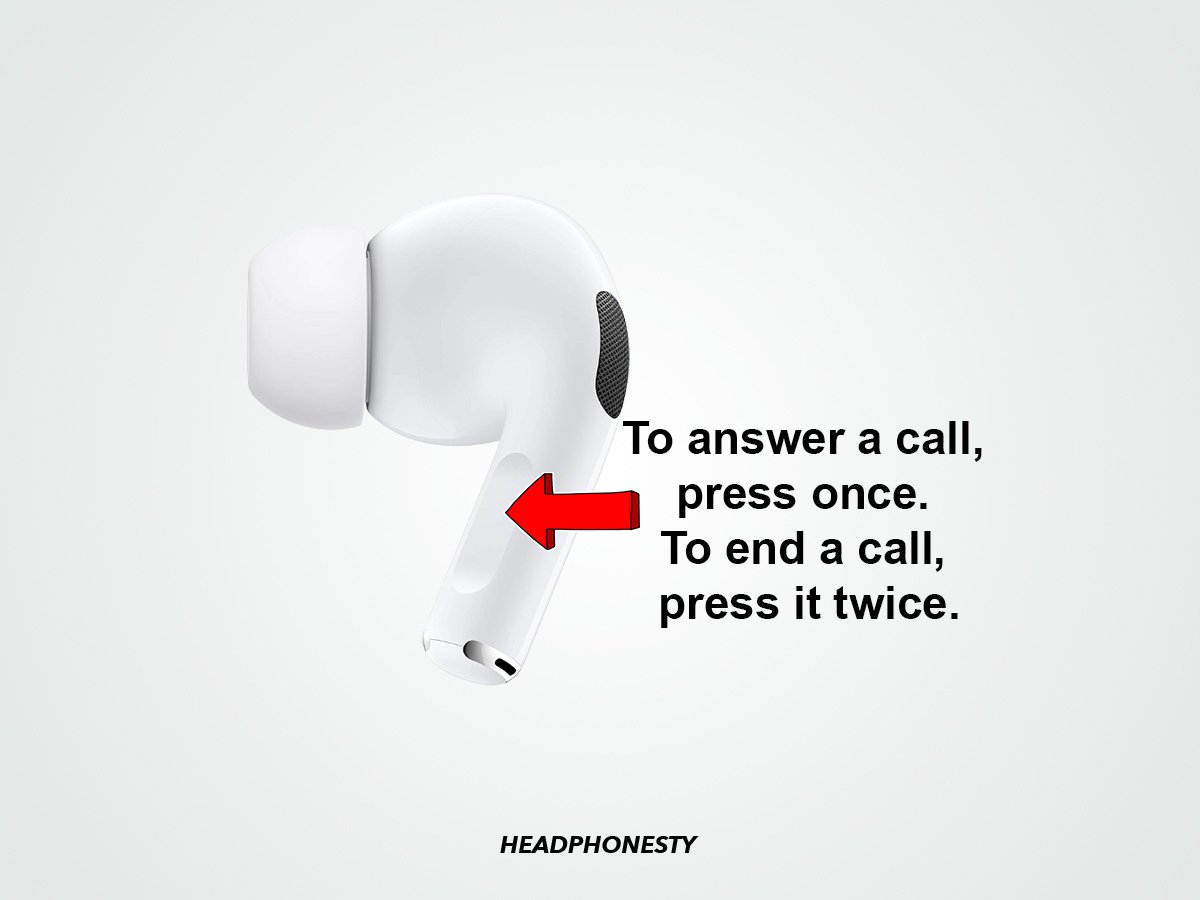
To answer a call, press the sensor once. To end a call, press it twice.
Make calls
To make a call, activate Siri and ask it to call someone in your contacts list. Alternatively, you can read out the phone number you want to call.
Decline a call

If someone is calling and you don’t want to answer, you can decline the call by pressing the touch sensor on either AirPod twice. This will send the call directly to voicemail.
Answer another call
If someone calls you while you’re already on a call, squeeze the touch sensor once to put the first call on hold and answer the second one.
To switch between calls, squeeze the touch sensor once again.
And, if you want to end the current call and transfer to the one on hold, squeeze the touch sensor twice.
How to Control AirPods Pro (1st Generation)
The main difference between 1st and 2nd Gen AirPods Pro controls is that 1st Gen AirPods Pro can’t sense gesture controls, like swiping to change the volume, and so they rely entirely on the force sensor. Here’s a quick rundown of the controls available for AirPods Pro 1st Gen:
- Play/Pause: Press once.
- Skip forward: Double press.
- Skip back: Triple press.
- Adjust volume: Activate Siri, then ask it to adjust the volume.
- Answer a call: Press once.
- End a call: Double press.
- Decline a call: Double press.
- Switch between calls: Press once.
- Activate noise control/Siri: Press and hold.
To keep things simpler, here’s a cheat sheet you can download for future reference:
How to Customize the AirPods Pro Controls
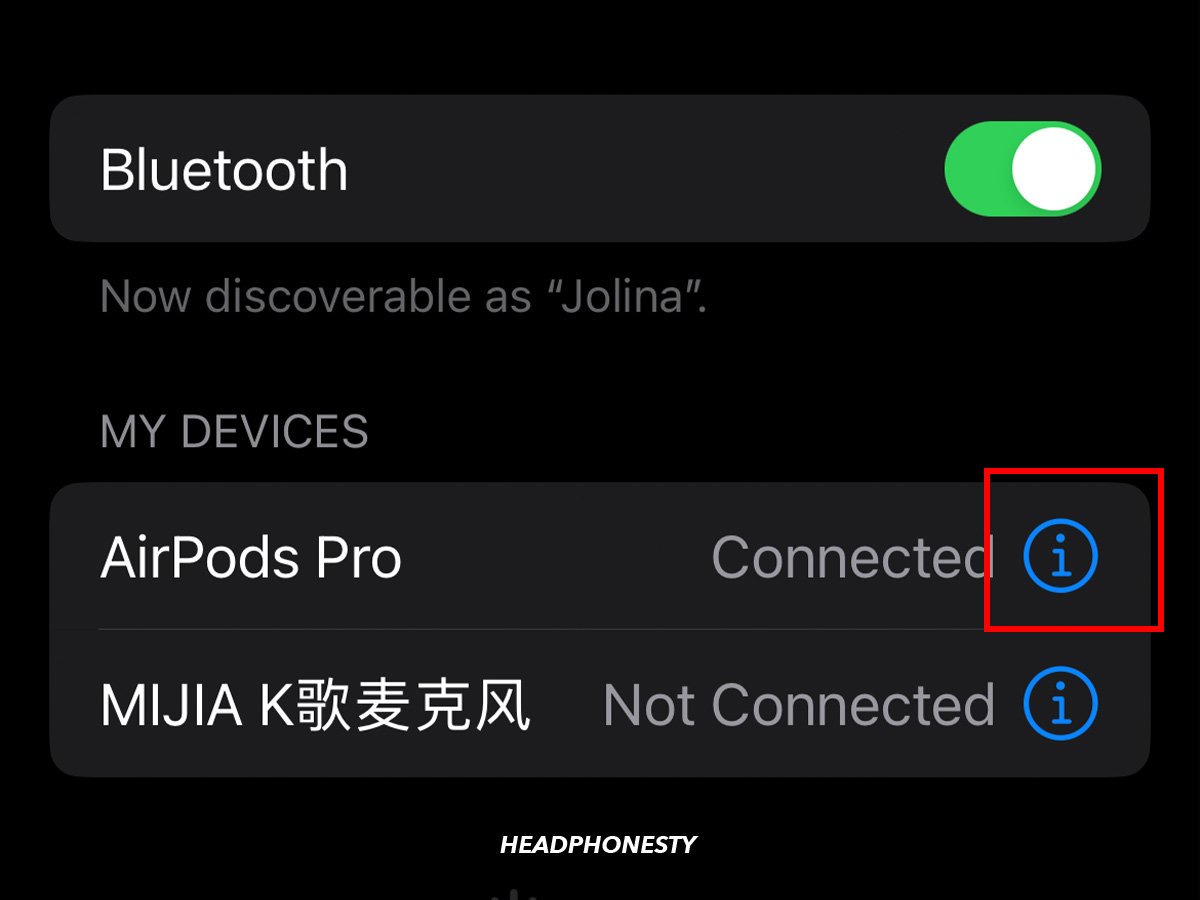
As stated above, you can change the ‘press and hold function’ in your iOS settings. Here’s how:
- Open your iPhone Settings, head to Bluetooth, and press on the More Info ‘i’ to the right of your AirPods.

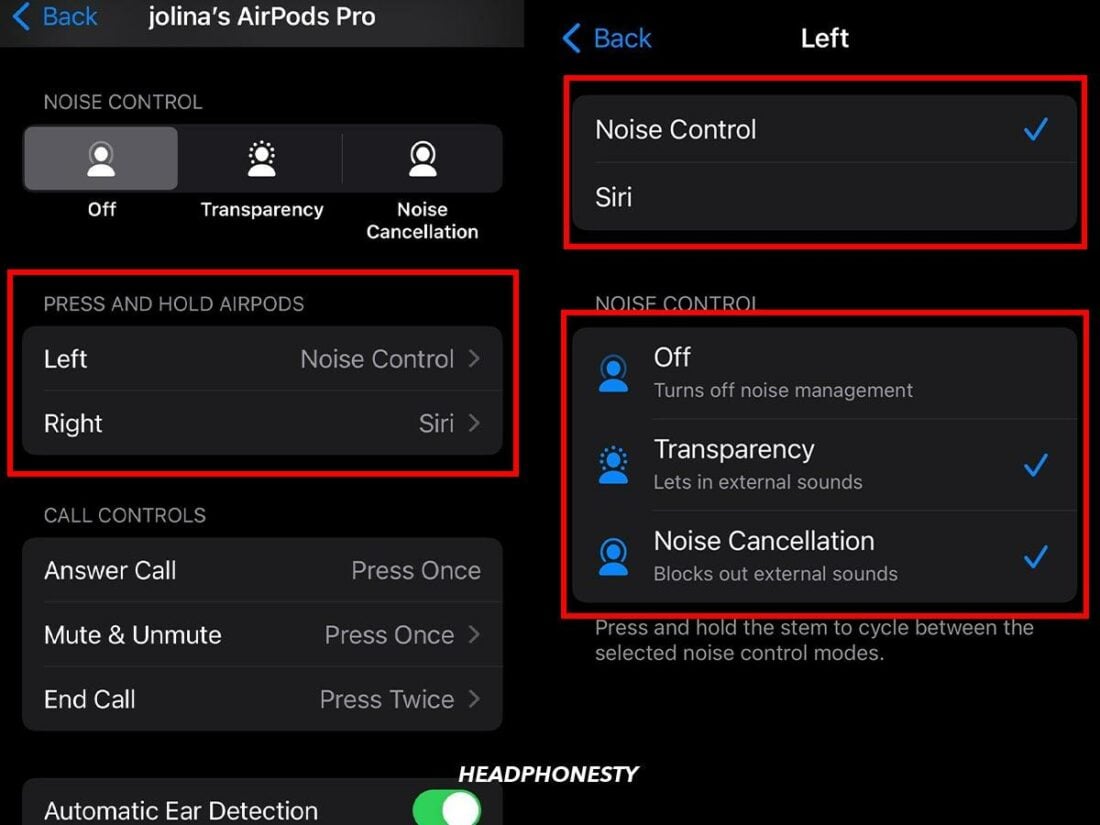
How to Customize the AirPods Pro Controls - In the Press and Hold AirPods header, choose Left or Right depending on the AirPod you want to customize.
- Choose if you want the AirPod Pro controls to activate Noise Control or Siri.
- If you choose Noise Control, select the two or three noise control modes you want to switch between using a long-press. You can switch between Active Noise Cancellation, Transparency Mode, Off, and Adaptive Noise Cancelation (for AirPods Pro 2).

How to Customize the AirPods Pro Controls
In your AirPods Pro settings, you can also set your microphone to Automatic (which will detect when you’re only wearing one earbud and use that mic), Always Left, or Always Right.
Additionally, you can toggle Automatic Ear Detection on or off. This mode detects when your AirPods Pro are removed from your ears and will play and pause audio accordingly. Turning this off will only pause your audio when you choose to pause it yourself.
I would like to see the definition of the “transparency mode”; what is it; example of use.
From article:
“In comparison, Transparency Mode does the exact opposite of ANC. It does not block external noise, but rather amplifies it and actively feeds it to the AirPods’ speakers so the user can hear them.
It makes it seem like you’re not wearing any earbuds at all so that you can still be aware of the sounds around you, which is especially useful for crossing busy roads.”
I would like to block out more external noise than the ANC is doing. It does block out a fair amount, but I can tell the mic is picking up some sounds, and I’d like to either further limit that, or turn down the volume these are delivering that sound to my ears. I got these (airpods pro 2) primarily for hearing protection, reducing the noise. I’ve been having a constant ringing, possibly tinnitus, and various sounds really ramp it up.
How do I know if my AirPods Pro noise canceling is working?
Check your AirPods Pro settings to see if noise canceling is turned on. If not, try turning it on again and check if there’s a difference in ambient sound.
If noise canceling isn’t working, try cleaning your AirPods. If that doesn’t work, contact the AirPods Pro Sound Service.
Can I control volume on AirPods Pro (1st generation)?
For 1st Gen AirPods Pro, you’ll need to activate Siri and use a voice command to change the volume.
Alternatively, you can adjust the volume on your device or in the app that’s playing audio.
How do I check my AirPod battery?
You can check your AirPods’ battery on the pop-up that appears when connecting your AirPods to an Apple device. You can also add the battery widget to your home screen.
Check out our article on how to check the AirPods battery for more details.