
Learn how to control Apple’s well-known noise canceling modes on your AirPods and enjoy a better listening experience.
Active noise cancellation (ANC) is one of the best things about the AirPods Pro 1 and 2, promising a distraction-free listening experience. But their minimalistic design and lack of indicators often make it difficult for new users to enable the feature.
When you’re on a loud flight or in crowds, not knowing how to enable the ANC feature can be extremely frustrating. Add to it the nagging feeling that you’re not getting the most out of your AirPods, and your whole day may fall apart.
Fortunately, it’s fairly easy to enable AirPods’ active noise canceling – as long as you know where to look. And, we’ve created this clear step-by-step guide to show you just that. Read on to find out how!
How to Turn on AirPods’ Noise Cancellation on iPhone or iPad
Since AirPods are native Apple devices, they work most seamlessly with the iPhone or iPad. You can use both of these iOS devices to turn on the noise-canceling feature.
Here are the steps:
- Connect your AirPods Pro or AirPods Max to your iOS device.

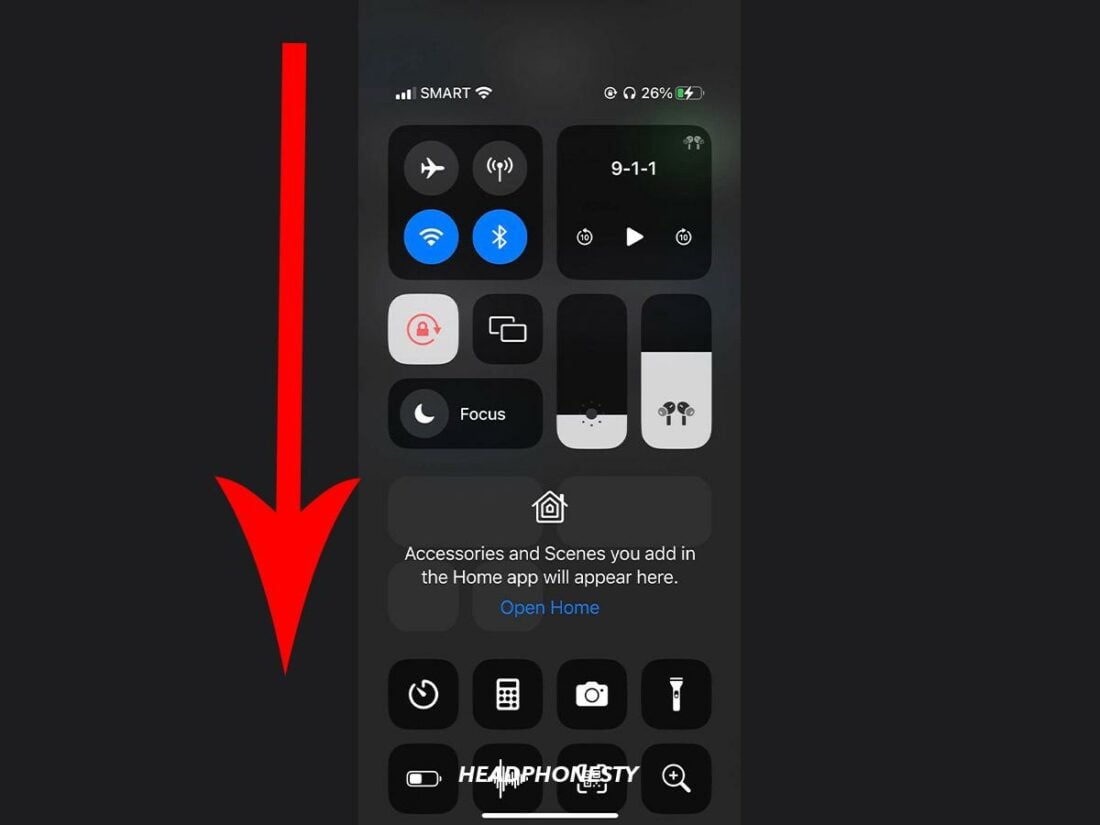
AirPods connected to iPhone - For iPhone X or later, swipe down from the top-right corner of the screen to open the Control Center. Whereas for iPhone 8 or earlier, swipe up from the bottom edge of the screen.
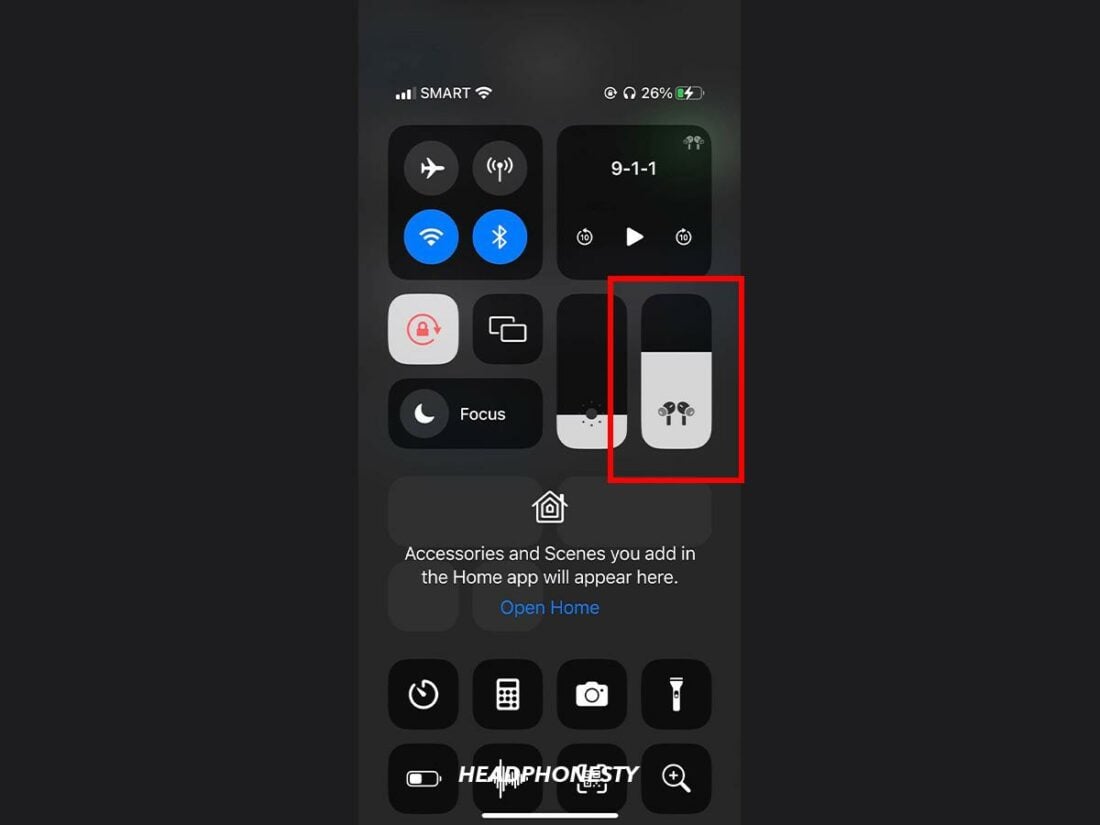
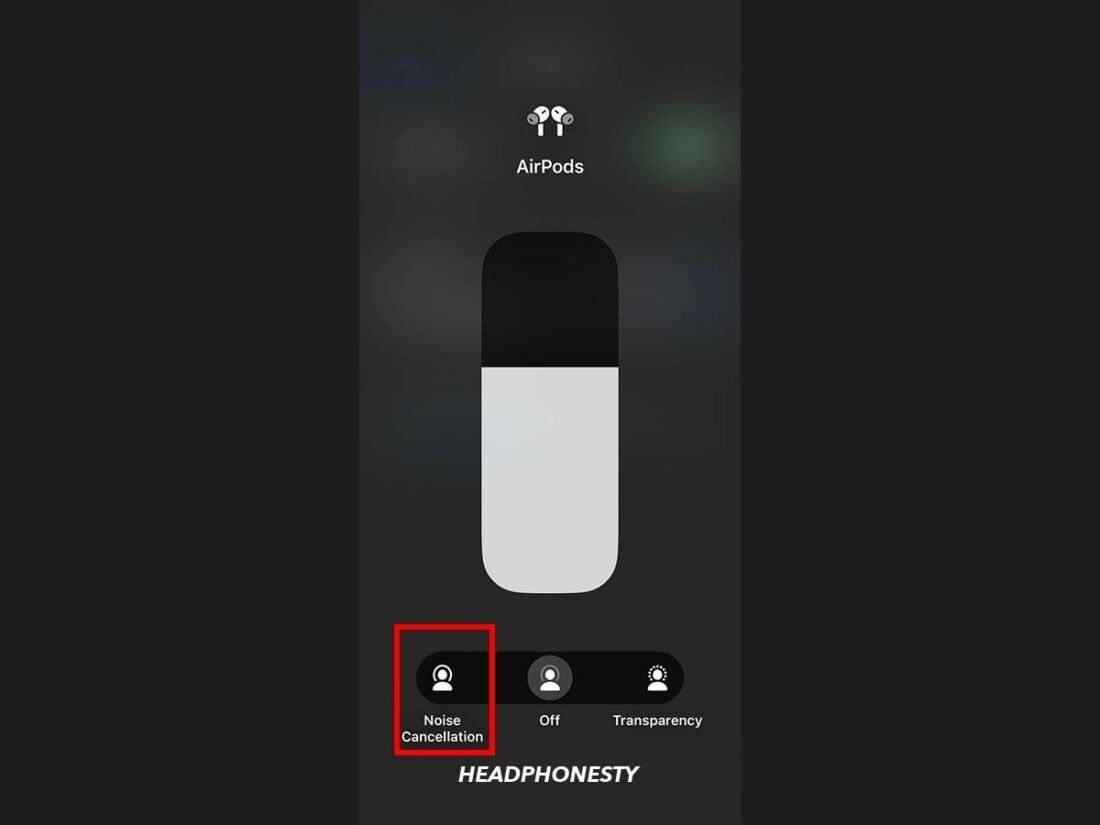
Swipe down from the top-right corner of the screen to open the Control Center - Press and hold the volume slider.
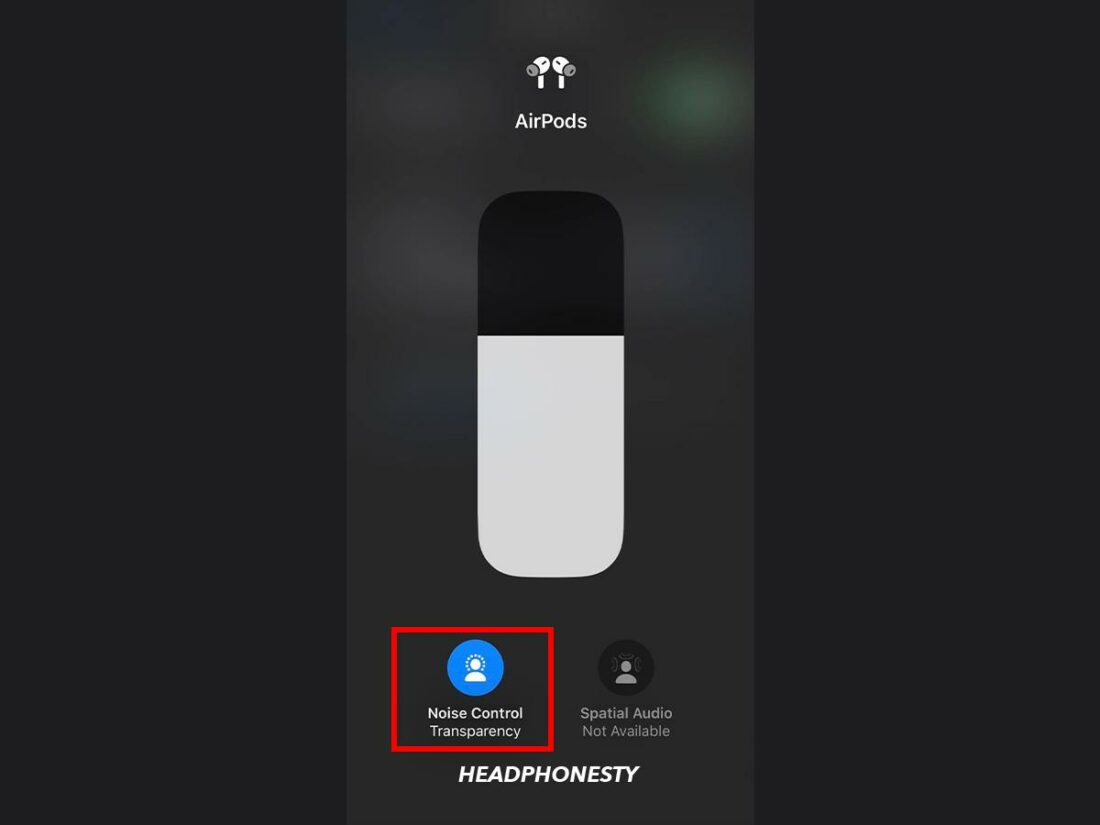
The iOS volume slider on Control Center - Tap Noise Control which will open a pop-up containing additional controls.
AirPods Noise Control - Tap Noise Cancellation to activate AirPods’ Active Noise Cancellation.
Enabling Noise Cancellation
Alternatively, you can also turn on noise canceling manually through your iOS device’s settings. Here’s how:
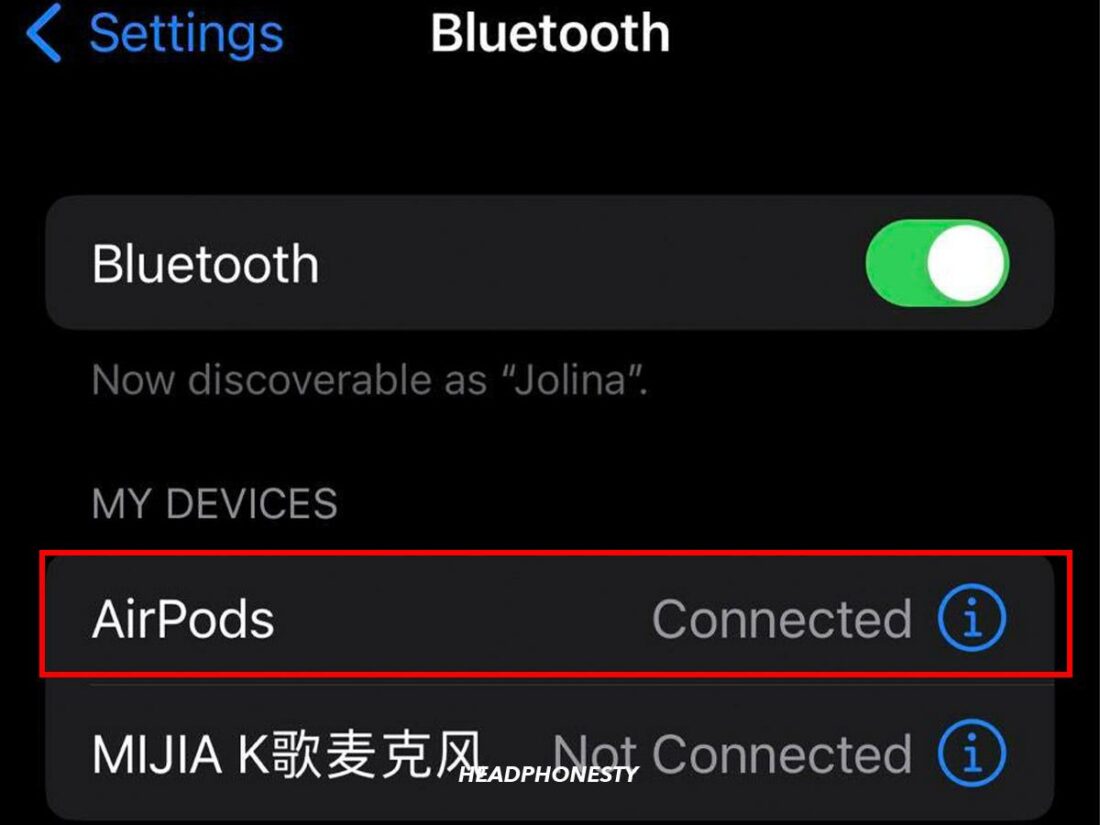
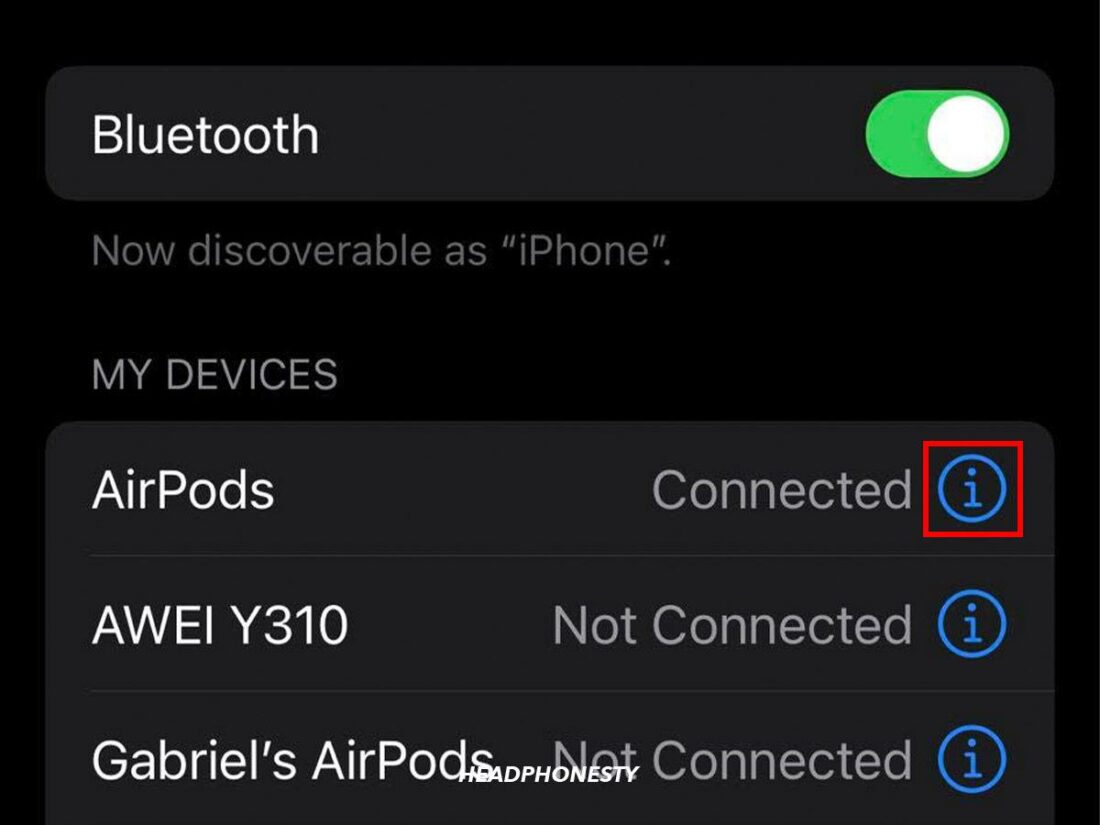
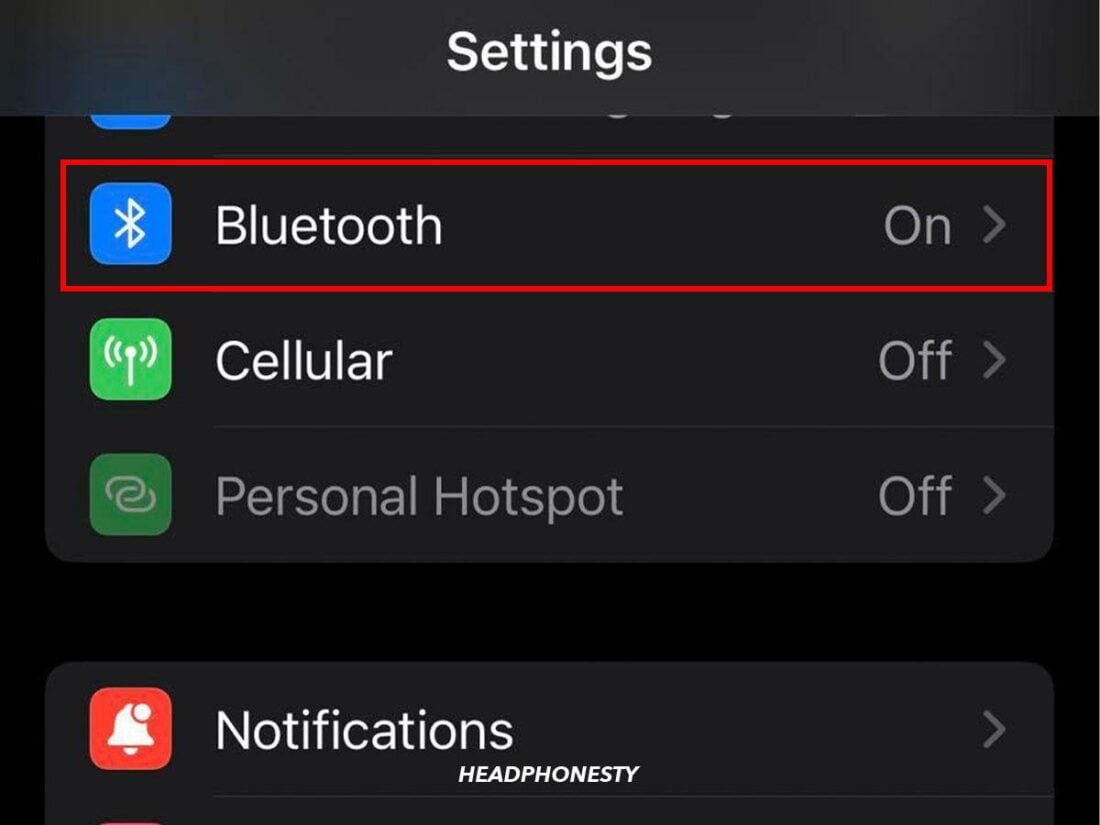
- Go to Settings > Bluetooth.
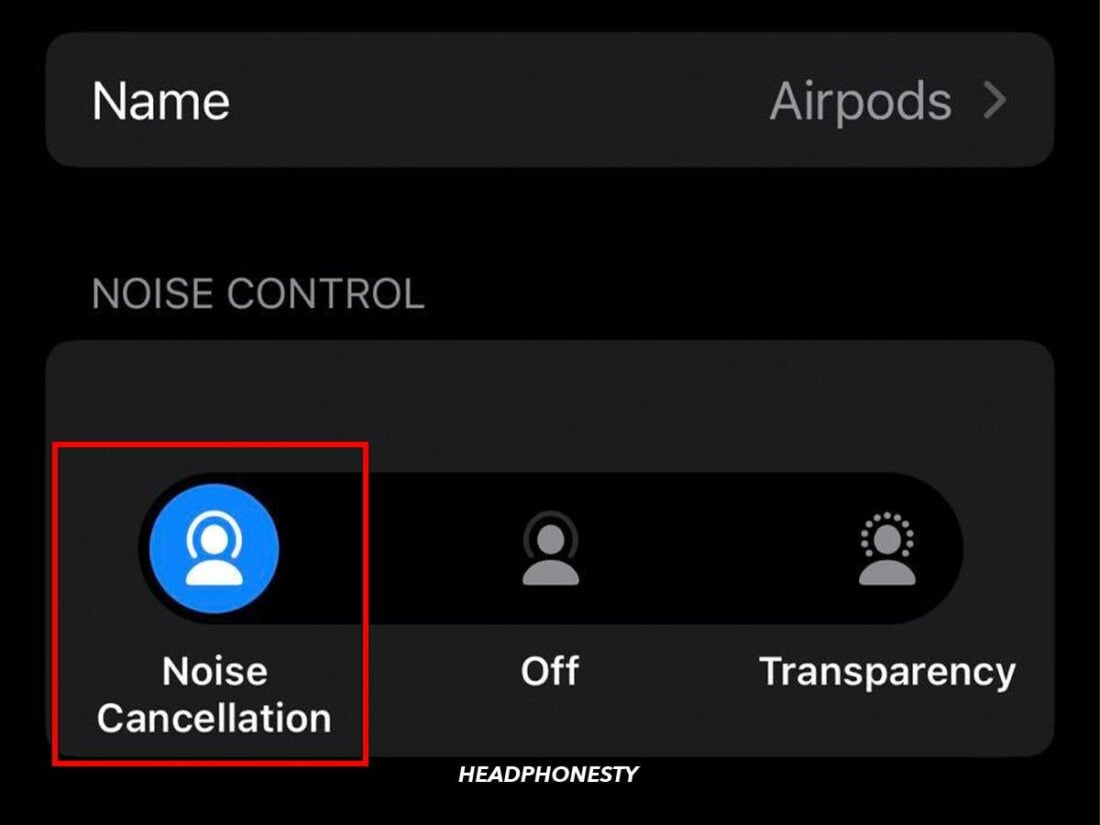
Go to Settings and select Bluetooth - Under the Devices list, click the information icon (i) beside your AirPods’ name.
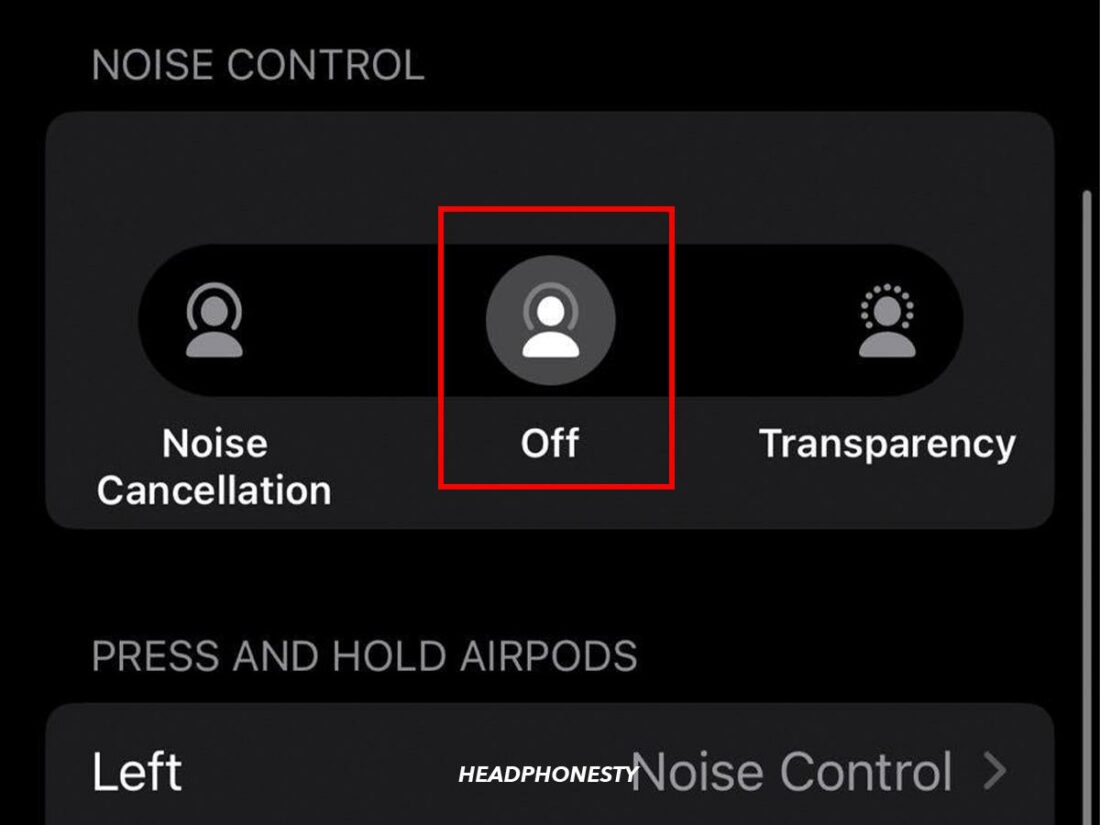
Tap on the information button - Under Noise Control, tap Noise Cancellation to enable it.
Select Noise Cancellation type


How to Turn on AirPods’ Noise Cancellation on a Mac
Together with iOS, Mac is part of the Apple ecosystem of devices that offer a seamless experience with the AirPods. Here’s how you can turn on AirPods’ active noise canceling on MacOS:
- Connect your AirPods Pro or AirPods Max to your Mac.
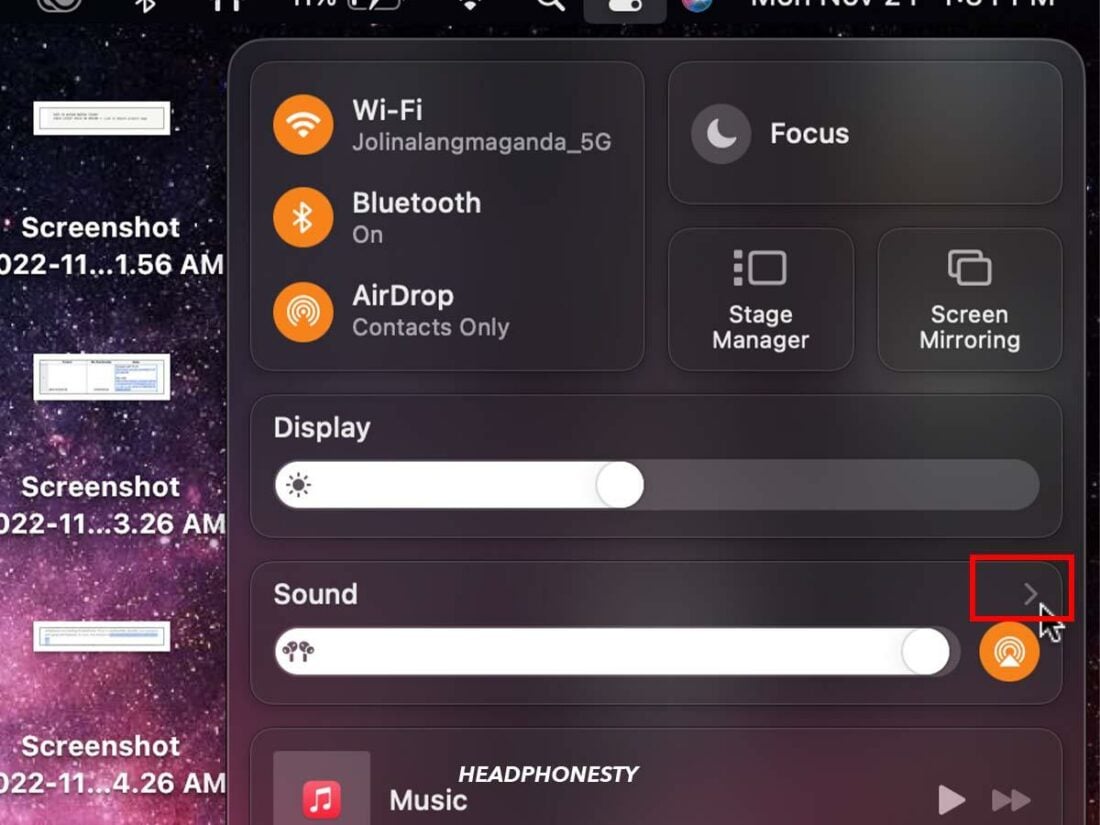
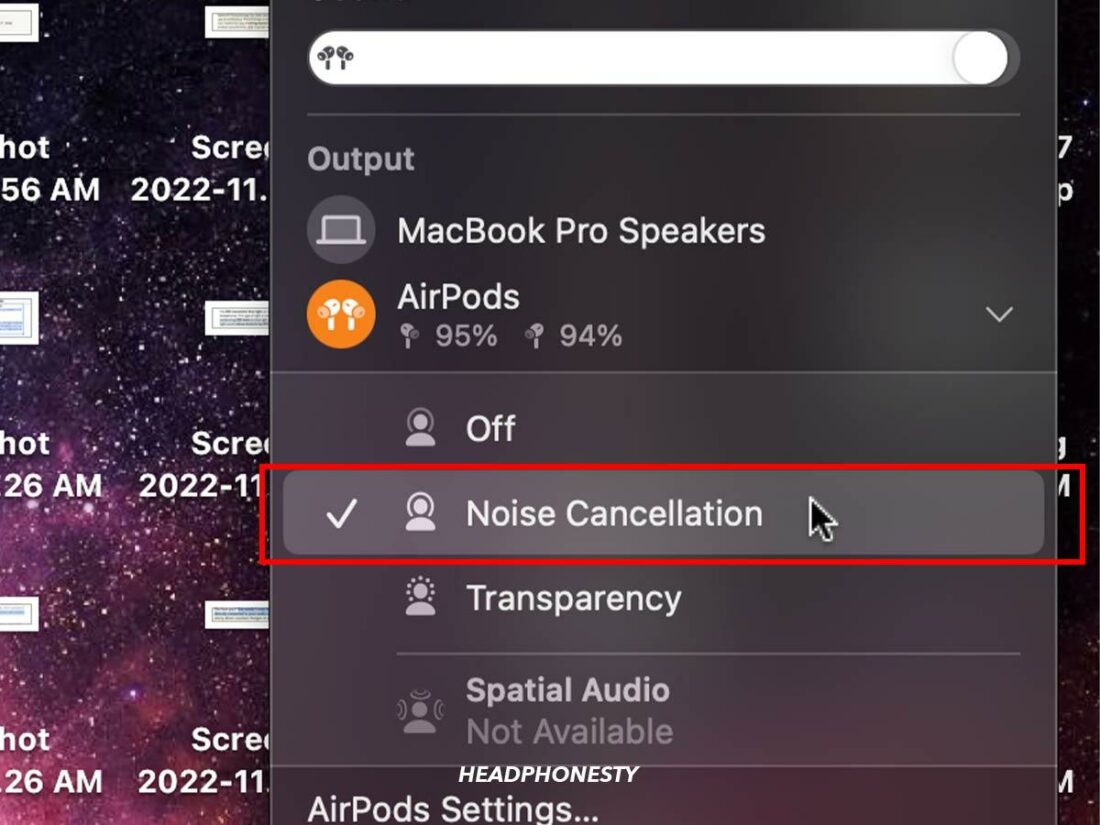
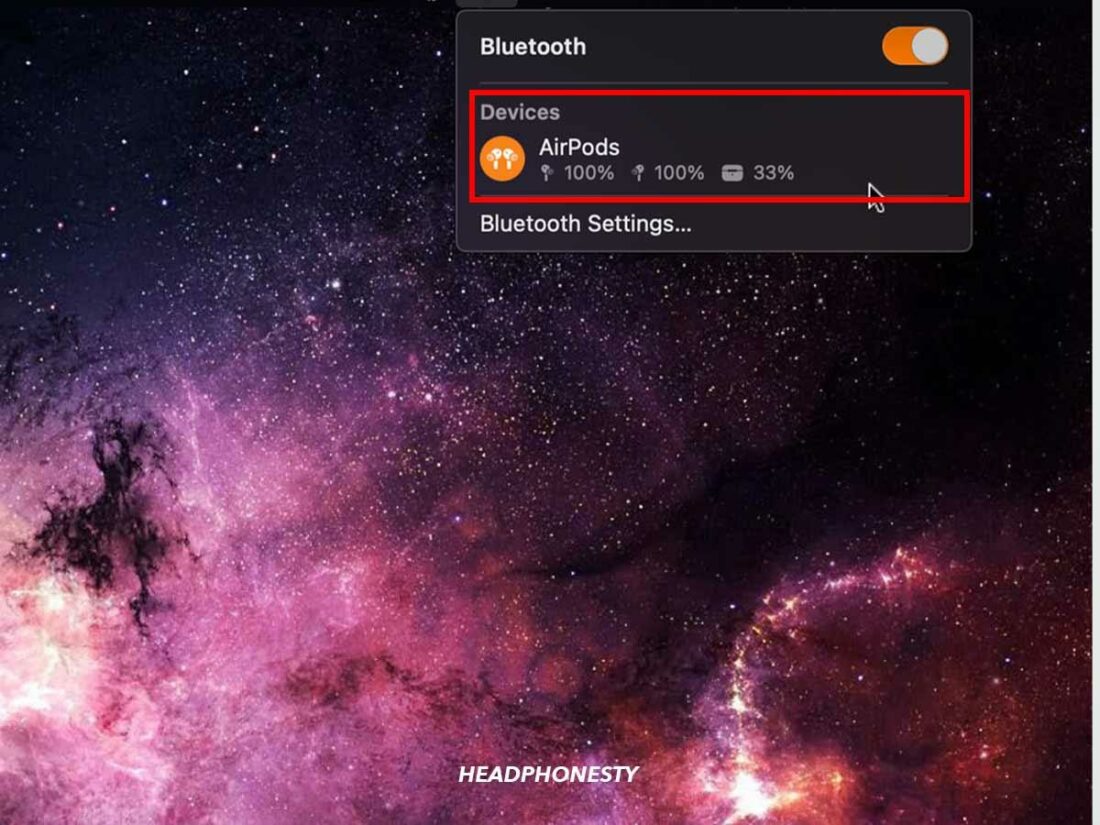
Connect your AirPods - Click the Volume icon in the menu bar in the top right-hand corner.
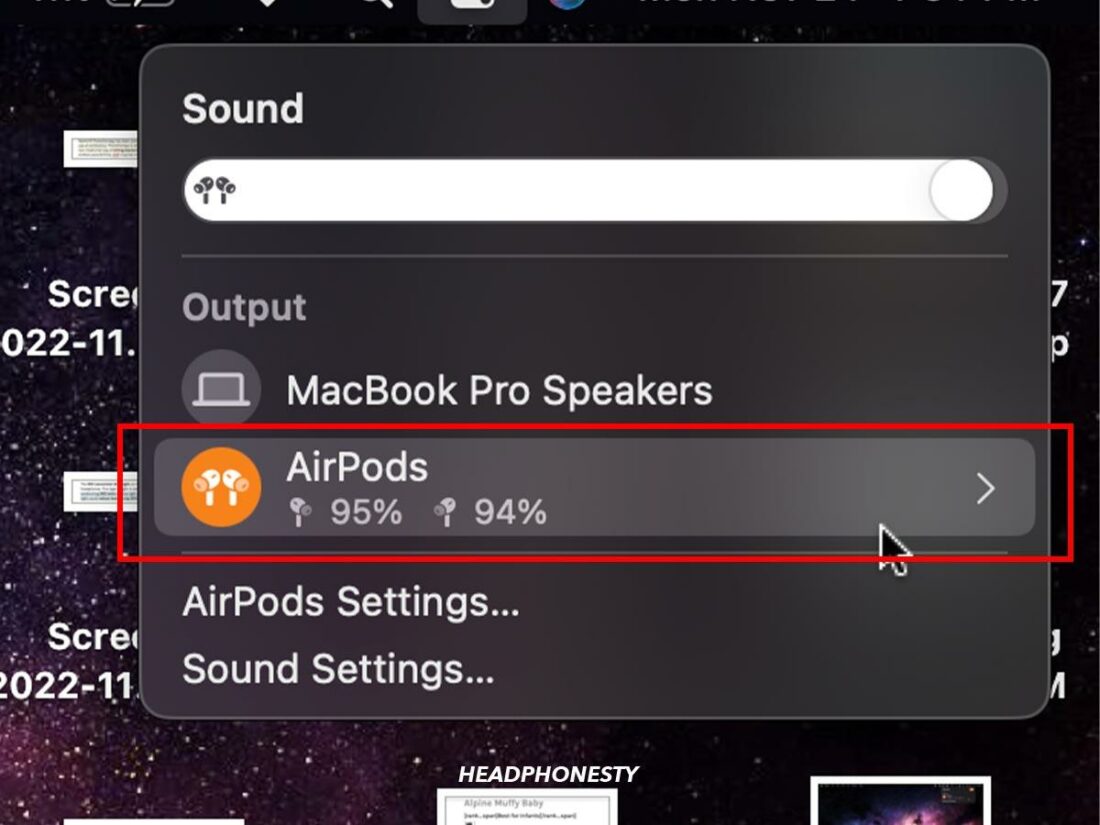
Click the Volume icon - Select your AirPods Pro or AirPods Max.
Select your AirPods - Select Noise Cancellation to enable it.
Select Noise Cancellation

Alternatively, you can also use the Apple Menu in Mac OS to activate noise canceling. Follow these steps:
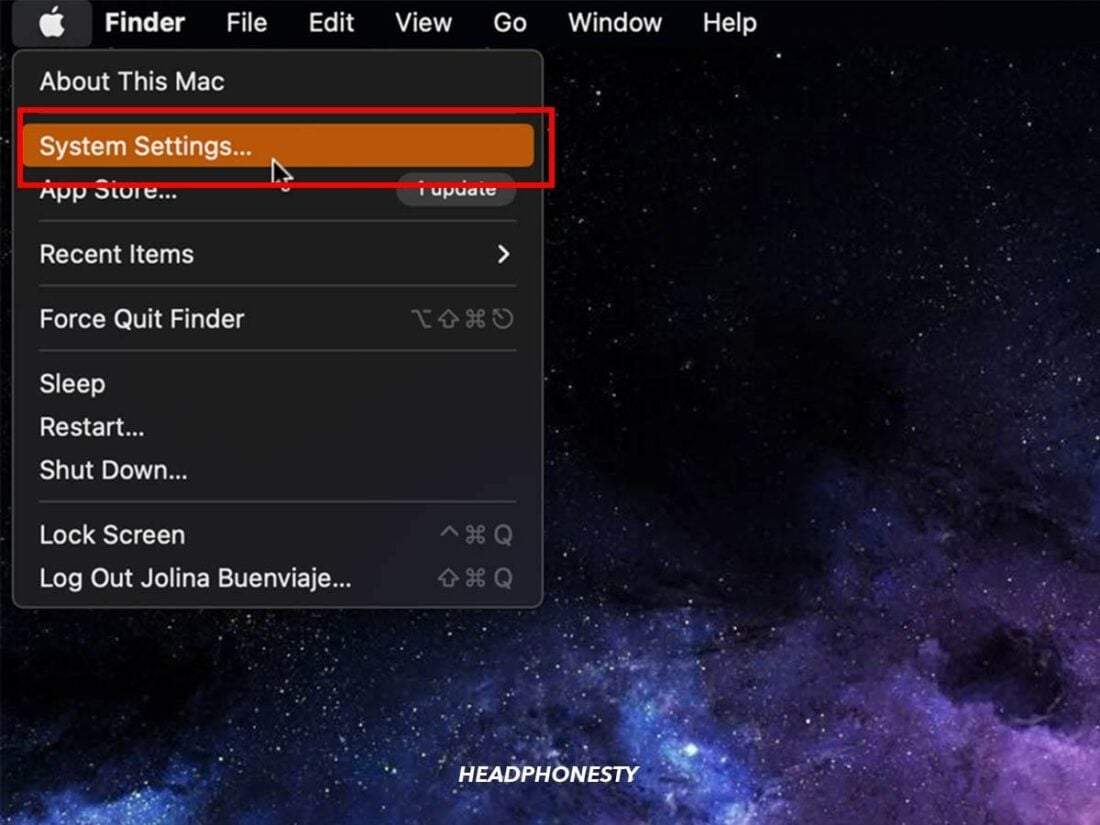
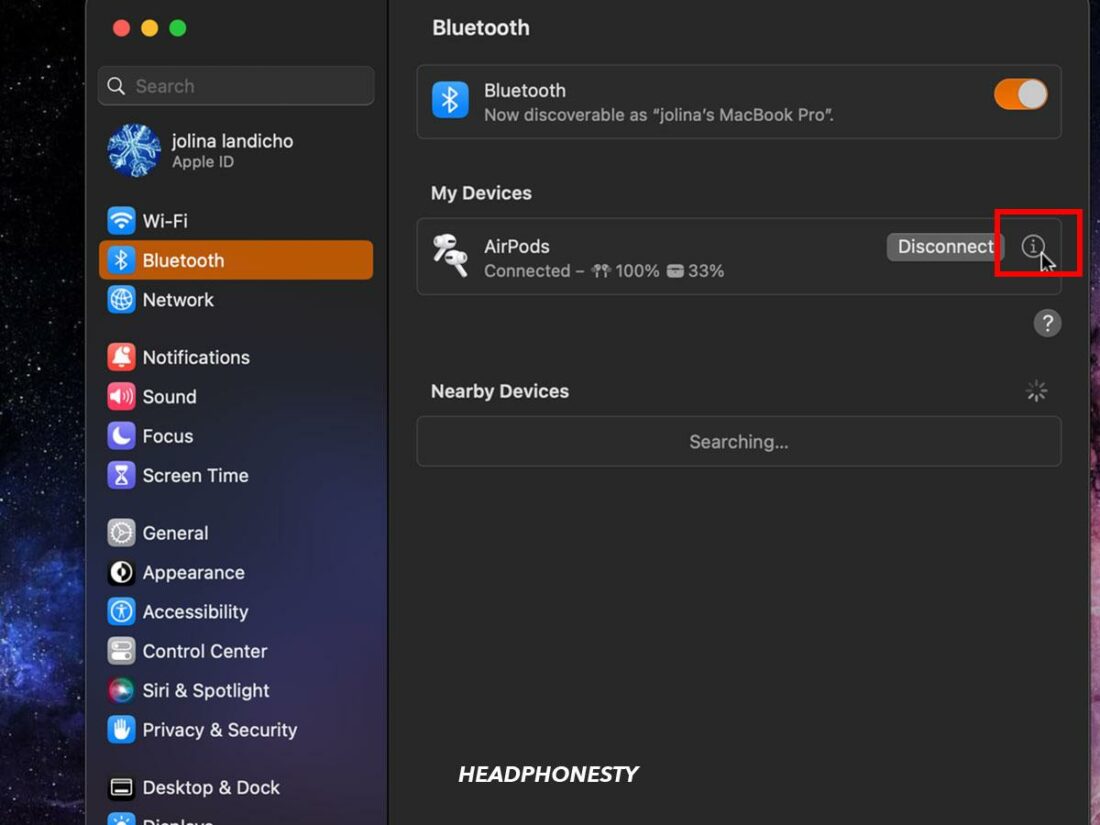
- Open System Settings.
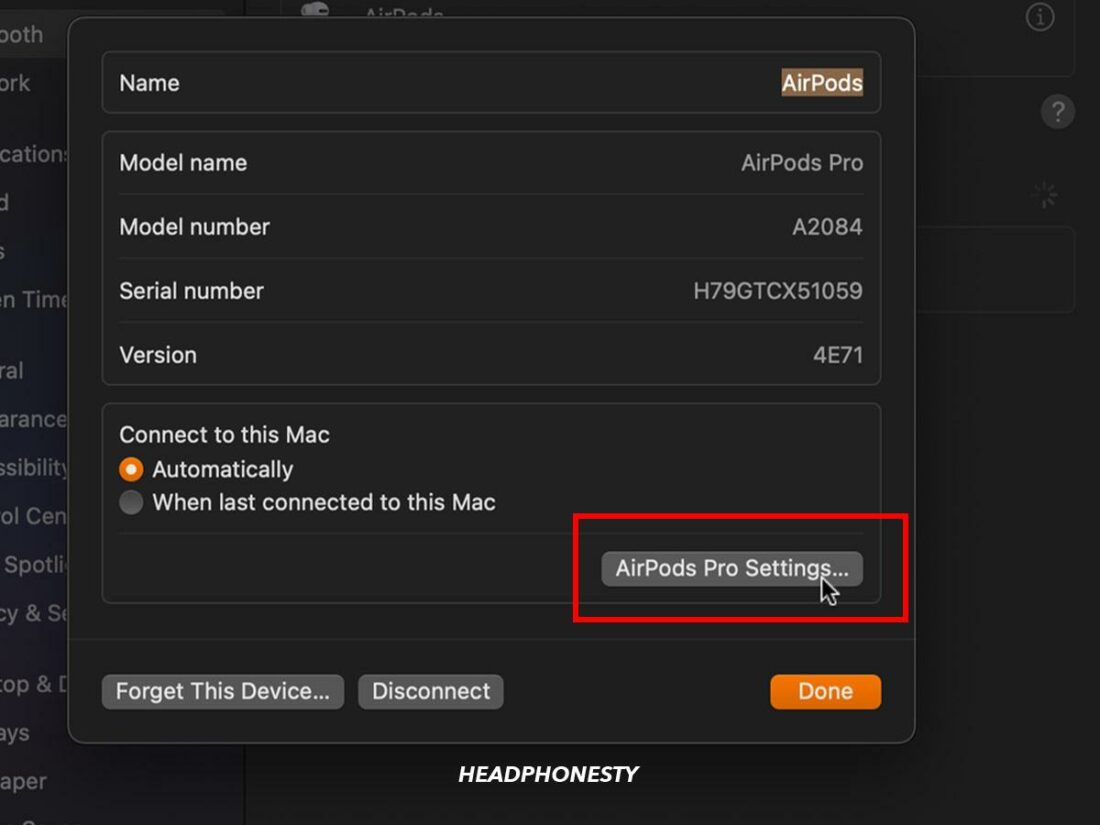
Click Apple logo and open System Settings - Click on Bluetooth, then click on the (i) button beside your AirPods or AirPods Pro.
Click on Bluetooth, then tap in the information button - Click on the AirPods Pro Settings.
Select AirPods Pro Settings - Select Noise Cancellation to turn it on.
Select Noise Cancellation

How to Turn on AirPods’ Noise Cancellation Without a Device
While you can use your iPhone or iPad to activate noise canceling, it can be cumbersome to do so, especially if you’re on the move or have your hands full.
In such cases, the force touch sensors on your AirPods can come in very handy. You might be familiar with the double-tap gesture that pauses or resumes your music.
But there’s also a touch gesture to enable noise canceling mode without reaching for your phone.
If noise canceling is currently not enabled, you can use the AirPods’ default touch gestures to turn it on. Here are the steps:
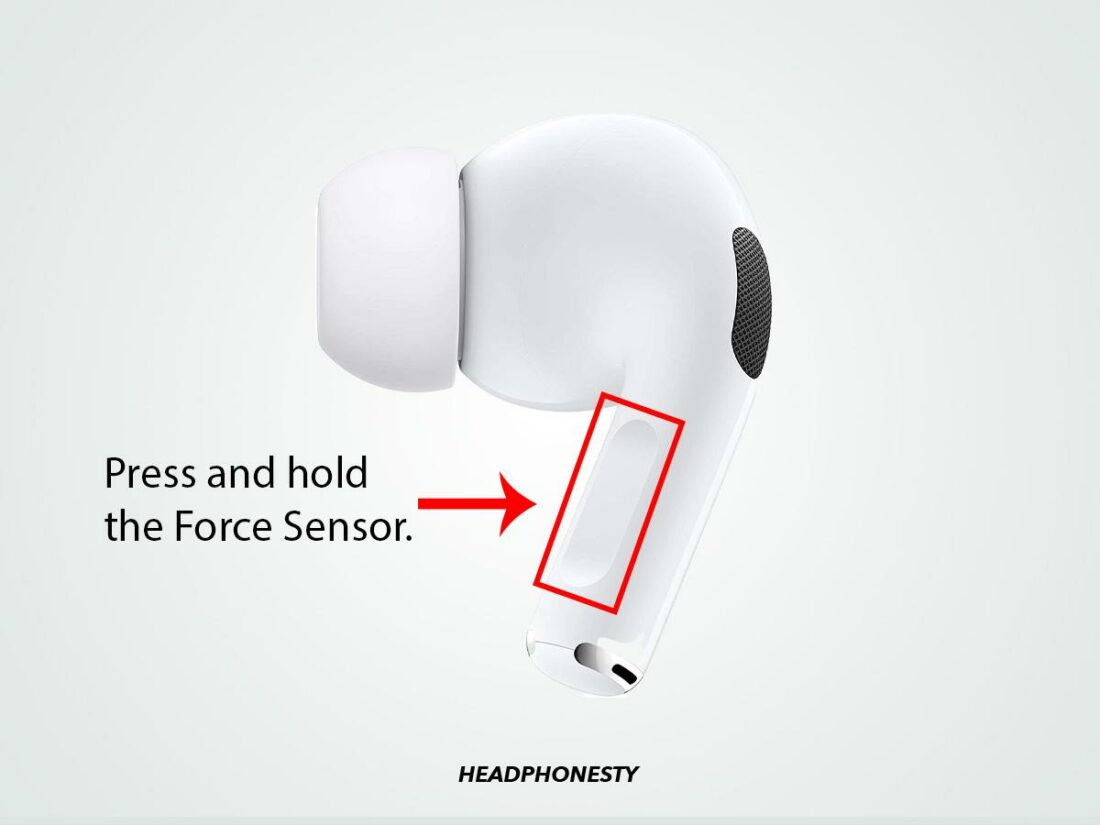
- Reach for the groove along the stem of your AirPods Pro.
- Press and hold down on it until you hear a high-pitched alert. This indicates that Noise Cancellation is activated.
You can also customize your AirPods Pro’s touch settings on an iOS device to select the noise control modes you want to be included in the cycle. Here’s how you can do so:
- Connect your AirPods Pro or AirPods Max to an iOS device.
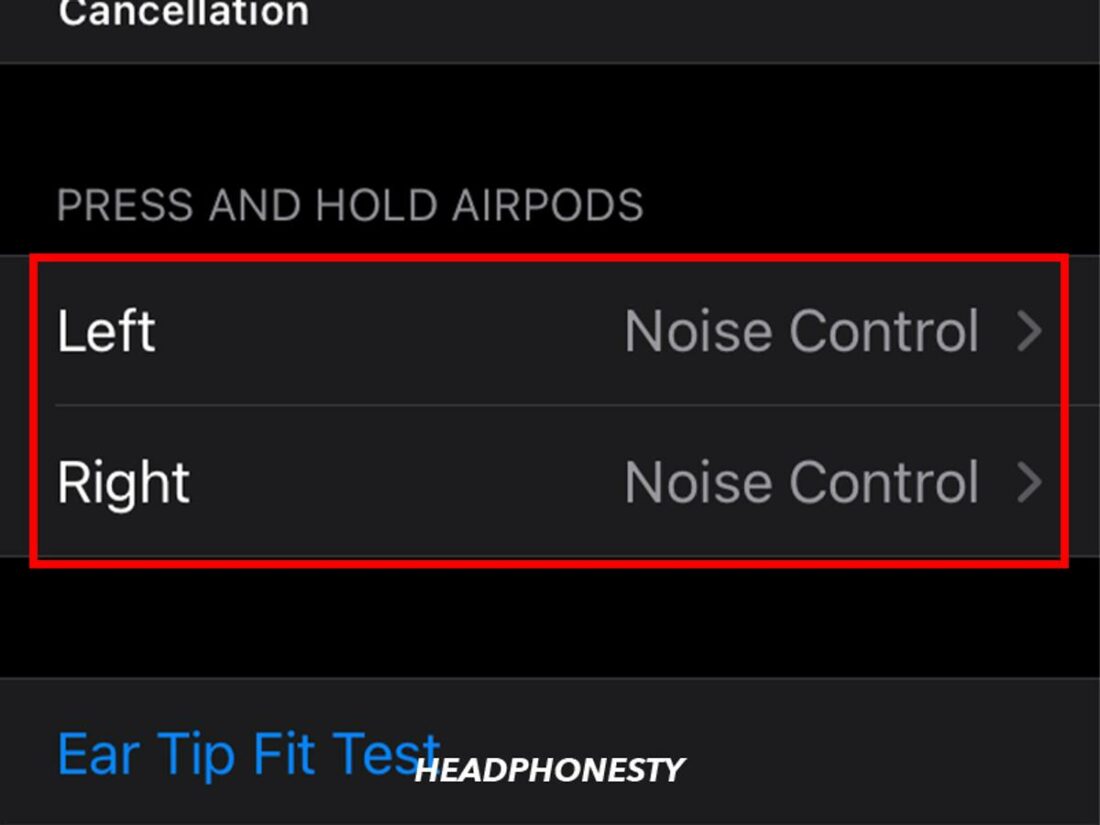
- Go to Settings > Tap Bluetooth.
Go to Settings and tap Bluetooth - Under the Device list, click the information icon (i) beside your AirPods.
Tap on the Information button - Under Press and Hold AirPods, tap Left or Right.
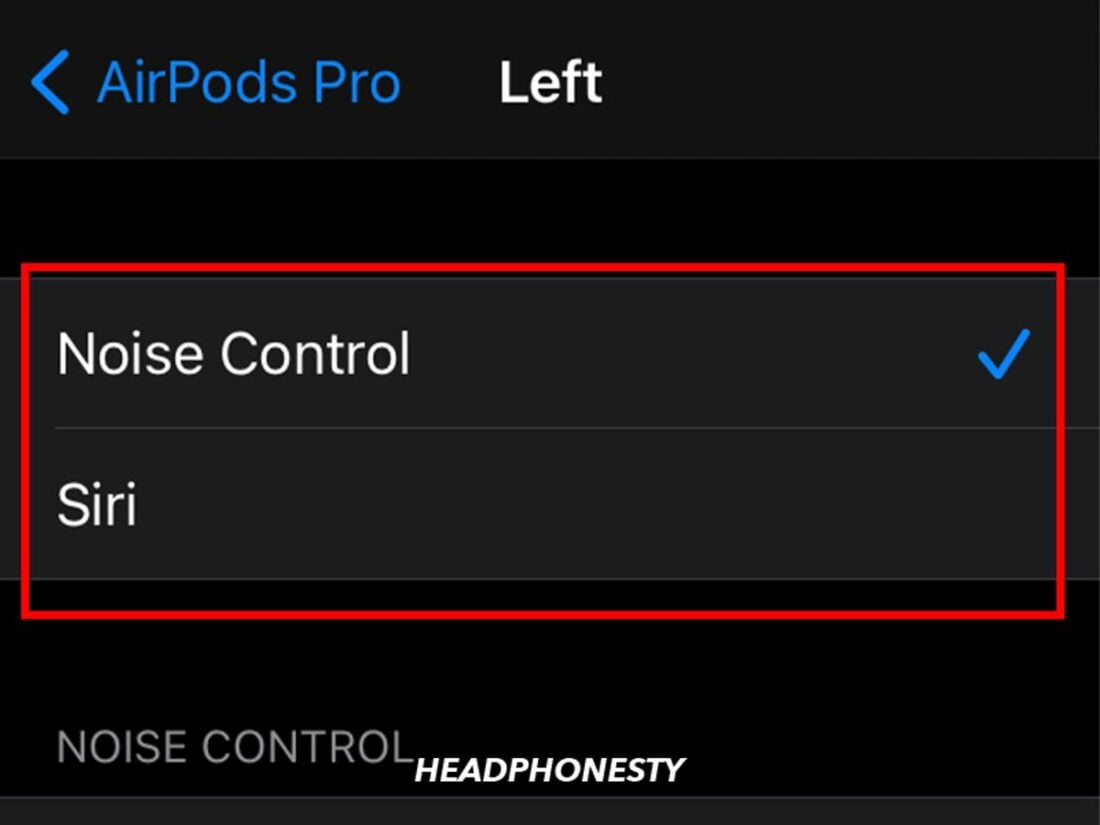
Under press and hold, select either left or right AirPods - Ensure that Noise Control is selected.
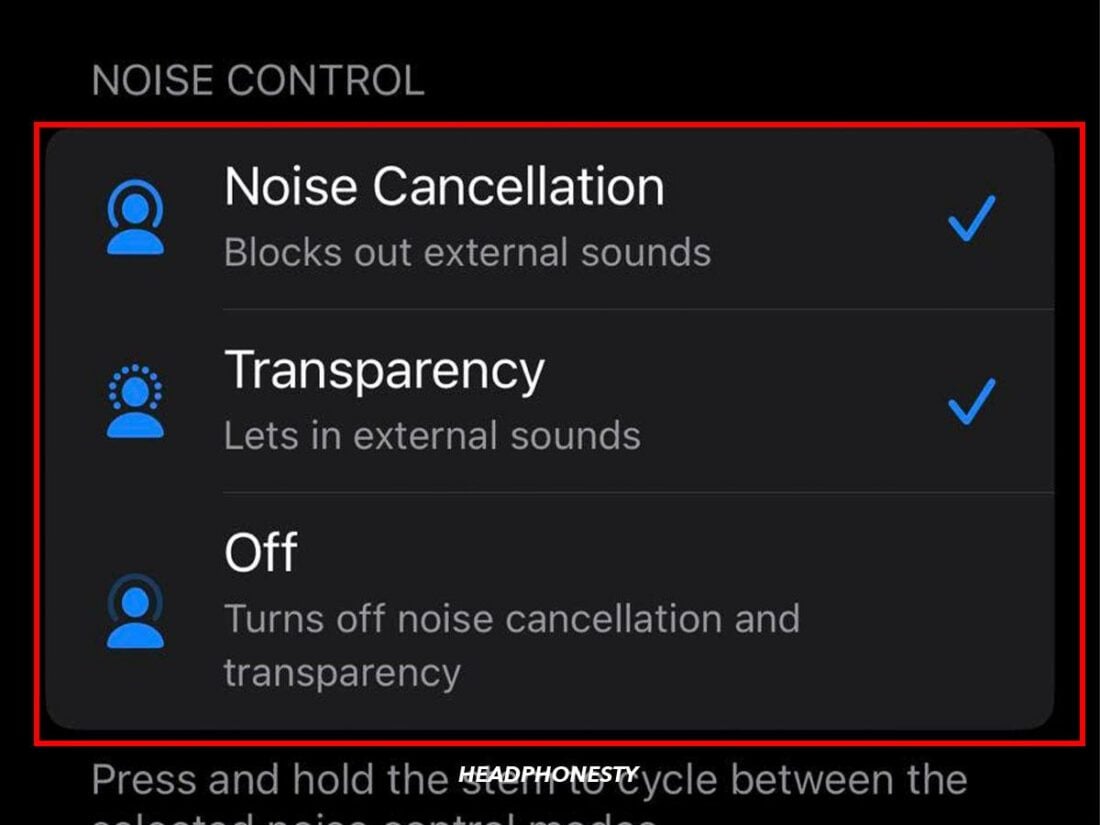
Set the option to Noise Control - Choose either two or three noise control modes to include in the cycle.
Include two or three noise control mode

How to Turn Off Noise Cancellation on AirPods
Although noise canceling is a nifty feature, you may want to disable it to conserve battery if you don’t need it.
Here are the different ways to disable Noise Canceling on AirPods Pro:
On an iPhone or iPad
- Connect your AirPods Pro or AirPods Max.
- Go to Settings > Tap Bluetooth.
Go to Bluetooth settings - Under the Device list, click the information icon (i) beside your AirPods.
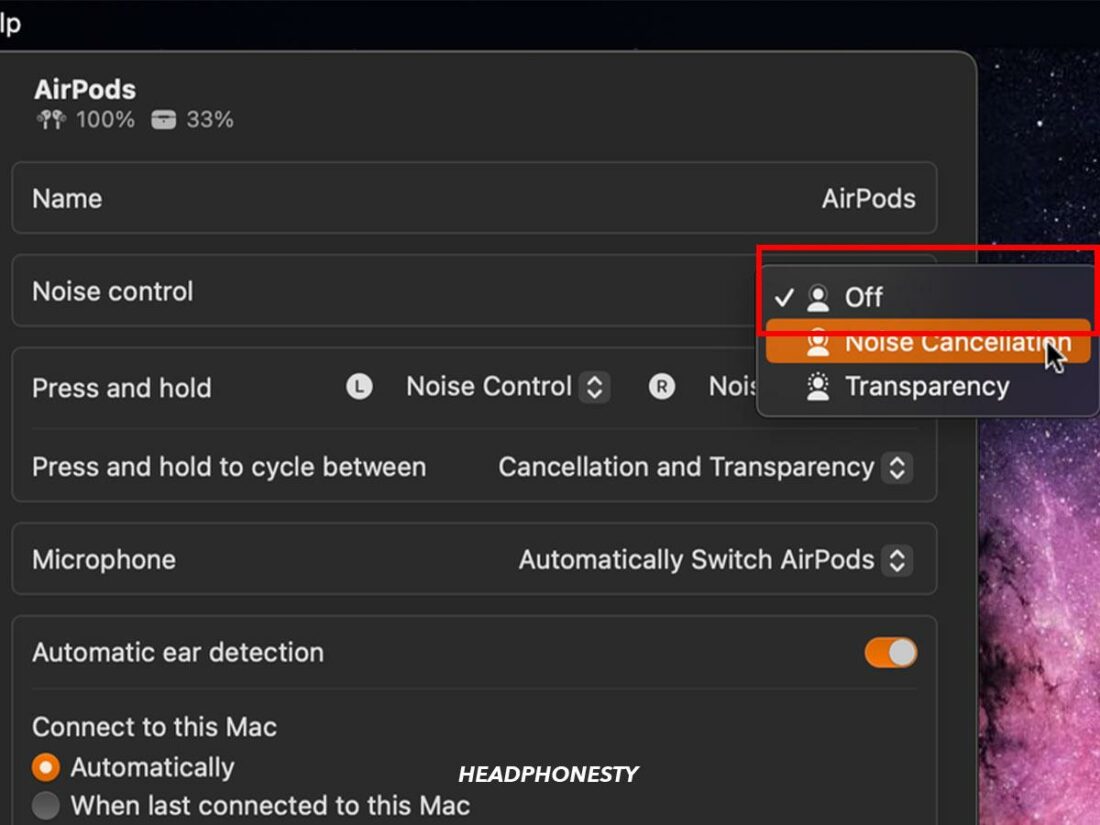
Access AirPods information - Under Noise Control Select Off.
Select Off under Noise Control

On a Mac
- Connect your AirPods Pro or AirPods Max.
Connect AirPods to Mac - Open System Settings.
Mac System Settings - Click on Bluetooth, then click on the (i) button beside your AirPods or AirPods Pro.
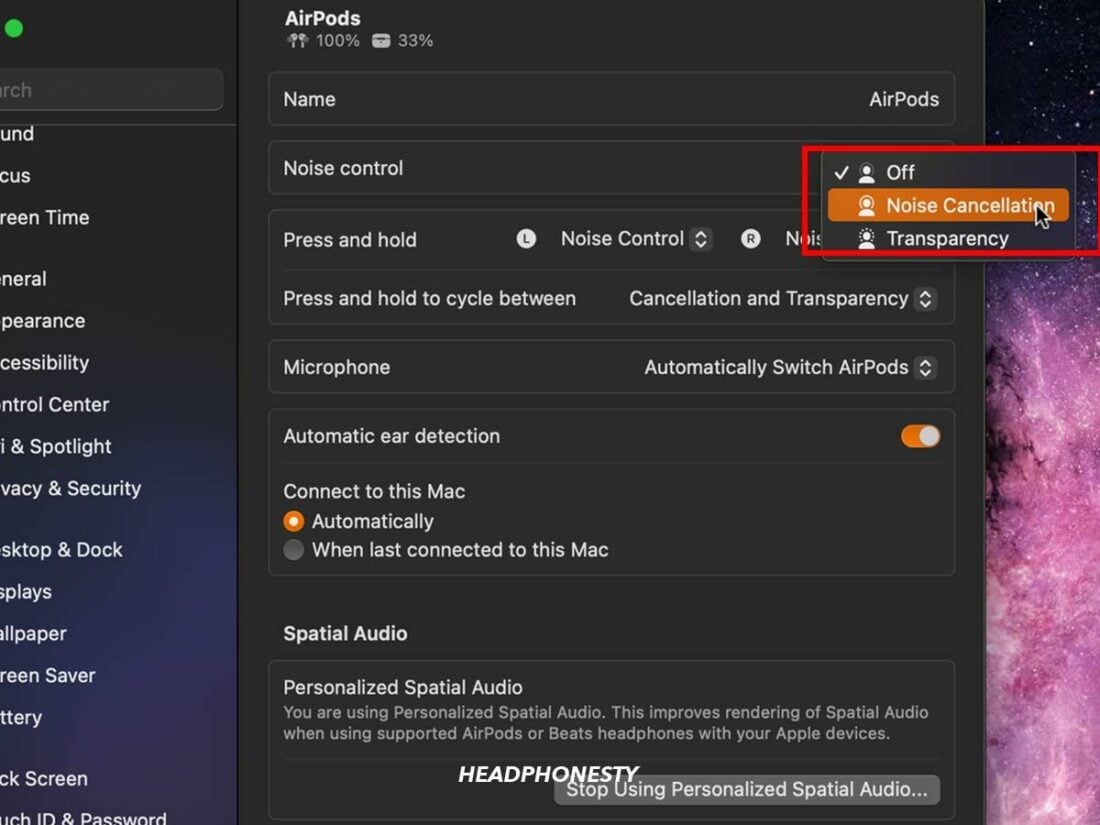
Click on the AirPods’ information button on Mac - Click on the AirPods Pro Settings.Select Noise Cancellation to turn it on.
Open AirPods Pro Settings - Select Off to turn off noise cancellation.
Turn off the noise cancellation

Without a device

- Reach for the groove along the stem of your AirPods Pro.
- Press and hold down on it until you hear a high-pitched alert. This means either Noise Cancellation is turned off or you switched to transparency mode. If it’s the latter, repeat steps 1-2.
AirPods Noise Control Levels: Explained
AirPods Pro and AirPods Max have three noise control modes: active noise canceling, transparency, and off. Here’s what each of these means:
- Active Noise Canceling (ANC): the AirPods Pro use internal microphones to detect external sounds and counter them with anti-noise.Noise-canceling technology has evolved rapidly alongside headphones. Check out the brief history of ANC and the factors that influenced its development.
- Transparency: Transparency mode allows ambient sounds to filter through. This means you can still hear what’s happening around you even with the AirPods on. AirPods Pro can automatically alternate from transparency to ANC to protect your hearing from loud sounds.
- ANC Off: This is the default AirPods Pro listening experience without either ANC or Transparency modes enabled. In this mode, you rely on passive noise isolation from the AirPods.
Conclusion
If we had our way, our AirPods would provide the same audio experience even in loud and noisy environments. Unfortunately, in the real world, some background noise is unavoidable.
Fortunately, now that you know how to enable noise canceling on AirPods, you can still get a high-quality listening experience. Not only that, you can also help others to enjoy the same by sharing your newfound knowledge.
What did you think of our suggestions? Or did you find some other method that worked for you? We’d love to hear from you. Let us know in the comments below!
Hello.
Can I use noise cancelling when iphone and computer is turned off? And if so, which model?
Thanks.
Is it work to Android??