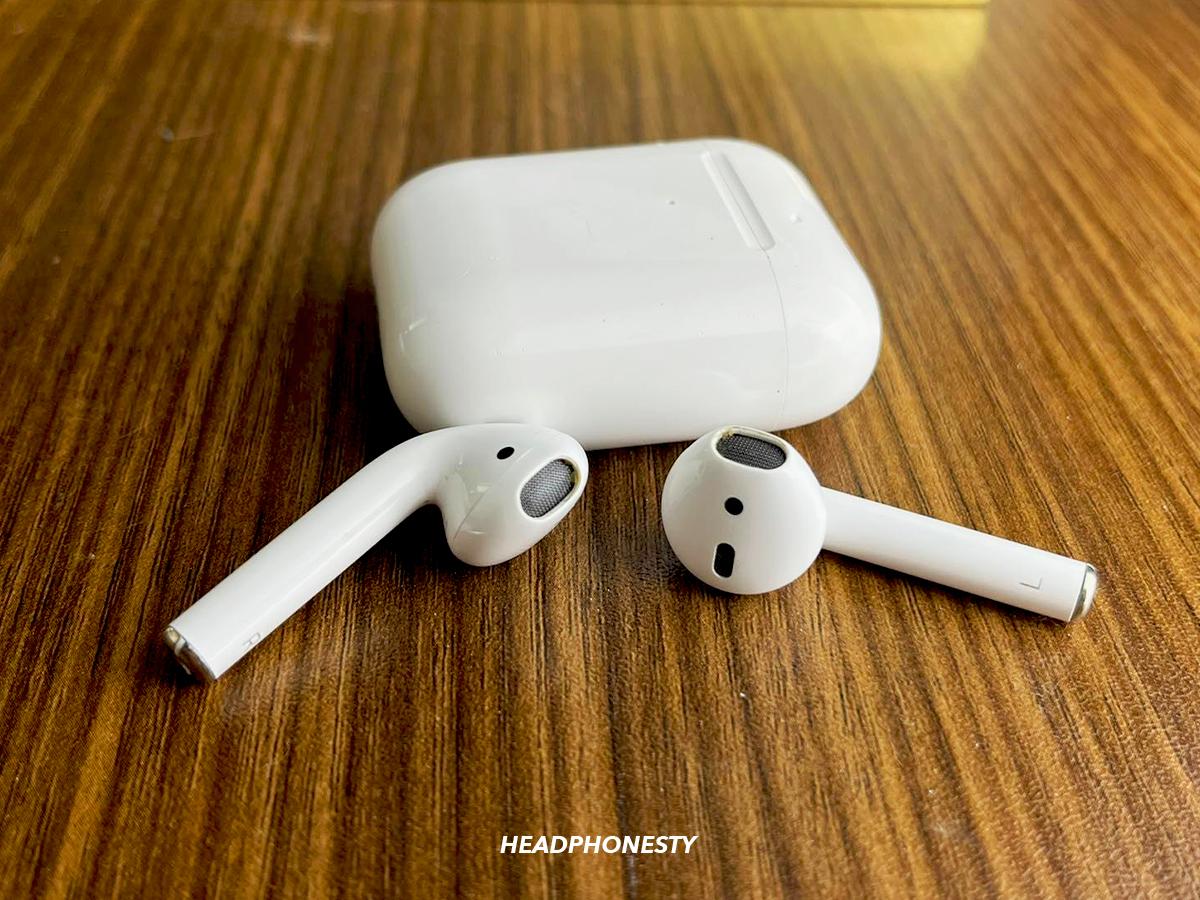
Struggling with one AirPod not working? Here are some fixes to try.
Having two fully-functional AirPods is essential to get the most out of features like active noise cancellation and spatial audio.
However, some users report instances wherein one AirPod sometimes fails, due to various factors, like low battery, charging issues, or software glitches.
Fortunately, simple steps like cleaning, charging, and resetting your AirPods can fix your problem – and we’ll talk about all of them (and more) below.
Check if Your AirPods and Case Are Charged
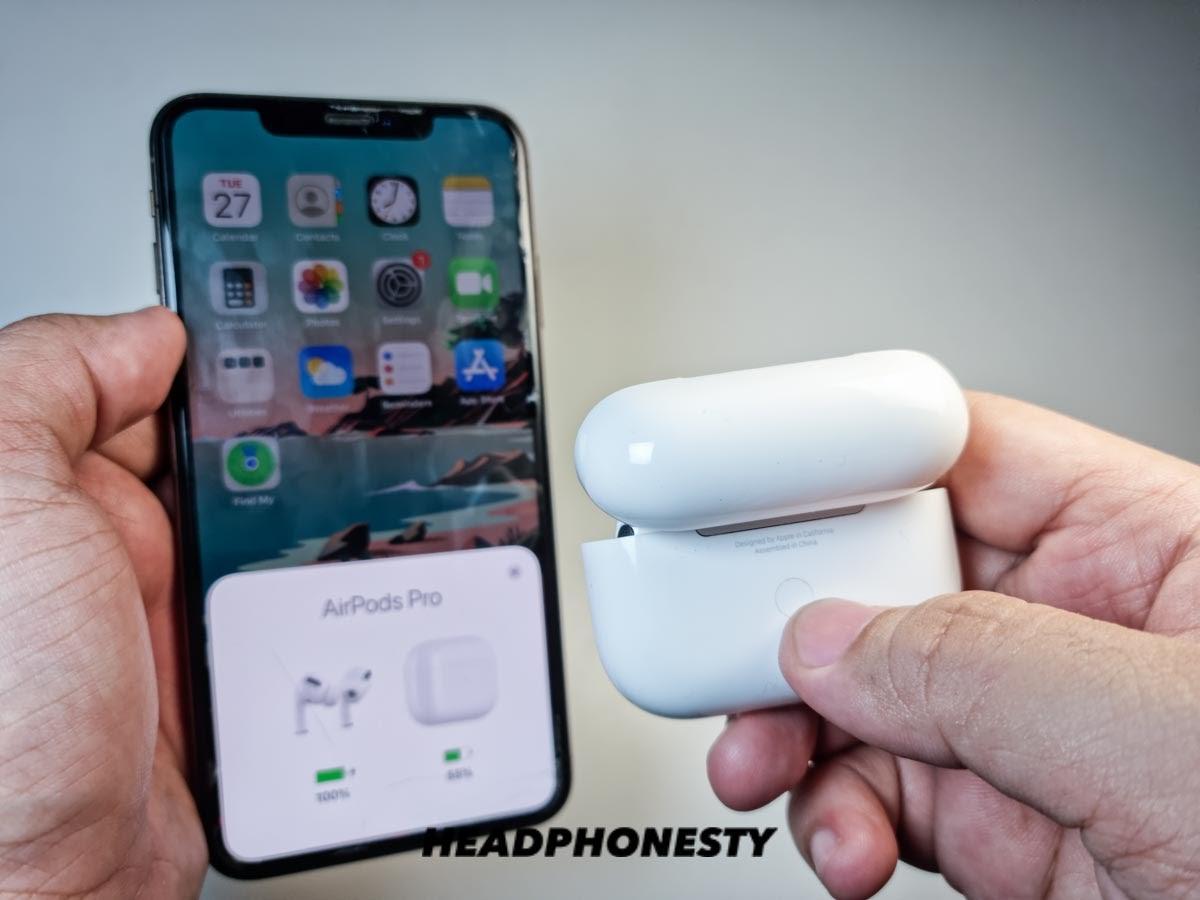
Frequently using one AirPod over the other or constantly using the microphone can cause one earbud to drain faster. If you suspect a low battery is the issue, give the AirPods and your case a quick charge using a Lightning cable or a Qi-certified charging mat. Then, follow the steps below to check your AirPods’ battery status:
- On your iOS device, swipe down from the top of the screen and turn on Bluetooth.
- Hold the case with the AirPods inside near your device and open the lid.
- An automatic pop-up should appear with the battery percentage of the AirPods and their case displayed.

AirPods Battery status on iPhone
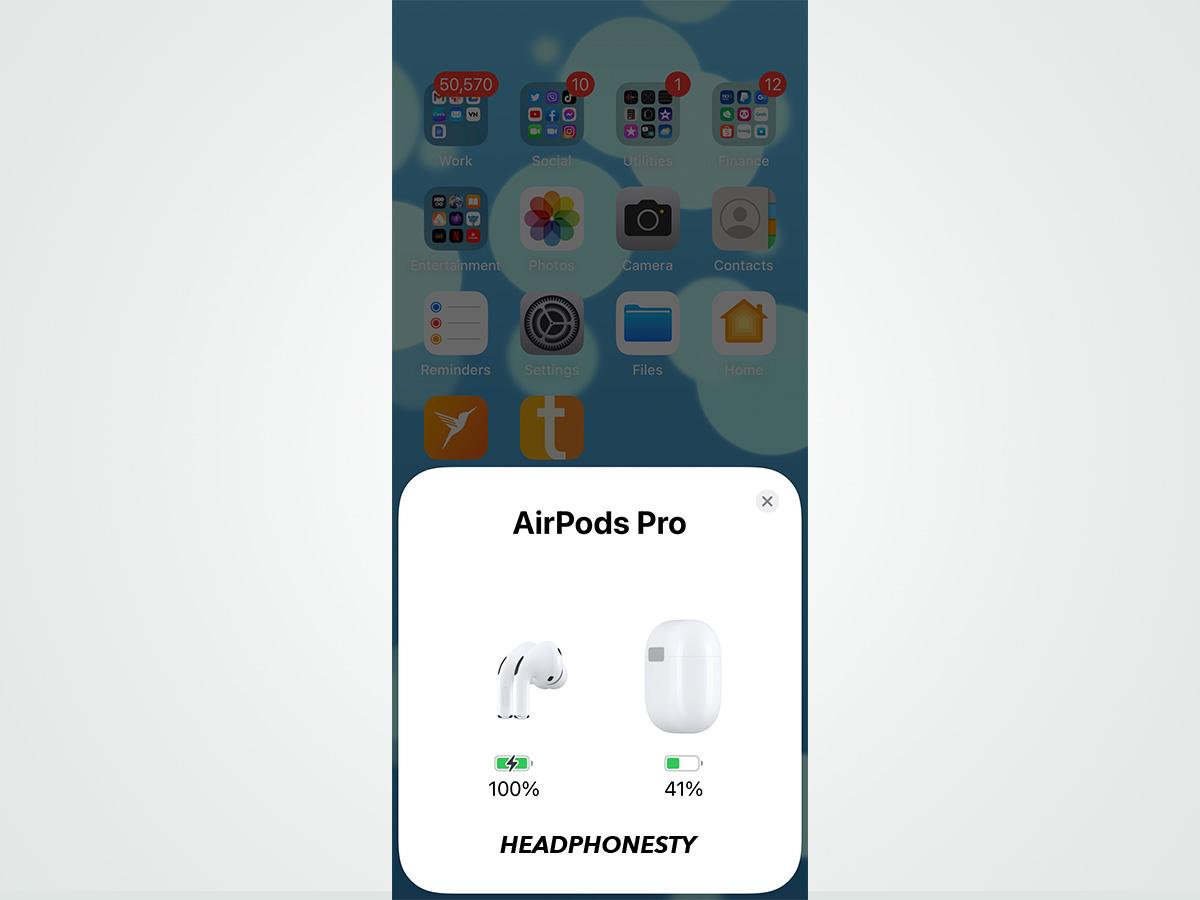
If you don’t see the battery status or if the faulty AirPod isn’t charging, test them using a different charging case. Doing this should at least help determine whether the problem is with the AirPods or their charging case.
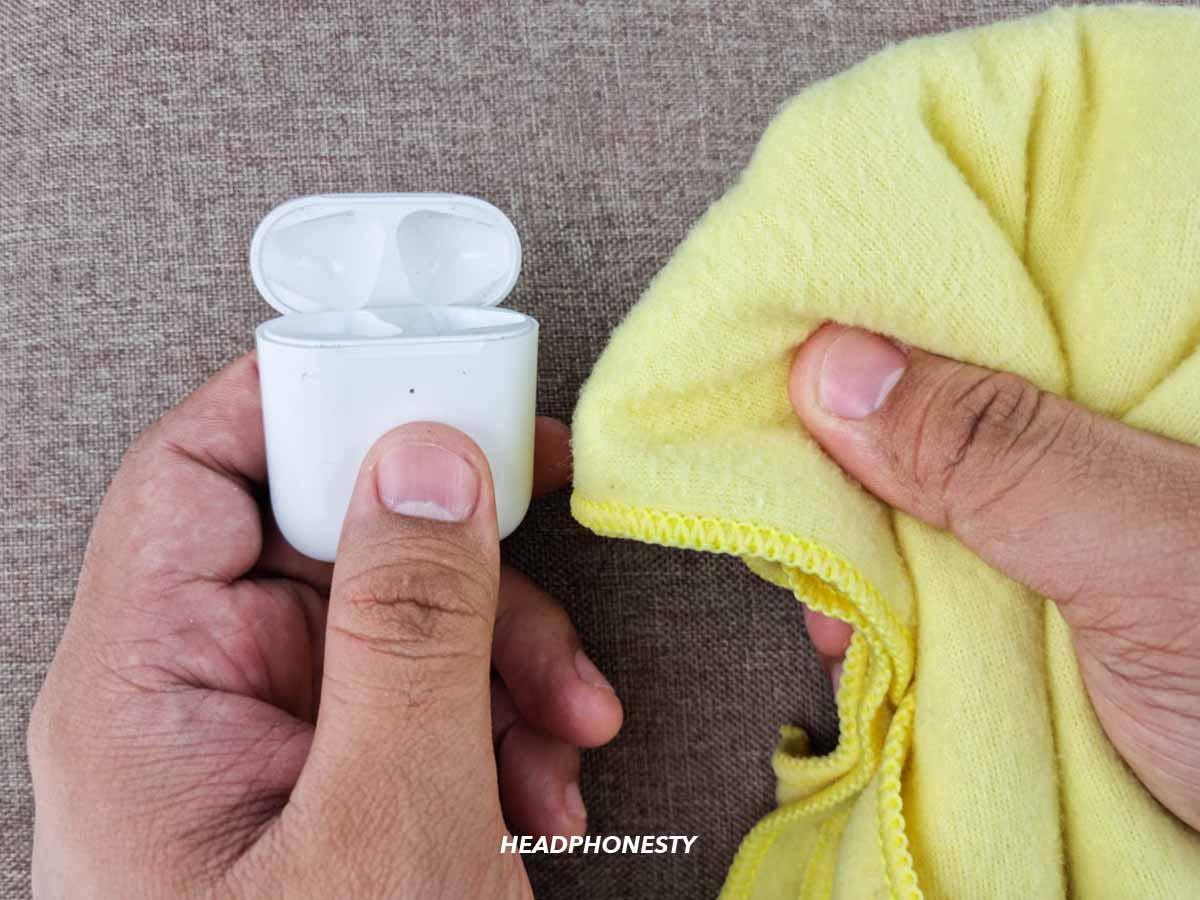
Try Cleaning the Charging Contacts
Dirt can block the connection between the charging contacts of the faulty AirPod and case, causing only one earbud to charge properly.
Cleaning the charging contacts will fix this issue. Here’s how to do that without damaging your AirPods:
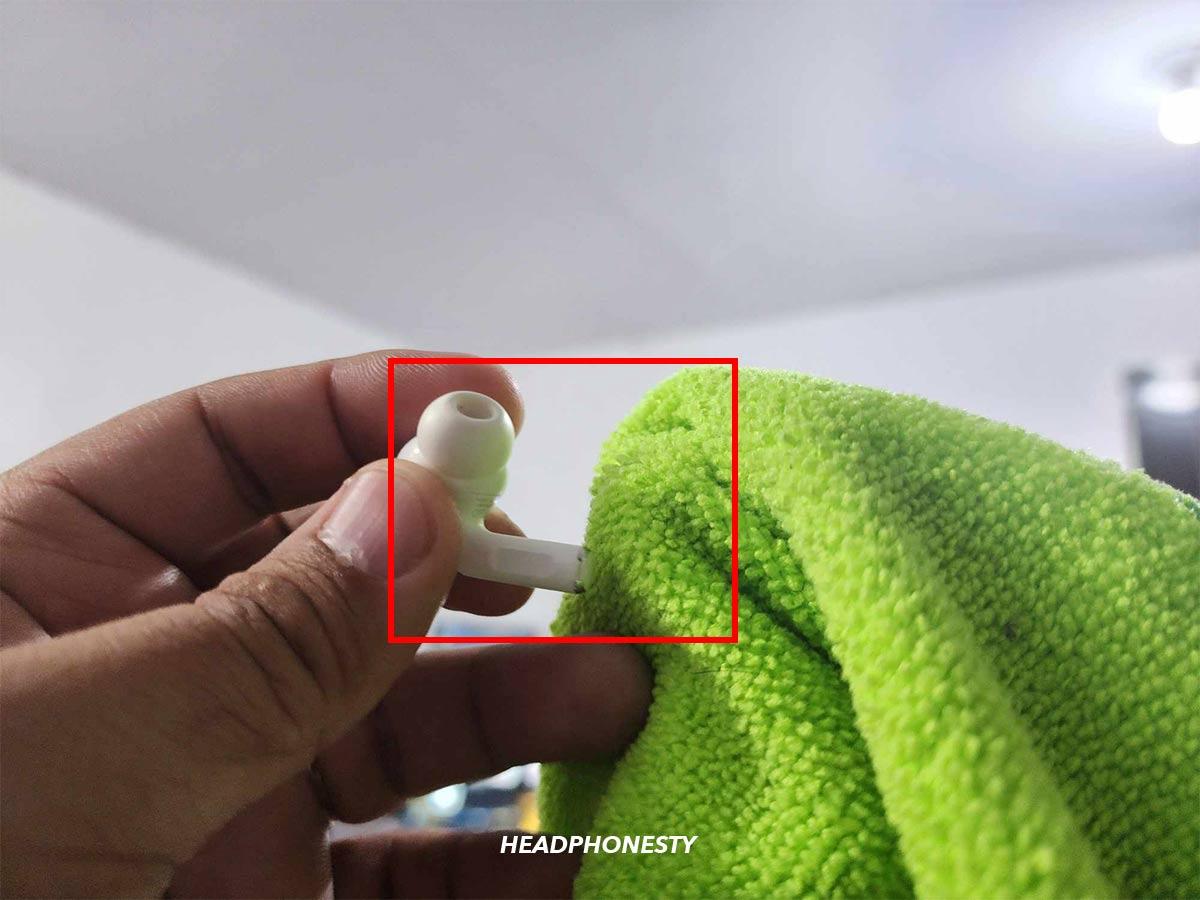
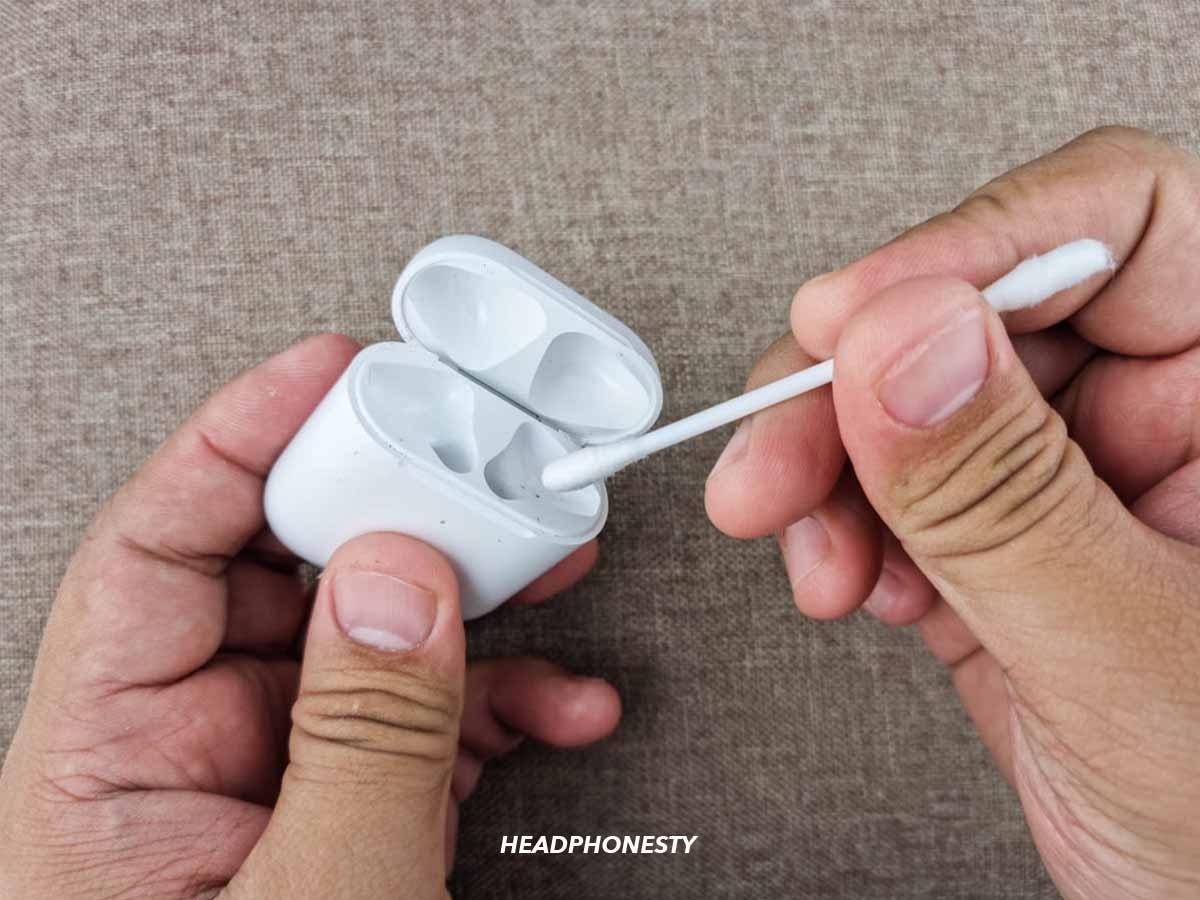
- Wipe the AirPods’ stems with a lint-free cloth.
Wipe the AirPods’ stems with a lint-free cloth. - Use an alcohol-dampened cotton swab to clean the case’s charging pins.
Use a cotton swab to clean the charging pin inside the charging case. The 1st and 2nd gen AirPods aren’t water-resistant, while the 3rd gen AirPods and all AirPods Pro have IPX4 moisture and dust resistance. None are waterproof, so avoid getting moisture into any openings. - Wipe all surfaces with a soft, dry, lint-free cloth.
Use a lint free cloth to wipe the visible surface of your AirPods. - Let the AirPods dry fully before placing them in the charging case.
Let the AirPods dry before placing them back into the charging case.
Try Resetting Your AirPods
A software glitch can similarly cause problems involving one AirPod not working. Investigating the exact root cause can be time-consuming, so a hard reset is a safe and efficient solution. This will erase all settings and linked devices, thus resolving any glitches.
Follow these steps to reset your AirPods:
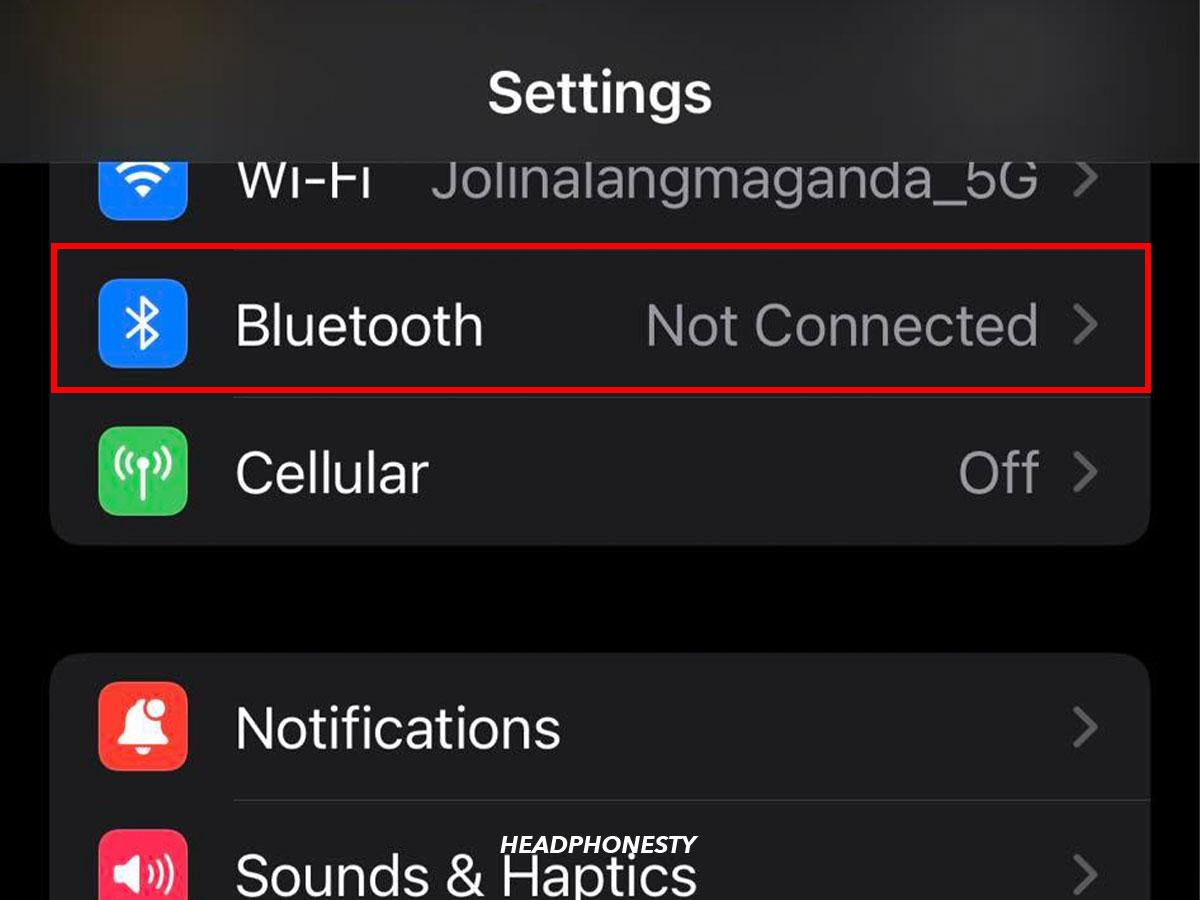
- On your iPhone, go to Settings > Bluetooth.
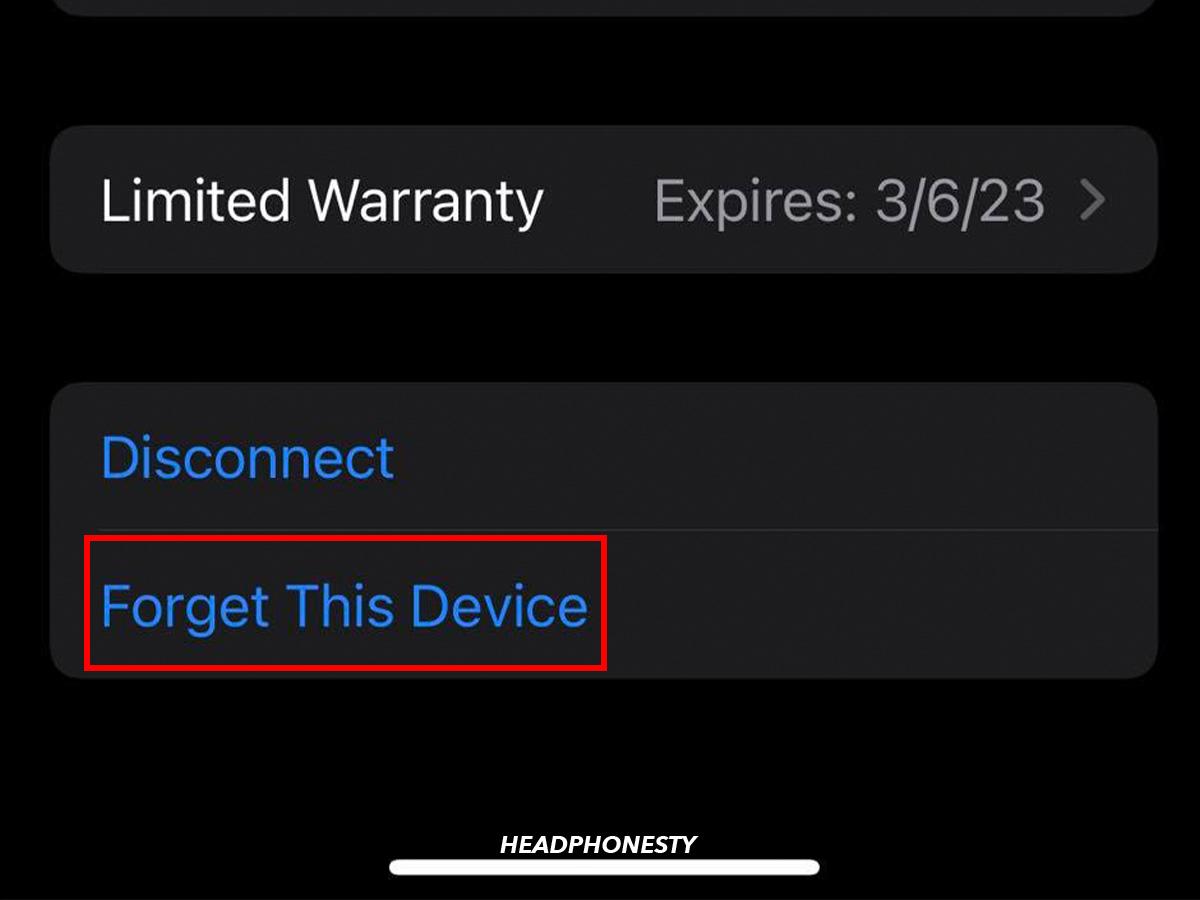
Select Bluetooth. - Tap the “i” icon next to your AirPods’ name and select Forget This Device.
Select Forget This Device. - With your AirPods in their case and the lid open, hold the setup button for about 15 seconds or until you see the status light flash amber and white three times.
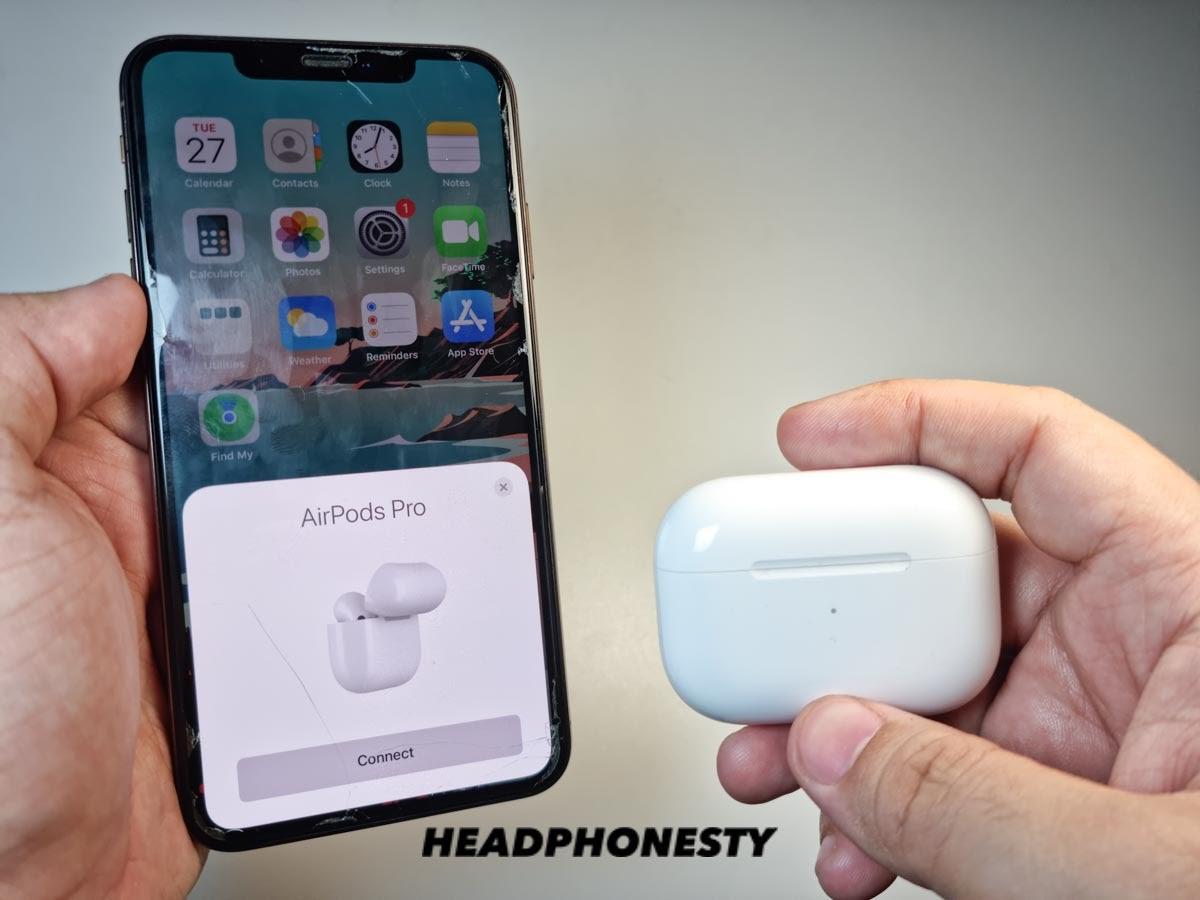
Holding button on charging case - Close and reopen your charging case, then reconnect your AirPods to your device.
Reconnecting AirPods
Software Solutions for Fixing One AirPod Not Working
In addition to cleaning and resetting your AirPods, there are software settings you can tweak that may fix the problem. Here are a few to try:
- Adjust the stereo balance
- Enable Mono Audio
- Reset your network settings
- Update the operating system (OS)
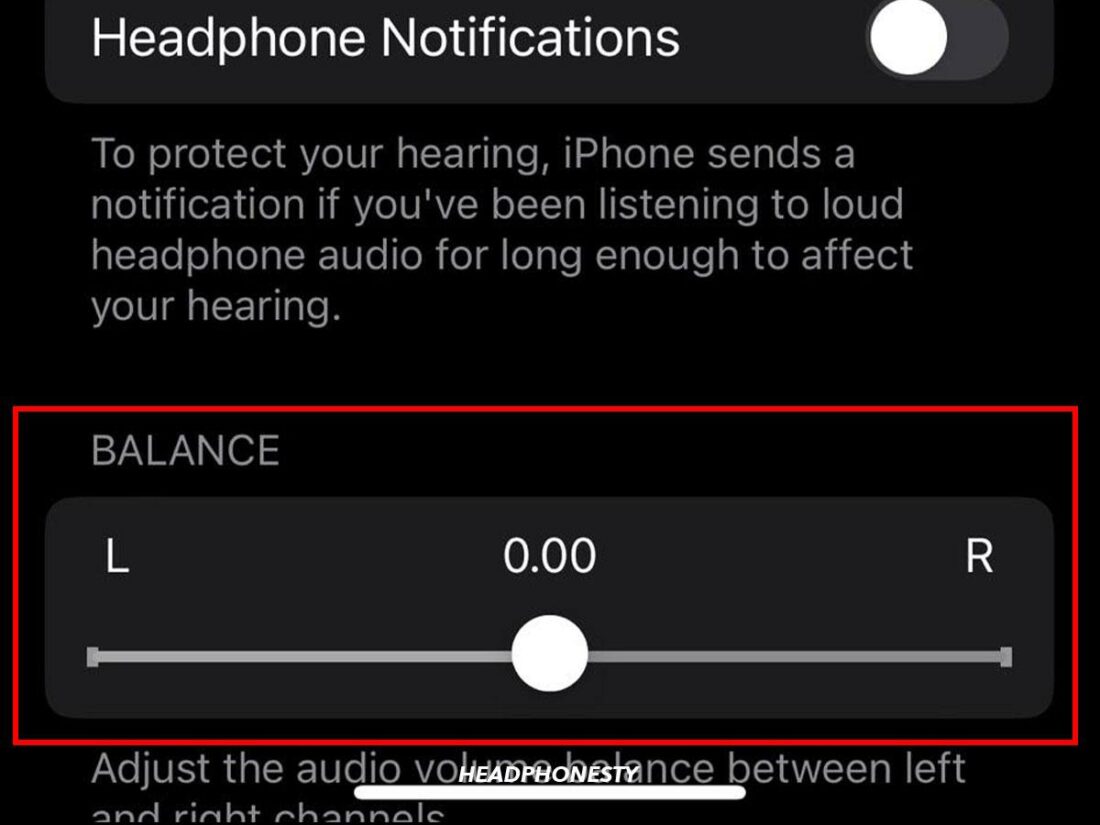
Adjust the stereo balance
This feature lets you balance the volume between both AirPods. If one AirPod has low or no sound, the stereo balance might have been inadvertently shifted. Here’s how to adjust this on iOS:
- Navigate to Settings > Accessibility.
- Select Audio/Visual and center the slider between L and R.

Center the slider between L and R.
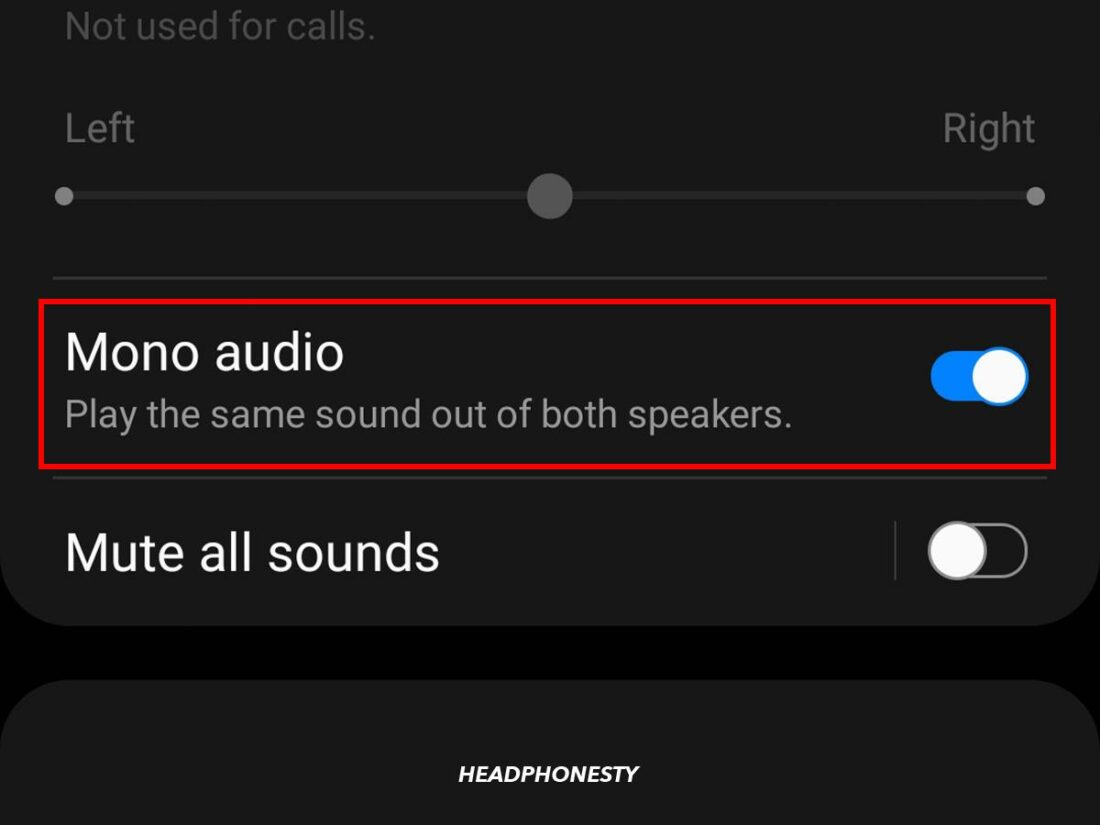
Enable Mono Audio
Enabling this feature redirects audio into a single channel, allowing you to hear all sounds, even when using one earbud.
To enable this on iOS, follow these steps:
- Go to Settings > Accessibility > Audio/Visual.
- Toggle Mono Audio to the On position.
Enable ‘Mono Audio’.
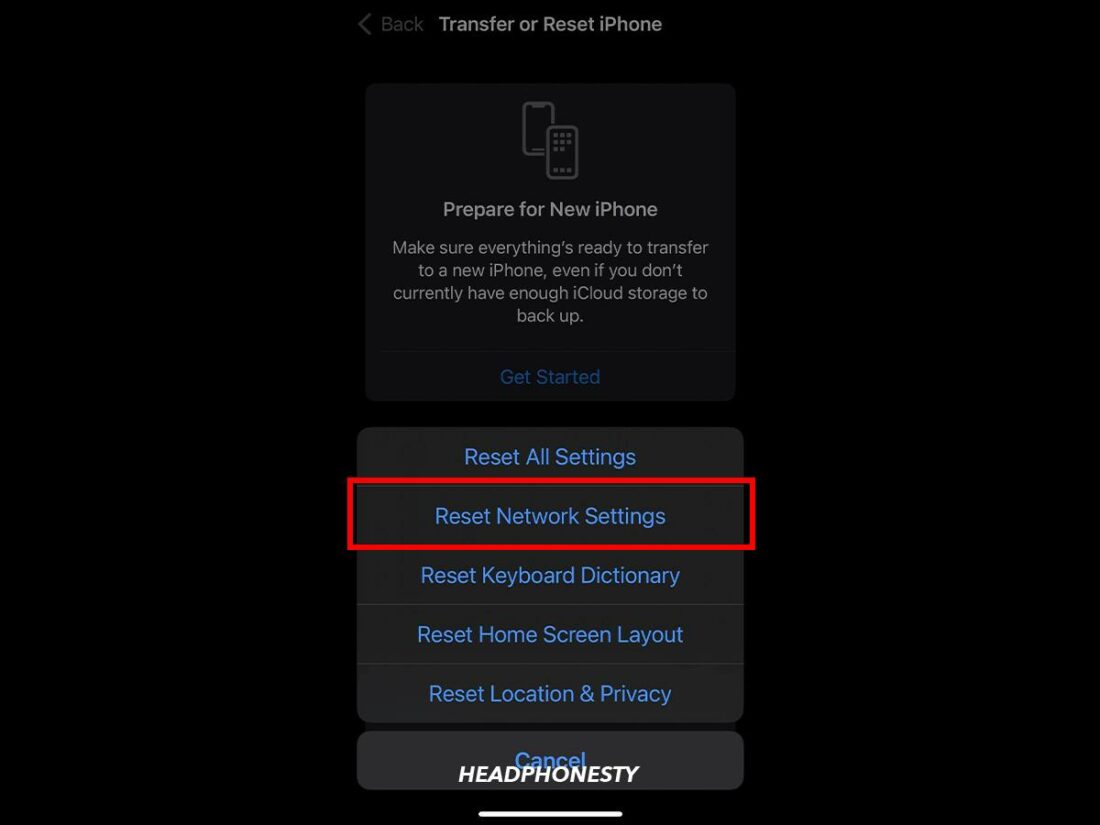
Reset your network settings
Various factors, like multiple Bluetooth or WiFi connections or a VPN app, can disrupt your device’s network and cause it to glitch. Instead of adjusting your network settings manually, simply reset them. Here’s how:
- Navigate to Settings > General > Reset.
- Select Reset Network Settings.
Select ‘Reset Network Settings.’
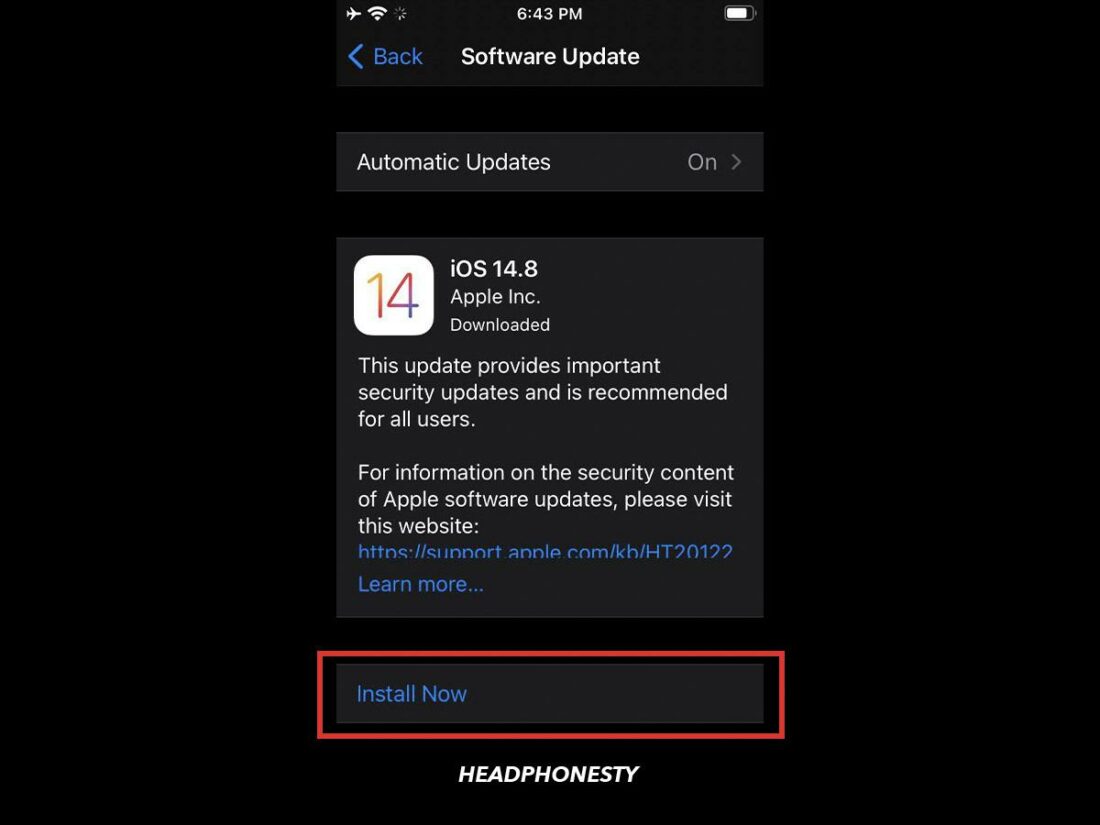
Update the operating system (OS)
AirPods need certain iOS or MacOS versions to work properly. Outdated OS versions might not support the latest AirPod features, leading to malfunctions. Ensure you’re updated for optimal compatibility by doing the following:
- Go to Settings > General > Software Update.
- Tap Install Now if an update is available.
Click ‘Install Now’ if an update is available.
Outdated OS versions might not support the latest AirPod features, leading to malfunctions. Ensure you’re updated for optimal compatibility.
If Nothing Works, Contact Apple Support
You may be dealing with internal hardware issues if none of the above solutions fixed the issue. In such cases, consider seeking assistance from Apple Support, which offers several repair options.
You can consult with an Apple Support advisor by phone or in-store. Alternatively, you can also take your AirPods to an authorized service provider or mail your AirPods in a prepaid box provided by Apple. This can be arranged online or by phone.
Regardless of which option you go for, make sure to prepare the following items to ensure a smooth repair process:
- AirPods serial number
- AirPods charging case
- Proof of purchase (original receipt or AirPods box)
The repair time for AirPods varies based on the issue’s severity, but you can check your repair status on the Apple Support page. On the other hand, replacements typically take a week. For costs, you can check the Apple website’s overview of replacement and out-of-warranty fees for AirPods.
My right AirPod Pro does not connect when I put it in my ear and when I bring up the AirPod menu by opening the case, it shows the charge of my left AirPod when I take it out but not the right one, it just goes blank. Then when I put my right AirPod back in it’s case it displays the charge going up and down erratically. I’ve disconnected and reconnected and reset my AirPods multiple times, reset my iPhone, charged the AirPods and their case all the way and then repeated the whole process and nothing has changed, they were working just fine last night, haven’t been dropped or around water just sitting in their case. I’m getting on a 16 hour flight to Phuket, Thailand next week and won’t even be able to get them repaired or replaced by then… pretty damn annoying.
It’s been a year, but have you fixed it and how?
I have a completely same issues, damn! How to fix this?
None of this worked. Left air pod still the same.
I have the same issues. Tried all the fixes. It is my right air pod, no sound. Was ok and just stopped.