Are you tired of your AirPods cutting out? Read on to find out why it happens and how you can fix it!
Apple AirPods offer a seamless, comfortable audio experience with excellent sound quality. This has even improved with every release of new AirPods models.
However, one problem persists no matter the AirPods version: audio cutting out. Unfortunately, this seems to occur randomly, without warning or plausible reason.
But while it appears unpredictable, there are only six common causes for this, ranging from unreliable connections to settings issues. And, understanding them can lead to a more targeted solution. Read on to find out why your AirPods’ audio keeps cutting out, and how to solve this frustrating problem.
6 Common Reasons Why Your AirPods’ Keep Cutting Out
Before solving the problem with the cutouts, let’s first understand why it happens so that you can prevent it in the future. And if it does happen again, you will know which steps to take depending on the most probable reason.
Here are six common reasons why the AirPods’ audio cuts out:
- Unstable connection
- AirPod sensor issues
- Low battery
- Incompatible firmware version
- Hardware defect
- Audio source issues
1. Unstable connection
One of the main advantages of true wireless earbuds is convenience. For one, you don’t have to worry about wires getting tangled or your device falling because you accidentally dragged it by the wires.
However, this has a caveat: relying on a wireless connection makes them more susceptible to issues such as Bluetooth interference and range limits.
Bluetooth interference occurs when something, like concrete objects or another wireless connection, impedes the Bluetooth connection between your devices. For example, Bluetooth uses 2.4 GHz frequency to contact your gadget. But, so does your typical Wi-Fi router.
This is fine when there aren’t many Wi-Fi sources, but more Wi-Fi sources means less space in the spectrum for Bluetooth to talk to your device. This causes your AirPods to cut out.
Bluetooth range also plays an important factor. This is defined by how far away you can move from your device to remain connected. For AirPods, the optimal range is 30-60 ft (10-18 m). When you move out of this range, the connection gets worse and causes the audio to crackle.
2. AirPod sensor issues
The AirPods, like many new wireless headphones, can detect when they’re in your ear and automatically play or pause the music accordingly. This feature is called “Automatic Ear Detection“ and is turned on by default.
With this feature, the audio pauses when you remove one or both of your AirPods and resumes when you wear them again.
This ensures that you don’t miss a thing when you take off your AirPods, but it may also cause audio cutouts for some users. This can happen when the detection isn’t accurate, like when you’re wearing the AirPods but they can’t detect them.
3. Low battery
When the AirPods’ battery dies, the Bluetooth connection gets disconnected, and you won’t hear audio through them anymore. However, the audio will still continue to play from your source device.
Insufficient power, usually less than 20% of the total battery life, can also cause your AirPods to cut out. After all, devices need enough power for optimal performance.
4. Incompatible firmware version
Apple phones and tablets operate using the iOS software, which has gone through many versions since its initial release in 2007. Unfortunately, like many new releases, bugs are common in early stages of the updates. Bugs and errors like these can cause issues for your AirPods, such as sudden cutoffs.
As a general rule-of-thumb, you should always keep both iOS software and AirPods’ firmware updated. This is because bugs that are present in previous versions should already be fixed in later ones.
5. Hardware defect
Sometimes, a hardware defect is to blame. These include manufacturing defects like what happened with a small number of AirPods Pro released in October 2020. Or even damages acquired from use. Other times, this is because the AirPods are counterfeit.
Defects or damages can affect the AirPods’ internal electronics and cause sound issues. Meanwhile, imitation products don’t have the proper Apple software. Most just tend to be cheap look-alikes that don’t have proper functions or build quality, which causes problems.
6. Audio source issues
If you’re sure the AirPods are fine but the audio still cuts out, then maybe the audio source is the problem.
The audio source may have too many apps running, which slows down its performance or interferes with the Bluetooth connection the AirPods require. Otherwise, the necessary drivers may be out-of-date and it needs a software update.
Additionally, audio enhancements in the audio source can cause audio cut outs. This seems counterintuitive, but it can happen if the AirPods can’t handle the additional processing weight.
What to Do When AirPods Keep Cutting Out
Now that we’ve listed common reasons why this happens, it’s time to solve this problem. So, without further ado, here are the things to do when your AirPods keep cutting out:
- Check the battery levels
- Check Bluetooth connection
- Reset your AirPods
- Turn the Automatic Ear Detection off
- Update your AirPods’ firmware
- Disable audio enhancements
Check the battery levels
Always remember that the first thing to do is to check your AirPods’ battery levels. Since AirPods don’t have any battery indicators on the earpieces themselves, users don’t usually realize that their AirPods have reached very low battery levels.
Here’s how to check your AirPods’ battery using an iPhone:
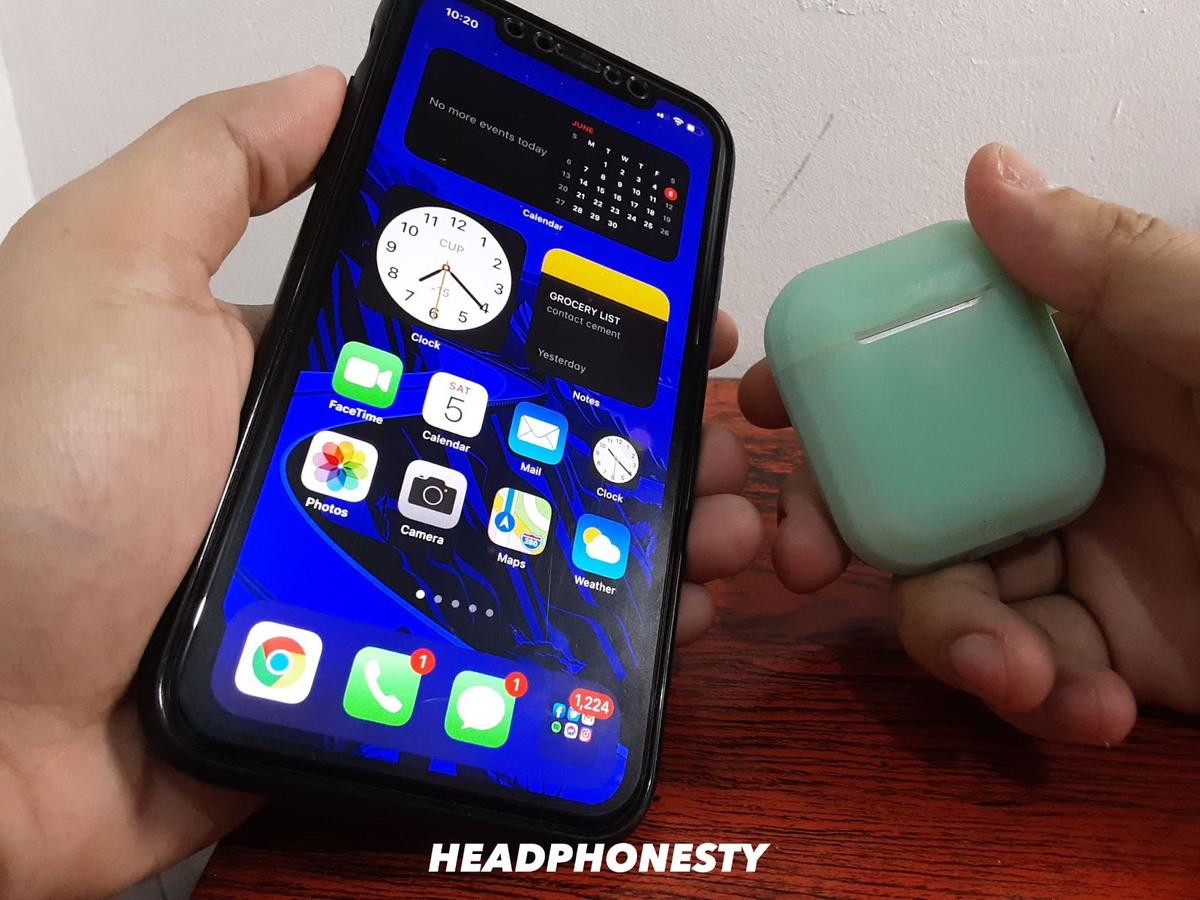
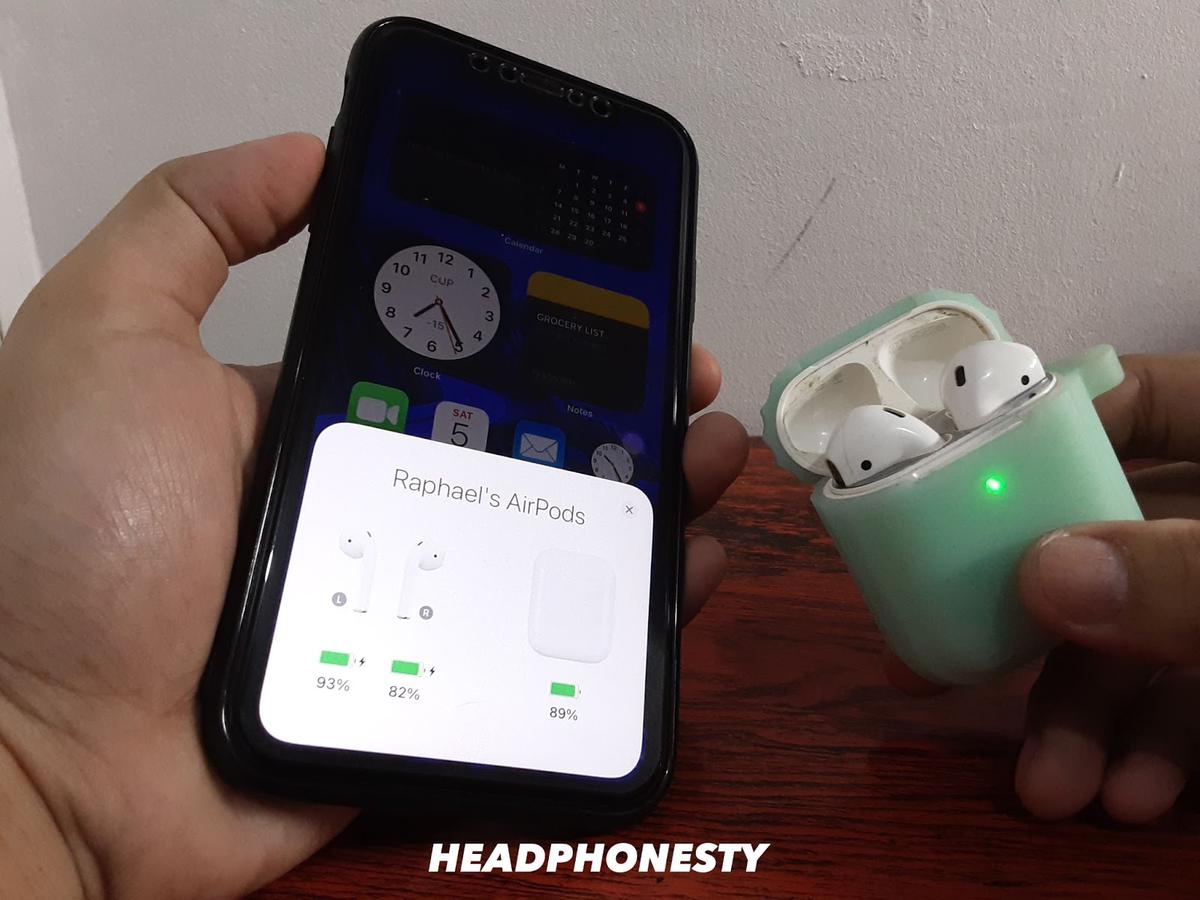
- With the AirPods inside, hold your AirPods case near your iPhone.

Bring your AirPods closer to your phone - Open your AirPods case.
Open the lid of the AirPods Case - Wait for a while and your battery status should automatically appear on your iPhone screen.
AirPods Battery Pop-up

Check Bluetooth connection
If your battery levels are good but the sound is still spotty, then maybe the Bluetooth connection isn’t stable.
Here’s how to improve your Bluetooth connection:
- Physical obstructions can disrupt your wireless connection, so put your device close to your AirPods to remove any source of physical interference.
- Moving to a different area might also help, especially one that is free of or has little wireless interference like those from Wi-Fi routers, microwave ovens, and wireless speakers.
Reset Your AirPods
Resetting your AirPods will restore them to their factory settings – as if they’re fresh out of the box. This removes any bugs or internal settings issues that may be causing your AirPods to cut out.
Here’s how to do it for your AirPods/AirPods Pro:
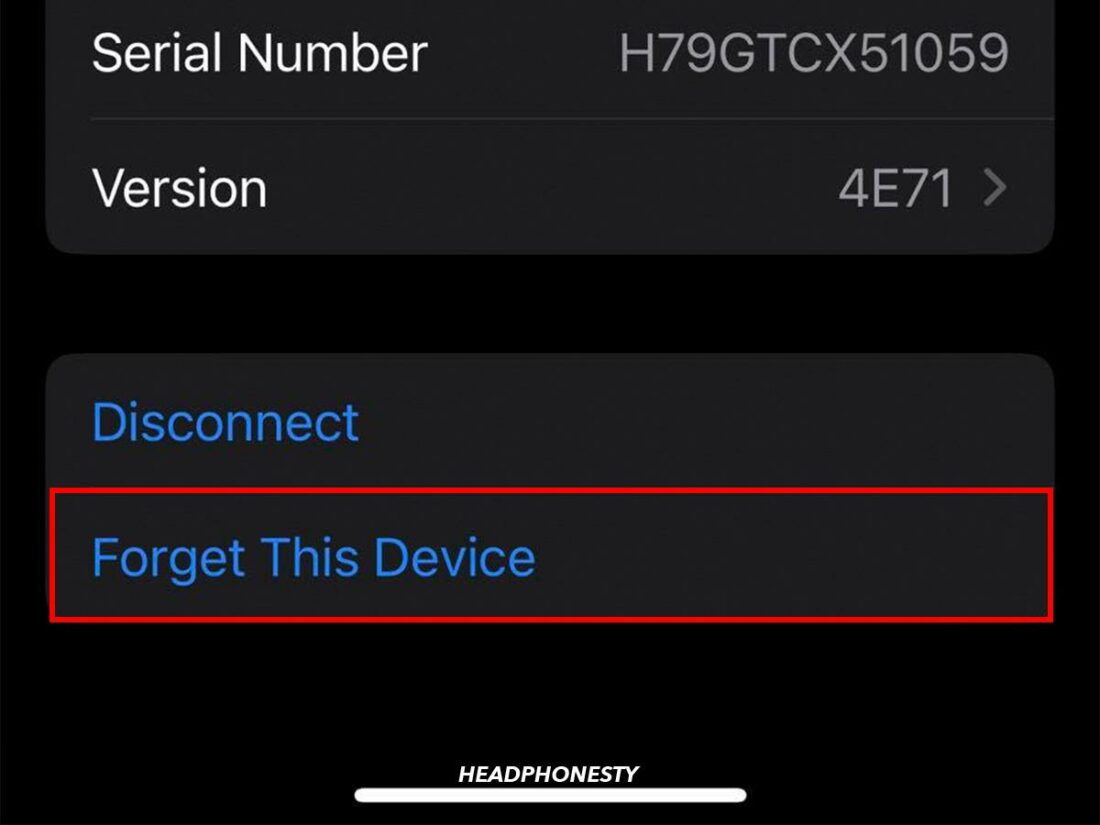
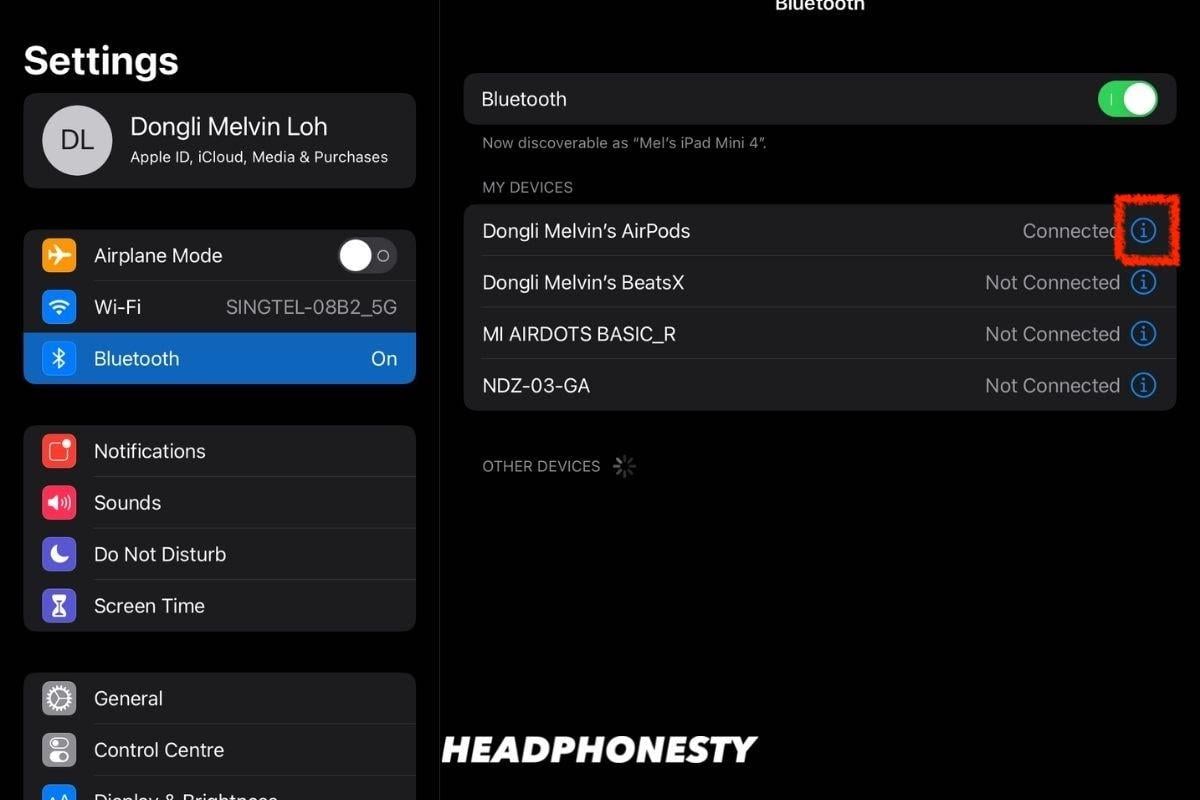
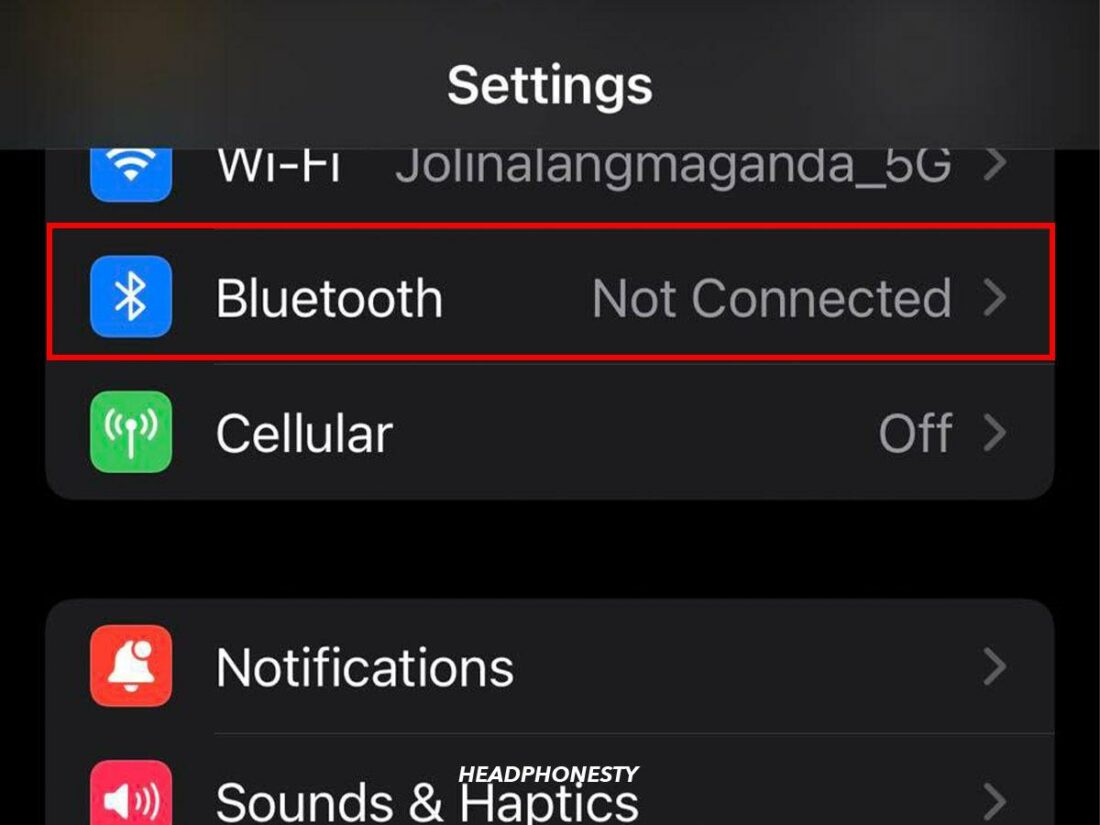
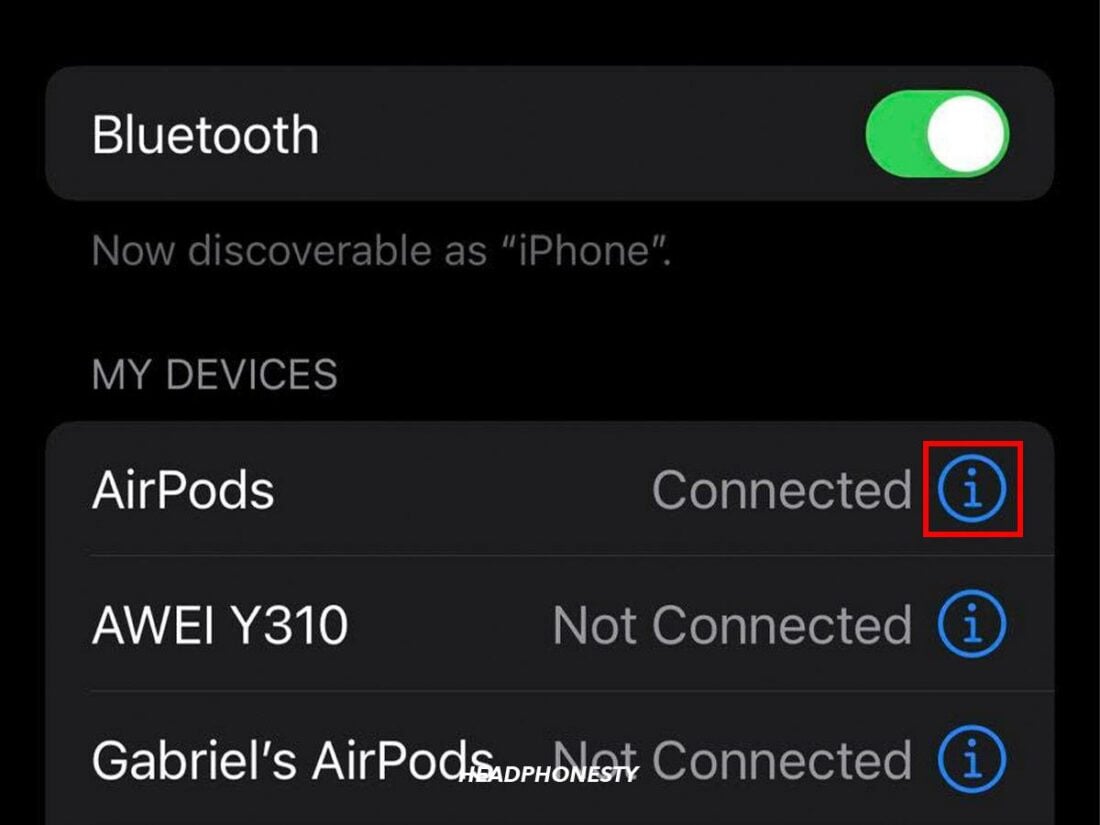
- Go to Settings > Bluetooth. Then, find your AirPods’ name and tap the small “i” icon beside it.

Tap the “i” icon. - Tap Forget this device and confirm. This unpairs your AirPods from all iOS devices using the same iCloud account.
Select Forget This Device. - Put the AirPods back in their case and close the lid.
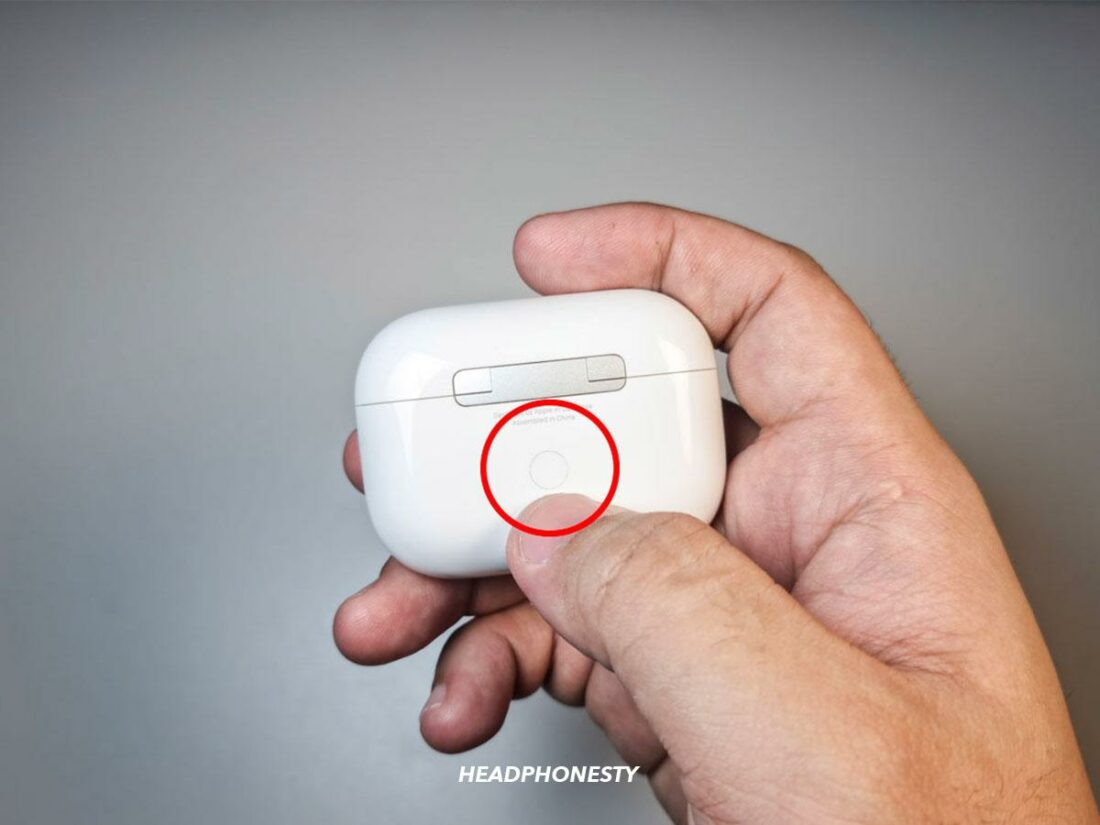
Put back the AirPods inside its case. - Press and hold the multifunction button at the back side of the case for 15 seconds, or until the status light to change from amber to white.
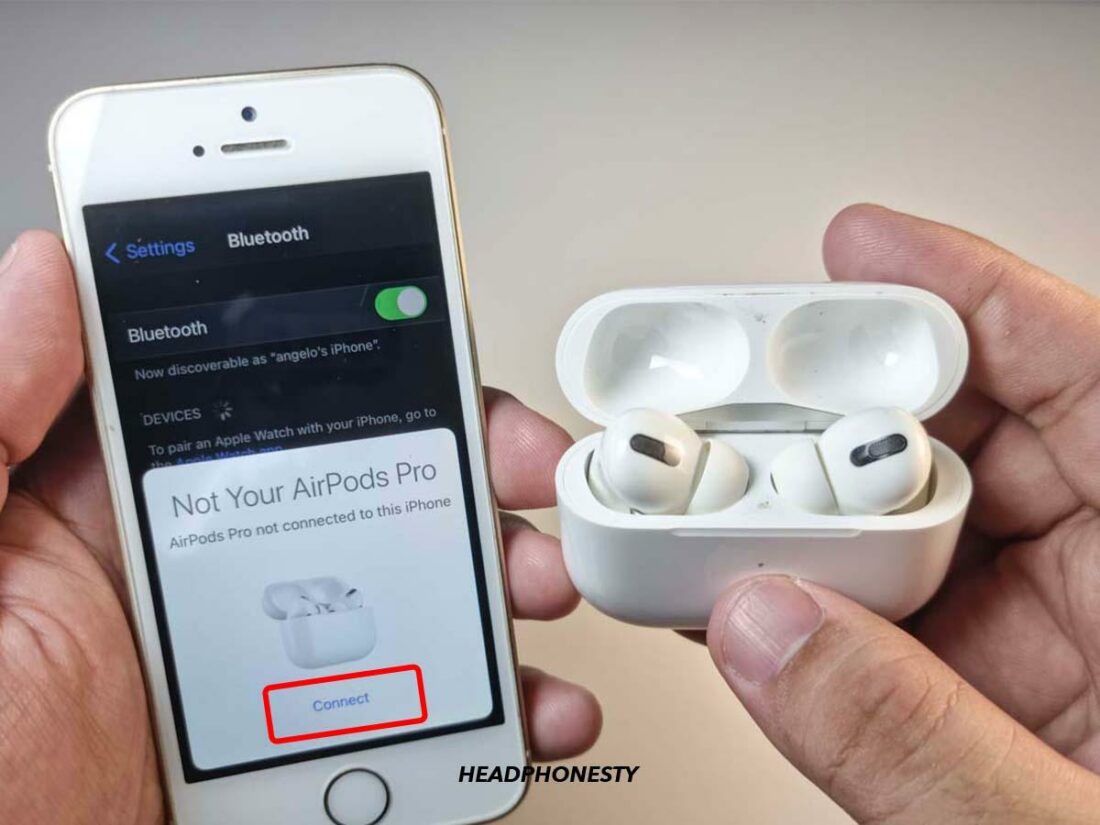
Press the setup button. - Wait a few seconds. Then, reconnect them by holding the case with the AirPods inside close to your iPhone. Wait for the setup animation to appear on your screen, and tap Connect. If the setup animation doesn’t appear, press and hold your AirPods’ case button.
Press connect.


Turn the Automatic Ear Detection off
Sometimes, Automatic Ear Detection can bring more problems than solutions to some users. Completely turning off Automatic Ear Detection allows your AirPods to continue playing audio whether or not you’re wearing them. This might help stop your audio from cutting out.
Here’s how to do it:
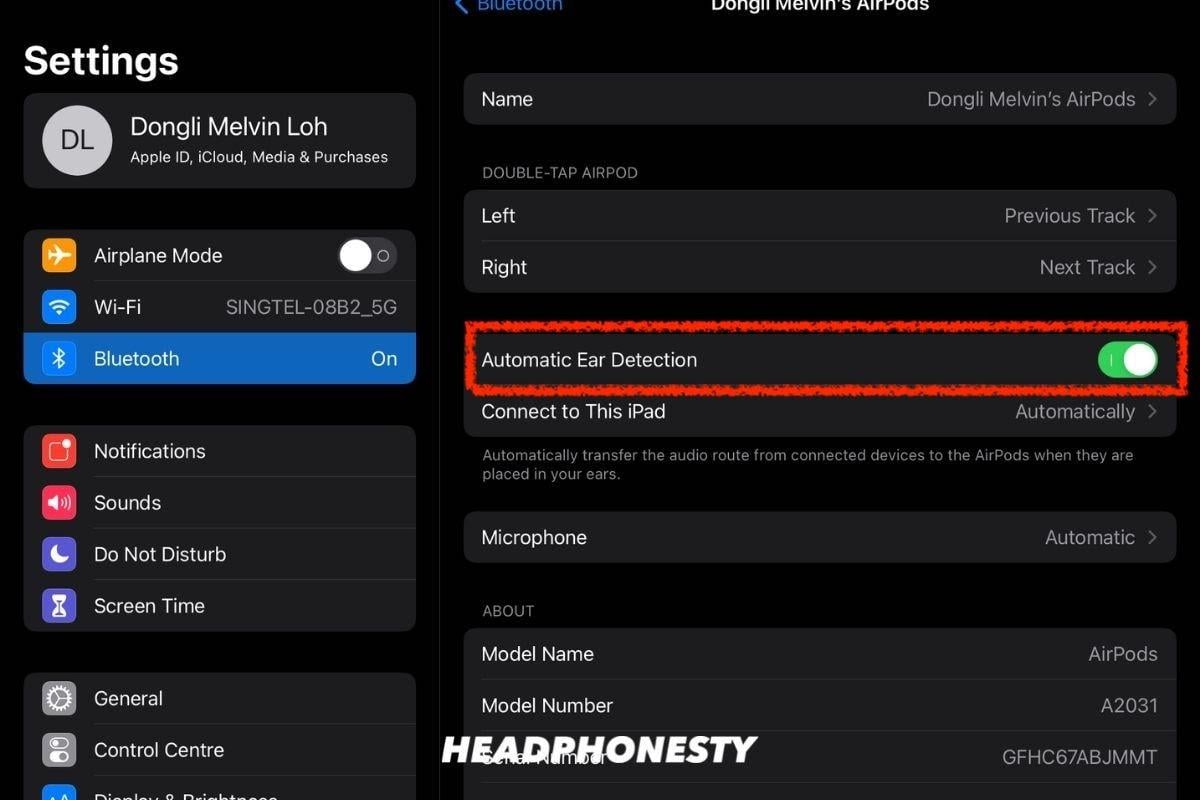
- Go to Settings > Bluetooth. There, find your AirPods and tap the small “i” icon at the right side.

Entering the additional settings menu for your AirPods. - Turn off Automatic Ear Detection by pressing on the toggle button.
The Automatic Ear Detection feature’s toggle
Update your AirPods’ firmware
Firmware is a type of computer software that provides low-level programming control for the hardware of a device. It may contain basic functions of a device or even its whole complete operating system.
It’s hard to manually update AirPods to newer versions of their firmware, but Apple mentions that this can be done automatically.
Here are the steps on how to update your AirPods’ firmware:
- Keep the AirPods turned on and connected to your iPhone via Bluetooth.
- Wait for at least 30 minutes. The firmware will automatically be downloaded, updated, and installed on the AirPods.
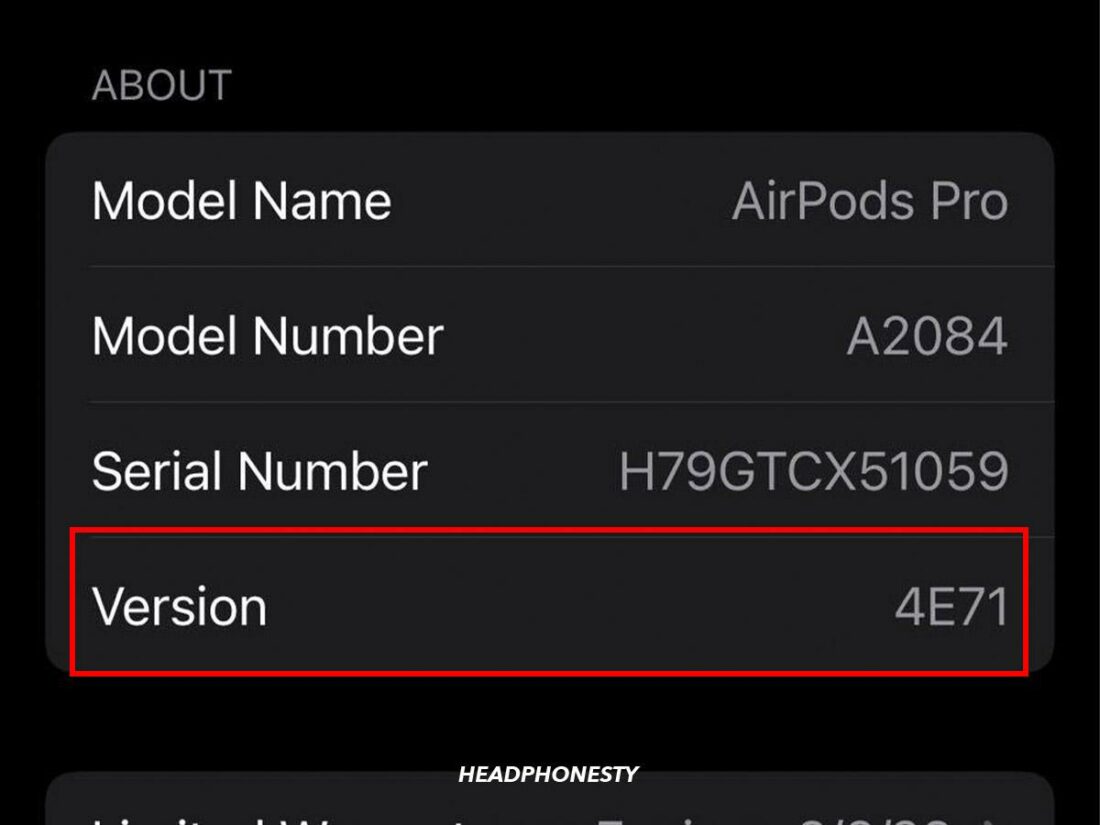
- Check if the existing firmware version of your AirPods has been updated by going to Settings > Bluetooth.
Select Bluetooth. - Find your AirPods and tap the small “i” icon at the right side.
Select the “i” icon. - Check the Firmware Version.
Check the Firmware version.
Disable audio enhancements
While audio enhancements should improve the listening experience in theory, they can also sometimes cause issues. This happens when there are too many audio enhancements set up that the AirPods cannot process them properly.
To disable these, you’ll have to go through different settings. Here’s how:
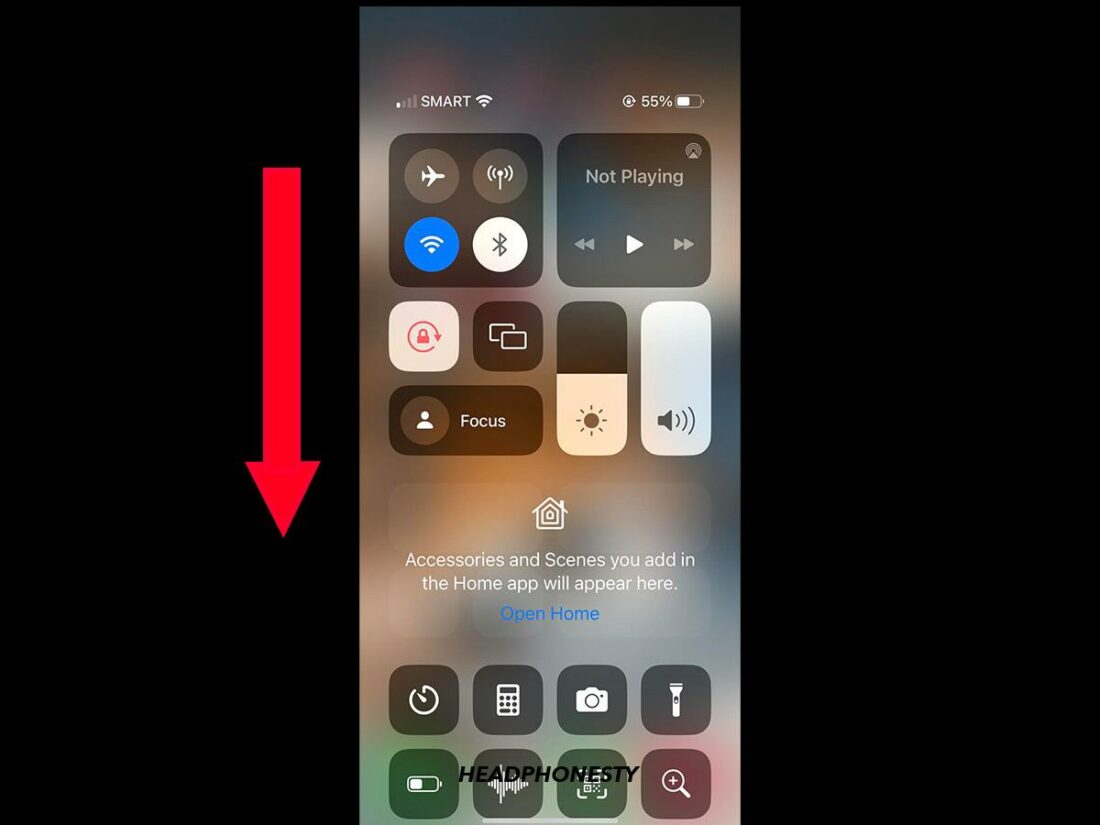
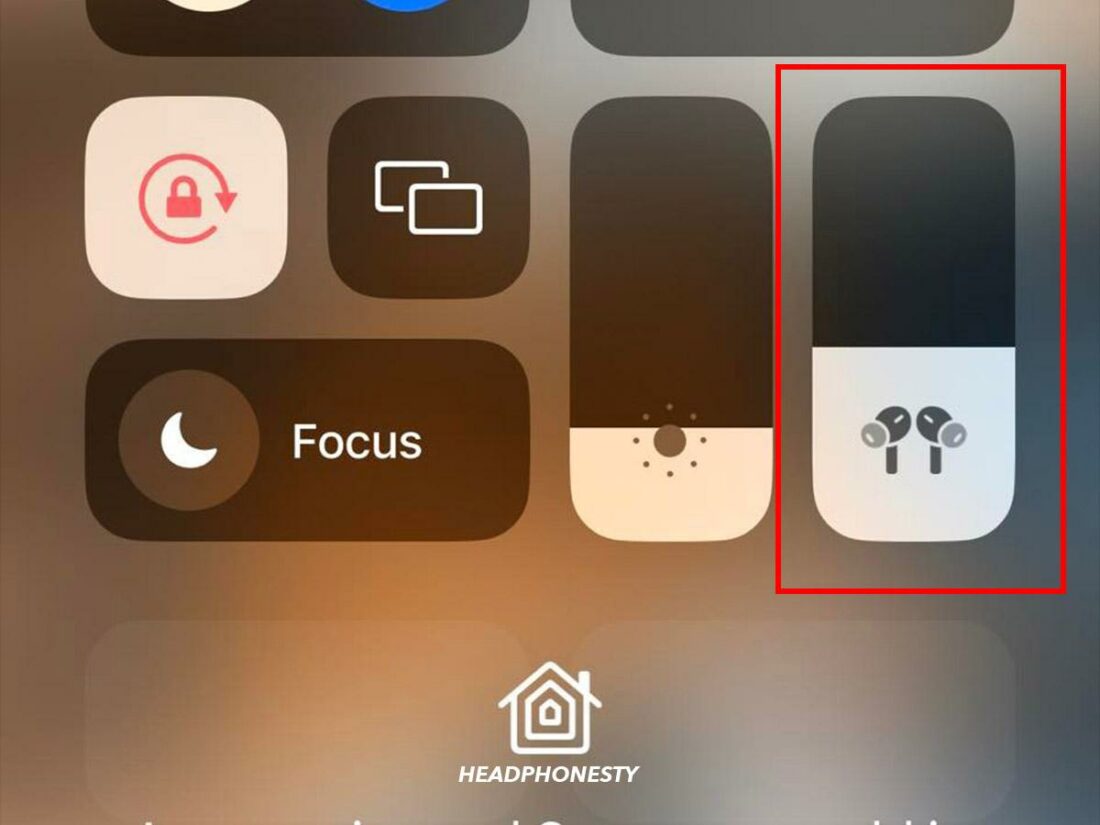
- Open the Control Center by swiping down from the top-right corner of your iOS device.
Open the Control Center. - Tap and hold the volume bar/icon.
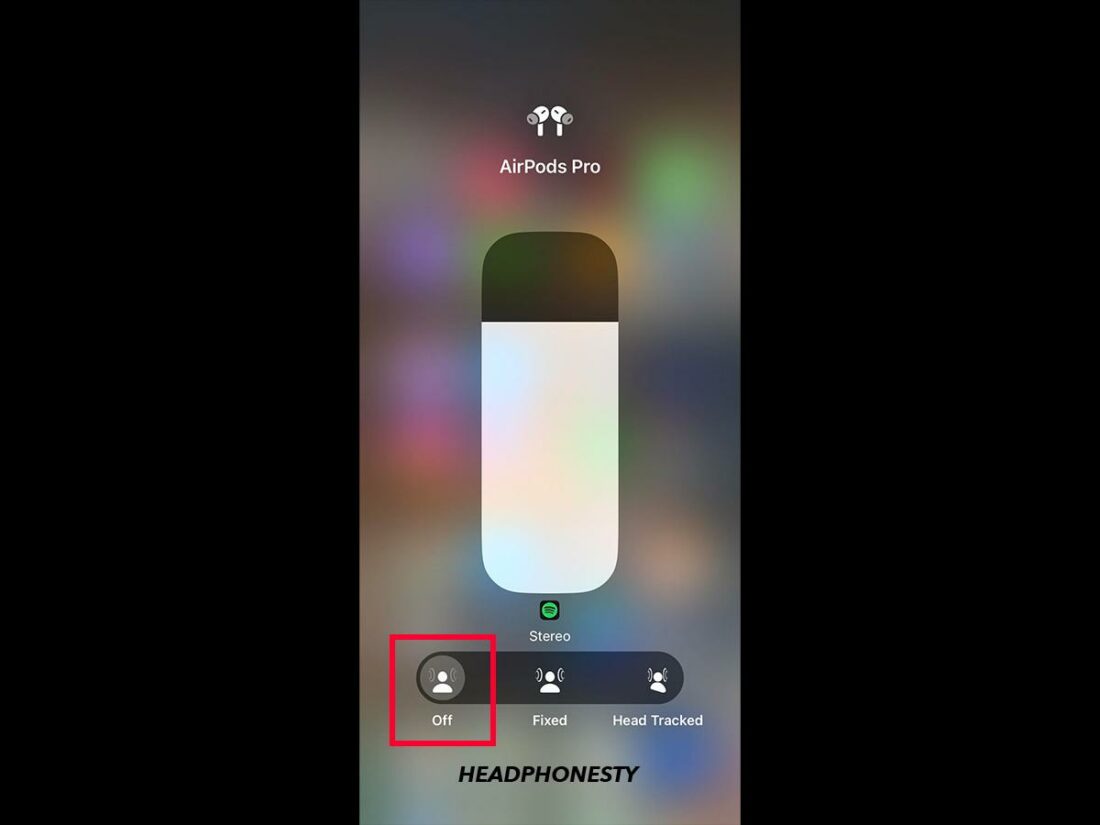
Tap and hold the volume bar/icon. - Tap the Spatial Audio button that appears below the volume bar and turn it off.
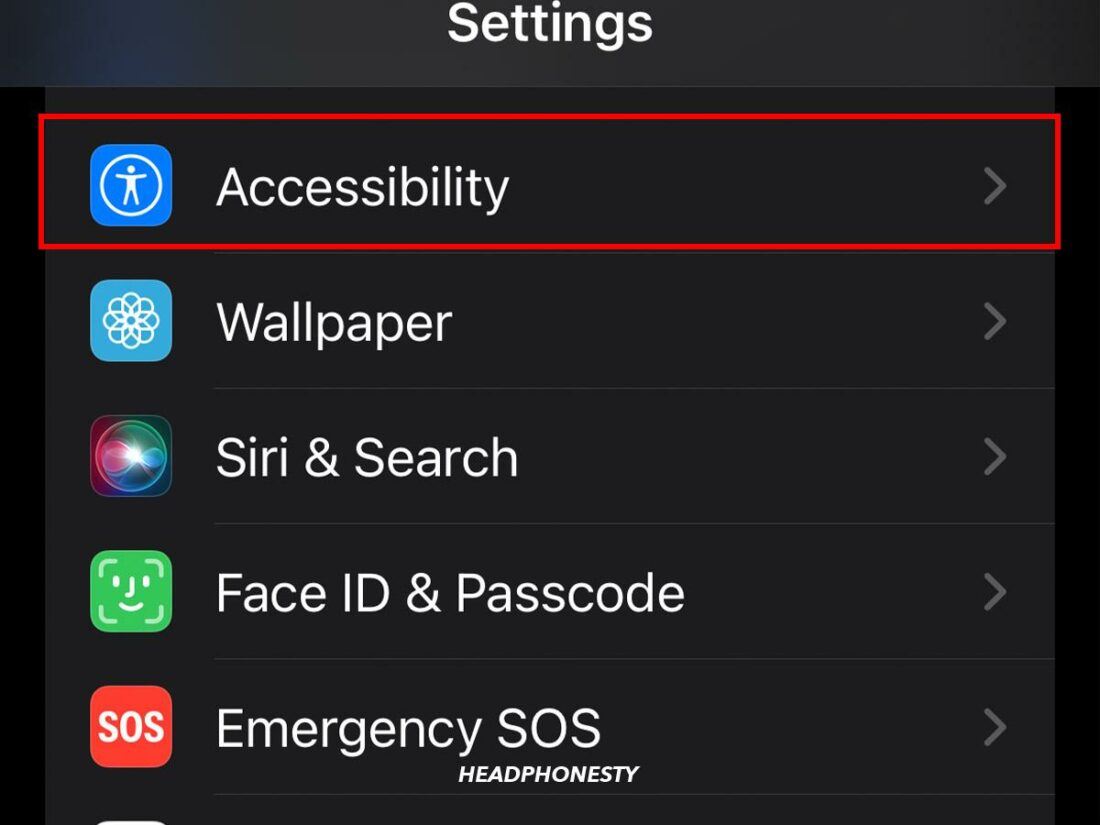
Turn off the Spatial Audio. - Then, close the Control Center and go to Settings > Accessibility.
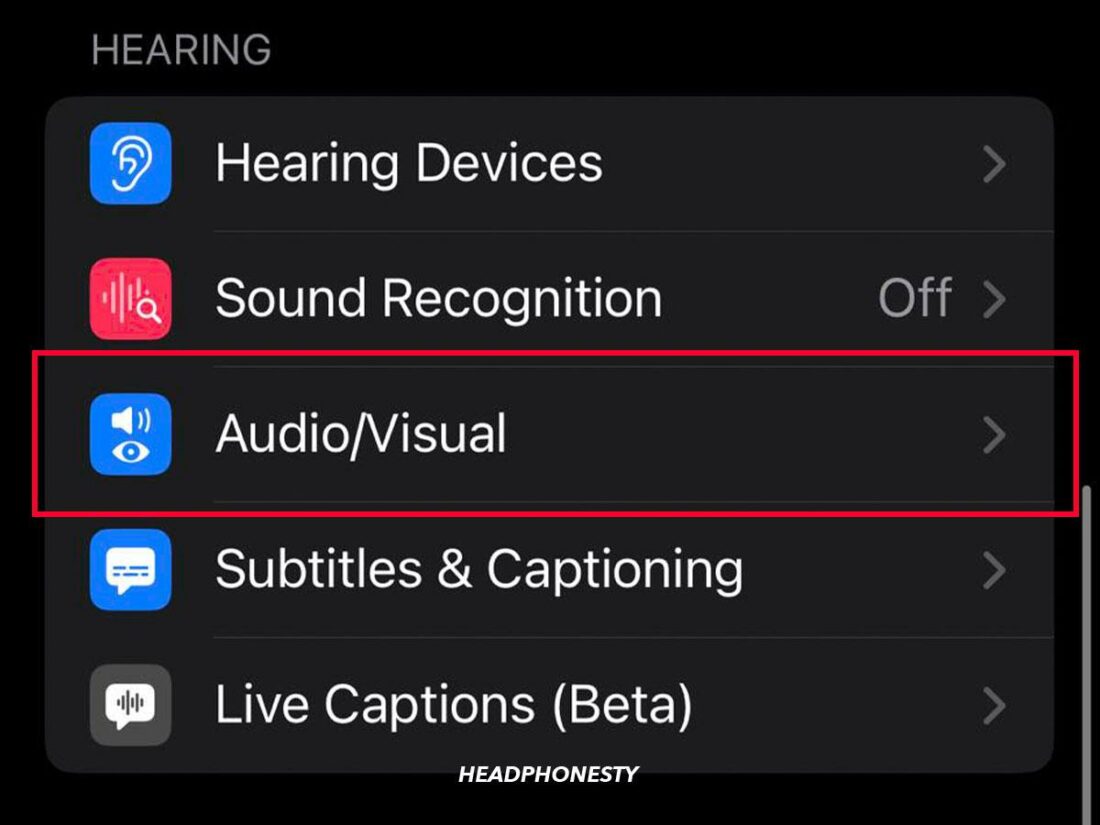
Select Accessibility. - Open the Audio/Visual settings.
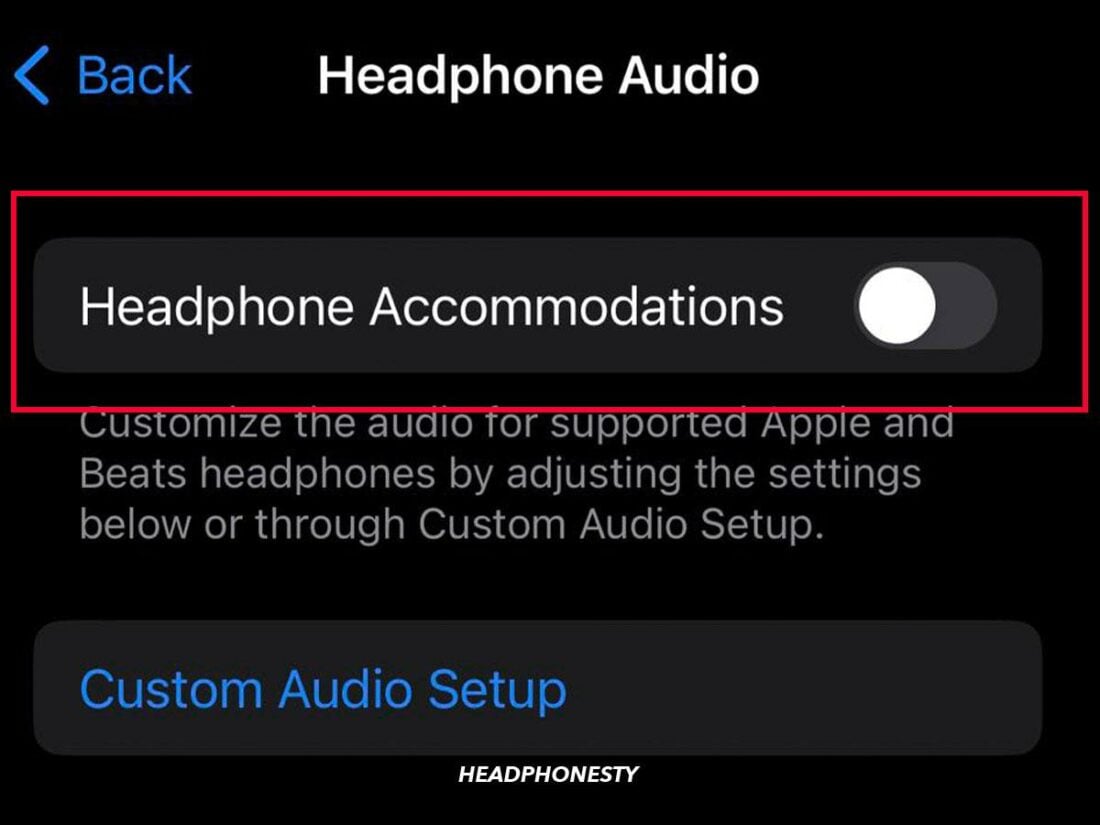
Go to the Audio/Visual settings. - Tap Headphone Accomodations and toggle it off.
Turn off Headphone Accommodations.
You can also check more ways to fix AirPods sound in our other article.
If the Issue Persists, Try Apple Support
If you’ve exhausted all your options, then it’s probably time to contact Apple Support.
Their online forums are helpful resources regarding issues other users have faced before. But, if you don’t have time to go through countless forum queries, you can also contact them directly via phone or chat.
However, when contacting Support, it is important that you properly communicate your issue. Have the following noted down for a smoother and less troublesome experience:
- On your iPhone settings, go to Bluetooth and tap the “i” icon beside your AirPods’ name.
- Check and take note of the following AirPod specifications:
- Model number
- Serial number
- Version
- Note down the specifics of your issue or concern:
- What happened?
- When did it start happening?
- What have you done since it happened?
Conclusion
In an ideal world, AirPods would never glitch or cut out, and you will always have the perfect listening experience. We aren’t quite there yet, but with these tips and tricks, we hope that you now understand why it happens. Most importantly, we hope that you can now solve the issue if it happens again.
What do you think? Were we able to help you get your AirPods working perfectly again? Do you think we missed out on something? Comment down below and let us know!
I found that it is due to my Airpods being connected to both my mac and my phone. Try disconnecting from one.
I’ve tried everything i went to Apple support and they didn’t know what to do