We demonstrate the most effective methods for preventing your AirPods from disconnecting from your Windows 10 or 11 PC.
AirPods are amazing wireless audio accessories that are easy to use in the Apple ecosystem. Unfortunately for non-Apple users, AirPods can sometimes have intermittent connectivity with devices like Windows PC.
This can be especially frustrating if it happens at the worst times, like during work calls, intense movie scenes, or important online classes.
In this guide, we’ll explain why your AirPods won’t stay connected to your PC and share several practical solutions to help you solve this problem. Read on to find out how!
- Check Your AirPods’ Battery Levels
- Check and Upgrade Your AirPods Firmware
- Factory Reset Your AirPods
- Toggle Your PC’s Bluetooth Function Off and On
- Restart Your PC
- Run Bluetooth Troubleshooter
- Update Windows Software
- Update Bluetooth Drivers
- Remove All Other Bluetooth Devices
- Completely Remove AirPods From Windows
- Disable Power Management for AirPods
- Change Your PC’s Power Plan Settings
- Change Bluetooth Support Service Settings to Automatic
- Disable Telephony Service for AirPods
- Remove Hidden Entries in Device Manager
- Disable Fast Startup
- Disable Swift Pair
- Edit Registry Entry
- Use a Bluetooth Dongle
- Conclusion
Check Your AirPods’ Battery Levels
Although AirPods are identical, sometimes one earbud may run out of power and disconnect before the other.
This occurs if you often use the ‘double-tap to skip a song’ or ‘activate Siri’ function on one earbud. These actions consume more power and drain the respective earbud’s battery faster, thus affecting its ability to maintain a stable Bluetooth connection.
Incidentally, this also causes connection drops with other iOS devices like iPhones and iPads, so check that your AirPods are sufficiently charged to ensure this doesn’t happen. Here’s how to do just that using an iOS device:
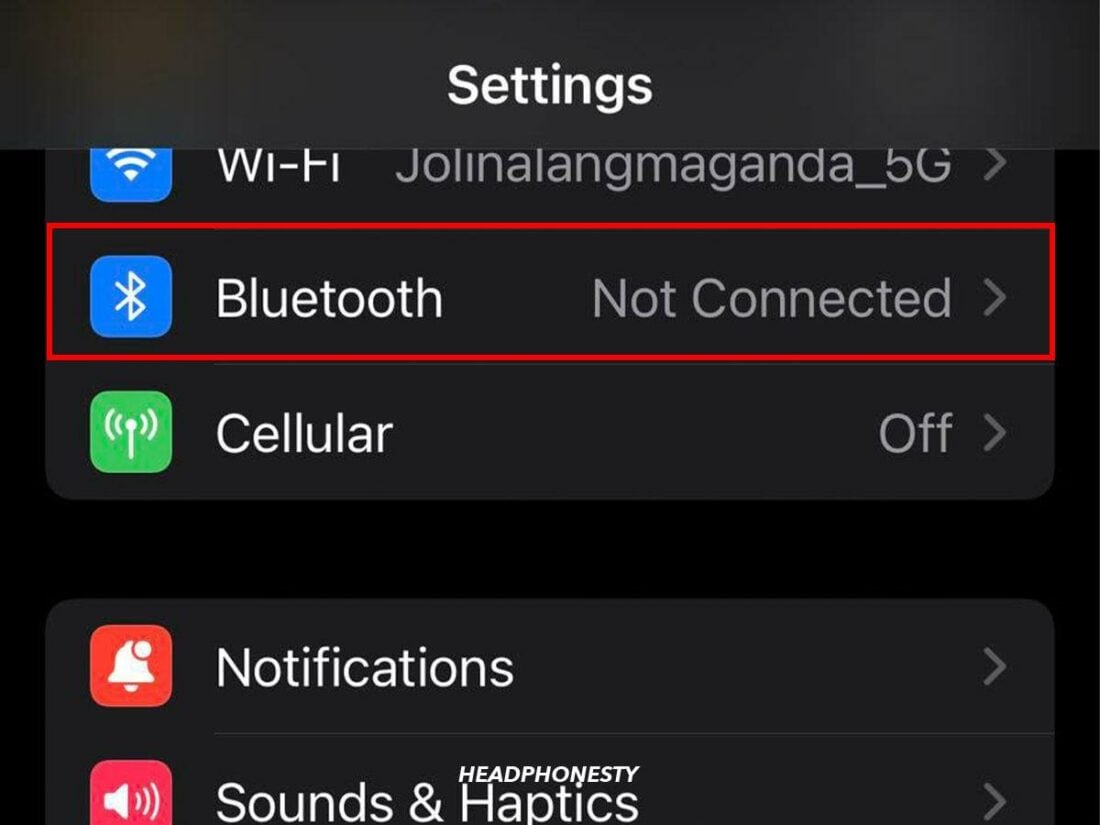
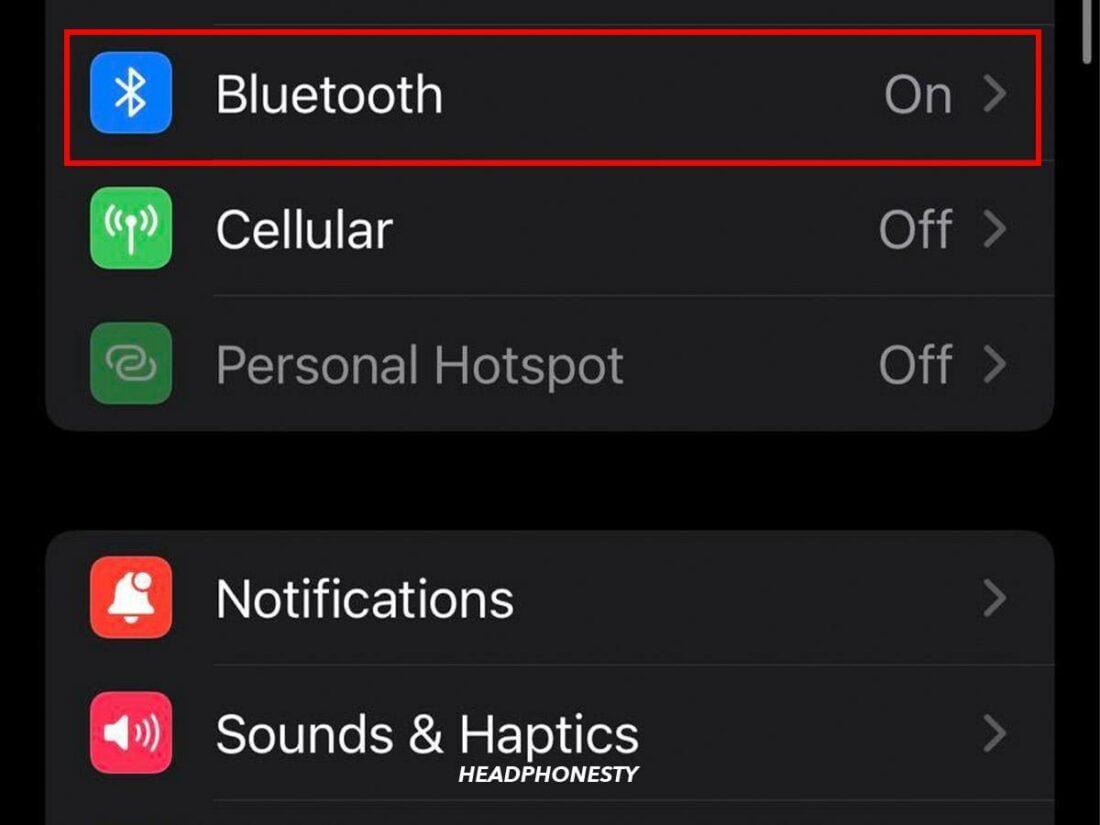
- Open Settings and tap on Bluetooth.

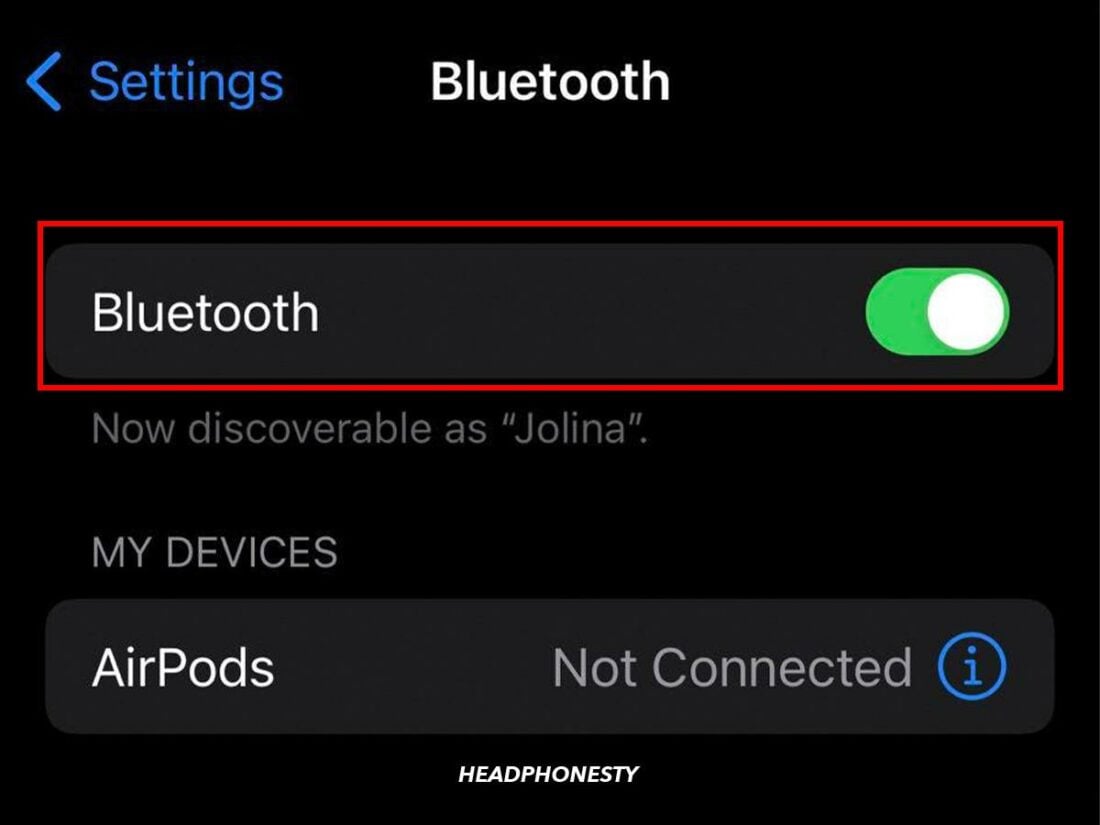
“Bluetooth” highlighted in Settings. - Toggle Bluetooth on.
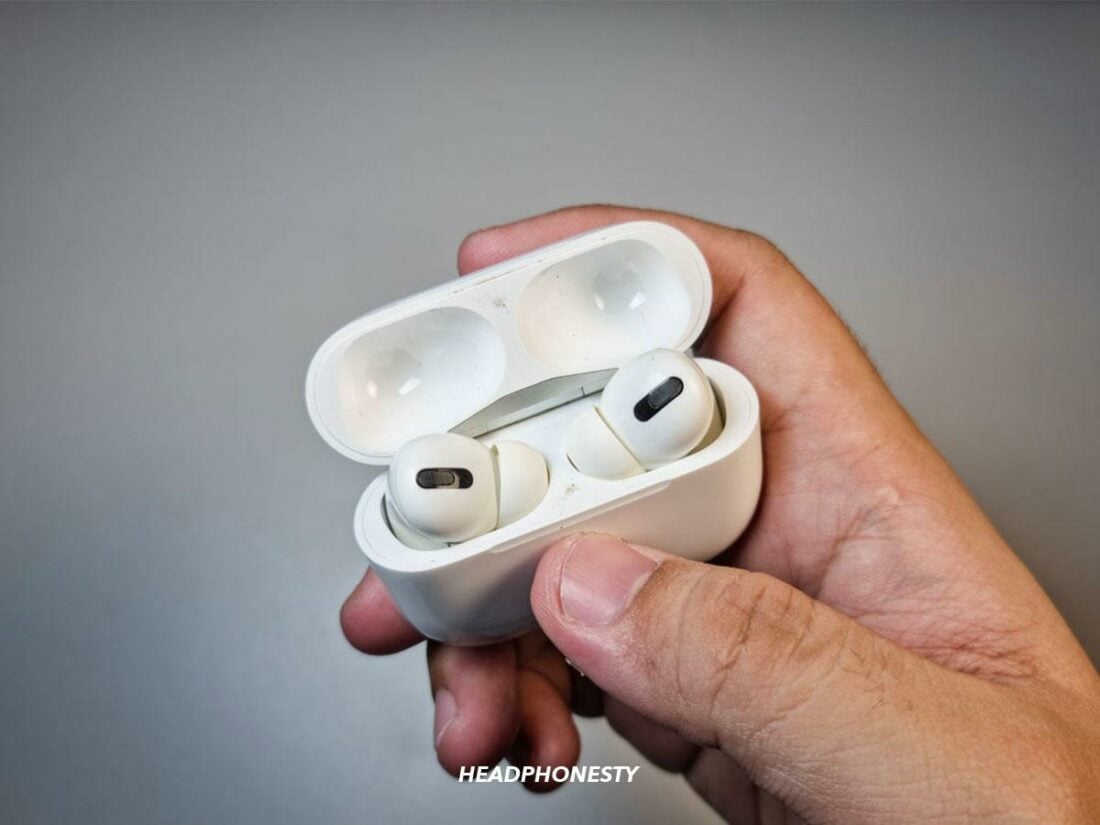
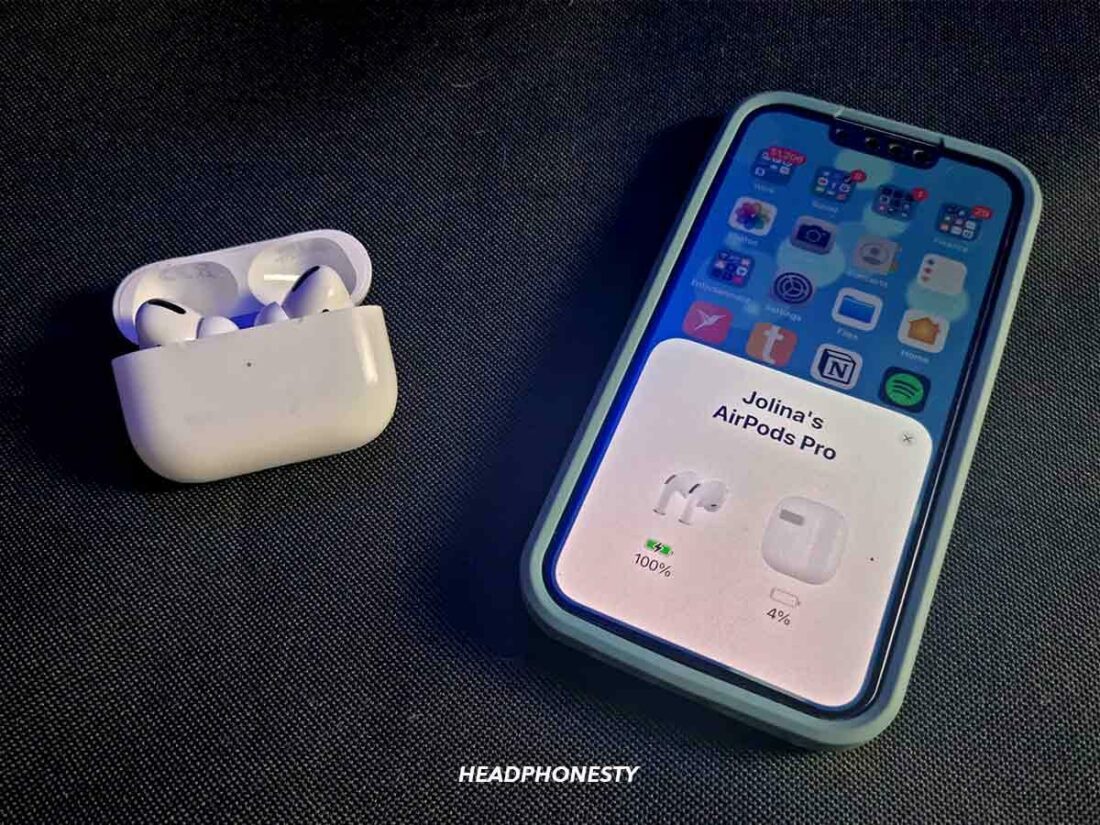
Bluetooth toggle switch. - Open your AirPods’ charging case (with the AirPods inside) near your iOS device.
Open Airpods charging case. - You should see an automatic pop-up moments later displaying your AirPods’ battery levels.
Pop-up showing battery levels on iOS.
Check and Upgrade Your AirPods Firmware
Apple sometimes releases firmware updates that activate new features and help fix old bugs. If you’re running outdated firmware on your AirPods, it can cause technical glitches, such as hearing audio only in one AirPod, distortion, and dropped disconnections.
To avoid this, update your AirPods’ firmware version. Here’s how:
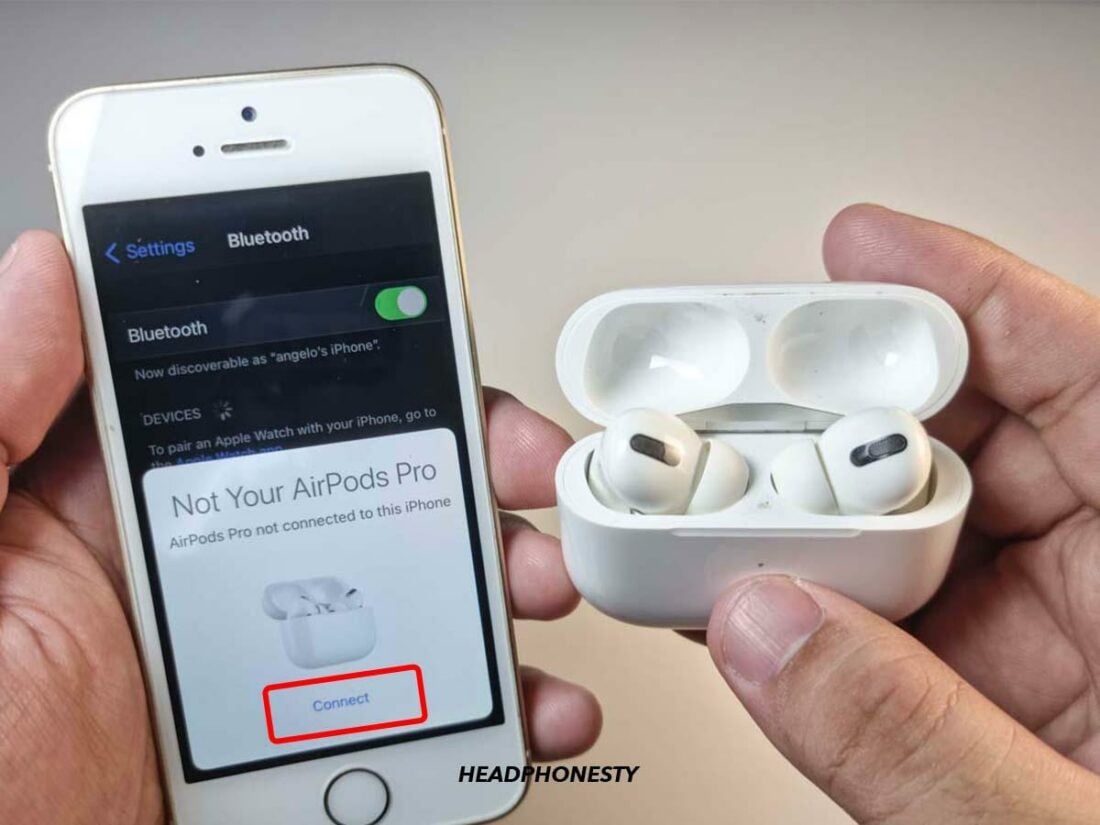
- Connect your AirPods to your iOS device.
Connect AirPods to iPhone. - Tap Settings, then Bluetooth.
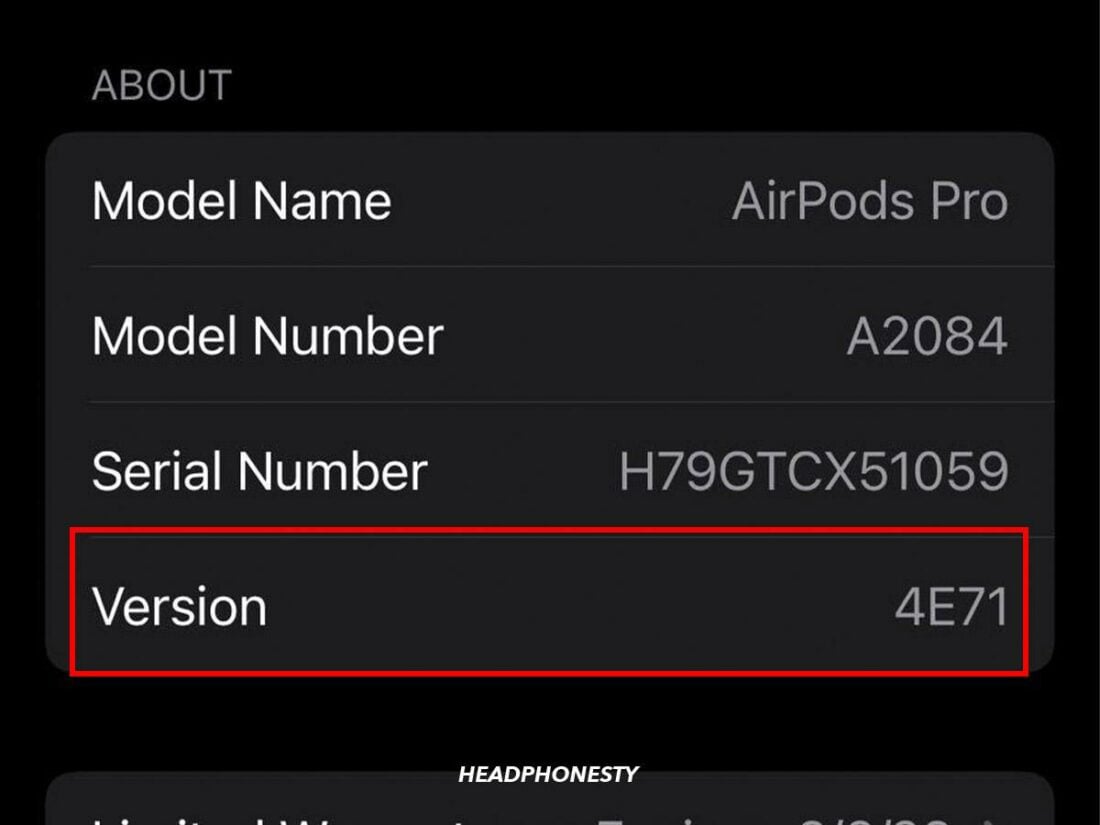
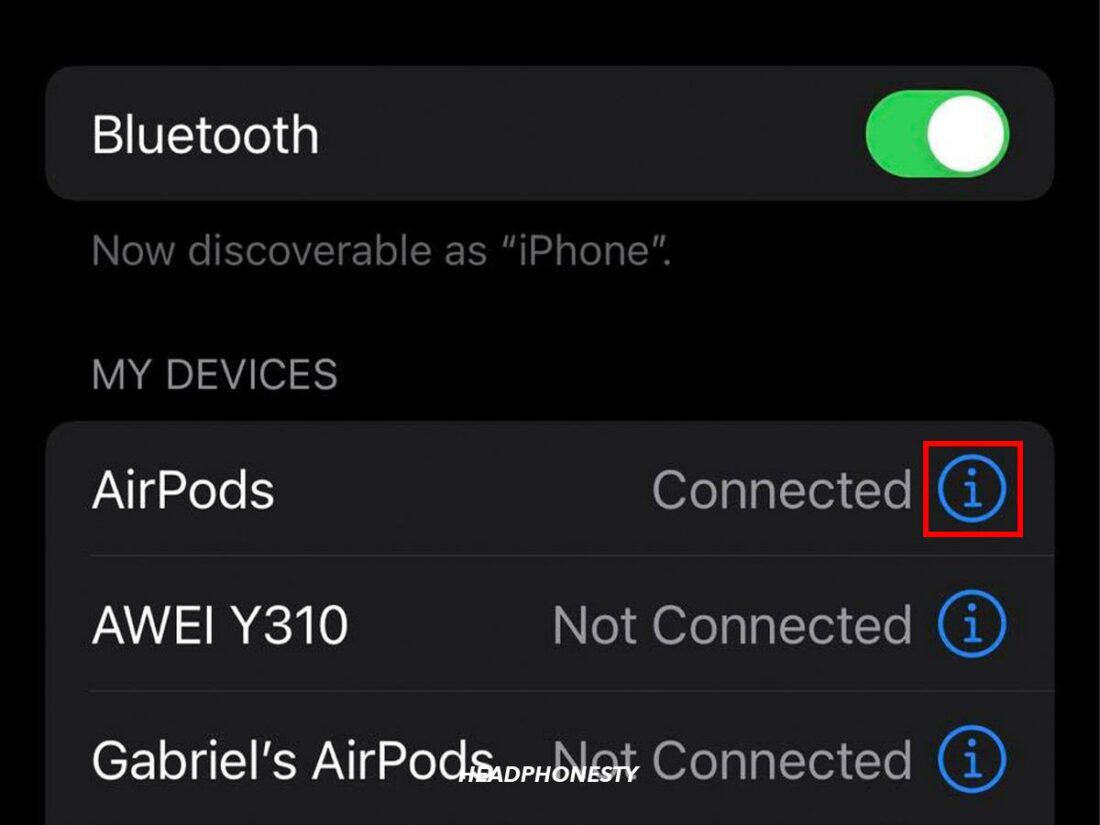
“Bluetooth” highlighted in Settings. - Under My Devices, tap the information icon (i) beside your AirPods.
Tap the “i” icon beside Airpods. - You should see the firmware version. As of 8 September 2022, the latest firmware version is 4E71.
Airpods firmware version.

Factory Reset Your AirPods
If you’re still experiencing persistent connection problems, you can factory reset your AirPods. This reverts them to their original “out of the box” settings. It also removes the history of previous pairings and fixes errors and bugs.
Here’s how to factory reset your AirPods with an iOS device:
- Open Settings and tap Bluetooth.
“Bluetooth” highlighted in Settings. - Under My Devices, click on the information (i) icon beside your AirPods.
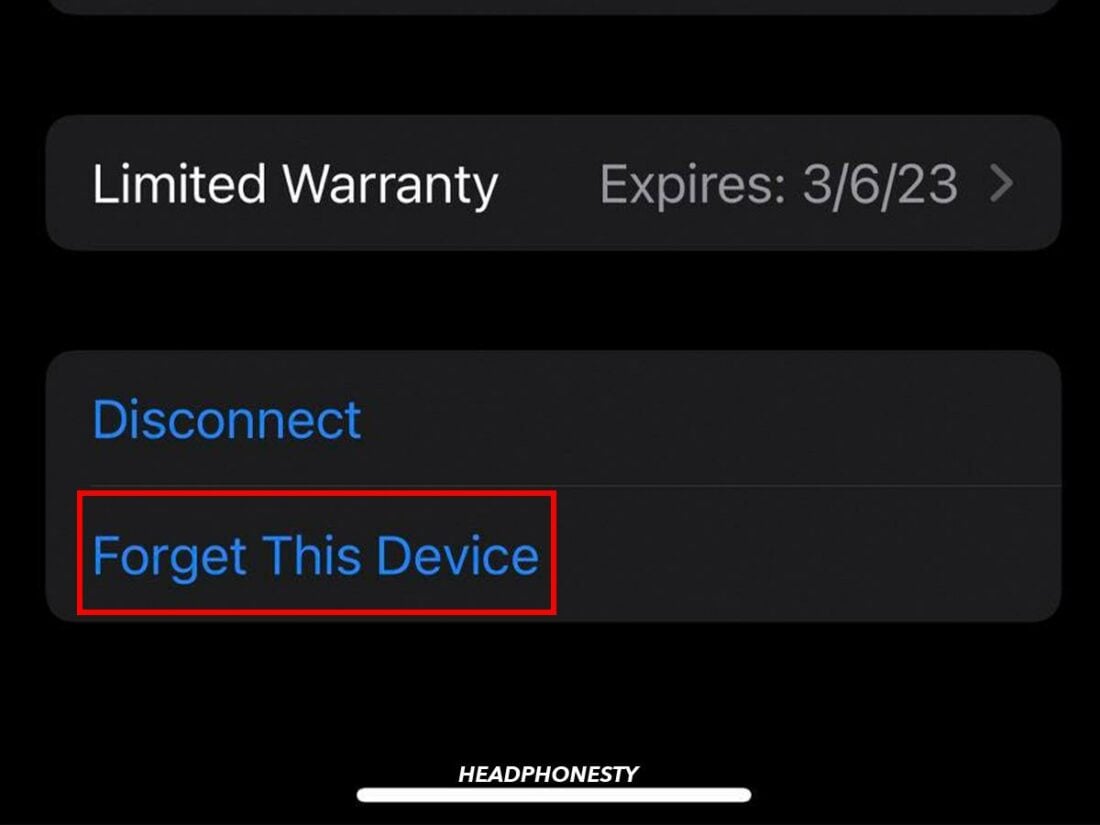
Click on the information (i) icon beside your AirPods. - Select Forget This Device.
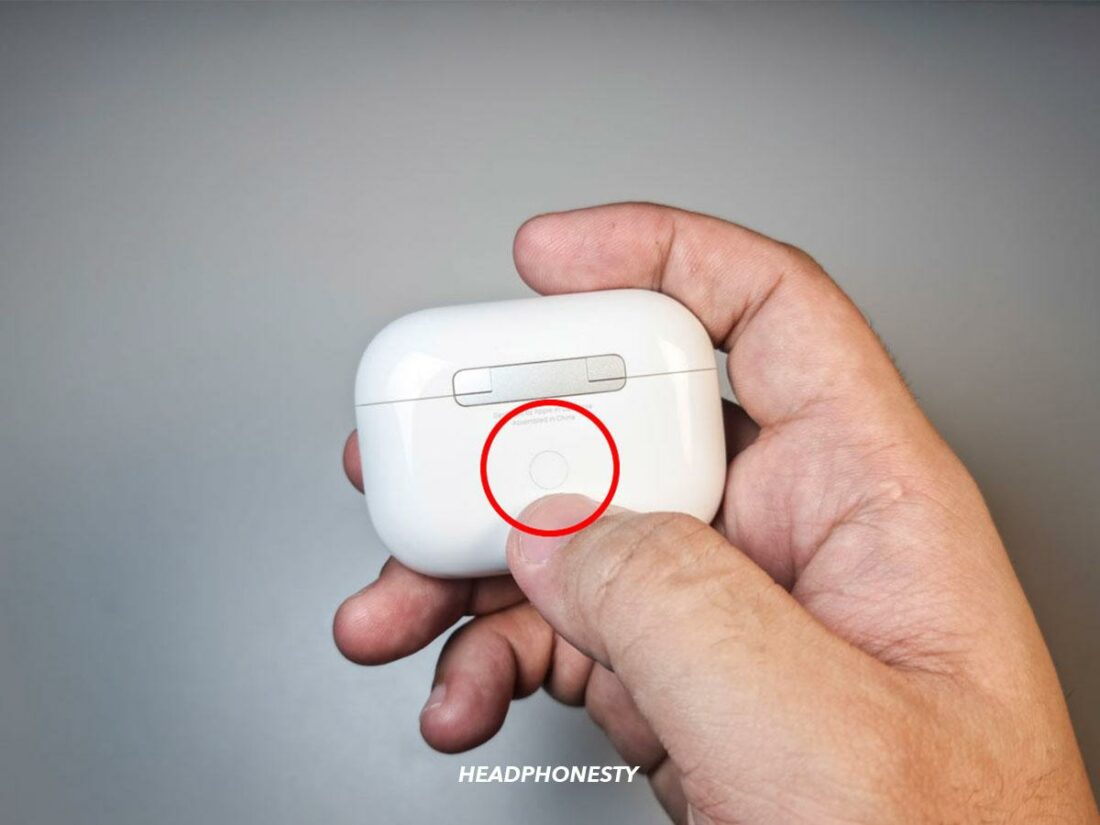
Forget This Device. - Place your AirPods back inside the charging case. Press and hold the setup button at the back of the case for about 15 seconds.
Charging Case setup button. - The indicator light on the case will flash white, then amber, indicating a successful reset.
Indicator light turns to white.


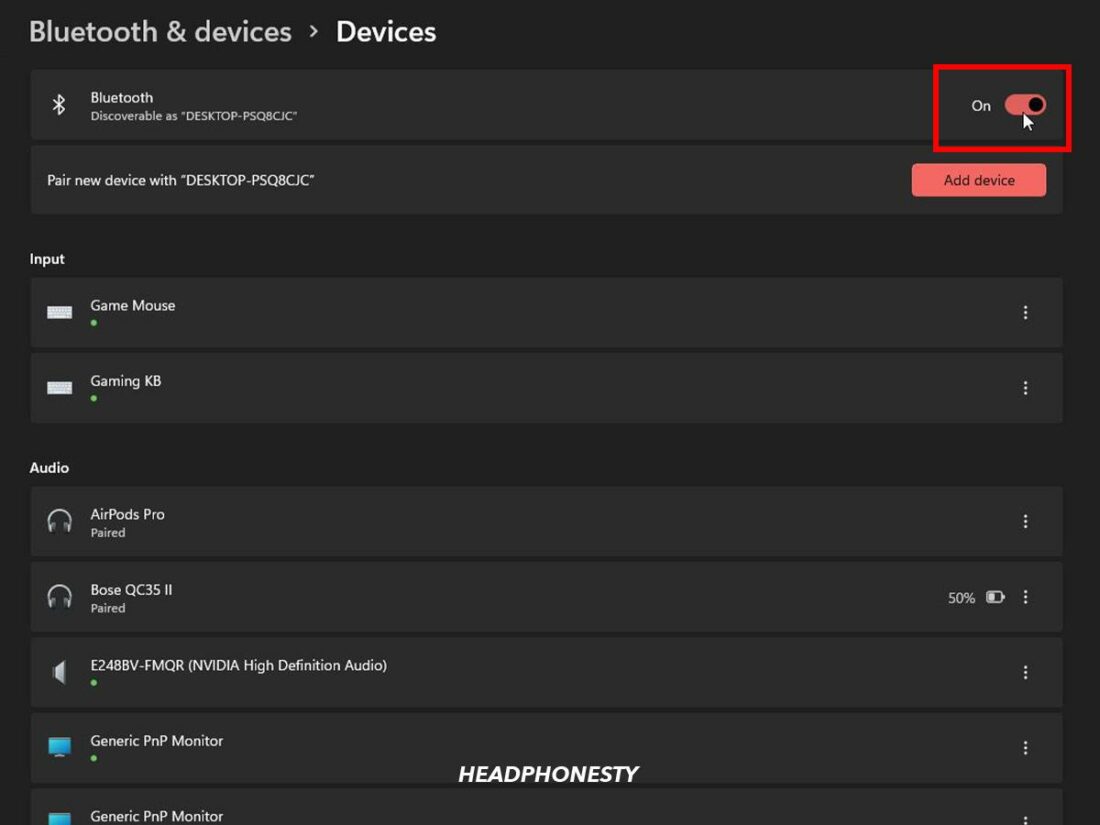
Toggle Your PC’s Bluetooth Function Off and On
Sometimes your PC’s Bluetooth may stop working correctly, leading to a spotty connection. Simply restarting your PC’s Bluetooth should help solve this error.
Here’s what you do:
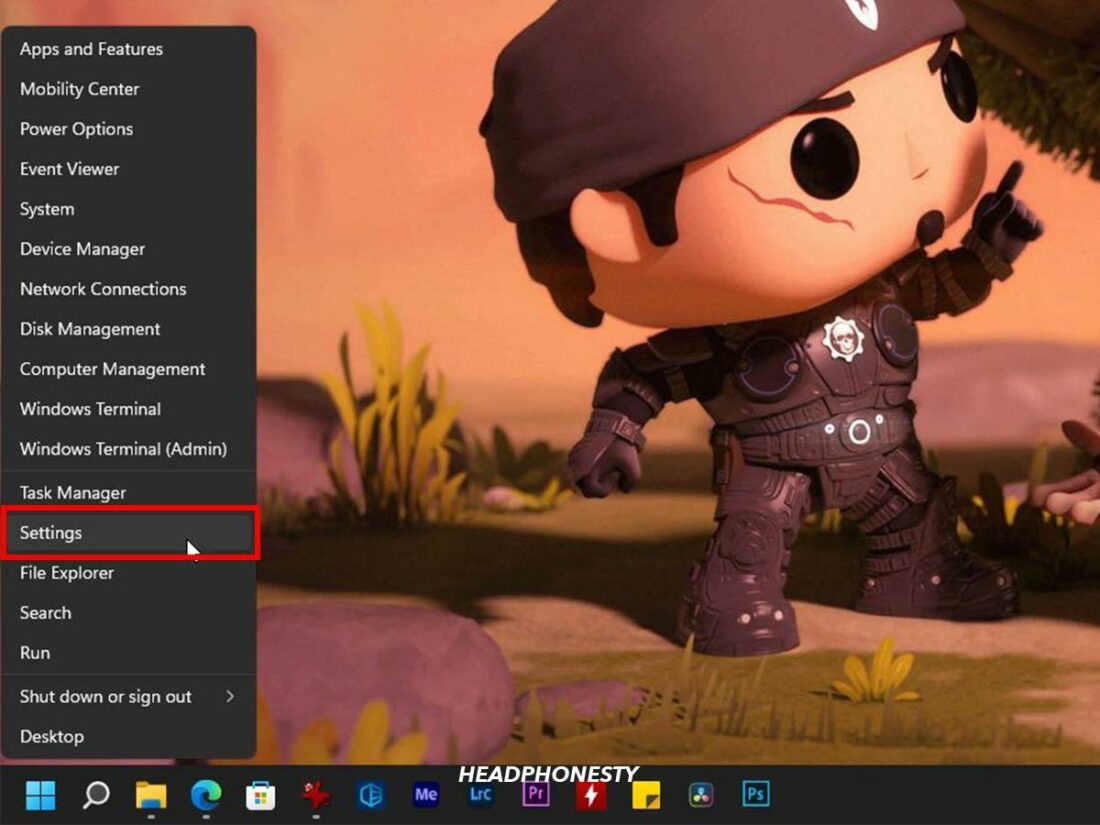
- Right-click on Start and select Settings.
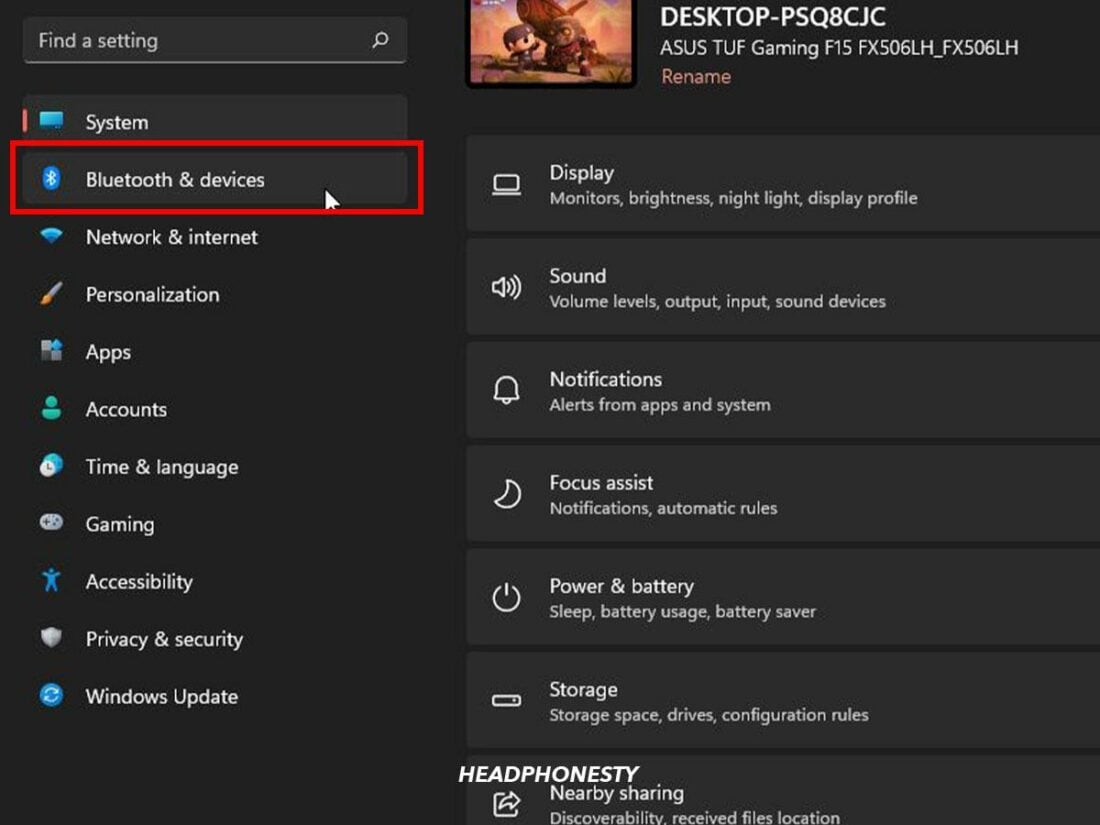
“Settings” highlighted in Windows Start menu. - Select Devices, then click Bluetooth & other devices.
“Bluetooth & devices” highlighted in Settings. - Toggle Bluetooth off. Wait a few seconds, then turn it back on again. Your PC’s Bluetooth will restart and should begin scanning for nearby devices automatically.
Bluetooth toggle switch.

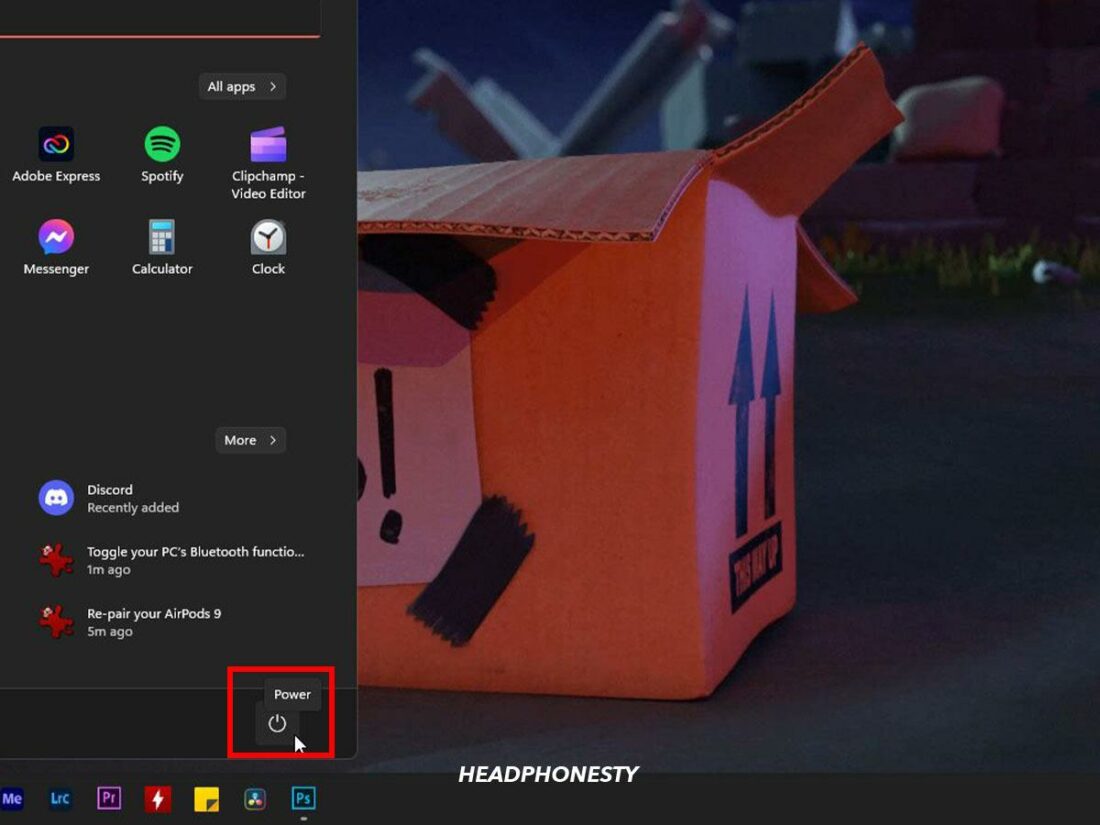
Restart Your PC
Other times, bugs or errors such as high CPU usage can cause certain processes or settings like your Bluetooth to lag or crash. Fortunately, restarting your PC is a common way to fix such problems.
Here are the steps:
- Click Start.
Start Button highlighted on Windows. - Select the Power button icon.
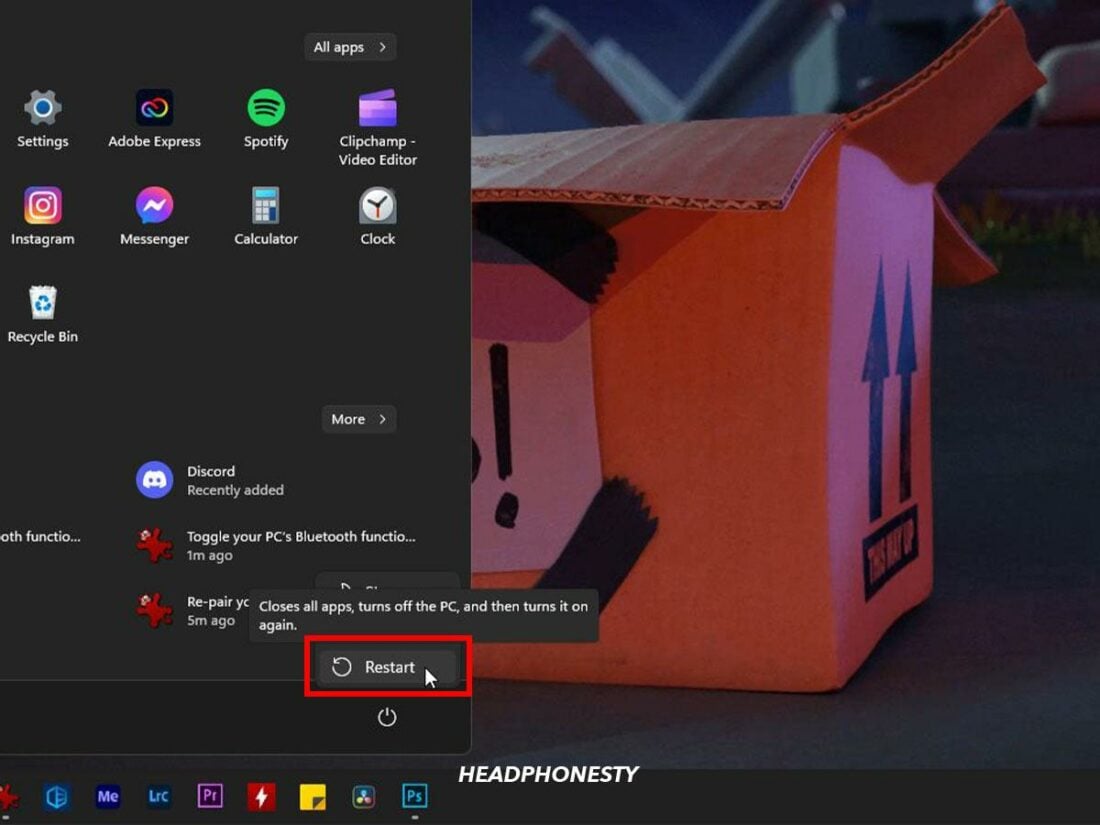
Power Button highlighted. - Select Restart in the pop-up menu.
Restart button highlighted.

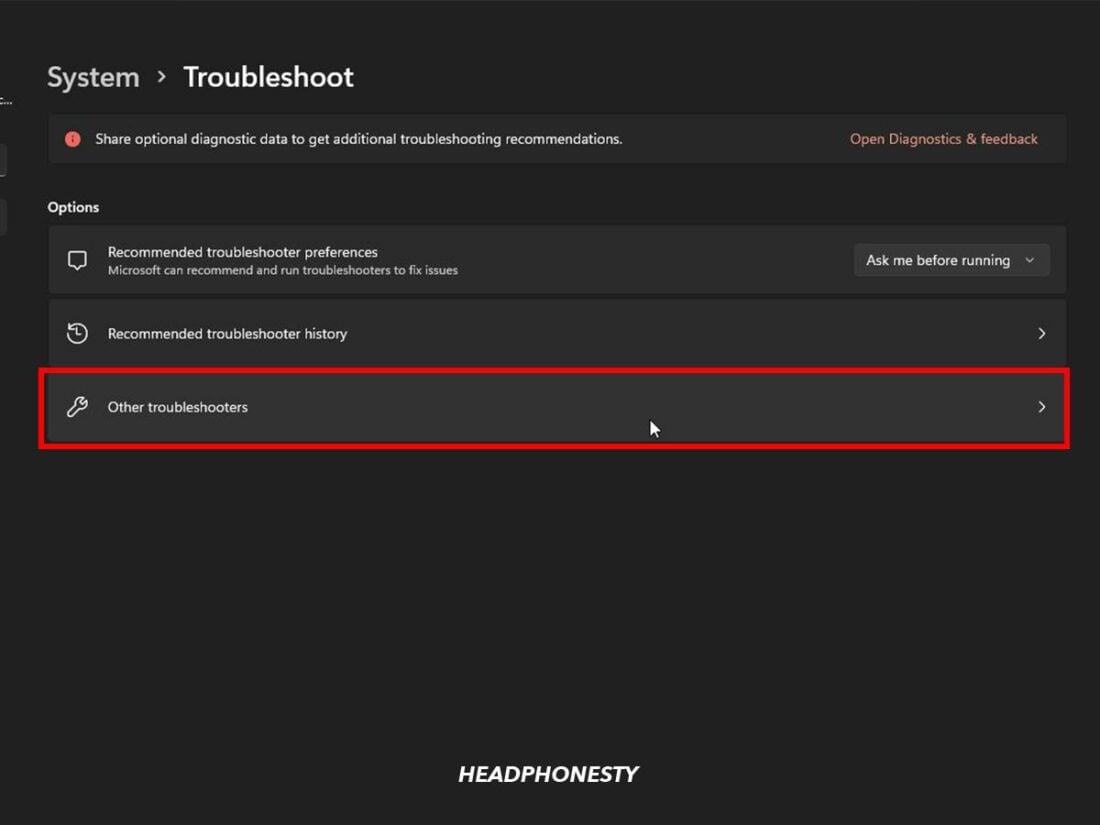
Run Bluetooth Troubleshooter
If you’re still experiencing connection issues after restarting your PC, try running the Windows Bluetooth Troubleshooter. It can help identify and fix common Bluetooth connectivity issues.
Here’s how to activate it:
- Right-click on Start and select Settings.
“Settings” highlighted in Windows Start menu. - Click System and select Troubleshoot.
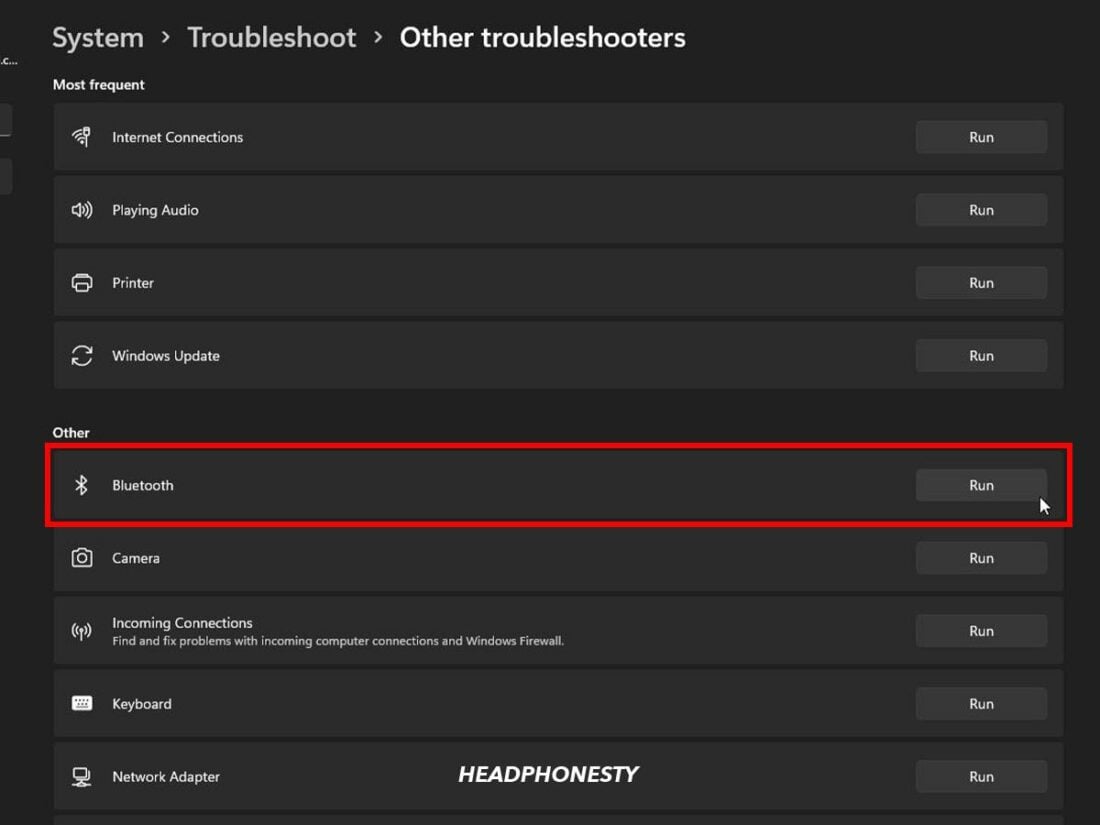
“Troubleshoot” highlighted. - Click Other troubleshooters.
“Other Troubleshooters” highlighted. - Select Run on Bluetooth to launch the troubleshooter, then follow the instructions.
Run Bluetooth troubleshooter.


Update Windows Software
Microsoft periodically releases updates and patches for Windows, which can help fix bugs and issues. An older version of Windows might make you susceptible to errors affecting your Bluetooth’s performance, so it’s best to always update it.
Here’s how:
- Right-click on Start and select Settings.
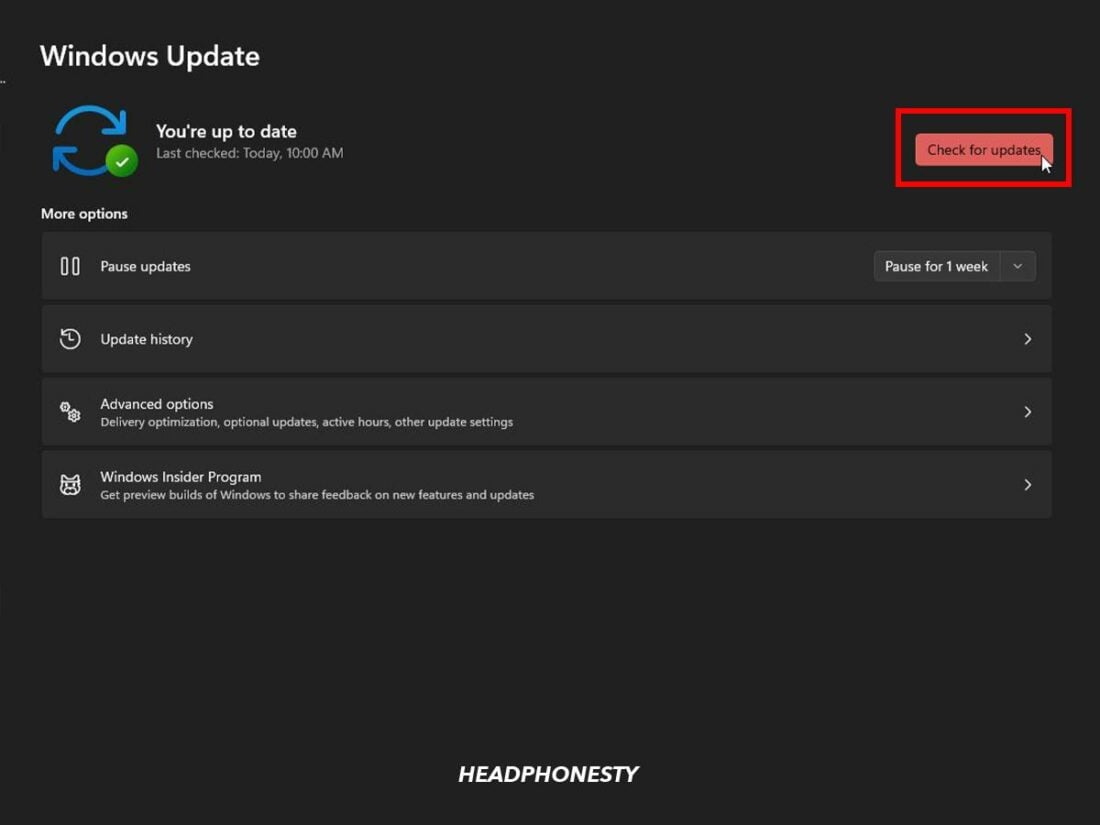
“Settings” highlighted in Windows Start menu. - Click Windows Update and choose Check for updates.
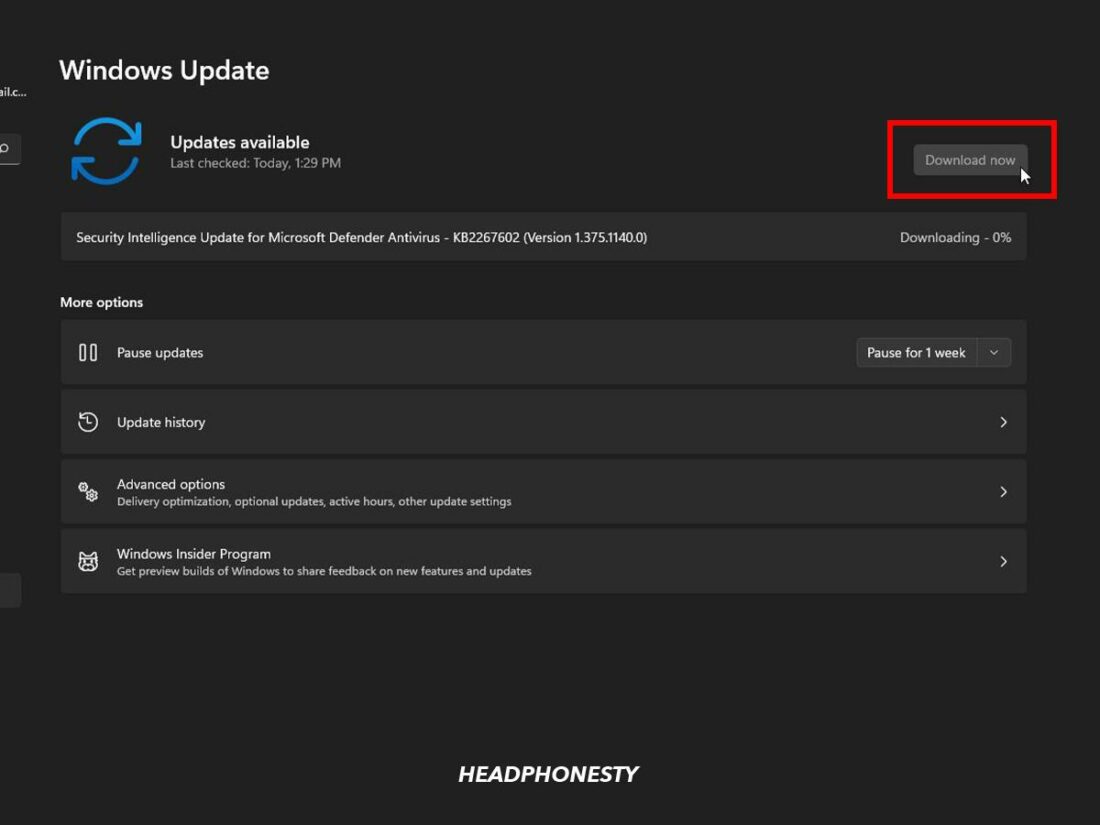
Check for updates. - If an update is available, select Download now.
Download now. - After installing, restart your PC, then check to see if your AirPods’ connection has improved.
Restart button highlighted.


Update Bluetooth Drivers
Outdated or incompatible Bluetooth drivers on your PC can cause system slowdowns that impact Bluetooth connectivity. Usually, this is another common cause of your AirPods’ connection problems.
To avoid this, update your PC’s Bluetooth drivers using the following steps:
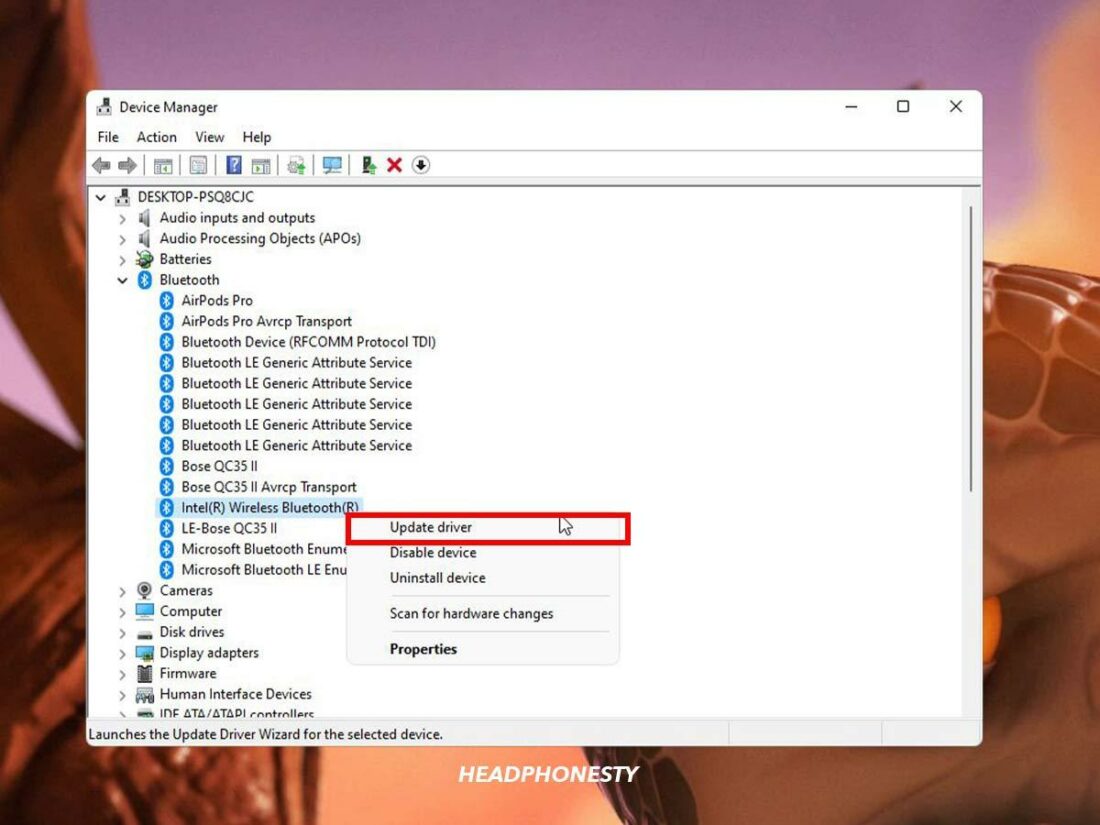
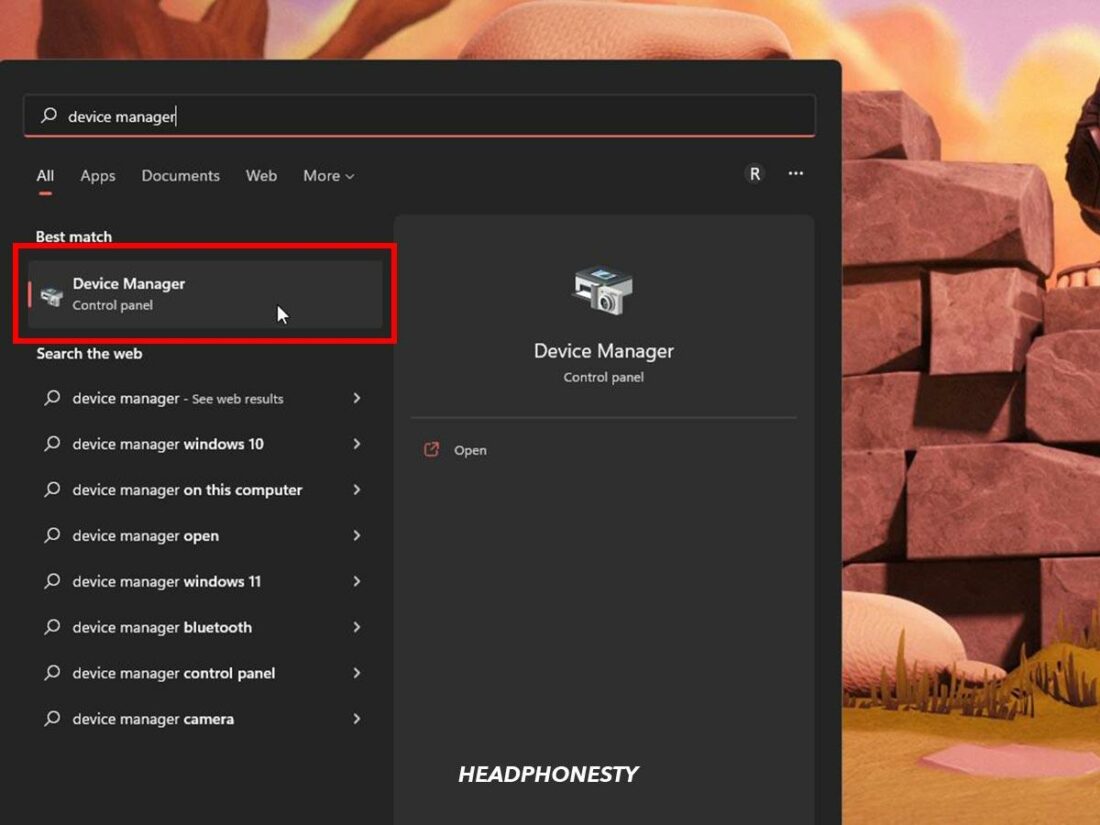
- Type Device Manager in the search bar and launch it.
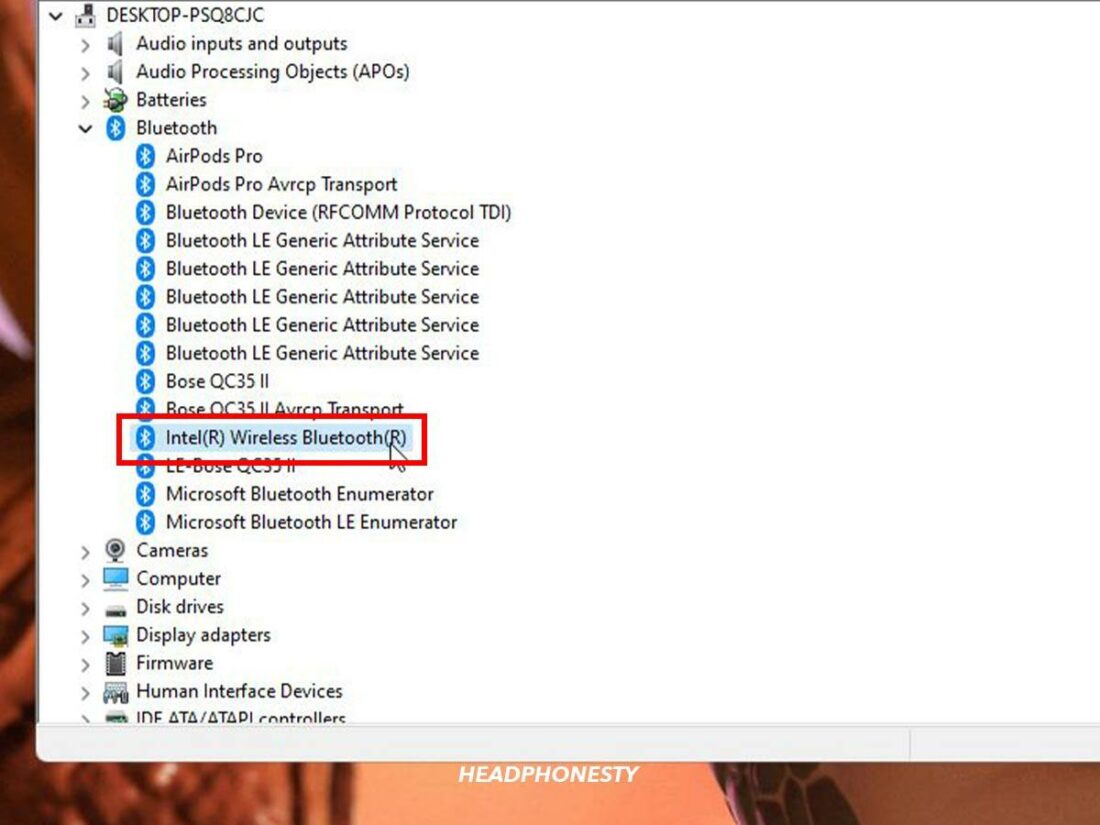
Device Manager. - Select Bluetooth, then right-click on the Bluetooth adapter.
“Intel Wireless Bluetooth” highlighted under Bluetooth. - Select Update driver and Search automatically for drivers. Windows will begin automatically searching for the latest driver version.
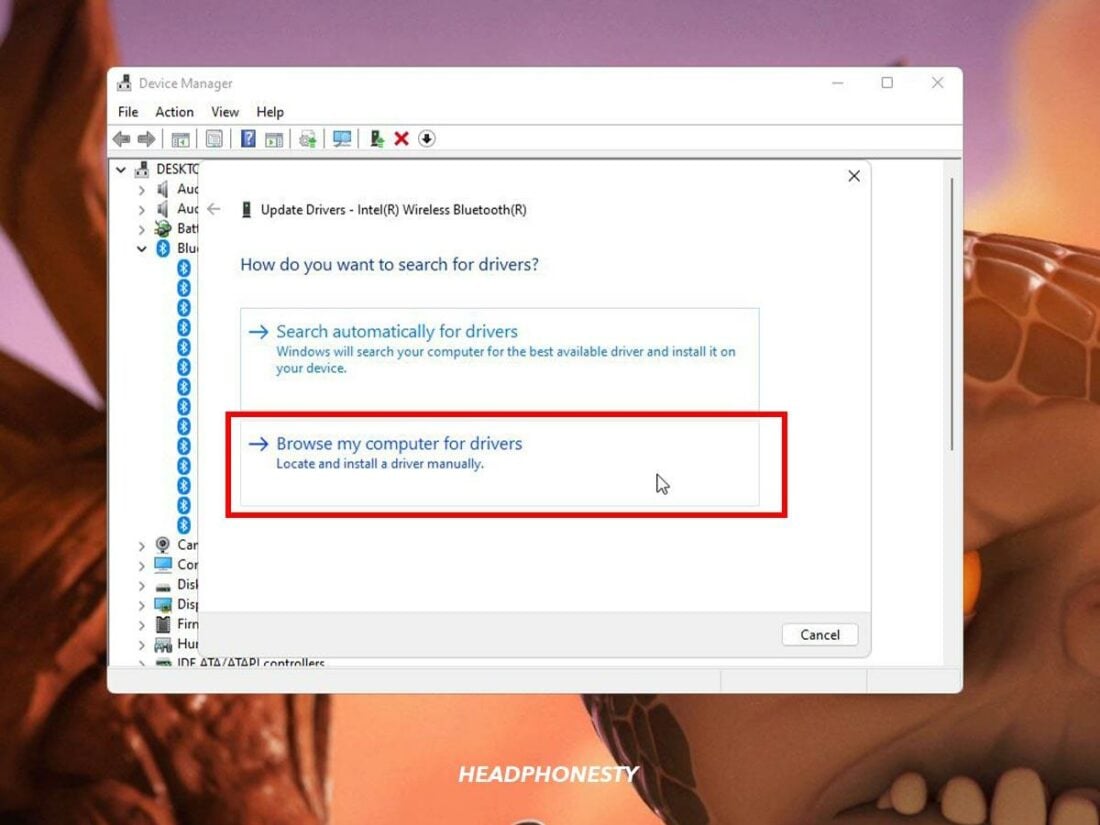
Update driver. - Select Browse my computer for drivers if you have downloaded the latest driver installation file from the manufacturer’s website.
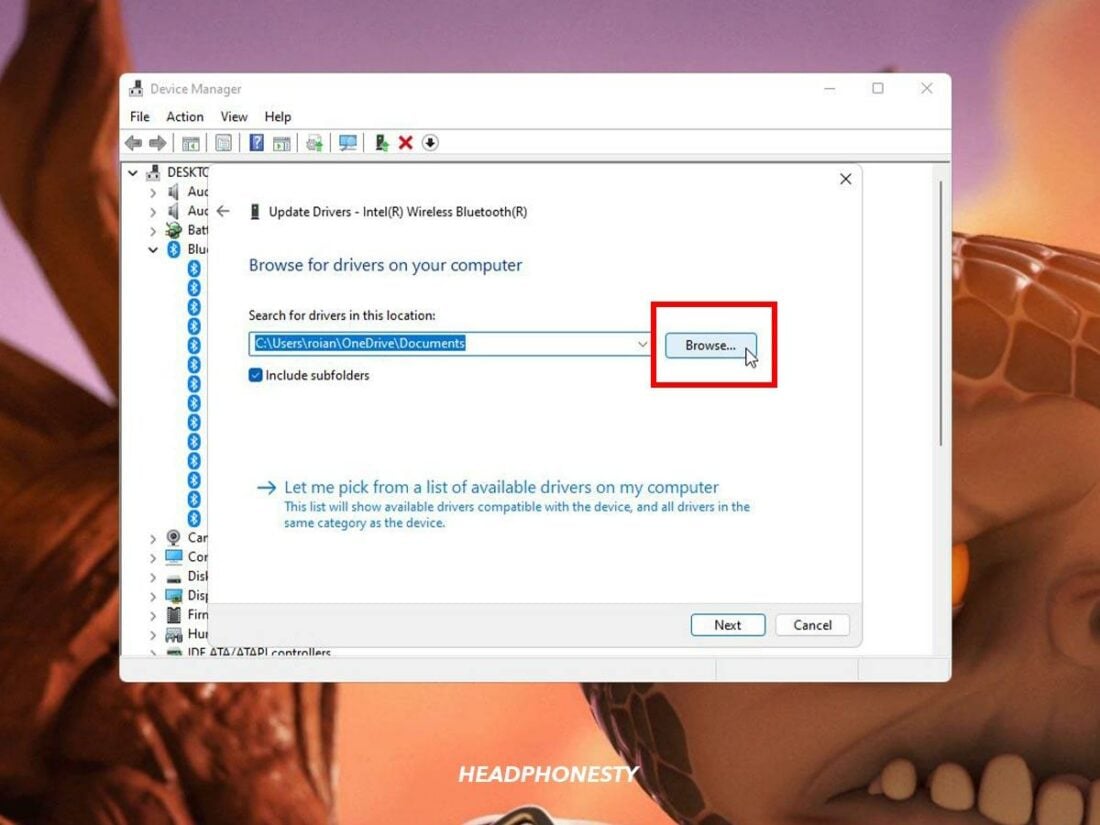
Browse my computer for drivers. - Select Browse to locate where you saved the installation file, then click OK.
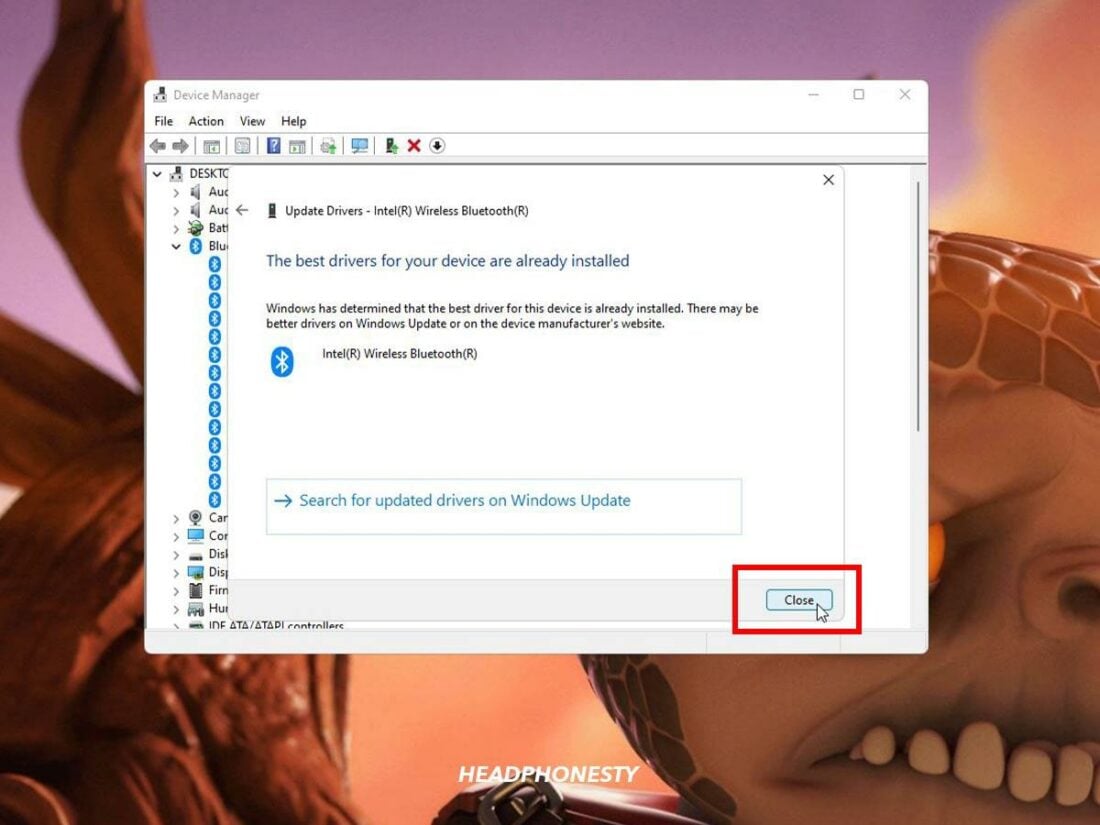
Browse button highlighted. - Select Next and follow the instructions for installing the driver. Once done, click Close.
Close button. - Restart your computer for the driver changes to take effect.
Restart button highlighted.


Remove All Other Bluetooth Devices
Sometimes, other Bluetooth devices or accessories connected to your PC may interfere with your AirPods’ signal, causing them to lose connection. If your AirPods have a poor connection, consider manually removing other Bluetooth devices from your PC.
Follow these steps:
- Right-click on Start and select Settings.
“Settings” highlighted in Windows Start menu. - Select Bluetooth & other devices then click Devices.
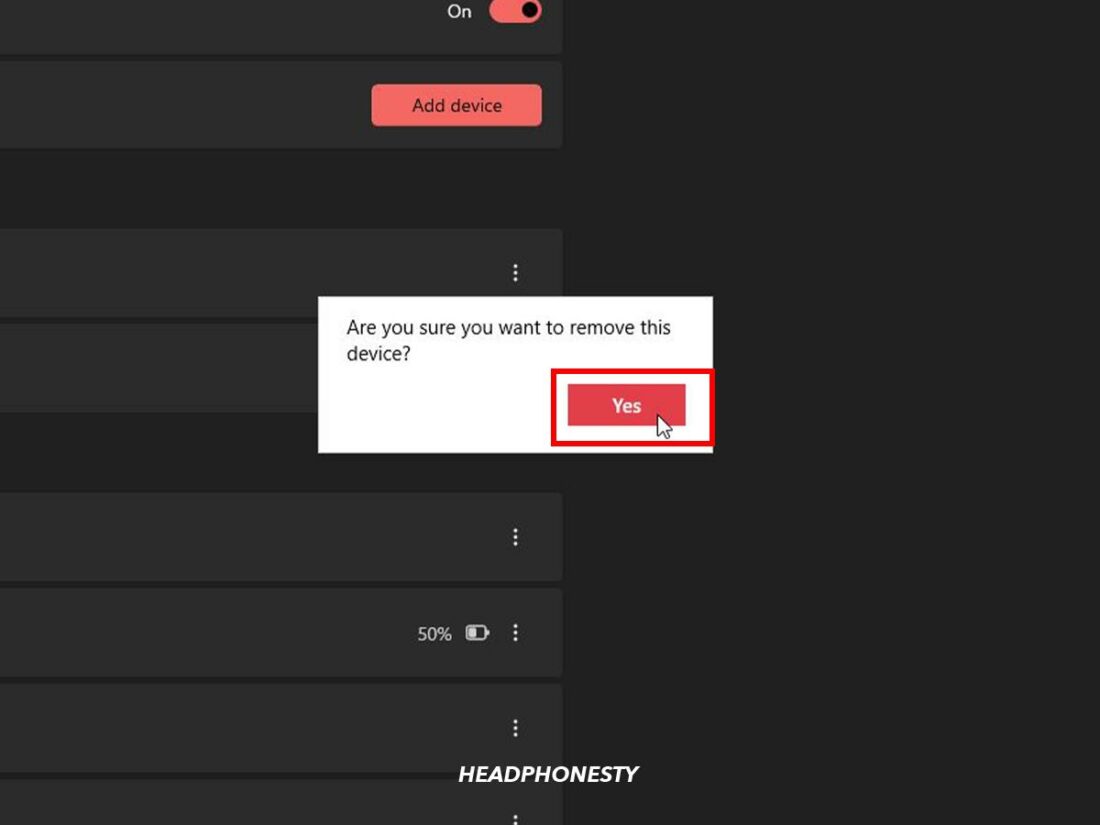
“Devices” highlighted under Bluetooth & other devices. - Click the three dots beside the devices you wish to remove and click Remove device.
Remove device. - Select Yes to confirm.
Select Yes to confirm.


Completely Remove AirPods From Windows
If removing other Bluetooth peripherals doesn’t help, try removing the AirPods from your PC entirely. This process removes all previous connections to Windows and its various hardware or software components. It also allows you to re-pair your AirPods on a new connection.
Here’s how to do just that:
- Type Device Manager into the search bar and launch it.
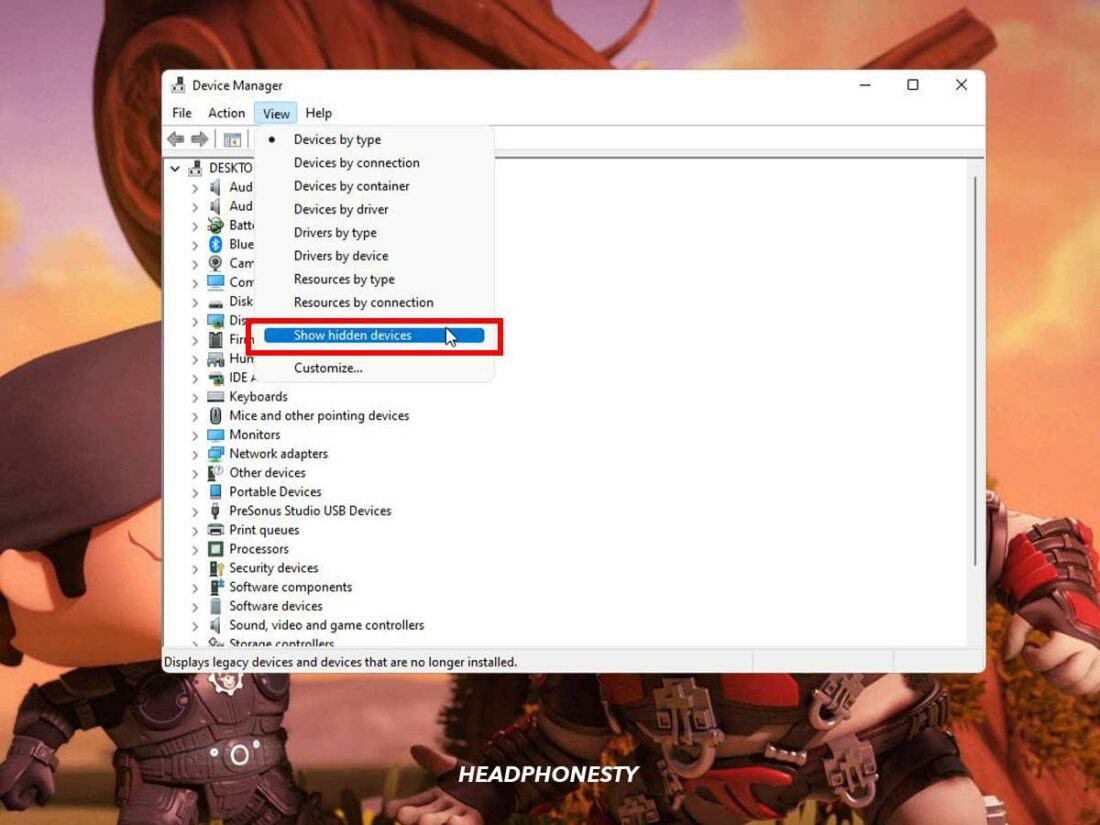
Device Manager. - Click on View and select Show hidden devices.
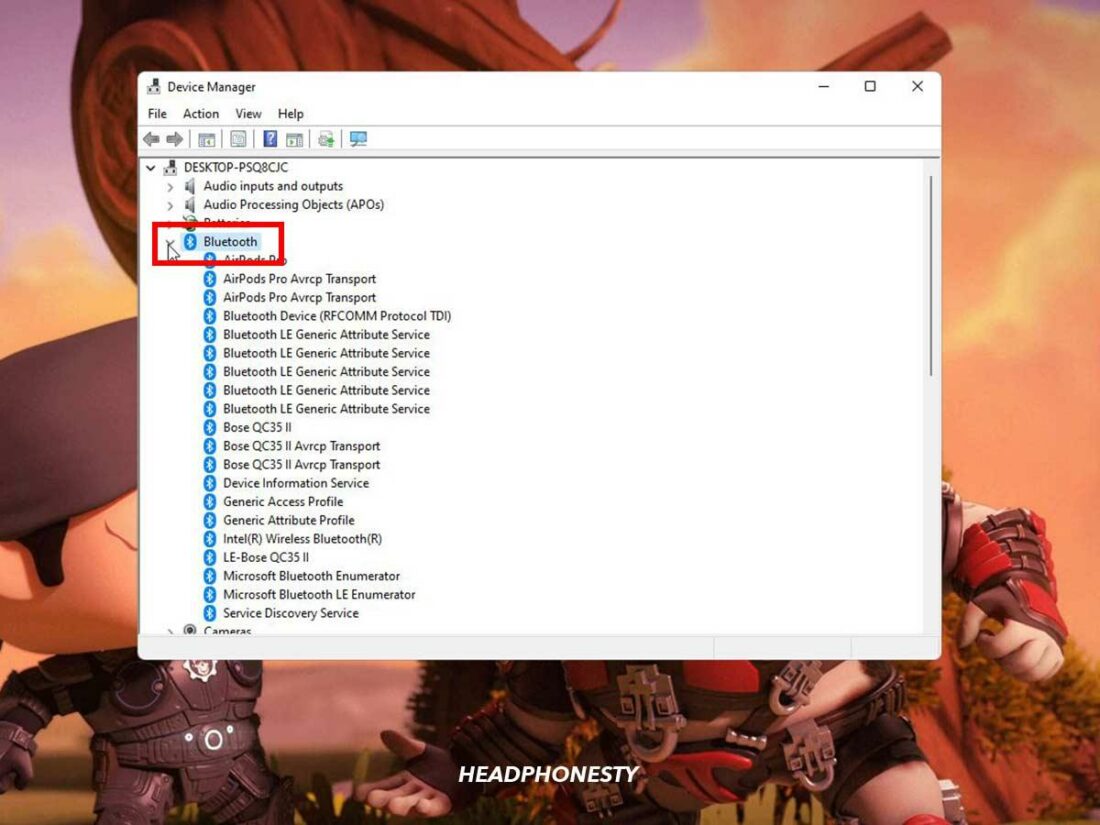
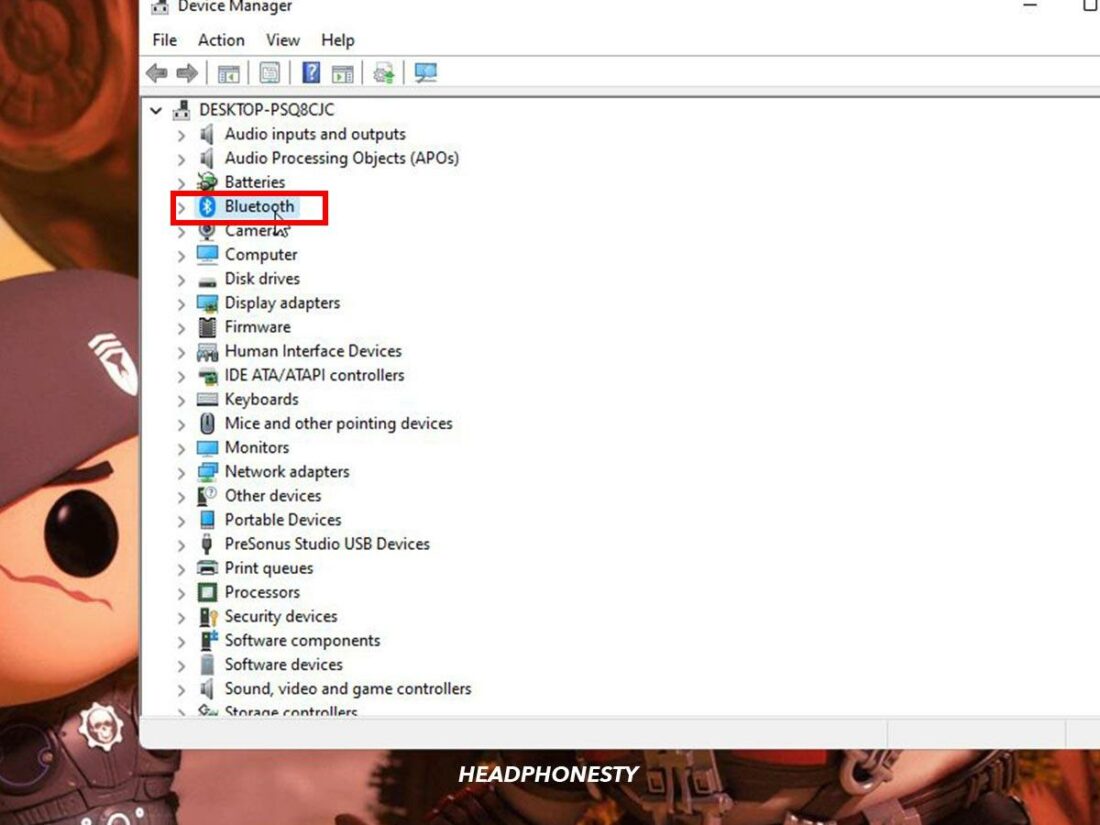
Show hidden devices in Device Manager. - Double-click on Bluetooth.
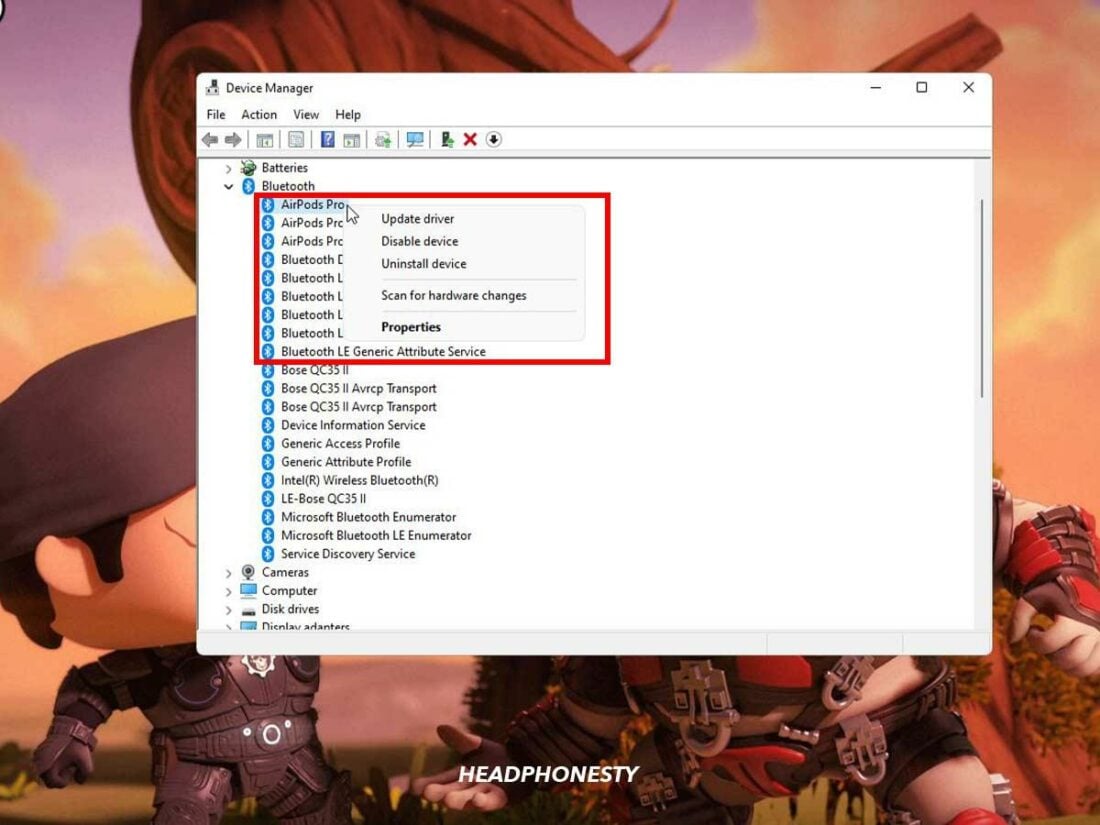
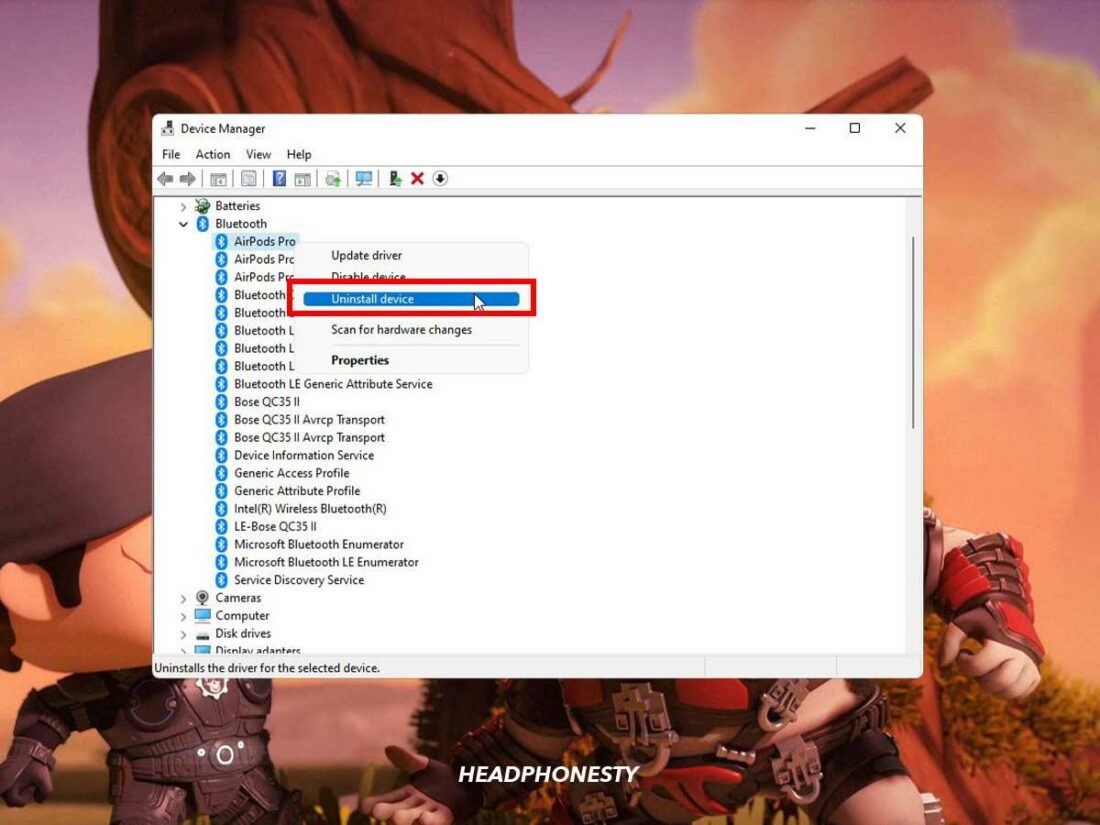
“Bluetooth” highlighted. - Right-click on your AirPods from the list.
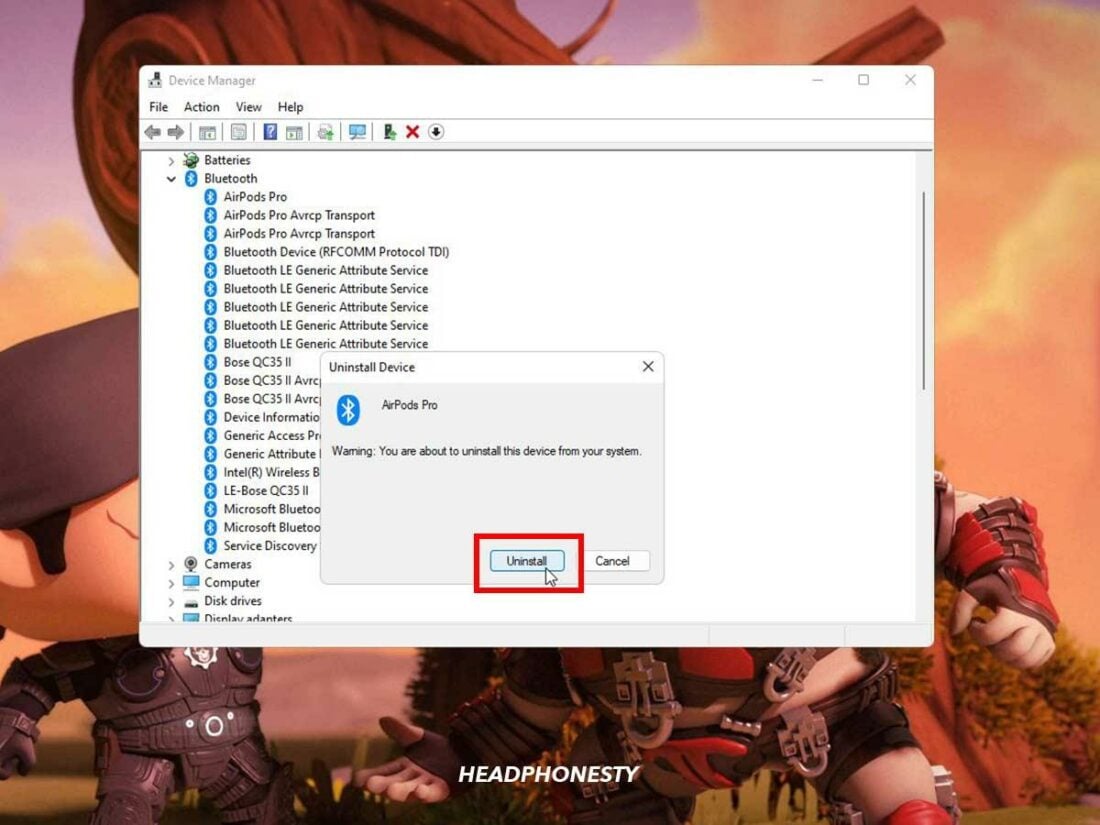
Select your AirPods from the list. - Select Uninstall device.
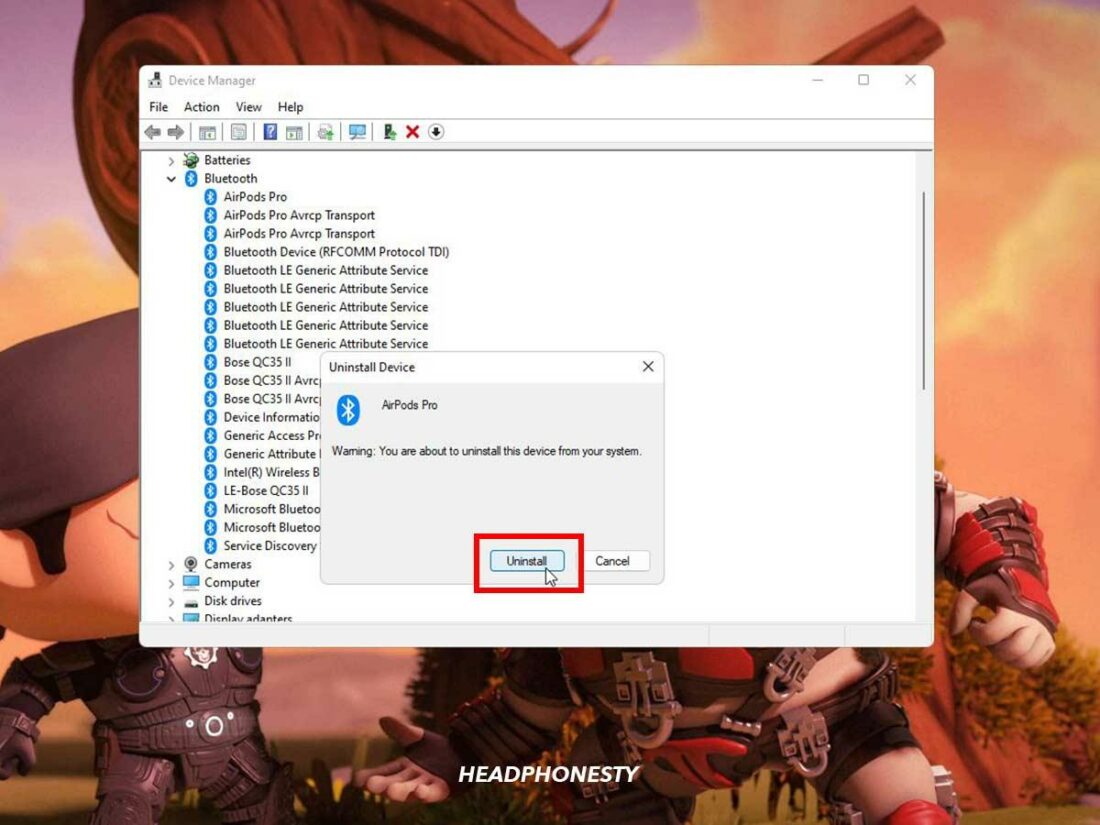
Select Uninstall device. - Click Uninstall to confirm.
Click Uninstall.


Repeat the same steps to remove any AirPods-related devices from the following items in Device manager:
- Audio inputs and outputs
- Other devices
- Sound, video and game controllers
- Xbox 360 Peripherals
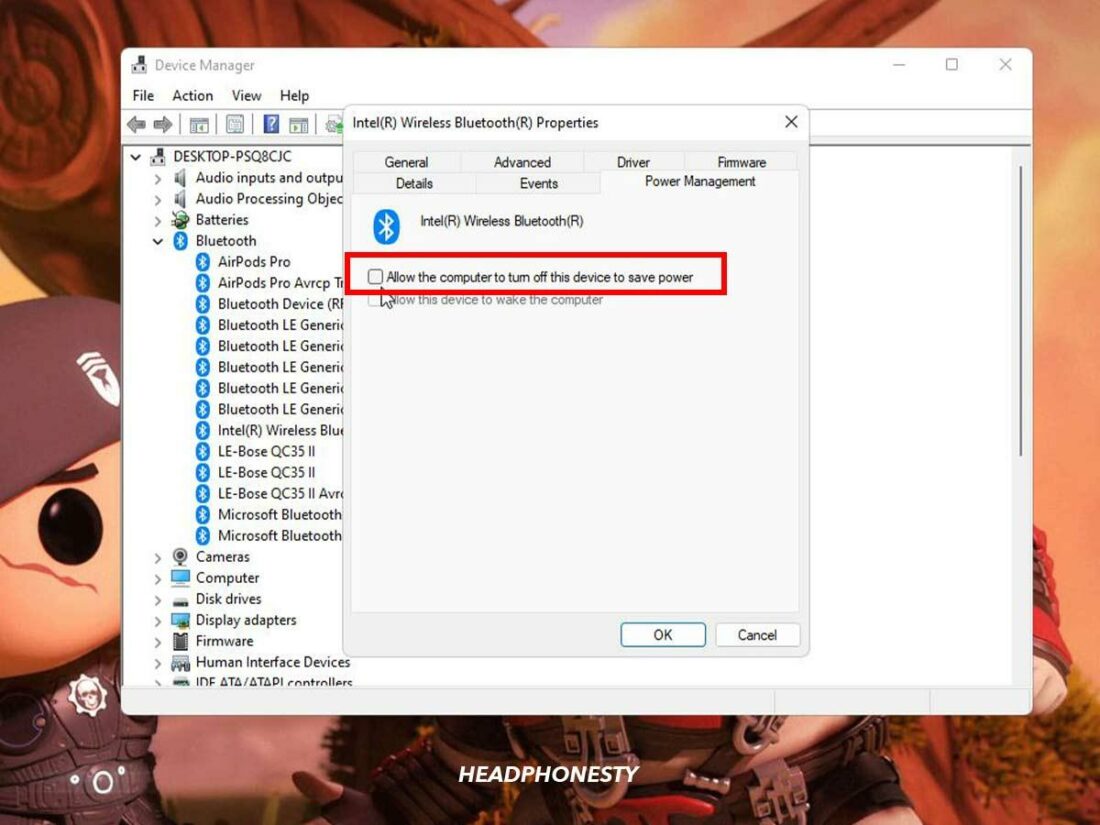
Disable Power Management for AirPods
There are specific features on Windows that automatically disable Bluetooth to help save power. If enabled, this can interrupt your AirPods connection. To fix this, disable the power-saving function on Windows.
Here’s how:
- In Device Manager, double-click Bluetooth.
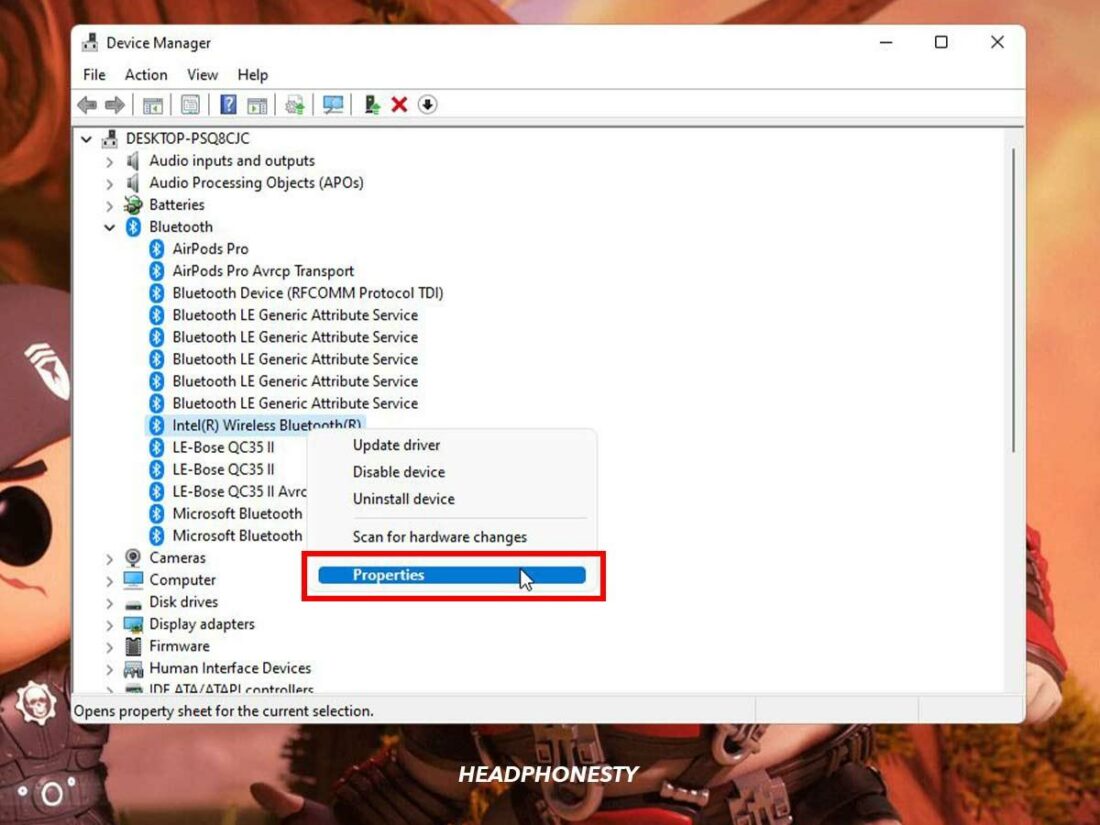
“Bluetooth” highlighted in Device Manager. - Right-click Intel Wireless Bluetooth and select Properties.
“Properties” highlighted. - Under the Power Management tab, uncheck the box beside Allow the computer to turn off this device to save power.
Allow the computer to turn off this device to save power.
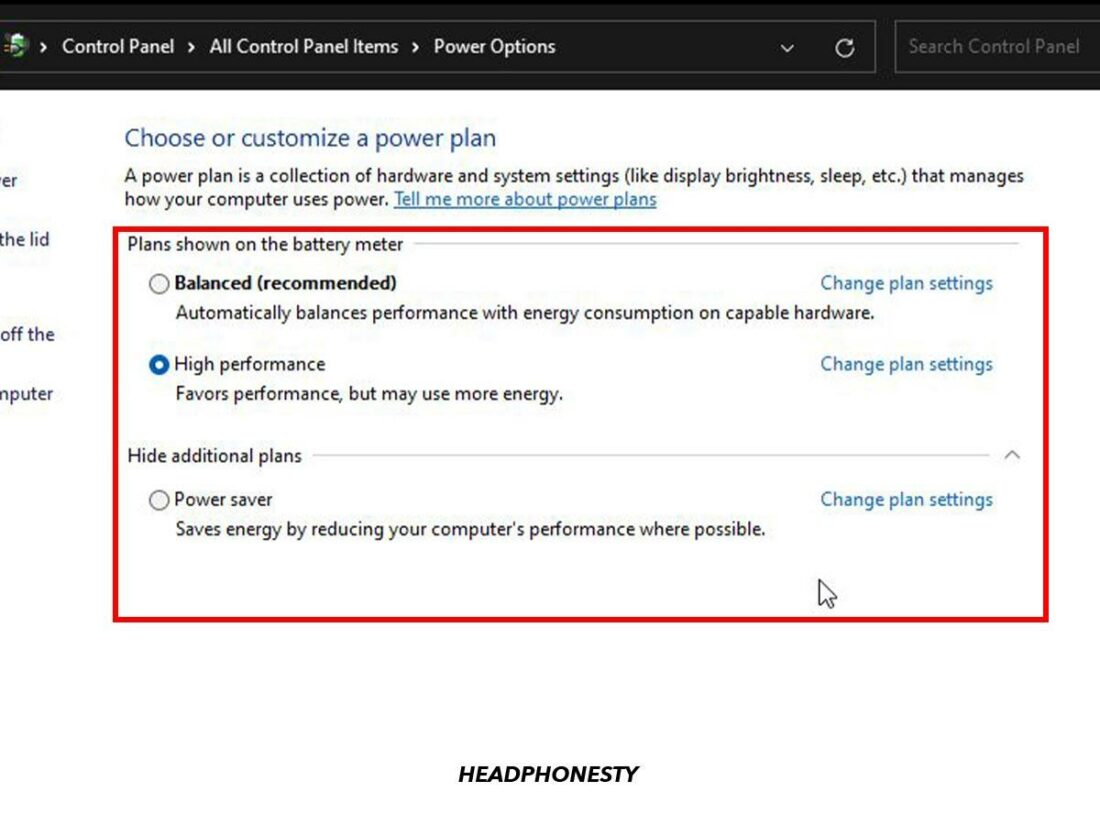
Change Your PC’s Power Plan Settings
Certain power-saving features on your PC might prioritize power saving over performance. However, this can come at the expense of other system processes, which might cause your AirPods to lose connection.
To fix this, you can change Windows’ power plan settings. Here’s how:
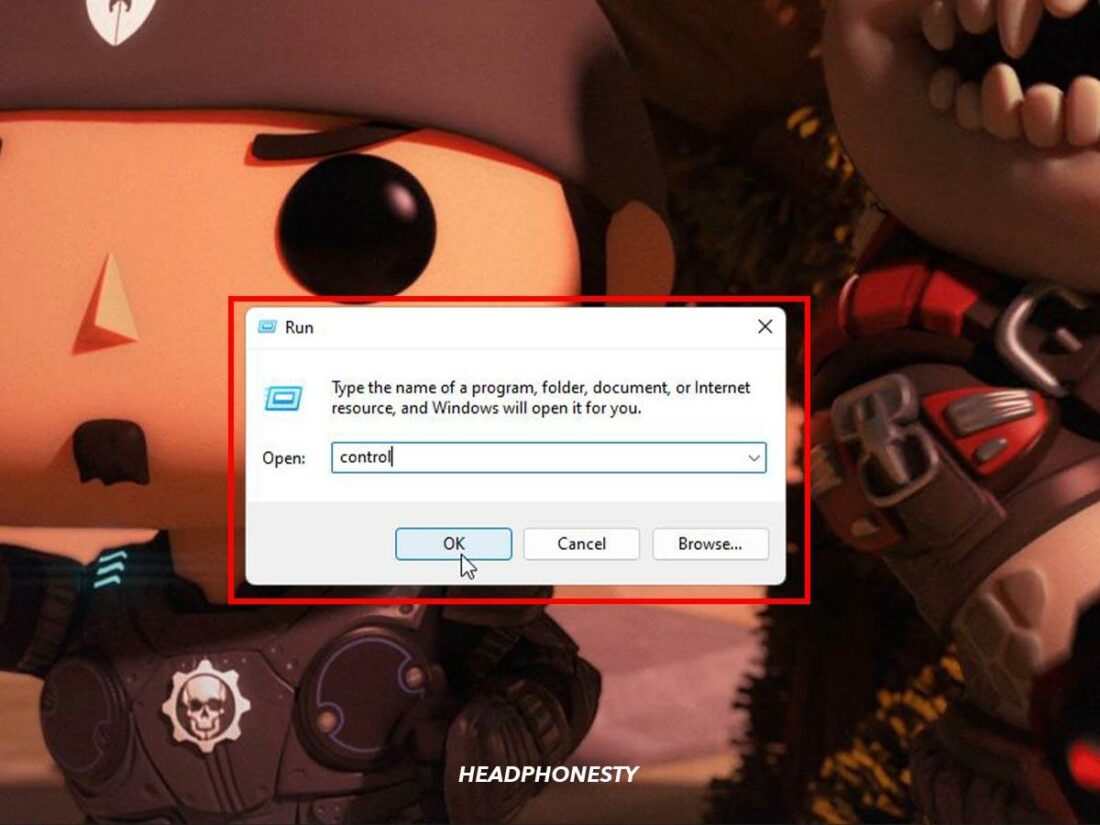
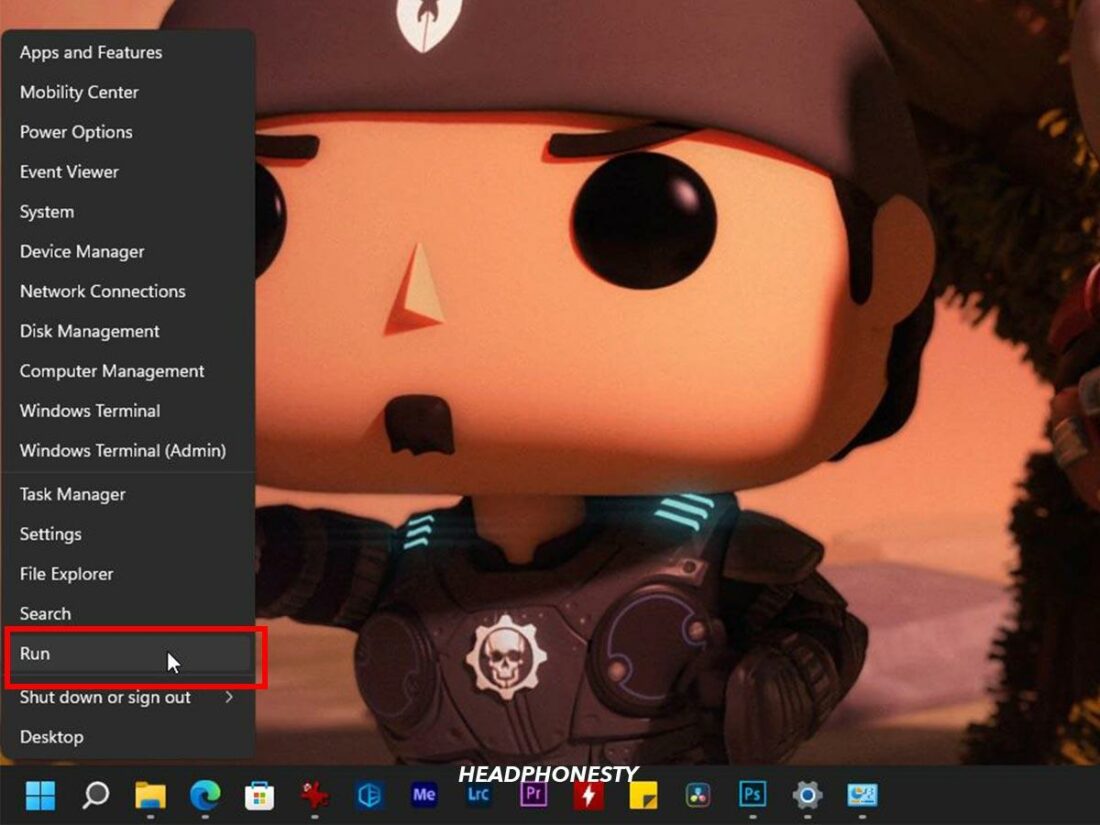
- Right-click on Start and select Run.
“Run” highlighted in Windows Start menu. - Type control into the dialog box and click OK to launch the Control Panel.
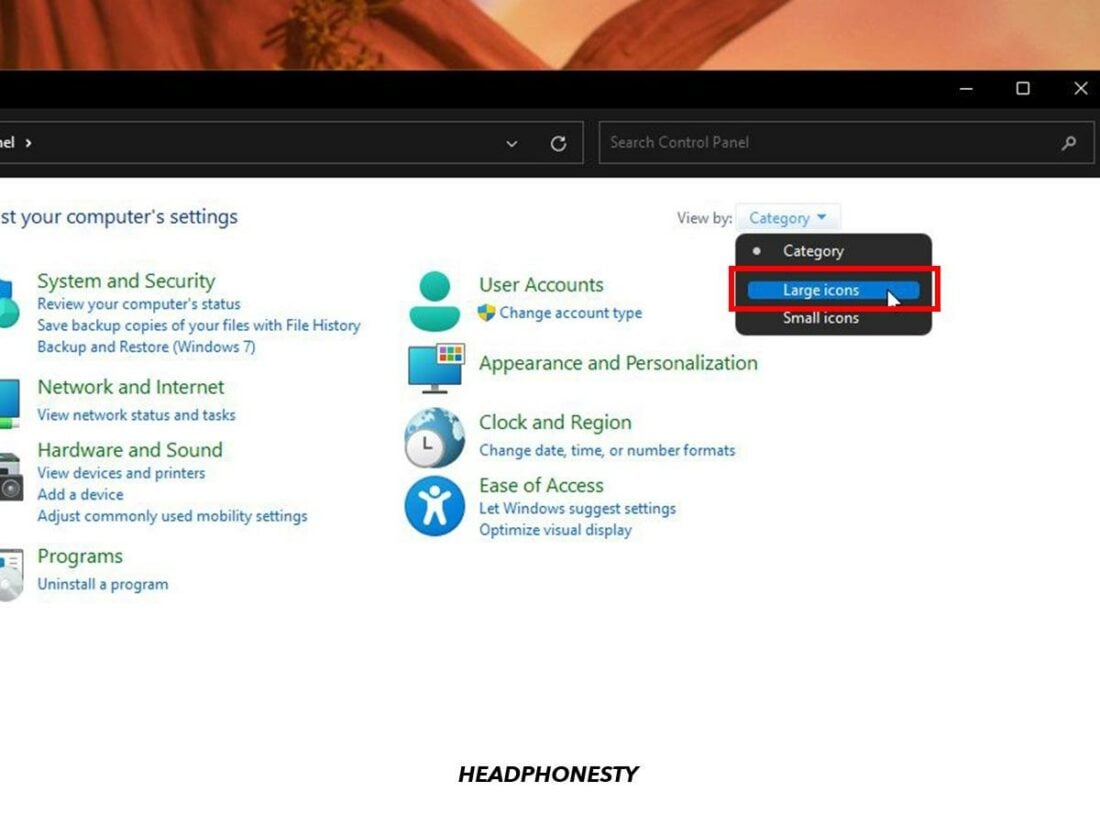
Type “control” in dialog box. - In the top right corner, change the display view to Large icons.
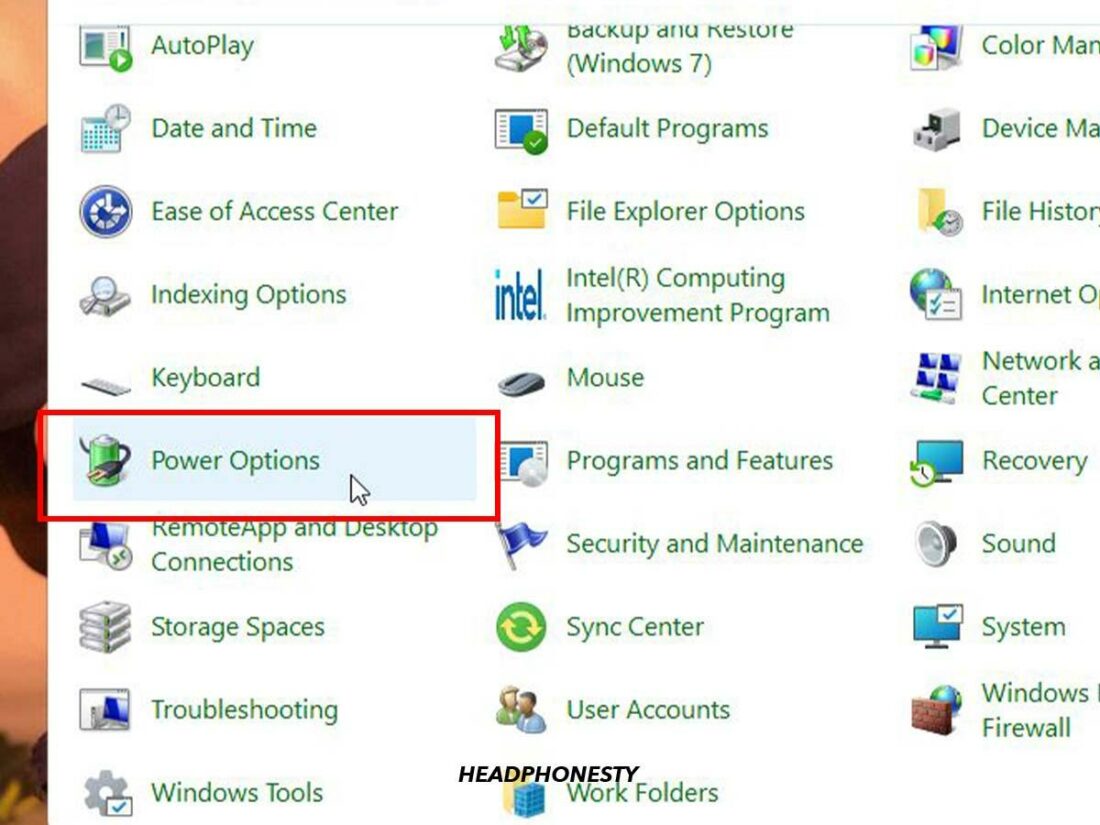
“Large Icons” highlighted. - Select Power Options.
Power Options. - Choose Balanced or High Performance in the list of power plans, then test your AirPods to see if you still experience any disconnections.
Choose a powerplan.

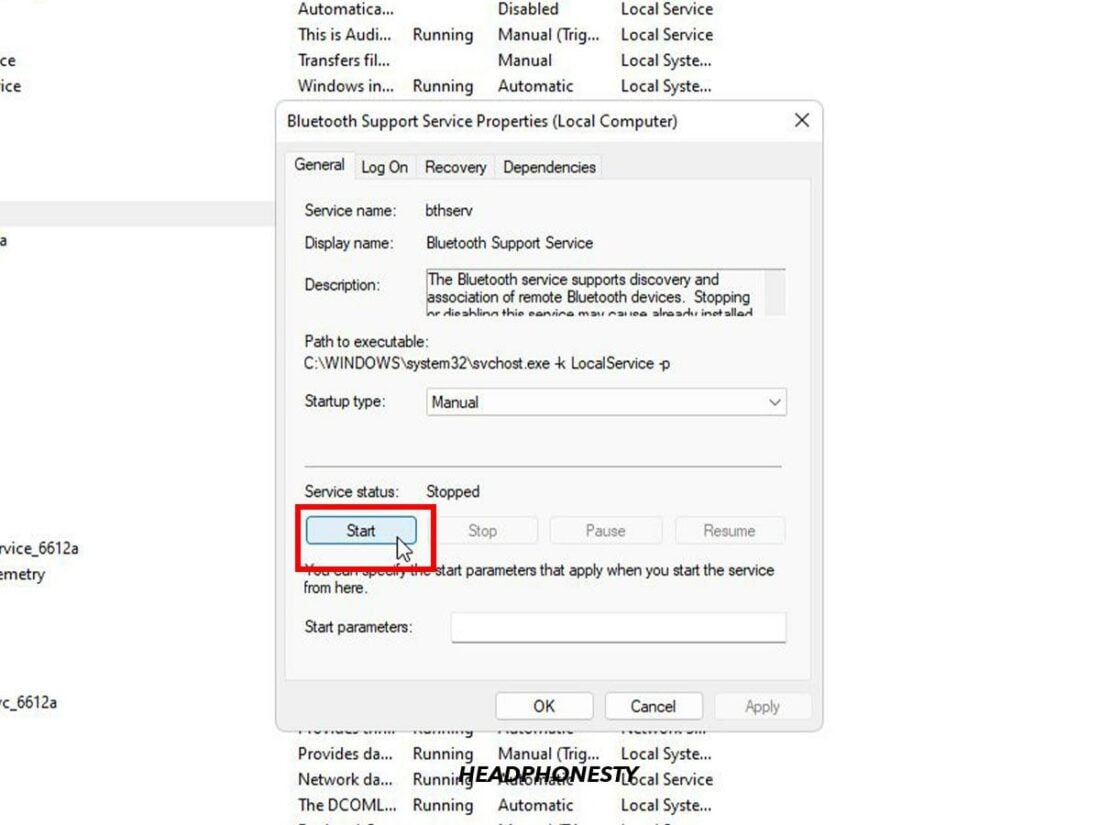
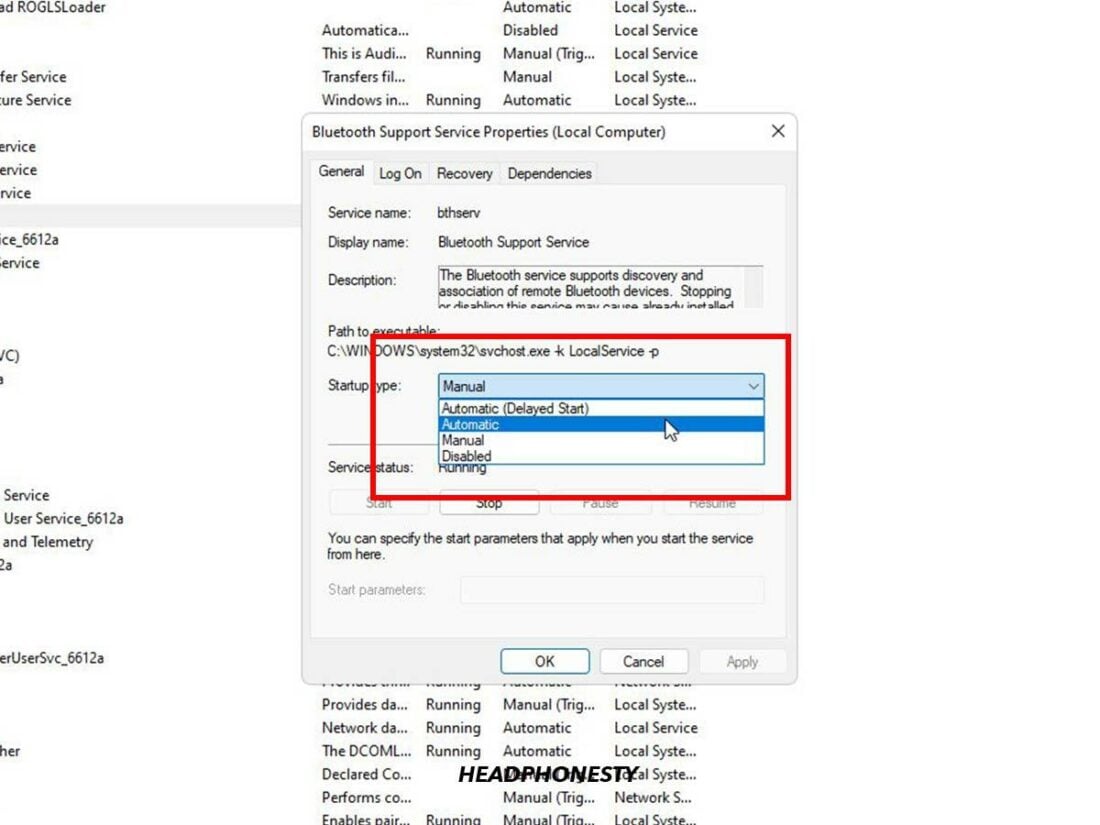
Change Bluetooth Support Service Settings to Automatic
The Bluetooth service settings in Windows allow remote Bluetooth devices like your AirPods to be found and paired. You might get disconnected often if this isn’t operating correctly on your PC.
To fix this, check that the Bluetooth Support Service setting on your PC isn’t turned off. If so, you can restart it and then set it to “automatic.” This lets the service launch on its own every time you start your computer.
Here are the steps:
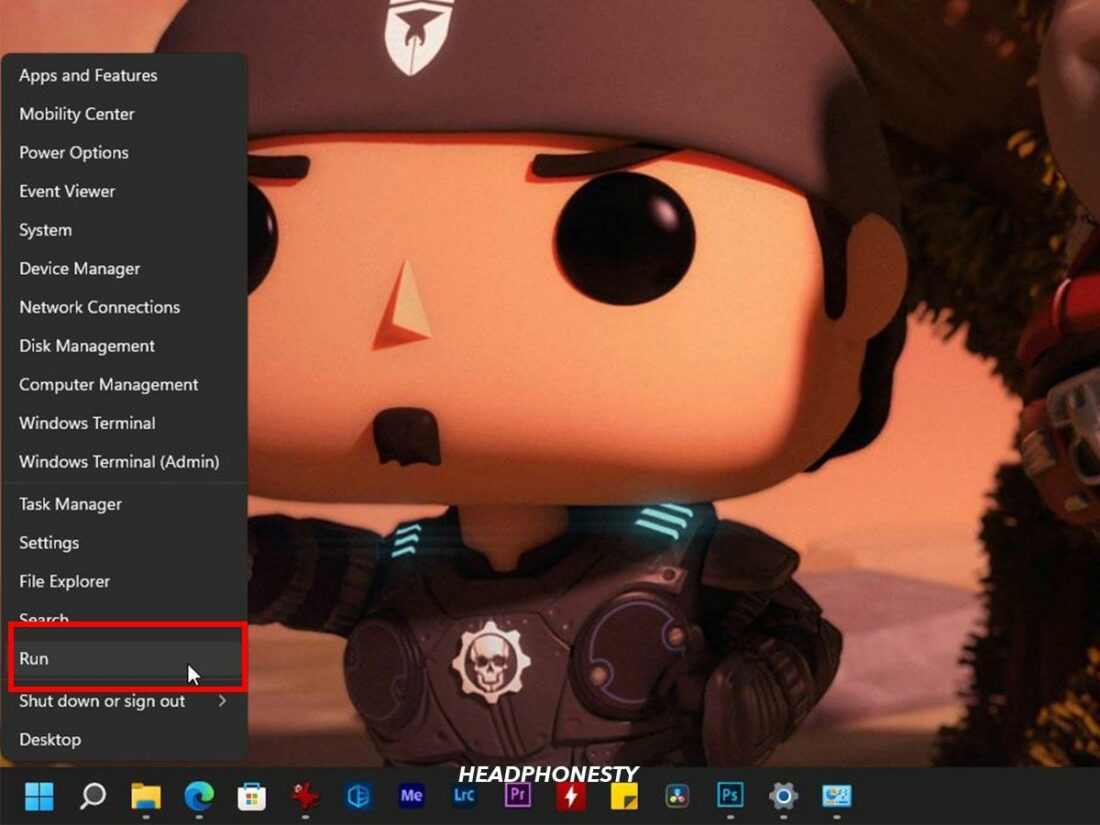
- Right-click on Start and select Run.
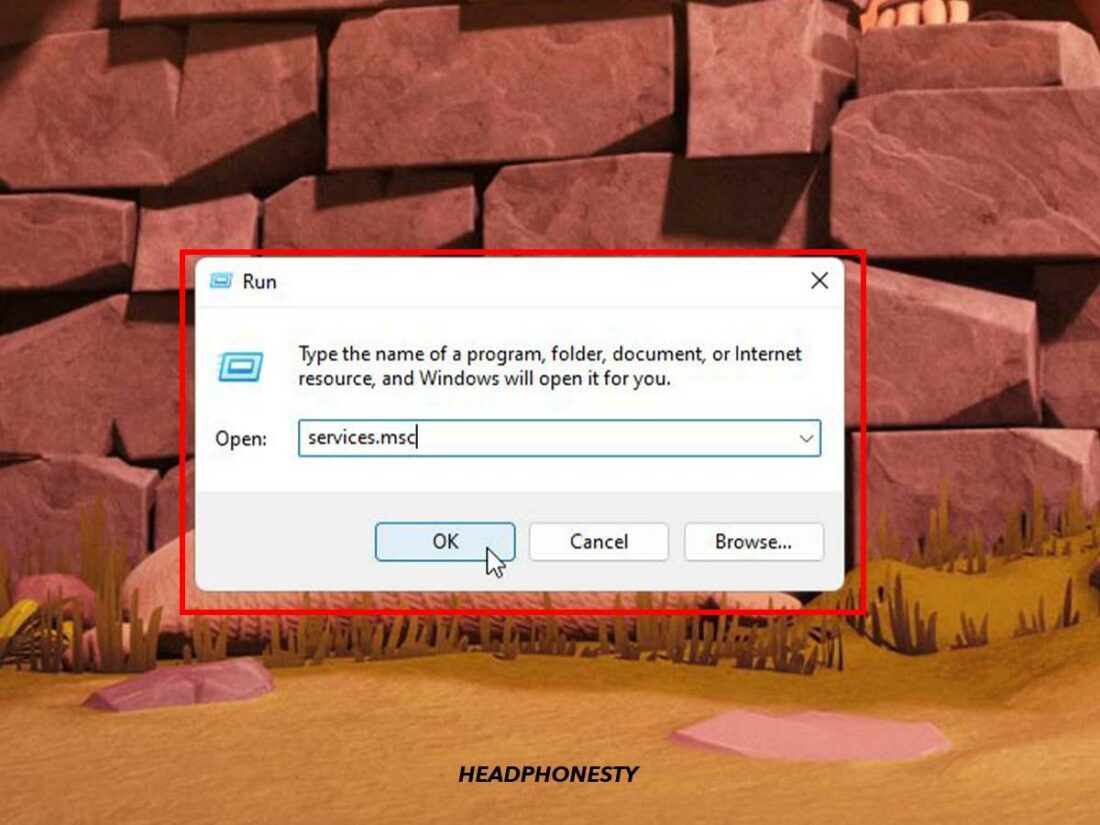
“Run” highlighted in Windows Start menu. - Type services.msc into the dialog box and press OK.
Type “services.msc” in dialog box. - Double-click on Bluetooth Support Service and check that the Service status indicates Running. If not, click Start.
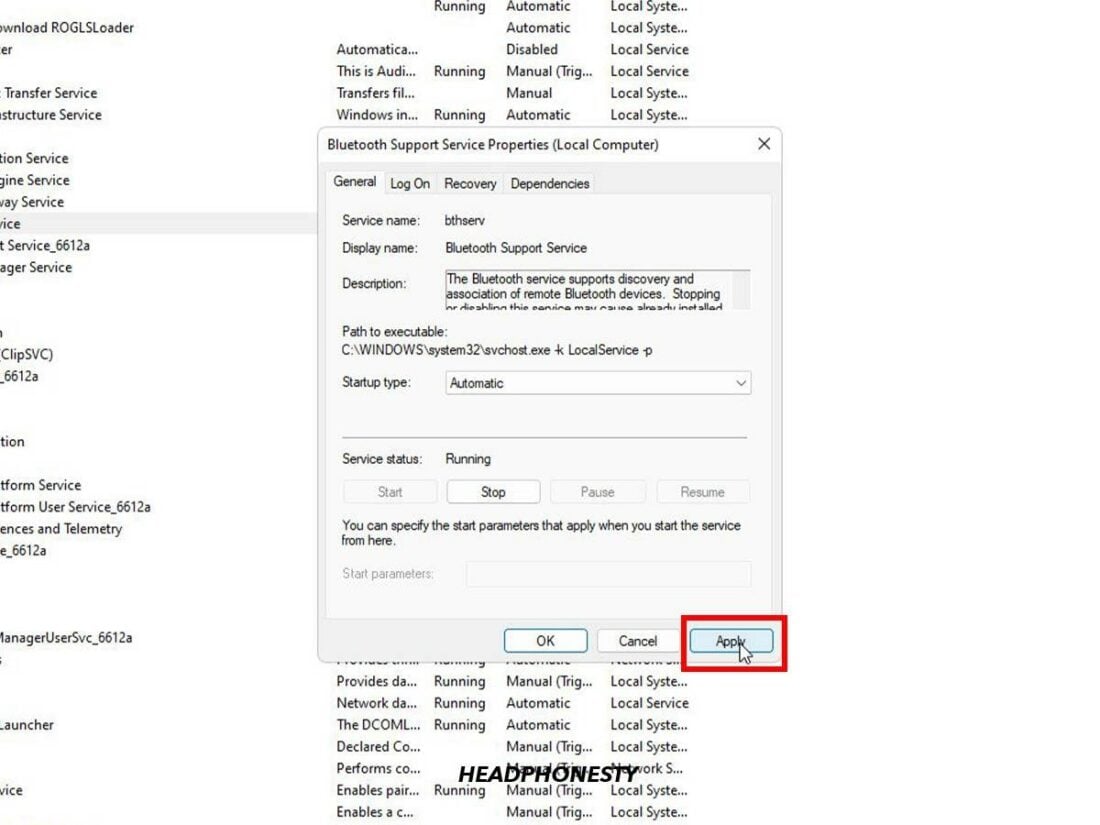
“Start” highlighted in Bluetooth Support Service properties. - Click the drop-down menu beside Startup type and select Automatic.
Select “Automatic” in Startup type. - Click Apply, then OK to exit.
Click Apply.
Disable Telephony Service for AirPods
Windows Telephony service allows you to use Bluetooth headsets for phone calls. However, it can sometimes cause audio issues with Bluetooth headphones like your AirPods, so disabling it may help.
Here’s how:
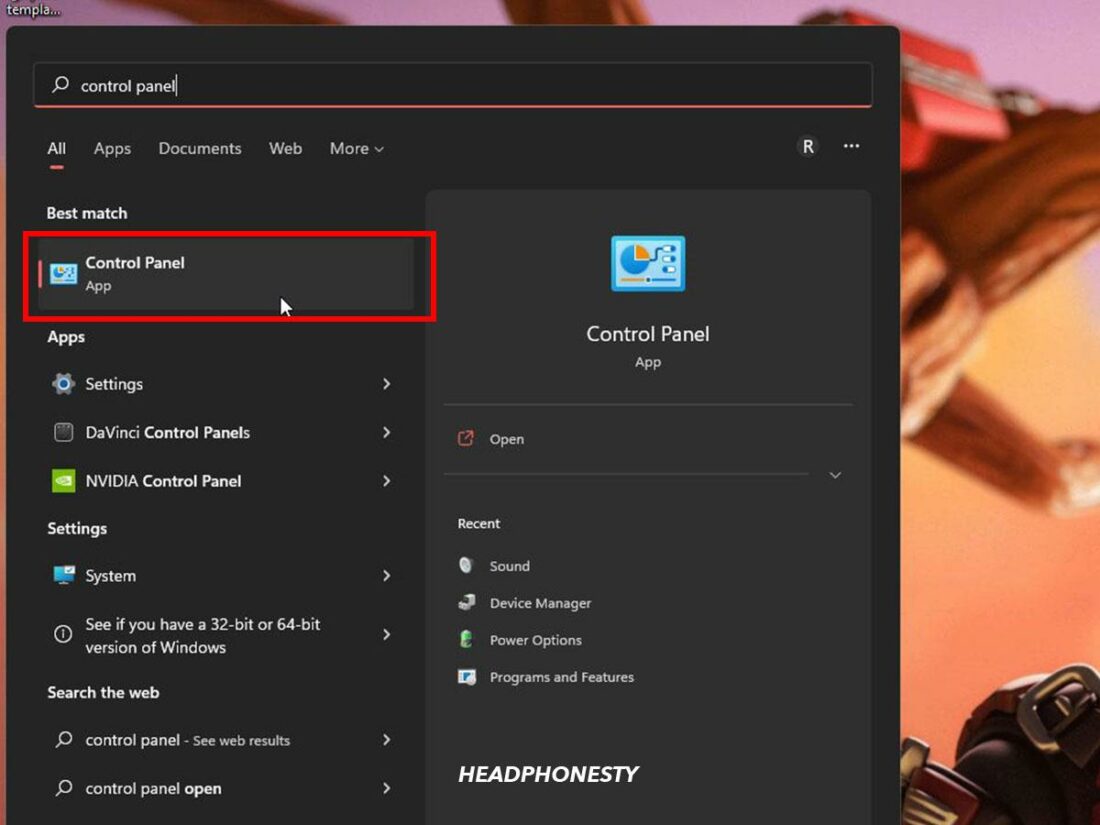
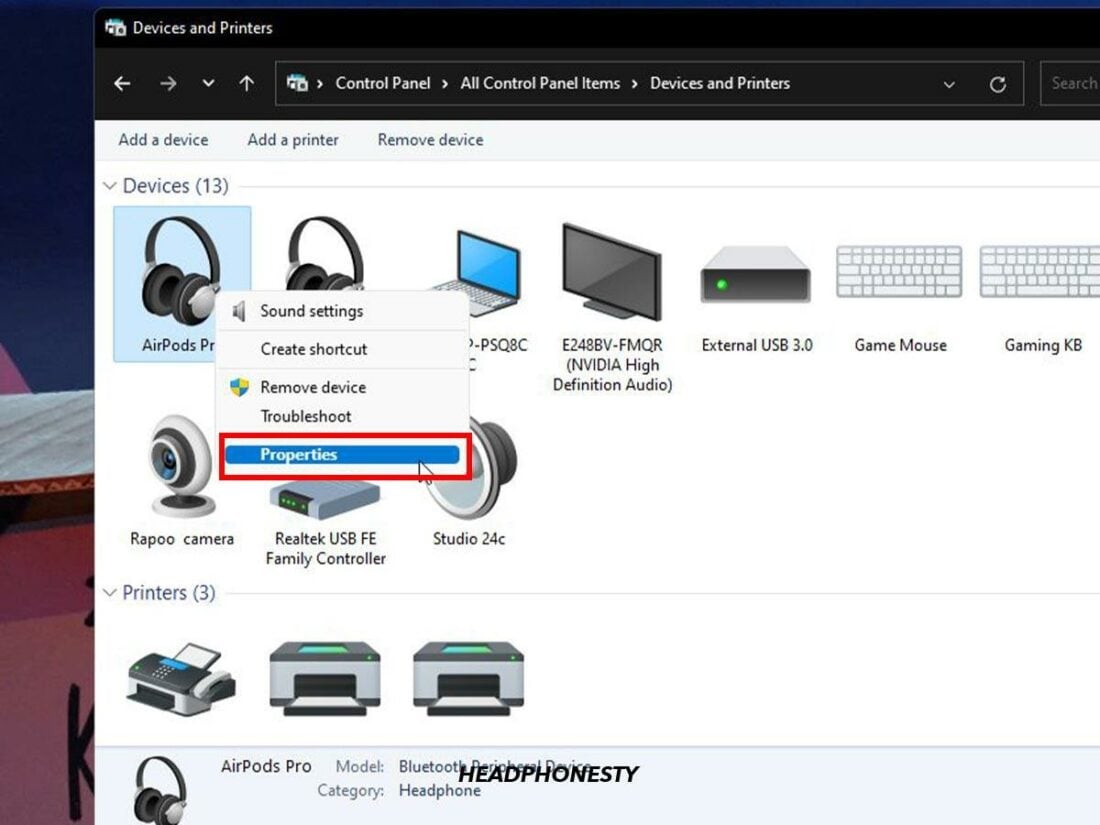
- Type control panel in the search bar and launch it.
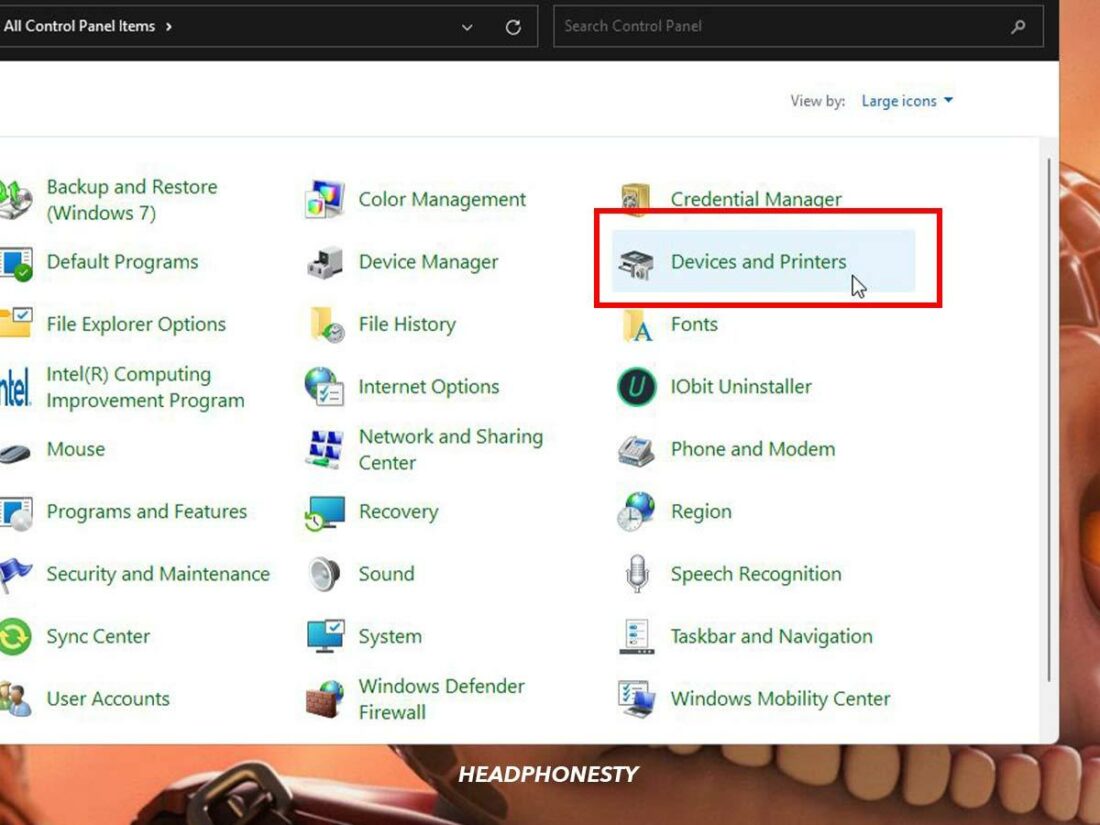
Control Panel. - Click on Device and Printers.
“Device and Printers” highlighted in Control Panel. - Right-click on your AirPods and select Properties.
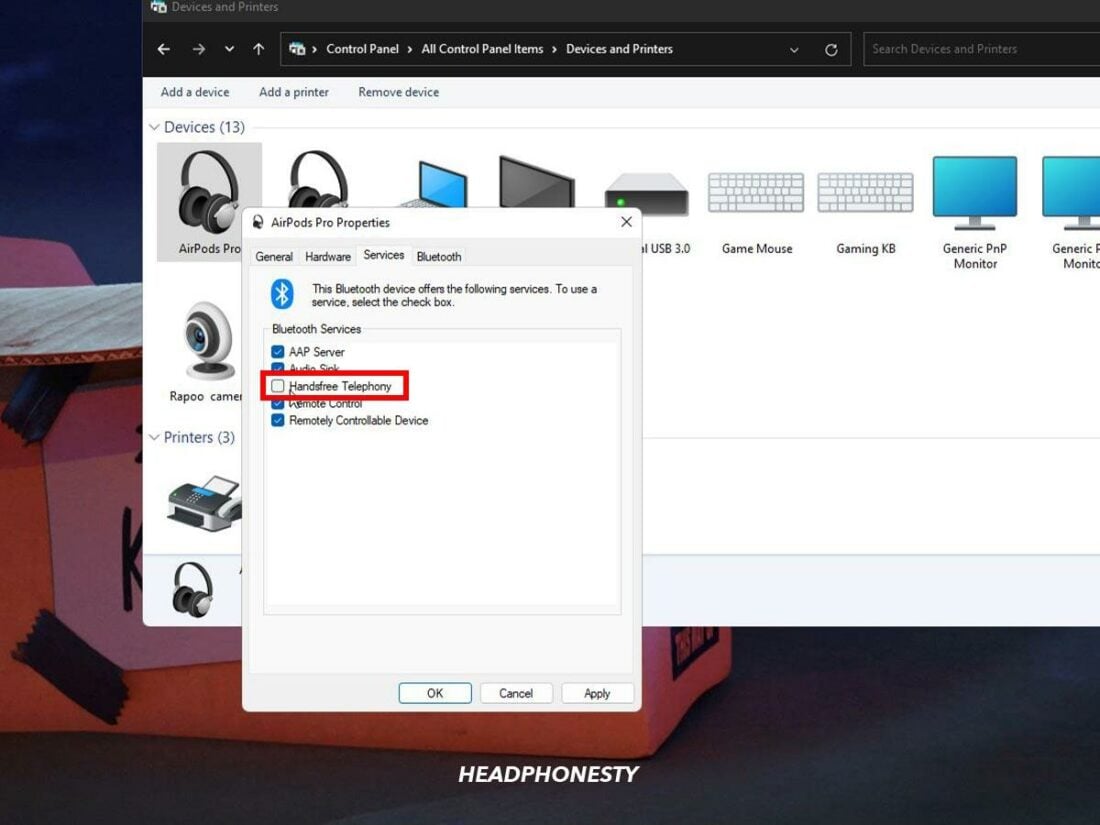
“Properties” highlighted. - Under the Services tab, uncheck Handsfree Telephony from the list.
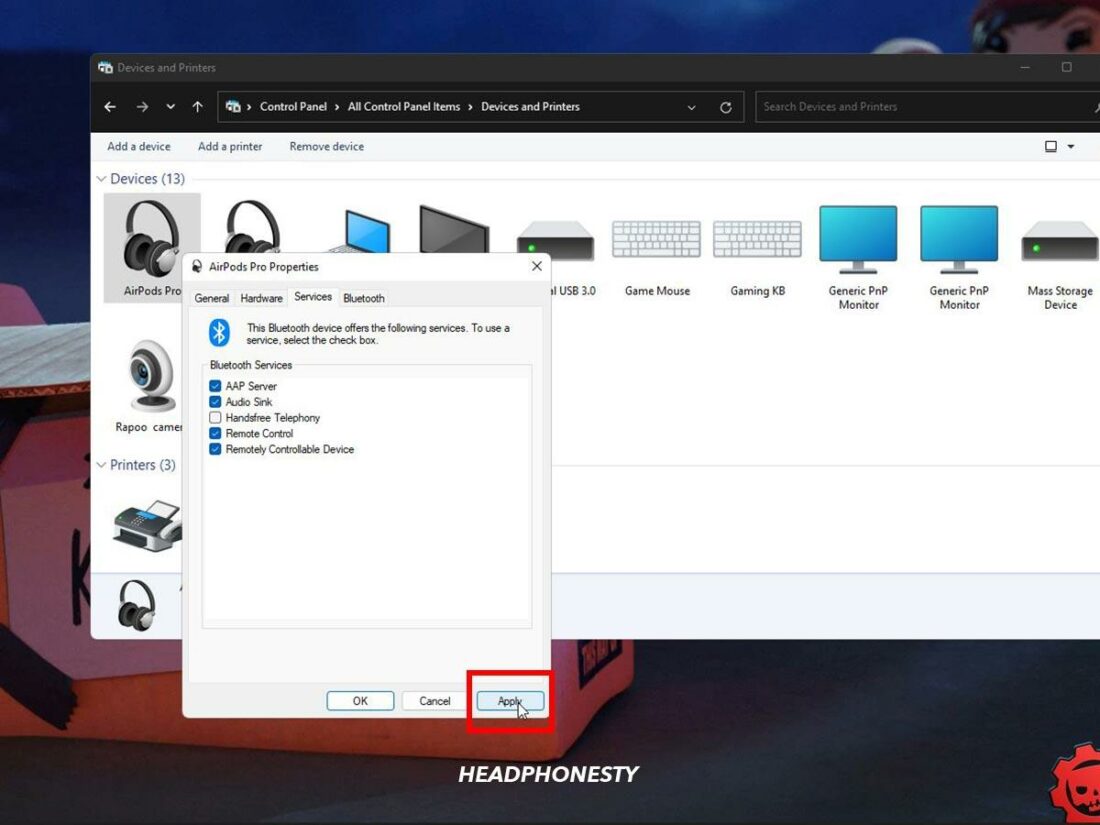
Uncheck Handsfree Telephony. - Click Apply, then OK.
Click Apply.
Remove Hidden Entries in Device Manager
Sometimes previous entries of your AirPods might still be present in Windows Device Manager. This results in incorrect device pairing, which might explain the connection errors.
Here’s how to delete hidden Device Manager entries:
- Type Device Manager in the search bar and launch it.
Device Manager. - Click on View and select Show hidden devices.
“Show hidden devices” highlighted. - Double-click on Bluetooth, then check for any greyed-out entries related to AirPods.
“Bluetooth” highlighted. - Right-click on each greyed-out entry, then select Uninstall device.
Uninstall device. - Click Uninstall to confirm removal of older AirPods-related devices from your system.
Click Uninstall to confirm. - Restart your computer for changes to take effect.
Restart button highlighted.


Disable Fast Startup
By design, the Windows Fast Startup feature reduces your computer’s boot-up time. However, certain services may not start up correctly, which can cause connection issues.
Disable fast startup easily with the following steps:
- Right-click on Start and select Run.
“Run” highlighted in Windows Start menu. - Type powercfg.cpl in the dialog box and press OK.
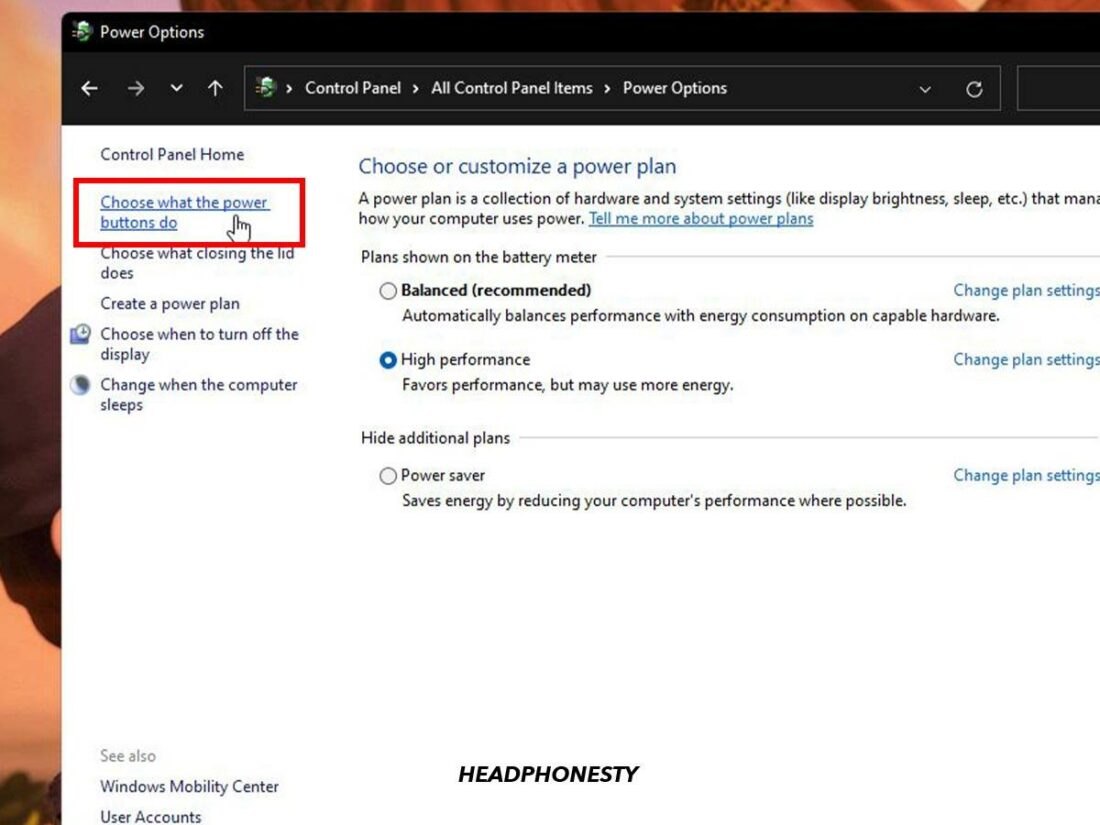
Type “powercfg.cpl” in dialog box. - In the Power Options window, select Choose what the power buttons do from the left sidebar.
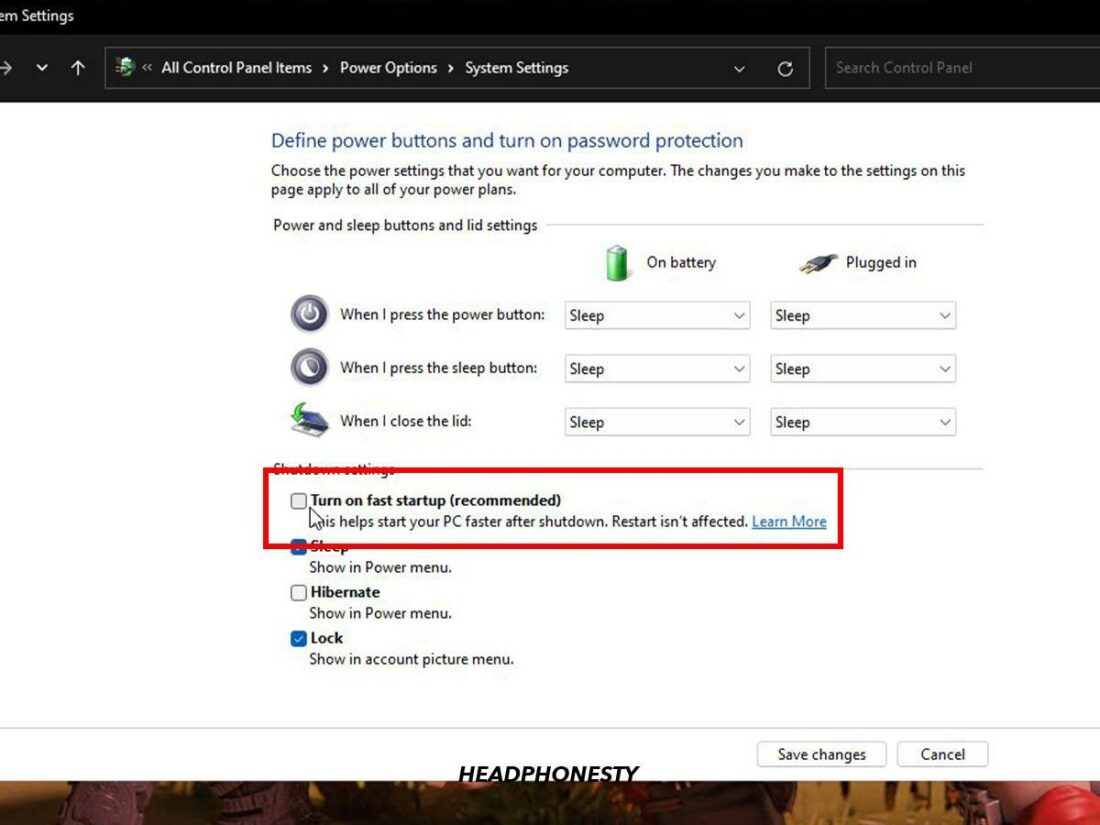
“Choose what the power buttons do” highlighted. - Go to Shutdown settings and uncheck the box beside Turn on fast startup.
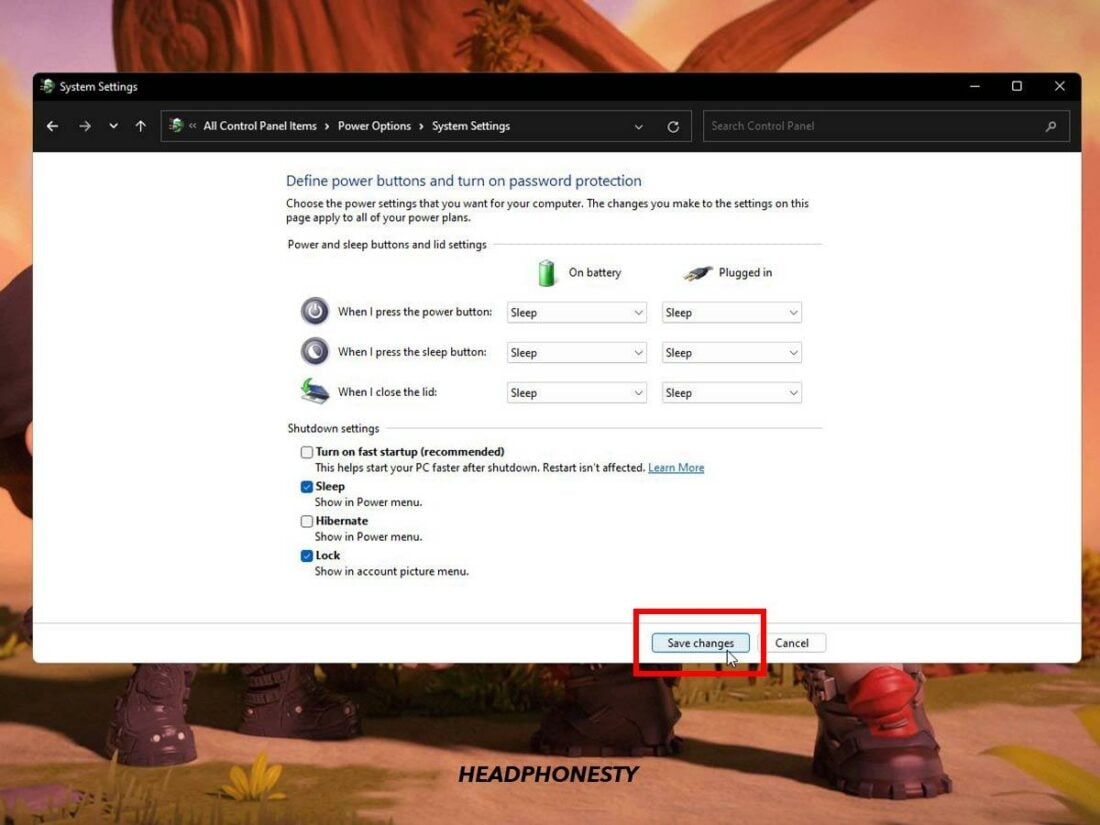
Uncheck “Turn on fast startup”. - Click Save changes to apply.
Save changes.

Disable Swift Pair
Windows’ Swift Pair is a valuable feature that can help you easily connect to nearby Bluetooth devices. However, it may also be why your AirPods can’t connect properly to your PC.
To see if it solves disconnection issues, disable this feature with the following steps:
- Right-click on Start and select Settings.
“Settings” highlighted in Windows Start menu. - Select Bluetooth & other devices from the left sidebar and click Devices.
“Devices” highlighted in Bluetoooth & other devices. - Under Device settings, toggle the switch beside Show notifications to connect using Swift Pair to disable it.
Uncheck “Show notifications to connect using Swift Pair”.


Edit Registry Entry
Bluetooth devices and drivers on your computer each have registry entries that inform the system of the kind of connected device. If there is a wrong entry in your Windows registry, it could be why your AirPods don’t always connect well.
To solve this, you’ll need to edit your registry manually and change its value. Here’s how to edit the value using the Windows Registry editor:
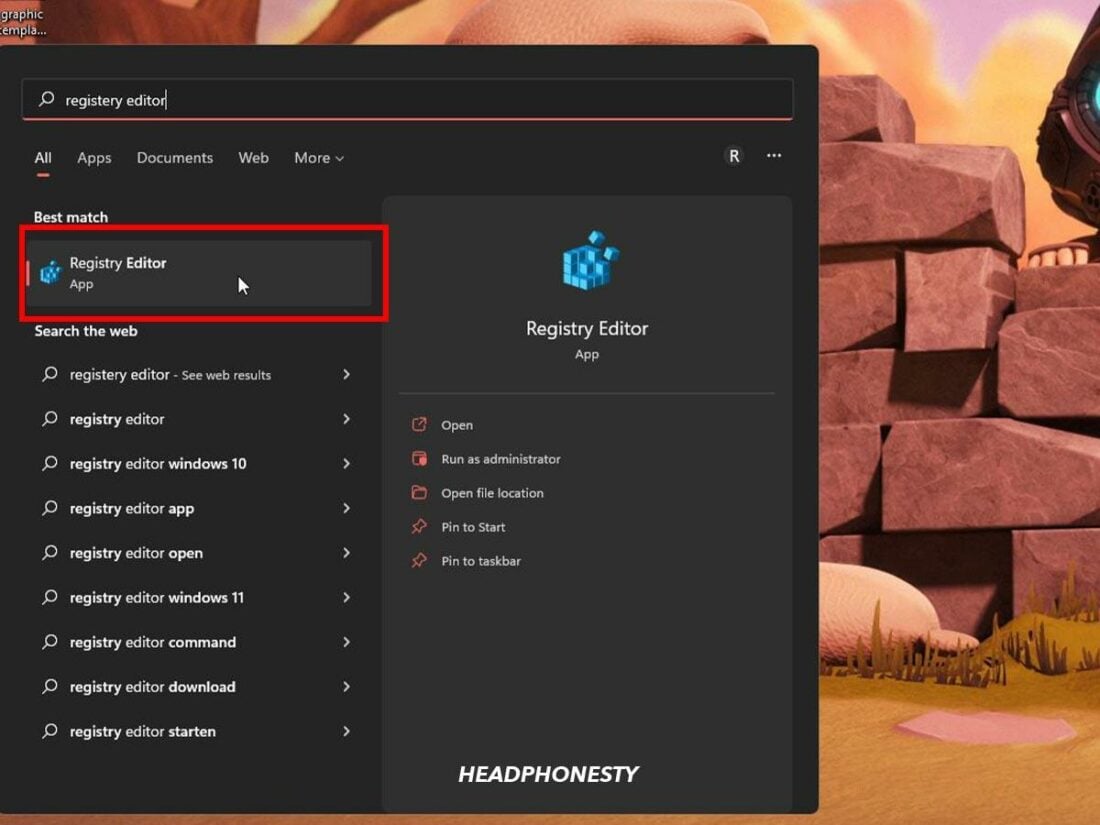
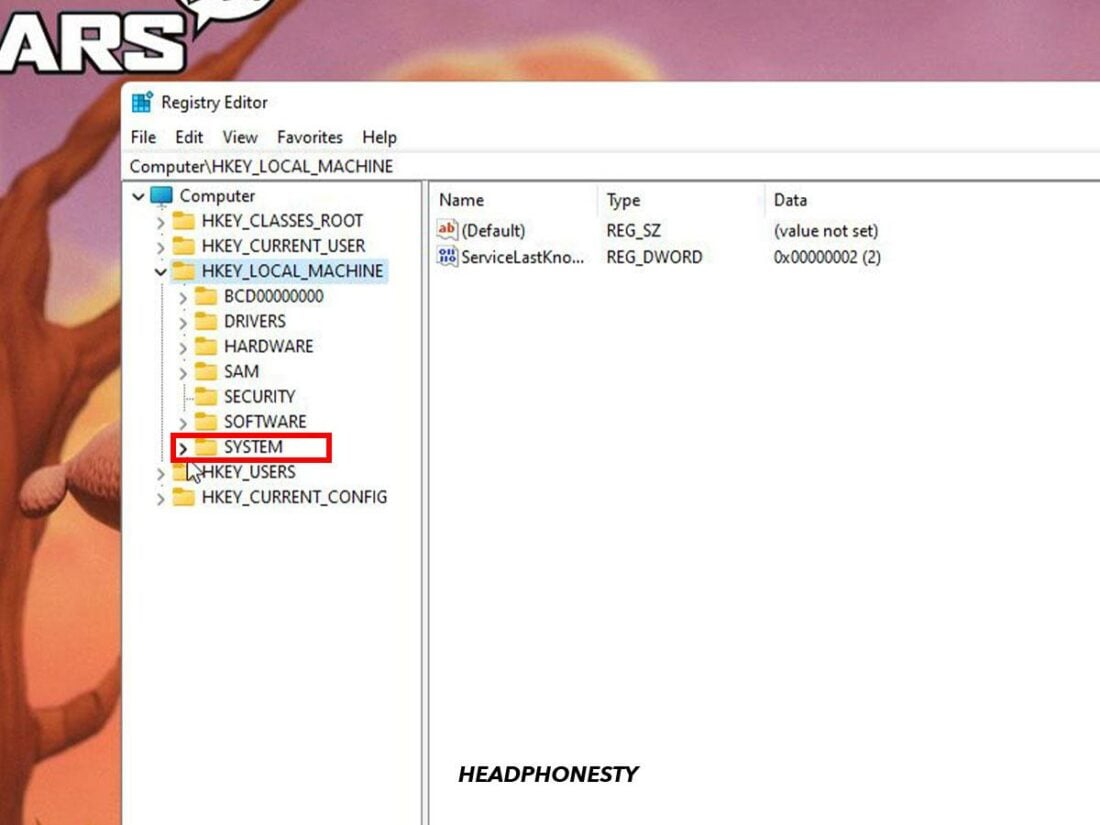
- Type Registry Editor in the search bar and launch it.
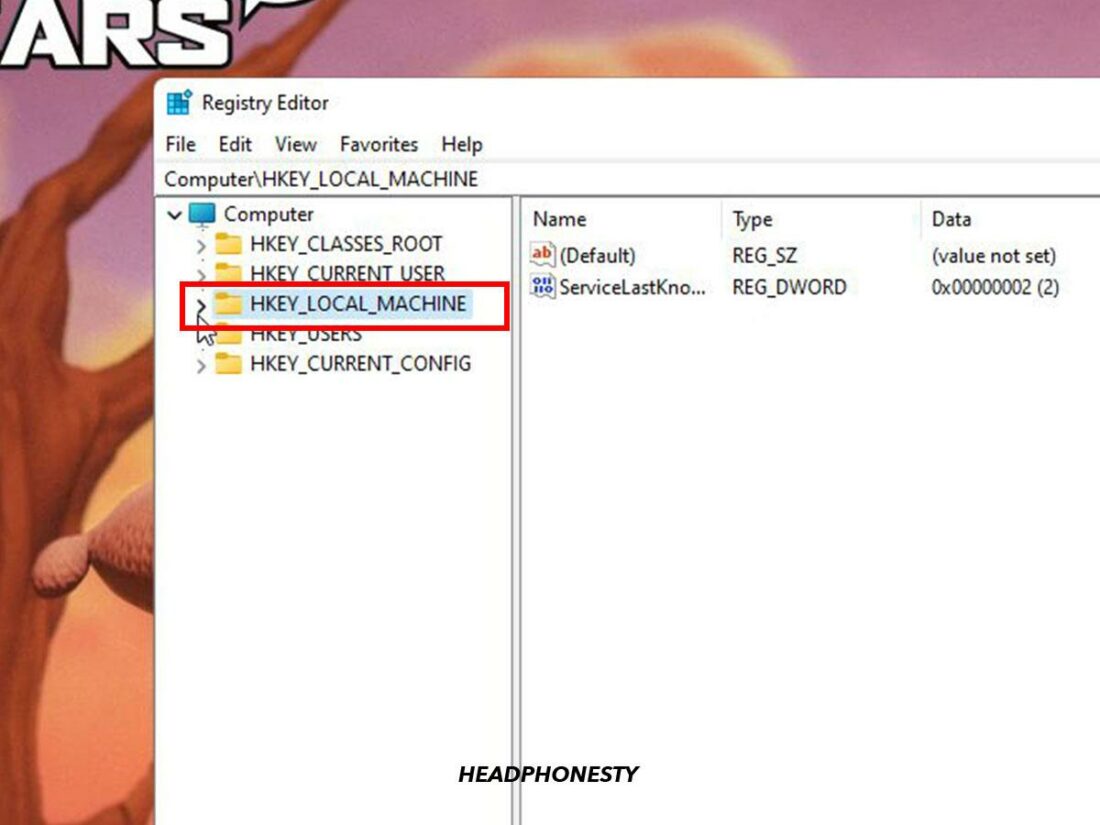
Registry Editor. - On the left sidebar under Computer, double-click on HKEY_LOCAL_MACHINE.
“HKEY_LOCAL_MACHINE” highlighted in Registry Editor. - Double-click on System.
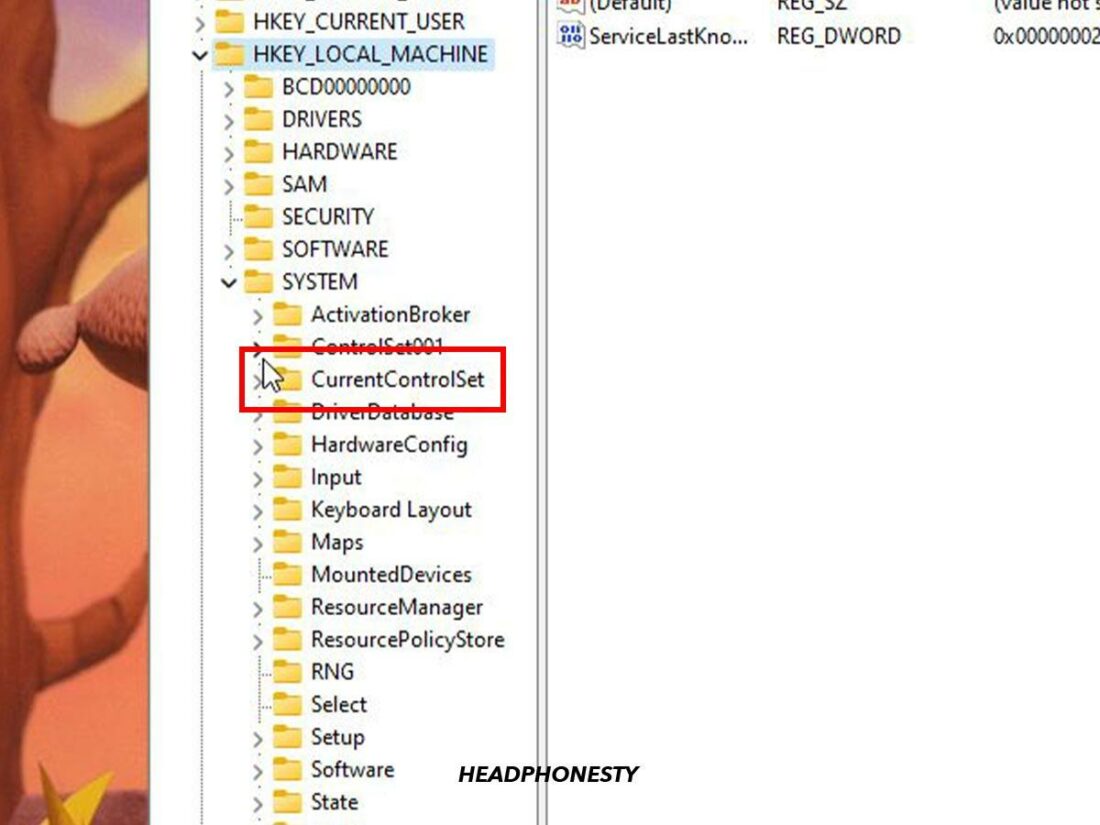
“System” highlighted. - Double-click ControlSet001.
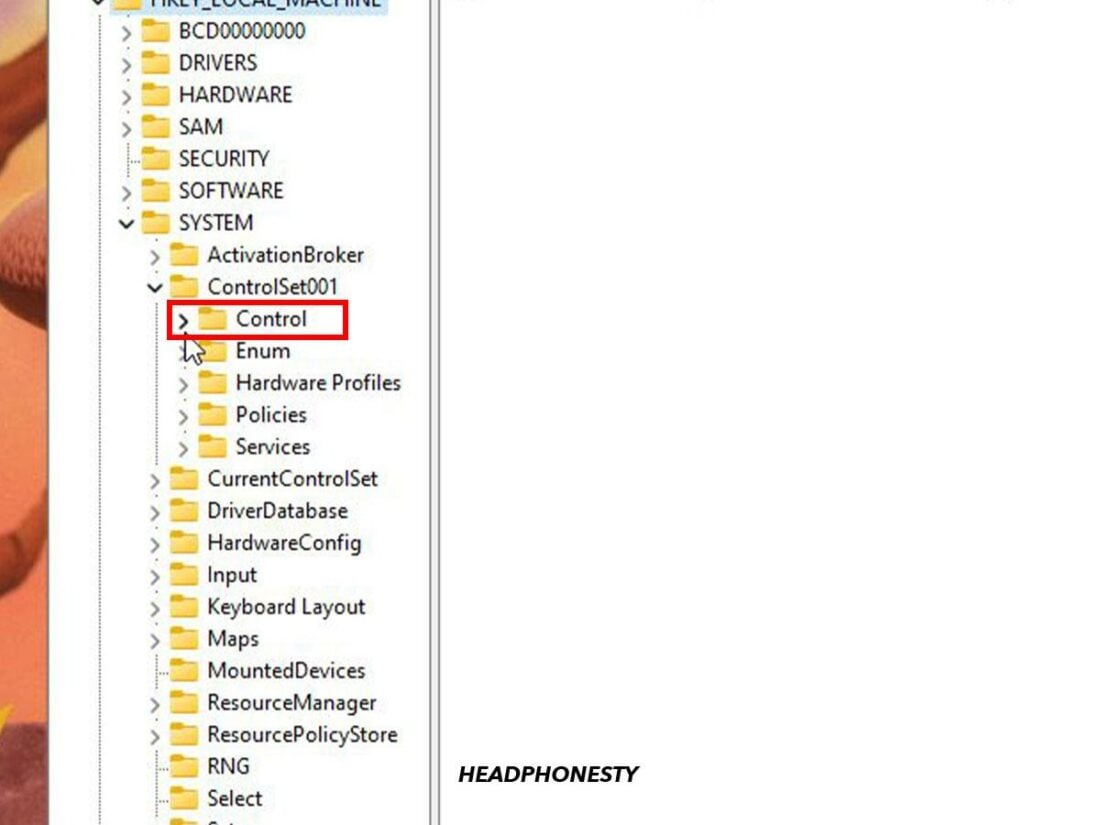
“ControlSet001” highlighted. - Double-click Control.
“Control” highlighted. - Double-click Class and locate the file named {e0cbf06c-cd8b-4647-bb8a-263b43f0f974}.
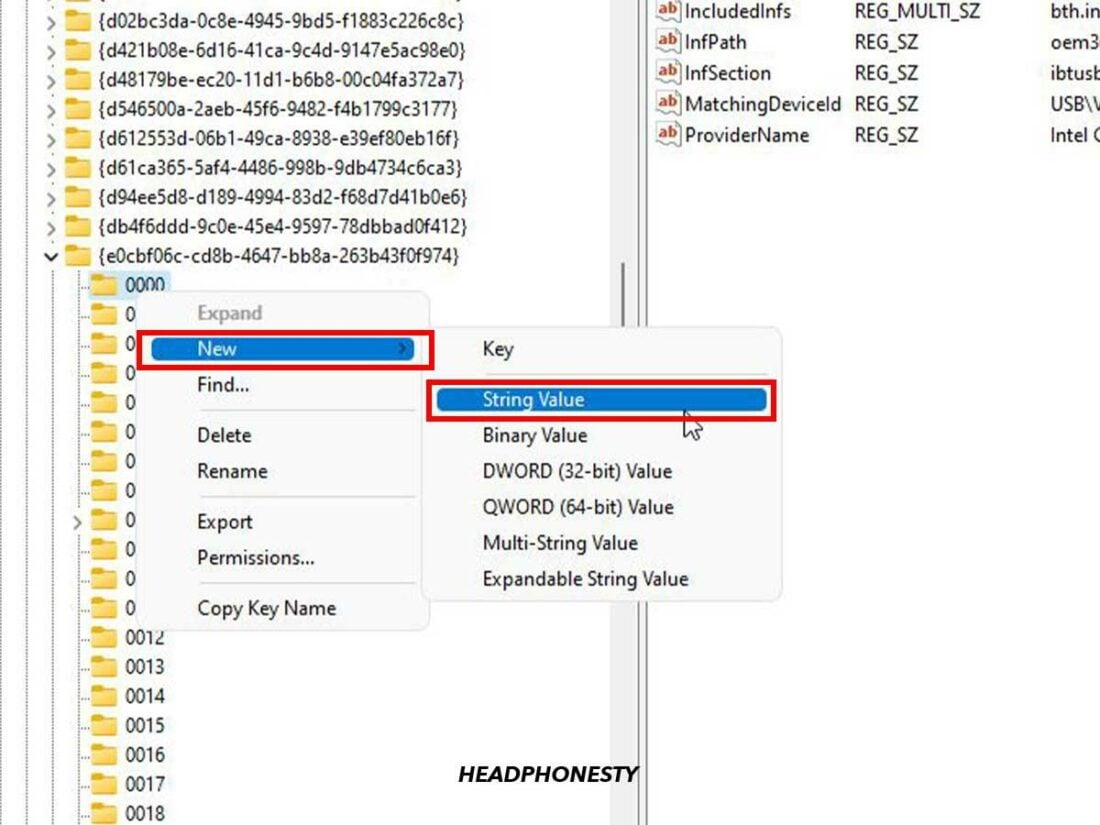
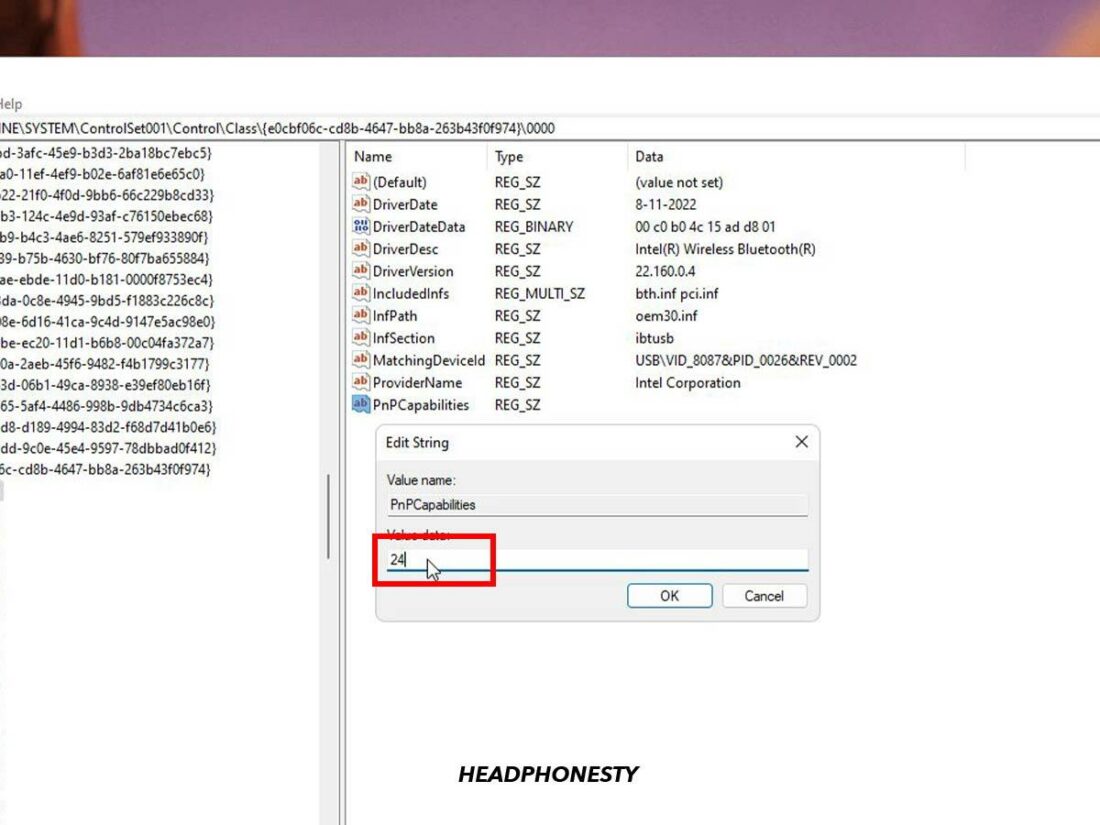
“{e0cbf06c-cd8b-4647-bb8a-263b43f0f974}” highlighted. - Right-click on 0000.
“0000” highlighted. - Select New, then String Value.
Add new String Value. - Rename the new string value as PnPCapabilities.
Rename new string “PnPCapabilities”. - Double-click PnPCapabilities, then type 24 under Value data.
Type 24 under Value data. - Click OK and restart your computer.
Click OK button.


Use a Bluetooth Dongle
If you’ve tried the above methods, but your AirPods still fail to connect properly to your PC, then you might want to use a Bluetooth dongle.
A Bluetooth dongle is an adapter that you plug into your computer via the USB port. When connected, it allows your PC to receive and transmit a Bluetooth signal. This device can let you re-pair your AirPods to your PC and see if the connection stabilizes.
You can shop for some of the best Bluetooth dongles here.
Conclusion
In a perfect world, AirPods would be cross-compatible and work seamlessly with all devices outside the Apple ecosystem. Unfortunately, even though Microsoft has been taking steps to improve the compatibility between AirPods and PCs, that reality is still a while away.
For now, you can at least use one of the twenty solutions above to solve connection problems between your AirPods and PC so that you can continue using them without interruptions or frustration.
What did you think of our solutions? Did we miss anything, or did you find something else that worked for you? Let us know down in the comments!