
How to bring the sound back when AirPods go mute on Windows 10 or 11.
AirPods are a versatile audio accessory. They’re easy to connect and use with just about any Bluetooth-enabled device on the market, including Windows PCs.
However, some users report that their AirPods sometimes do not have any sound despite being properly connected to their PC. This happens due to various issues, including software bugs or improper settings.
Don’t worry: this can easily be fixed by resetting your AirPods or doing some settings tweaks. So, if you want to solve this AirPods connected but no sound problem on Windows 10 or 11, read on to learn how!
- 1. Check the AirPods’ Battery
- 2. Factory Reset AirPods
- 3. Update the AirPods’ Firmware
- 4. Set AirPods as Your Default Audio Output Device
- 5. Adjust Audio Balance
- 6. Reset Network Settings
- 7. Restart and Reconfigure Bluetooth Support Service Settings
- 8. Run Bluetooth Device Troubleshooter
- 9. Run Audio Playback Troubleshooter
- 10. Check and Update Windows OS
- 11. Update Bluetooth Driver
- 12. Ensure Stereo Audio Is Enabled for AirPods
- 13. Adjust Absolute Volume in Registry Editor
- Conclusion
1. Check the AirPods’ Battery
Always make sure your AirPods are sufficiently charged. You might not be able to hear anything because your AirPods may lack enough power to transmit sound.
Unlike iOS, Windows does not automatically display your AirPods’ battery levels, so it’s not easy to see if they’re already running low. However, you can try connecting your AirPods to an iPhone or Android device to check their battery.
Alternatively, you can use third-party applications like Magic Pods to see your AirPods’ battery levels on Windows.
Magic Pods allows Windows users to experience the same benefits as iOS or macOS users. So, when you open your AirPods case, you get the same automatic pop-up showing their battery levels. Moreover, there’s even a complete 3D moving model of your AirPods, just like when using them with an iPhone.
2. Factory Reset AirPods
Performing a factory reset or re-pairing your AirPods are universal solutions that can fix common AirPods issues. For example, this can include the problem of not hearing any sound when connected to your Windows PC.
While it’s a more technical procedure, a factory reset returns your AirPods to their default factory settings. Just as if they are being used fresh out of the box. However, do not confuse this with re-pairing, which involves unpairing your AirPods and reconnecting them to your Windows PC.
Here’s how to factory reset your AirPods:
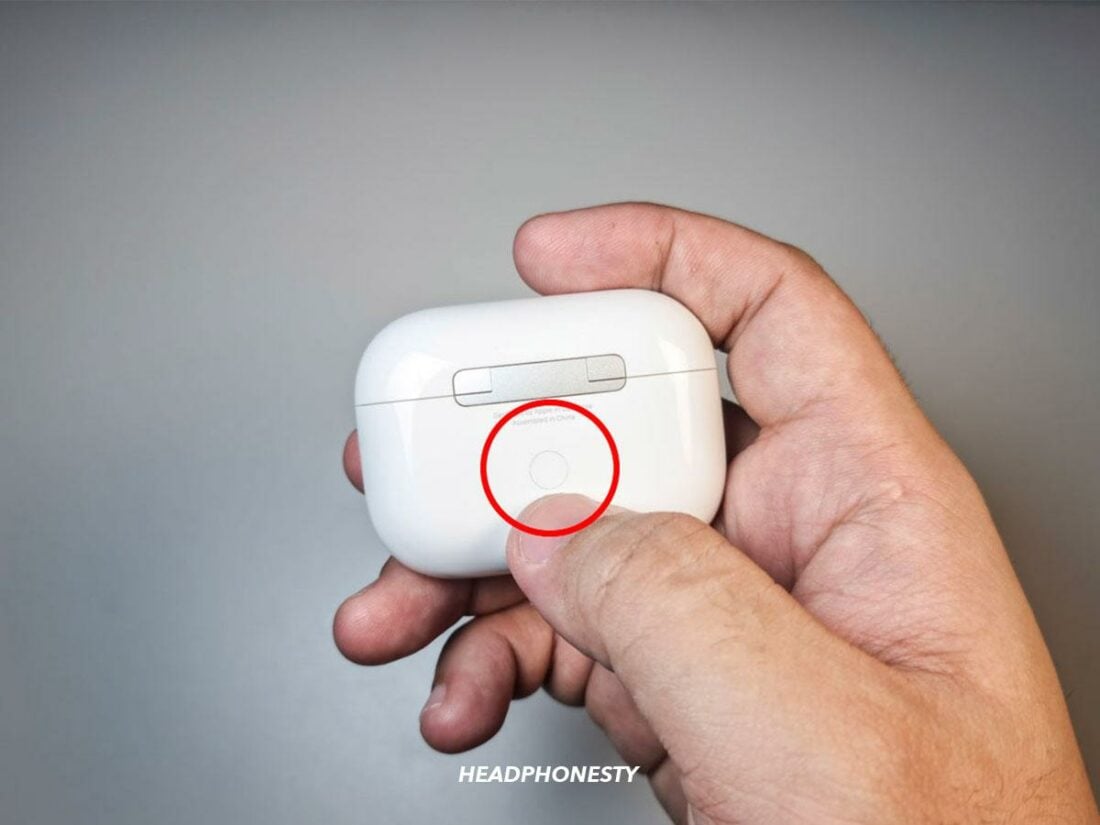
- Put your AirPods back into the charging case. Open the lid.

Airpods inside the charging case. - Press and hold the Setup button at the back of the AirPods case for 15 seconds. The status light should change from flashing amber to white.
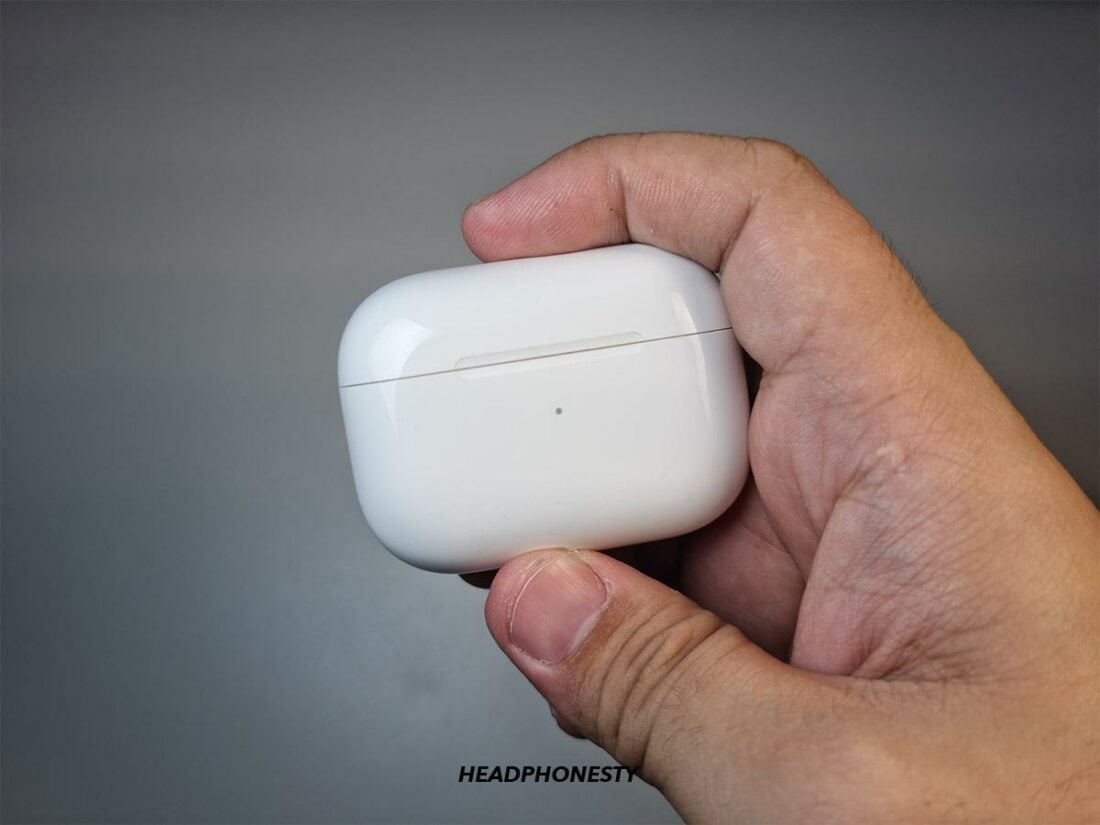
Airpods setup button. - Close the lid. Your AirPods are fully reset.
Airpods case with closed lid.

3. Update the AirPods’ Firmware
If your AirPods are running on outdated firmware, it might cause compatibility issues when using them. Such problems can include sound cutting out, random disconnects, or issues with the audio.
First, check your current firmware version to see if you need to upgrade. Follow these steps:
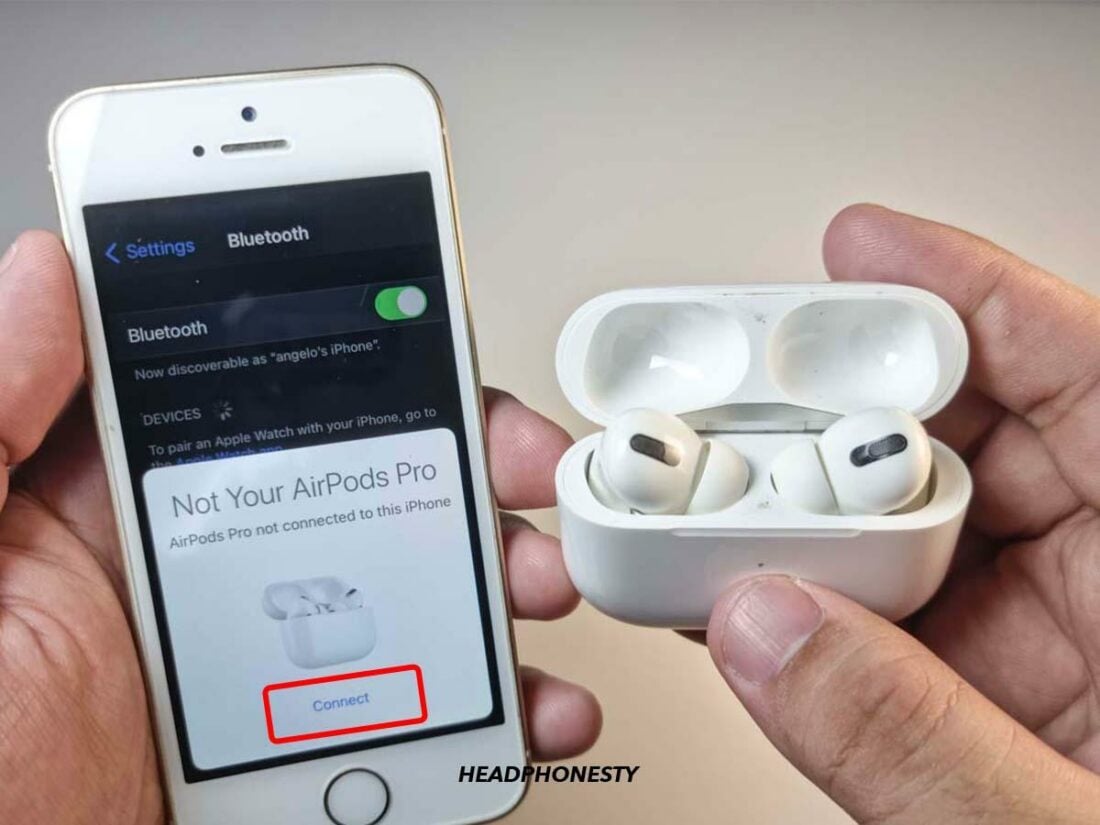
- Connect your AirPods to your iOS device.
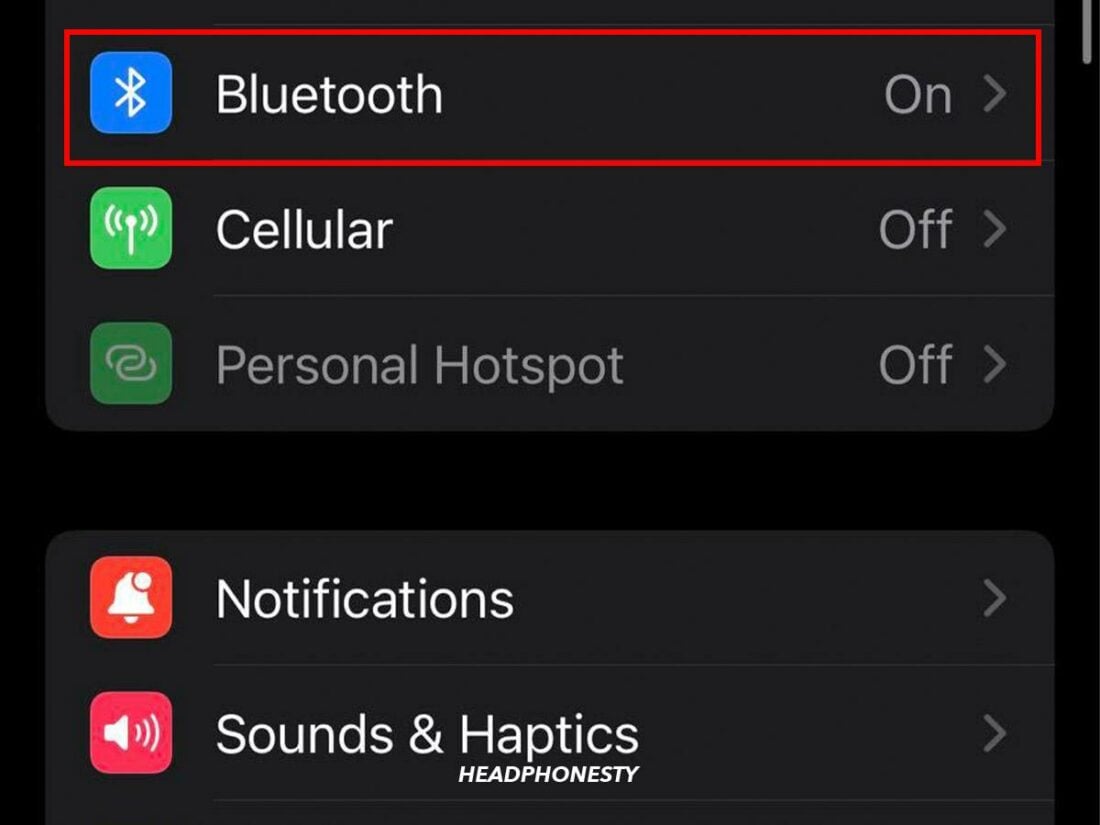
Connect your AirPods to your iOS device. - Open Settings and tap Bluetooth.
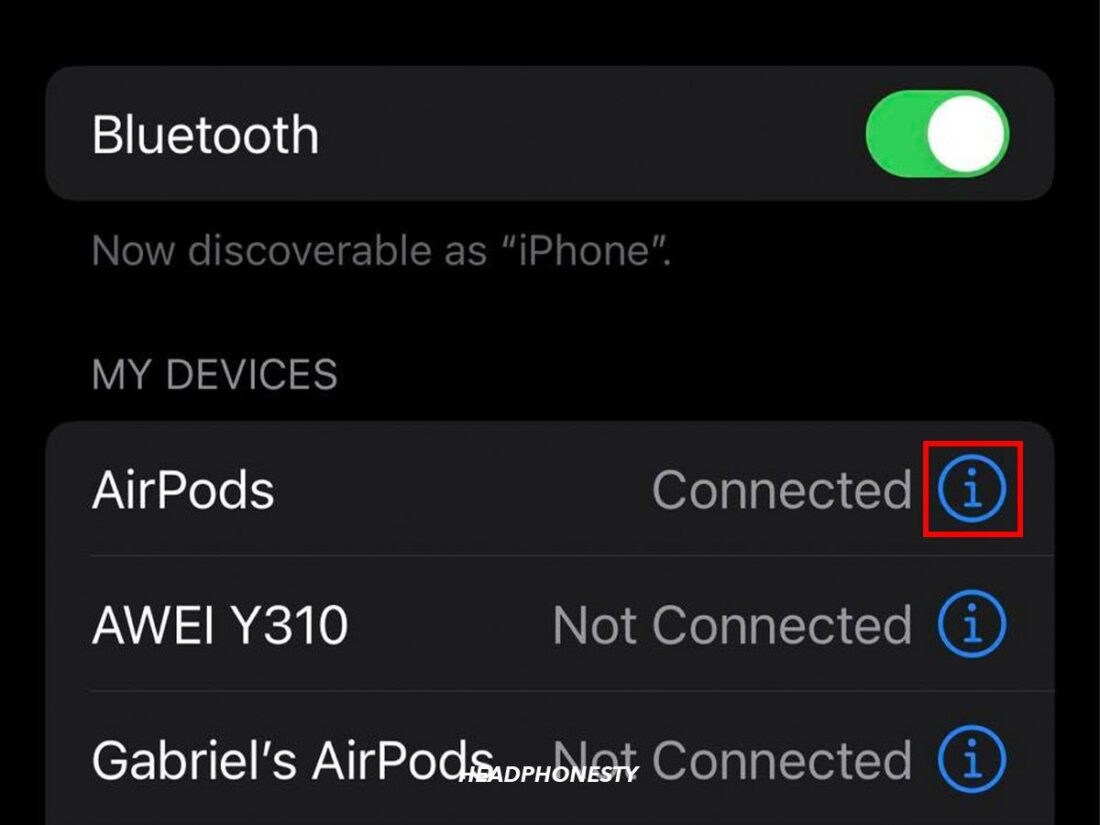
‘Bluetooth’ in iOS settings. - Under My Devices, click the information icon (i) next to your AirPods to see your firmware version.
Information icon (i)
Thanks to Apple, all firmware upgrades will automatically install on your AirPods whenever a new update is released.
However, your AirPods must access Apple’s servers to update their firmware. As a result, Windows PC users will need to use an Apple device to get the latest AirPods firmware version.
4. Set AirPods as Your Default Audio Output Device
Usually, if you don’t hear any sound on your AirPods, it might be because they are not the default output device on Windows. As a result, the transmitted audio goes to your computer speakers or other connected devices instead of your AirPods.
Follow these steps to change the settings:
For Windows 10:
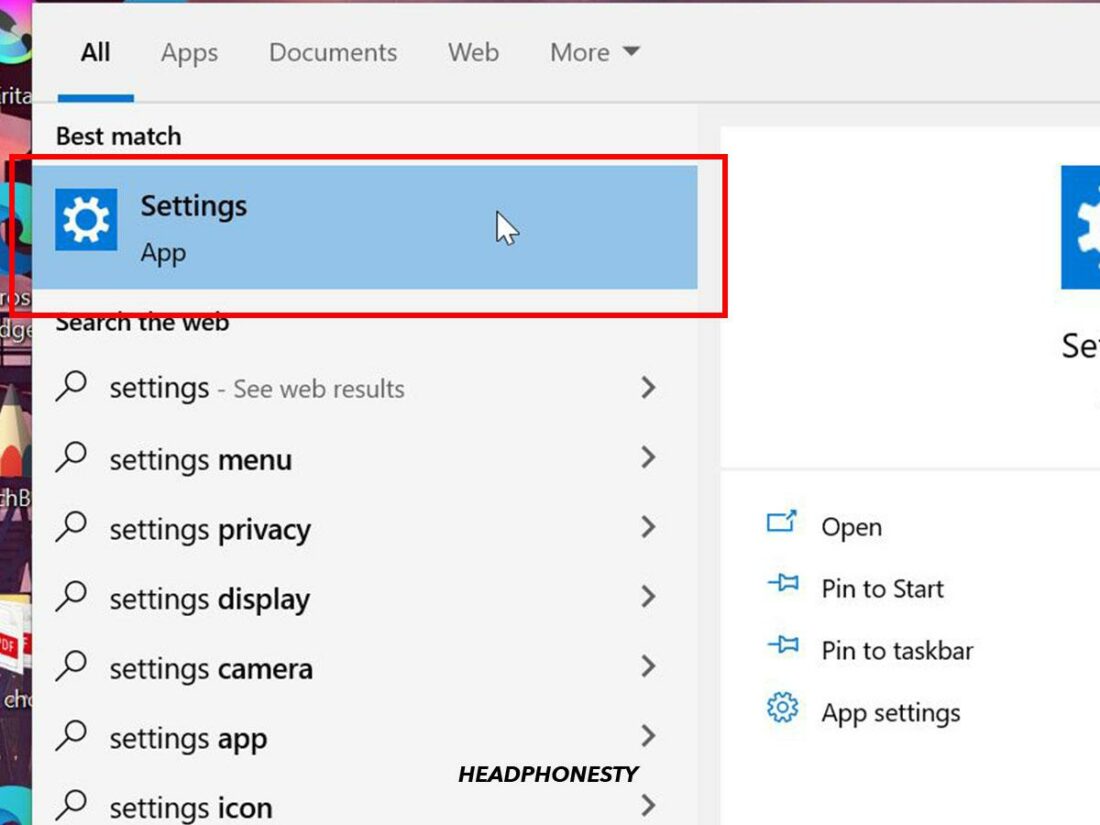
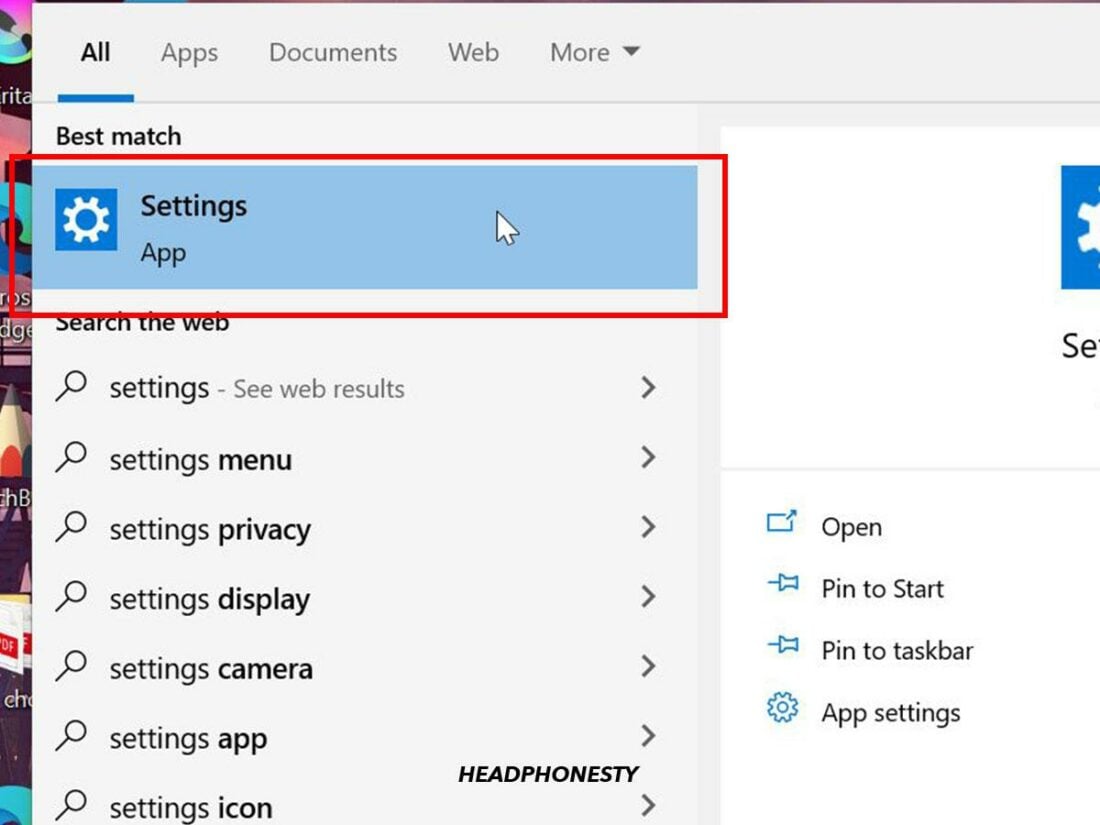
- Open Settings.
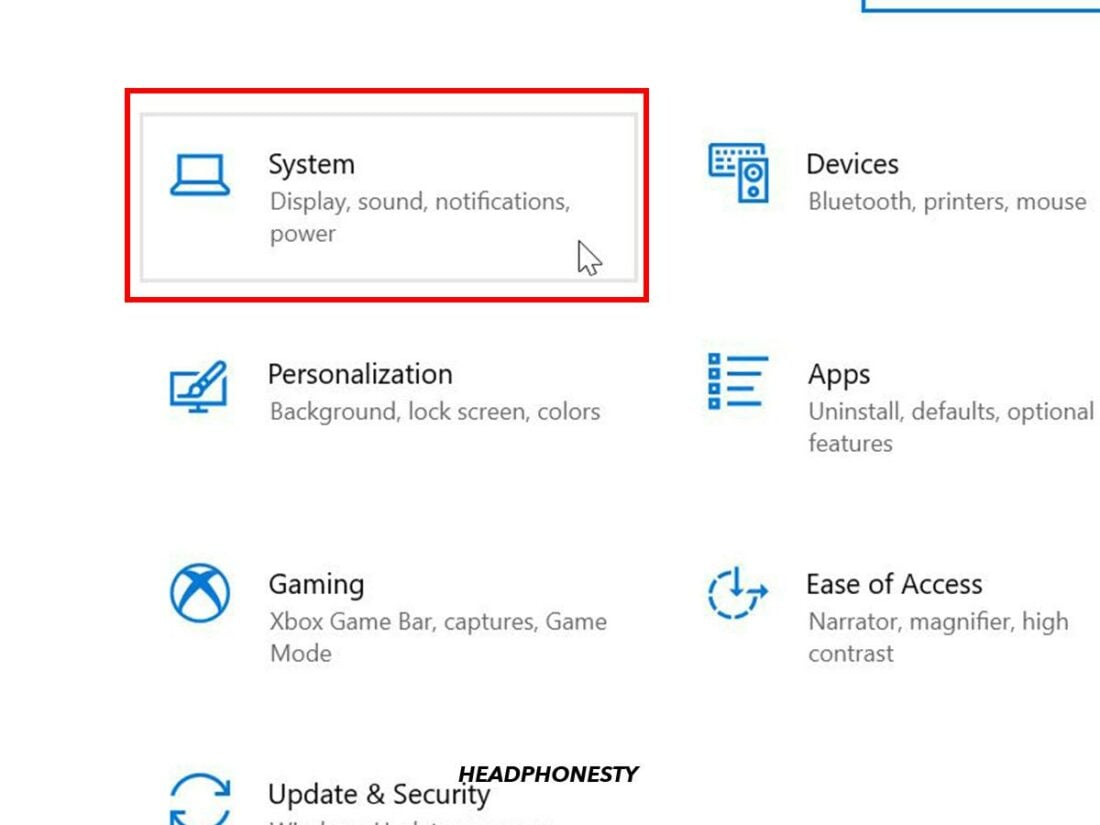
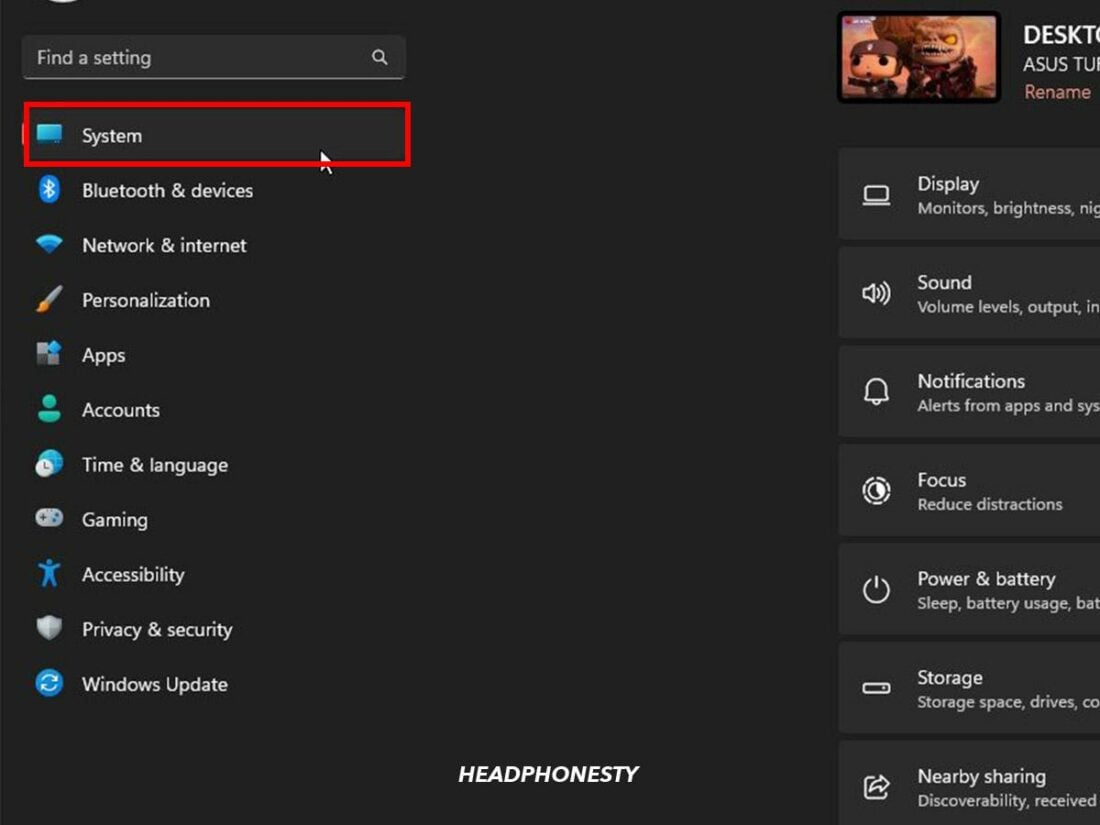
‘Settings’ on Windows PC. - Click System.
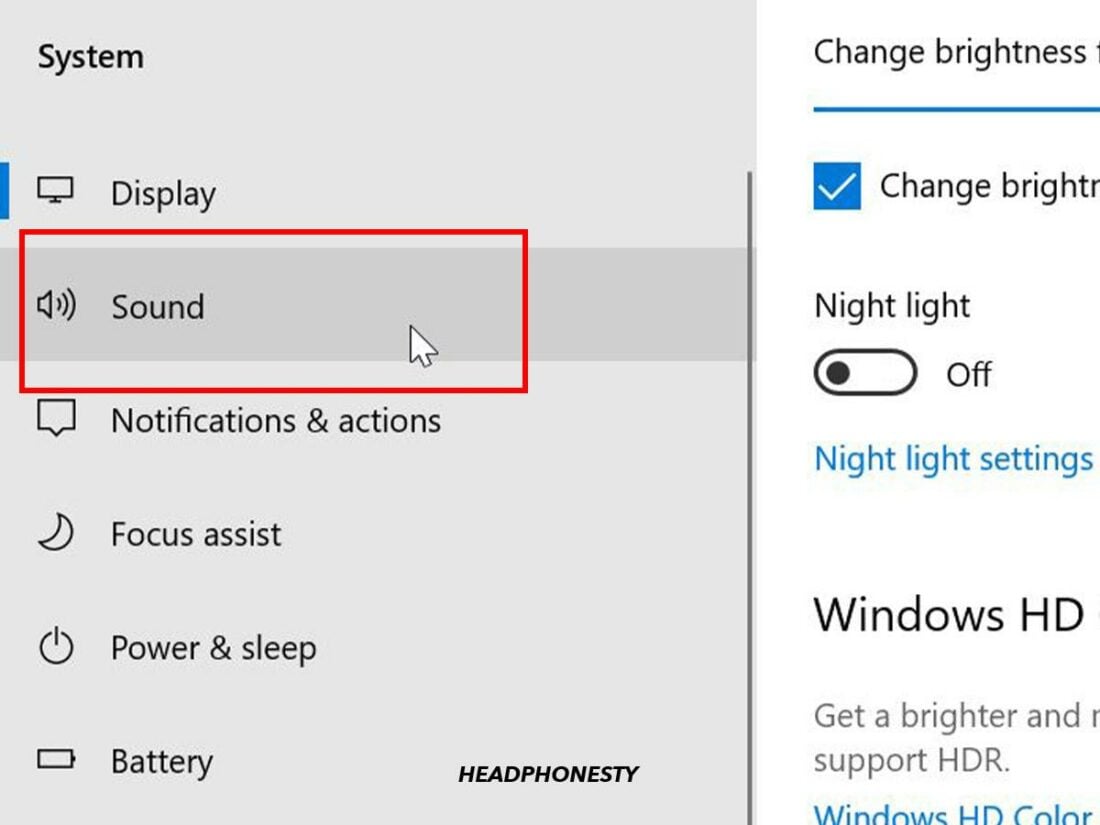
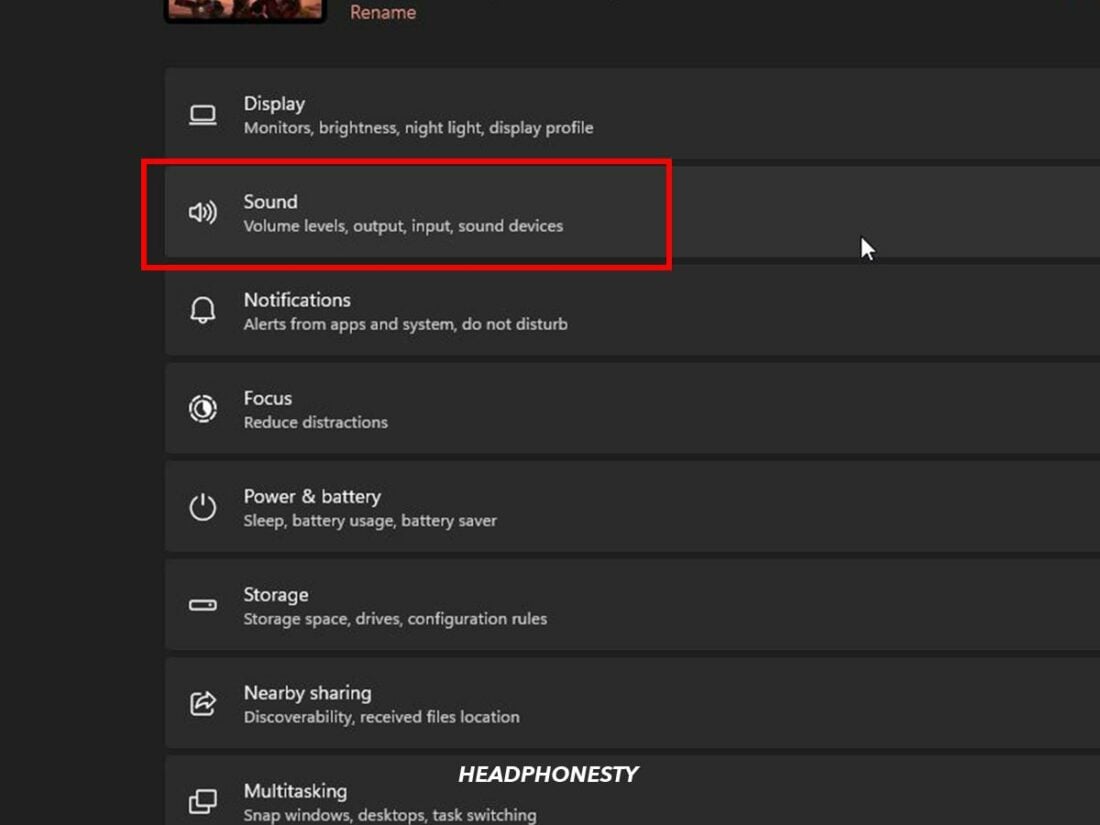
‘System’ in Settings. - Click Sound.
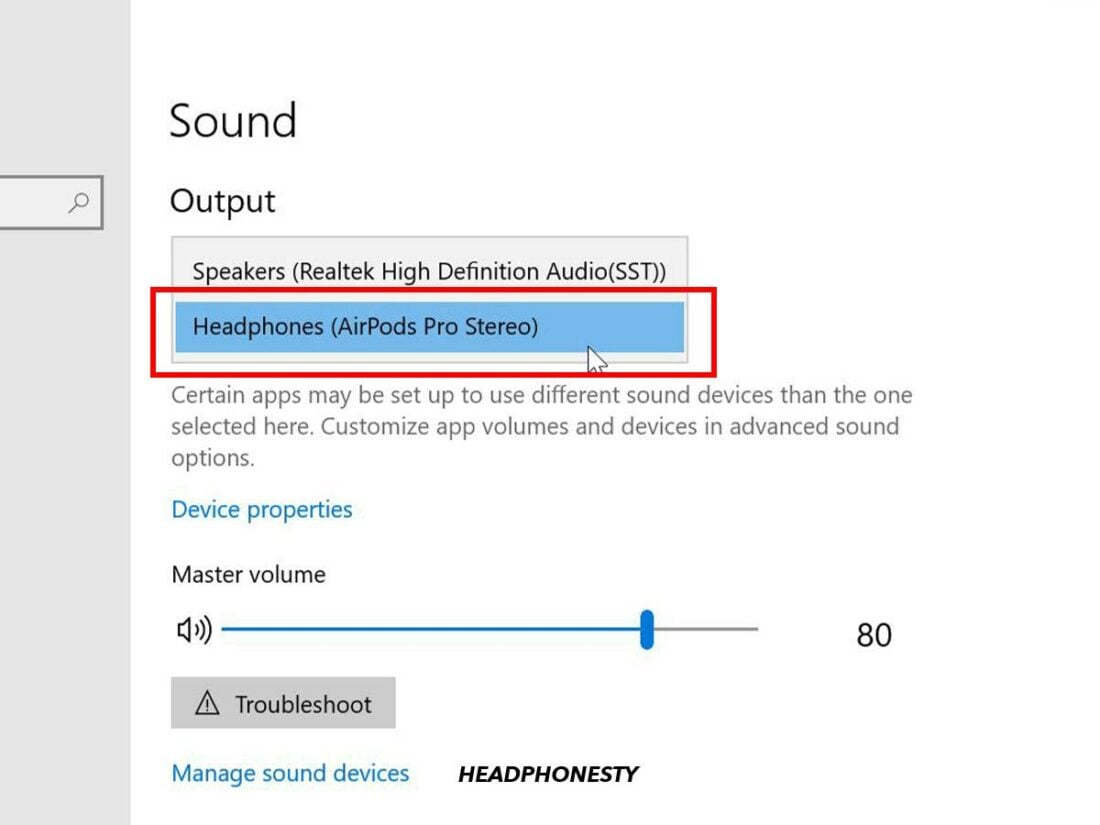
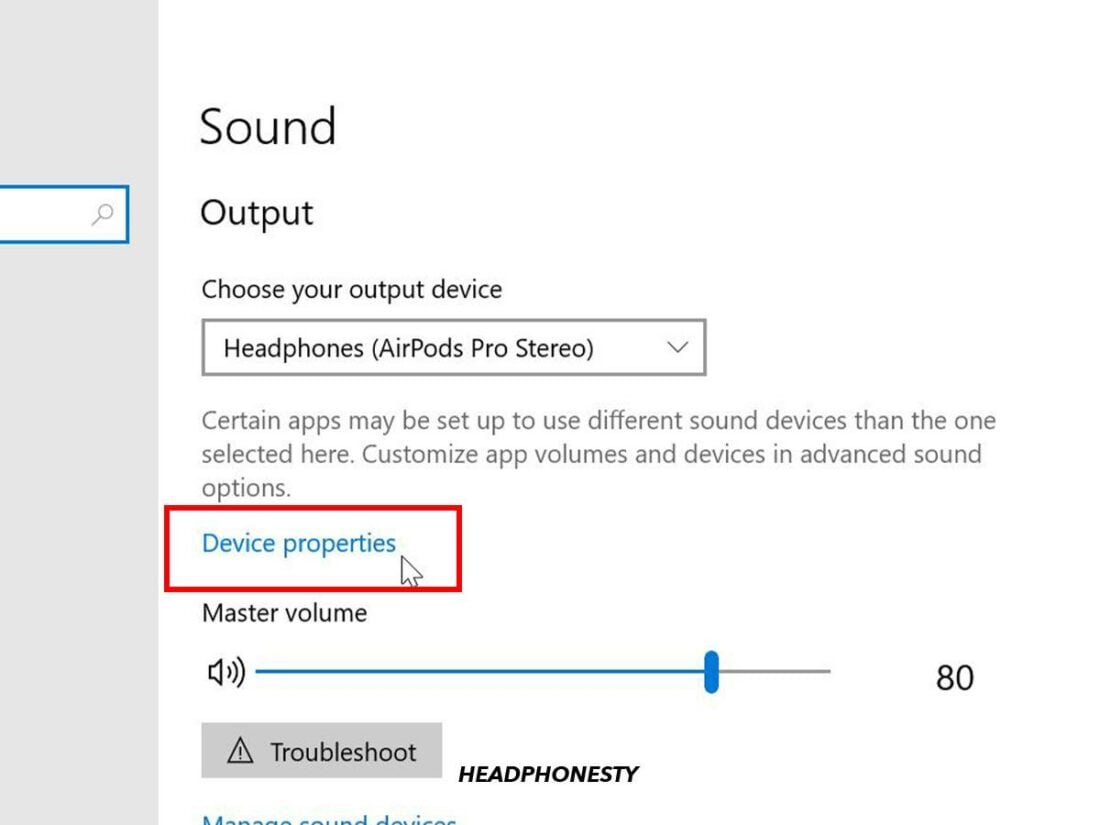
‘Sound’ in System. - Under Output, select your AirPods as the default output device.
Choose your output device.

For Windows 11:
- Open Settings.
‘Settings’ on Windows PC. - Click System on the left-hand menu.
‘System’ in Settings. - Click Sound.
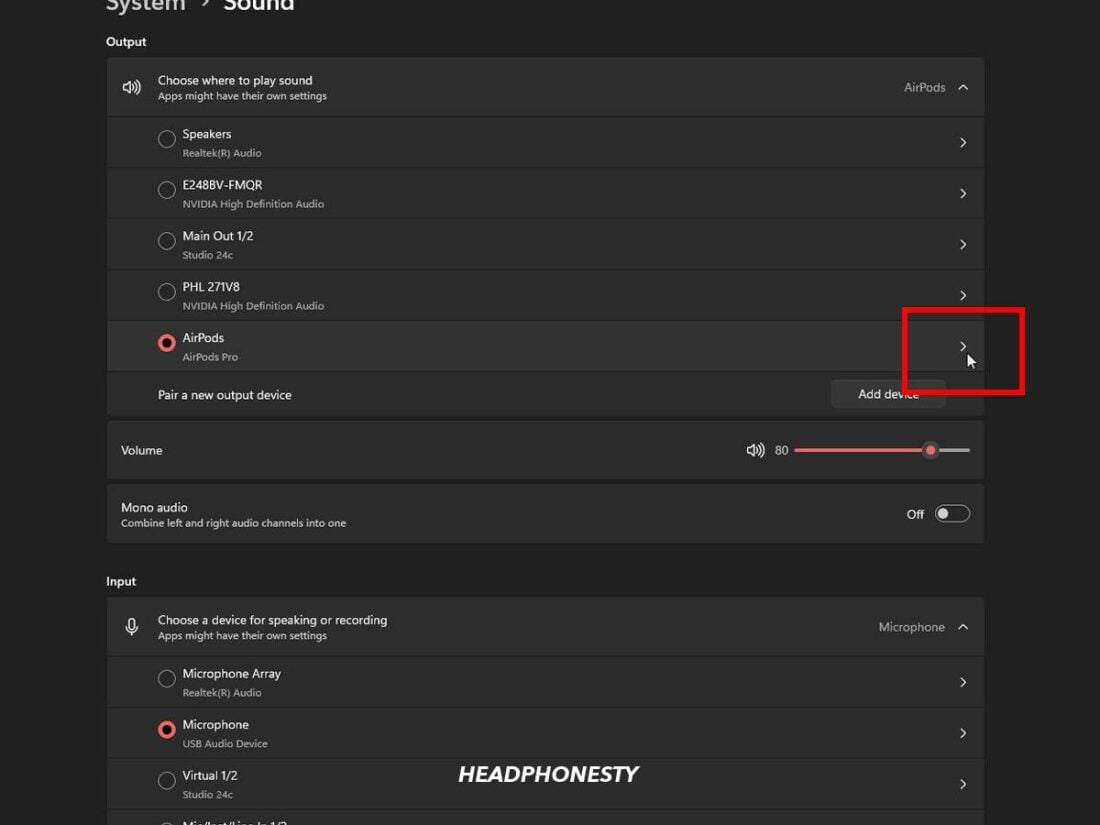
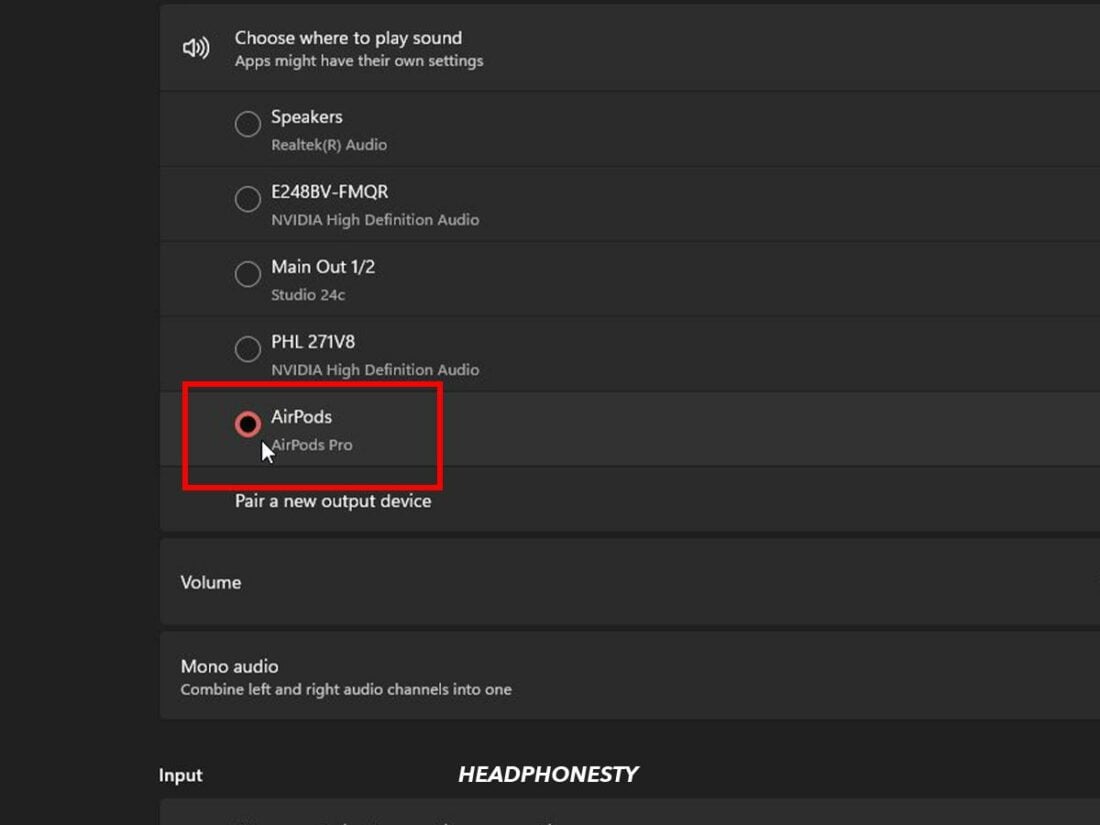
‘Sound’ in System. - Under Choose where to play sound, select your AirPods.
Select Airpods. - Click on the arrow (>) icon beside your AirPods.
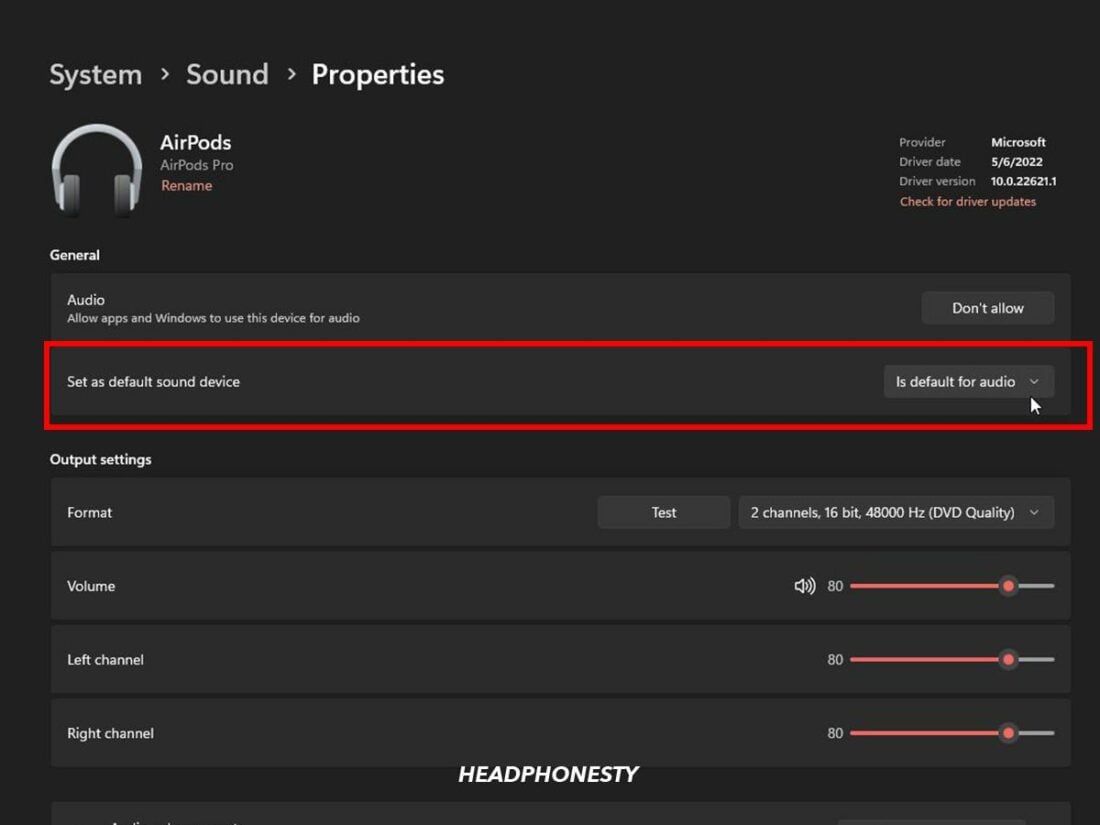
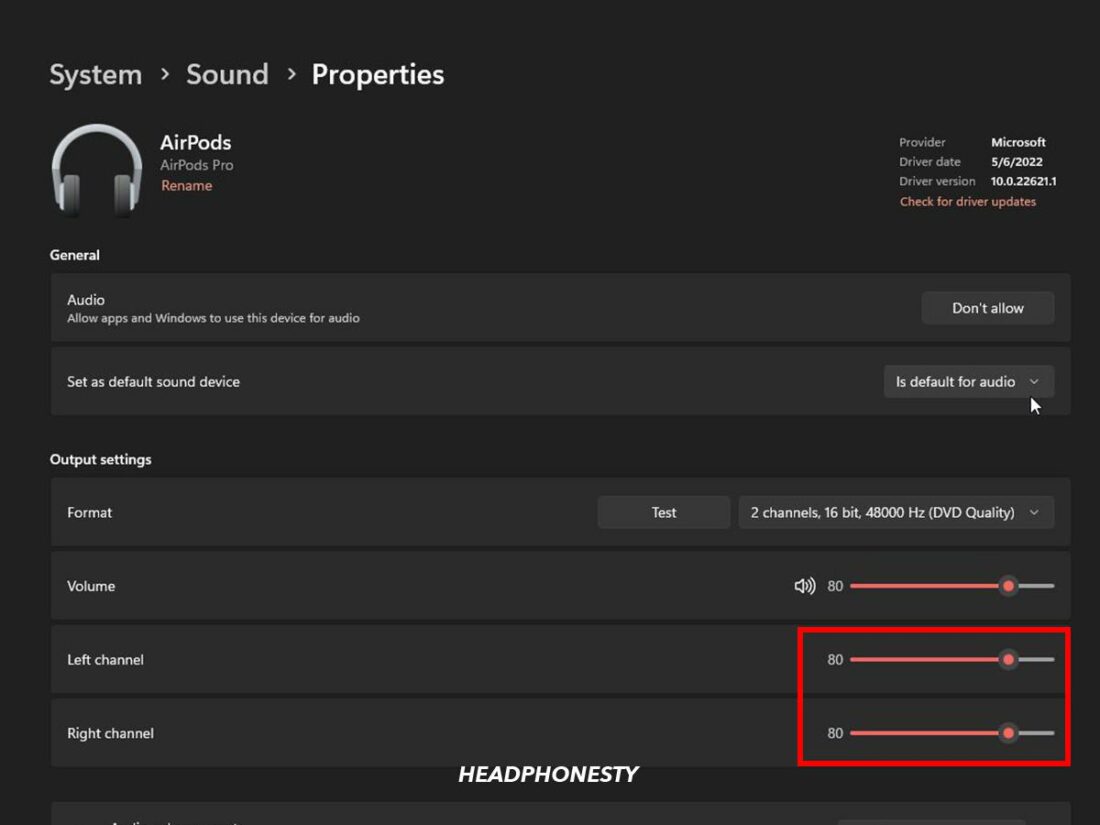
Click the arrow icon. - Under General, click Set as default sound device and select Is default for audio.
Set as default audio device.


5. Adjust Audio Balance
Another hack is to check your AirPods’ audio balance. You might have accidentally changed the settings, shifting the volume toward your left or right AirPod. As a result, this can cause sound-related issues, such as one of your AirPods sounding softer than usual or having no audio on one side.
To adjust your audio balance, follow these steps:
For Windows 10:
- Open Settings.
Open ‘Settings’ on Windows. - Click System, then Sound.
Click ‘Sound’ in System. - Under Output, select your AirPods.
Choose your output device. - Click Device properties.
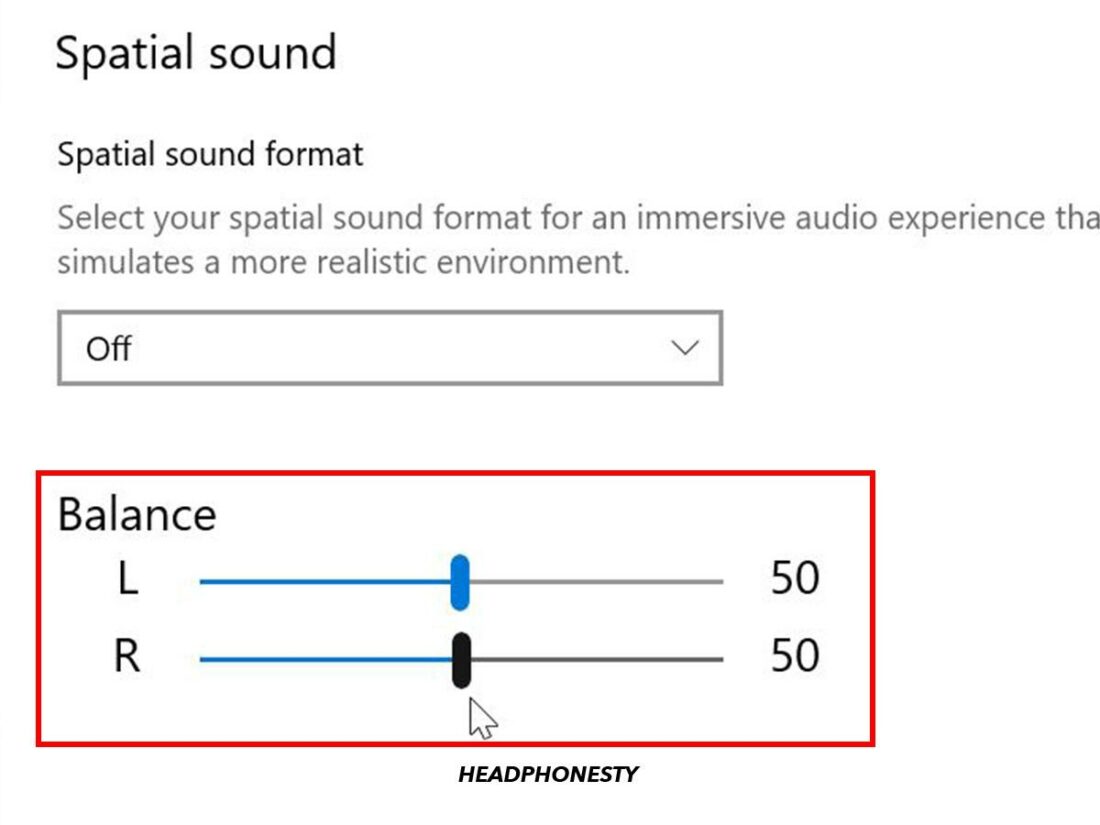
Click ‘Device properties’. - Adjust the sliders to 50 on L and R to distribute the sound volume equally.
Adjust volume sliders.


For Windows 11:
- Open Settings.
Open ‘Settings’ on Windows. - Click System on the left-hand menu.
Click ‘System’ in Settings. - Click Sound.
Click ‘Sound’ in System. - Under Choose where to play sound, select your AirPods.
Select Airpods. - Manually adjust the volume on the left and right channels.
Adjust volume sliders.


6. Reset Network Settings
AirPods normally rely on a stable Bluetooth connection with your Windows PC to transmit sound. Hence, a network connection error might be a possible reason why you can’t hear any sound on your AirPods.
The simplest way to fix this is to reset your network settings on Windows. Then, recheck your AirPods connection, and see if that solves the issue. Here’s how:
On Windows 10:
- Open Settings.
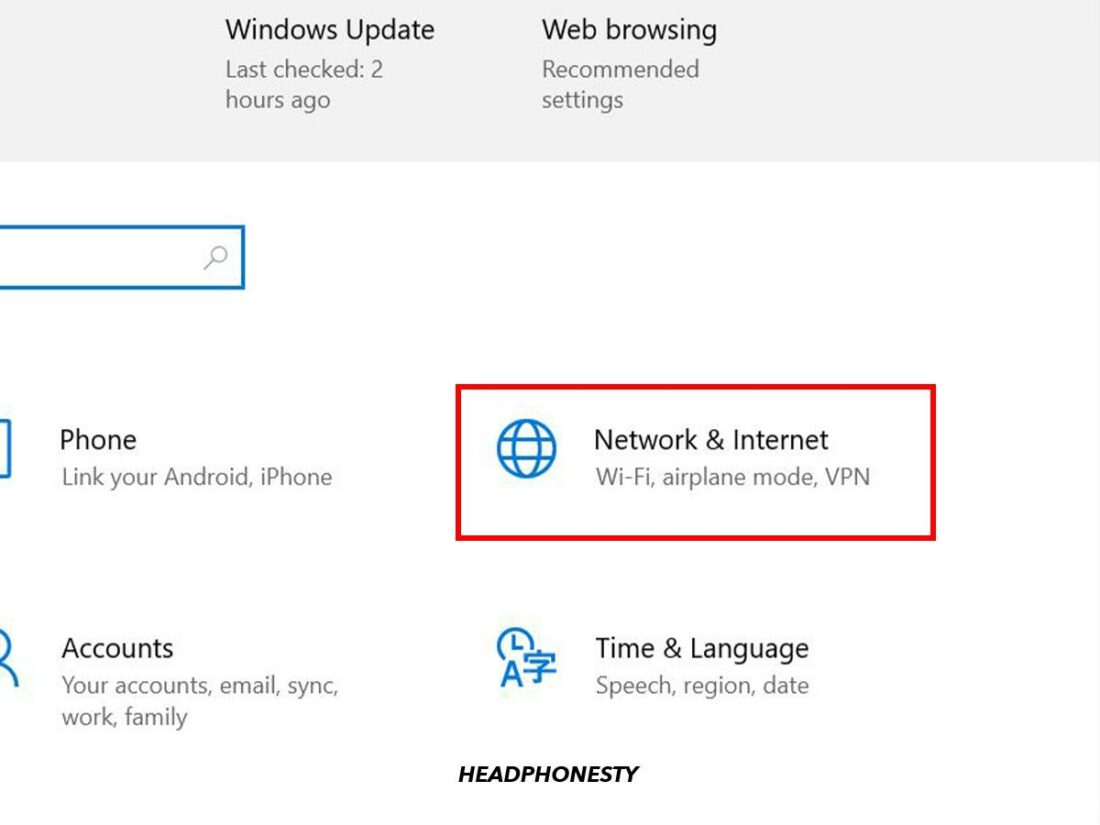
‘Settings’ on Windows PC. - Select Network & Internet.
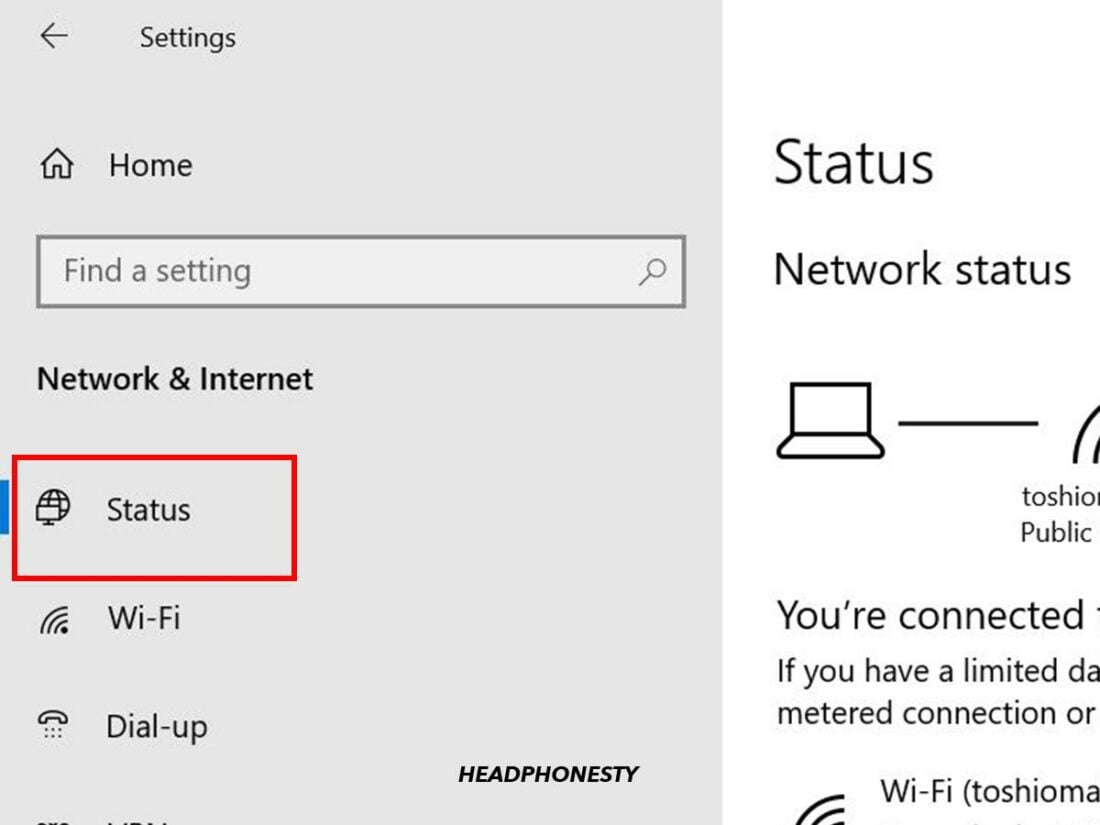
‘Network and Internet’ in Settings. - Click Status on the left-hand menu.
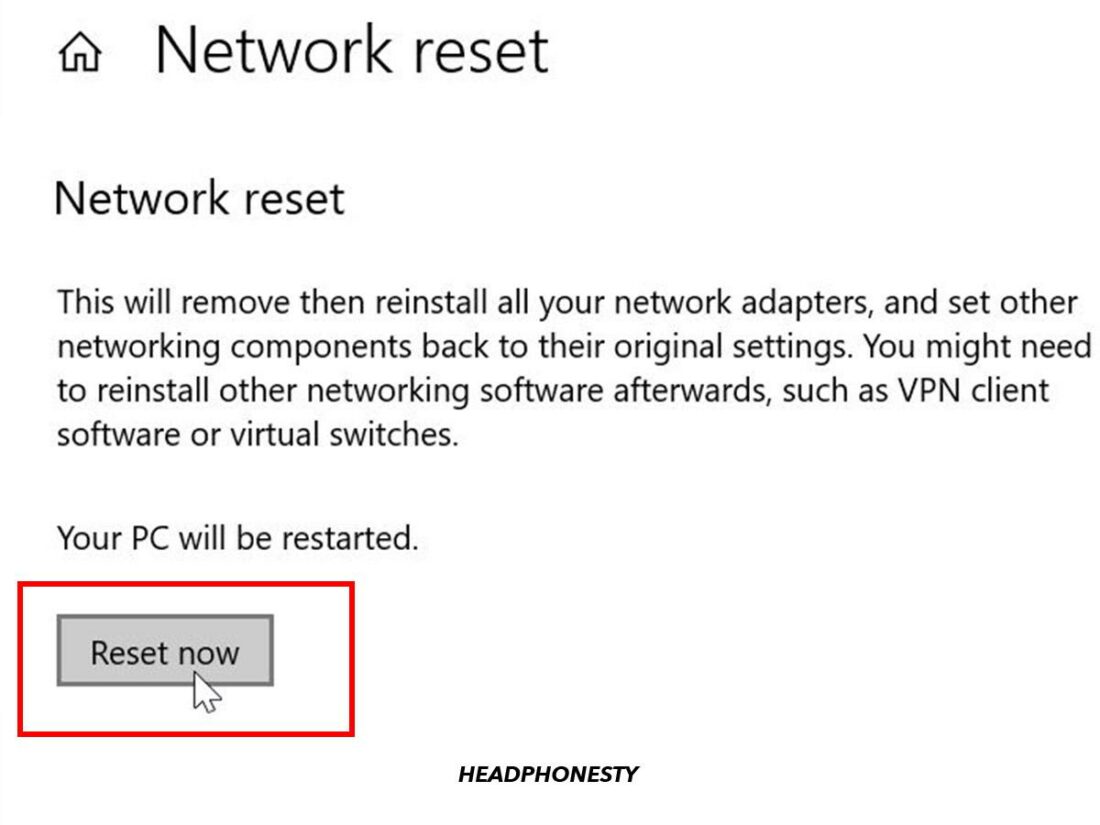
‘Status’ in Network & Internet. - Click Network Reset, then Reset now.
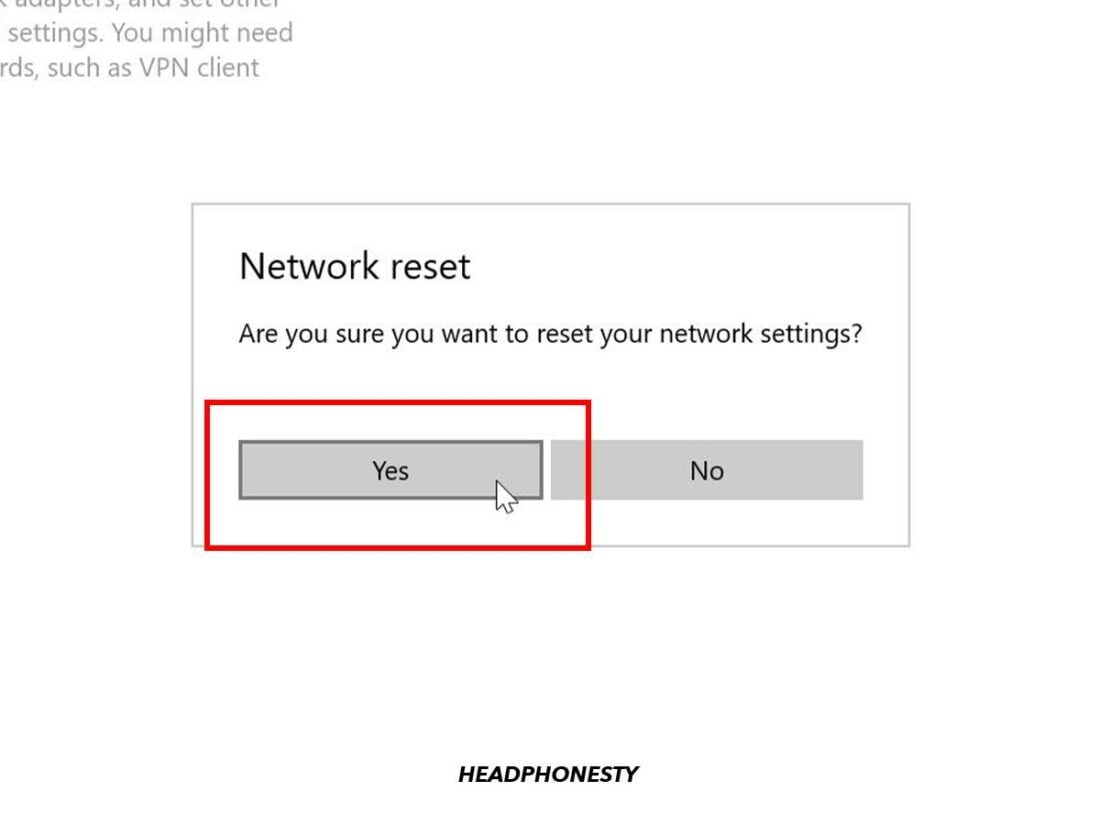
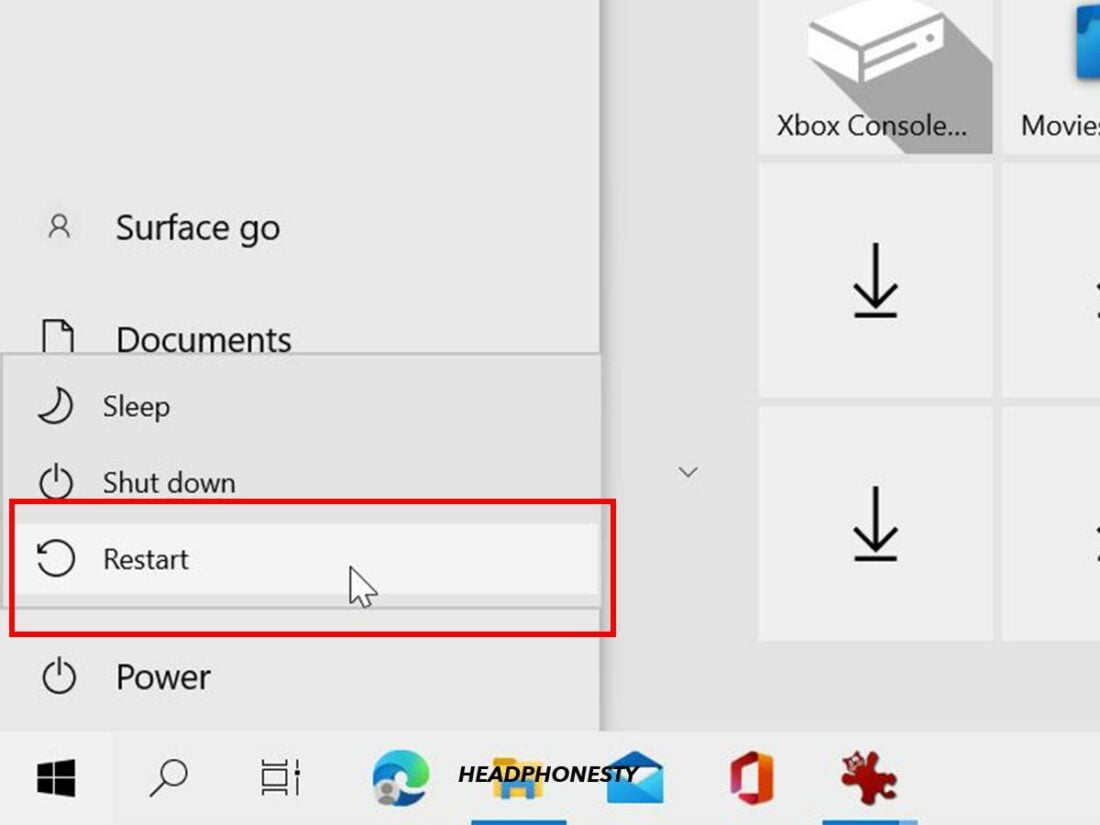
Click ‘Reset now’. - Click Yes to confirm. Your computer will automatically restart to apply the changes.
Click ‘Yes’ to confirm.
On Windows 11:
- Open Settings.
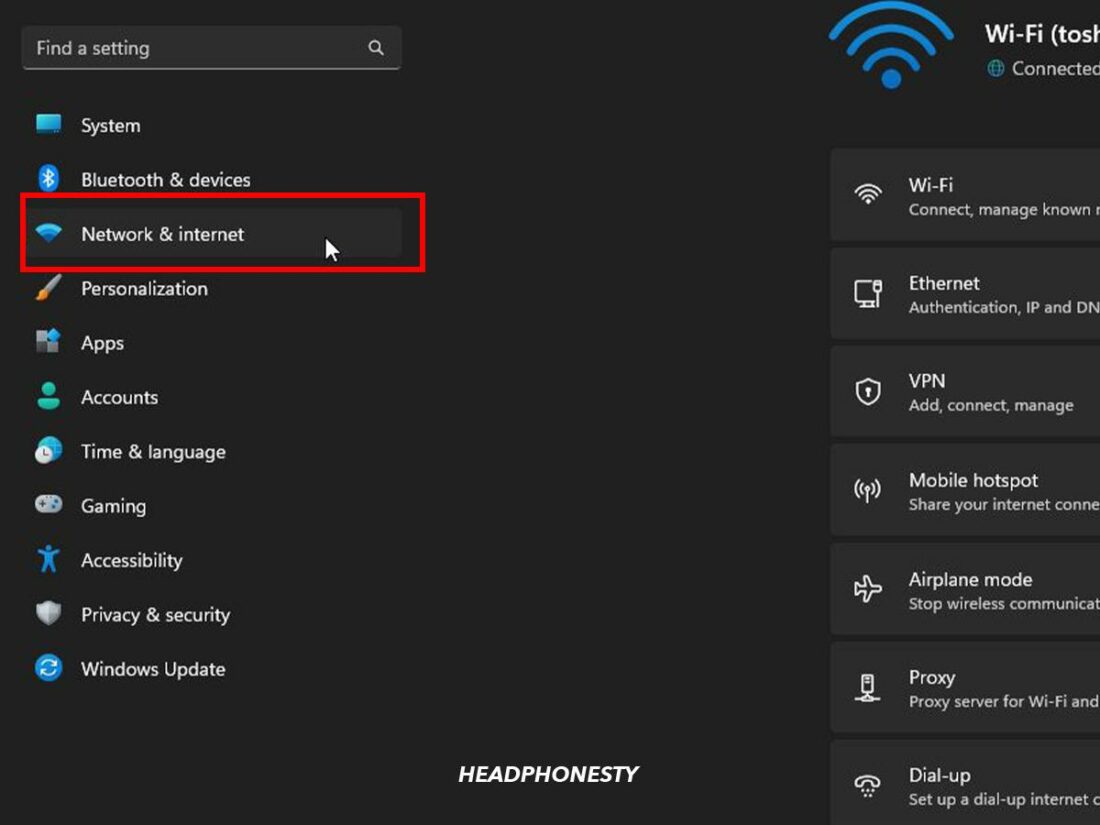
Open ‘Settings’ on Windows. - Select Network & internet.
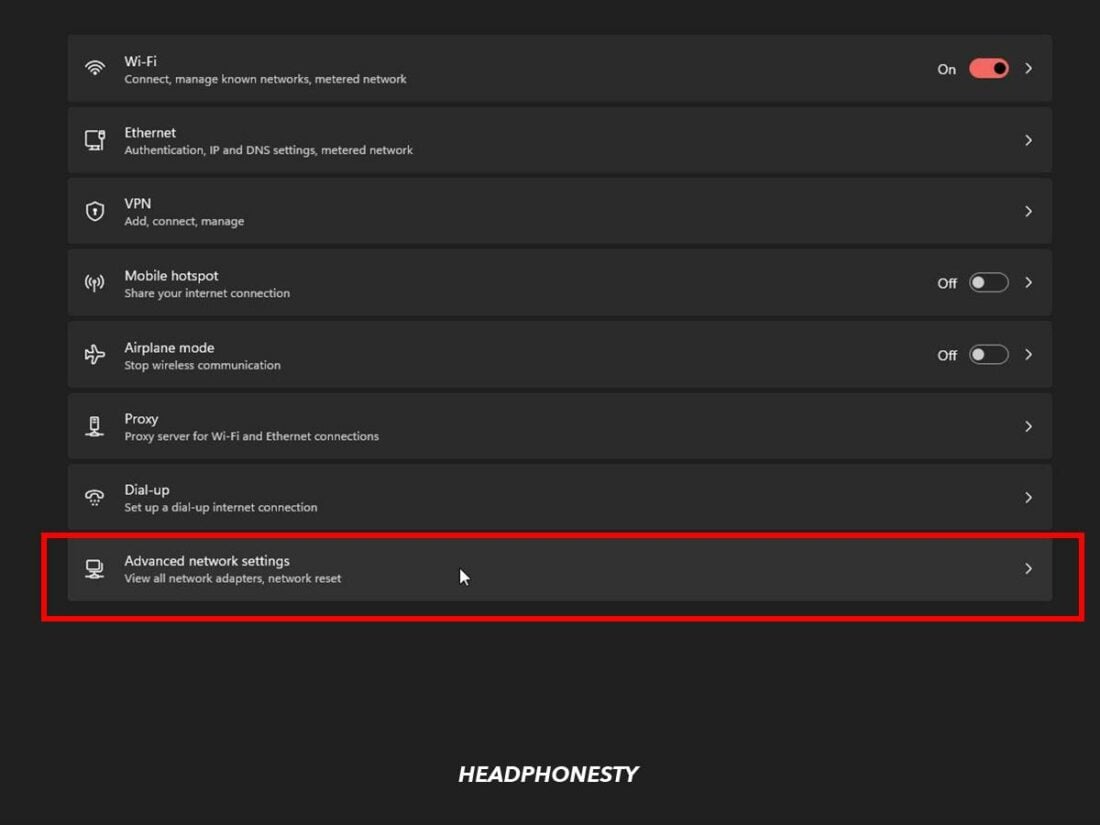
Click ‘Network and Internet’. - Select Advanced network settings.
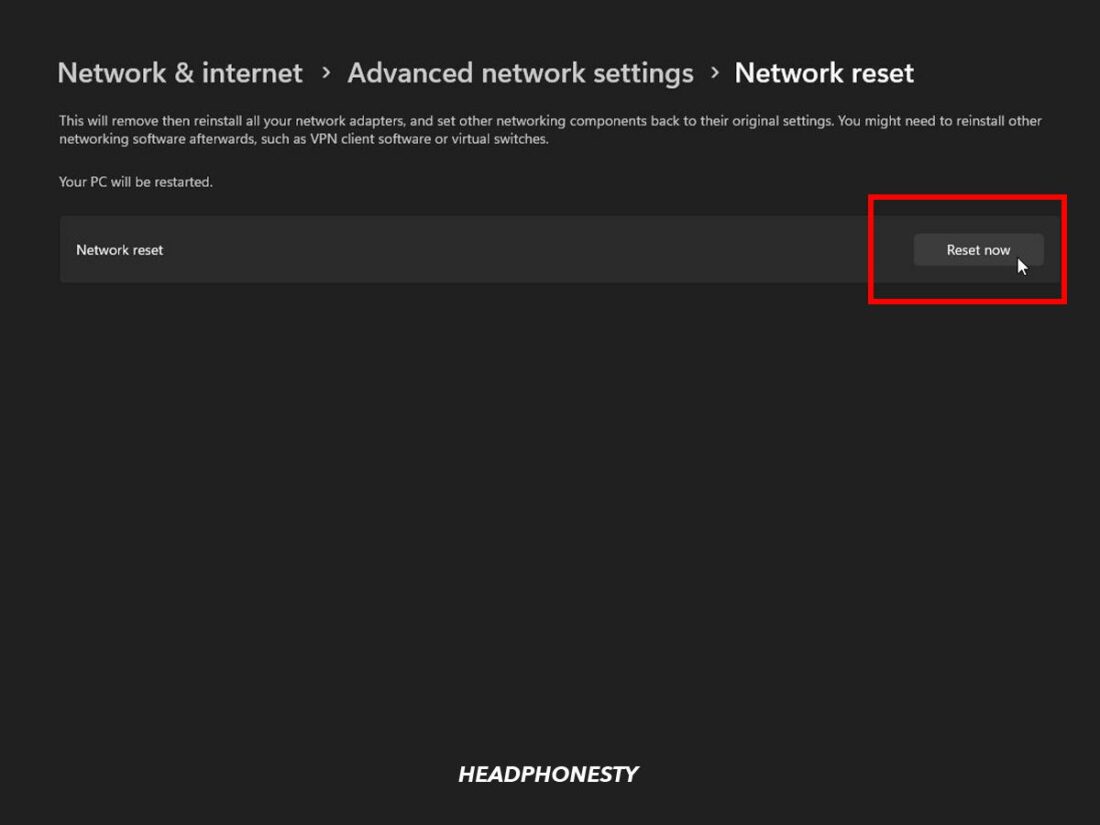
Click ‘Advanced network settings’. - Click Network reset, then Reset now.
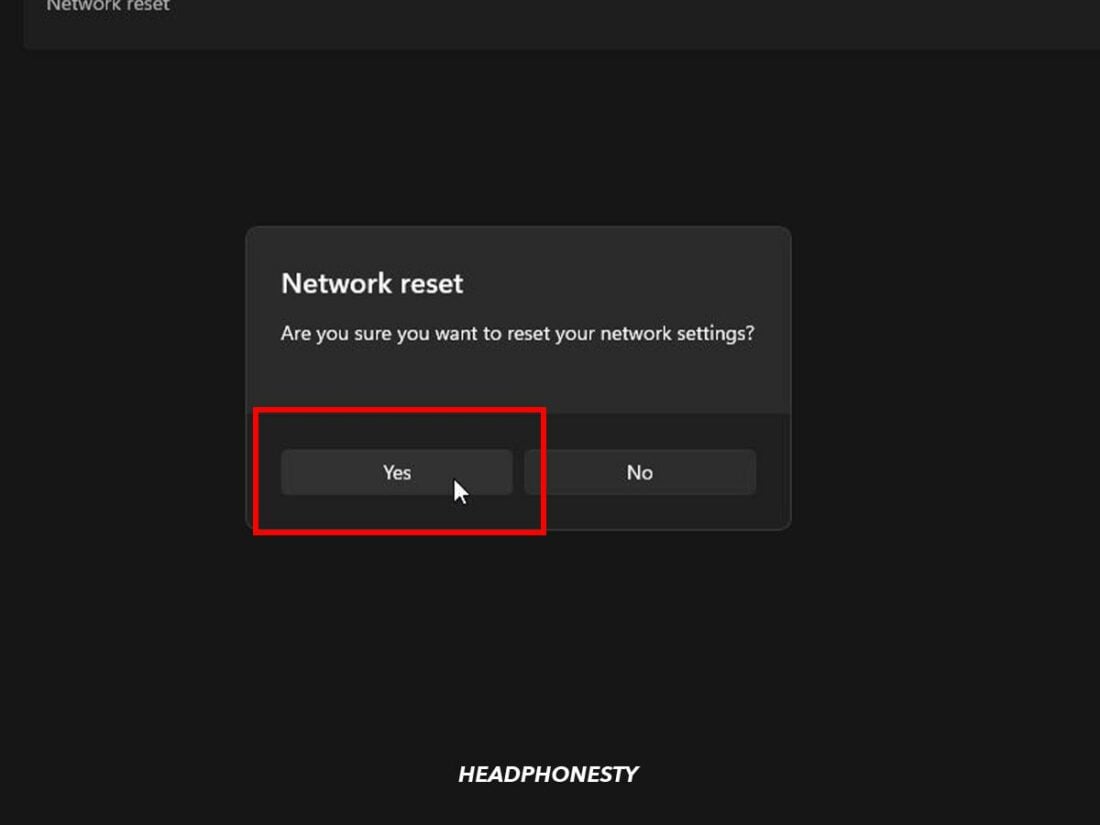
Click ‘Reset now’. - Click Yes to confirm. Your computer will automatically restart to apply the changes.
Click ‘Yes’ to confirm.

7. Restart and Reconfigure Bluetooth Support Service Settings
On Windows, several programs usually run in the background at any time. They help monitor the system, check for updates and provide other essential services. For example, Bluetooth Support Services help to regulate and control remote Bluetooth device connections, including your AirPods.
If it’s not running correctly or fails to start, it might cause issues with your AirPods when using them on Windows. To resolve this, you can restart the service manually and set it to launch whenever you turn on your computer automatically.
Here’s how to do it:
On Windows 10:
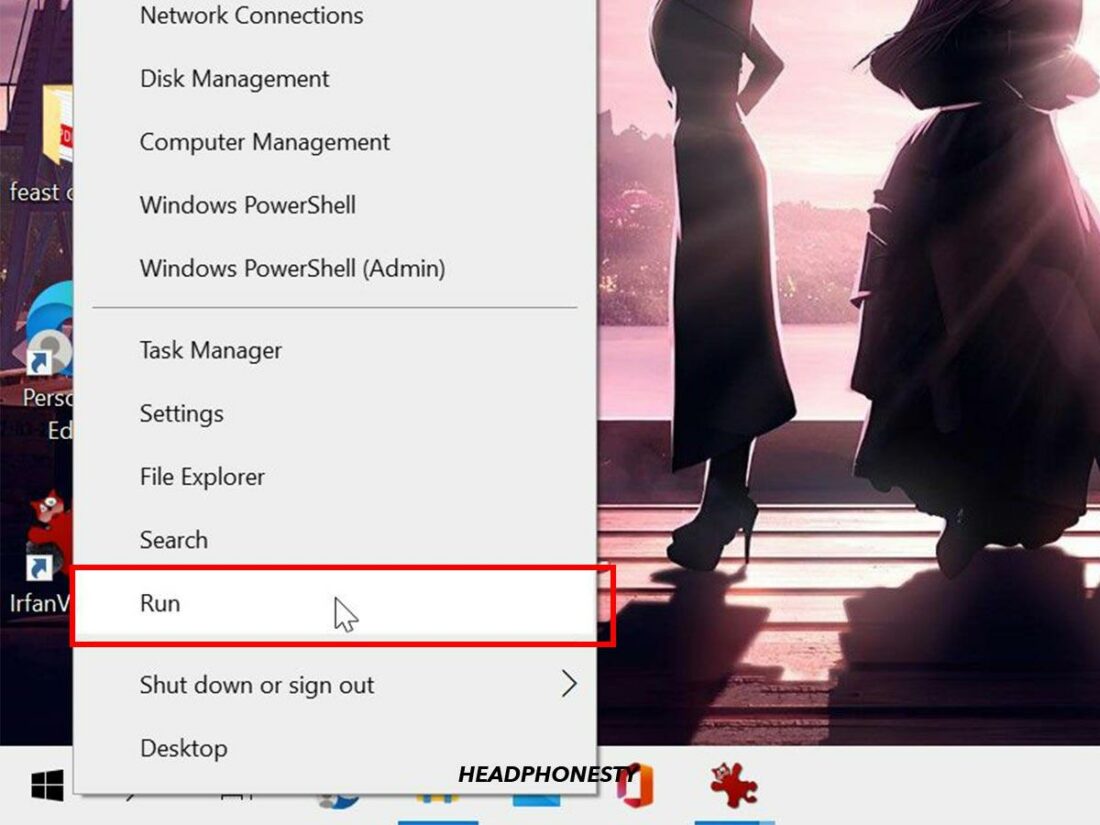
- Right-click on Start and select Run.
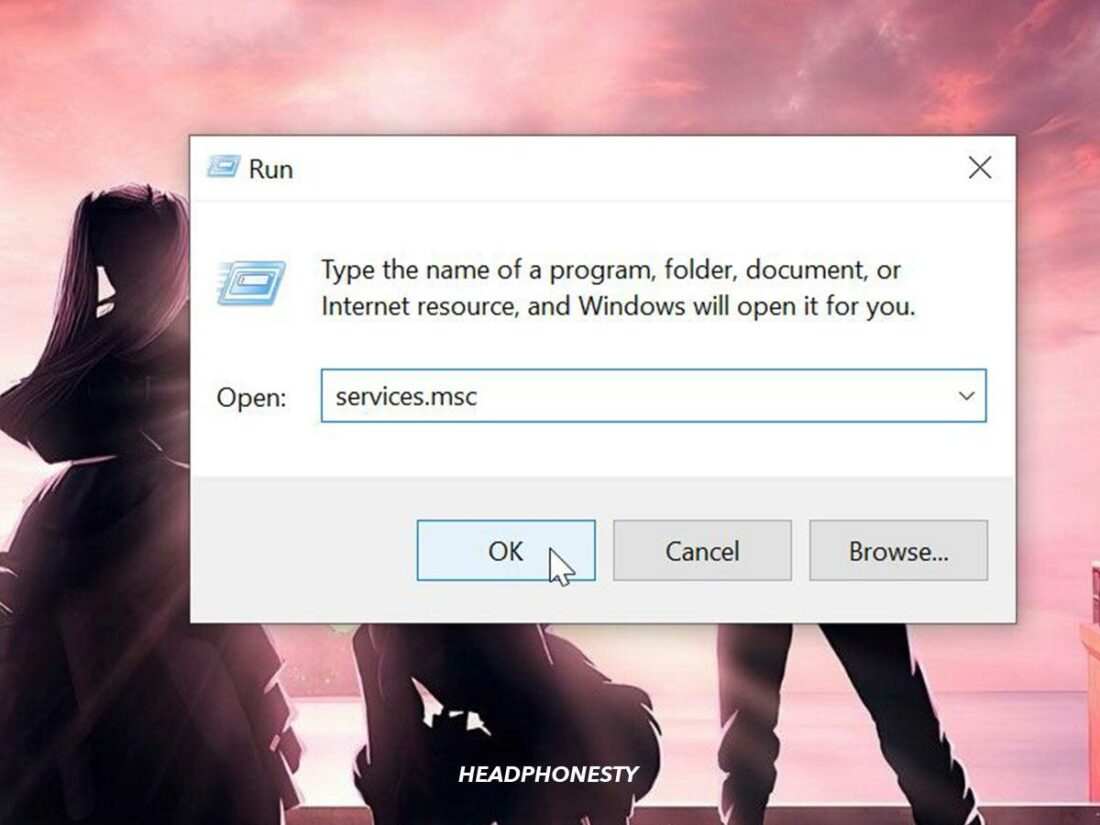
Open the Run dialog box. - Type services.msc into the dialog box and press OK.
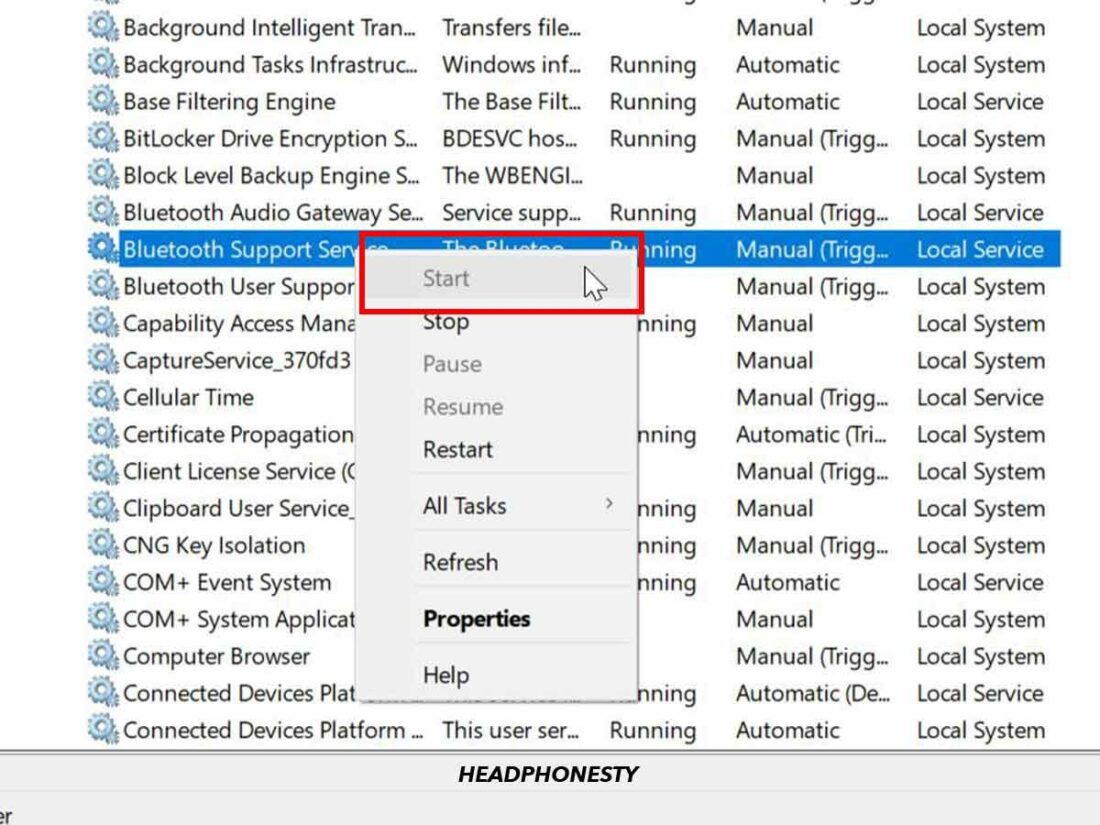
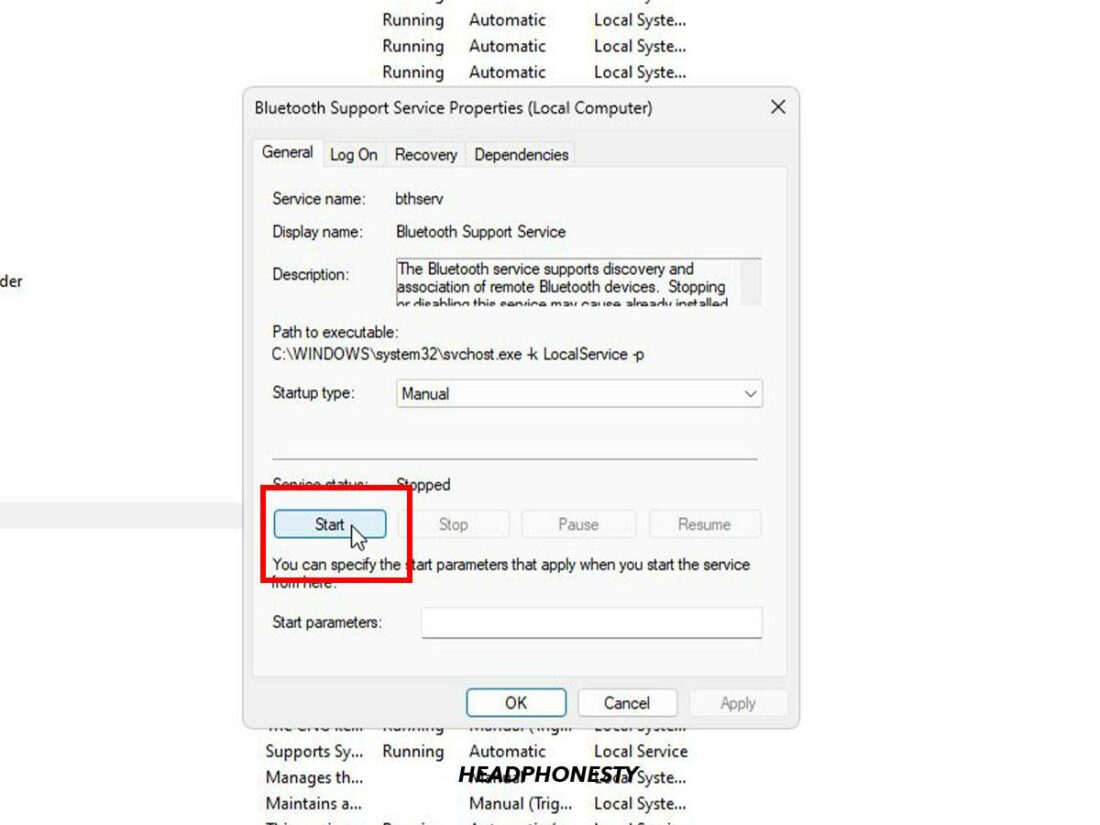
Open Services. - Double-click Bluetooth Support Service and check that the Service status indicates Running. If not, click Start.
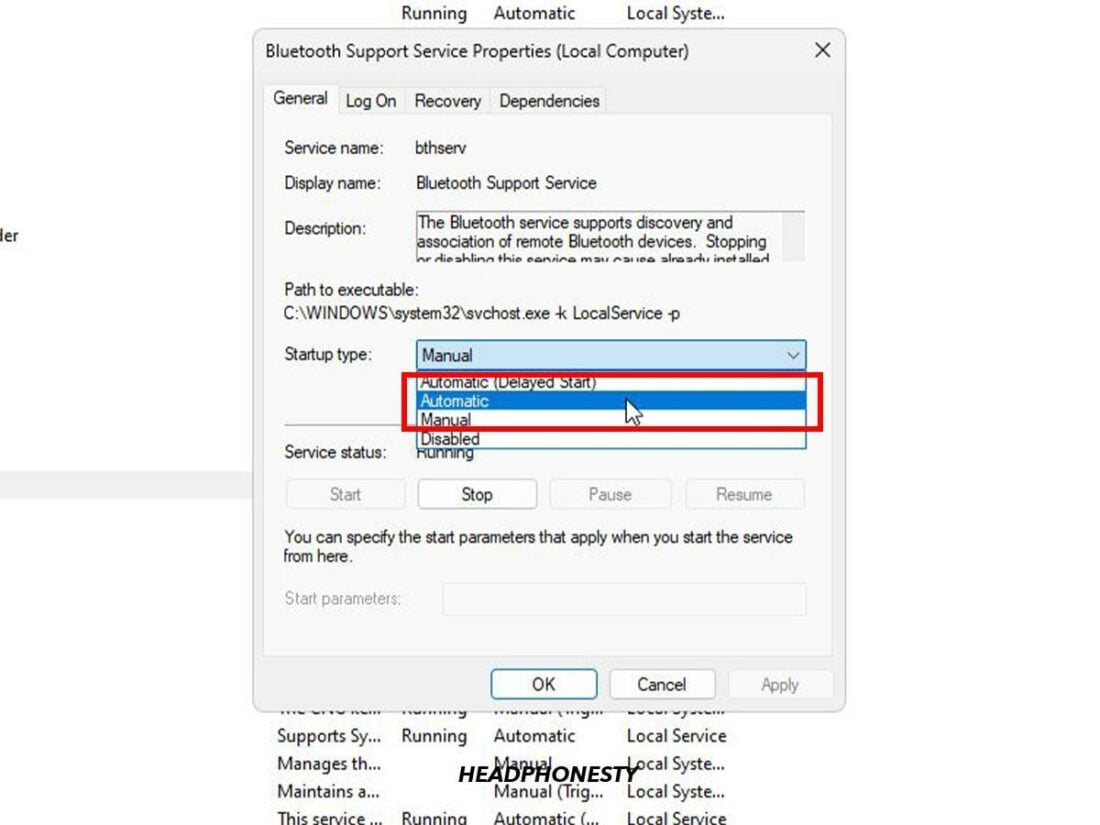
Click ‘Start’. - Click the drop-down menu beside Startup type and select Automatic.
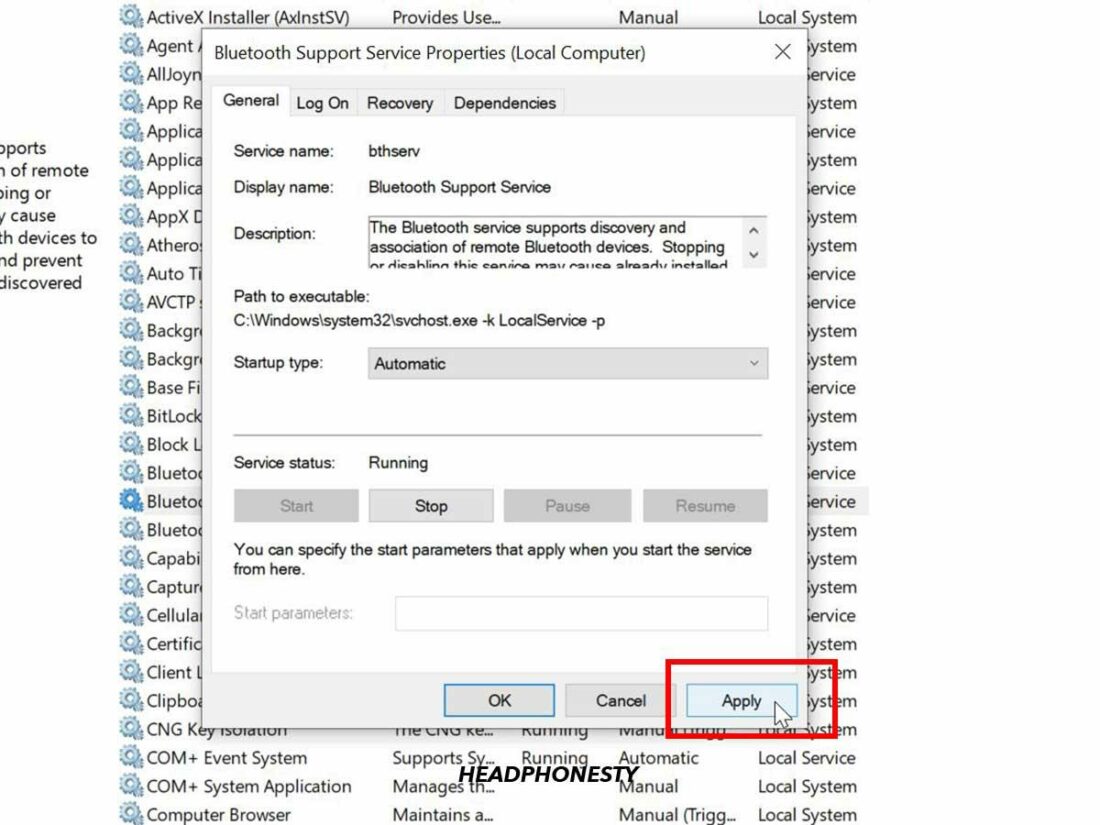
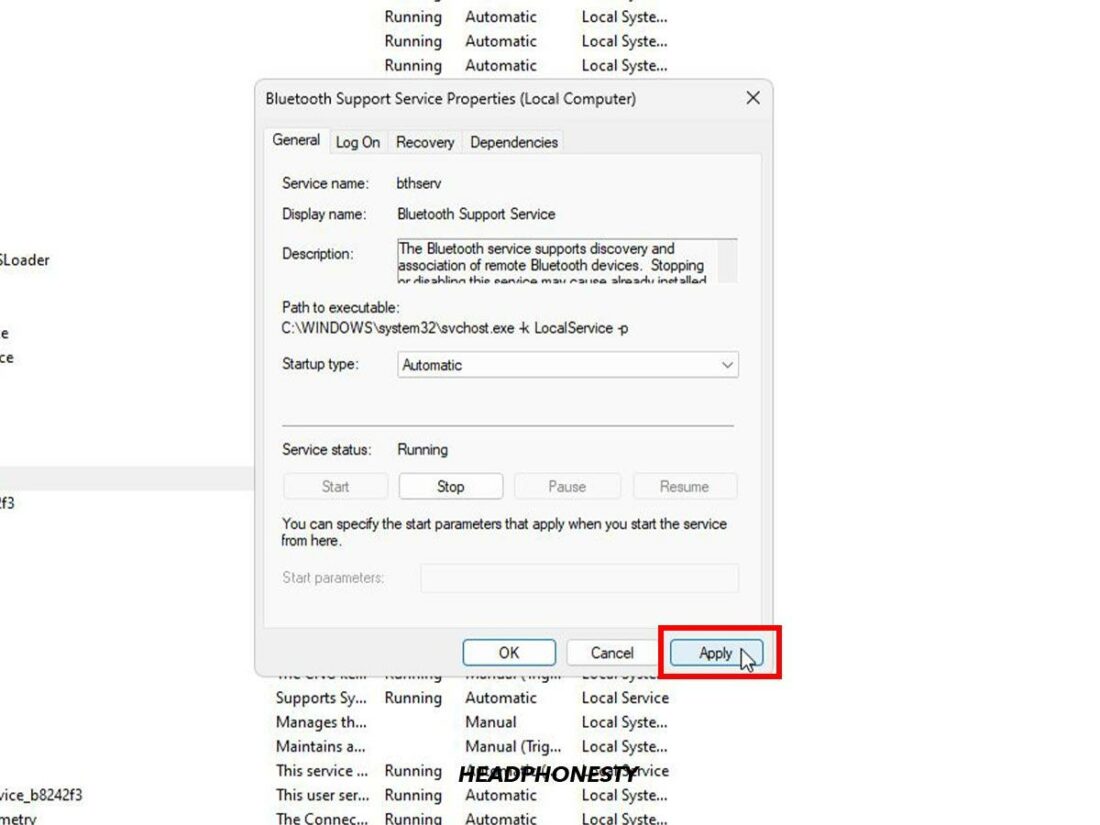
Select ‘Automatic’. - Click Apply, then OK to exit.
Click ‘Apply’.

On Windows 11:
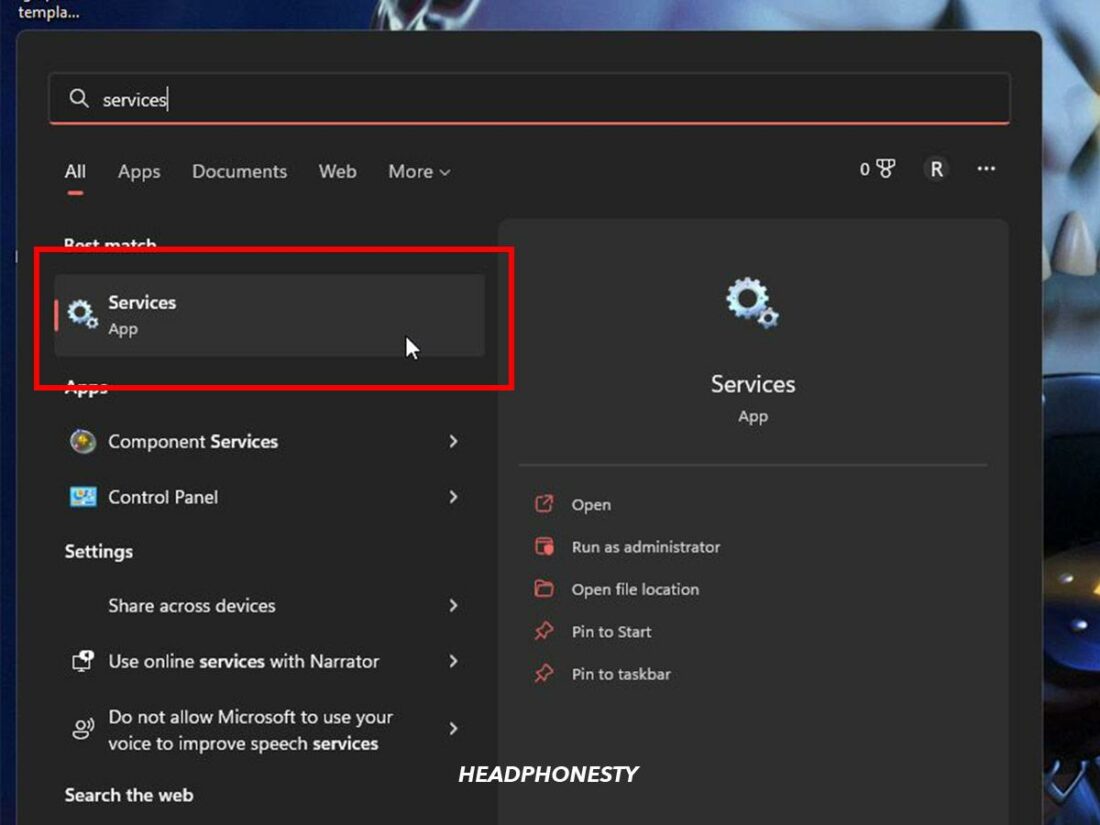
- Press the Windows key and S together to launch the search bar.
Launch the search bar. - Type in services and launch the Services app.
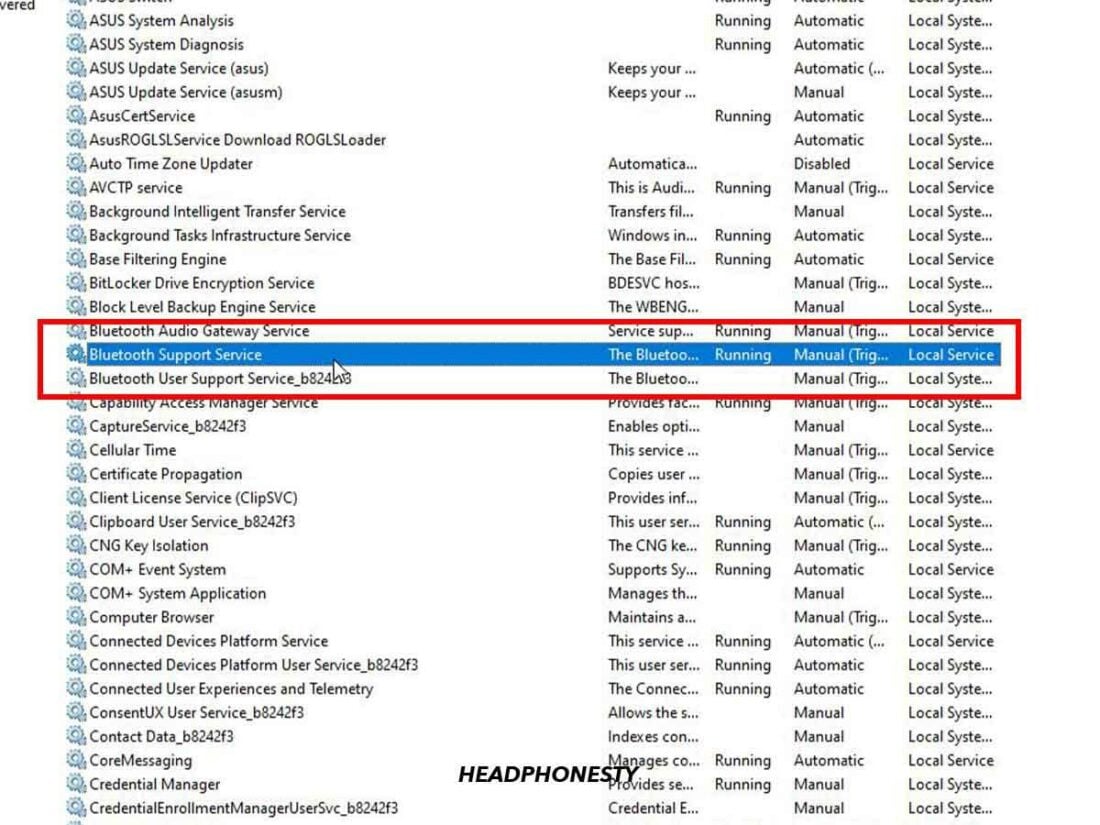
Open Services. - Double-click Bluetooth Support Service.
Double-click Bluetooth Support Service. - In the General tab, click Stop under Service status. Then click, Start to restart it.
Click ‘Start’. - Click the drop-down menu beside Startup type and select Automatic.
Select ‘Automatic’. - Click Apply, then OK to exit.
Click ‘Apply’.

8. Run Bluetooth Device Troubleshooter
Windows has several built-in troubleshooters to help users with common issues. These include troubleshooting Bluetooth devices, hardware and device problems, and audio playback errors. When launched, the troubleshooter automatically detects issues with your Bluetooth devices and starts to repair them.
Try running the Bluetooth device troubleshooter and see if it solves the problem with your AirPods. Here’s what to do:
On Windows 10:
- Open Settings.
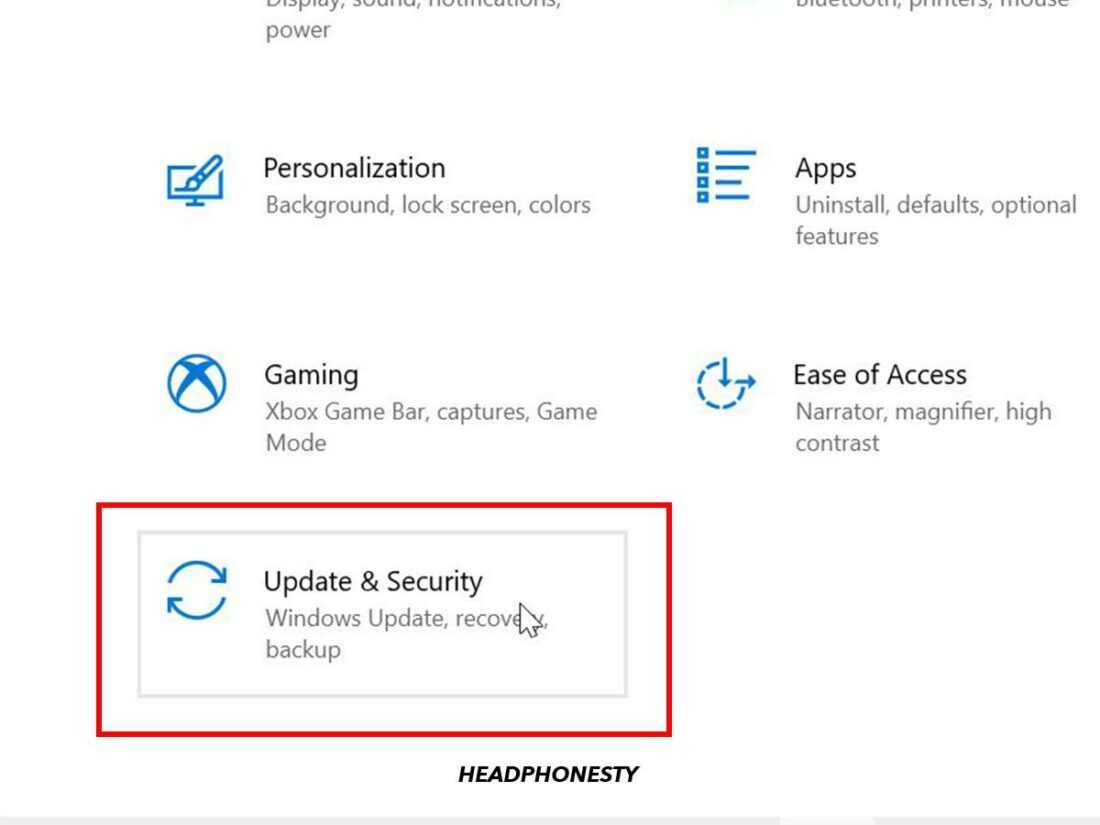
Open ‘Settings’ on Windows. - Select Update & Security.
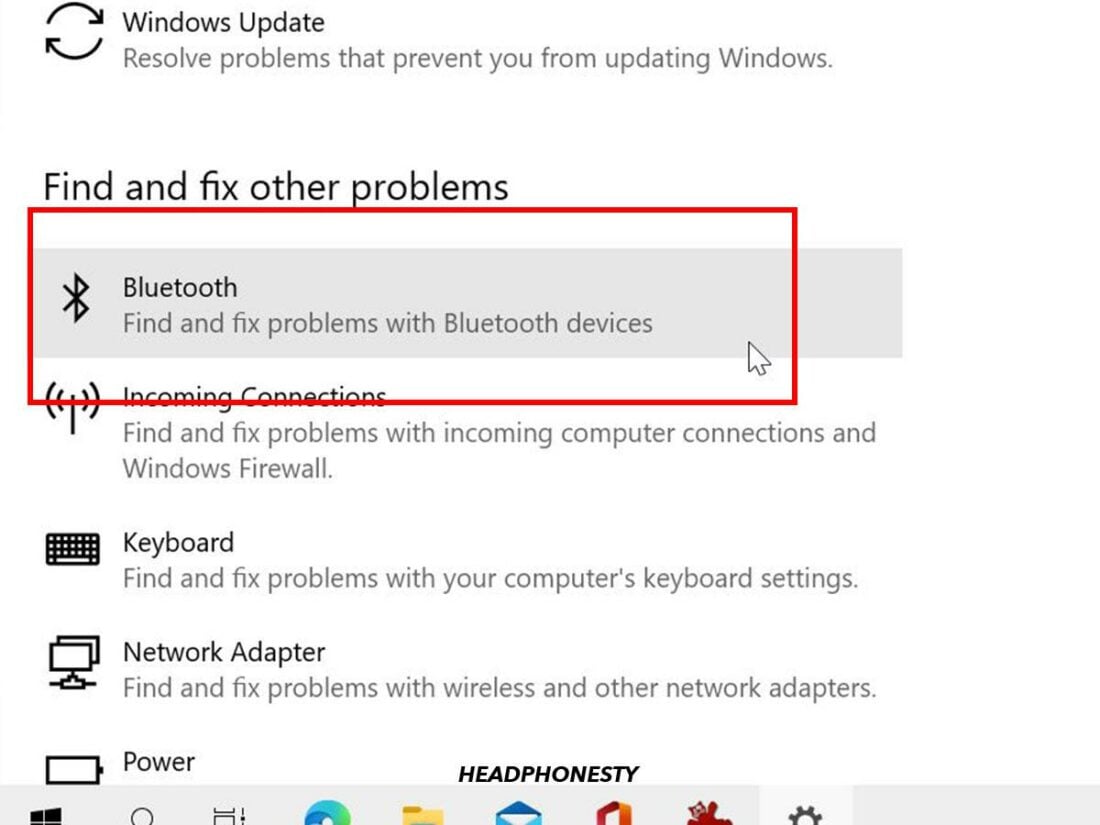
Open Update & Security. - Under Find and fix other problems, click Bluetooth.
Click ‘Bluetooth’.

On Windows 11:
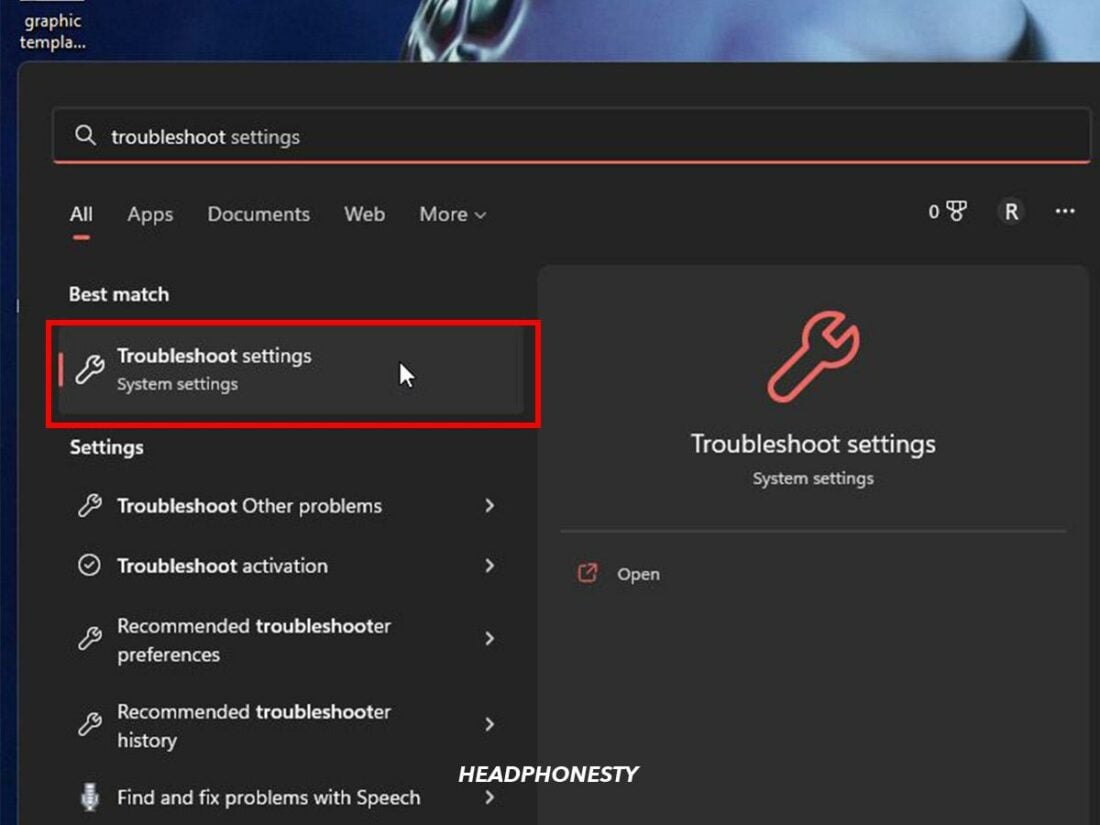
- Type troubleshoot in the search bar and click Troubleshoot settings from the results.
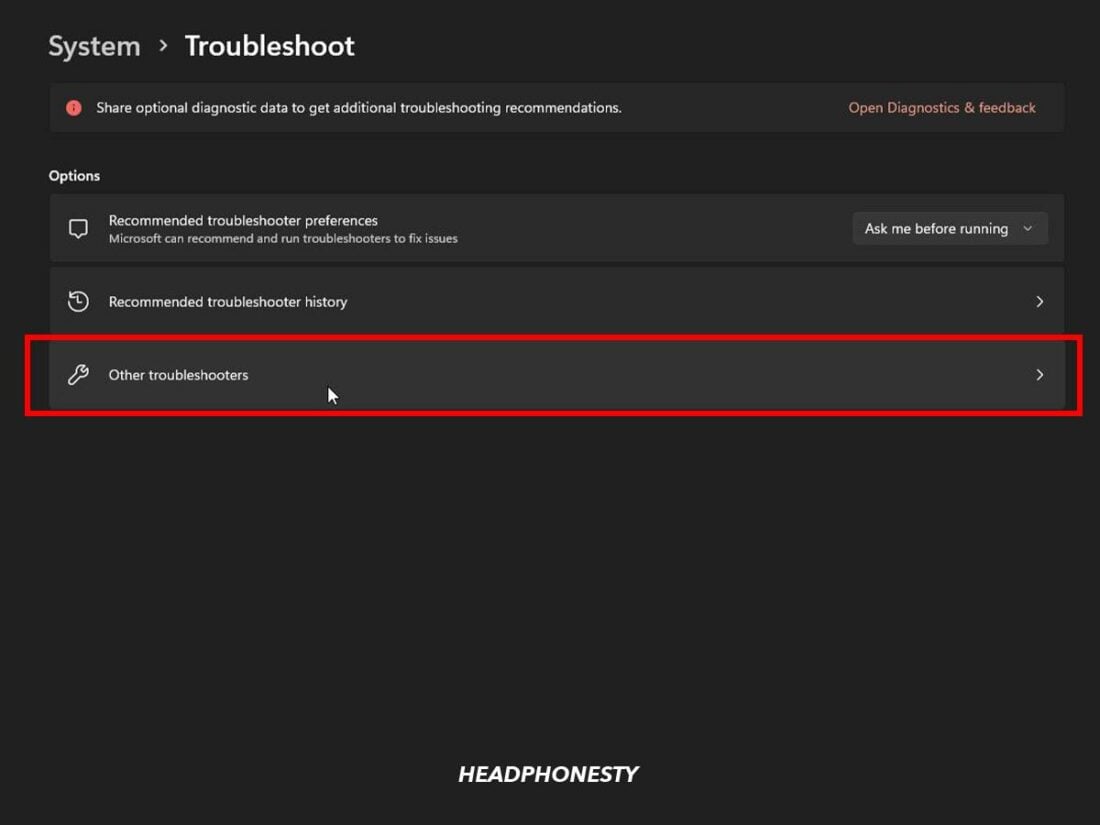
Open Troubleshoot settings. - Click Other troubleshooters.
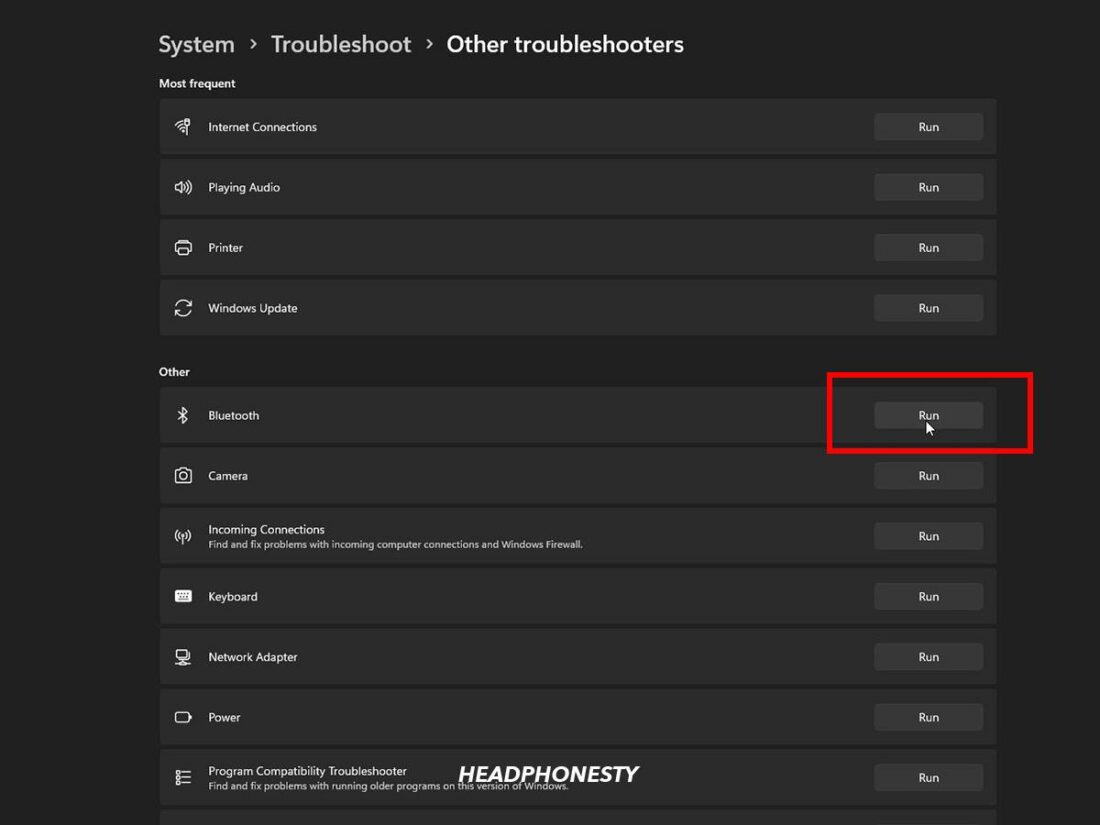
Click ‘Other troubleshooters’. - Select Run next to the Bluetooth troubleshooter.
Click ‘Run’ next to Bluetooth.
9. Run Audio Playback Troubleshooter
Your AirPods’ problem may be due to corrupt audio drivers, headphone connection, or incorrect sound settings on Windows. If that’s the case, you can try to run the audio playback troubleshooter, which may help with common issues playing audio on Windows.
Follow these steps to launch the audio playback troubleshooter:
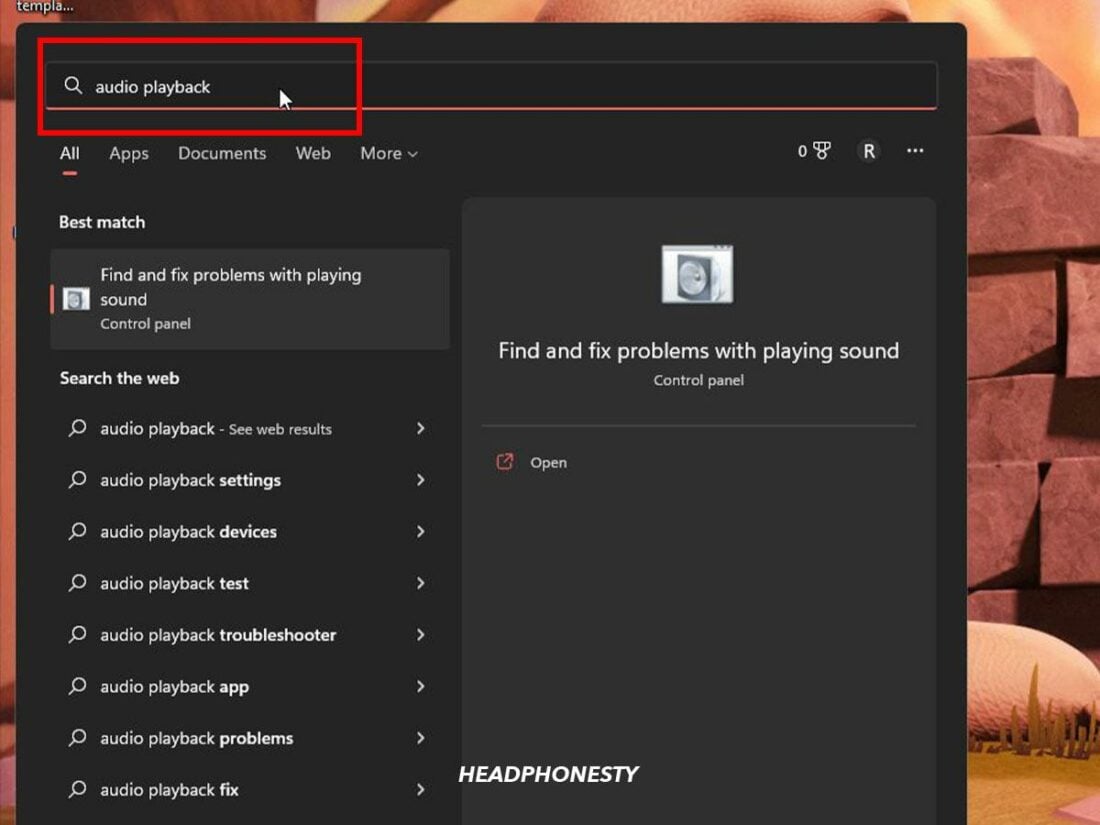
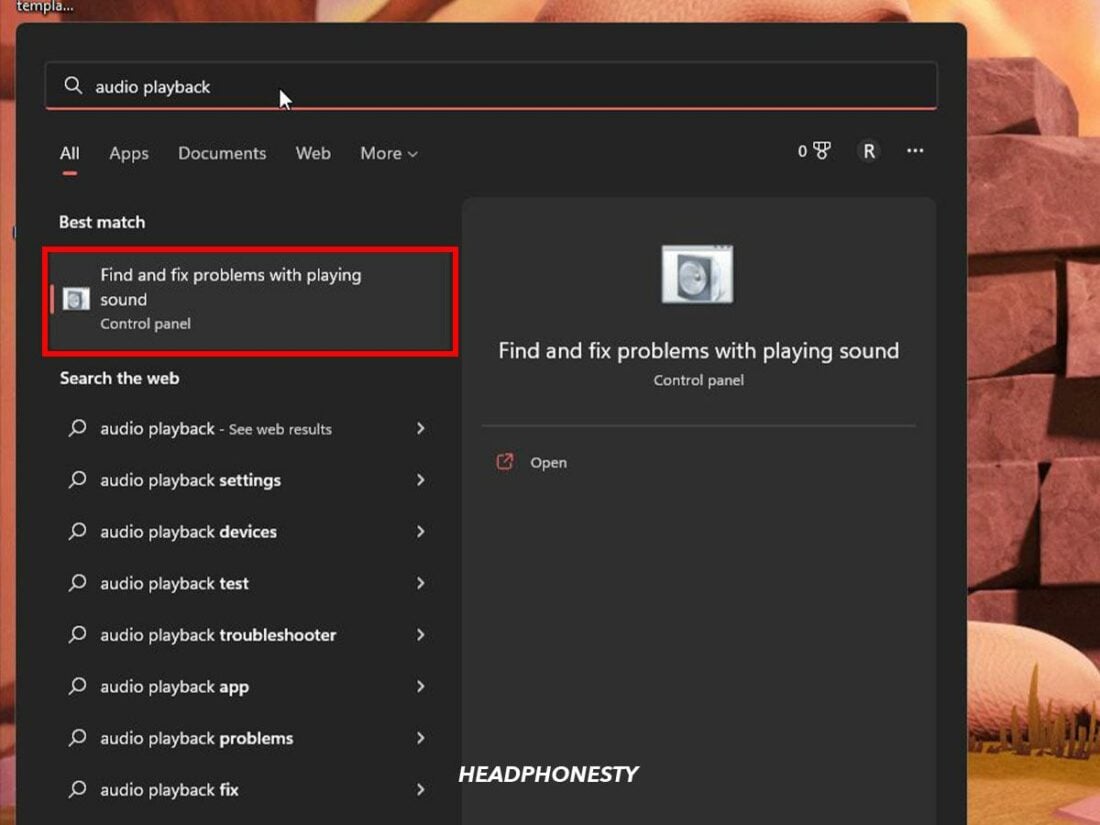
- Type audio playback into the Windows search bar.
Search ‘audio playback’. - Select Find and fix problems with playing sound from the results.
Click ‘Find and fix problems with playing sound’. - Select your AirPods from the list and click Next to start the troubleshooter.
Click ‘Next’.

10. Check and Update Windows OS
Windows frequently release patches that fix bugs and improve overall system functionality. Running an outdated Windows build can lead to incompatibility issues with hardware and other connected devices like your AirPods.
Depending on your settings, these updates may download and install automatically. Otherwise, you may have to install them manually.
Check for the latest Windows updates and see if it fixes your AirPods’ audio problem.
Here’s what you need to do:
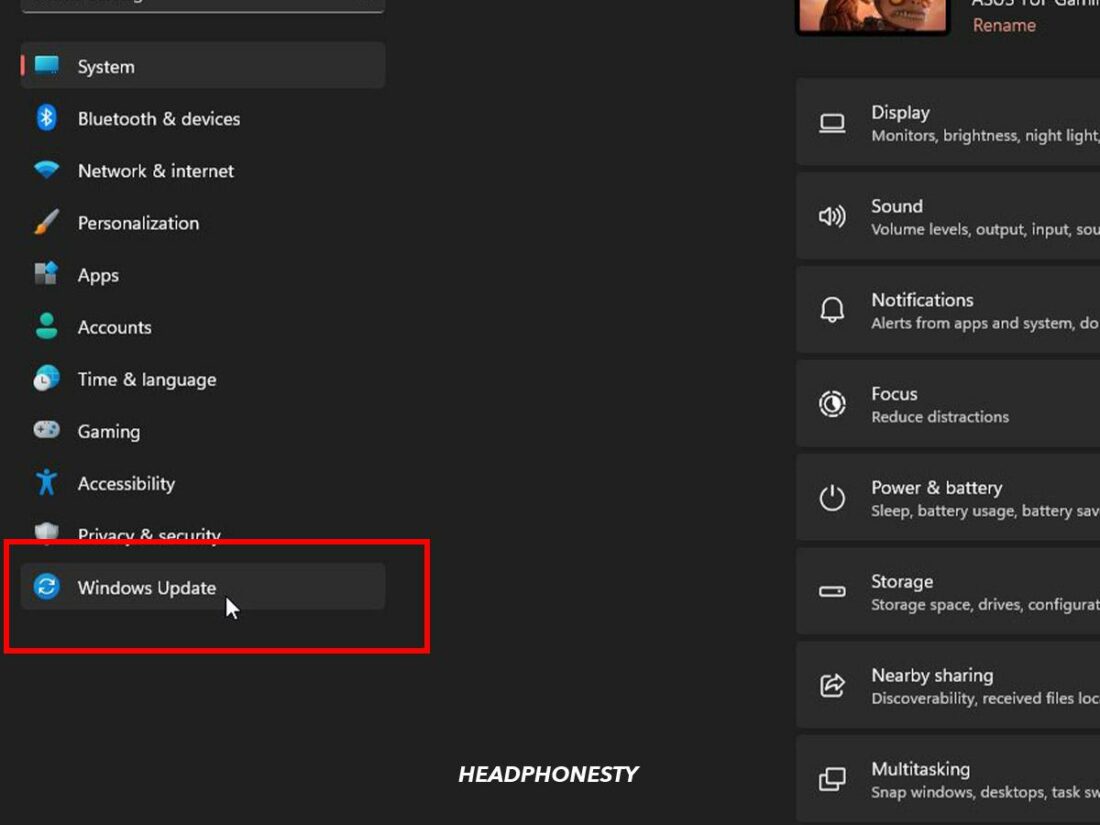
- Open Settings.
Click ‘Settings’ in Windows. - Select Windows Update.
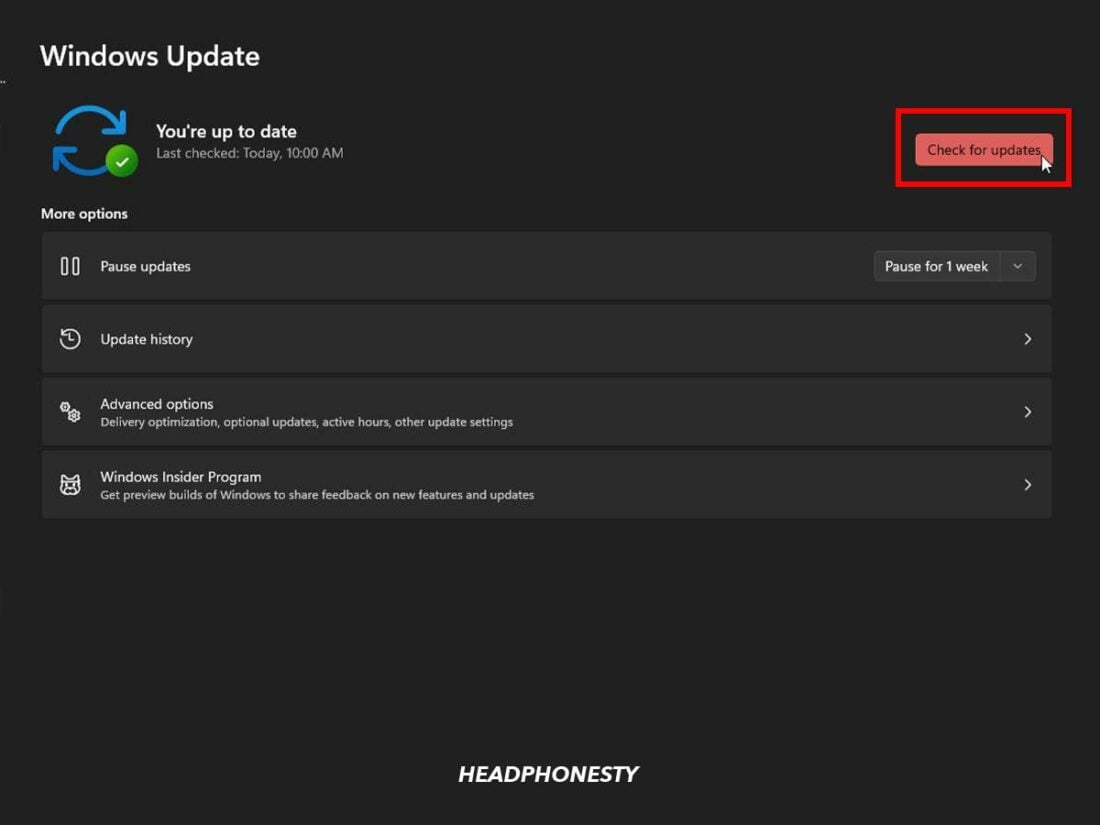
Click ‘Windows Update’. - Click Check for updates. If a new update is available, it should begin to download and install automatically.
Click ‘Check for updates’.

11. Update Bluetooth Driver
If the Bluetooth drivers on your PC are outdated, it can affect Bluetooth connectivity. Moreover, this might also explain why you don’t hear any sound from your AirPod.
You can rectify this by updating your PC’s Bluetooth drivers. Follow these steps:
On Windows 10:
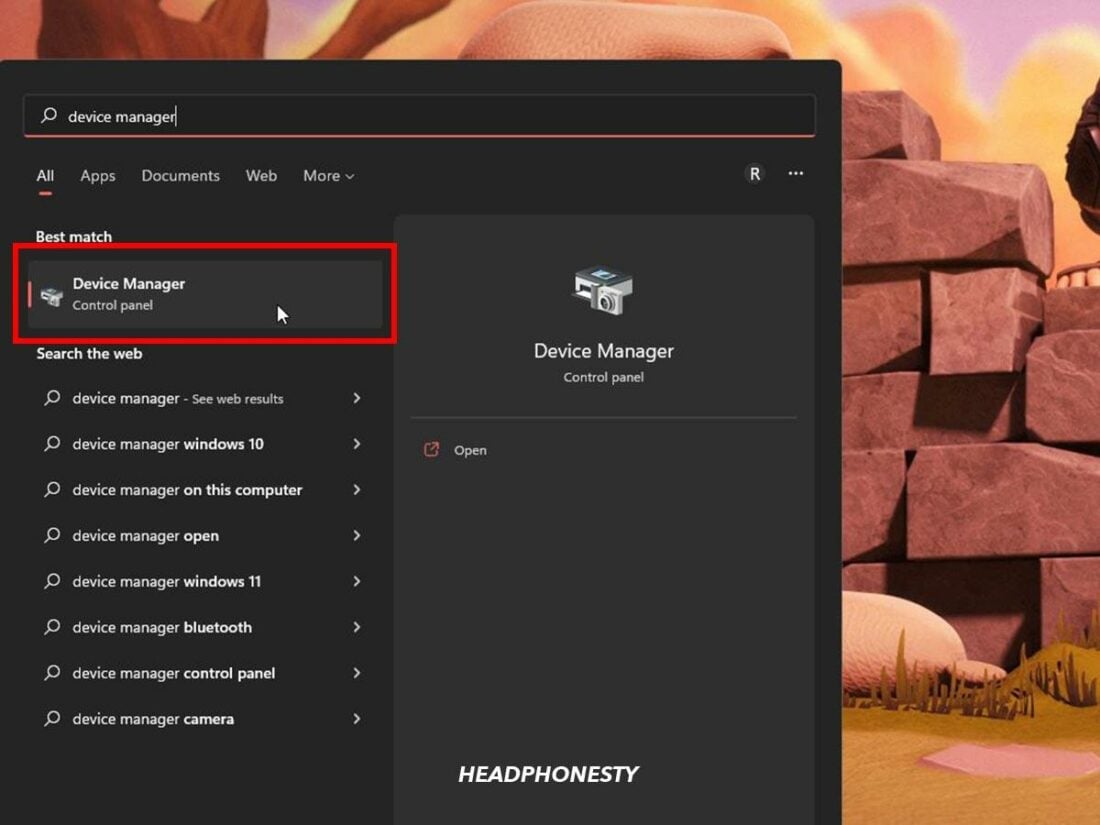
- Type Device Manager in the search bar and launch it.
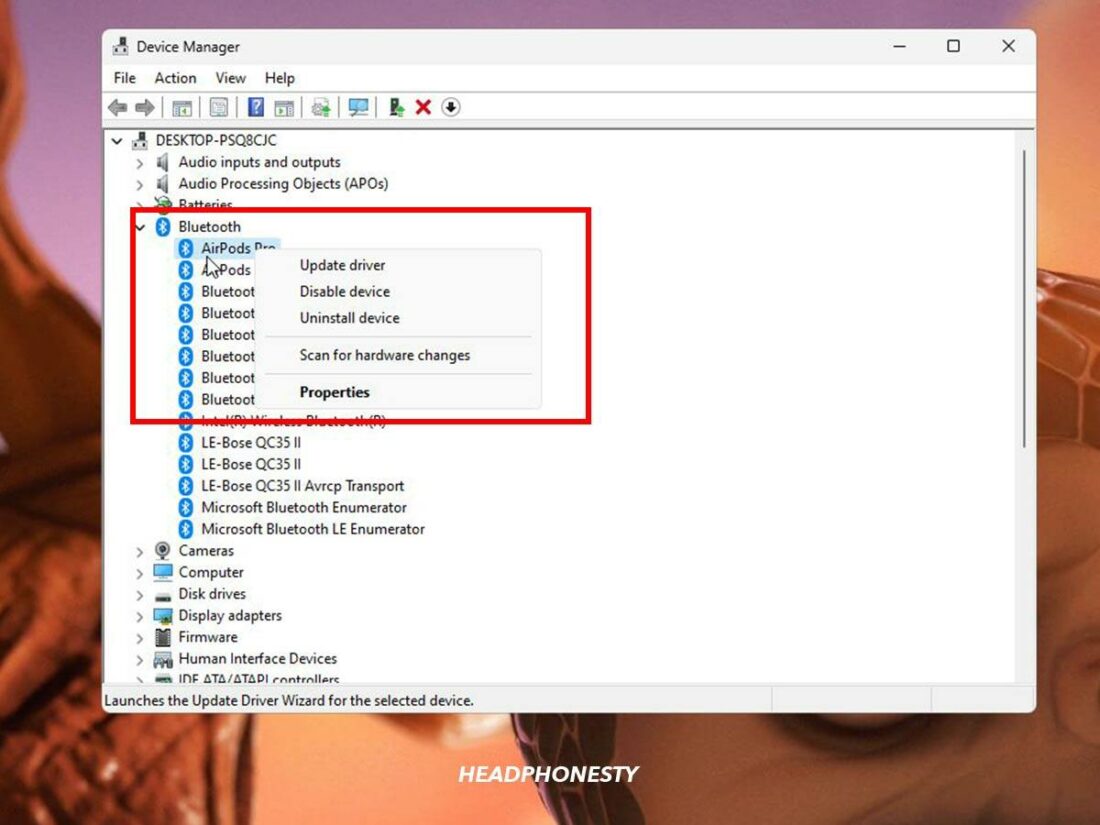
Open Device Manager. - Select Bluetooth, then right-click your AirPods and click Update driver.
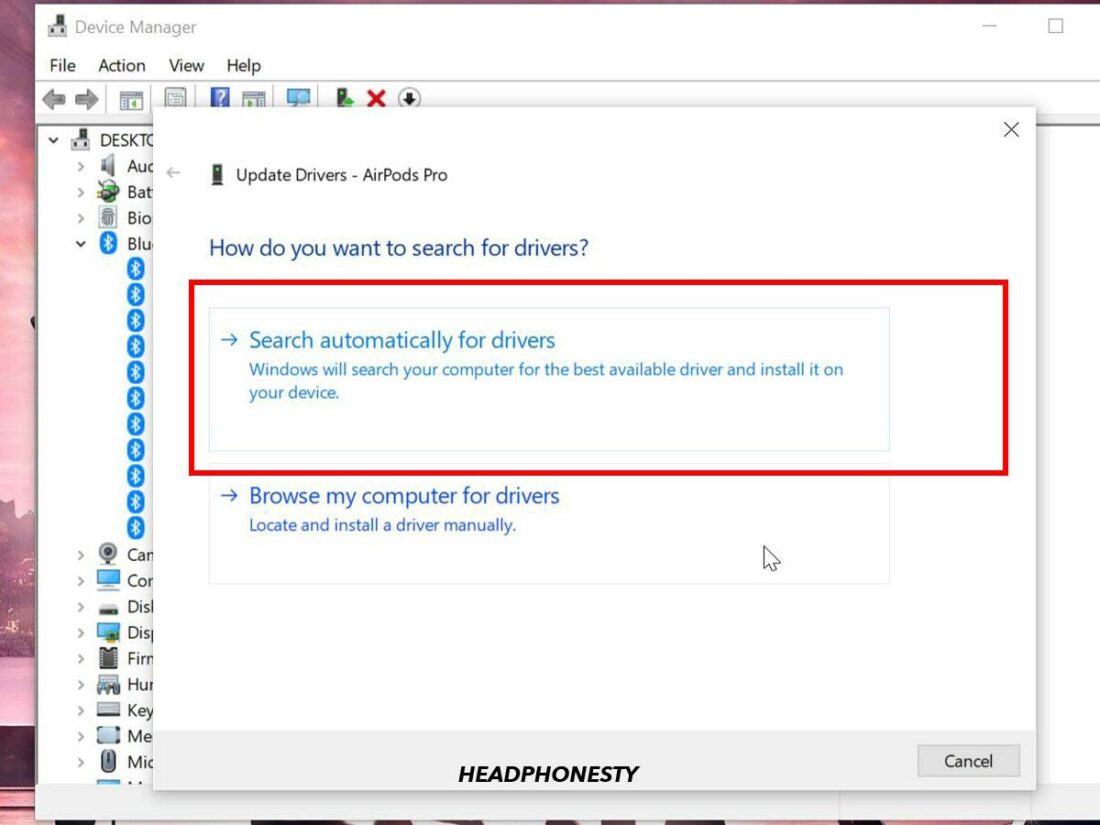
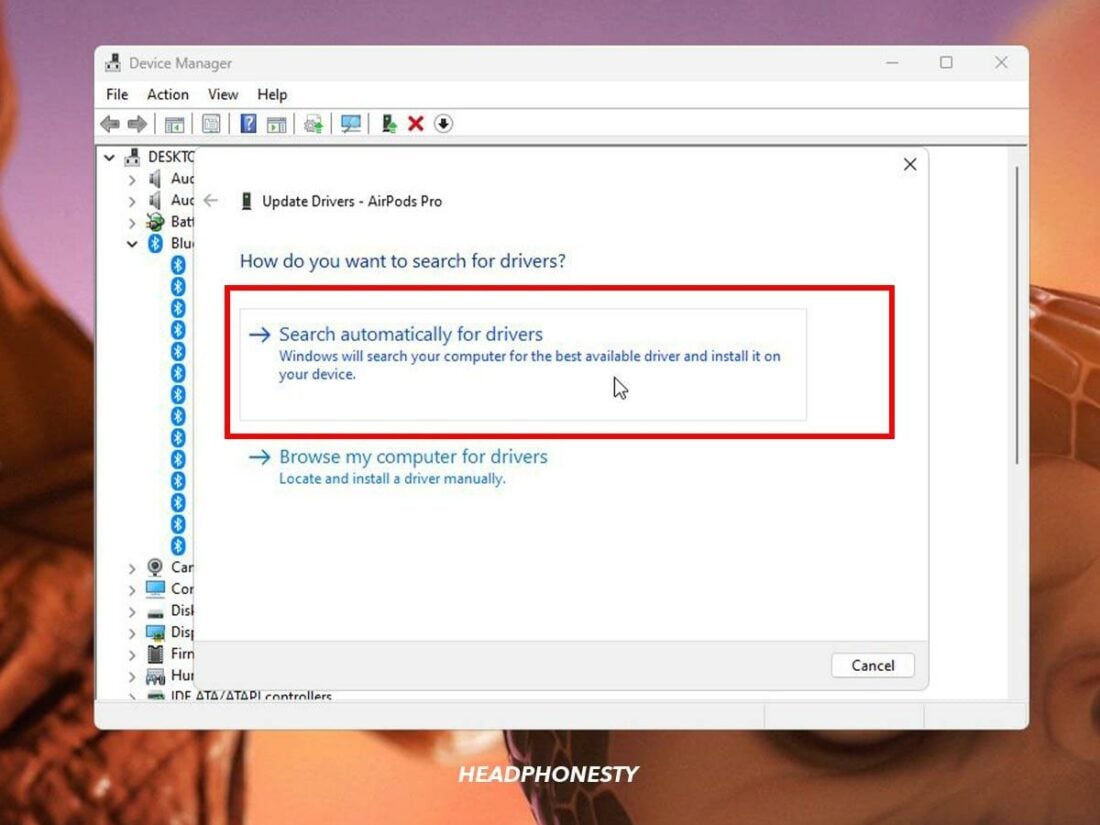
Right-click ‘Bluetooth adapter’. - Click Search automatically for drivers. Windows will begin automatically searching for the latest driver version.
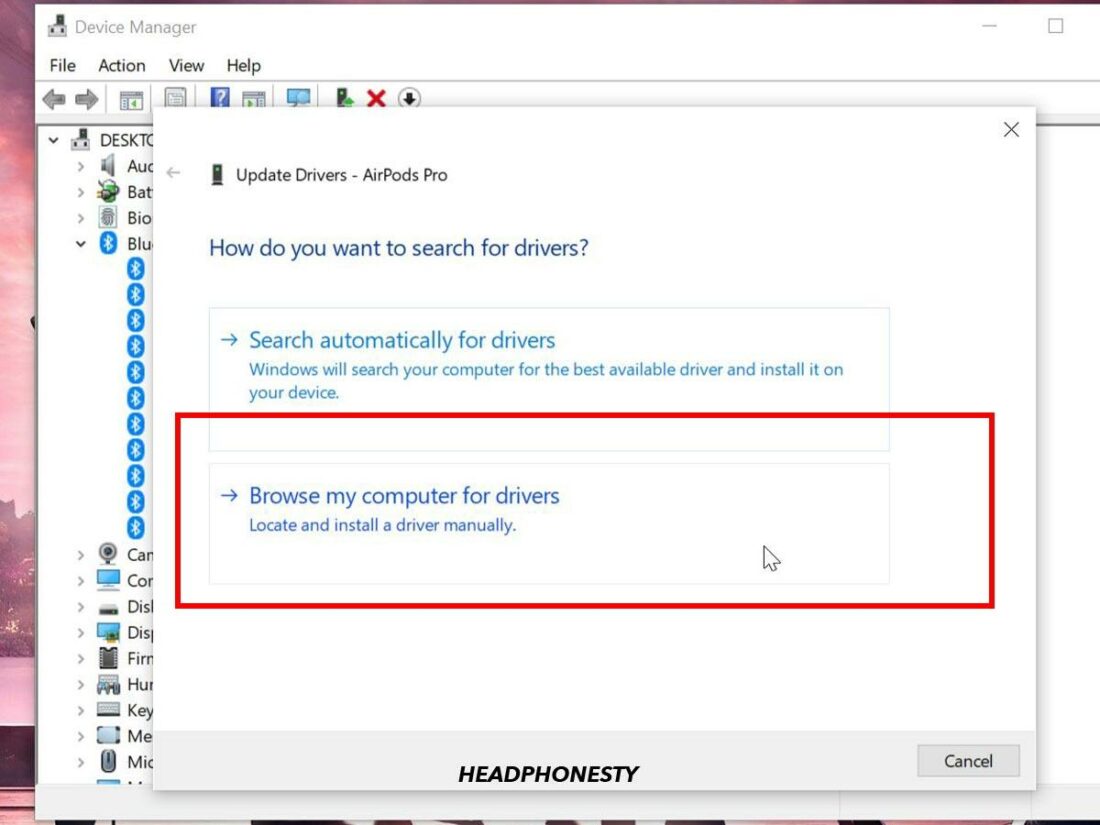
Click ‘Search automatically for drivers’. - If you have downloaded the latest driver installation file from the manufacturer’s website, select Browse my computer for drivers.
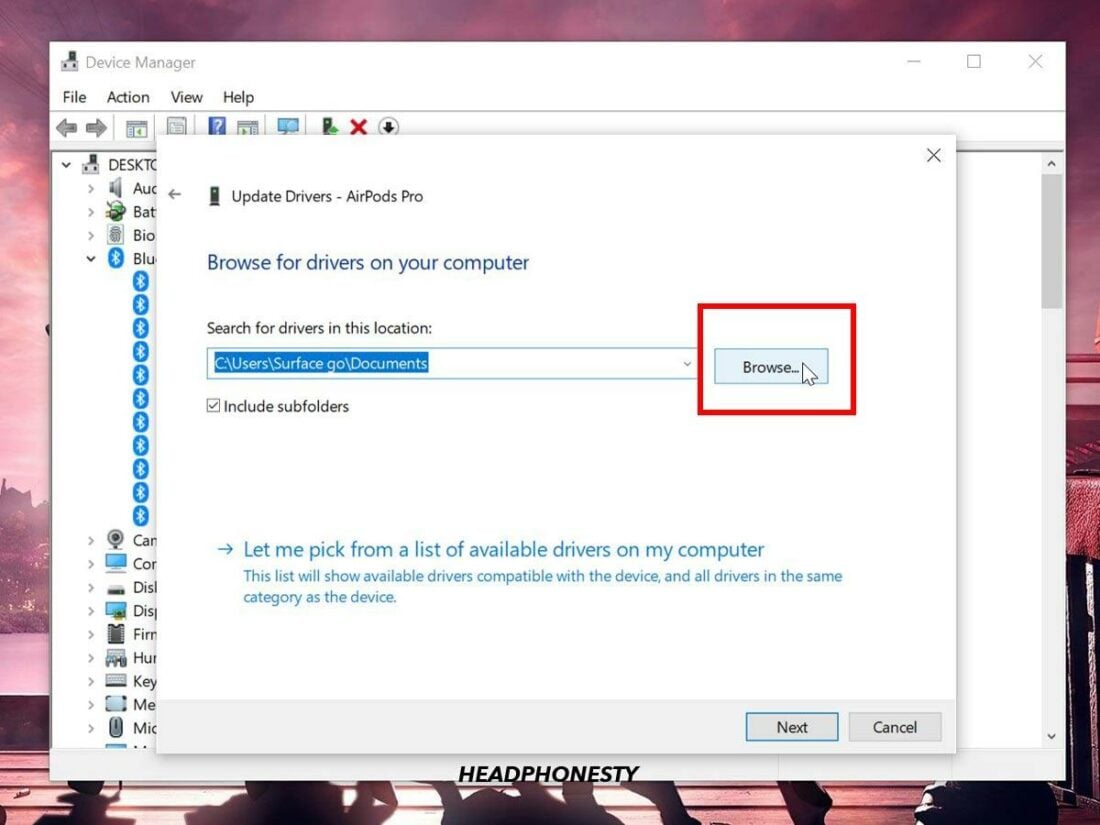
Click ‘Browse my computer for drivers’. - Click Browse to locate where you saved the installation file, then click OK.
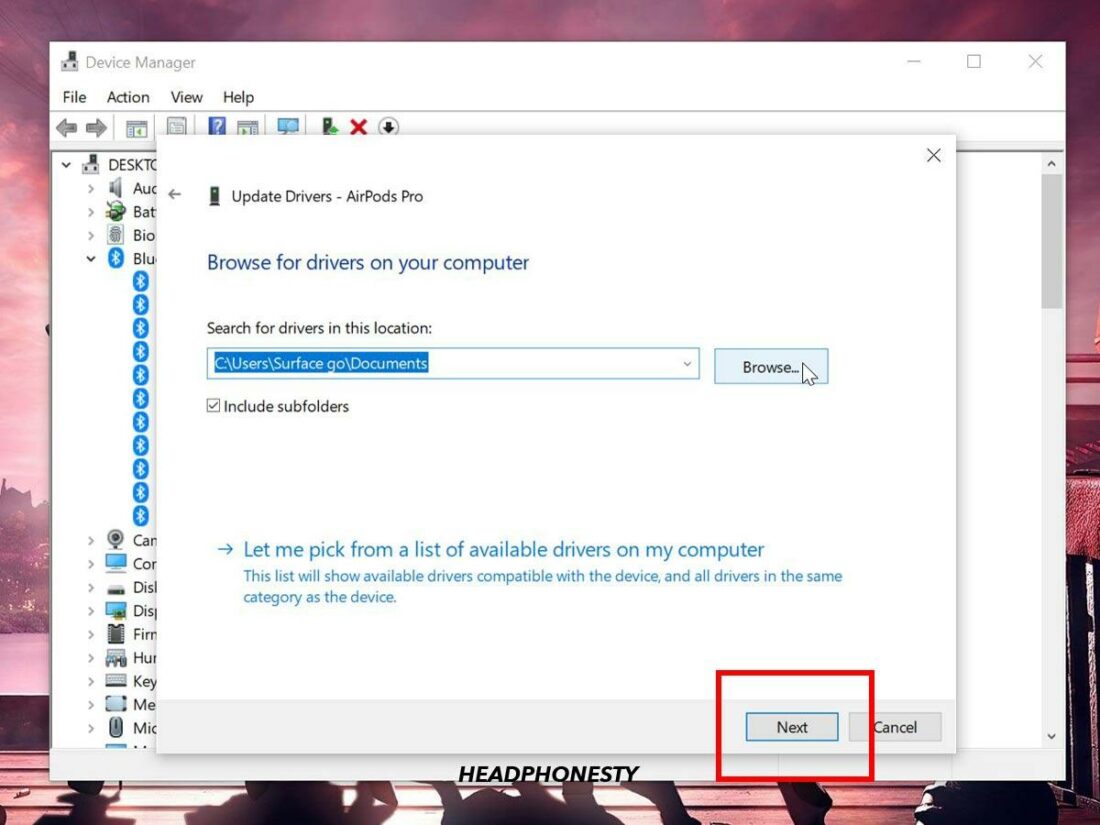
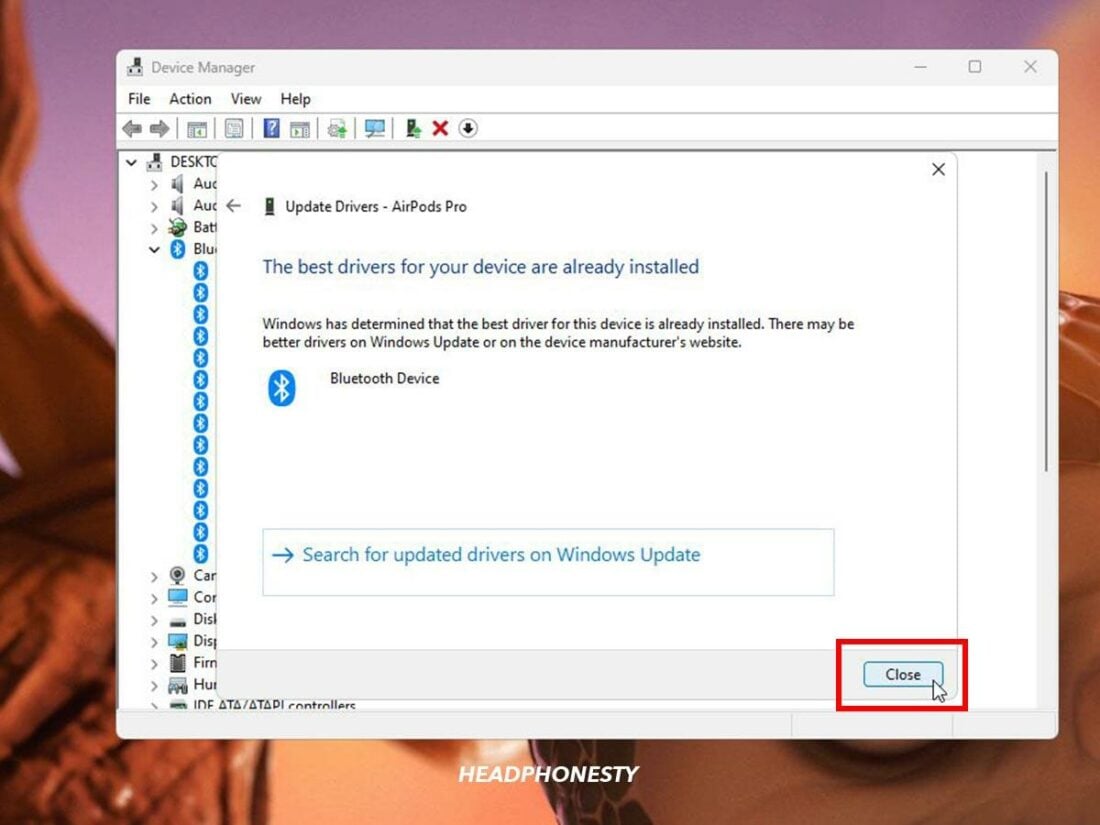
Click ‘Browse’. - Select Next and follow the instructions for installing the driver. Once done, click Close.
Click ‘Next’. - Restart your computer to allow the driver changes to take effect.
Restart PC.


On Windows 11:
- Type Device Manager in the search bar and launch it.
Open Device Manager. - Select Bluetooth, then right-click your AirPods and select Update driver.
Right-click ‘Bluetooth adapter’. - Click Search automatically for drivers. Windows will begin automatically searching for the latest driver version.
Click ‘Search automatically for drivers’. - Follow the steps to install the driver. Once done, click Close and restart your PC.
Click ‘Close’.
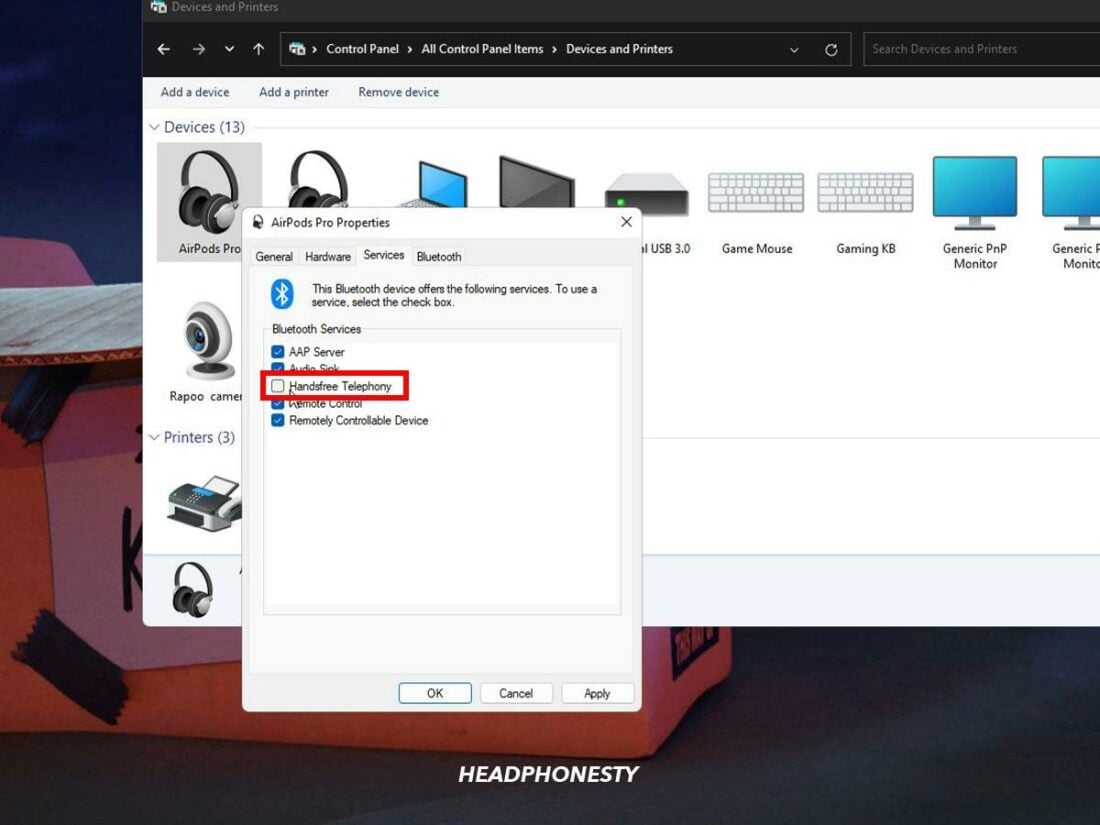
12. Ensure Stereo Audio Is Enabled for AirPods
Windows has a hands-free telephony service that supports Bluetooth headsets for phone calls. However, it can sometimes cause audio problems with your AirPods. We recommend you try disabling this feature and enabling stereo audio instead to see if it helps.
Here are the steps:
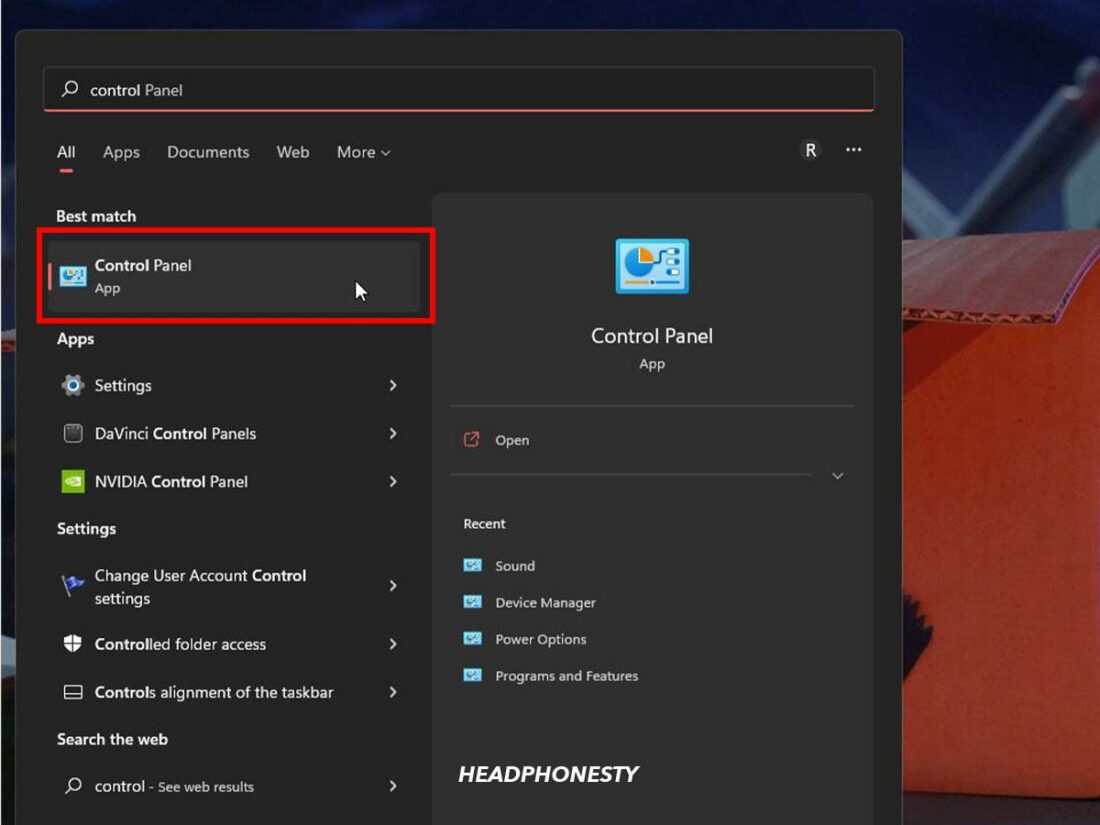
- Type control panel in the search bar and launch it.
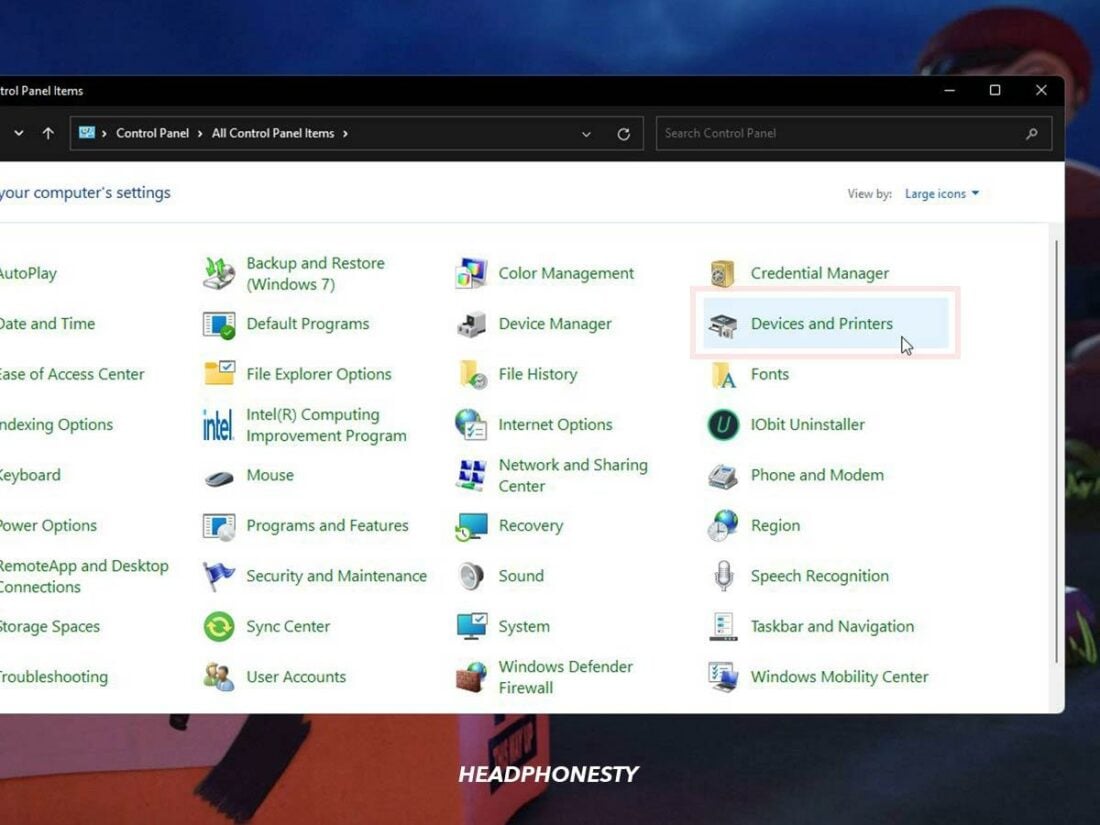
Launch ‘Control Panel’. - Click Device and Printers.
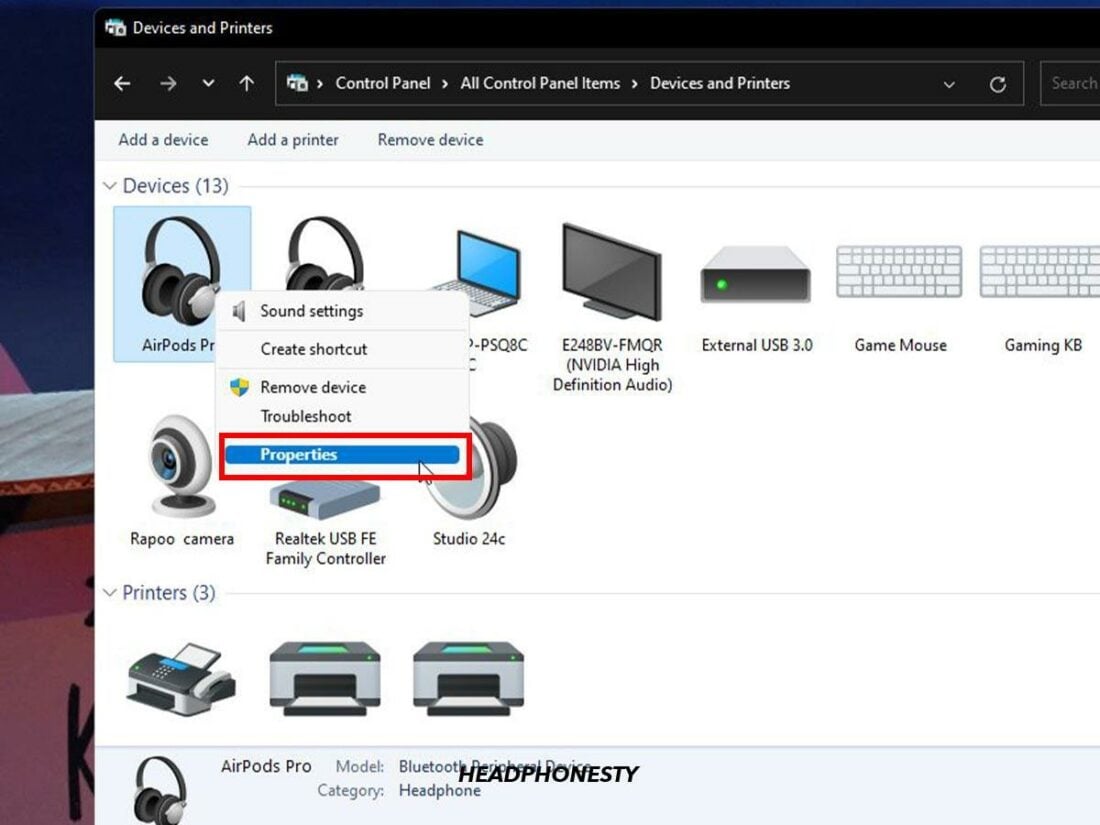
‘Device and Printers’ in Settings. - Right-click your AirPods and select Properties.
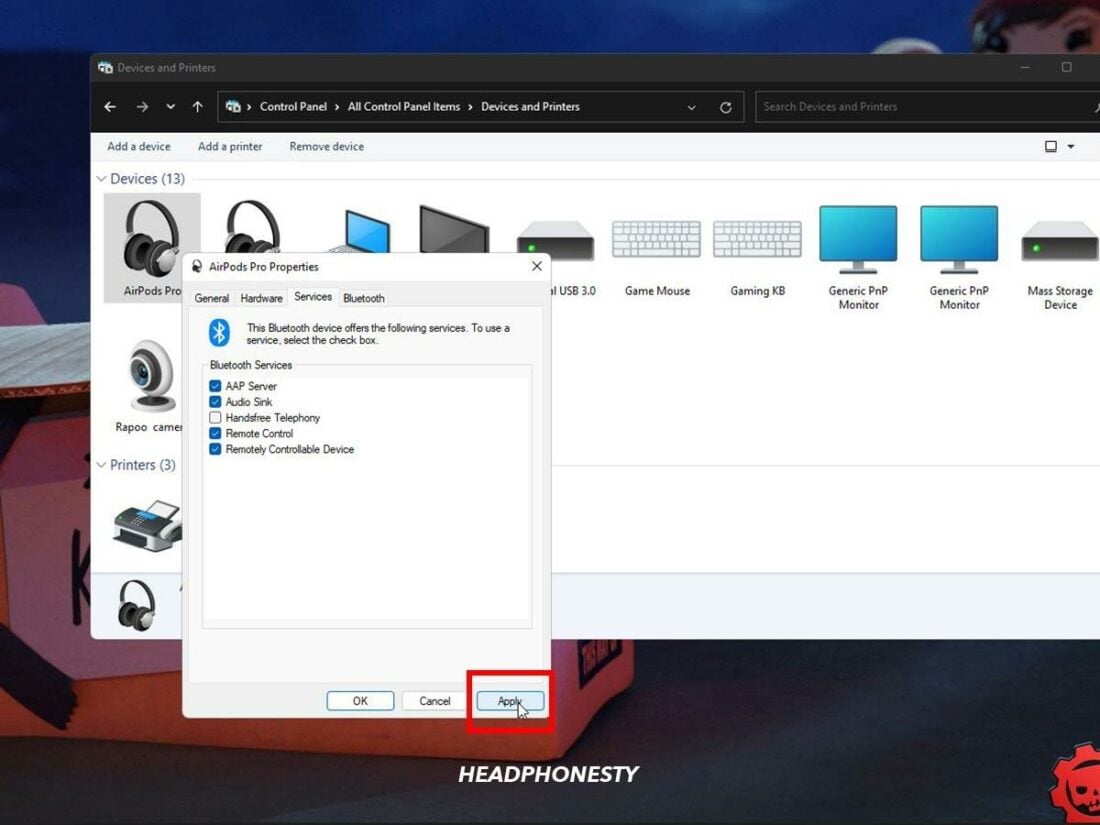
Click ‘Properties’. - Under the Services tab, uncheck Handsfree Telephony.
Uncheck ‘Handsfree Telephony’. - Click Apply, then OK.
Click ‘Apply’.
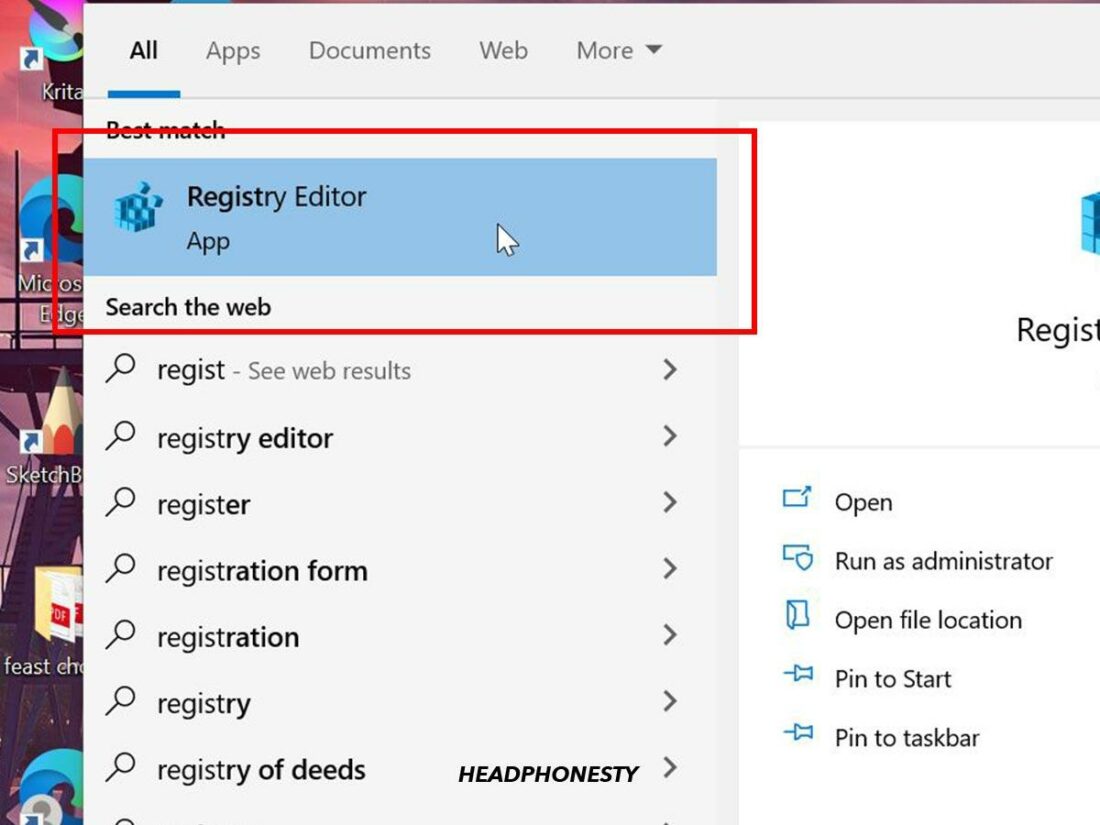
13. Adjust Absolute Volume in Registry Editor
Absolute volume is a Windows feature that helps users better control the volume of their Bluetooth headphones. However, it can sometimes prevent you from adjusting the volume of specific devices like your AirPods.
You’ll need to use the Windows Registry Editor to turn off this feature and see if you can hear any sound on your AirPods.
Here are the steps to disable the absolute volume:
- Type Registry Editor in the search bar and launch it.
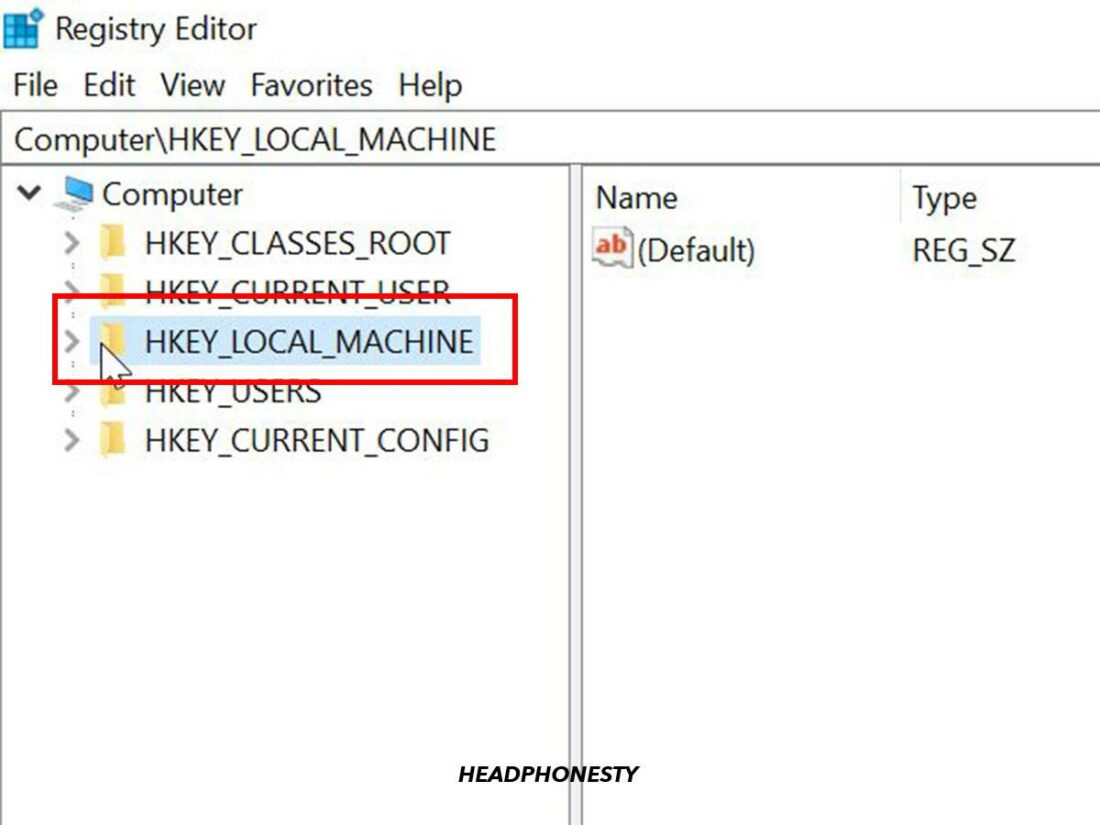
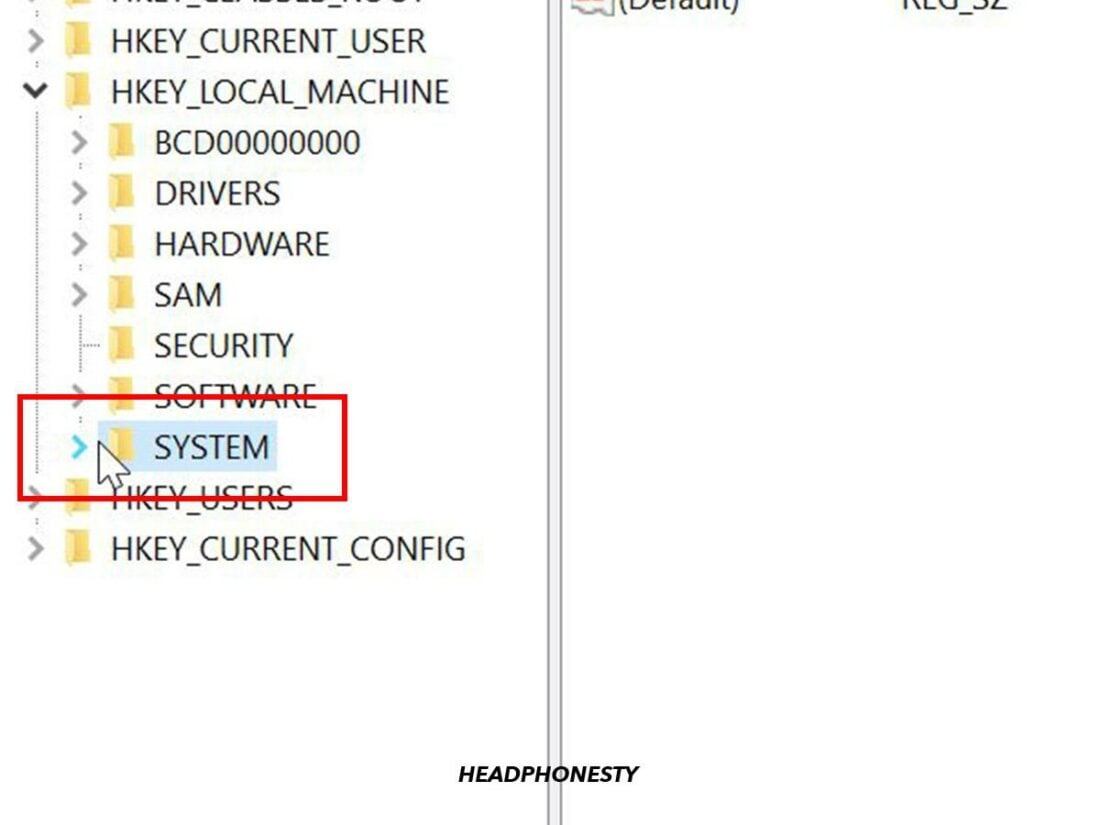
Open Registry Editor. - On the left sidebar under Computer, double-click HKEY_LOCAL_MACHINE.
Open HKEY_LOCAL_MACHINE. - Double-click SYSTEM.
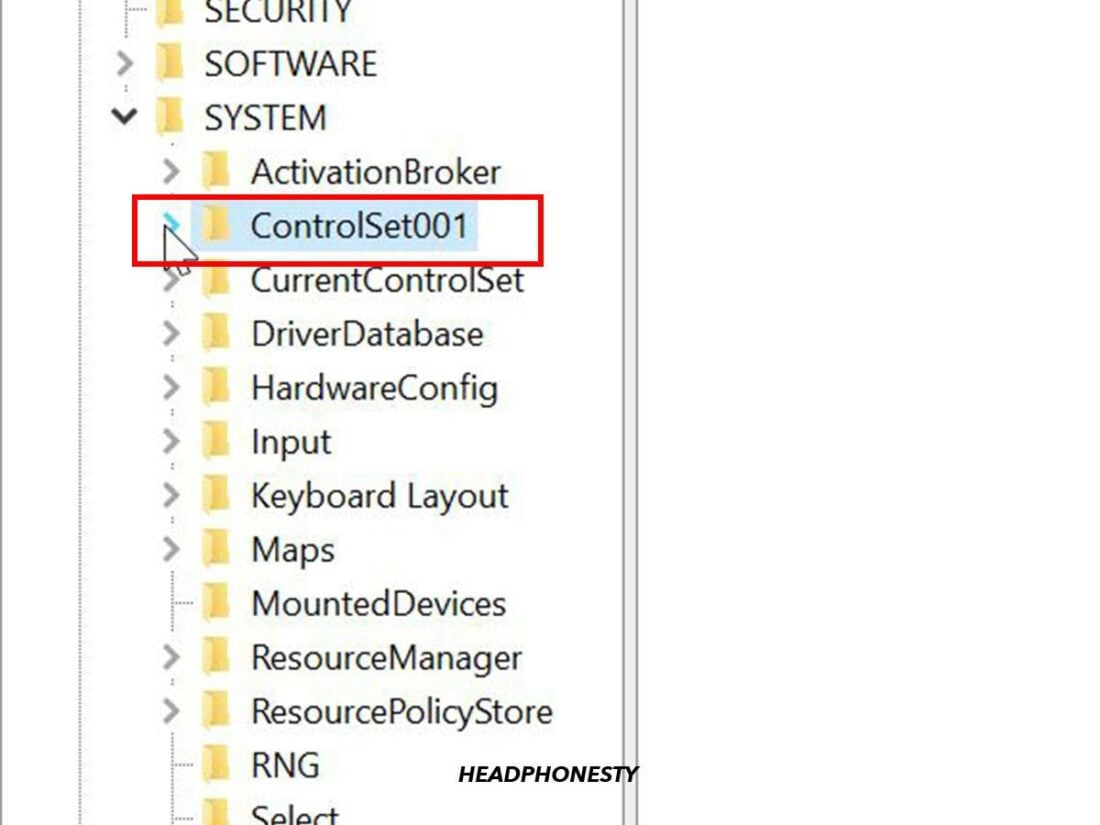
Open SYSTEM. - Double-click ControlSet001.
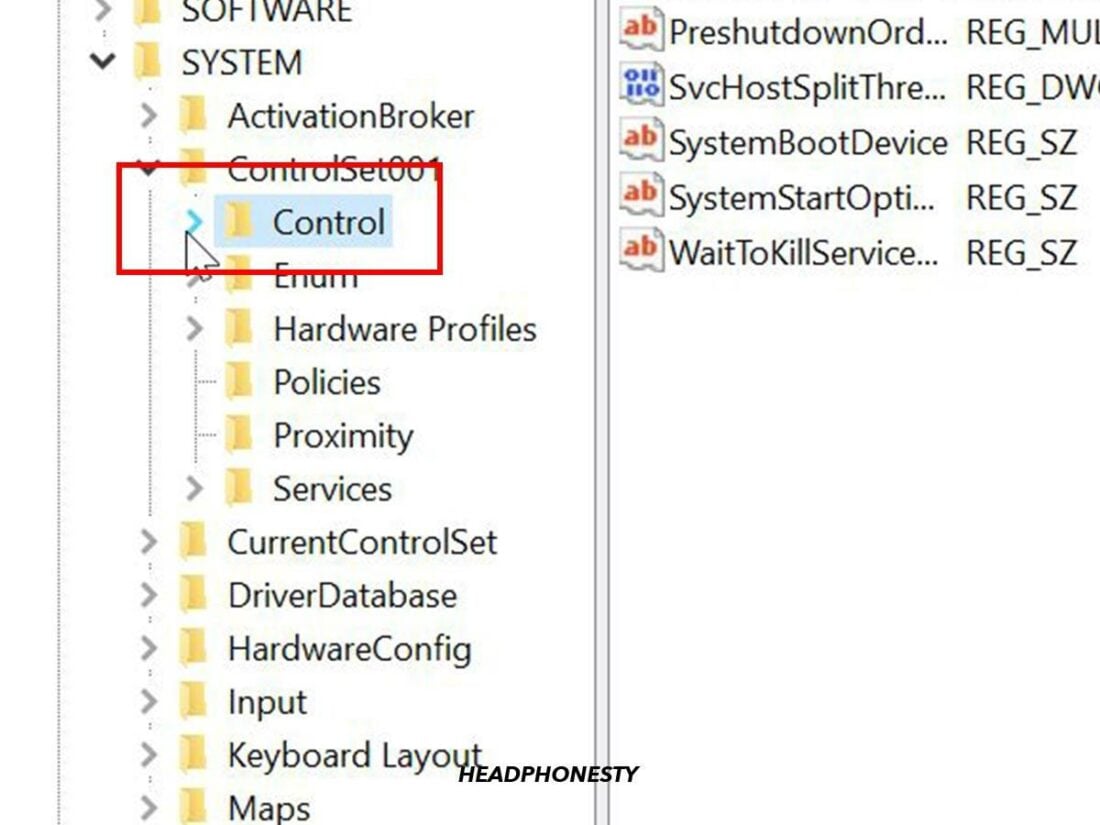
Open ControlSet001. - Double-click Control.
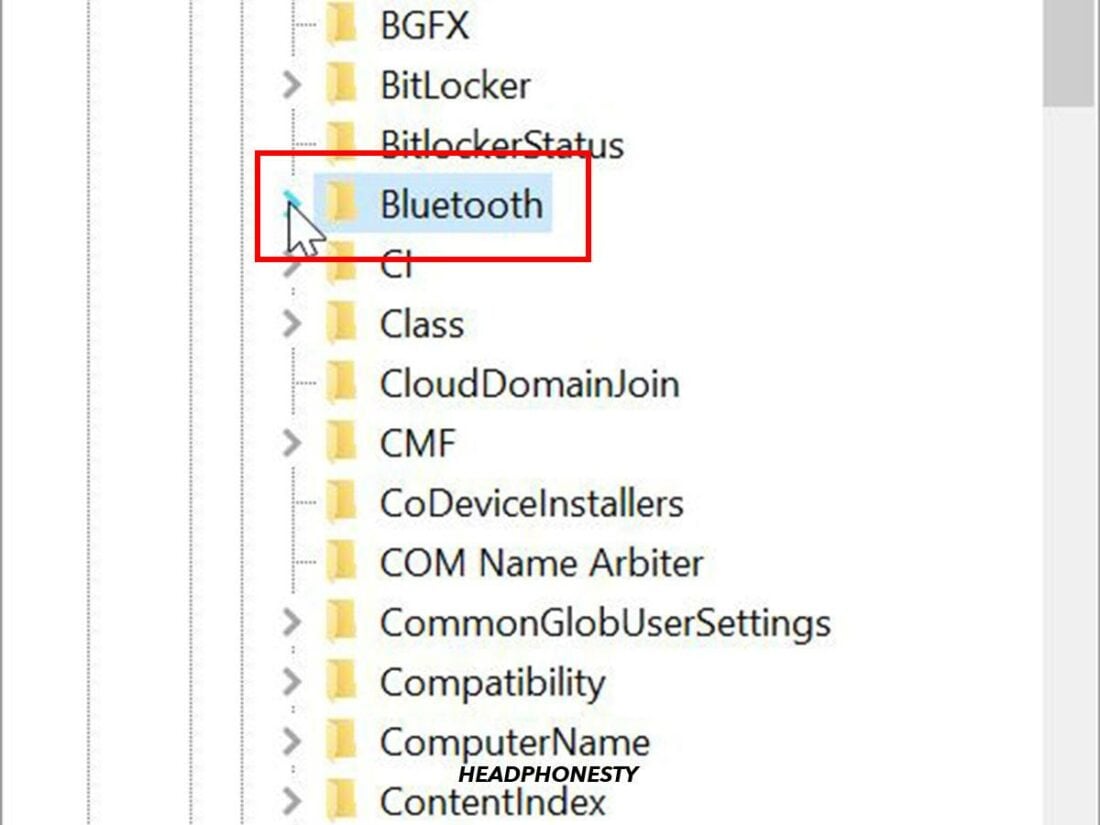
Open Control. - Double-click Bluetooth.
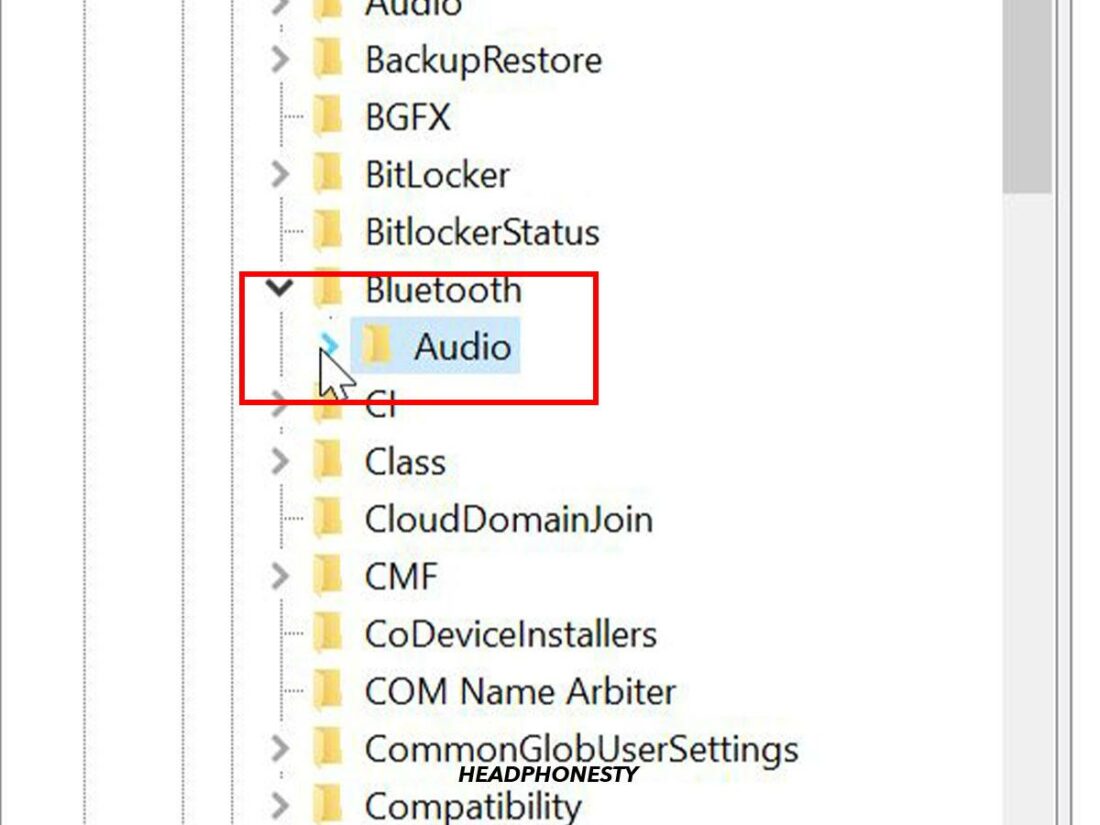
Open Bluetooth. - Double-click Audio.
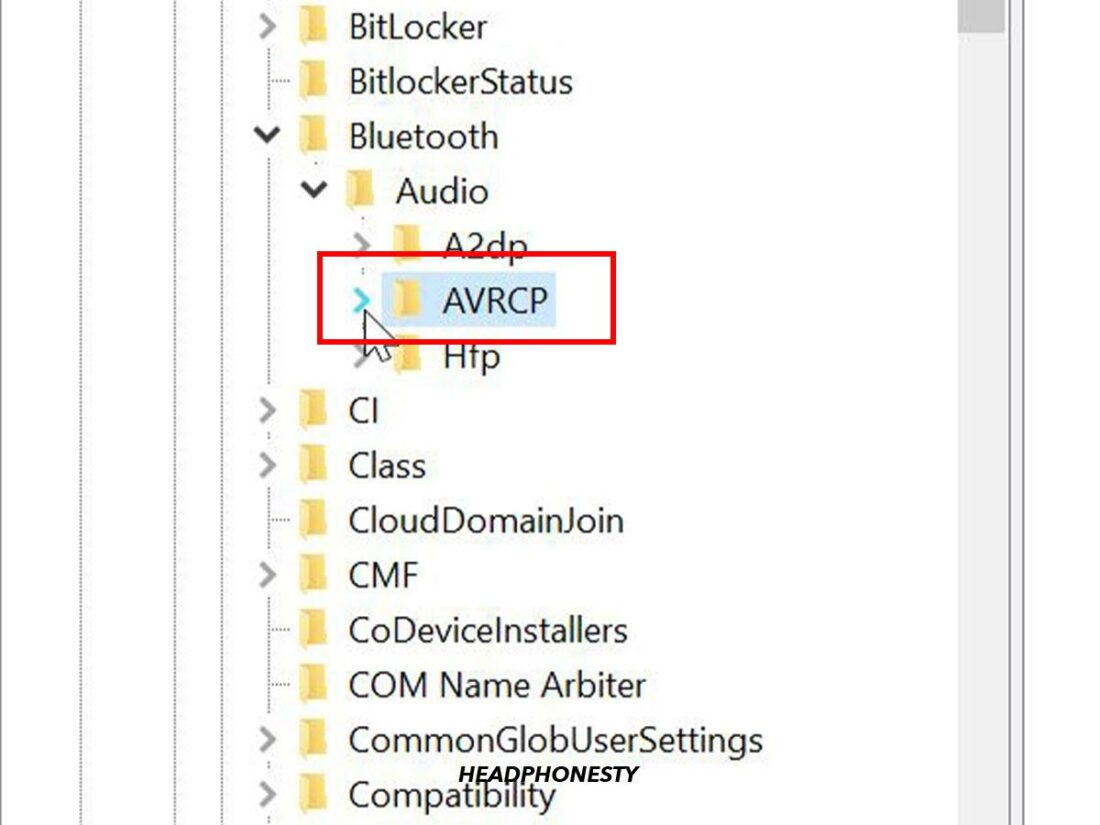
Open Audio. - Double-click AVRCP.
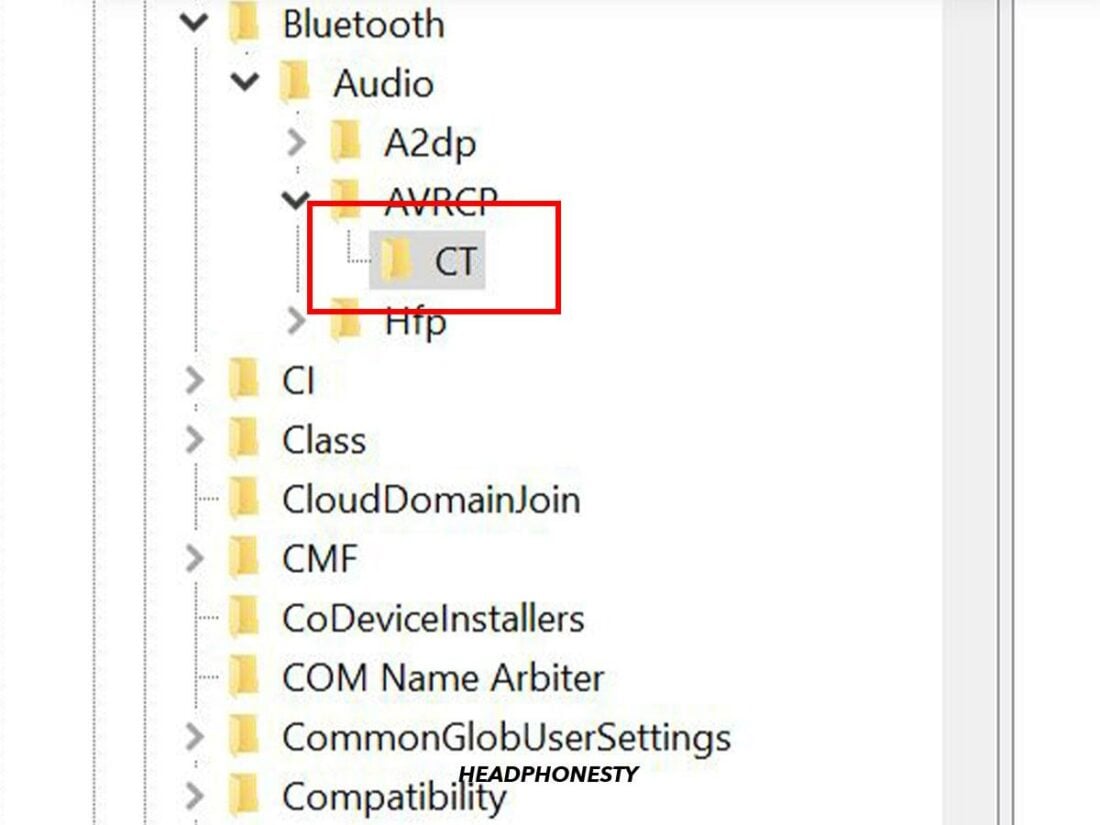
Open AVRCP. - Double-click CT.
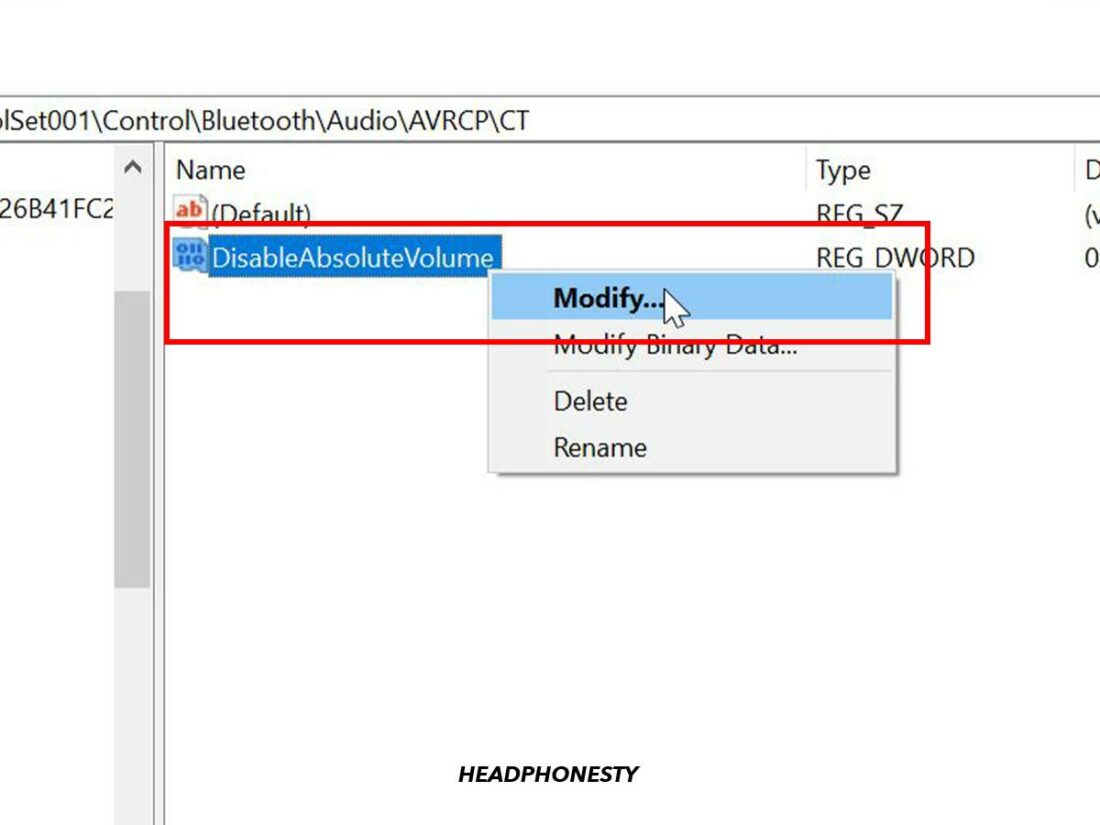
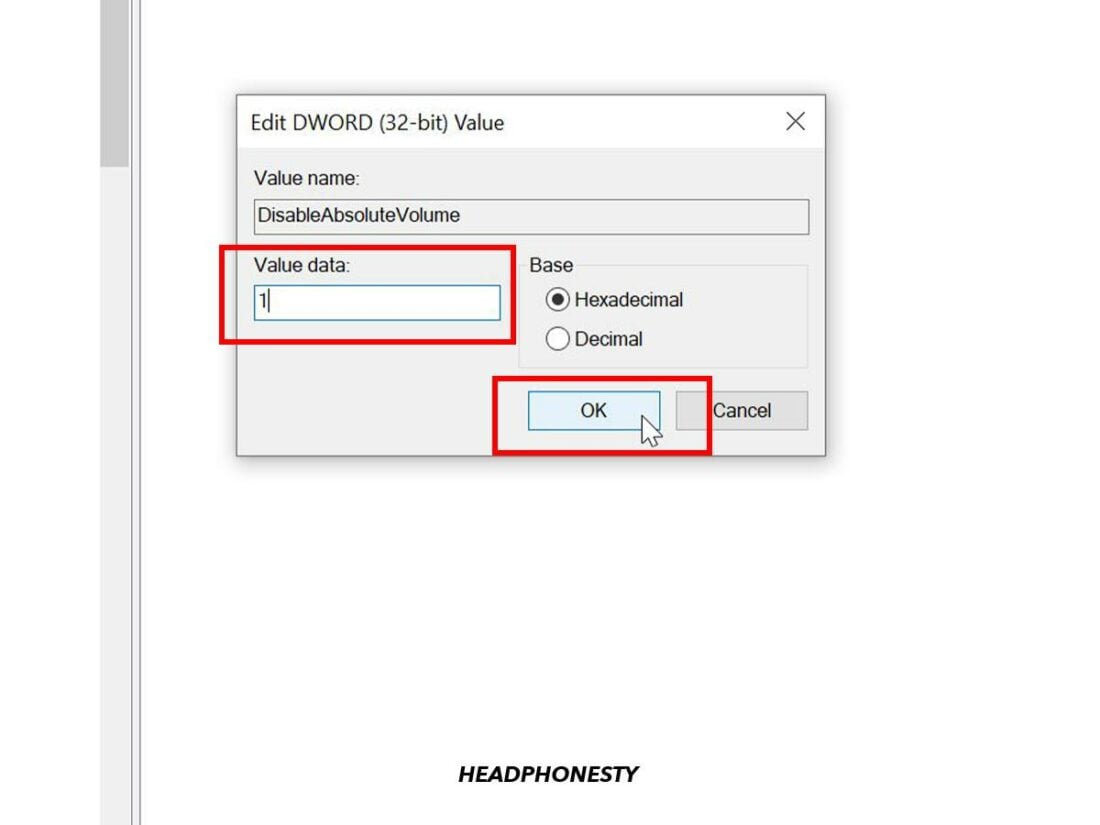
Open CT. - On the right-hand window, right-click DisableAbsoluteVolume and select Modify.
Modify DisableAbsoluteVolume. - Edit Value data to 1 to disable Absolute Volume, then click OK.
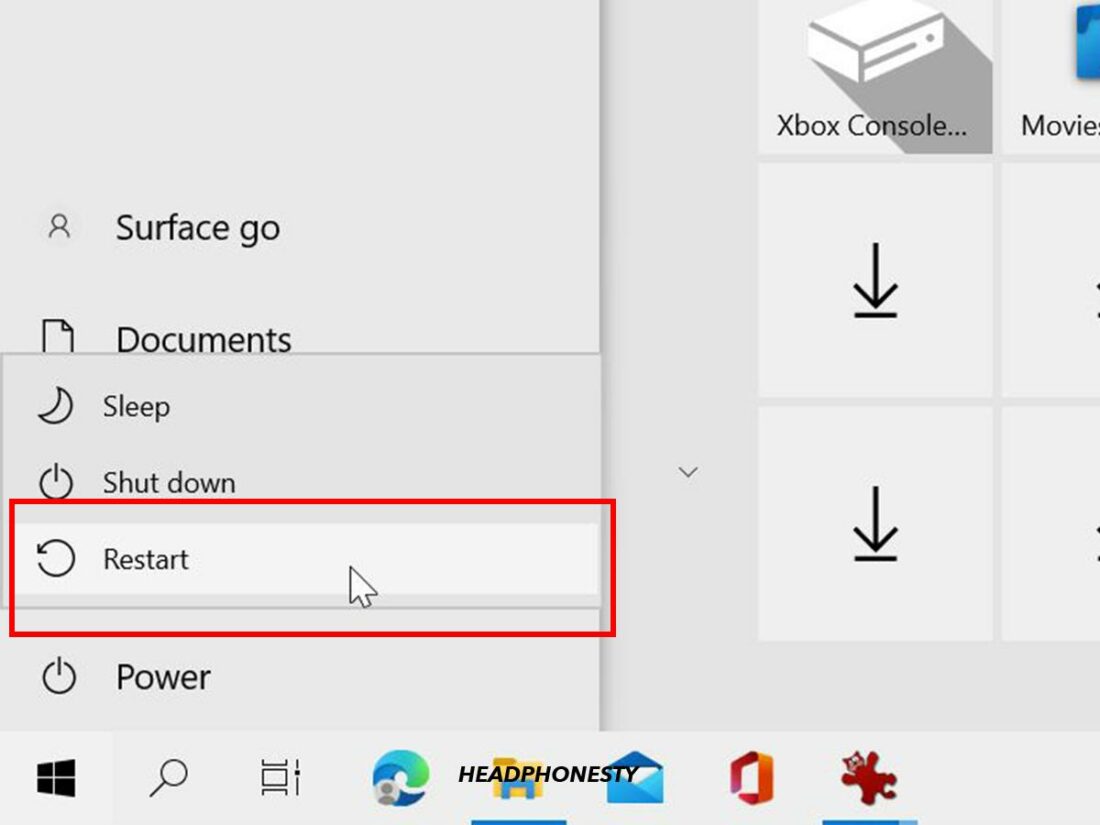
Edit Value data. - Restart your computer for the changes to take effect.
Restart PC.
Conclusion
While AirPods are versatile and popular wireless audio devices, they are not perfect by any means.
There will always be technological limitations when using devices from different manufacturers together. Unfortunately, this can sometimes happen with AirPods and Windows computers.
The good news is that you are now better prepared to solve the issue of hearing no sound on your AirPods when they are connected to Windows. That way, you can continue enjoying your AirPods free of any disruption.
What did you think of our suggestions? Did you find them helpful, or was there a method we missed? Let us know in the comments below!
So useful
Fixed my problem, thanks