
A one-stop guide for all the possible solutions you can try for when your headphones are not working on your Windows laptop.
We’ve all run into this issue at some point – you plug your headphones into your computer like you always do, but they aren’t working as they should. It could be that your headphones don’t have any sound, or if they just won’t get recognized by the laptop.
Whatever your specific problem is, it can be more frustrating if you really need your headphones right away. And if you can’t figure out if the problem lies with the headphones or the laptop.
We’re here for the rescue! Try these steps below to help you find out what exactly is wrong and how you can go about rectifying it.

Isolate the Problem
Before resolving any potential software issues with Windows, it’s worth ruling out the possibility of any hardware problems. The fault might be with your headphones or your laptop’s audio port.
To check if your headphones are working properly, try connecting them to another device. If they still don’t work, the headphones may be faulty, and replacing or having them repaired can resolve the issue.
On the other hand, if they suddenly start working, you’ll know that the problem could be with your PC’s aux port or software settings. But before running to the nearest tech repair store, it’s better to try and see if any software adjustments can resolve your issue. This won’t just help save you a few bucks but also prevent any unnecessary hardware tweaks.
Make Sure Your Headphones Are Connected Properly
The first thing you should check to see is if your headphones are connected properly. This applies to both wired and wireless headphones. Improper connections can cause static, unclear audio or interruptions in playback. Or, it can even cause your laptop to not recognize your headphones at all.
In the case of wired headphones, ensure that they are plugged into the right port – there’s usually a headphones symbol or color code to help you recognize the right port and plug. The port for microphones is colored pick, while the one for your headphones speakers is colored lime green. The same goes with your headphone plug.
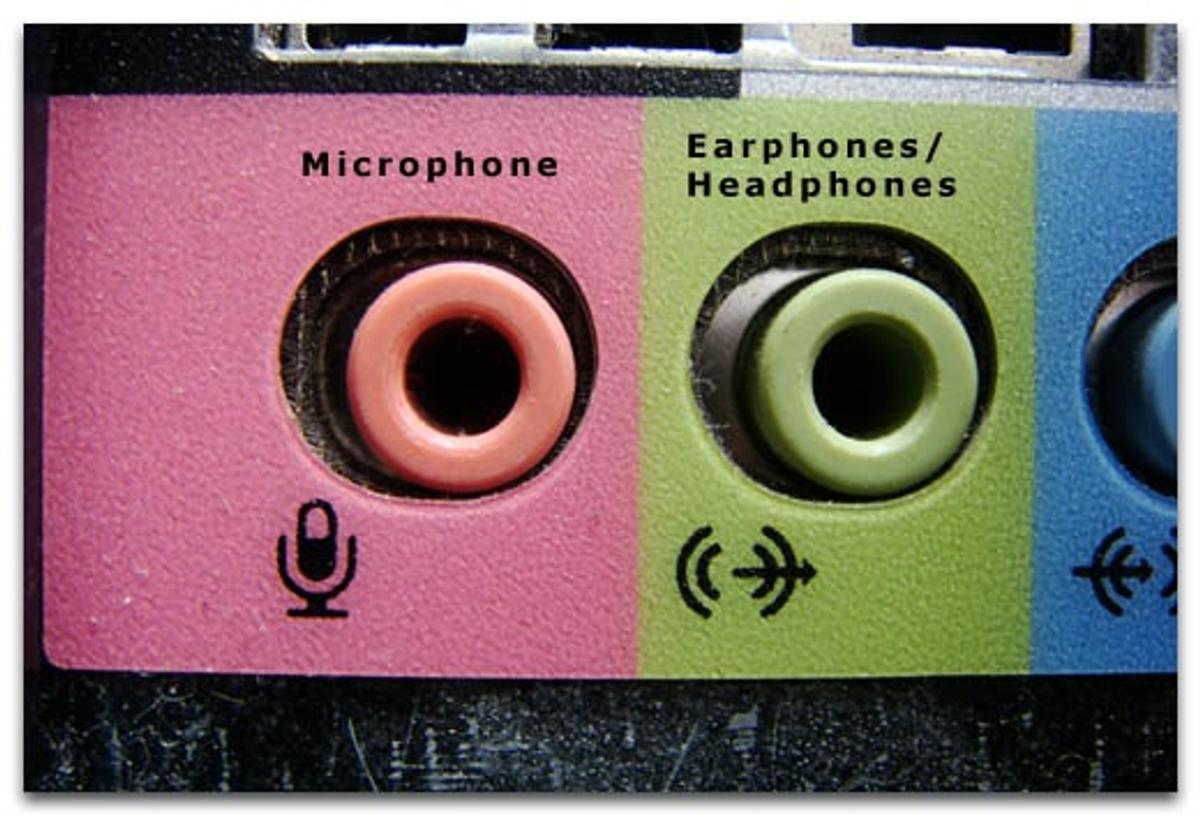
However, most Windows laptops already have a single TRRS port instead of the abovementioned colored TRS ports. So, if your headphones have two jacks (one for mic and one for the speakers) but your laptop only has one port, you can only use either of the two unless you invest in a TRS-to-TRRS audio splitter.
If replugging your headphones doesn’t solve the issue, check to see if the headphone jack is damaged. For this, check if they are bent for even the slightest or if they feel loose and keeps falling out of their port. If it’s heavily damaged, the best course of action will be to buy a replacement. But, if you want to save some cash, you can try checking out our tutorial on how to fix your headphones.
With wireless headphones, most issues can be solved by resetting your headphones. If they still don’t connect properly, the problem could stem from a software issue with the headphones or the Bluetooth module. In most cases, you only need a few minutes to resolve your Bluetooth connection on your PC.
Configure Headphones Settings
Once your headphones are properly connected, Windows 10 will notify you of a successful connection with a ‘ding’. This typically means that the device has been recognized by Windows and is now ready to use.
However, in some cases, your headphones may not work even after the notification sounds – this means some software issues have to be resolved. Here’s a quick look at some of the potential problems and how you can resolve them:
Set headphones as ‘Default Output Device’
The first thing you can do is check if your headphones have been set as the default output device. To do this, simply follow these steps:
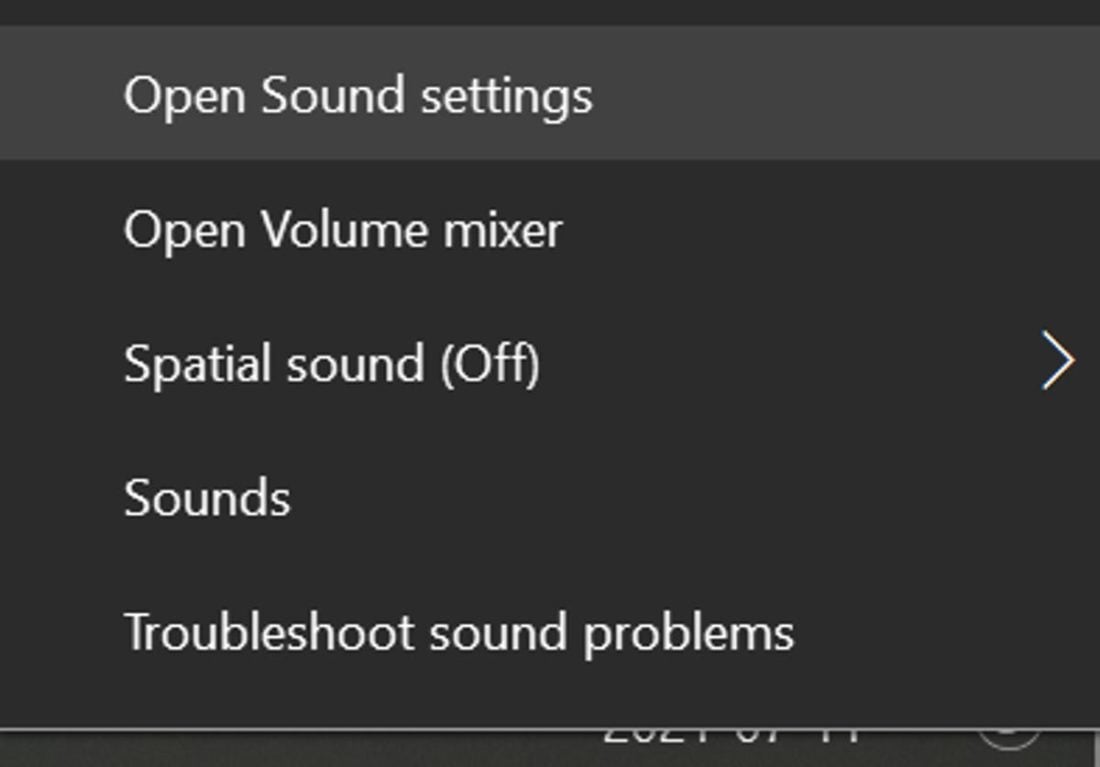
- Right-click the speaker icon in the notification panel (usually on the bottom right of your screen) and click ‘Open Sound Settings.’

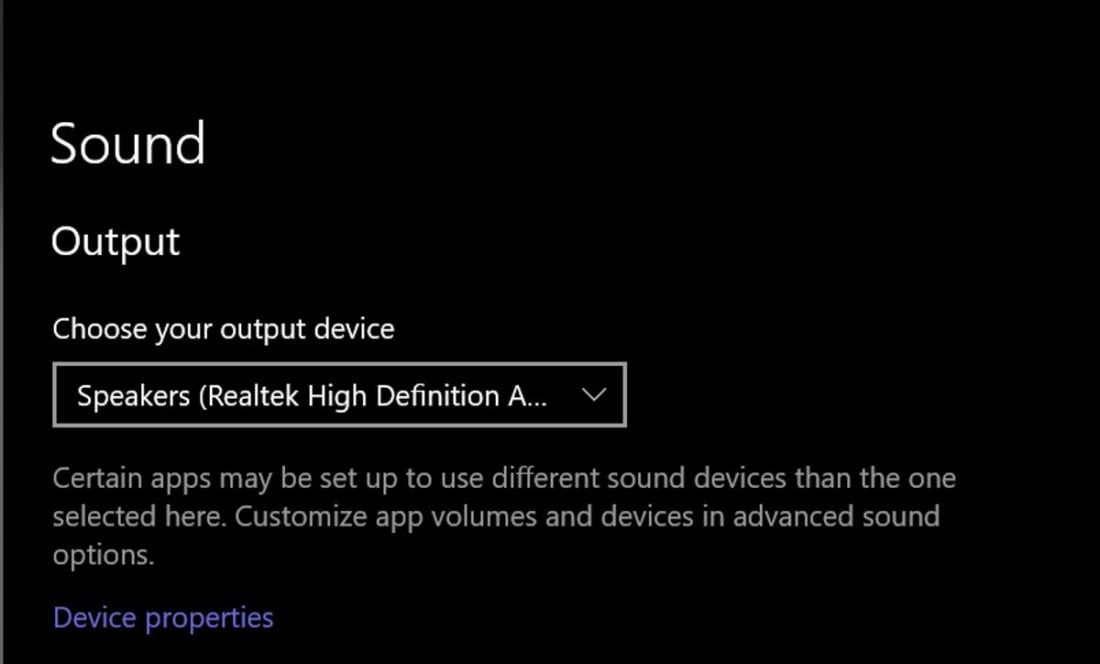
The menu containing sound settings - In the window that opens, click on the ‘Choose your output device’ drop-down list and select your headphones.

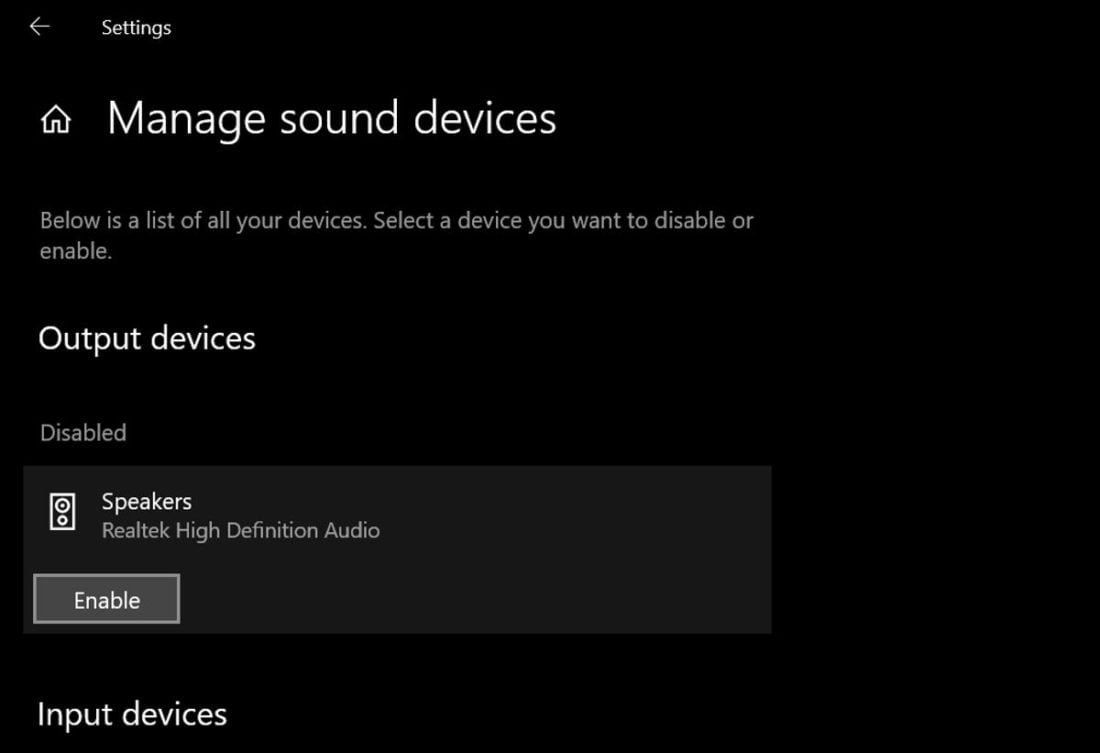
Sound settings with audio output dropdown - Next, select ‘Manage Sound Devices’ and check if your headphones are ‘Disabled.’ If yes, select them and click ‘Enable.’

Manage sound devices window
These steps will enable your headphones to be the default audio output device every time you connect them to your PC or laptop. In some cases, your headphones may not show up in the drop-down list. If this happens, here’s a quick guide on how to manually show your headphones in the list of playback devices.
Change default audio format
Now, having your headphones set as the default audio device sometimes doesn’t solve the problem. For this, the next thing you can do is to check if the default audio format of your laptop matches the capacity of your headphones.
The audio format determines the resolution, the frequency range, and the dynamic range of the audio. Of course, not all headphones can manage some higher-end audio formats. That’s why, sometimes, using specific audio formats can prevent your headphones from functioning properly.
To check this:
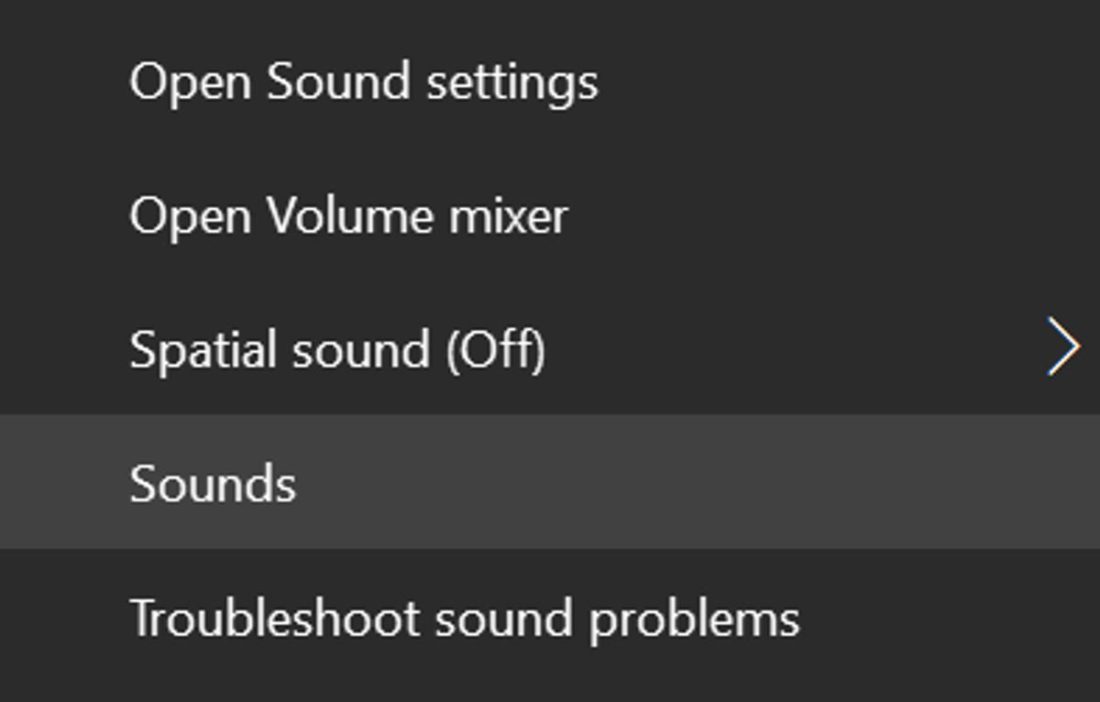
- Right-click the speaker icon in the notification panel and click ‘Sounds.’

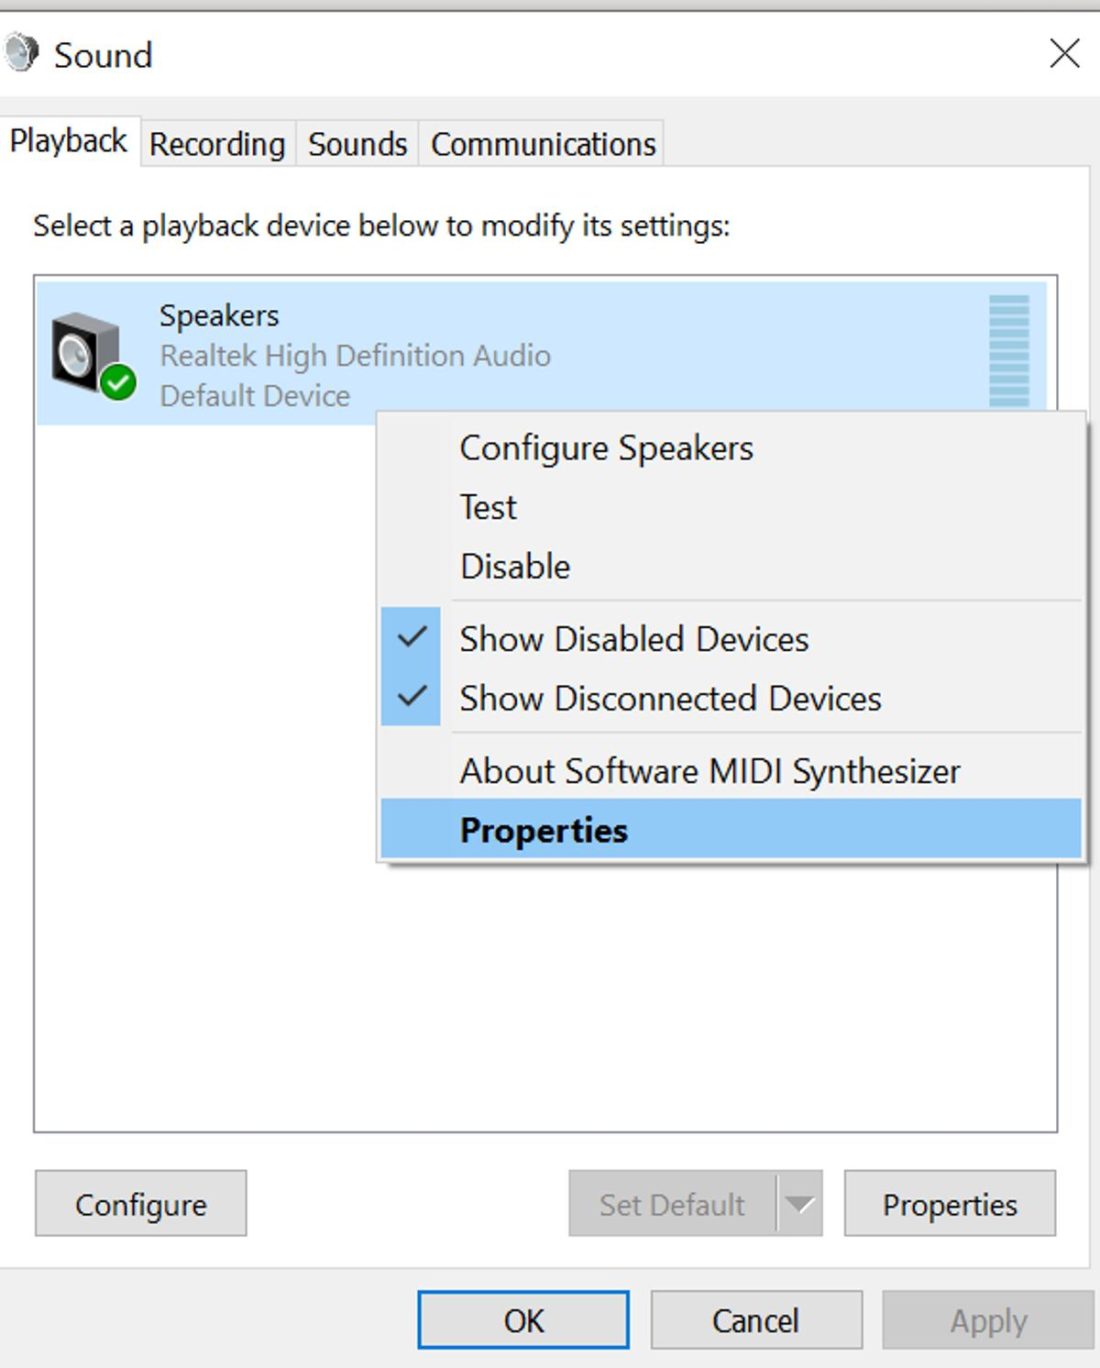
Taskbar sound settings with sounds highlighted - Select the Playback tab, right-click on your headphones, and select ‘Properties.’

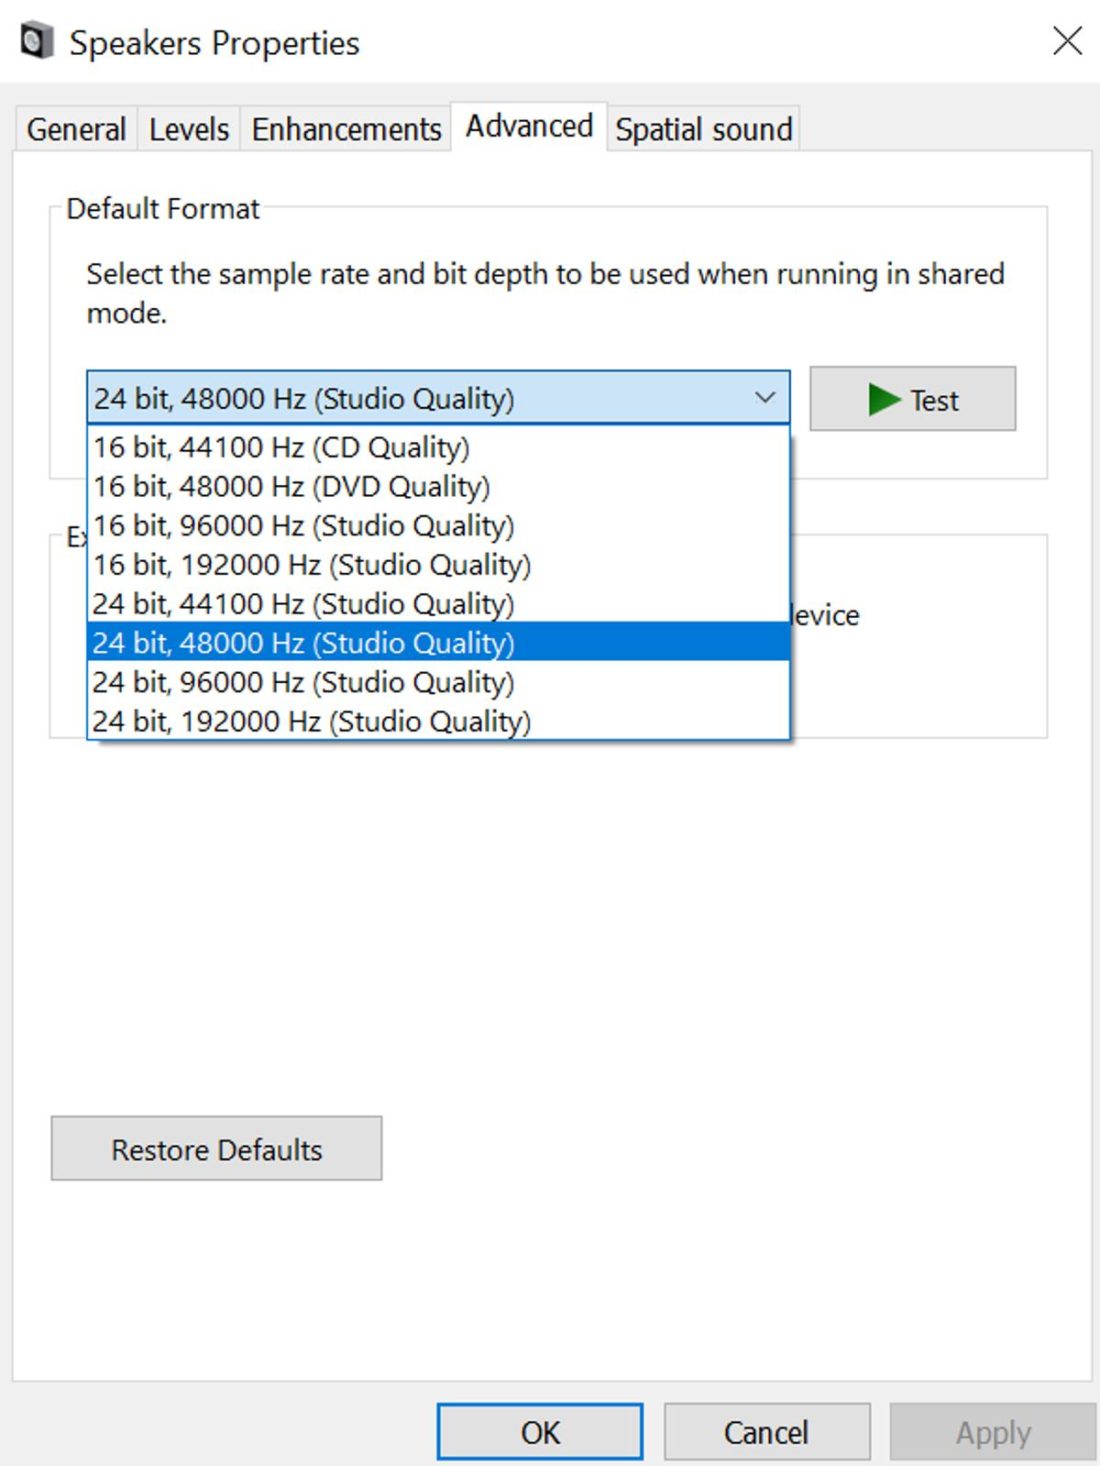
Your headphone properties - In the window that opens up, select the ‘Advanced’ tab. Individually select and ‘Test’ the formats from the list until you find one that works.

Your headphone properties - Click ‘Apply’ and then ‘OK.’
Install/Uninstall Windows Update
Another possible reason why your headphones are not working on your laptop is if you recently updated to a newer version of Windows.
On the flip side, running an outdated version of the operating system can also result in incompatibility and your headphones not working properly.
Whatever’s the case, here’s how you can update or revert to an older version of 9+Windows:
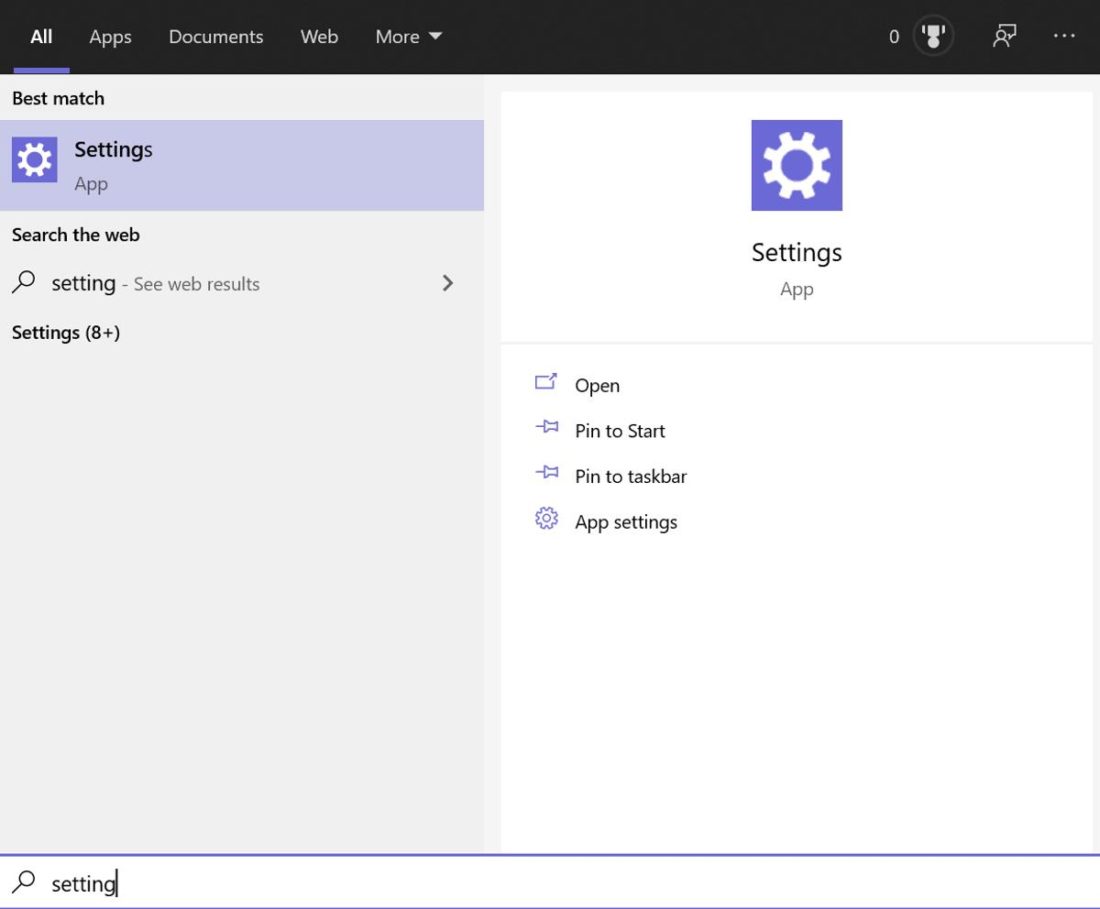
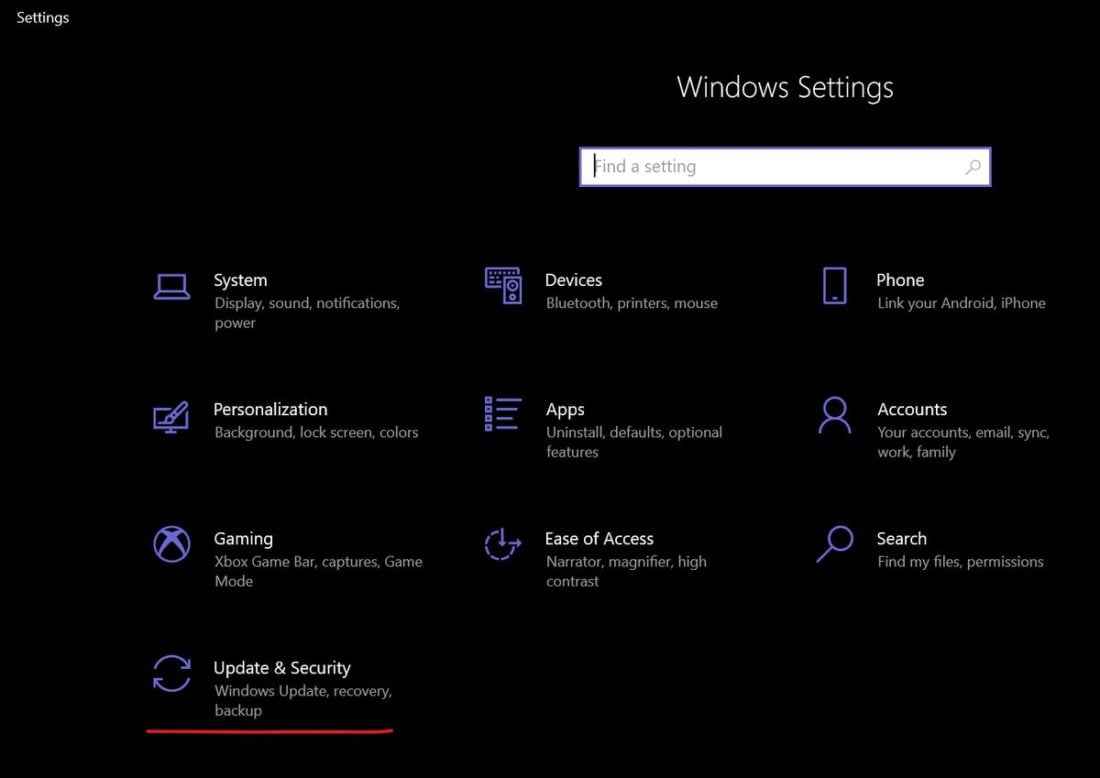
- Open up ‘Settings.’ You can do this by using the search bar in the ‘Start’ menu.

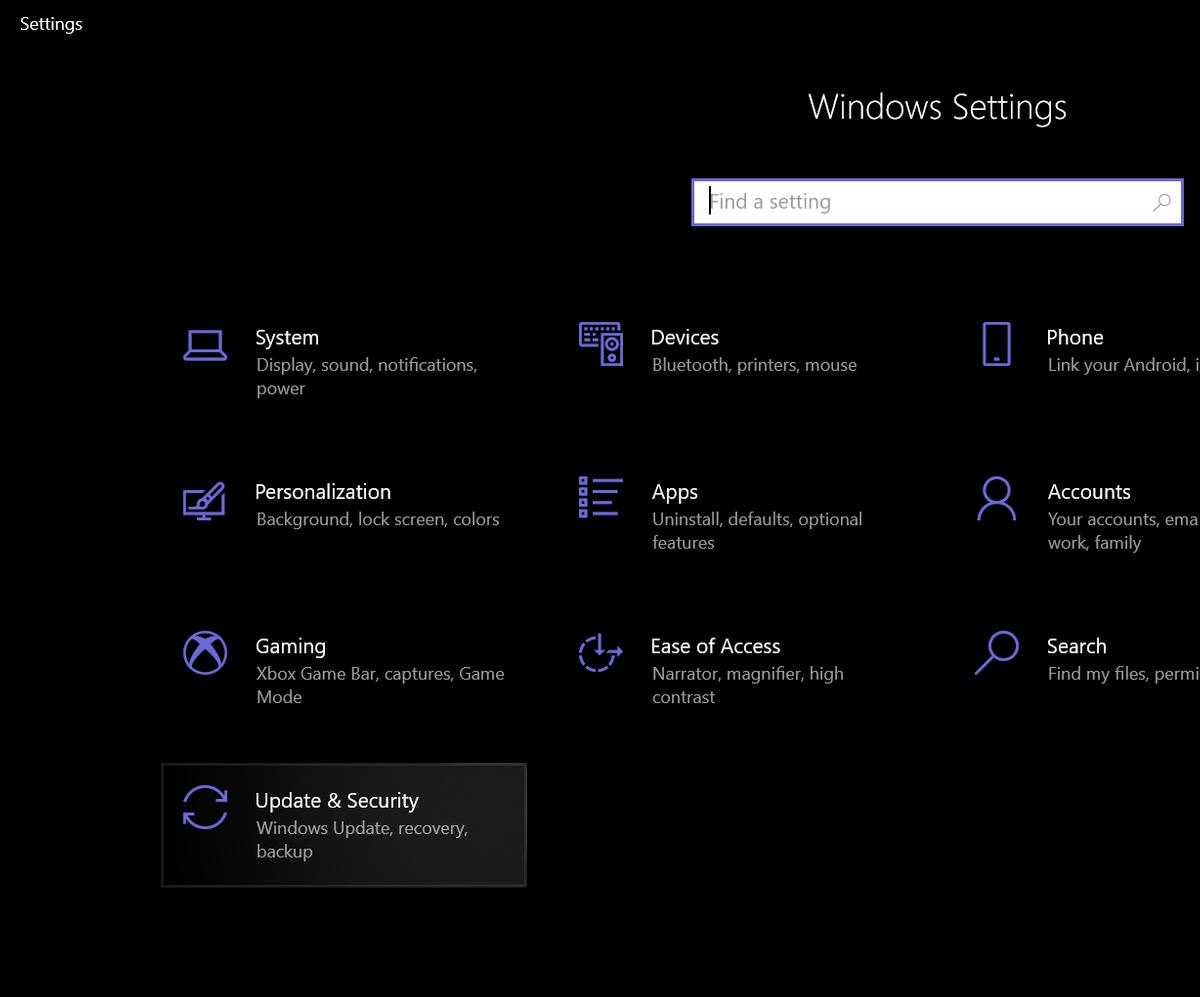
Searching for settings in the Start menu - Select the ‘Update & Security’ panel and click on ‘Windows Update.’

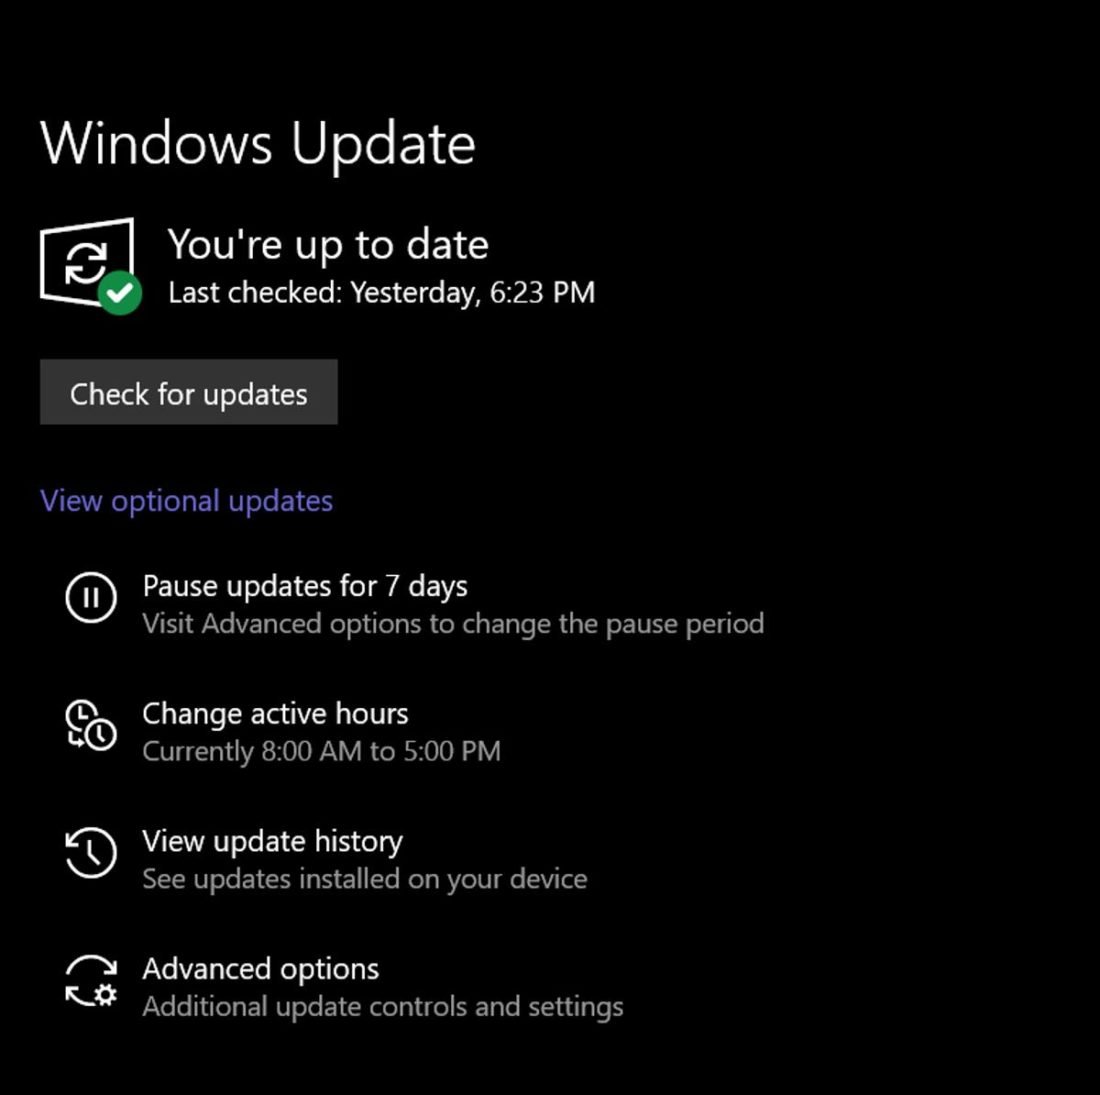
Windows settings with Updates and security highlighted - You can uninstall recent updates or check if a newer version is available.

Windows Update window
Install/Uninstall Driver Update
Drivers allow hardware devices to be read and recognized by Windows. That’s why a corrupt or outdated driver can prevent a proper connection. Aside from that, driver issues can also result in improper audio, static, or low volume levels.
Just like in Windows updates, both updated and outdated drivers can cause similar issues. Updated drivers can introduce new bugs, while outdated ones can result in incompatibility. Here are the steps on how to install and how to roll back your driver update.
How to install driver update
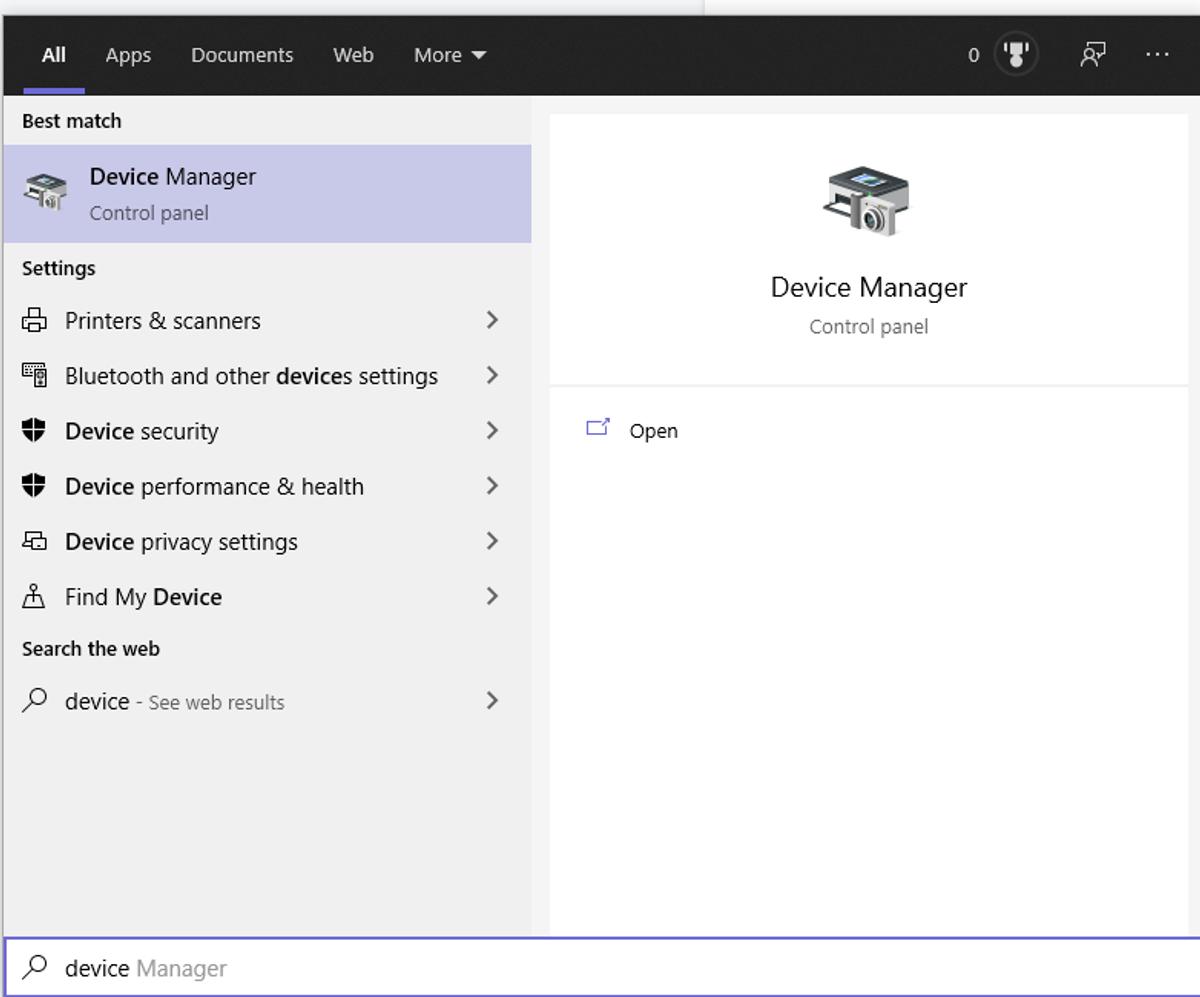
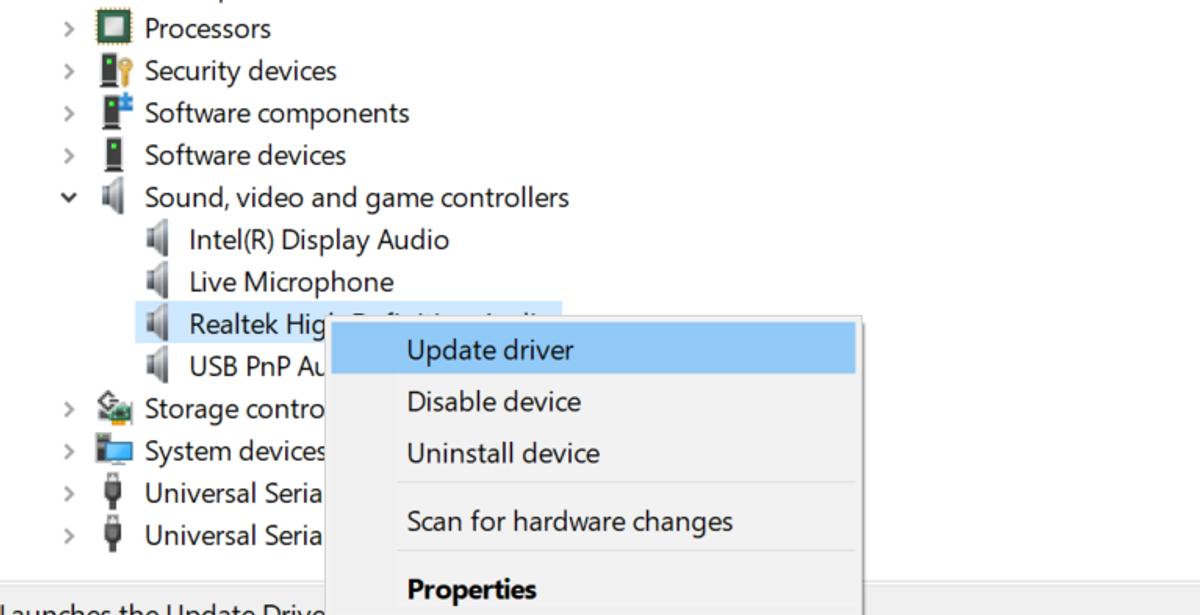
- Open the ‘Start’ menu and then search and open ‘Device Manager.’

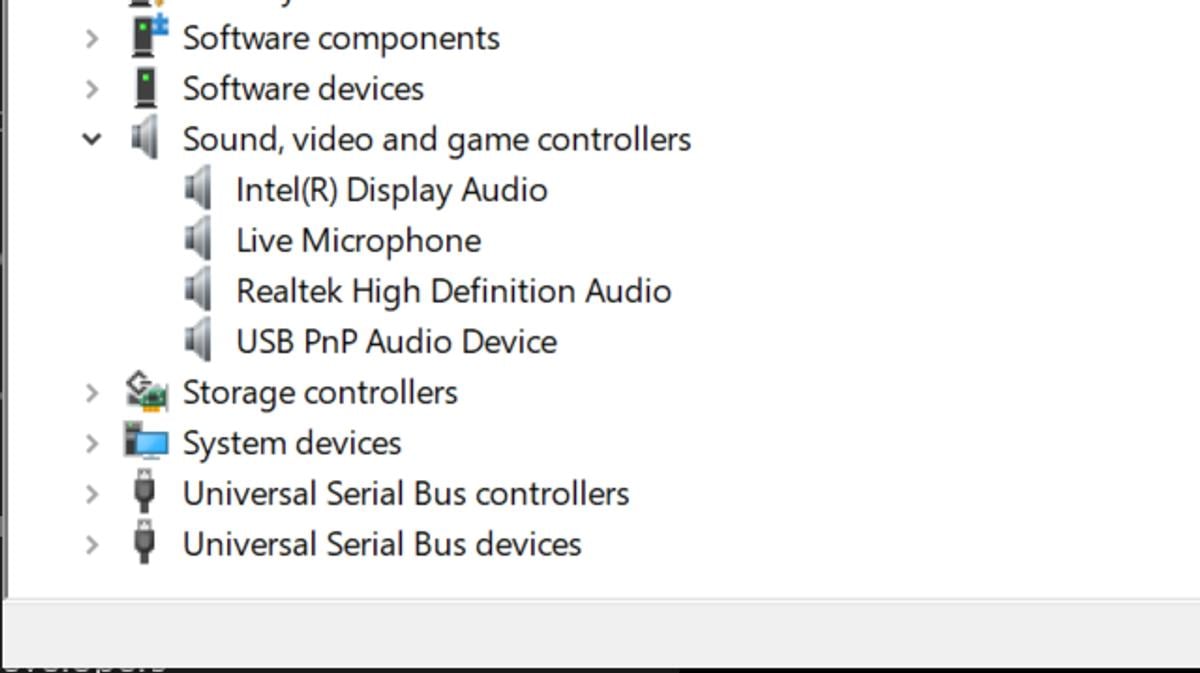
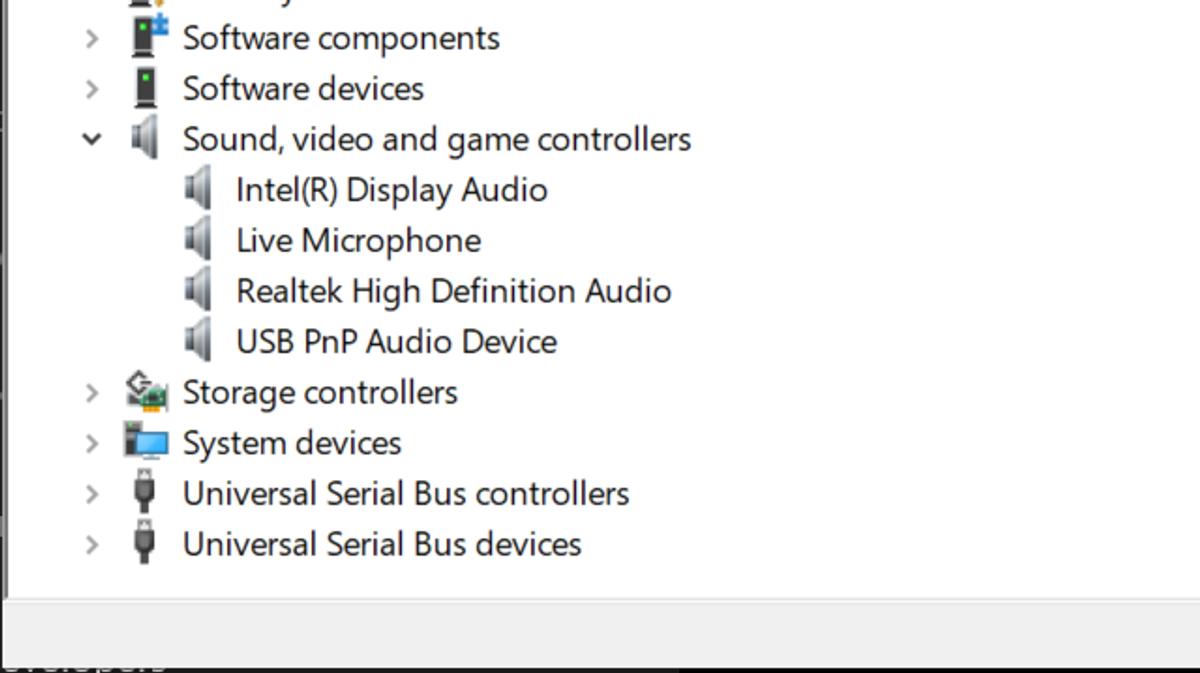
Searching Device Manager in Start menu - Once the Device Manager window opens, select ‘Sound, video and game controllers,’

Device manager list of devices - A list of connected devices will open. From there, right-click on your headphones and select ‘Update Driver.’

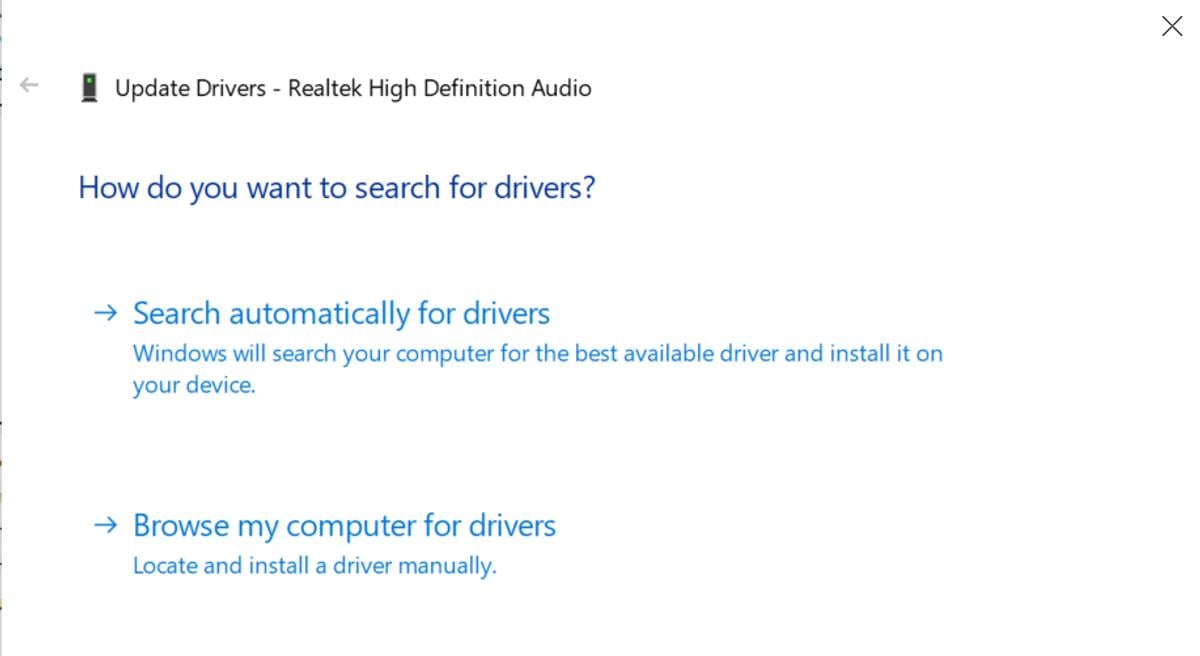
Device selected with update driver menu item highlighted - From the page that opens, select ‘Search automatically for drivers.’ This prompts your PC to look for driver updates. If there’s a new update available, simply follow the next instructions to install them.

Window asking how you want to search for drivers
How to roll back driver update
Sometimes, a driver update can result in your headphone no longer working with your laptop or PC. In such a case, you can roll back to an older driver version. To do so:
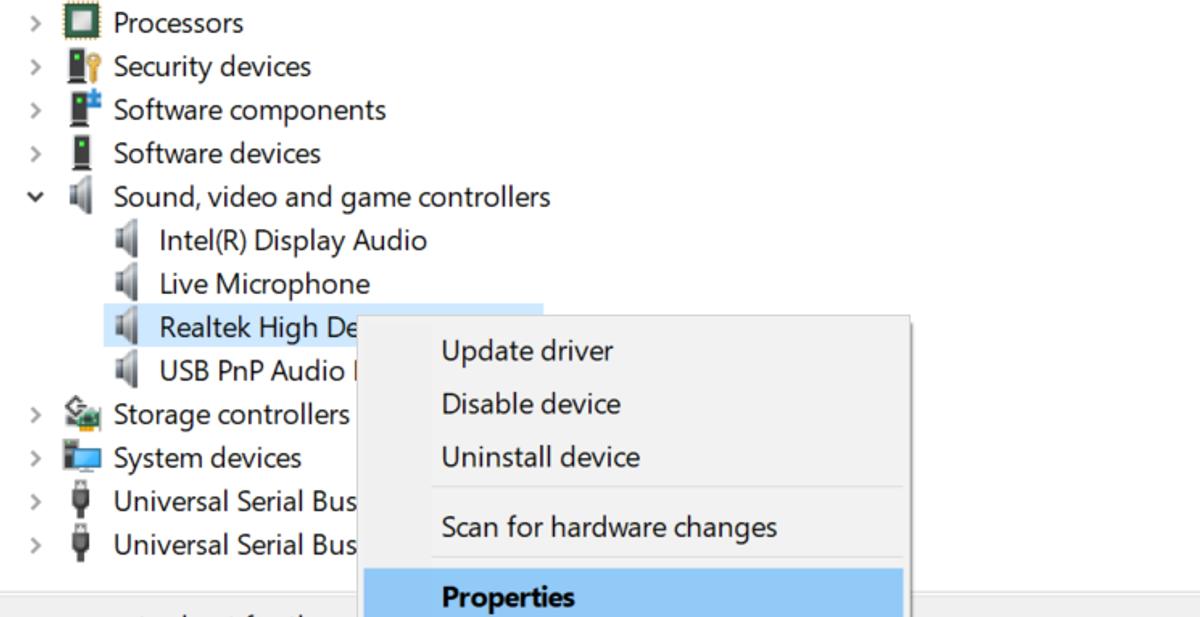
- Open Device Manager and double-click on Sound, video, and game controllers.
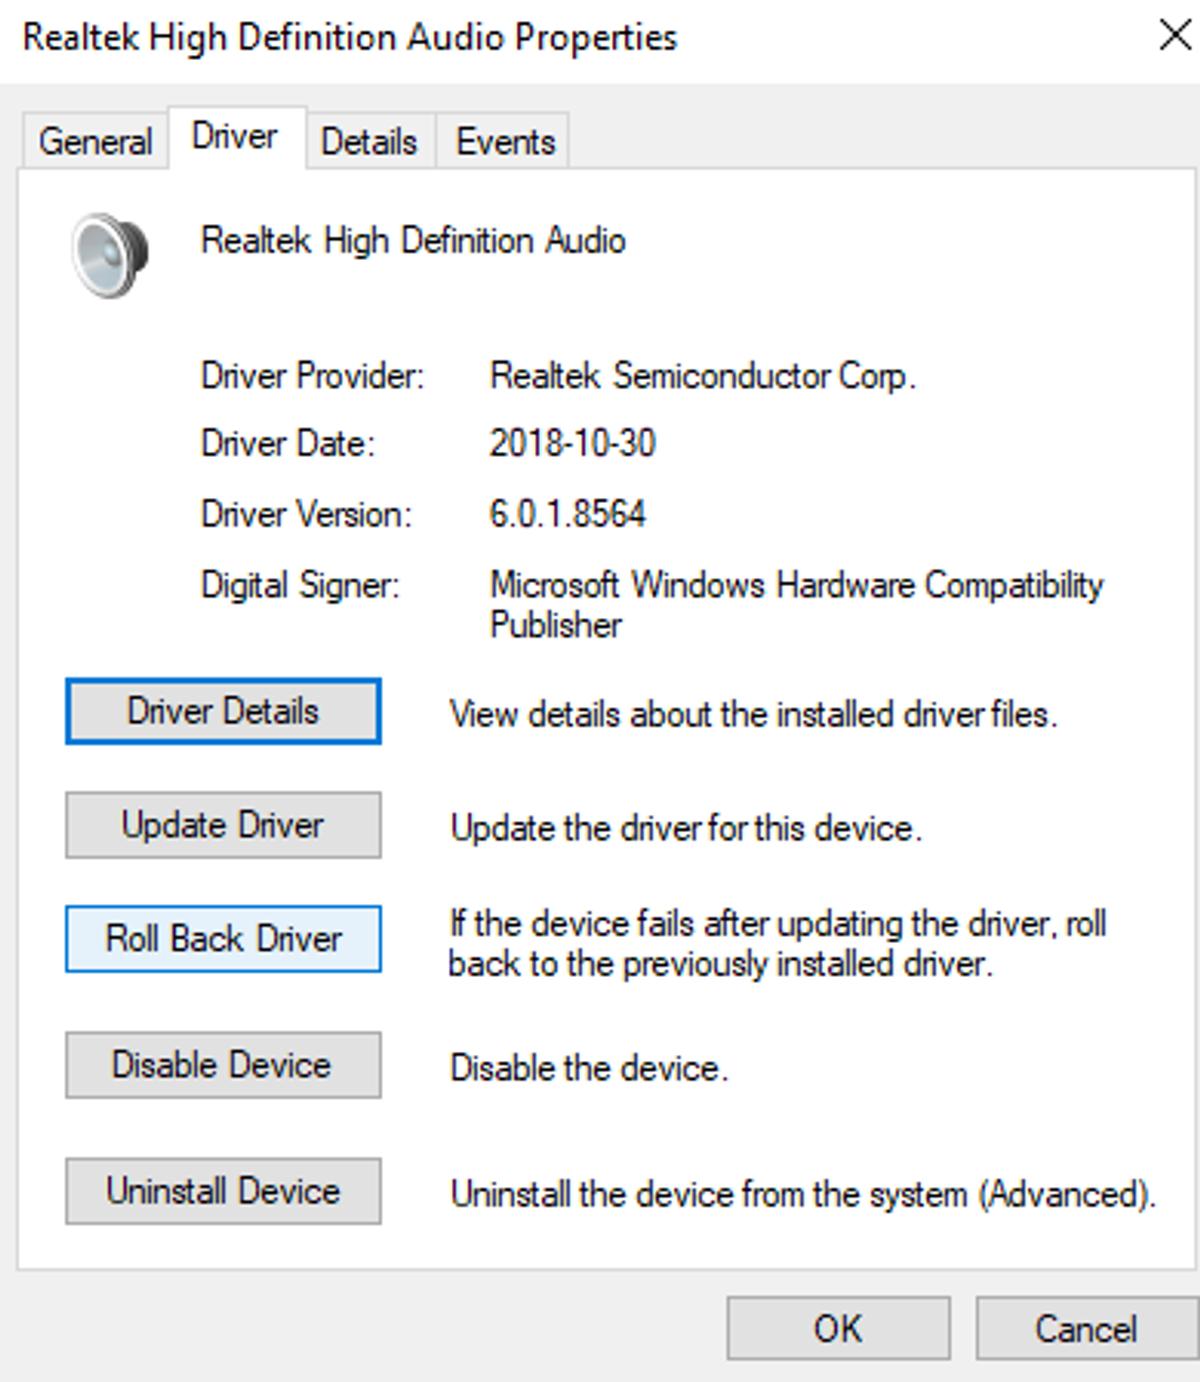
Device manager list of devices - Right-click on your device and select ‘Properties’

Go to your device ‘Properties’ - From the window that opens, select the ‘Driver’ tab and click on ‘Roll Back Driver.’

Click on ‘Roll Back Driver’
Run the Troubleshooter
If following the steps above didn’t resolve your headphones’ issues, you can use the Windows Troubleshooter to check what’s wrong.
General Windows troubleshooter
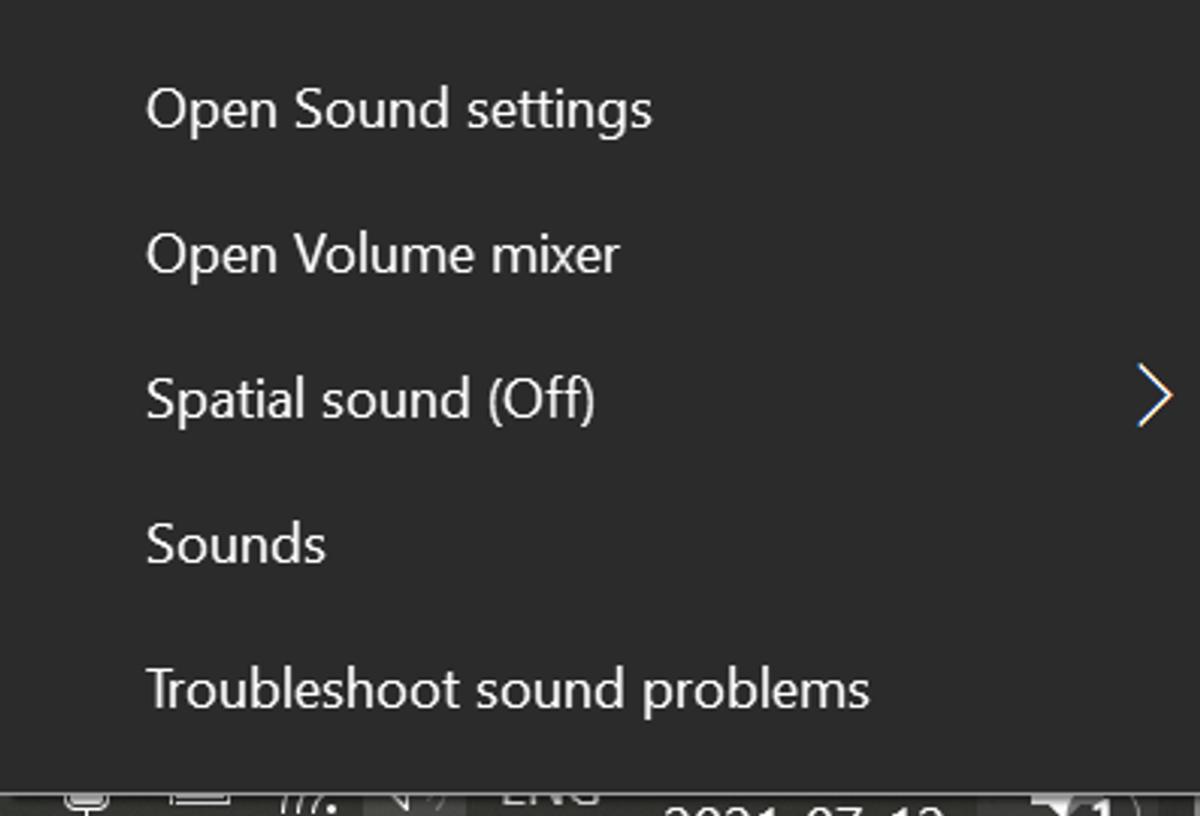
- Right-click on the speaker icon in your notification panel and select ‘Troubleshoot sound problems.’

Menu with Troubleshoot sound problems option - From the menu that asks which device you want to troubleshoot, select your headphones and click ‘Next.’

Window’s Audio Troubleshooter - The next steps depend on issues that the Windows troubleshooter identified. Follow the steps on the screen.
Audio troubleshooter
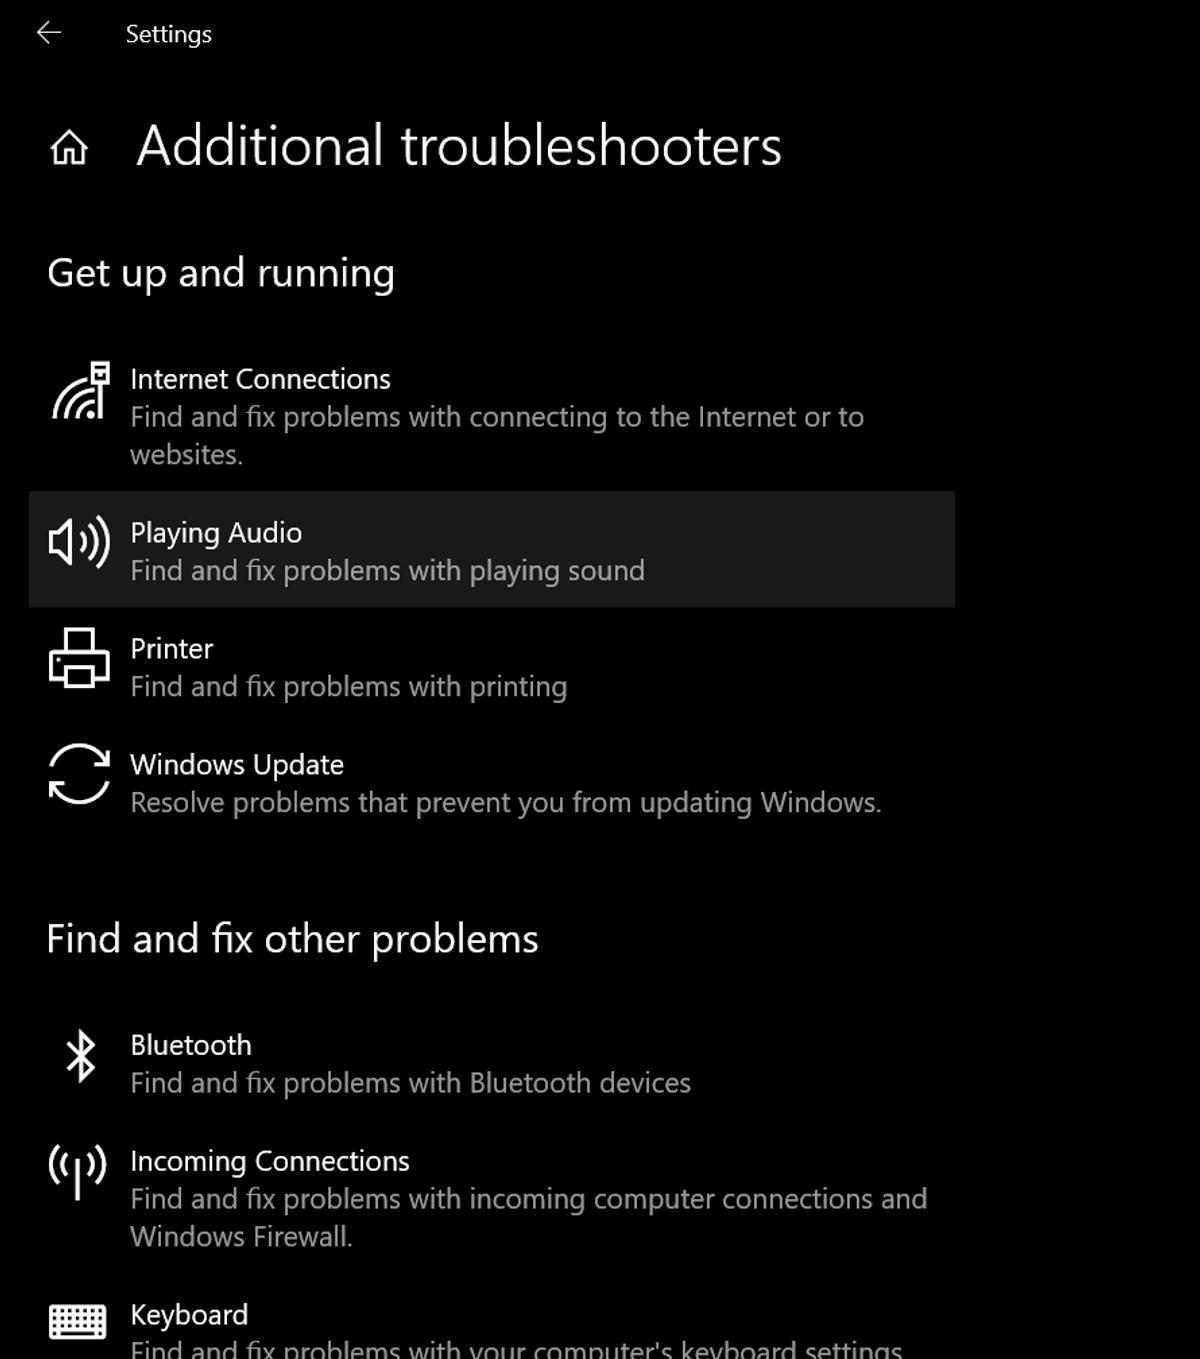
- To run the audio troubleshooter, head to the Settings page and select Update & Security.
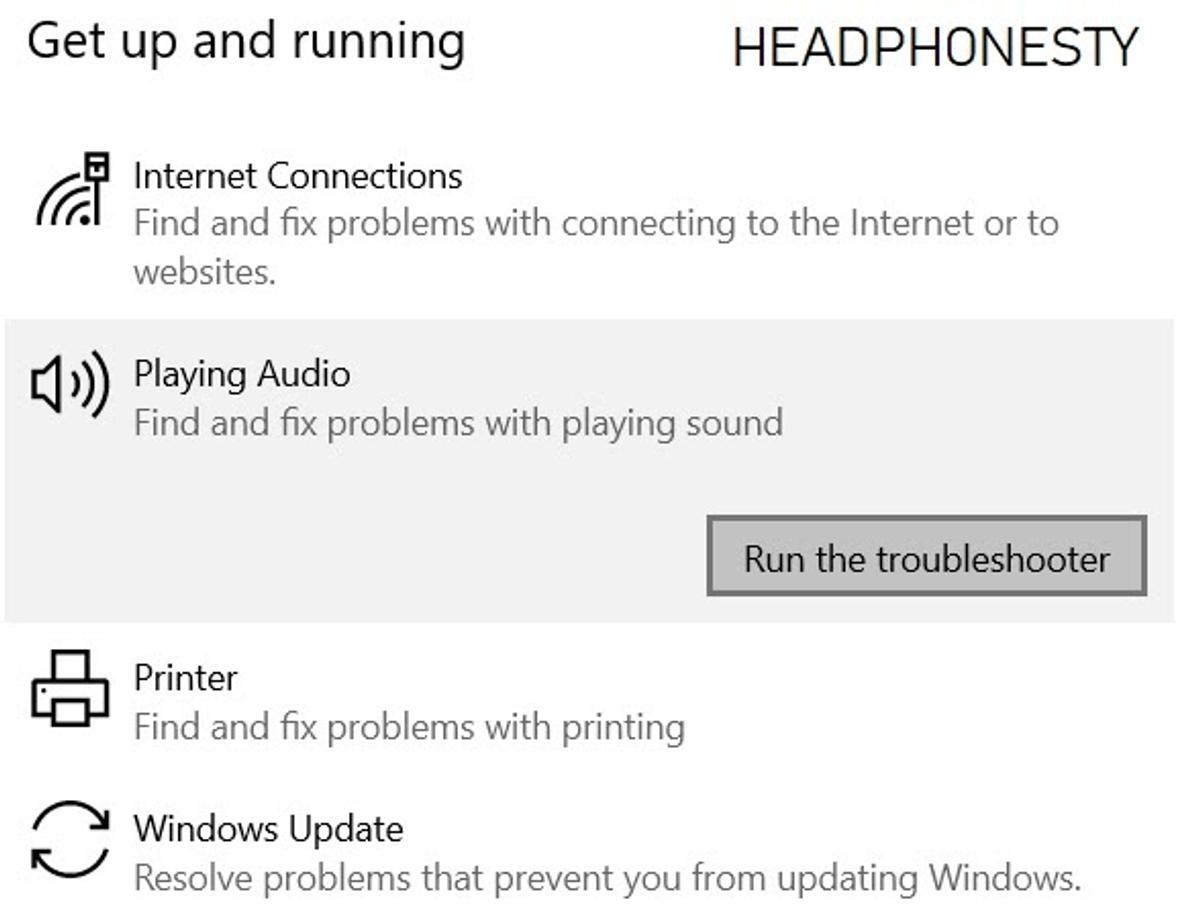
Windows settings - Click on the ‘Troubleshoot’ option and select the ‘Playing Audio’ option on the right side of the page.

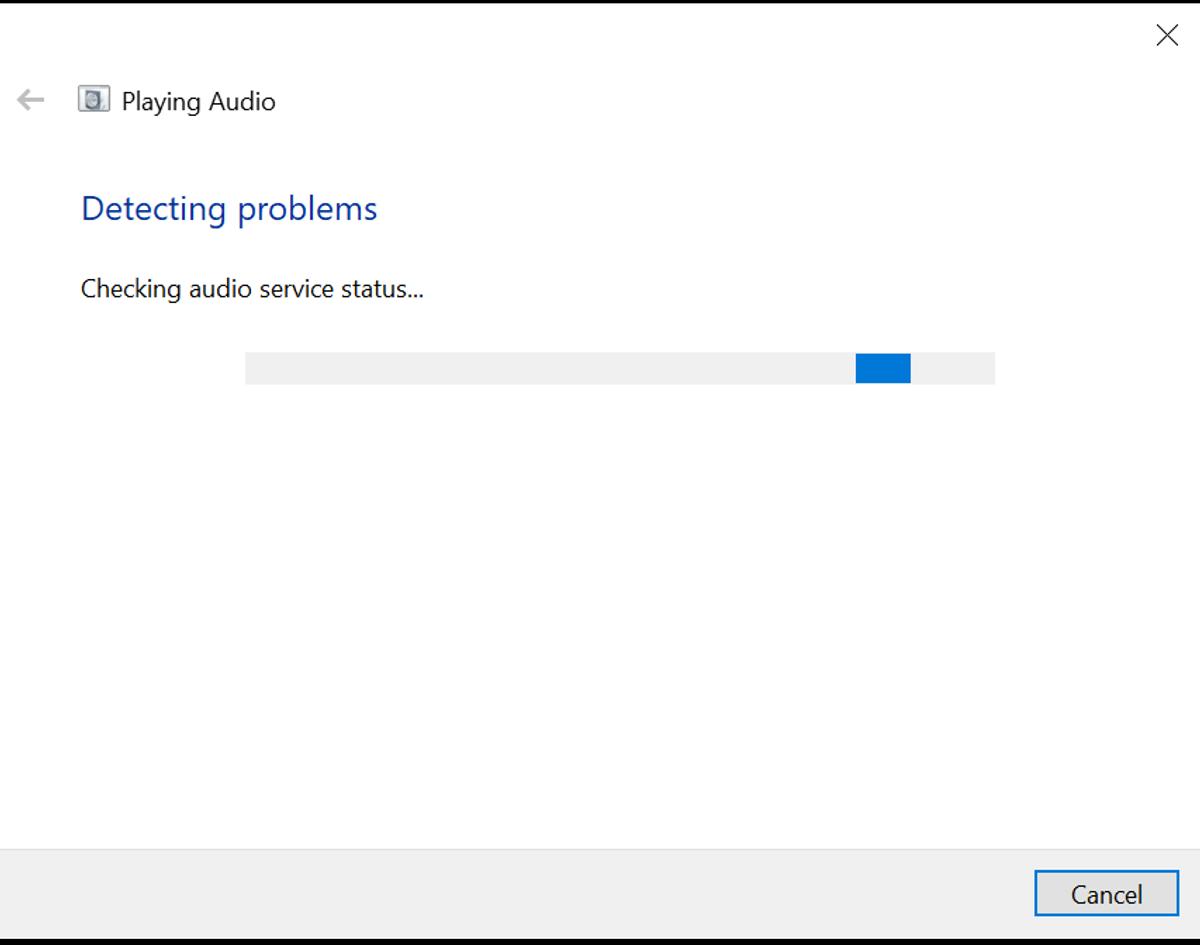
Additional troubleshooters window - Click ‘Run the troubleshooter’ and follow the on-screen instructions.

Running the audio troubleshooter
Switch to ‘HD Audio Front Panel’
The last thing you can do is to ensure that the Connector Settings are correct using the default audio driver tool. In most cases, this is the Realtek HD Audio Manager, but it might be different if you’ve installed an alternate audio driver tool.
If you use the Realtek HD Audio Manager:
- Open the Realtek HD Audio Manager and click the Settings icon in the top-right.
- Under ‘Connector Settings’, select ‘HD Audio Front Panel.’
If All Else Fails, Consider to Repair or Replace
Now, if you’ve tried all the aforementioned steps and still find that your headphones aren’t working properly with your laptop or PC, the problem could be with the internal hardware of either device. Unfortunately, this requires a trained technician to look at your device.
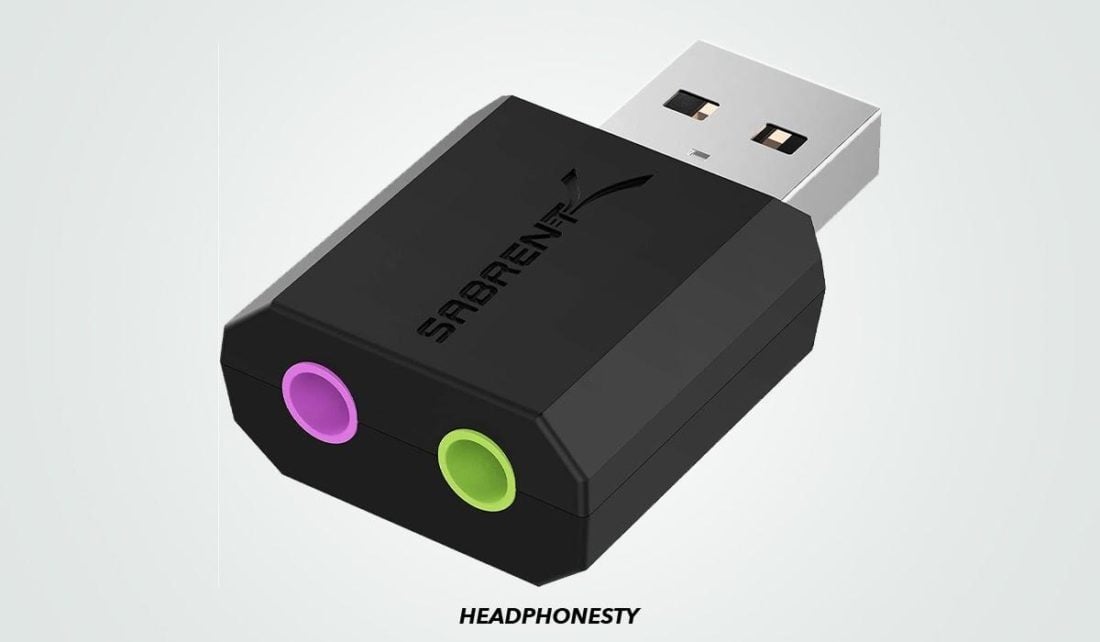
Or, if you think the problem is with some physical defects on your audio port, it may be good to just invest in an external USB Sound Adapter. With this, you simply have to plug it into one of your USB ports. This automatically installs its own audio driver. This way, you’re sure to have your headphones working in no time.
Conclusion
Having headphones that don’t work properly on one of the most popular operating systems out there can be frustrating. Having said that, Windows does offer several measures to resolve any potential software issues, and we’ve addressed all of them above.
You should now be able to plug your headphones into any Windows laptop and get them to work perfectly.
Which of these steps resolved your problem? Is there something else you tried that got your headphones to work faster? Let us know in the comments!
Thank you very much!
Thank you for putting this information together, it was very easy to follow even & an old man to follow, & best of all I followed it clearly to the end and when done I had sound. Thank you very much.😃🤩
PITA to have to go into settings every time want to change from laptop speakers to headphones. My old windows 10 would automatically switch to headphones as soon as plugged in!? Aren’t new versions of software supposed to be an improvement? WTF!