Learn how to fix your Bose headphones as we look into some of the most common issues related to them.
Just like any headphone brand, Bose headphones aren’t immune to damage, unstable connection, audio problems, or other issues that can affect your overall listening experience.
Some issues can even seem so severe that you believe the only remedy is to get them replaced, especially if they’re still under warranty. But, what if they’re no longer covered by Bose’s warranty? Does this mean it’s time to throw them in the trash?
Of course not! Most of Bose headphones’ issues can be fixed with simple tricks. And we’re here to reveal all of them for you.
Let’s get started!
- Bose Headphones Not Connecting
- Bose App Doesn’t Detect the Headphones
- Bose Headphones Connection Drop-Outs
- Bose Headphones Have Distorted or Crackling Sound
- Bose Headphones Won’t Turn On
- Bose Headphones Won’t Charge
- Bose Headphones Only Work on One Ear
- ANC Performance Issues After Bose Headphones Update
- Bose Headphones Updater Not Working
- How to Replace the Earpads of Bose Headphones
- Conclusion
Bose Headphones Not Connecting
While Bluetooth is the most common wireless connection technology, it’s not without flaws. For example, aside from static sounds and sound delays, you may have trouble connecting your Bose headphones with any of your devices.
This can be caused by bugs on the firmware, improper settings, or an overloaded Bluetooth pairing list.
Fortunately, almost all connection issues can be fixed by either of these: power-cycling, factory resetting, or clearing the pairing list of your Bose headphones.
Let’s break down each of these methods.
Power cycle the headphones
The classic tech advice of turning your device off and on again when it’s not working may trigger an eye roll, but it often works. You just have to do it the right way.
Power cycling your headphones is a soft reset that helps reboot the headset. This stops all backup processes and erases low-level errors in your headphones’ firmware without erasing the settings, such as the name and pairing list.
To power cycle your Bose headphones, do the following:
- Power off your headphones by sliding the Bluetooth or Power button.
- After about 30 seconds, connect your headphones to a wall outlet via a USB charger.
- Wait for at least 15 seconds, then unplug the headphones from the charger.
- Lastly, power on your headphones.
Reset the Bose headphones
If you power cycle your headphones and still can’t connect with your device, then your headphones may be suffering from bugs or incorrect settings. For this, you need to reset your headphones to return them to their clean state.
With this in mind, follow the steps below to reset your Bose headphones:
- Disconnect all cables from the headphones.
- Connect your charger to a wall outlet or a running computer.
- Then, press and hold the power button while connecting the smaller end of the charging cable to the USB-C port on the right side ear cup.
- Wait until the Bluetooth light blinks to blue before releasing the button.
Clear the pairing list
If the above solutions don’t work, your headphones’ memory may be overloaded with data from your previously connected devices. This means that the headphones may not have enough room to connect with a new device.
Other times, your Bose headphones may be trying to connect to their last paired device and not the current device you’re attempting to connect with.
In either of these cases, clearing your pairing list should help solve the problem. Just remember that this will require you to pair and connect with your devices again as if it’s the first time.
To clear the Bluetooth device list, you simply need to press and hold the Bluetooth button for around 10 seconds until you hear, “Bluetooth device list cleared.”
For Bose earbuds, visit our separate guide on how to connect Bose earbuds to any device.
Bose App Doesn’t Detect the Headphones
Bose has two apps, Bose Music and Bose Connect. These help your Bose headphones to automatically pair with your audio source without the need to go through your device settings.
Sadly, there are instances where these apps may have a few issues. The most common is when the app doesn’t detect the headphones. Headphone detection problems can be due to several reasons, including app incompatibility.
Here are some things you can try when your Bose app can’t detect your headphones:
Check if you have the right app
While both apps may come from the same headphone manufacturer, each app supports different Bose headphone models. So you need to ensure that you match your headphones with the right app.
For this, you can browse through your headphones’ user manual or product page to identify which app they work with.
Alternatively, check out the lists of Bose products compatible with either app and see where your headphones are mentioned.
Fix app permissions
On your mobile device, you need to ensure that the location and network permissions for the app are enabled.
With this in mind, here’s a rundown on how to enable app permissions on iOS or Android devices:
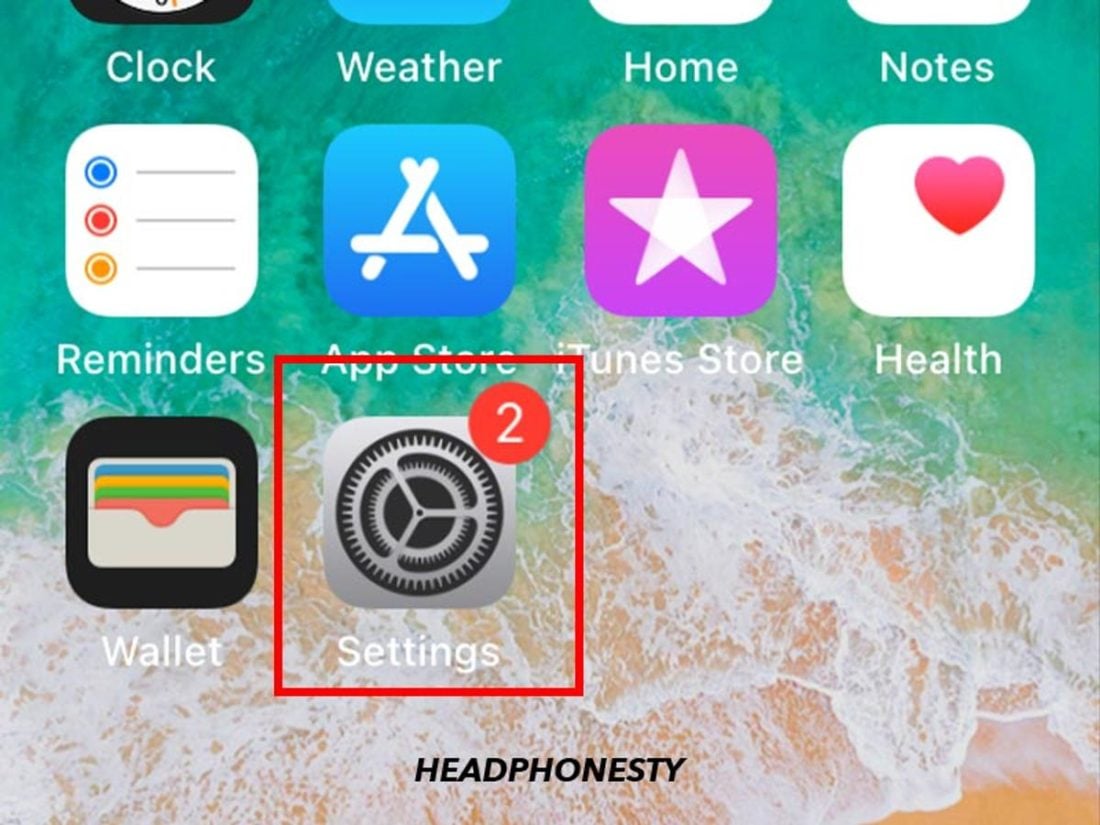
For iOS
On iOs devices (iOS 12 or below), simply do the following steps to enable app permissions:
- Head to settings and scroll down to apps. Then select Bose Connect.
- Select ‘Permissions’.
- Ensure that ‘Location’ isn’t ‘Denied’.
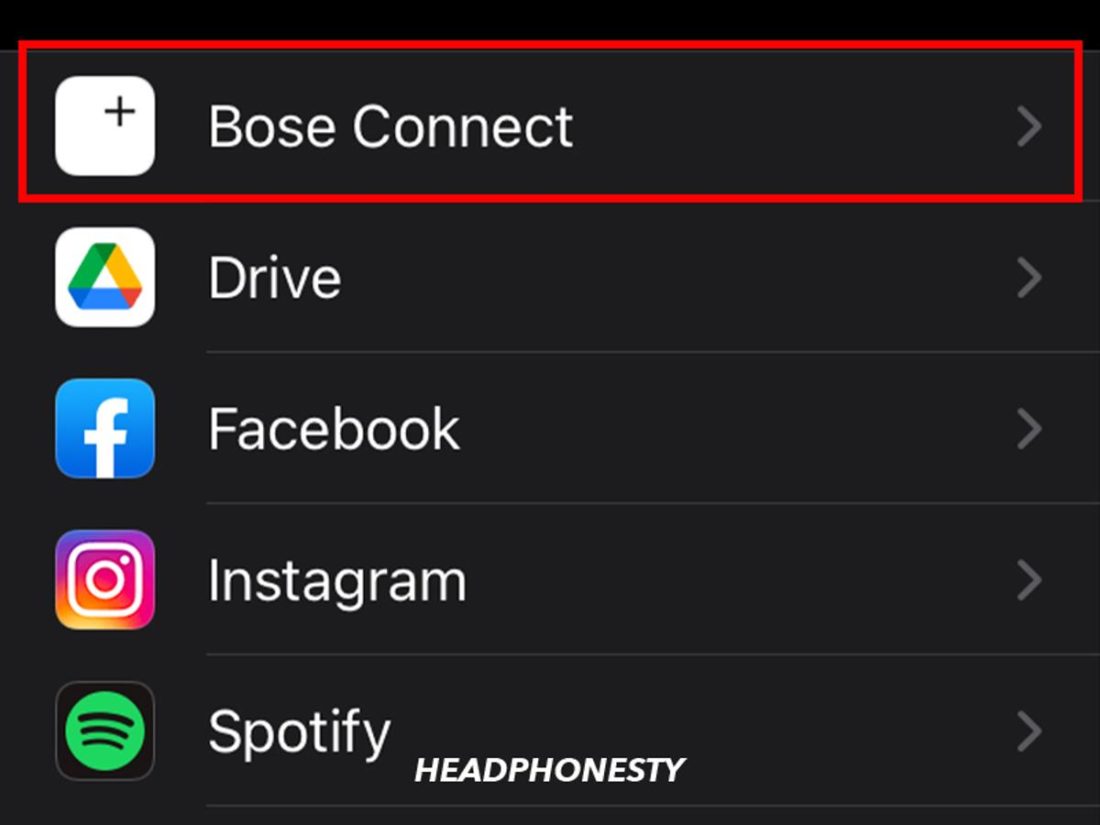
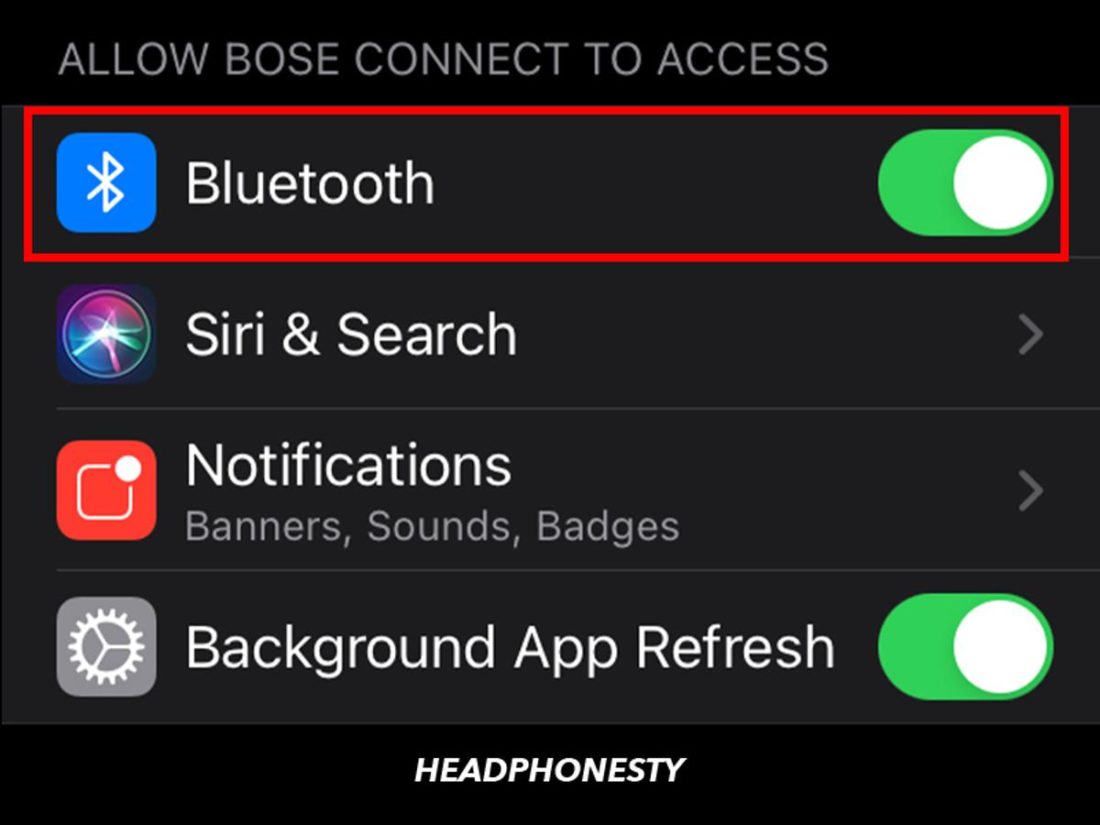
If you have an iOS 13 or newer, you also need to enable Bluetooth permissions after you install the Bose Connect app:
- Head to the settings and scroll down to the list of apps.

Going to iOS Settings - Choose Bose Connect.
Bose Connect option - Then enable Bluetooth under ‘Allow Bose Connect To Access.’
Enabling Bluetooth permission on Bose Connect
For Android
To allow location and network permissions on Android Devices, simply do the following steps:
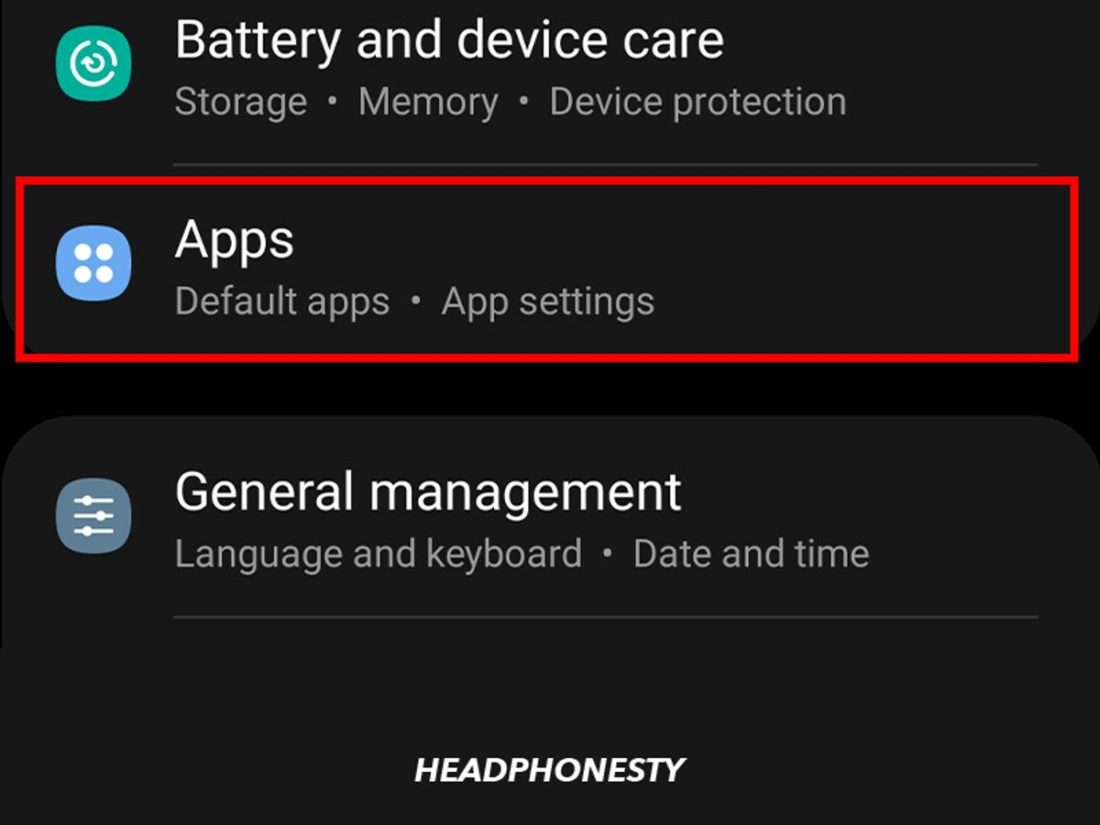
- Go to settings and select ‘Applications’.
Android Apps settings - Select your Bose app
Choosing Bose Connect - Select ‘Permissions’ and ensure that there are no permissions required.
Checking required permissions


Restart your mobile device
You can also consider restarting your mobile device to refresh its operating system. This clears the junk from your phone’s RAM and closes unknown background software so apps can restart on a clean slate. This also helps your Bose app to load and run quicker.
The process for this depends on the design of your audio source or mobile device. But, usually, you simply have to press the power button for a few seconds until the power settings come up. Then, tap the restart icon and let the system switch itself back on.
Alternatively, you can manually turn your phone off and turn it back on after a few seconds.
Uninstall and Reinstall App
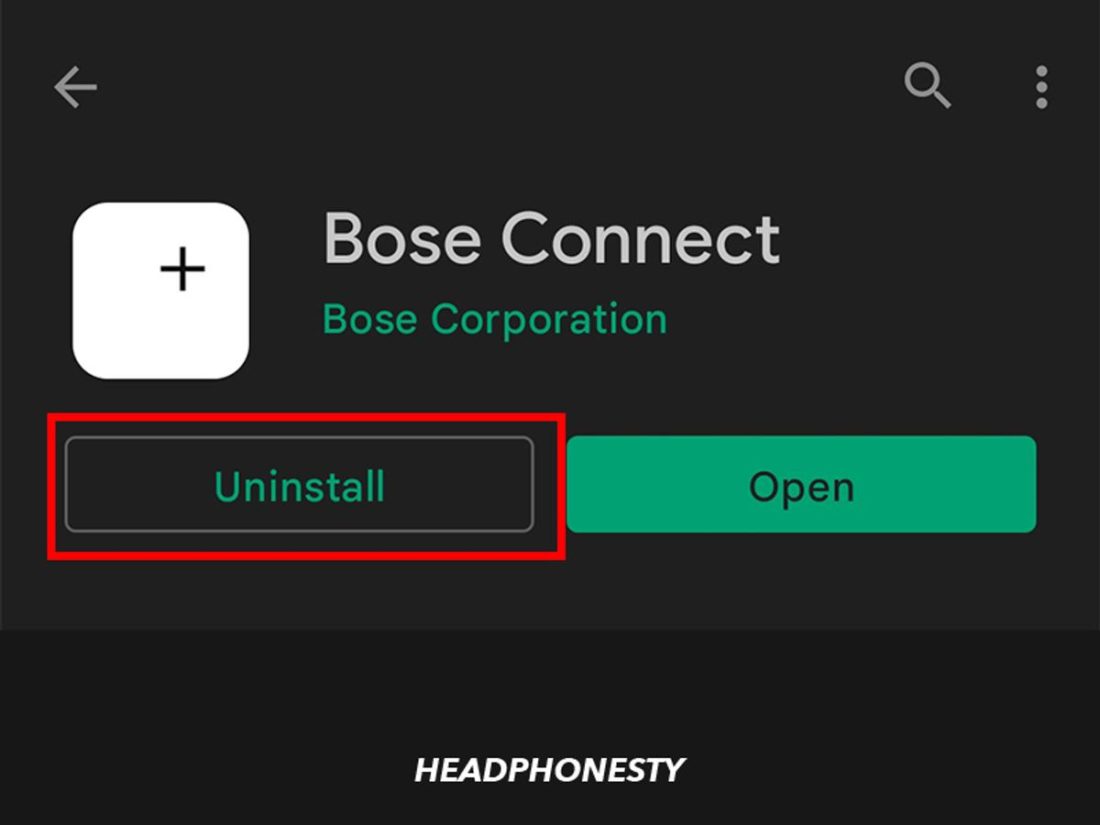
If none of the above solutions work, consider uninstalling then reinstalling your Bose app.
Uninstalling the application helps clear the app’s data and gets rid of junk files or cache that may be causing the connection problem.
The process of uninstalling the app depends on the mobile device, but ideally, you simply have to hold down the app until the uninstall option appears.
If this doesn’t work, simply go to your app store, find your Bose app, and click ‘Uninstall’.
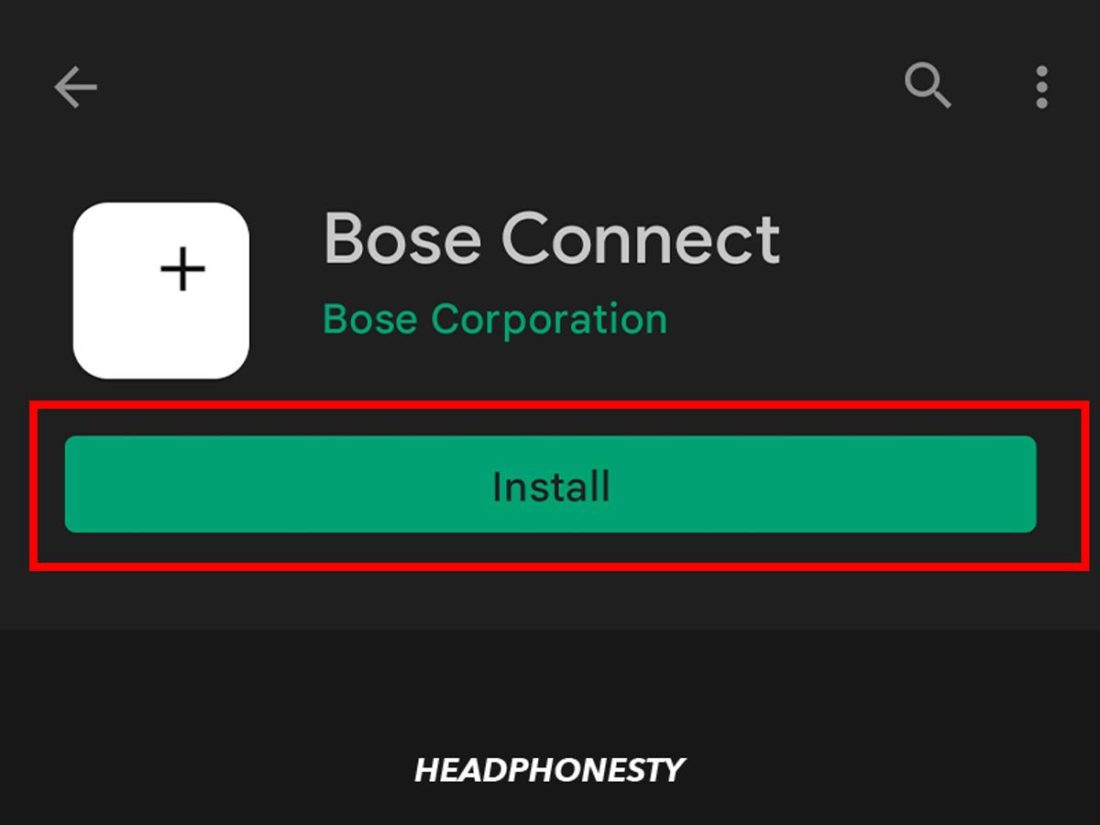
After that, you can wait for a few minutes before reinstalling the app and connecting it with your headphones.
Bose Headphones Connection Drop-Outs
At times, your headphones may connect successfully but drop out frequently. This can be frustrating since you only get a few seconds/minutes of audio before it drops out. And be extra aggravating if it occurs during essential calls.
There are two main reasons why your Bose headphones’ connection drops out:
Bluetooth interference
Bluetooth interference happens when something blocks the wireless headphones and the audio source.
The interference could be a physical object like a wall or any intangibles such as Wi-Fi signals or electromagnetic waves (such as a microwave) overlapping with the frequency of your Bluetooth signals.
Try to stay within your headphones’ recommended Bluetooth range to limit the interference. The average range for headphones such as the Bose 700 and Boss QC35ii is about 30 feet, but the closer, the better.
Incompatible audio codec
This mostly happens when Bose headphones are used with Android devices that can’t support your Bose headphones’ Bluetooth audio codecs.
Sometimes, the Android operating system may not manage to efficiently encode the AAC codec, resulting in lags or connection drop-outs.
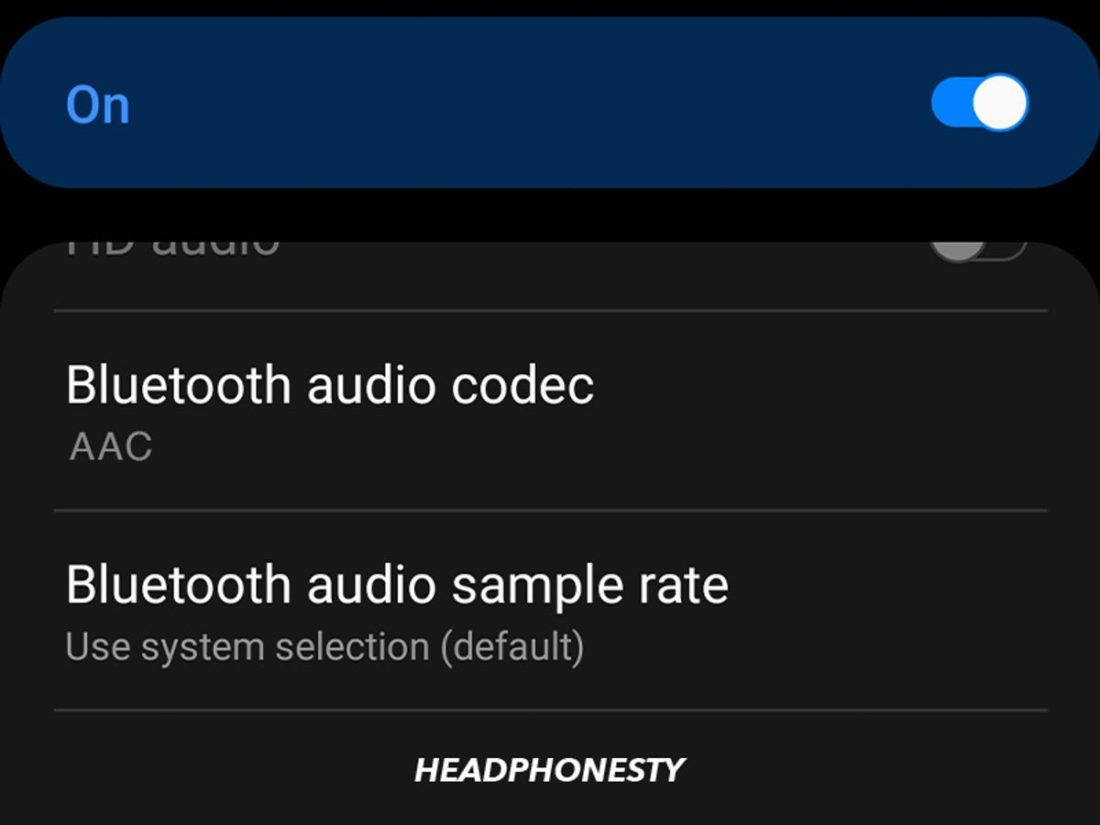
If you are using an Android device, follow the steps below to manually switch to SBC:
- Head to the settings and navigate to the ‘Developer options’
Going to Android ‘Developer options’ - Select ‘Bluetooth Audio Codec’
Bluetooth audio codec option - From the selection list, switch from ‘AAC’ to ‘SBC’, then press ‘Ok’ to effect the changes.
Changing the audio codec to SBC


Bose Headphones Have Distorted or Crackling Sound
A distorted or crackling sound from your headphones is simply annoying and can even force you to toss them aside for a while.
Aside from connection issues, this can result from various reasons involving your headphones noise cancellation tech and hardware or software issues.
ANC issues due to loud environments
According to Bose, it’s typical for your headphones to have distorted or crackling sounds when using them in significantly noisy environments. This is because the mics on your ANC may not be able to handle the level of noise it receives.
Unfortunately, this can happen in both Quiet and Aware modes.
The good news is, crackling or distortions caused by this issue won’t permanently damage your device. However, this may only be solved by moving away from the loud noise source.
Hardware and software issues
If you still can’t pin down the problem, you may be dealing with a hardware or software issue. The crackling sound may be caused by wire damage, blown out drivers, a loose headphone jack, a bent headphone plug, or perhaps your computer’s sound drivers may need an update.
Bose Headphones Won’t Turn On
Ideally, turning on your Bose headphones is as simple as pressing or sliding the power button. But at times, this doesn’t work, usually because of faulty batteries or internal hardware issues.
To check the battery condition, you need to charge your headphones for 2 minutes and wait for the voice prompt to announce the battery level.
If the voice prompt announces, “Battery low, please charge now,” then they may be in a low discharge state, and you simply need to recharge them until the battery is full.
If the voice prompt doesn’t work and your headphones still won’t turn on, then the best course of action is to visit the Bose service request page. Here, you can troubleshoot the problem with the appropriate solutions depending on your exact headphones model.
Bose Headphones Won’t Charge
Your Bose headphones may not charge due to different things such as: faulty batteries or chargers and extreme temperatures
Here are a few tips that can help remedy the problem:
- Ensure that your headphones are at room temperature before charging them.
- Try using a different USB cable than the one you typically use.
- If your headphones take too long to charge or won’t hold a charge, try plugging them into a wall USB charger with an amp rating of 1-amp or higher.
- Reboot your headphones and try recharging them.
Another possible reason could be over-discharging. This happens when the headphones haven’t been used or charged for a long time, which causes the copper components on your headphones batteries to dissolve, resulting in unwarranted chemical reactions.
Unfortunately, if over-discharging is the culprit, you may need to replace your Bose headphones’ batteries.
Bose Headphones Only Work on One Ear
Both hardware and software issues can cause headphones that only work on one ear.
Hardware issues may involve damaged wires or blown drivers in one ear cup. For this, you can send them for repair or replacement if the Bose warranty still covers them.
A common software issue may involve an audio imbalance where one side may simply be quieter than the other. If this happens on your PC, you can fix this by following the steps below:
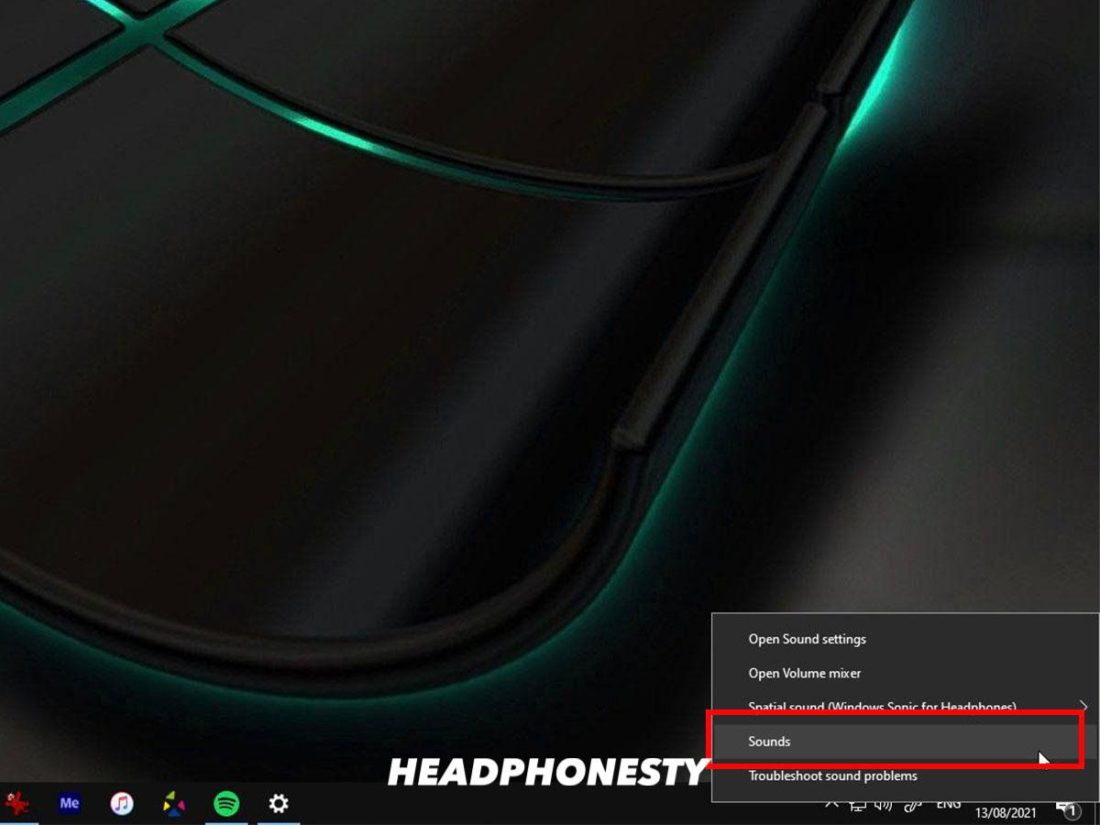
- Locate the sound icon at the bottom of your screen and right-click on it.
- Then, select ‘Sound’ from the pop-up menu.
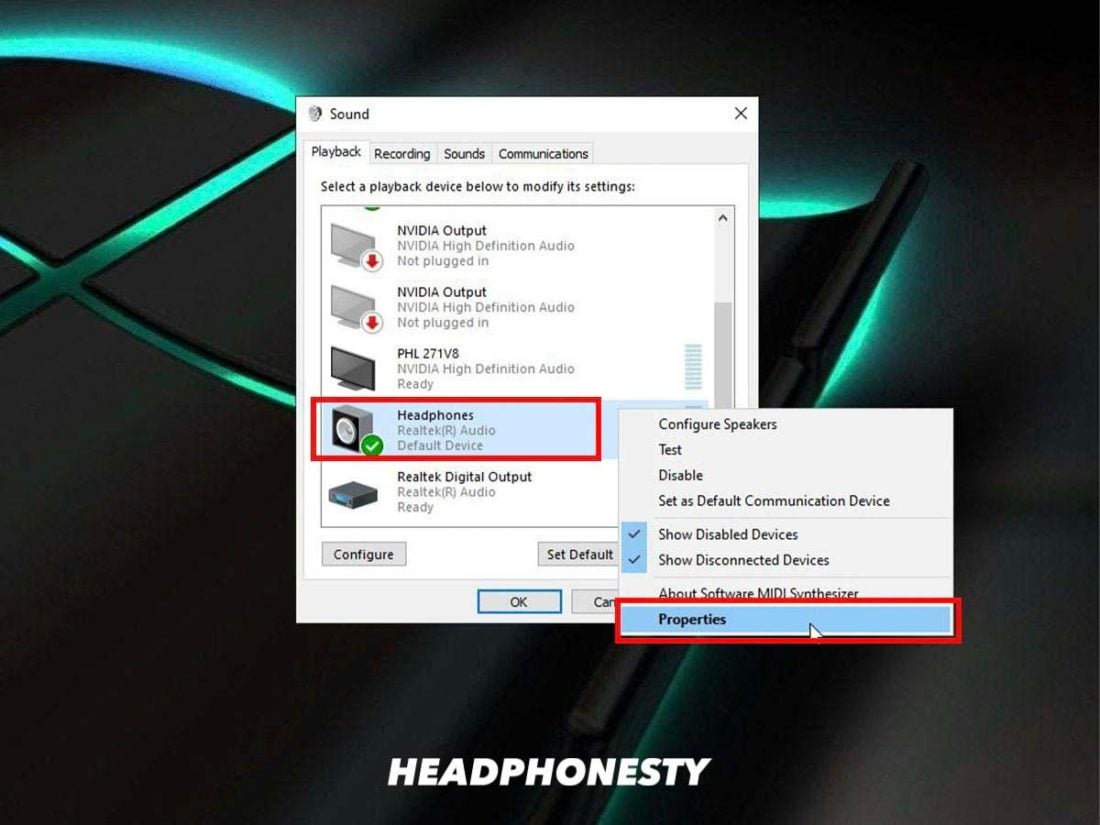
Heading to Sound Settings - A window will appear displaying your headphones name. Click on your headphones and select ‘Properties’ from the tab that appears.
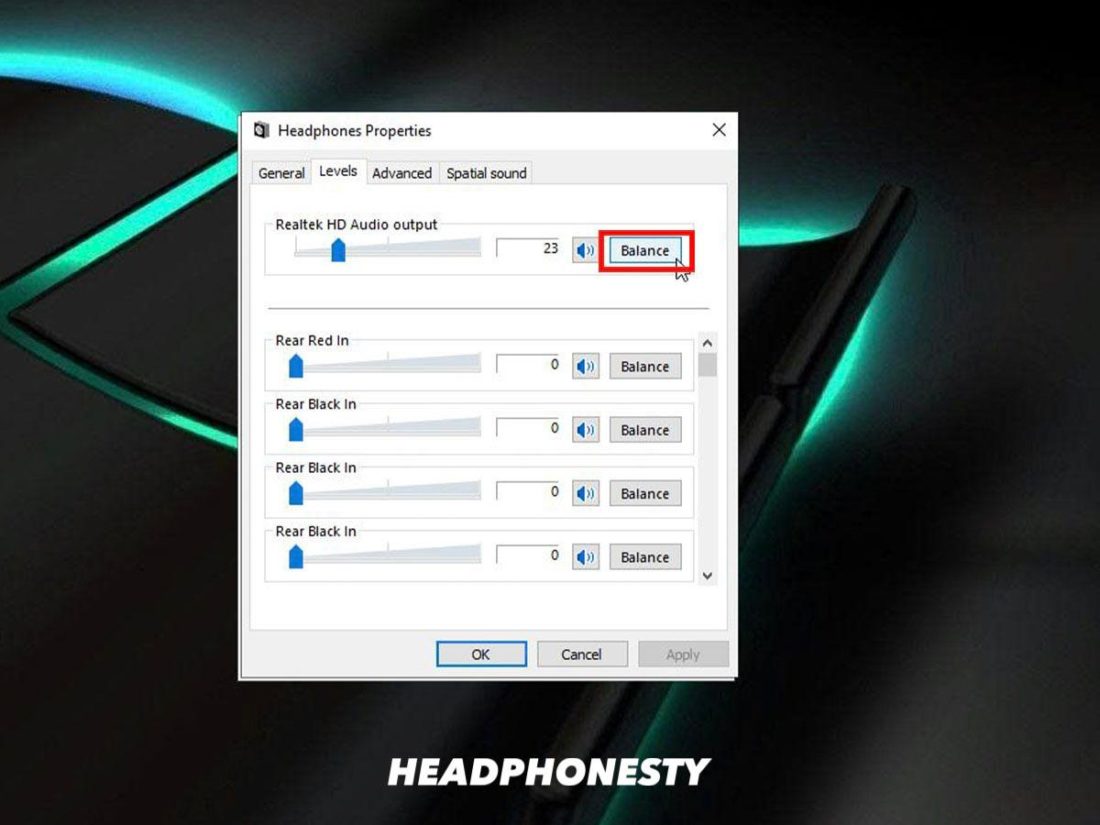
Headphone Properties - Proceed to ‘Levels’ on the ‘Headphone Properties’ tab and select ‘Balance.’ This will let you adjust the volume of both your left and right earcup. Adjust them until you get a balanced volume level.
Changing audio balance
We also have another guide with tips on what to do if you’re experiencing low volume in both headphone drivers.
ANC Performance Issues After Bose Headphones Update
Some Bose headphones users reported that the ANC performance degraded after updating their Bose QuietComfort 35 ii, especially for version 4.5.2. However, this isn’t just an isolated version’s fault but can also happen in later versions.
For this, there are two leading solutions: updating the headphones again or turning off the Self Voice feature.
Try updating the headphones again
One common reason why your Bose headphones’ ANC degrades after an update is that there could have been errors while updating the headset. This happens when the connection between the headset and source device was disrupted during the update or the steps were not followed properly.
Here’s how you update your Bose headphones again:
- Turn off your headphones and connect them to a wall charger for at least 2 minutes before disconnecting the cable. This ensures your headphones have enough charge to go through the update.
- Then, connect your headphones to your PC or laptop via a USB cable.
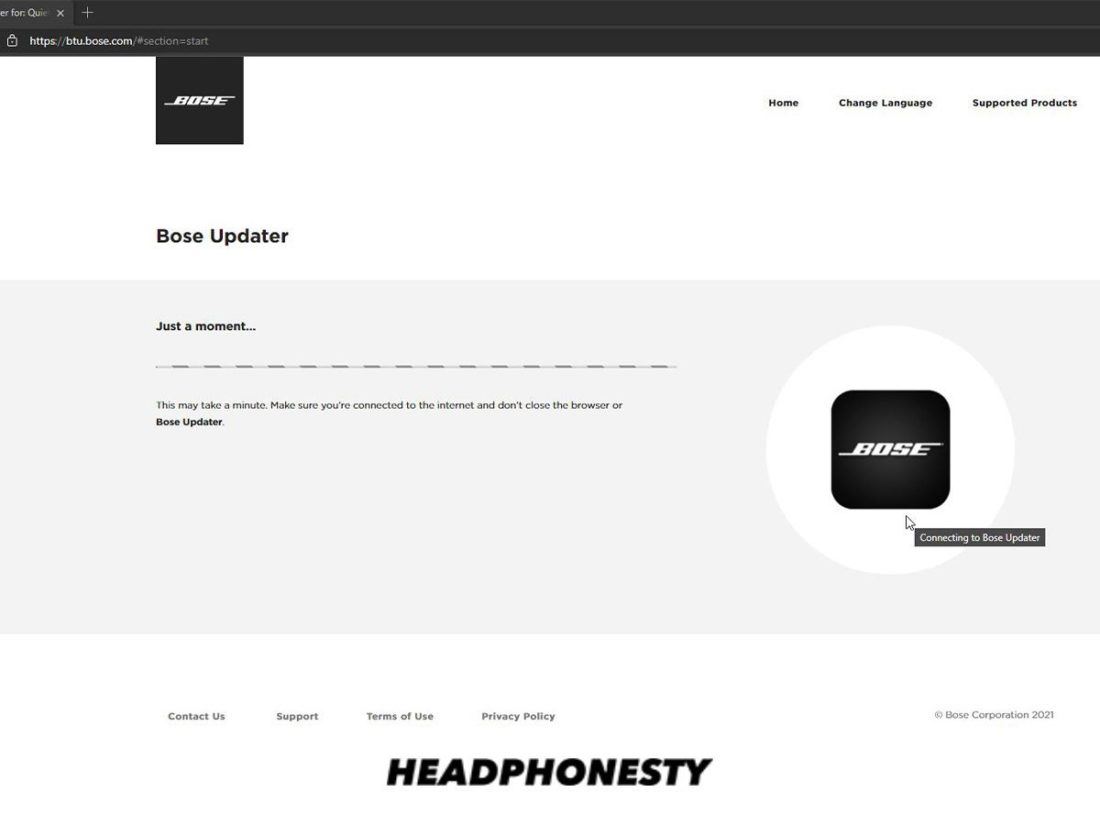
- From your PC’s browser, head to btu.bose.com, then download and run the Bose Updater app.
Running Bose Updater - Using your PC, update your headphones to the latest firmware. To prevent any issues, make sure to not move your headphones while the update is ongoing.
Updating Bose headphones
Turn off the Self Voice feature
The Self Voice feature found on Bose noise-canceling headphones allows the user to hear their own voice when they receive a call. This functions the same way as mic monitoring.
Self Voice should automatically activate when answering phone calls and automatically deactivate at the end of the call, but it can malfunction and sometimes remain active. When this happens, it may give you the impression that the ANC isn’t working.
If you suspect that Self-Voice remains active even after a phone call, you can deactivate it by disconnecting and reconnecting your mobile device. If that doesn’t work, you can also manually turn it off from the Bose app by following these steps:
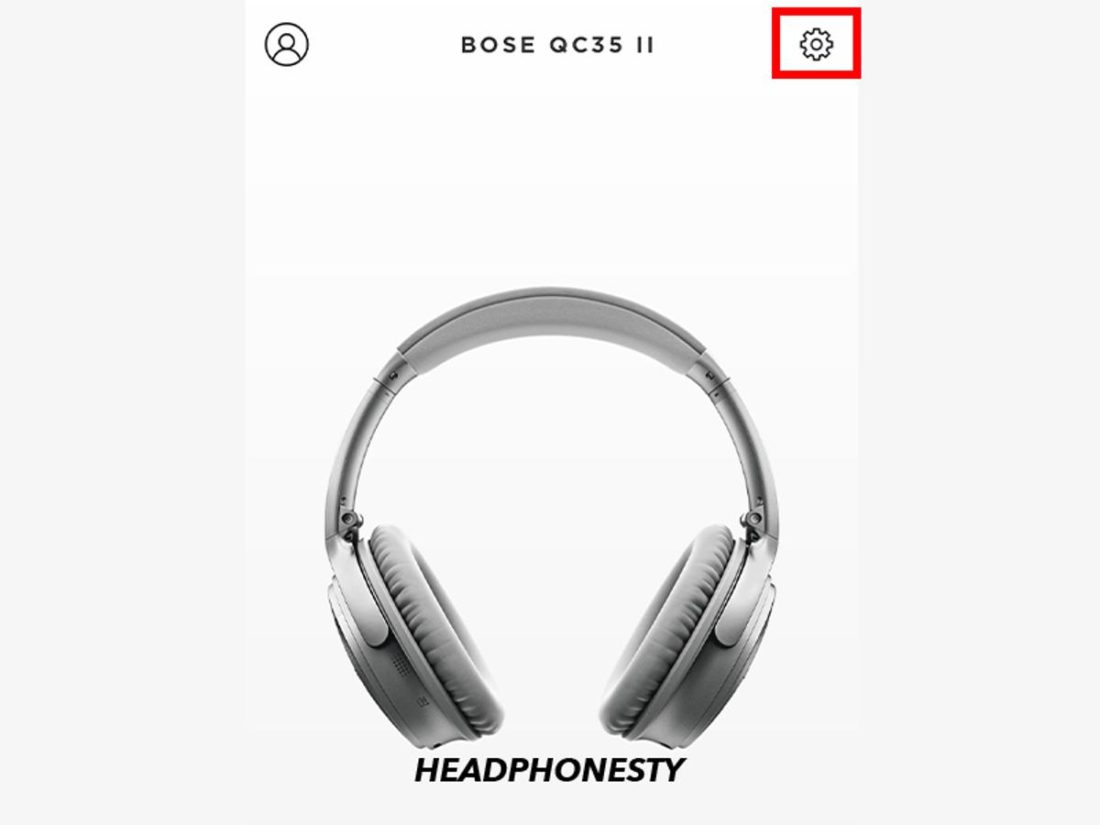
- Head to the Bose app settings
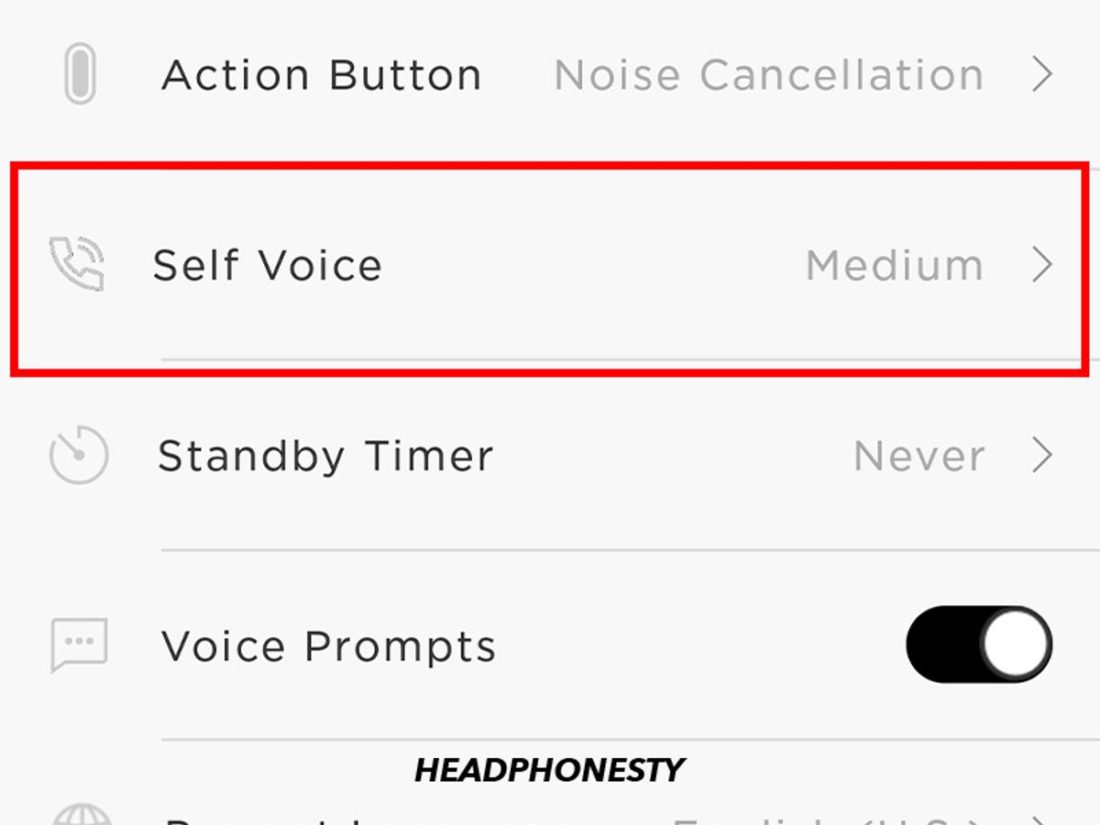
Bose Connect app settings - Select ‘Self Voice.’
Going to Self Voice settings - From the list of options, select ‘Off’.
Turning Self Voice off

Bose Headphones Updater Not Working
The Bose software updater provides the latest features and enhancements, which allow the headphones to work at their best.
While the software updates can be done automatically from the Bose app, it’s not always reliable. For this, it’s best to go through the manual route via the Bose Updater website. Here’s how:
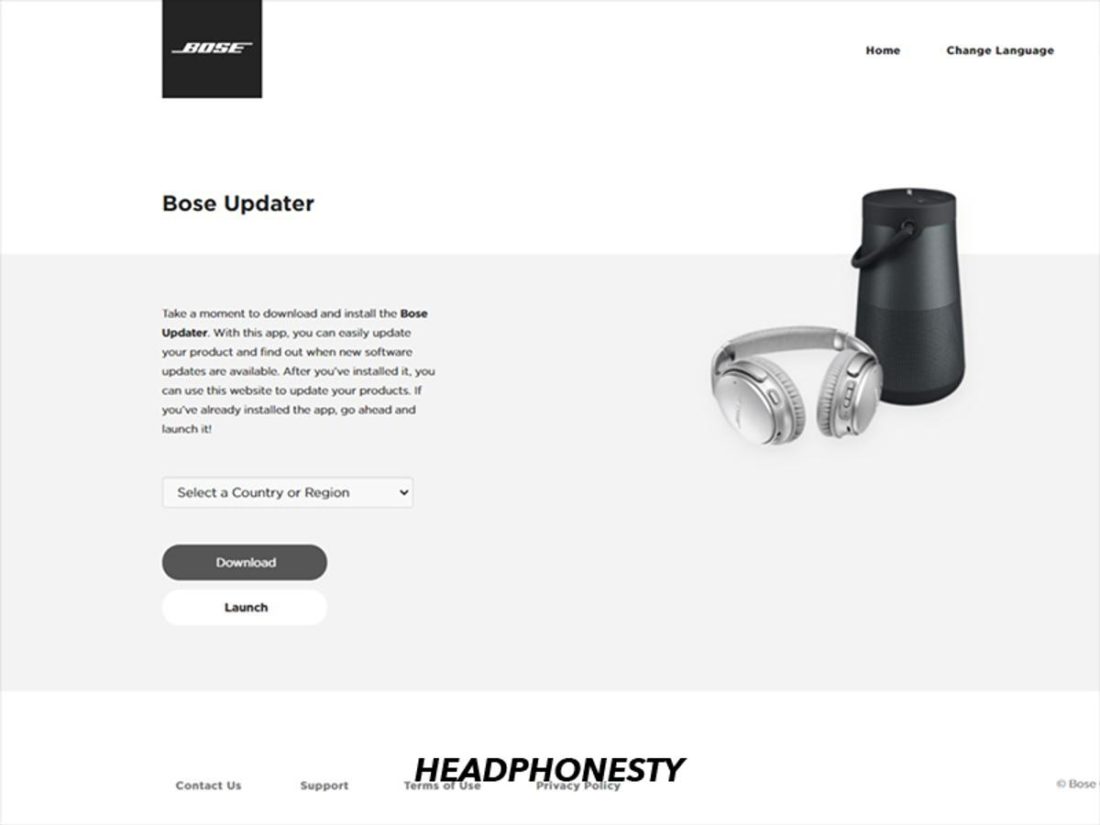
- Open the Bose Updater from your web browser. Click ‘Accept and Continue’ to proceed.
- You will be prompted to download and install the updater on your computer. Click ‘Download’ to save the updater file to your computer.
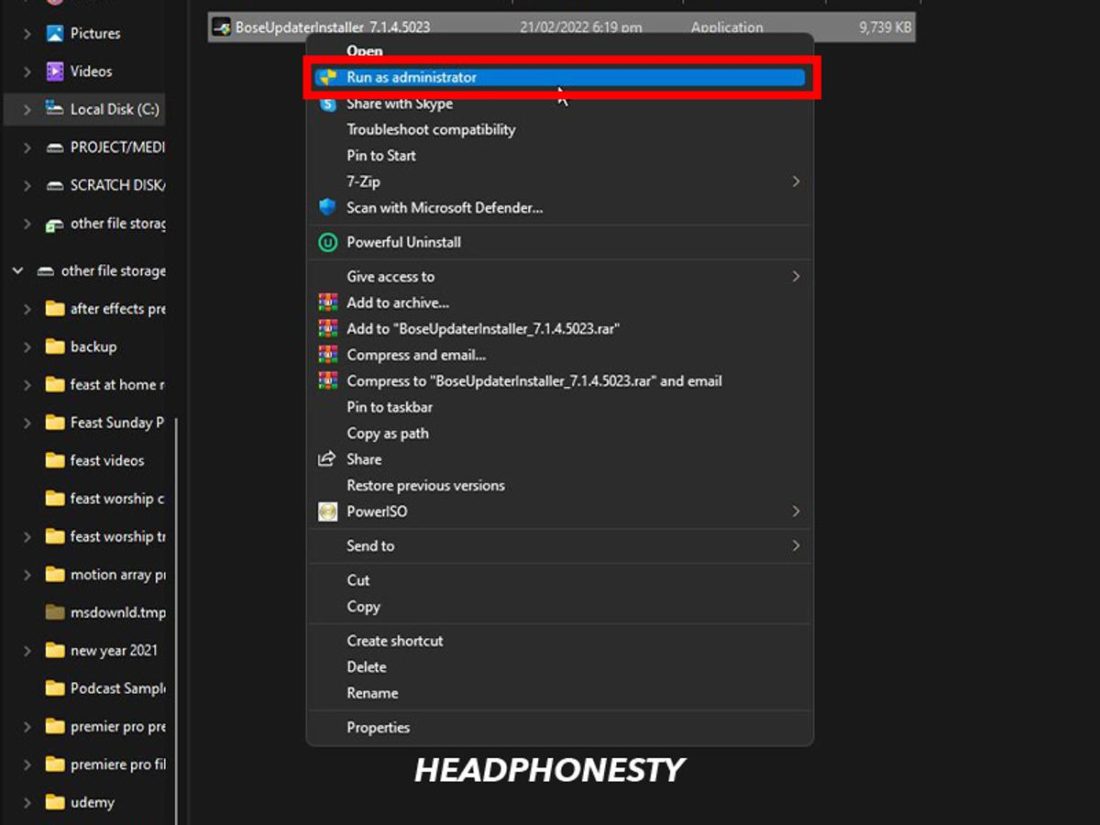
Downloading Bose Updater - Richt-click on the downloaded app file and select ‘Run as administrator’.
Run the Bose updater as administrator - After the Boss Updater is ready on your computer, connect your headphones to your computer with a USB cable. The headphones’ model name and image will appear on the screen.
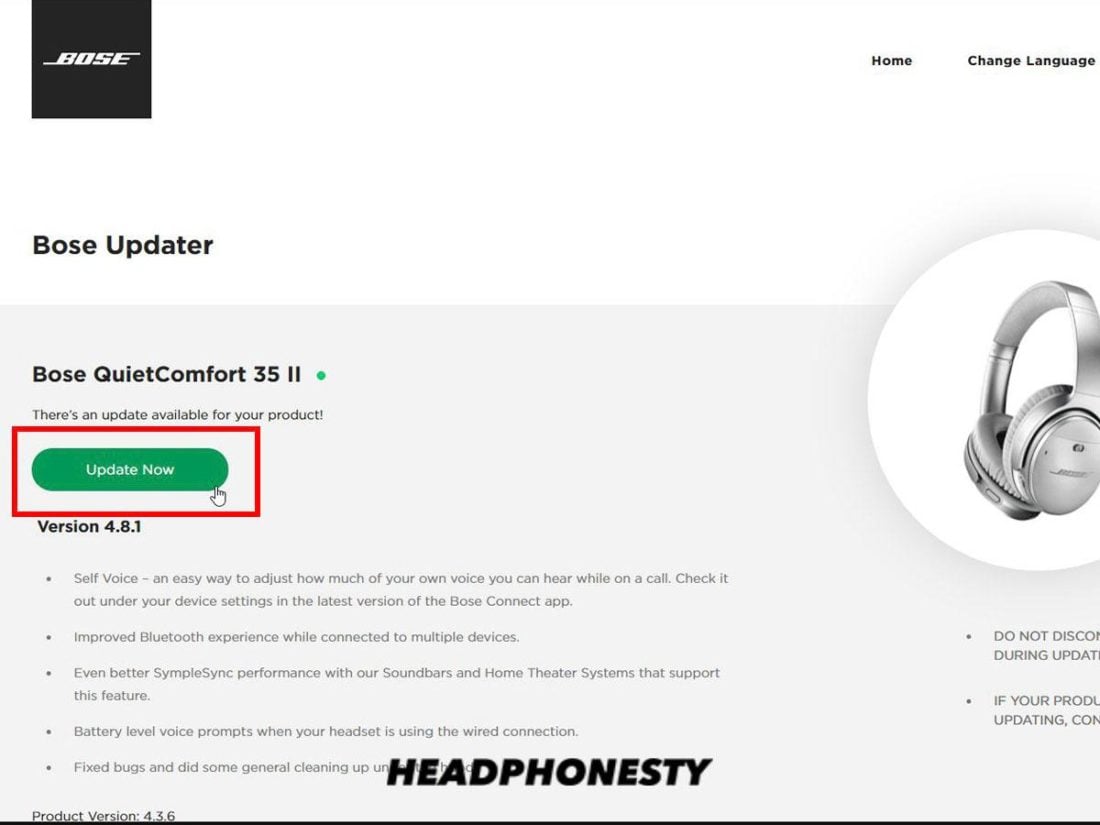
- On the website, check if it shows that an update is available. If yes, click ‘Update Now’ and wait for the update to complete.
Selecting ‘Update Now’ - You can then disconnect your headphones after the update is complete.

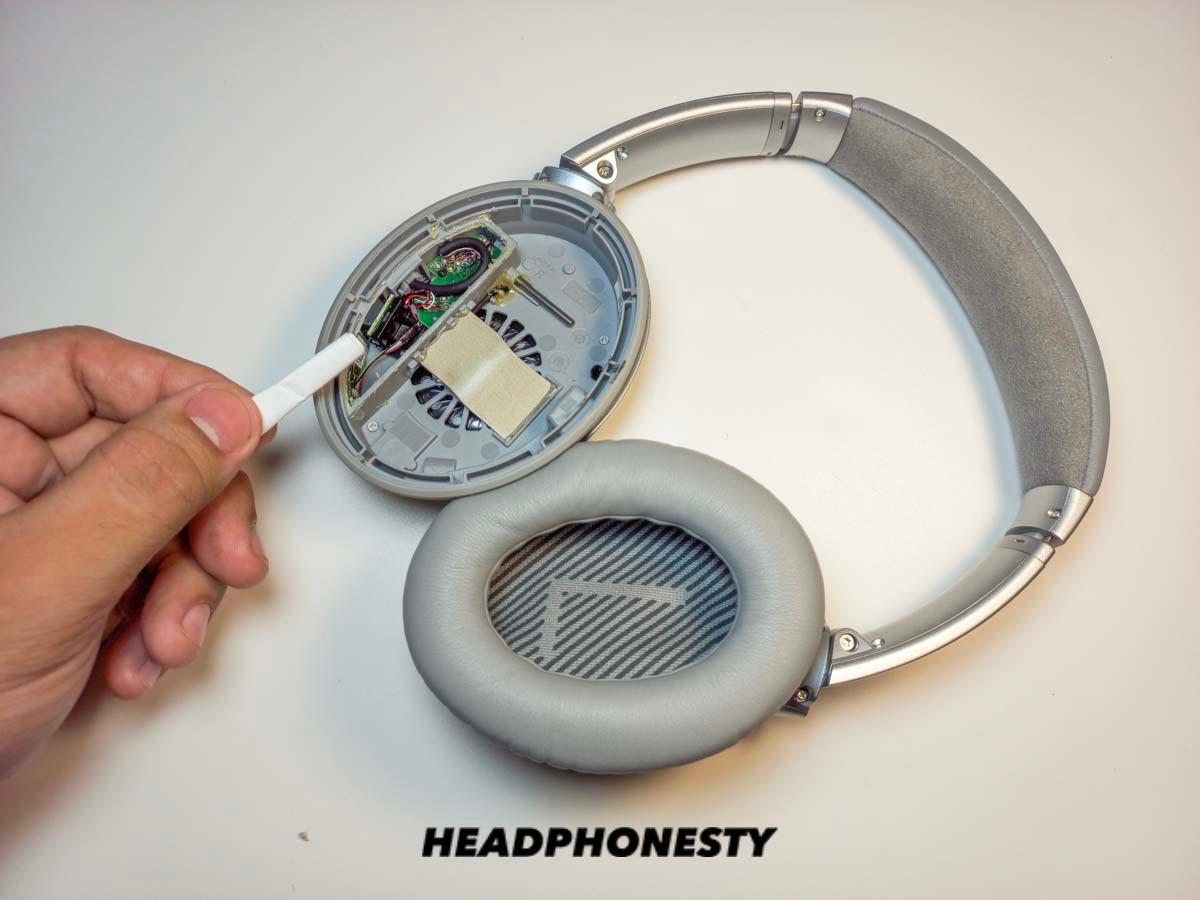
How to Replace the Earpads of Bose Headphones
From our discussion, we can see that Bose headphones are not foolproof, and even their earpads are no exception. For example, they can wear out from frequent use, improper storage of your headphones, or poor handling.
Since you can’t toss out a pair of sweet-sounding headphones just because of worn-out earpads, it’s better to replace them.
To replace your earpads, simply do the following:
- Hold the side of the worn-out earpad and pull it upward and outward from the small tabs being careful not to remove the material covering the speaker. Do this until both earpads are completely removed.
- Take the new earpads and locate the side with the grooves.
- With the groove side facing the earcup, gently push the edges of the earpad until they snap in place.
Conclusion
Even the best Bose headphones cannot be free from occasional issues. Hopefully, with this article, you now have all the information you need to troubleshoot possible problems with your Bose headphones and fix them right at the comfort of your home.
You won’t even have to buy a new headset or take them to a repair shop!
We would like to know how you feel about our suggestions. Did they work for you? Is there a common issue we didn’t cover? Leave us a comment, and we will be sure to check it out.
tried everything still not working please help
Mine got wet… dried them. And was only able to get them working when I unplug charging ribbon… then they work… but then cannot charge… qc35 2 can I replace that item?
Started with a crackling and vibration if I talk. Now using them to talk on the phone the other person can’t hear me.
My Bose headphones make a constant ringing/beeping noise and will not pair – (manually or through app) like the bluetooth button just doesn’t work. I turn them on and they say “connected to Apple Watch” and then I get a constant “beep, beep, beep” unless I press any of the buttons and it stops the sound until I let go of that button.
I can’t get any volume control, also mini jack crackles and goes dead
The post-it solved the issue for me, with left cup not working. Hope it stays on. Thanks a lot!
Hi
The issue with my QC35 set is that the white led is lighted all the time, even when the unit is off via the on/off button.
The white led goes off only when the unit has drained power on the battery.
Tried resetting, not sure if the unit was reset.
Tried updating, my unit has the latest version.
The moment I connect to charge the unit the white led goes on again.
Any insights what is the problem?
Thanks