Everything you need to know to start using your AirPods on any mobile device, PC, or gaming console.
The AirPods are some of the top true wireless earbuds on the market, so making them your go-to earbuds for all your devices is a dream.
However, the steps may vary depending on the device you’re connecting to. For example, some gaming consoles will require the use of third-party apps or accessories to connect your AirPods, while iOS devices enjoy an automatic pairing feature.
Fortunately, you can connect your AirPods to your mobile, PC, or console in the same way as any other pair of Bluetooth headphones. We’ll go over everything you need to know about this below, so read on!
How to Connect AirPods to iPhone/iPad
Connecting AirPods to an iPhone or iPad is a seamless process that can be done in two ways: manually or automatically. Both methods are straightforward and user-friendly, designed to get you listening to your favorite tunes in no time.
Here are the steps for each method:
How to connect AirPods to iPhone/iPad automatically
The automatic method is the quickest and easiest way to connect your AirPods to your iOS device. Here’s how to connect AirPods to your iPhone/iPad using the automatic pairing feature:
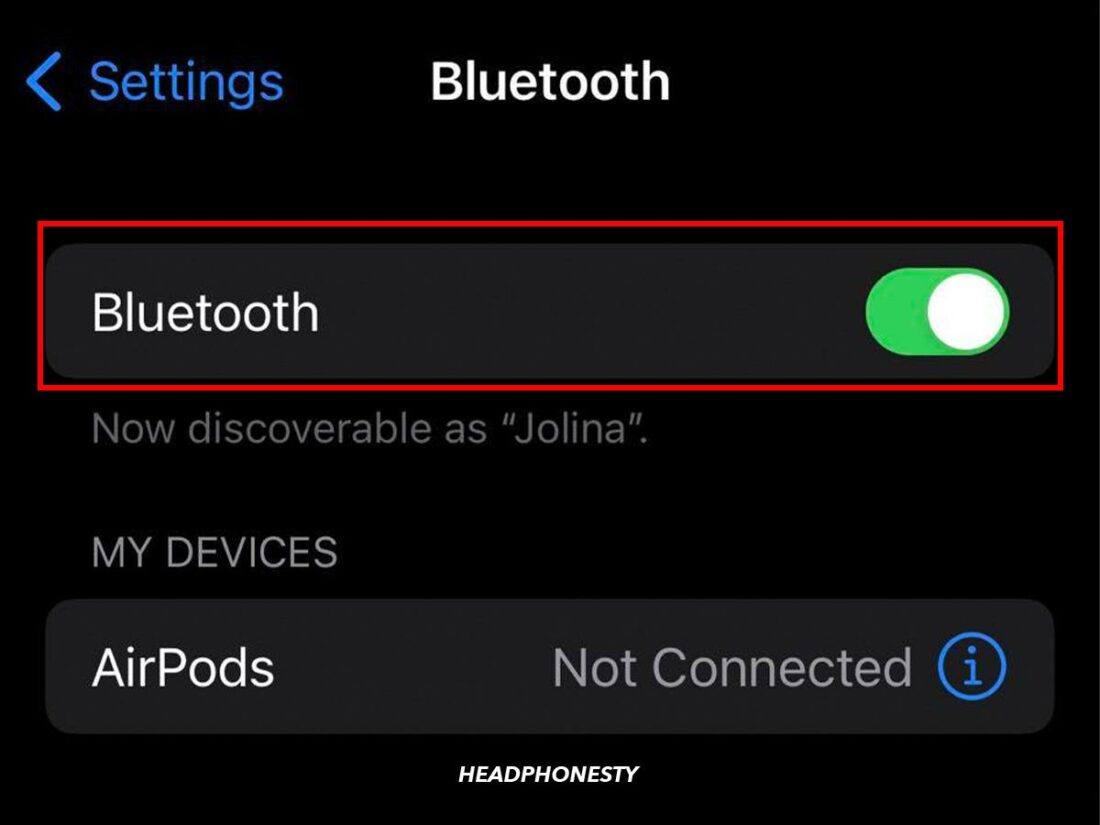
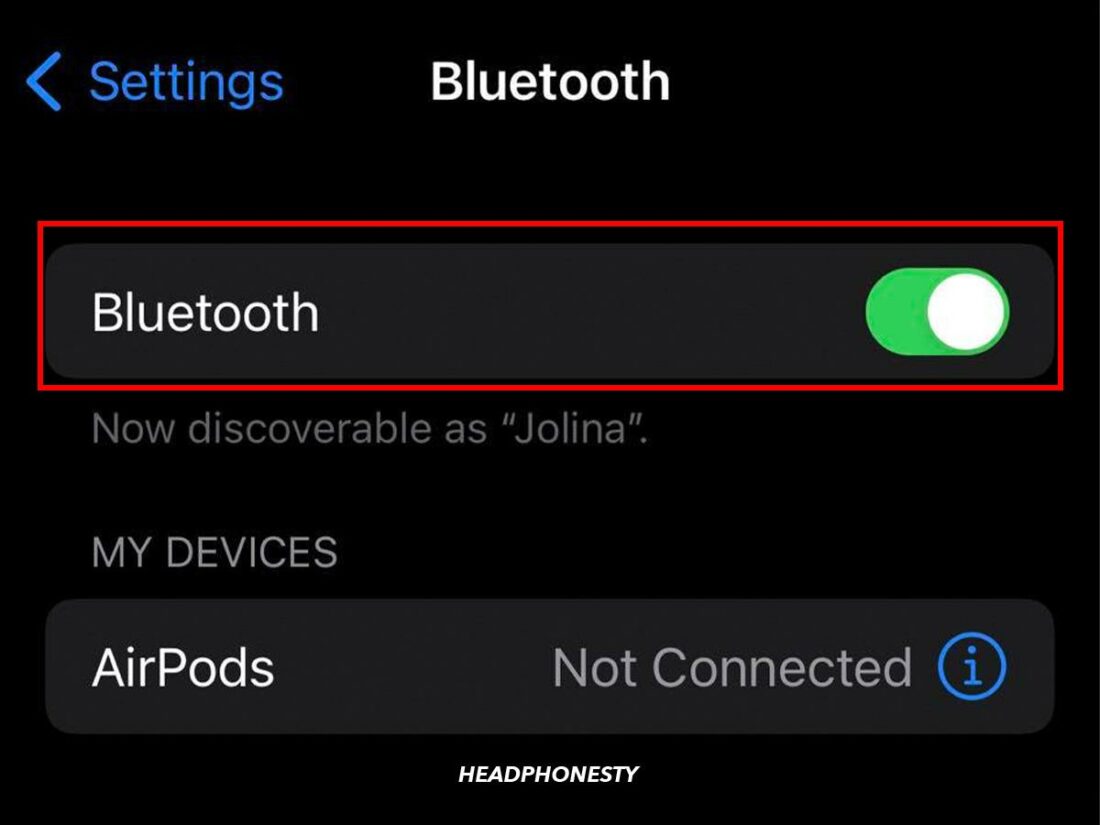
- Turn on Bluetooth on your device by going to Settings > Bluetooth > toggle button. Then, go to your home screen.
Turn on Bluetooth toggle switch. - Place your AirPods in their case and open the lid.
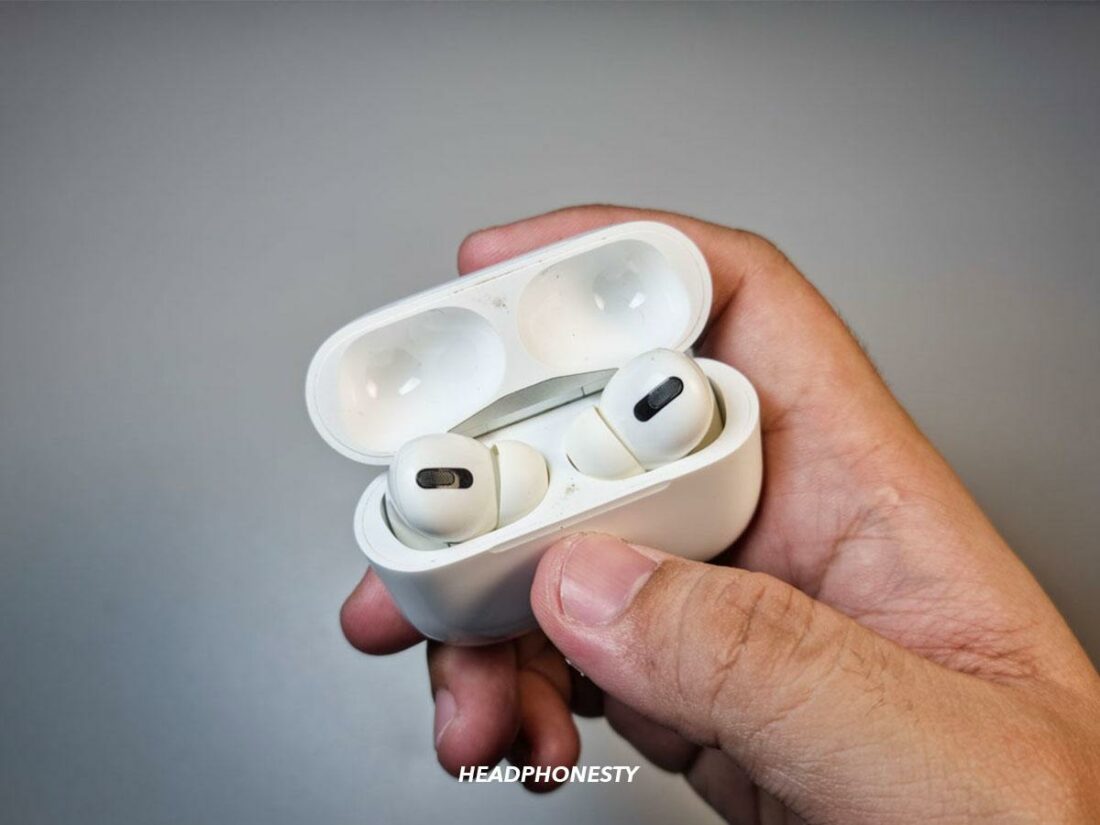
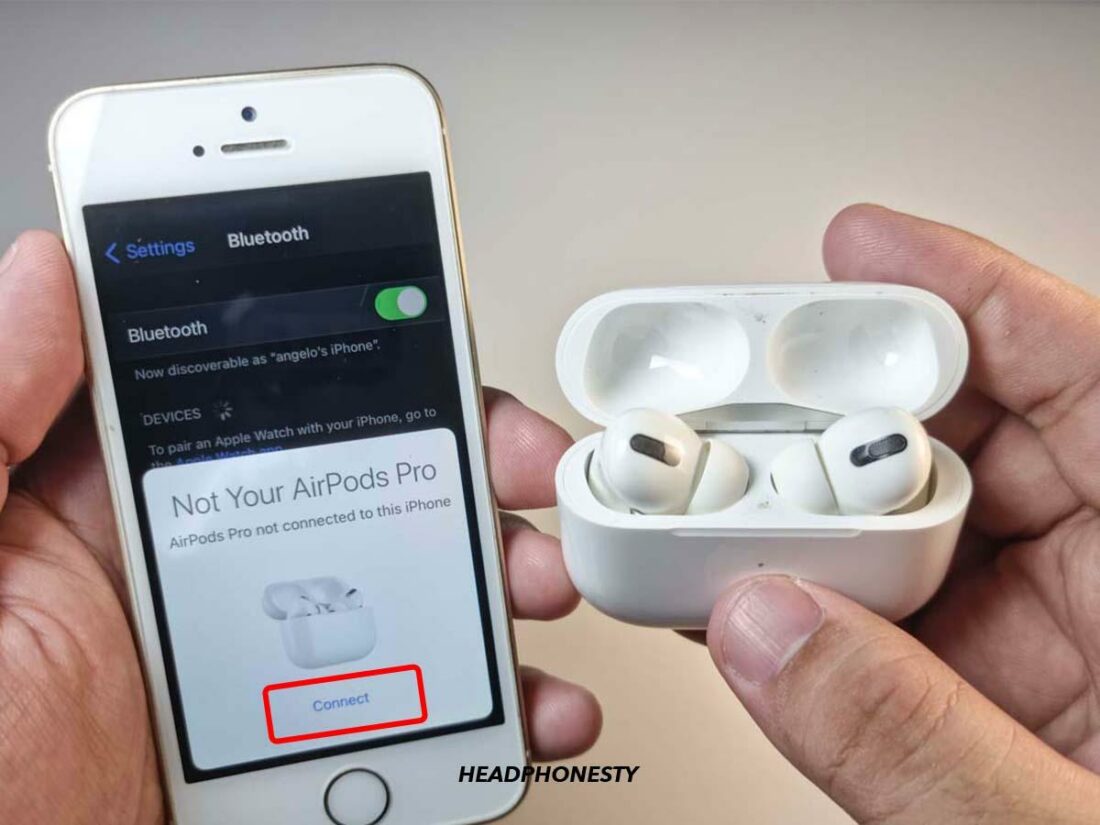
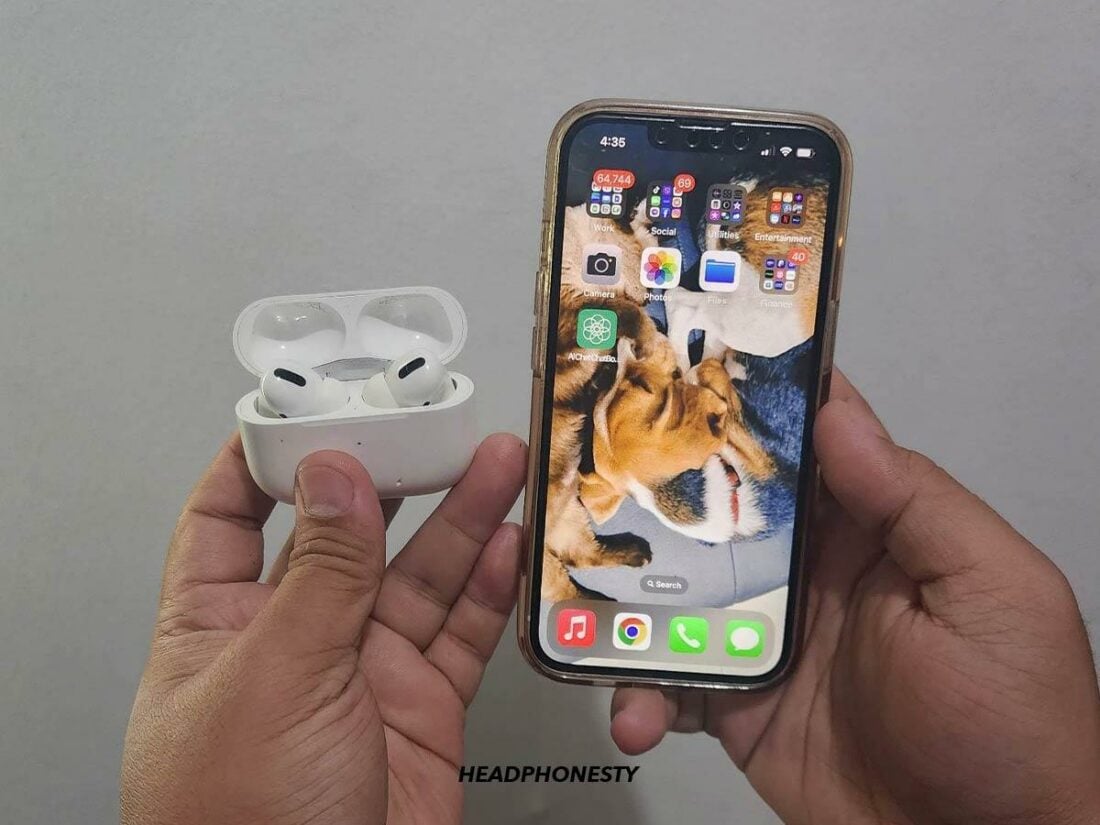
AirPods in their open case. - Hold the AirPods case close to your iPhone/iPad and wait for the setup animation to appear on your device’s screen. Tap Connect, then Done.
Connection pop-up prompt.
How to connect AirPods to iPhone/iPad manually
If the automatic connection fails, you can manually connect your AirPods to your iOS device. This method is more involved but still relatively simple. Here’s how:
- Open the Settings app on your iOS device, choose Bluetooth, and check that Bluetooth is turned on.
Bluetooth turned on. - Put your AirPods in their case and hold them close to your device. Then, open the lid.
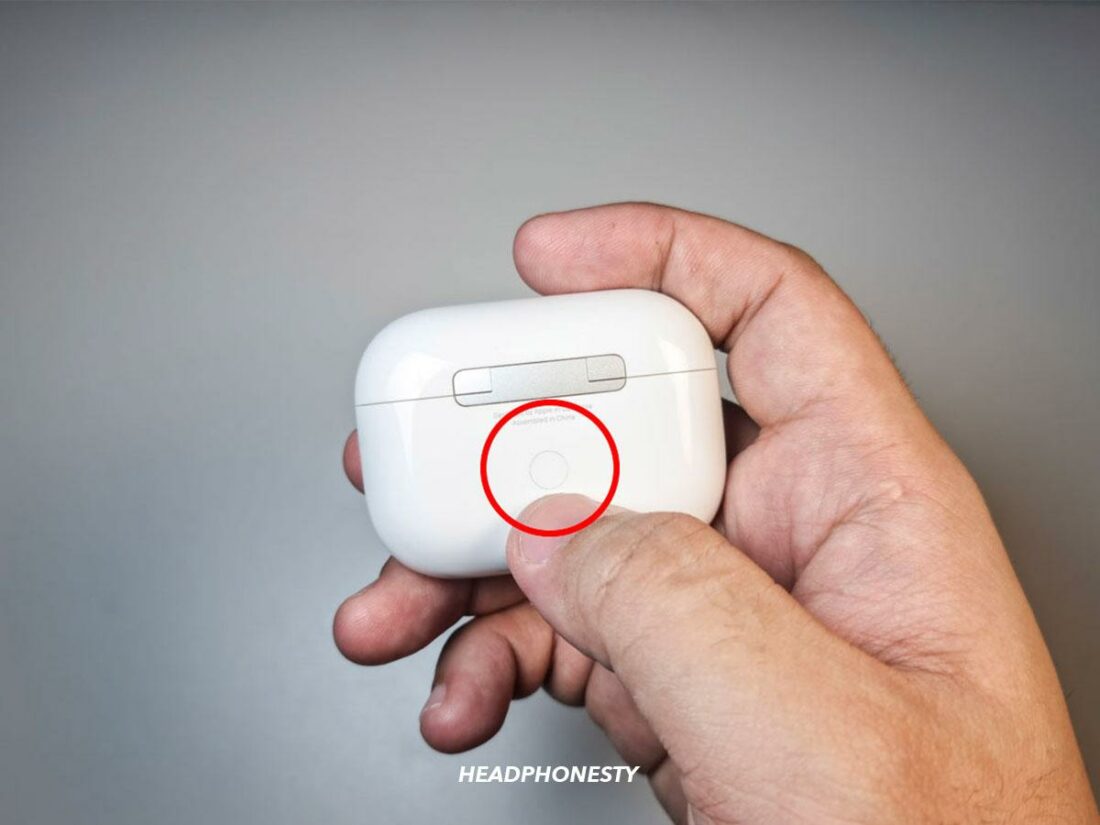
Put your AirPods in their case and hold them close to your device. Open the lid. - Hold down the setup button on the back of the case until the status light flashes white.
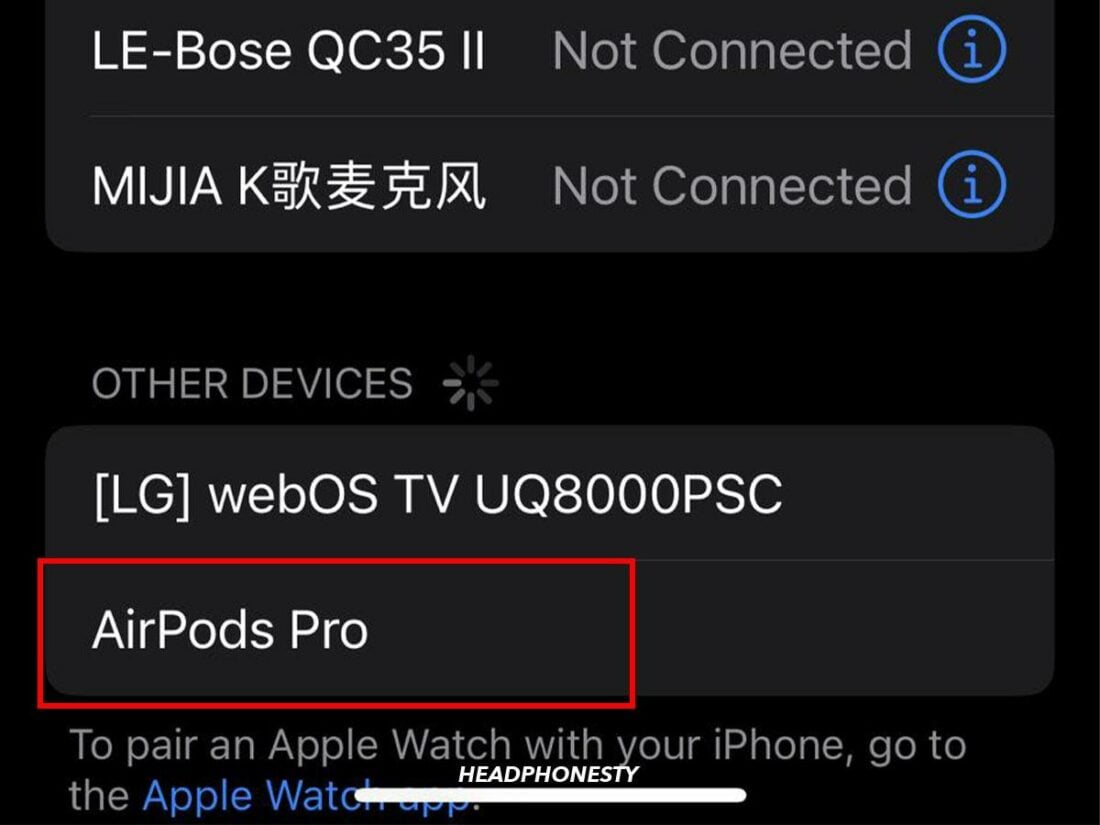
Hold down the setup button. - Your AirPods should now be on the list of available Bluetooth devices on your iPhone or iPad. Select your AirPods to connect them to your device.
Select AirPods Pro.
How to Connect AirPods to Mac
Before connecting your AirPods to your Mac, it’s important to ensure your devices are compatible. The compatibility of your AirPods with your Mac depends on the model of your AirPods and the version of MacOS installed on your Mac.
Here are the minimum MacOS requirements for different AirPods models:
- AirPods (1st generation) – macOS Sierra or later
- AirPods (2nd generation) – macOS Mojave 10.14.4 or later
- AirPods (3rd generation) – macOS Monterey or later
- AirPods Pro (1st generation) – macOS Catalina 10.15.1 or later
- AirPods Pro (2nd generation) – the latest version of macOS
- AirPods Max – macOS Big Sur 11.1 or later
Once you’ve confirmed your devices are compatible, you can connect your AirPods to your Mac. Here’s how:
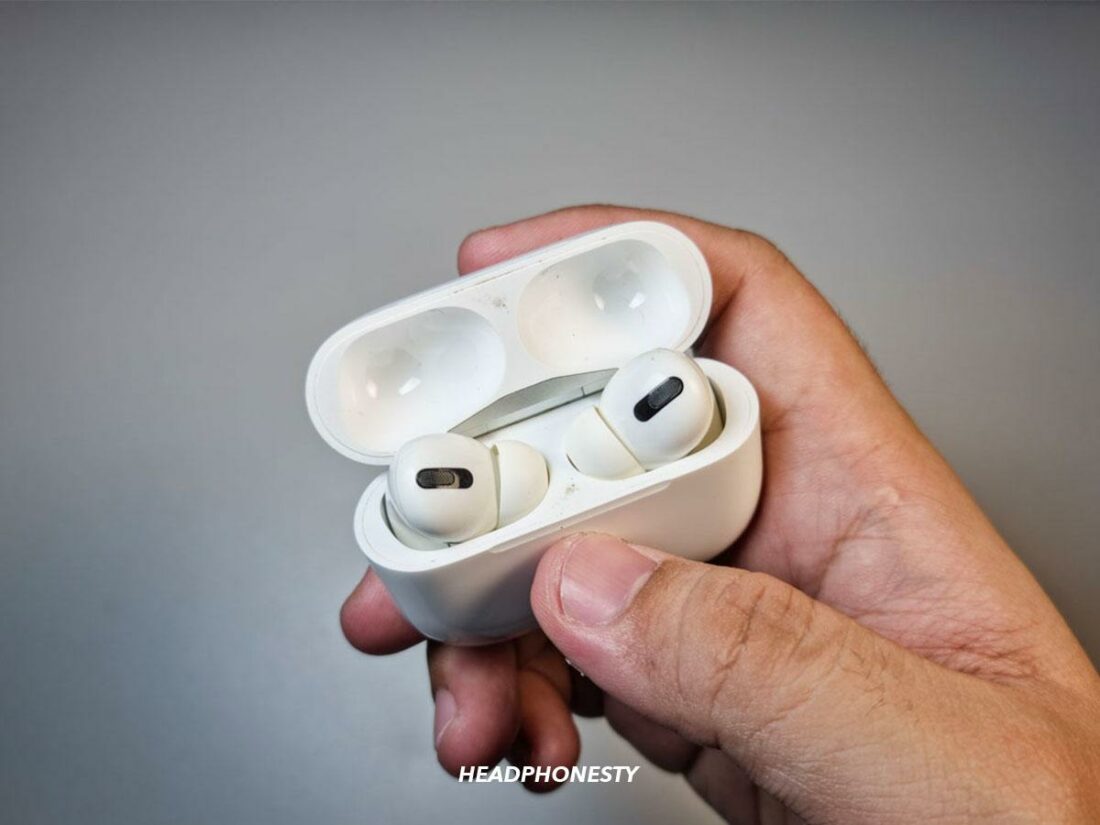
- Keep the AirPods in their charging case and open the lid.
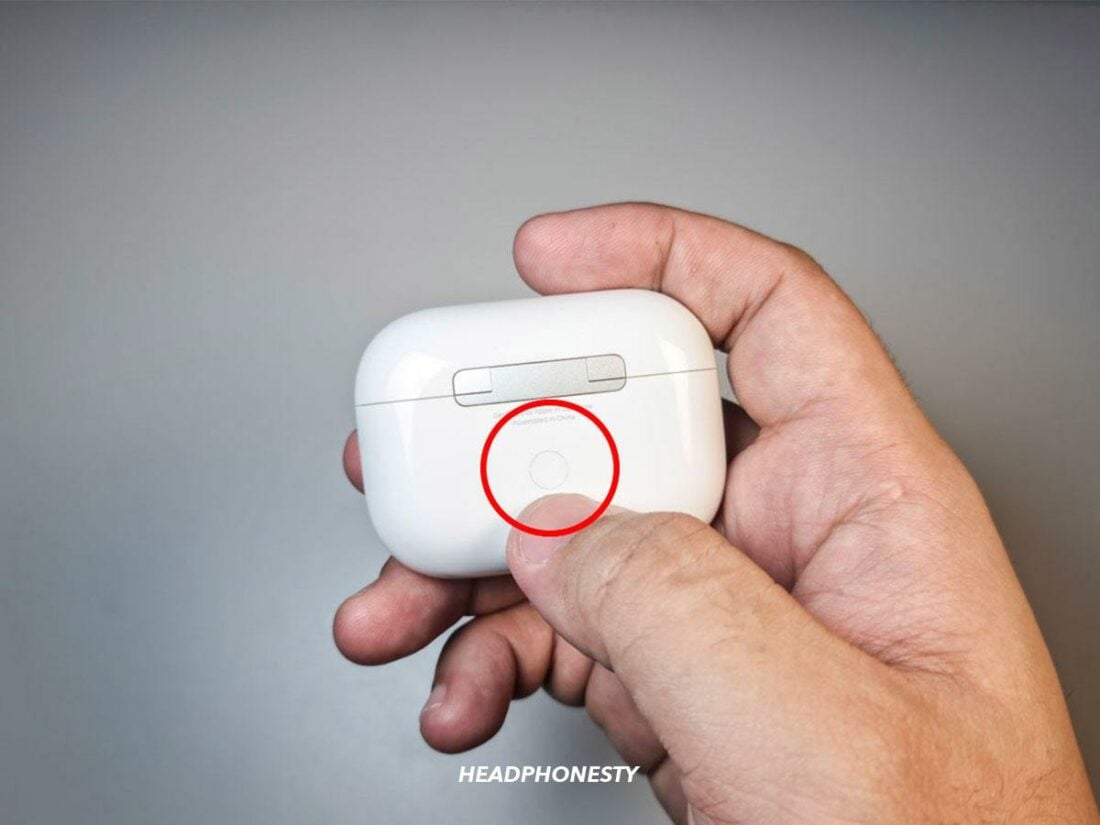
Open the lid of the AirPods case. - Long-press the button on the back of the case until the status light flashes white. This makes the AirPods discoverable.
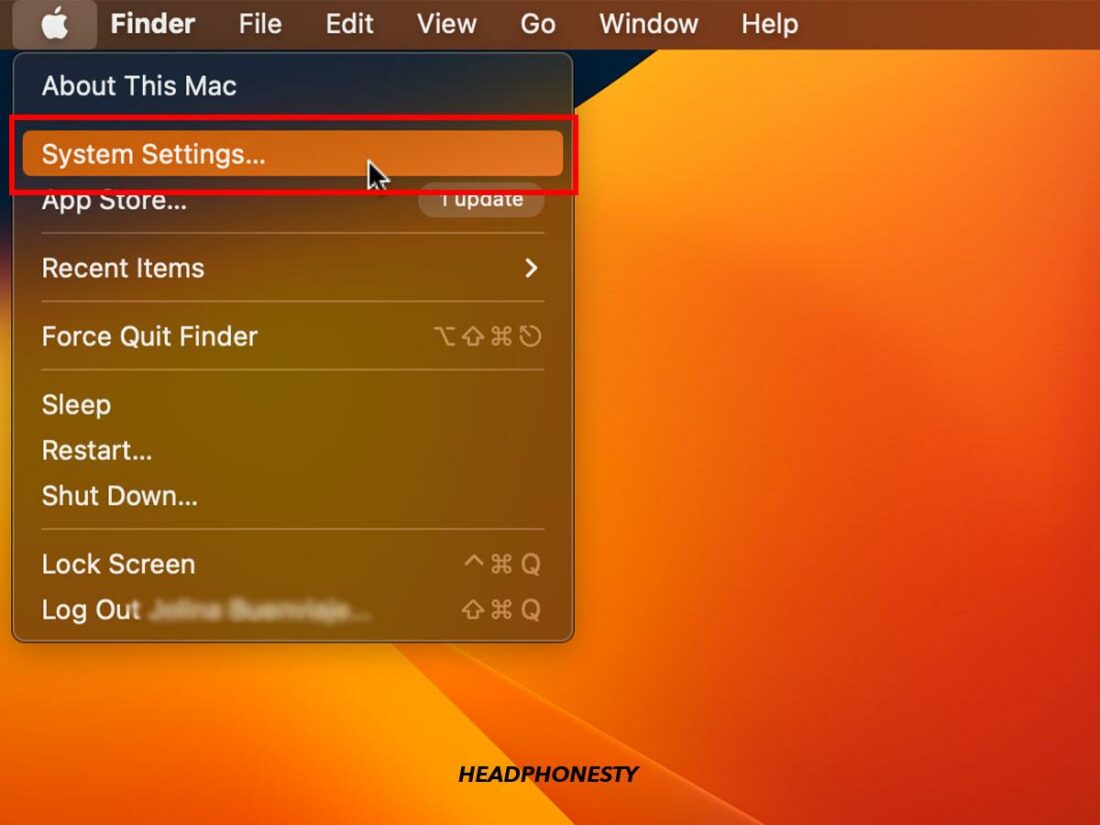
Long-press the setup button. - On your Mac, access the Apple menu in the corner of your screen and select System Settings.
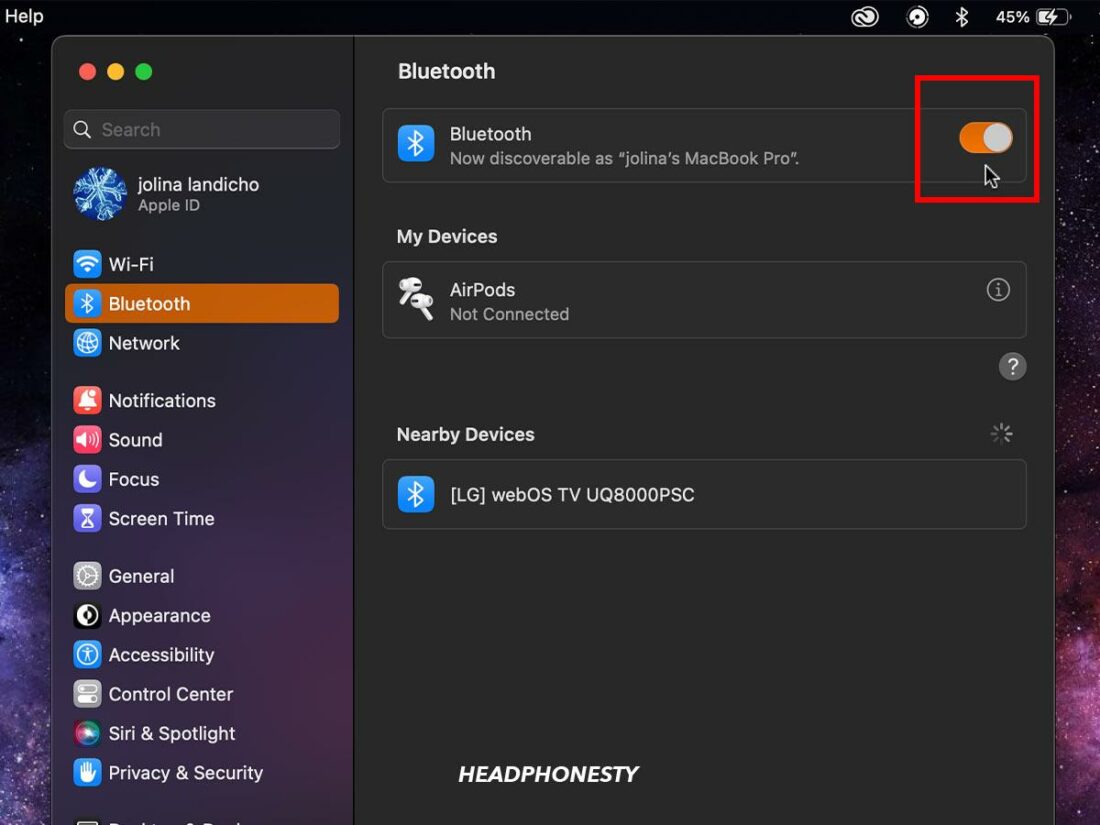
Select System Settings. - Go to Bluetooth and turn on the Bluetooth toggle switch.
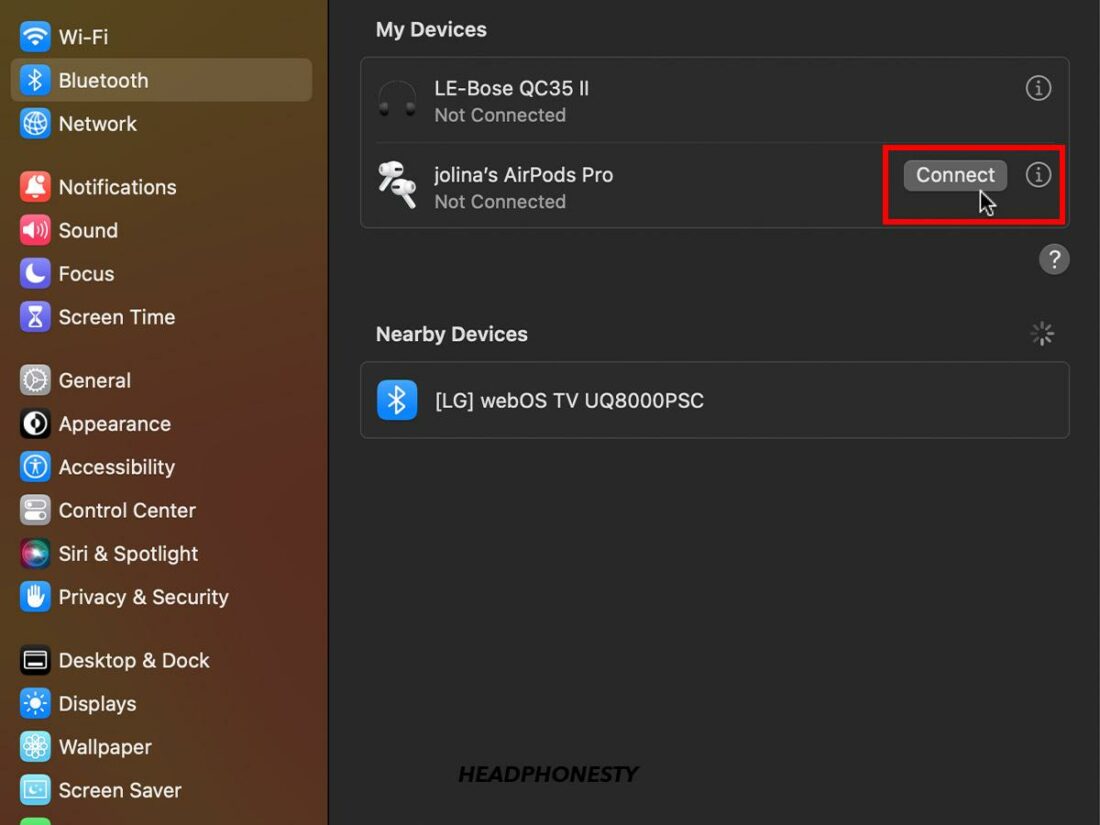
Turn on Bluetooth toggle switch. - From the list of available devices, locate your AirPods and click on Connect.
Locate your AirPods and click on Connect.
How to Connect AirPods to Apple Watch
Connecting your AirPods to your Apple Watch can be convenient when you’re on the go, as you don’t need to carry another device around to listen to your audio.
Before you begin, ensure that your Apple Watch is updated to the latest version of watchOS. This is crucial, as updates often include improvements and new features that can enhance the connectivity and functionality of your AirPods.
Here are the steps to connect your AirPods to your Apple Watch:
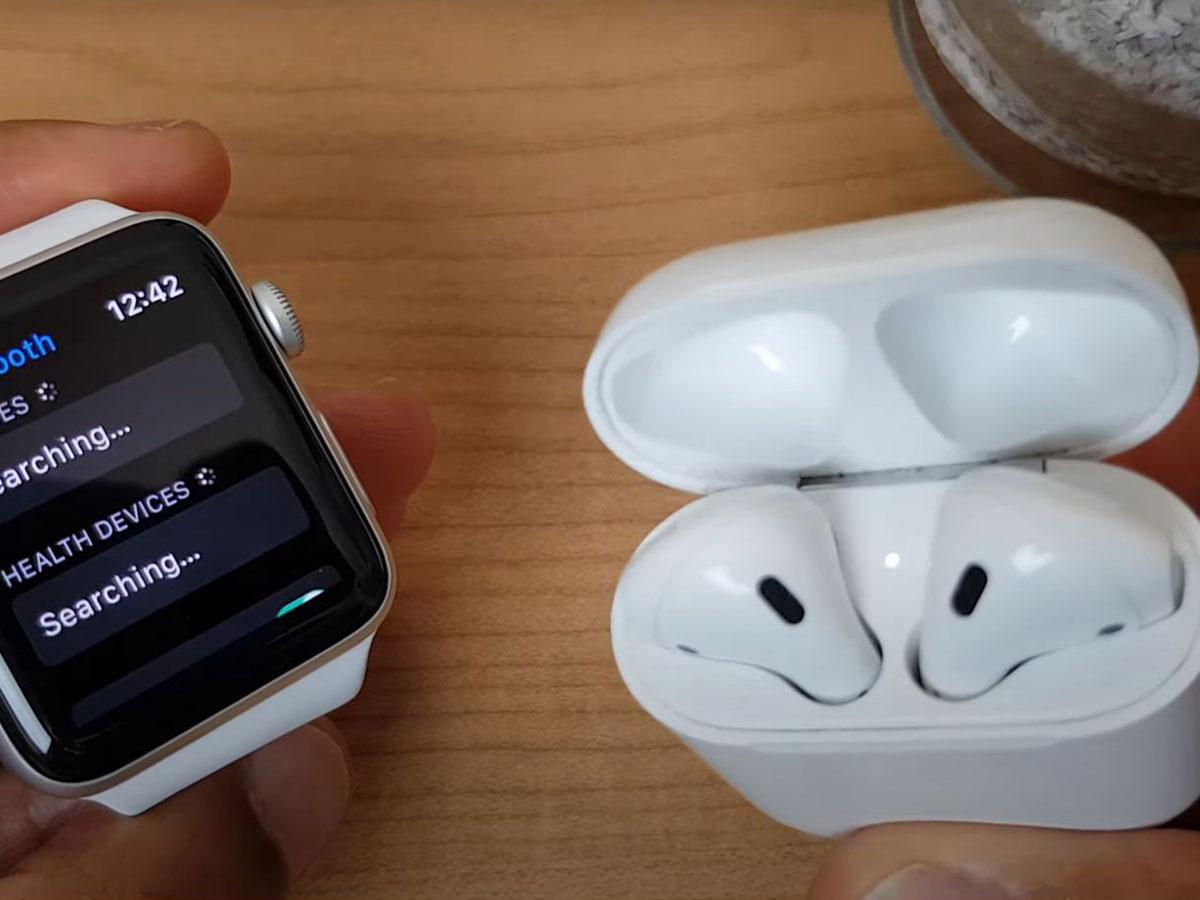
- Put your AirPods in their case and open the lid. This will make them discoverable. Hold them near your Apple Watch.
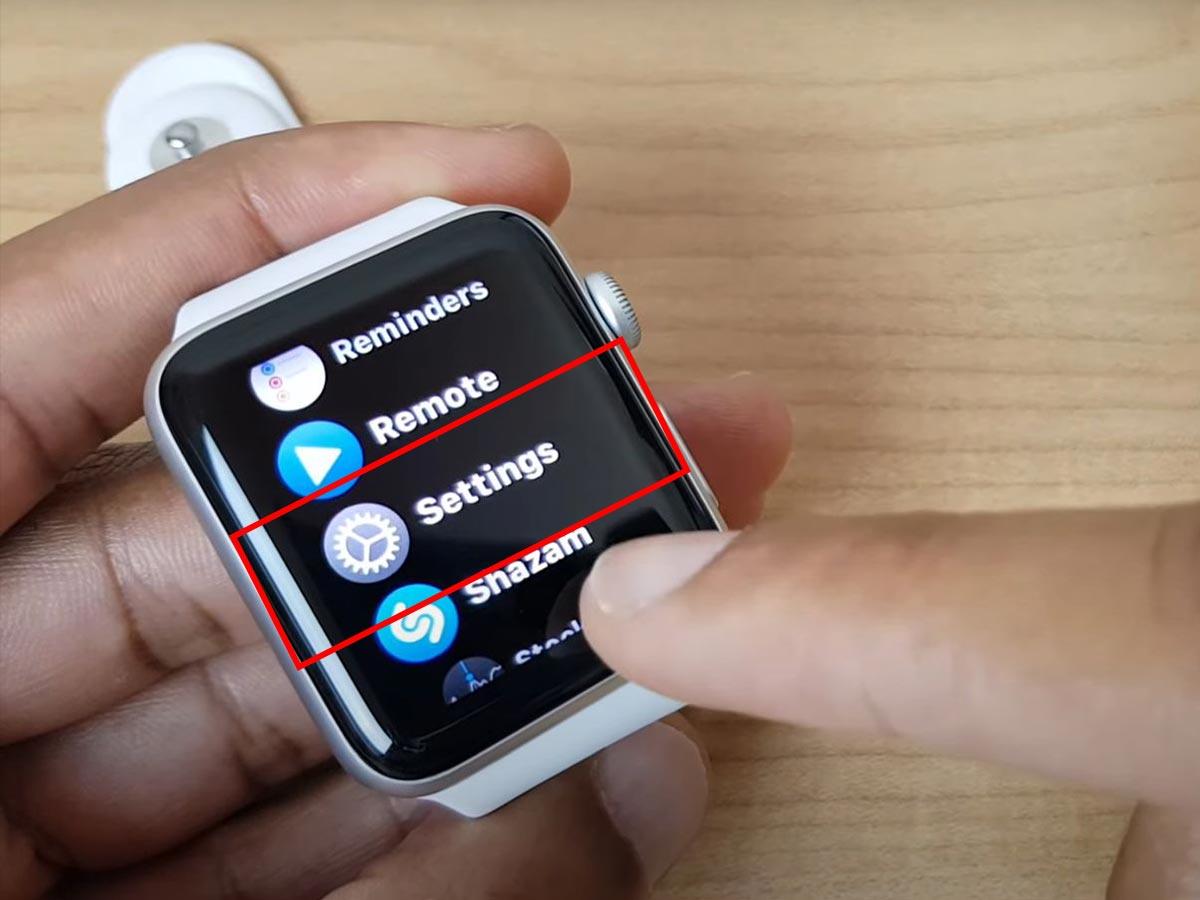
Put your AirPods in their case and open the lid near your Apple Watch. (From: Youtube/Team AG) - On your Apple Watch, open the Settings app.
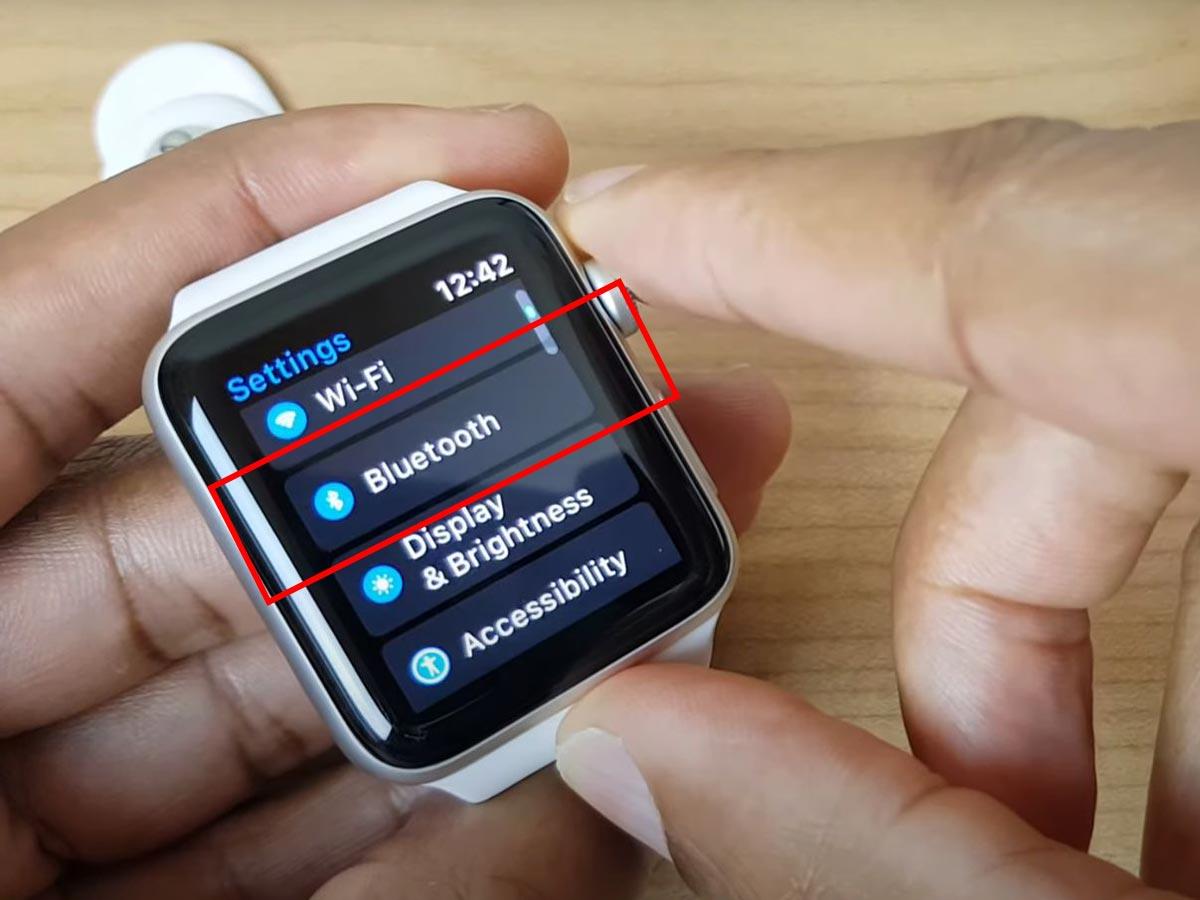
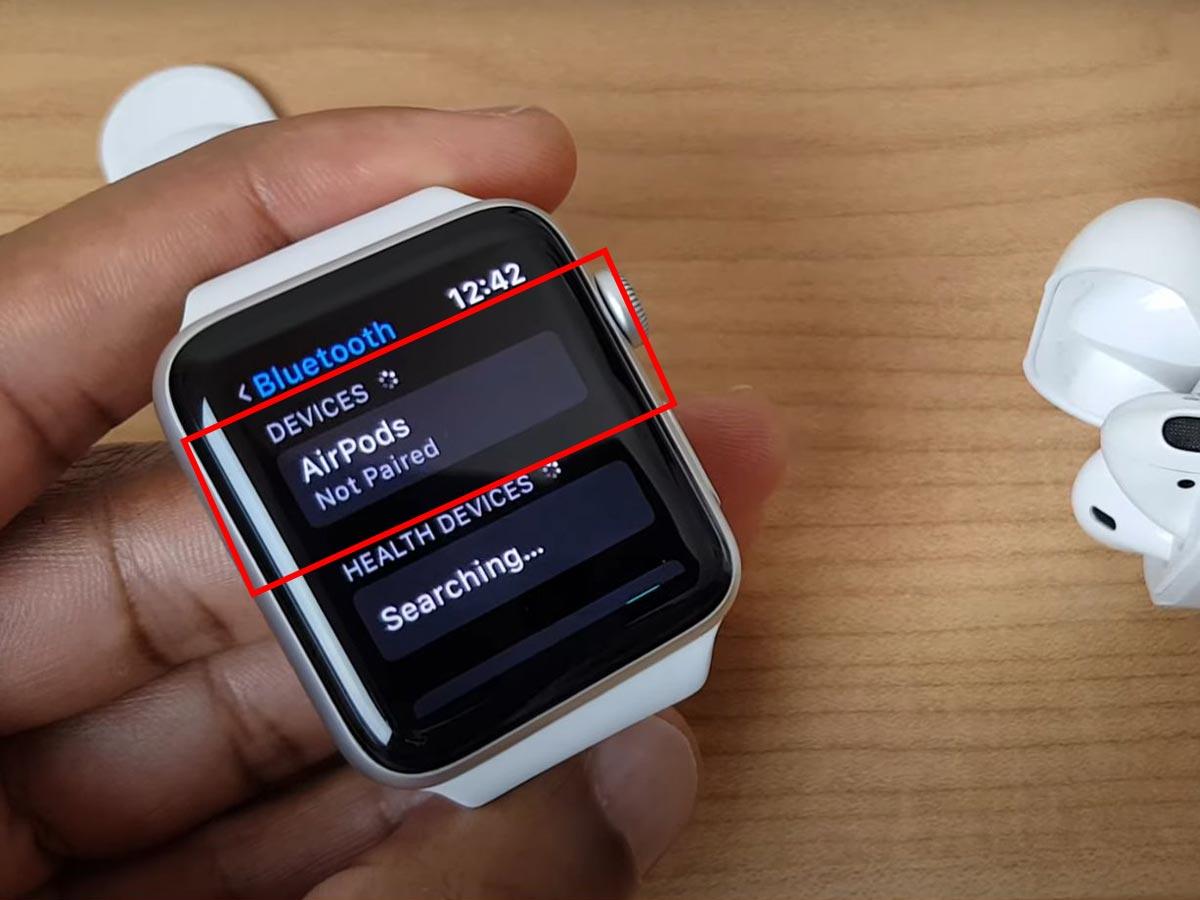
Open the Settings app. (From: Youtube/Team AG) - Tap on Bluetooth and turn it on.
Tap on Bluetooth. (From: Youtube/Team AG) - Your AirPods should appear on the Bluetooth screen. Tap on your AirPods to connect.
Tap on your AirPods to connect. (From: Youtube/Team AG)
How to Connect AirPods to Android
While AirPods are designed primarily for use with Apple products, they can also be paired with Android devices.
However, there are certain limitations when connecting AirPods to Android. For instance, the automatic pairing feature that Apple users enjoy on iOS devices is unavailable on Android devices. This means that connecting your AirPods to an Android device will require a few more steps.
Here’s how you can connect your AirPods to an Android device:
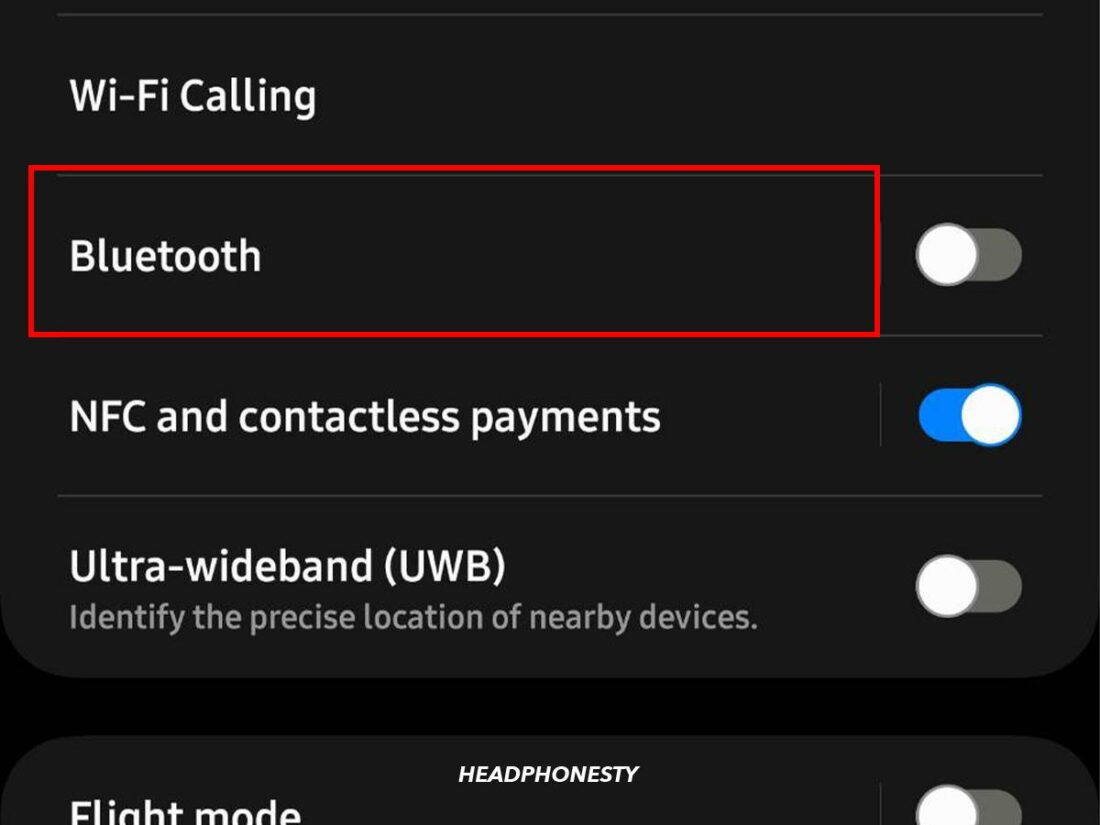
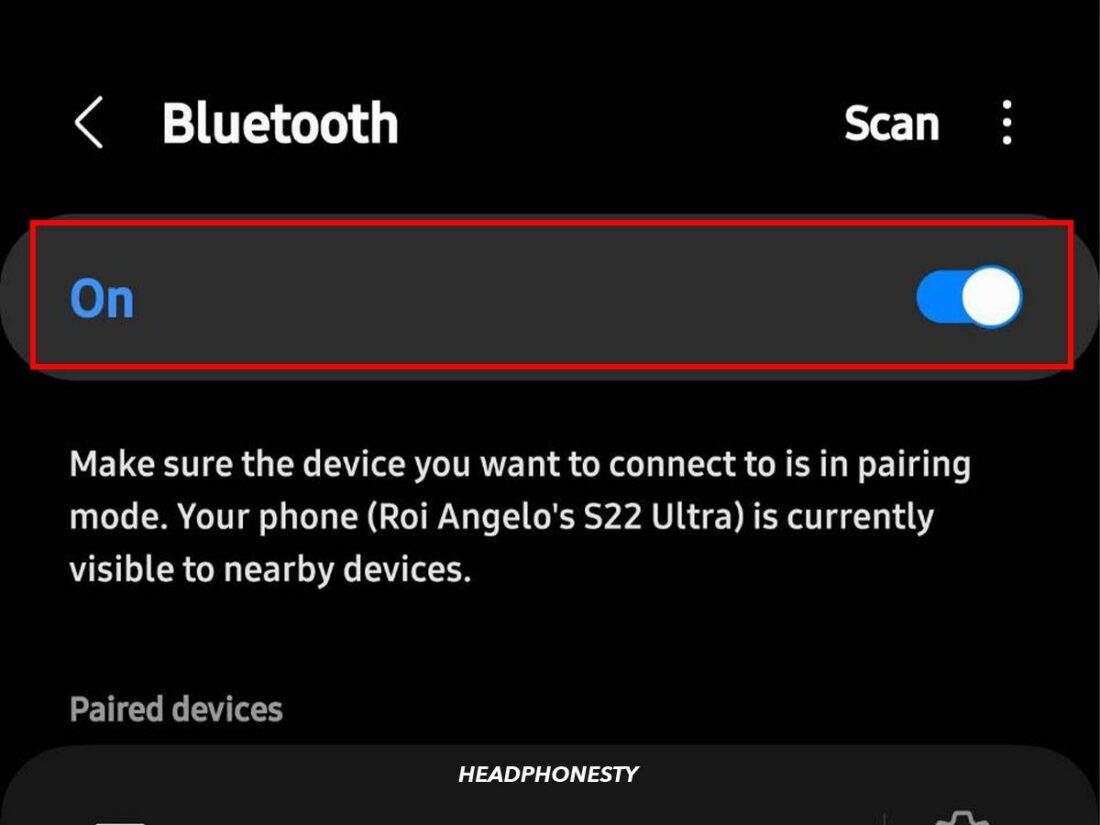
- Navigate to the Settings of your Android device and select the Bluetooth menu.
Select the Bluetooth menu. - Ensure that your Bluetooth is enabled.
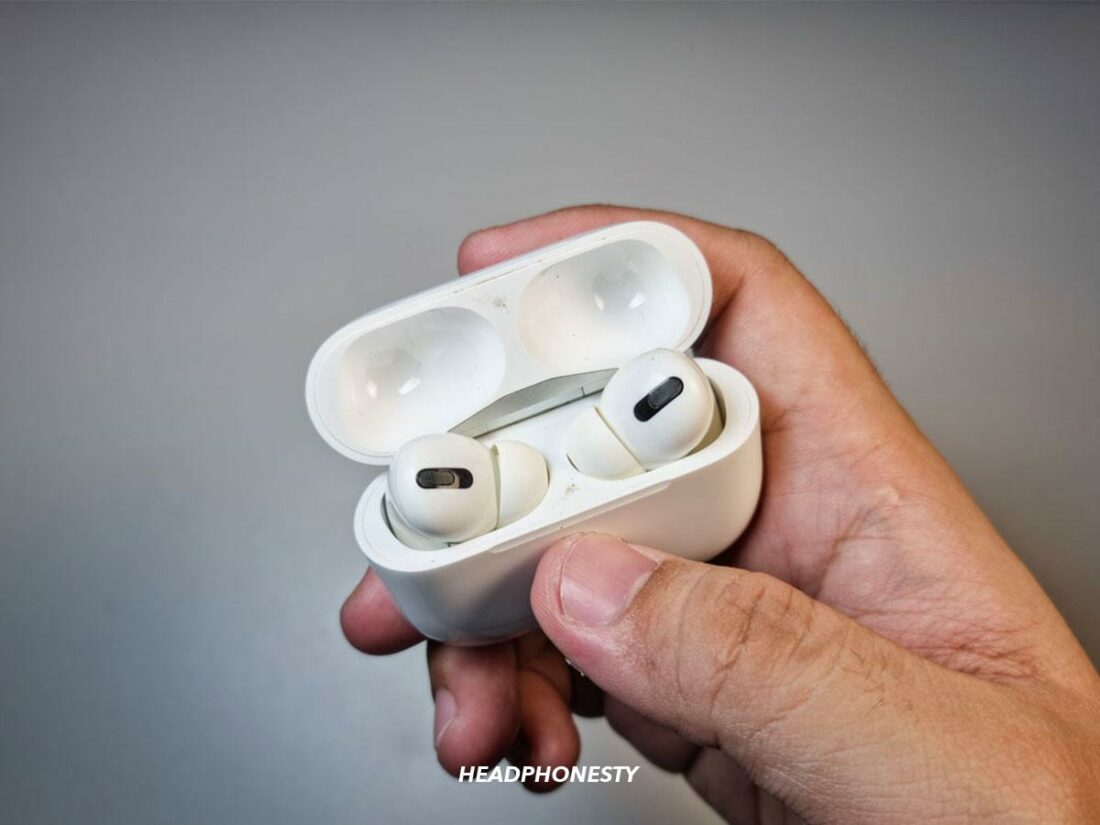
Turn on Bluetooth. - Place your AirPods in their case and open the lid. This prepares your AirPods for pairing.
Place your AirPods in their case and open the lid. - Press and hold the setup button on the back of the case until the light flashes white, indicating that your AirPods are now in pairing mode.
Press and hold the setup button. - Look for your AirPods in your Bluetooth settings under the list of available devices. Then, select your AirPods from the list and choose Pair to connect them to your Android device.
Select your AirPods from the list.
How to Connect AirPods to TV
Connecting your AirPods to your TV can be useful, allowing you to enjoy your favorite shows, movies, or music in private.
Here’s a step-by-step guide on how to connect your AirPods to a TV:
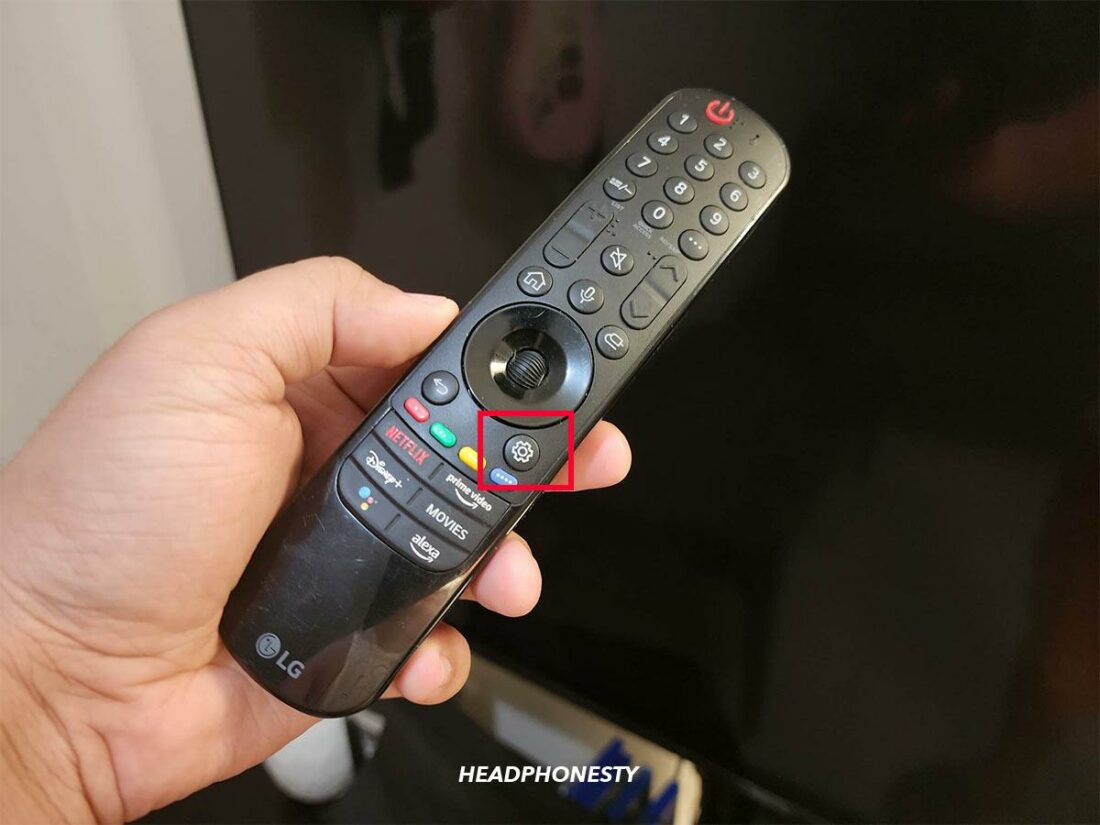
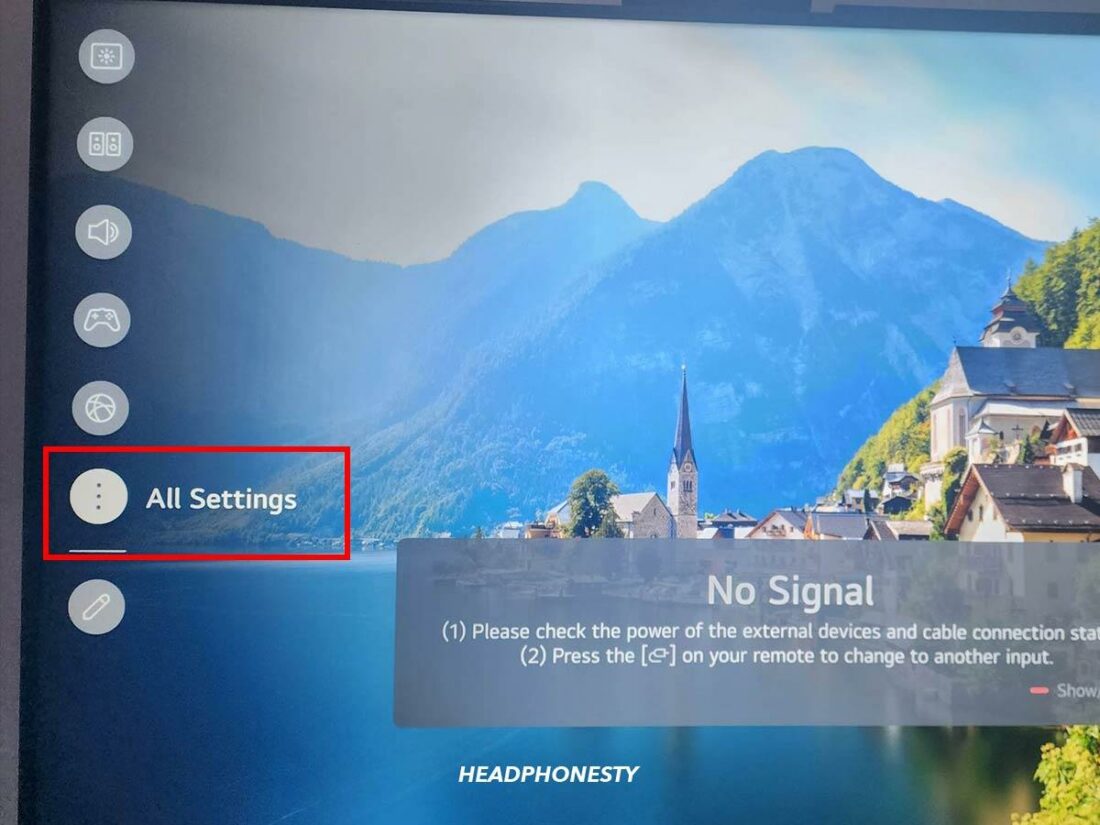
- Navigate to your TV settings by pressing the Settings button on your remote. The settings menu will appear on the left side of the screen.
Press the settings button on your remote - In the settings menu, choose All Settings.
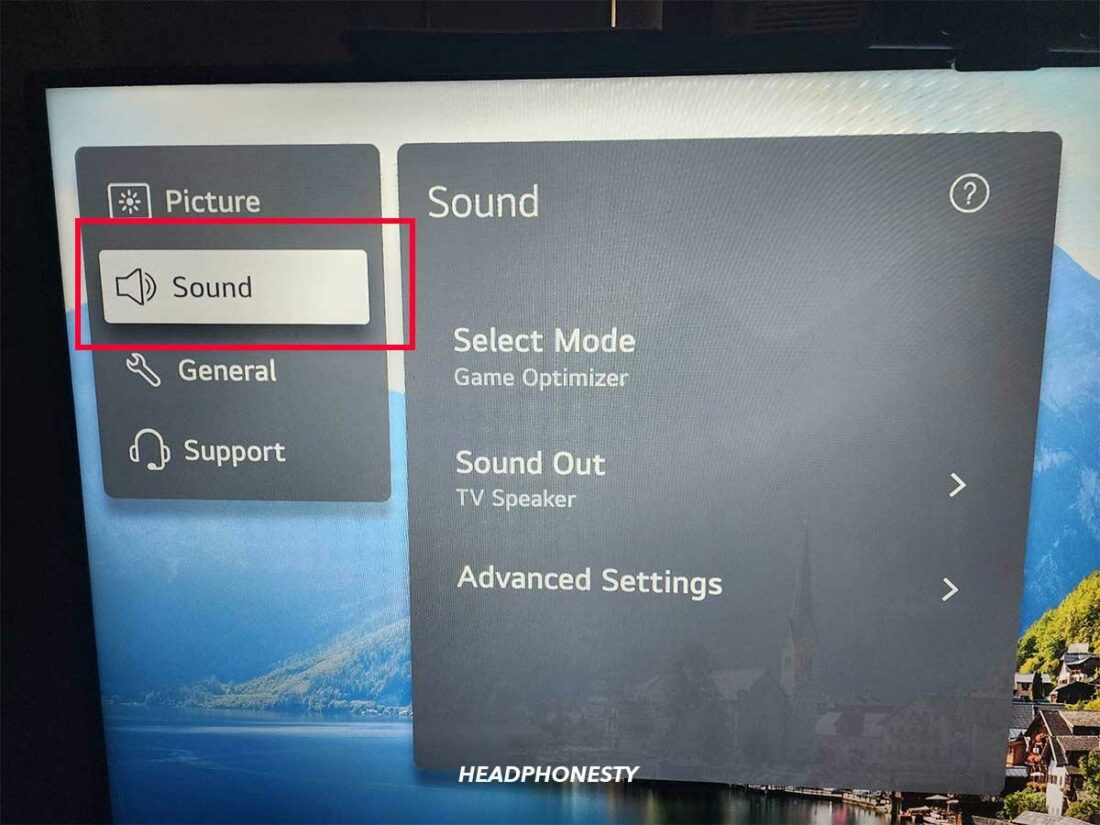
Choose All Settings. - Select Sound.
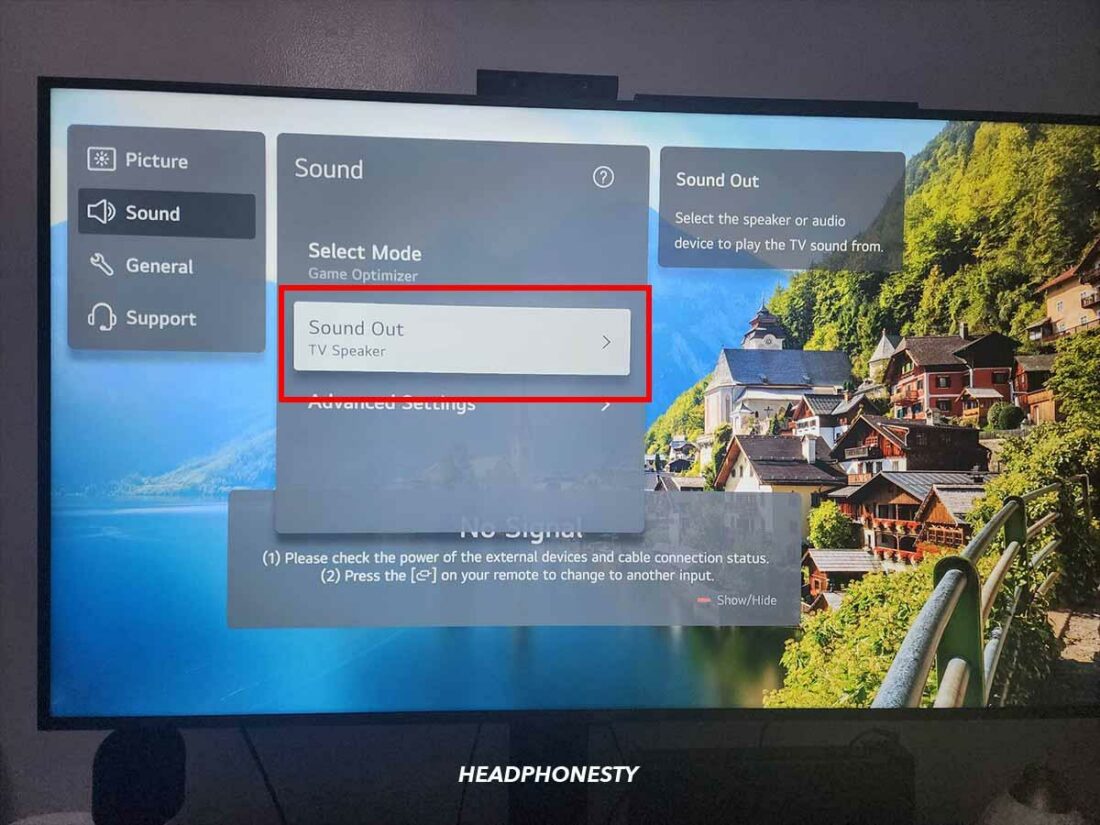
Select Sound. - In the Sound menu, click on Sound Out.
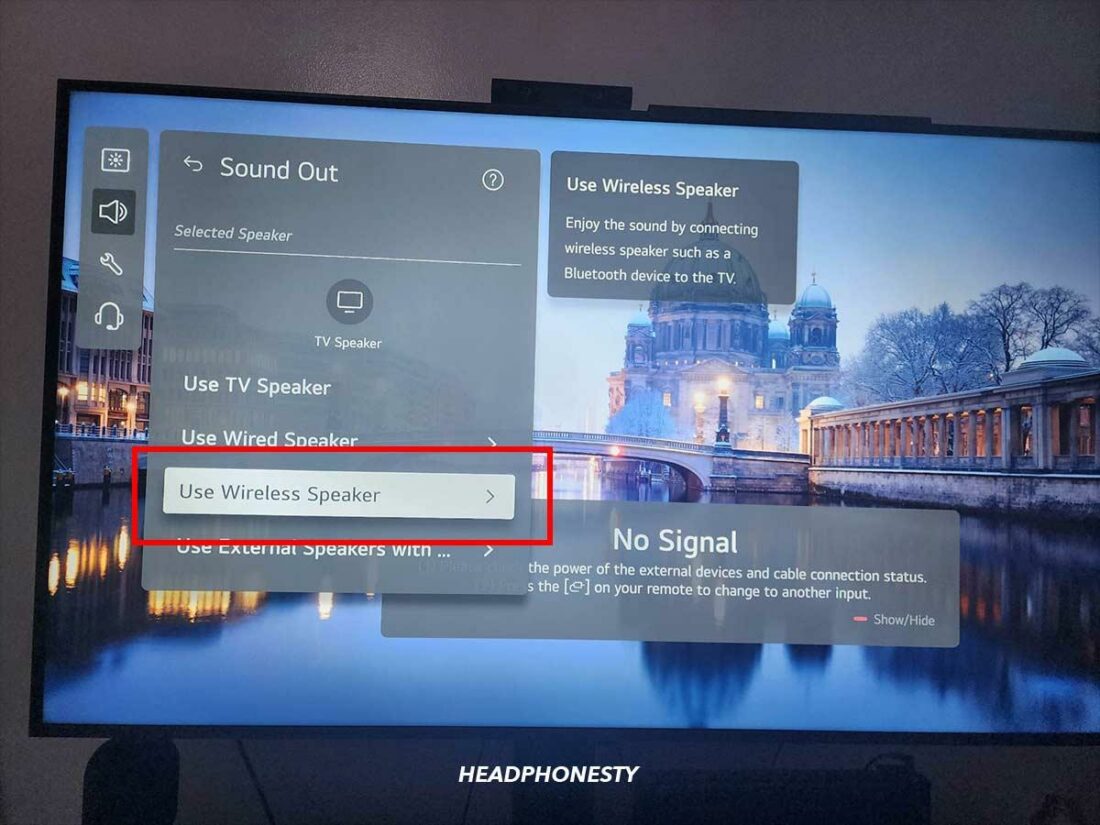
Click on Sound Out. - Scroll down and select Use Wireless Speaker.
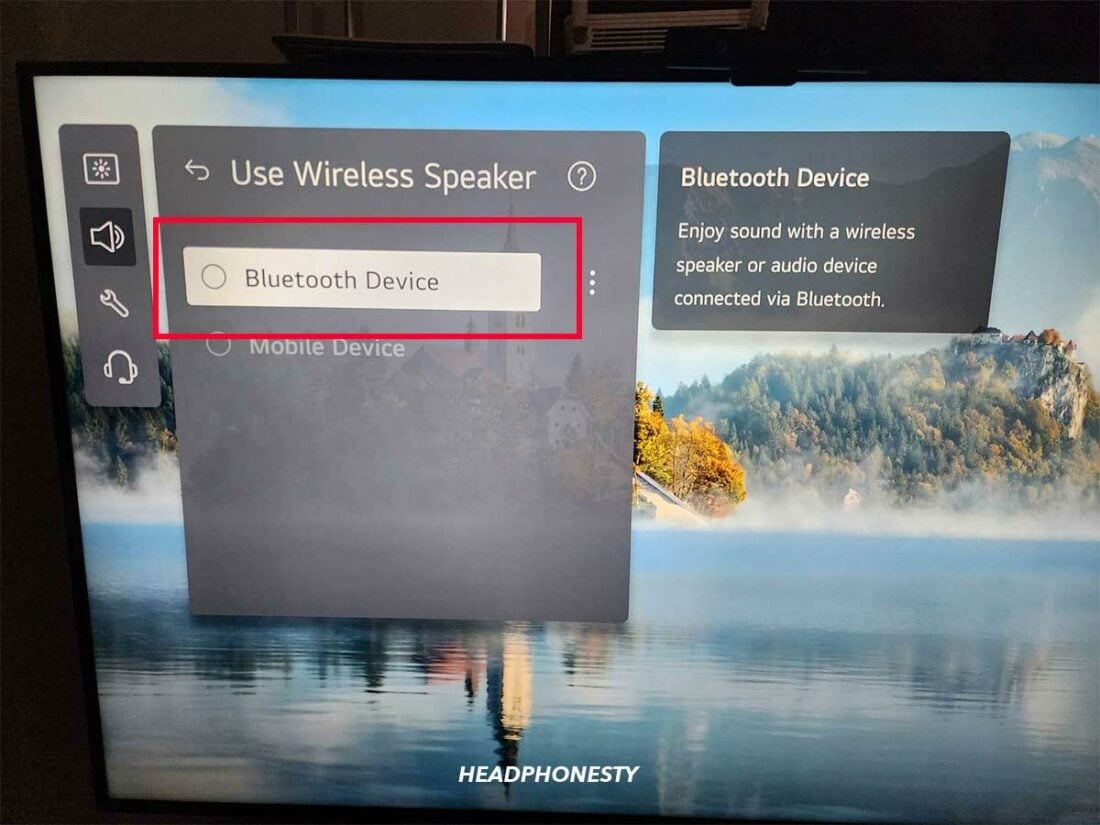
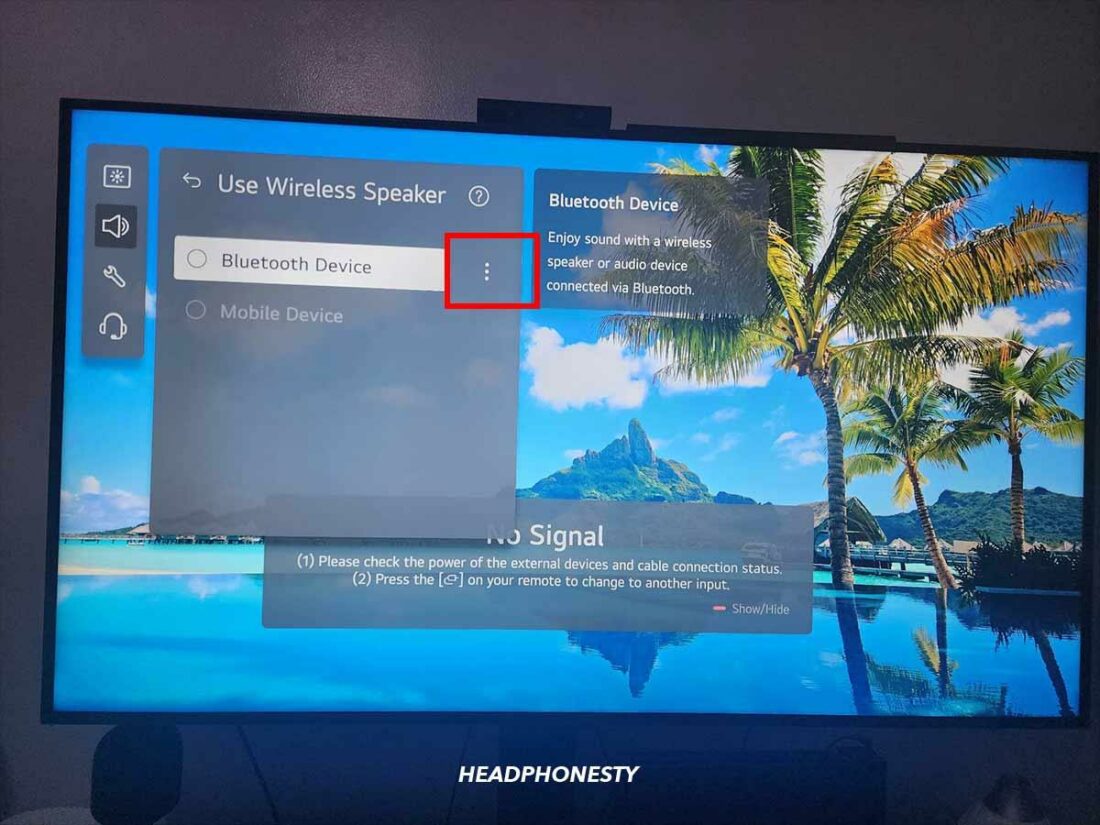
Select Use Wireless Speaker. - Under Use Wireless Speaker, you will see options like Bluetooth, Visa, and Mobile Device. Select Bluetooth Device.
Select Bluetooth Device. - Click on the three dots next to Bluetooth. This will start scanning for a Bluetooth device.
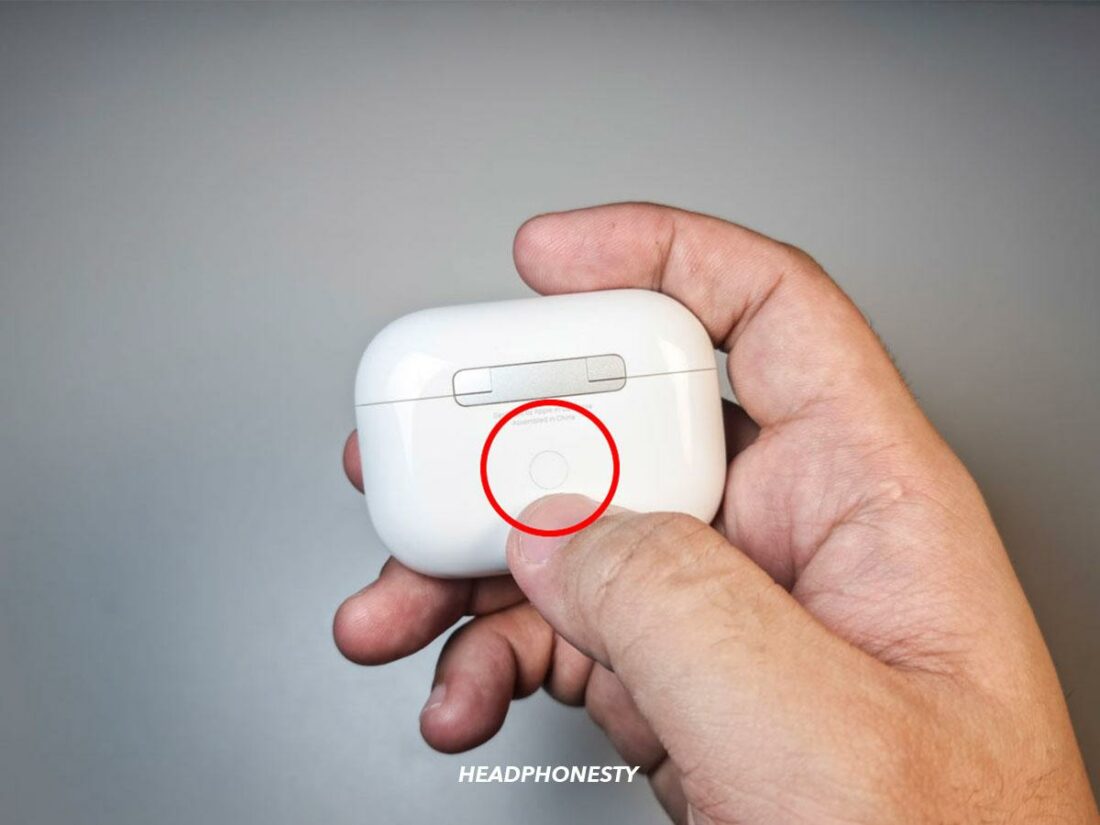
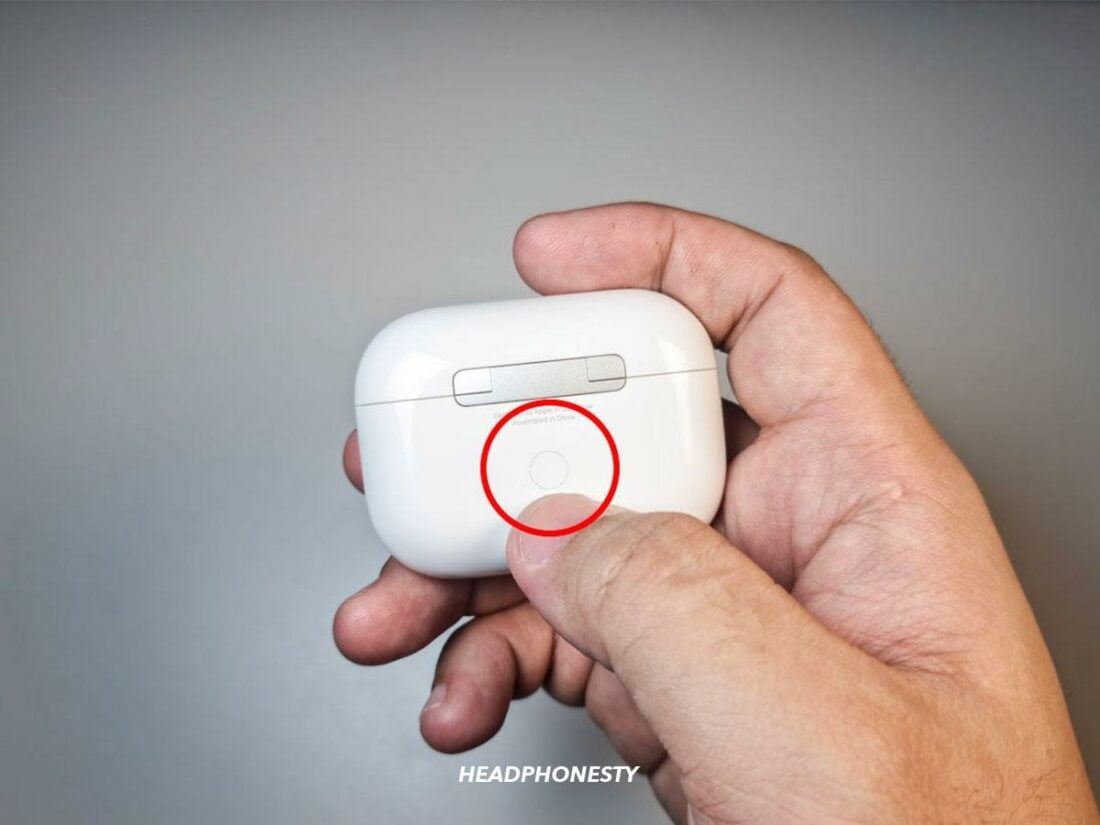
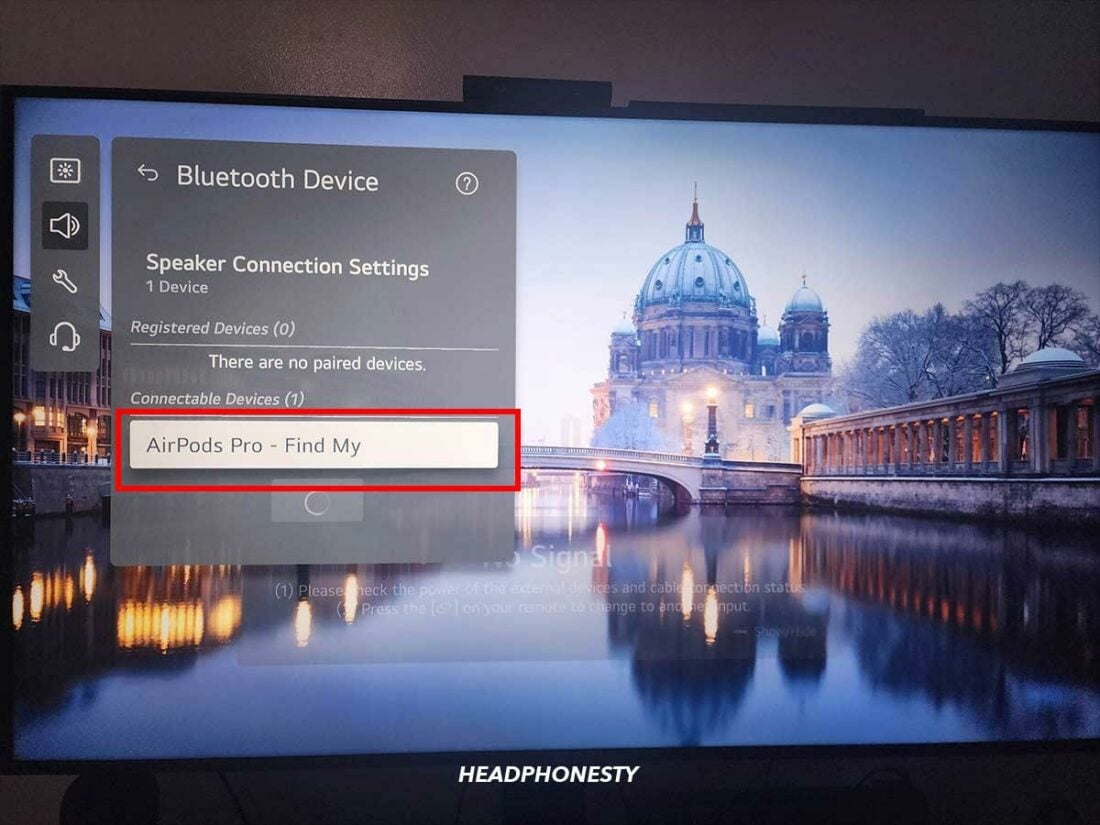
Click on the three dots next to Bluetooth. - Open the AirPods case and press and hold the setup button. Once the AirPods are in pairing mode, you should see the AirPods’ name on the TV.
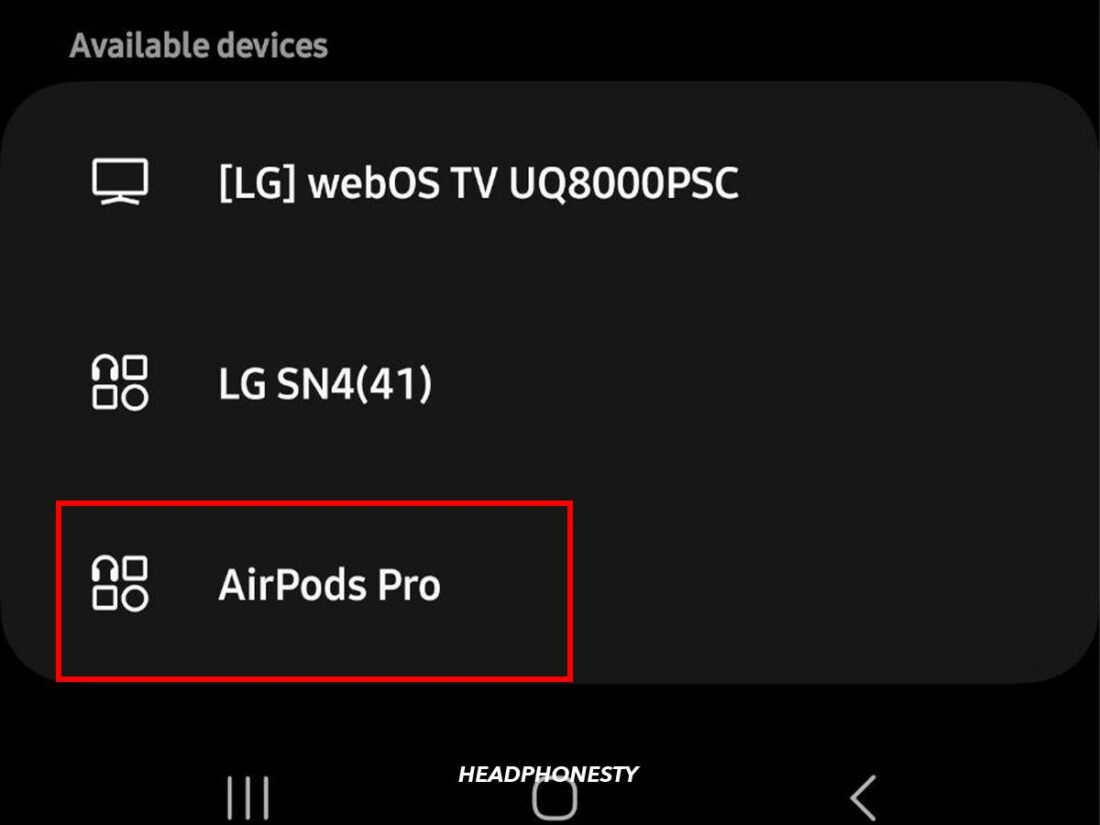
Hold the setup button. - Click on the AirPods’ name on the TV. They will start connecting, and once connected, you will see a confirmation on the TV screen.
Click on the AirPods’ name on the TV.
How to Connect AirPods to Gaming Consoles
AirPods are a good option for streaming game audio from your console. They provide high-quality sound and reliable wireless connectivity without the additional purchase of a gaming headset.
While AirPods are primarily designed to work with Apple devices, they can also be used with gaming consoles, albeit with some workarounds. Here’s how to do so for each type of gaming console:
- How to connect AirPods to PS4 or PS5
- How to connect AirPods to Nintendo Switch
- How to connect AirPods to Xbox One or Xbox Series X or S
How to connect AirPods to PS4 or PS5
The PS4 and PS5 do not naturally support Bluetooth audio due to potential issues such as disconnections, audio dropouts, and static noises that can negatively impact gameplay.
This is because Bluetooth compresses and decompresses the audio signals wirelessly, which can affect the audio and connection quality.
However, this doesn’t mean you can’t use your AirPods while gaming on your PS4 or PS5.
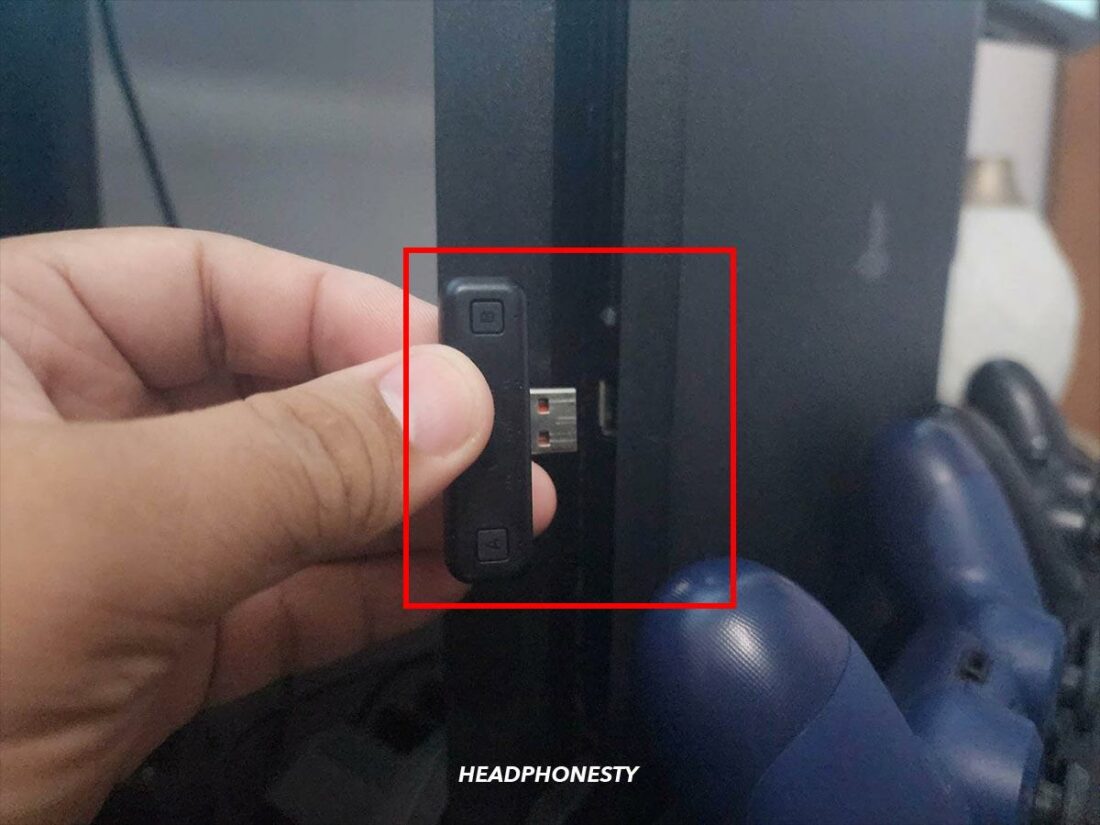
It’s still possible to connect your AirPods to your PS console by using a Bluetooth adapter. Here’s a step-by-step guide on how to do it:
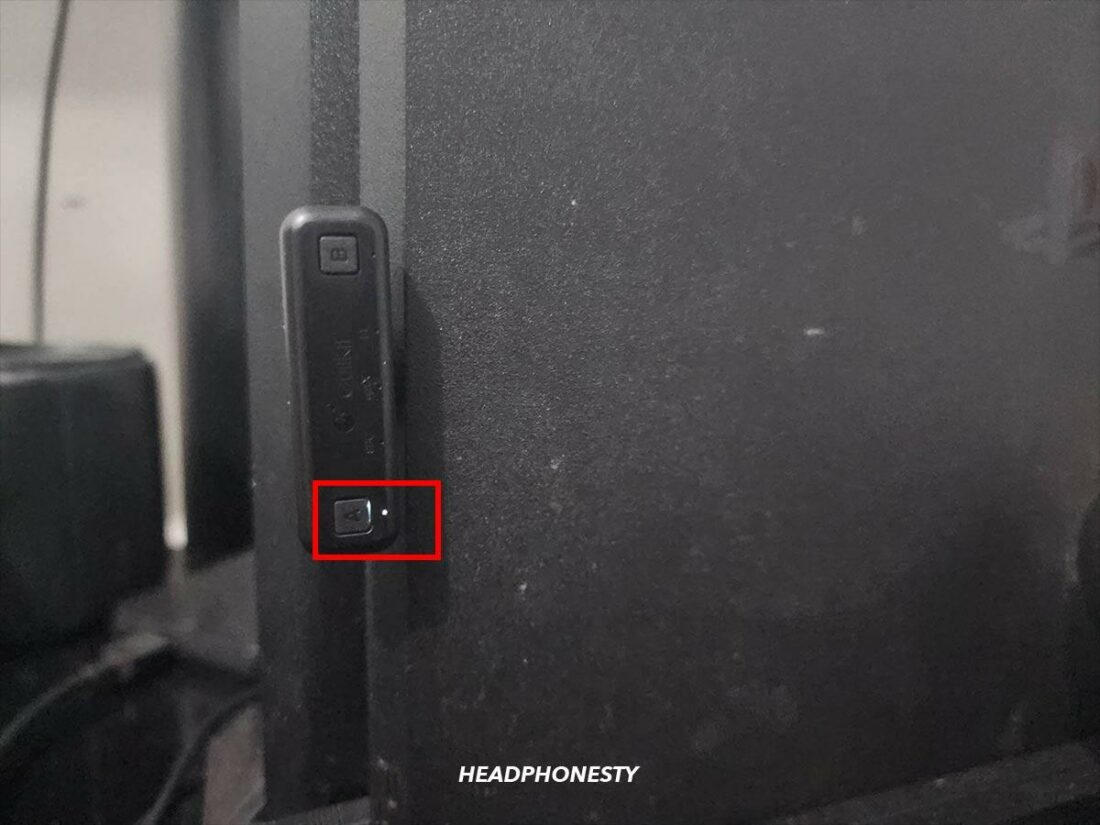
- Plug the Bluetooth adapter into one of the free USB ports on your PS console. You should see a light indicating that the adapter is powered on.Check the description of the Bluetooth adapter to ensure it’s compatible with the PS4 and your AirPods. Some good options are the RALAN PS4 adapter and the Zamia Bluetooth adapter.
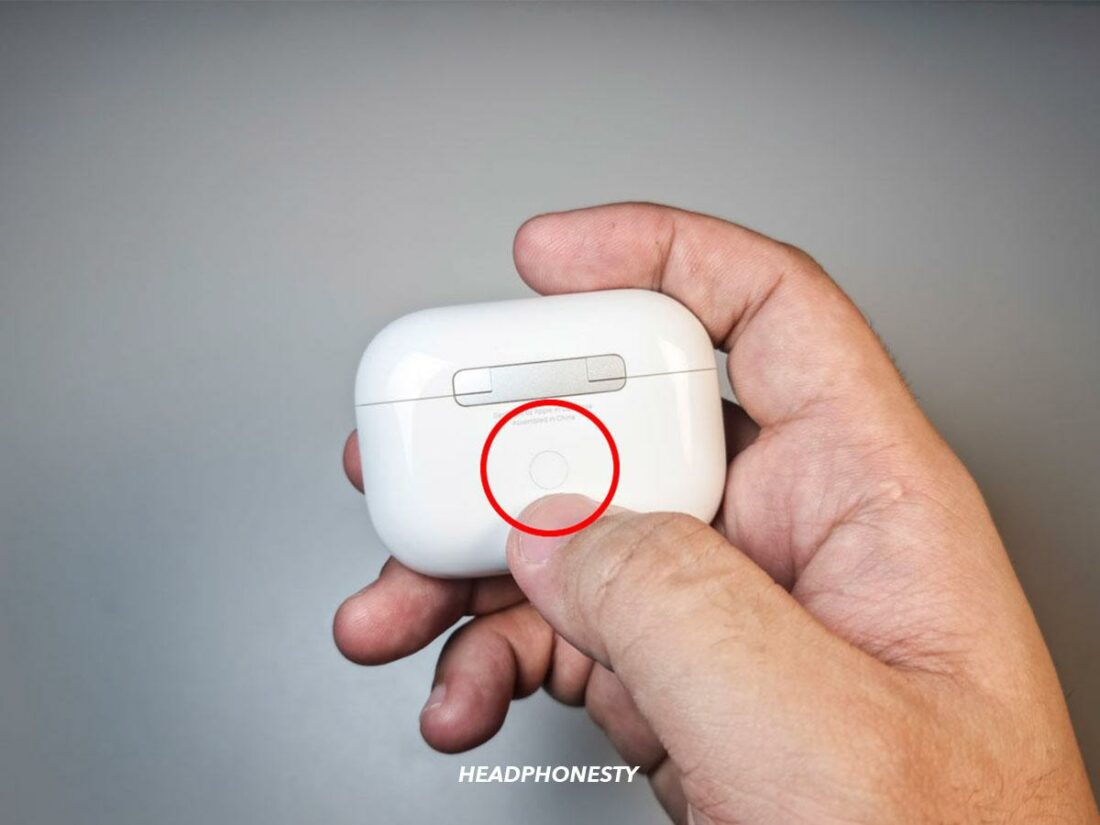
Plug the Bluetooth adapter into one of the free USB ports on your PS console. - Enable pairing mode on your AirPods by putting them in the charging case and pressing the setup button until the status light turns white. You might also need to press the pairing button on the adapter. Check the instructions on the Bluetooth adapter you purchase to get specific instructions on how it works.
Press the setup button. - The Bluetooth adapter should then automatically connect with your AirPods. You’ll know the connection is successful when the light on the adapter stops blinking and becomes steady.
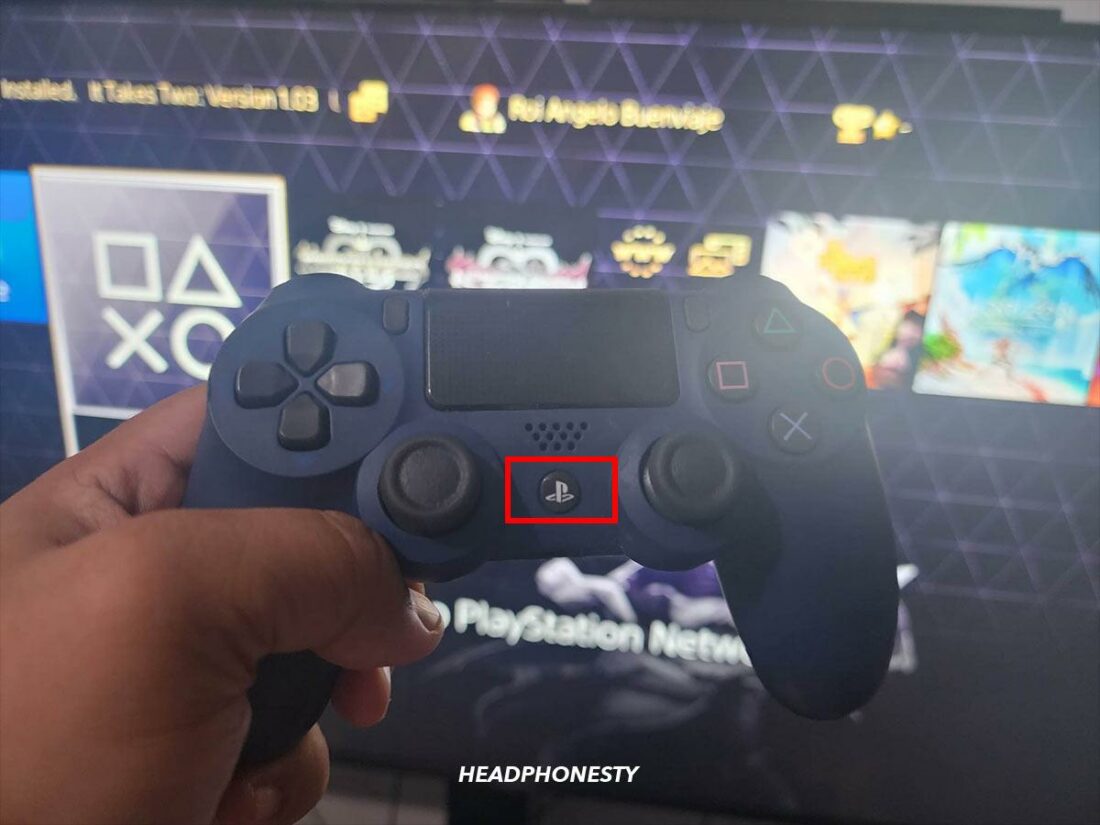
Bluetooth adapter light indicator. - Open the PS quick menu by pressing the PlayStation button on your controller.
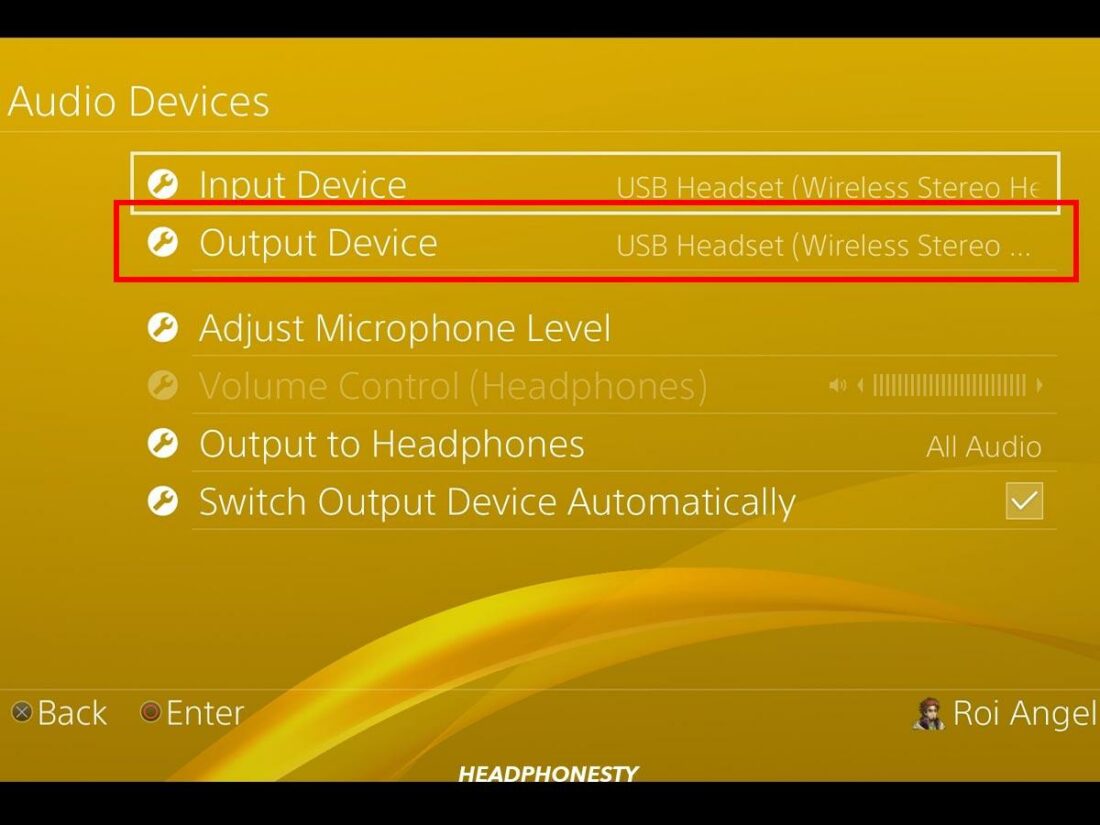
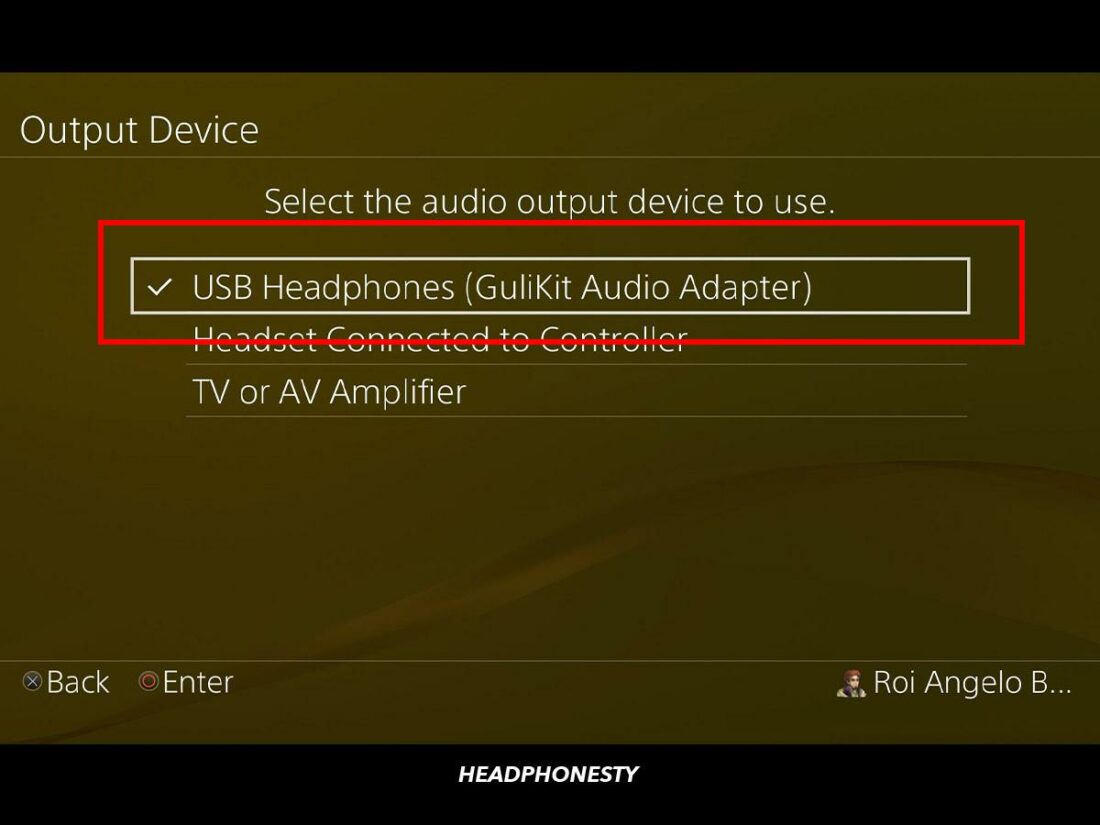
Press the PlayStation button on your controller. - Select Sound, then Output Device.
Select Output Device. - Choose your AirPods. They might come up under the name of your Bluetooth adapter or as a USB headset.
Choose the name of your Bluetooth adapter or USB headphones.
How to connect AirPods to Nintendo Switch
The Nintendo Switch, a popular portable gaming console, now supports Bluetooth audio, making it possible to connect your AirPods directly to the device and enjoy your game audio wirelessly.
Here’s a step-by-step guide on how to connect your AirPods to a Nintendo Switch:
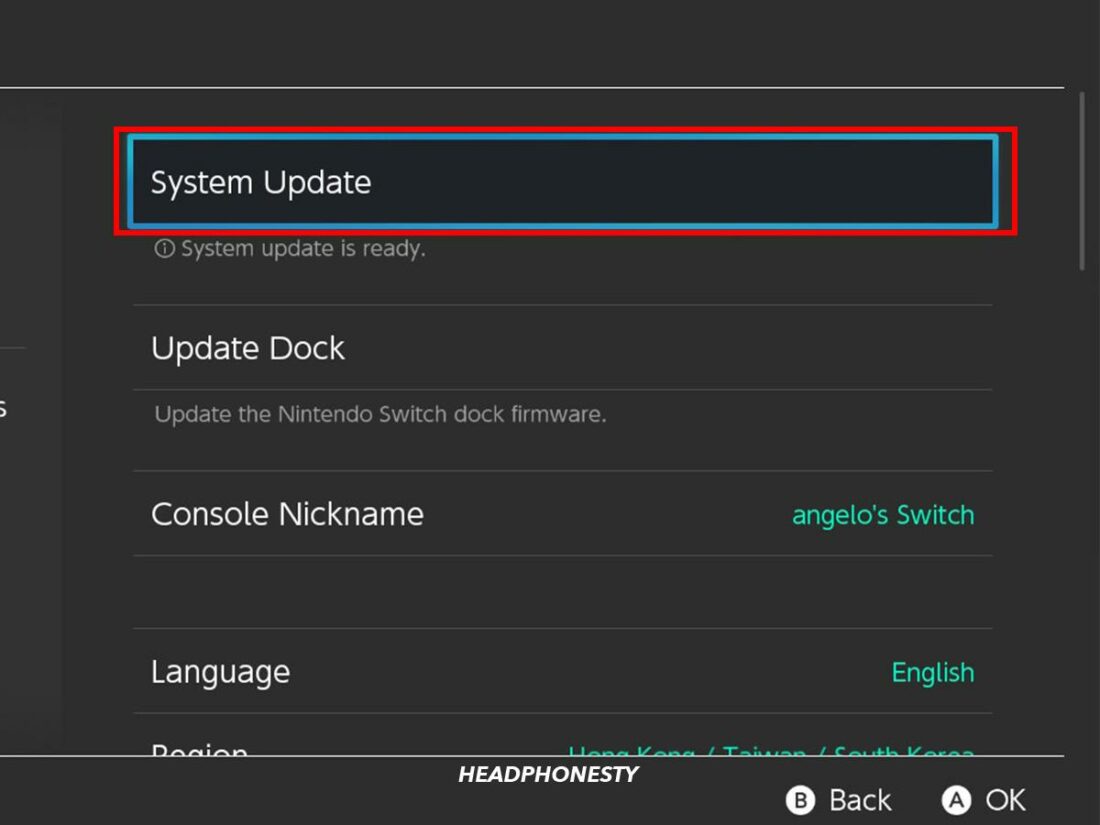
- First, ensure your Nintendo Switch system is updated to the latest version. You can check this by going to System Settings > System > System Update. If your system is outdated, update it by connecting the console to the internet and selecting System Update.
Select System Update. - After updating the system, restart the console.
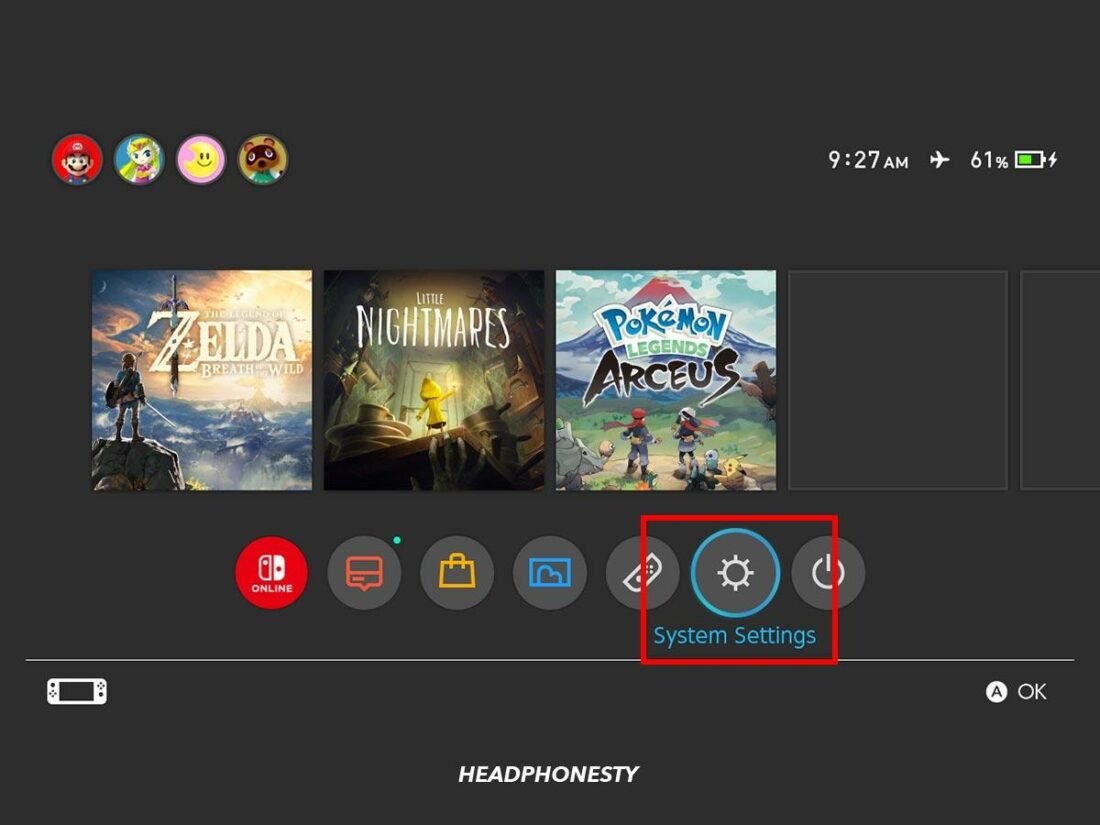
- Open System Settings by clicking on the gear icon at the bottom right of the Switch home screen.
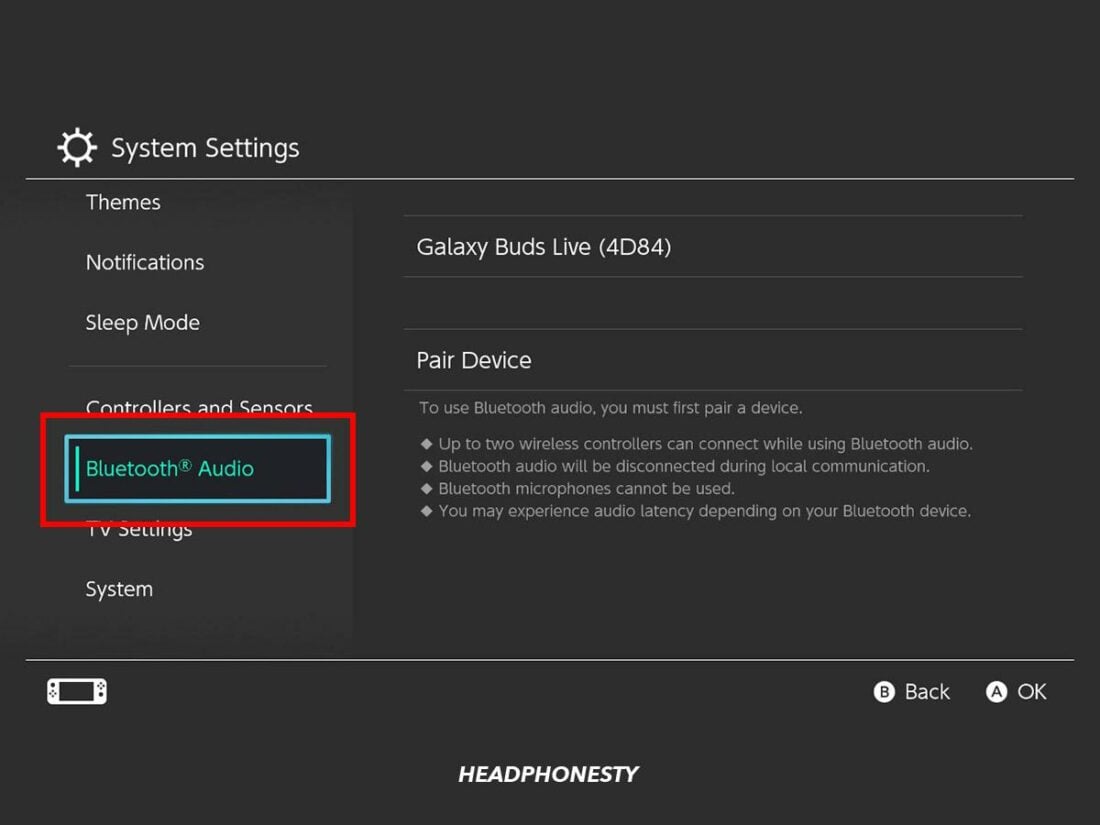
Open the System Settings. - Scroll down the menu and select Bluetooth Audio.
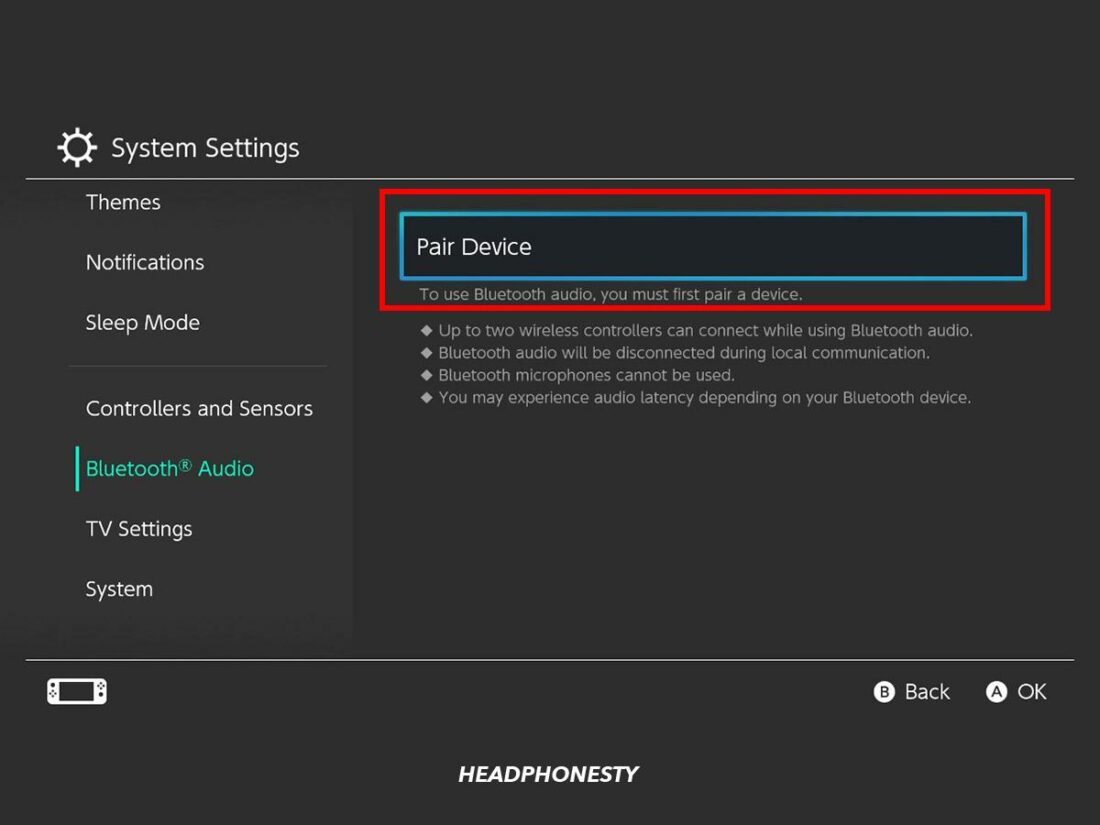
Select Bluetooth Audio. - Select Pair Device. A message will appear describing the capability and limitations of the Switch’s Bluetooth feature.
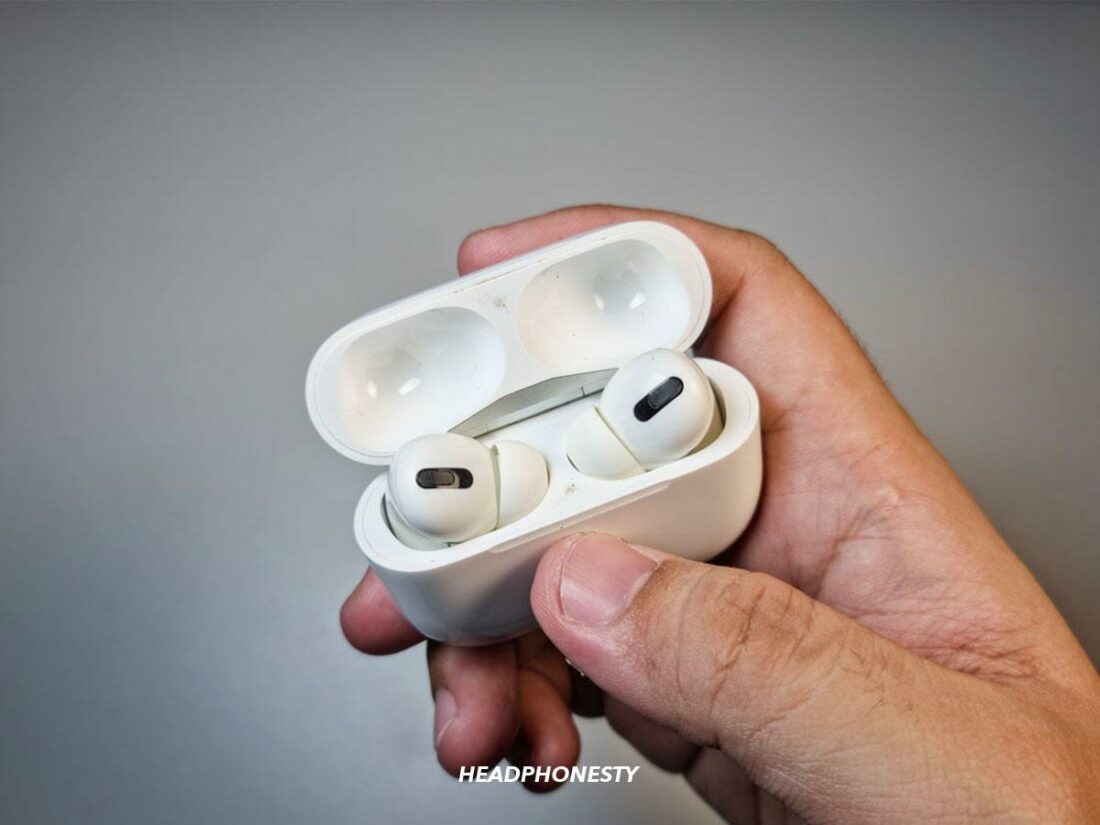
Select Pair Device. - Put your AirPods in their case and open the lid.
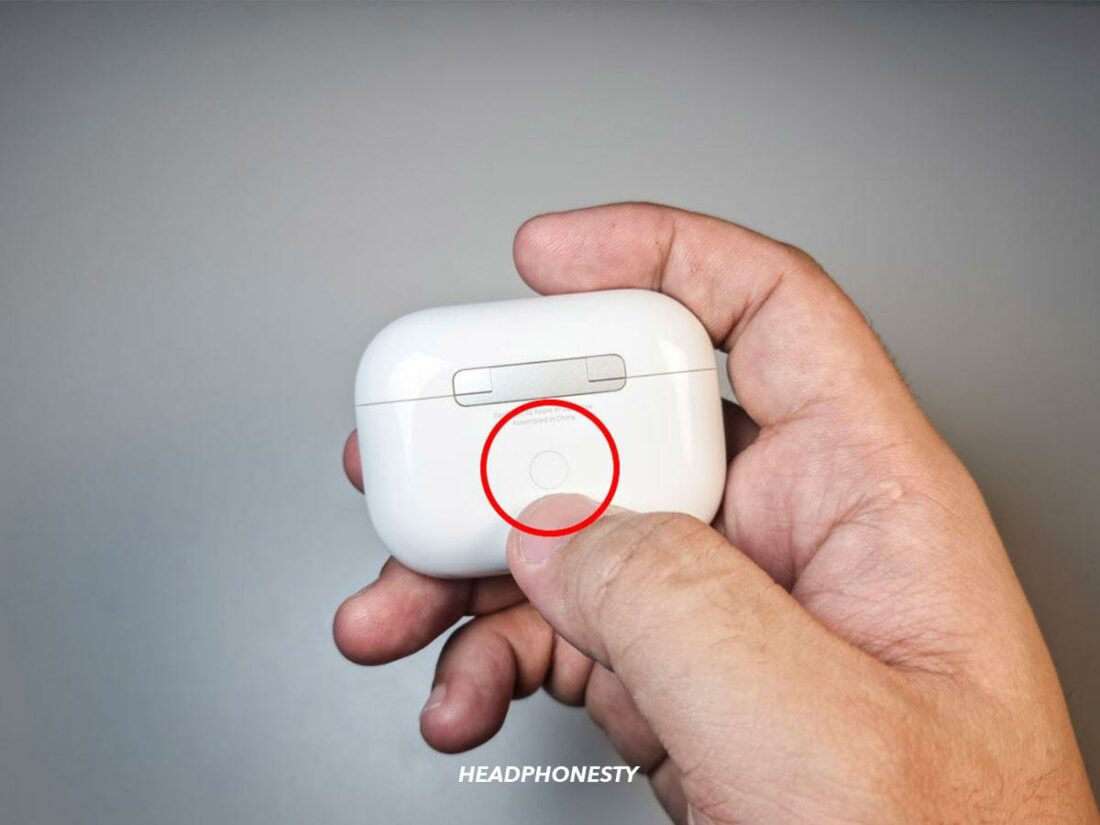
Place AirPods in their case. - Hold down the setup button on your AirPods case until the status light turns white to put them into pairing mode.
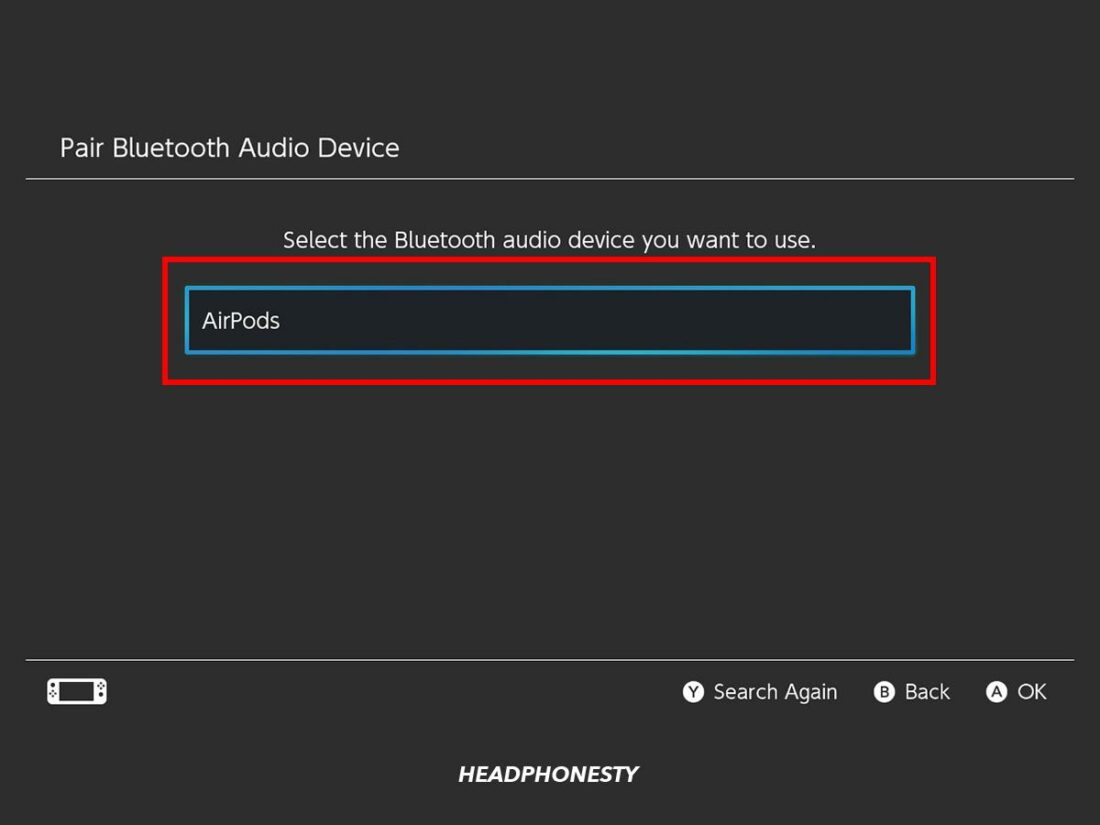
Hold down the setup button. - Wait for your AirPods to show up in the list of available devices. Select the AirPods’ name. If pairing fails, repeat the process.
Select the AirPods’ name.
While the Nintendo Switch now supports Bluetooth audio, some limitations remain. For instance, you won’t be able to use your AirPods’ mic when connecting them directly to your Nintendo Switch.
However, there are workarounds to this, such as using a separate Bluetooth dongle with a mic input or the Nintendo Switch Online app. For more information, you can read our article on connecting AirPods to the Nintendo Switch.
How to connect AirPods to Xbox One or Xbox Series X or S
Like the PlayStation, Xbox consoles, including Xbox One and Xbox Series X or S, do not natively support Bluetooth audio.
This is because Bluetooth operates on the 2.4 GHz frequency, which is already crowded with numerous other wireless devices, potentially leading to interference that can affect audio and gameplay.
To avoid this, Microsoft developed its own wireless technology, known as the Xbox Wireless Protocol. This technology operates at a higher frequency, making it less likely to experience interference and resulting in smoother audio and gameplay. However, this makes normal Bluetooth headphones incompatible with the Xbox.
Despite this limitation, it is still possible to connect your AirPods to your Xbox console using a workaround.
One such method involves using the Xbox app. This app lets you access your Xbox console games on a mobile device or PC, letting you play your games and send the audio to your AirPods through your PC.
Here’s a guide on how to connect your AirPods to the Xbox One using the Xbox app:
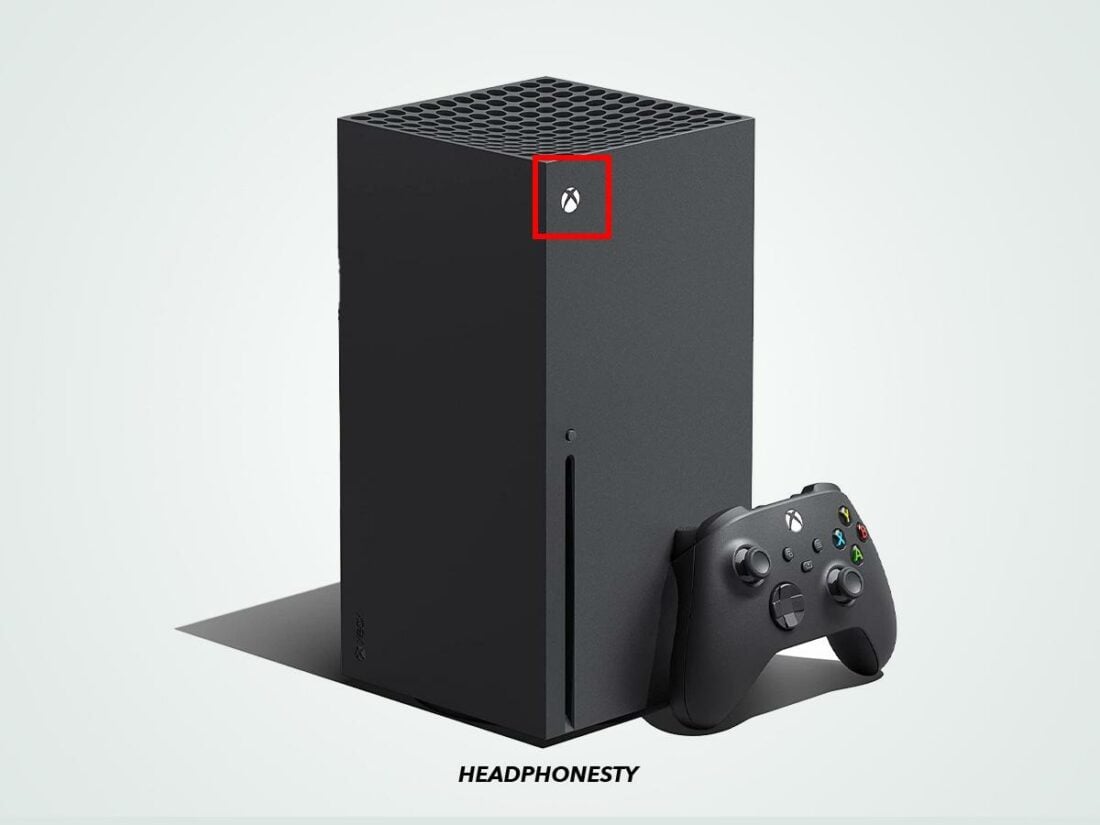
- Turn on your Xbox console.
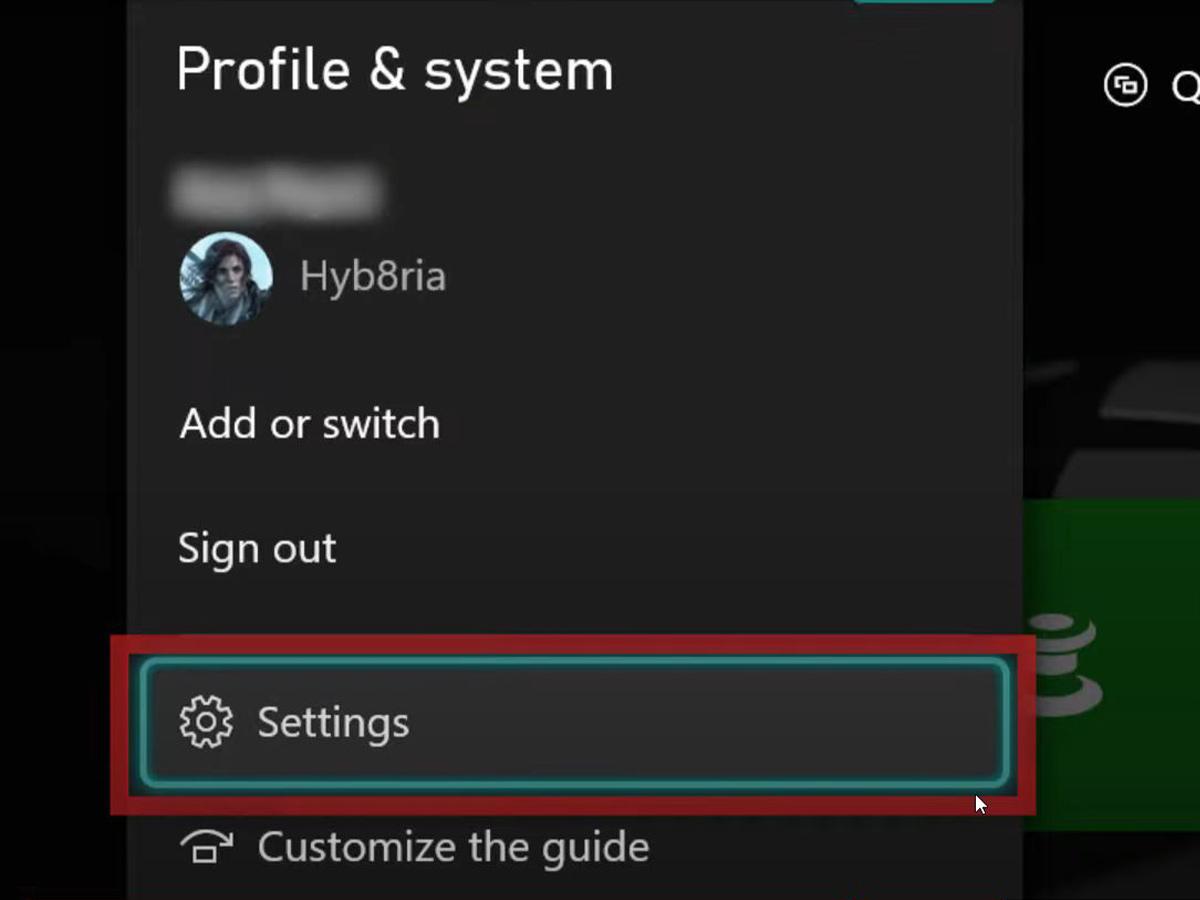
Turn on your Xbox console. - Press the Xbox icon on your controller, then go to Profile & System > Settings.
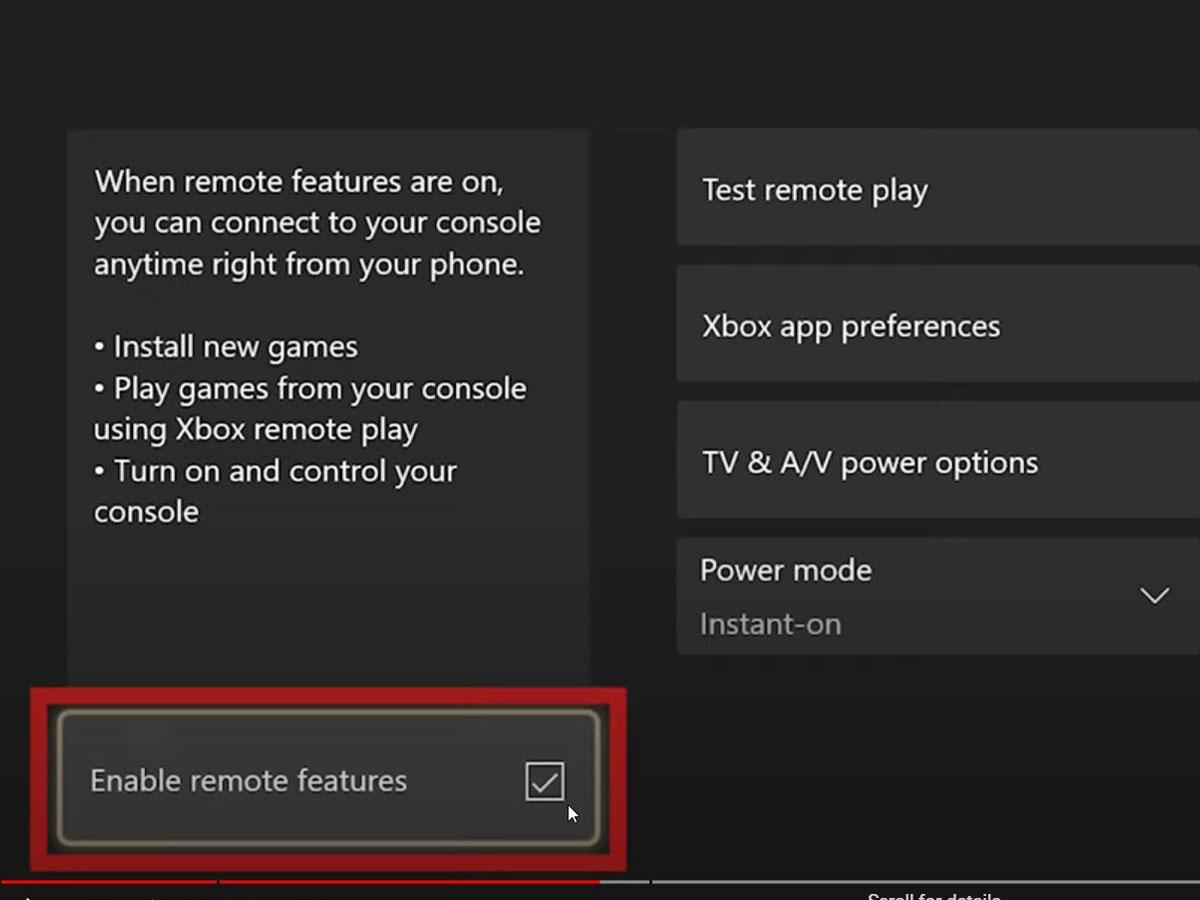
Accessing Xbox One settings. (From: Youtube/Insider Tech) - Select Devices & Connections > Remote features, then tick the check box beside Enable remote features.
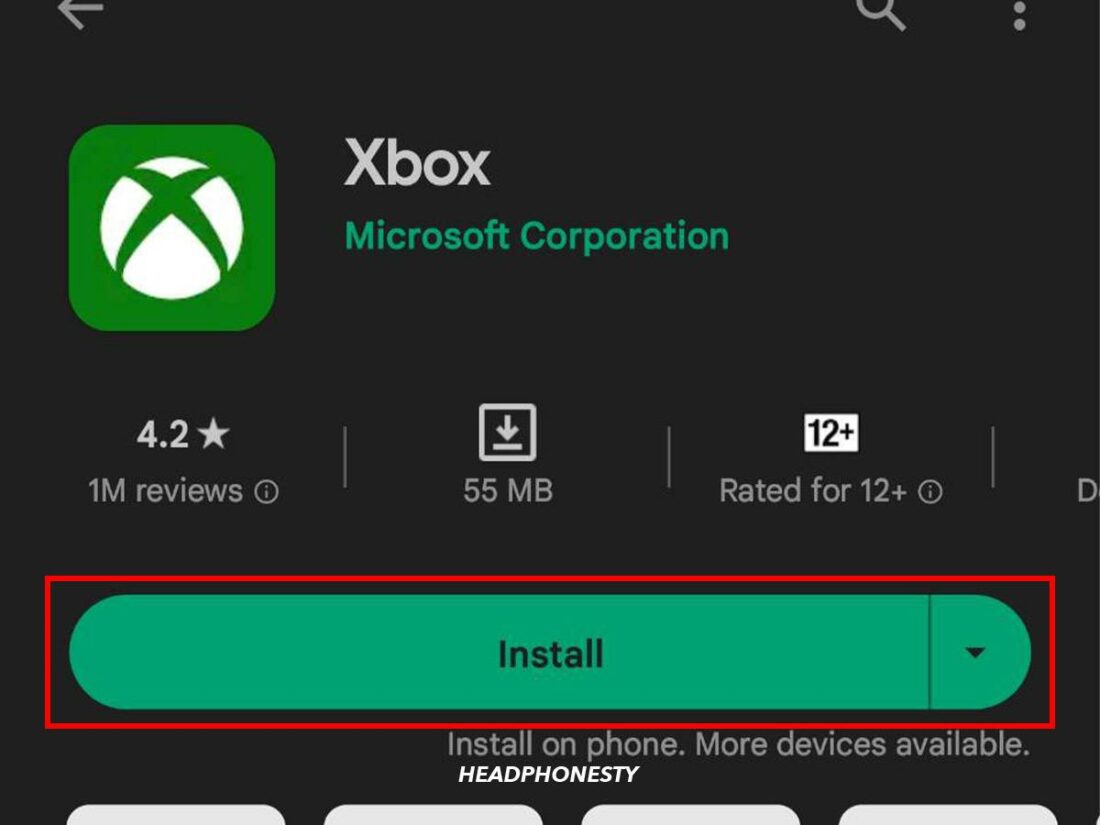
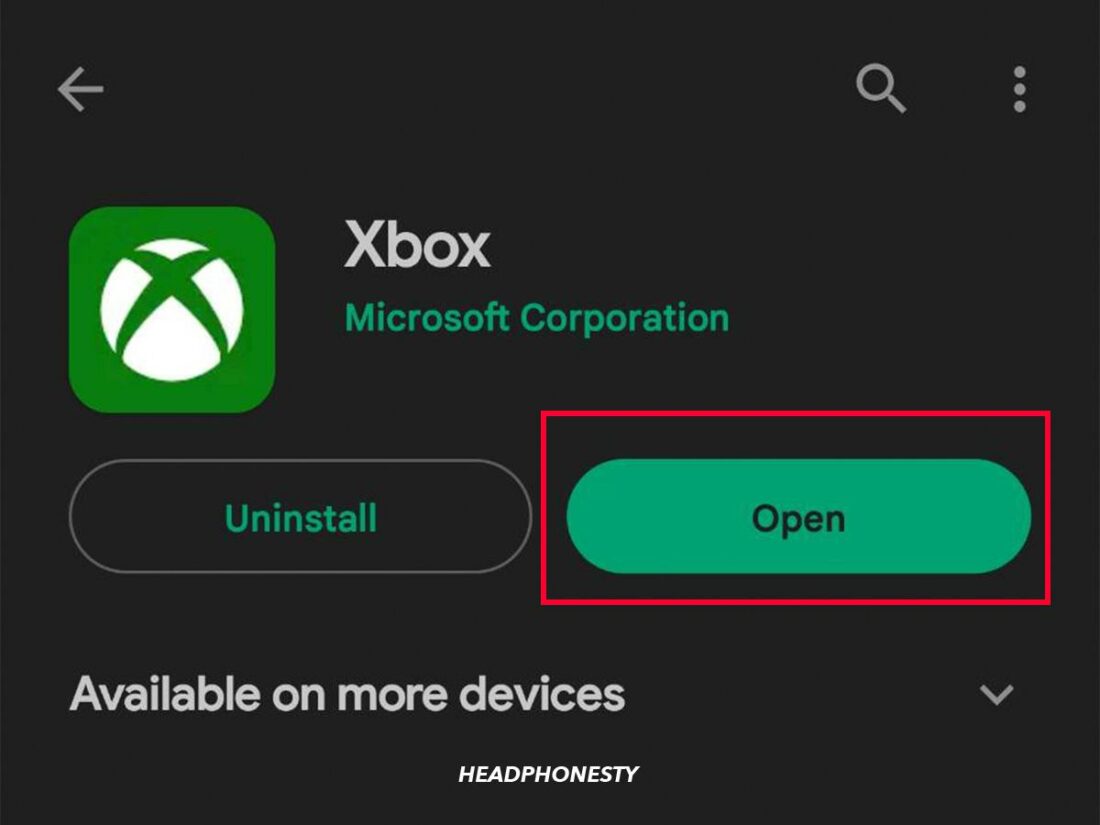
Enabling remote features on Xbox (From: Youtube/Tech Insider) - Download the Xbox app from the App Store or Google Play Store onto your mobile device or from the Microsoft Store onto your PC.
Install the Xbox app. - Open the Xbox app on your device and log in to the same Microsoft account as your Xbox One.
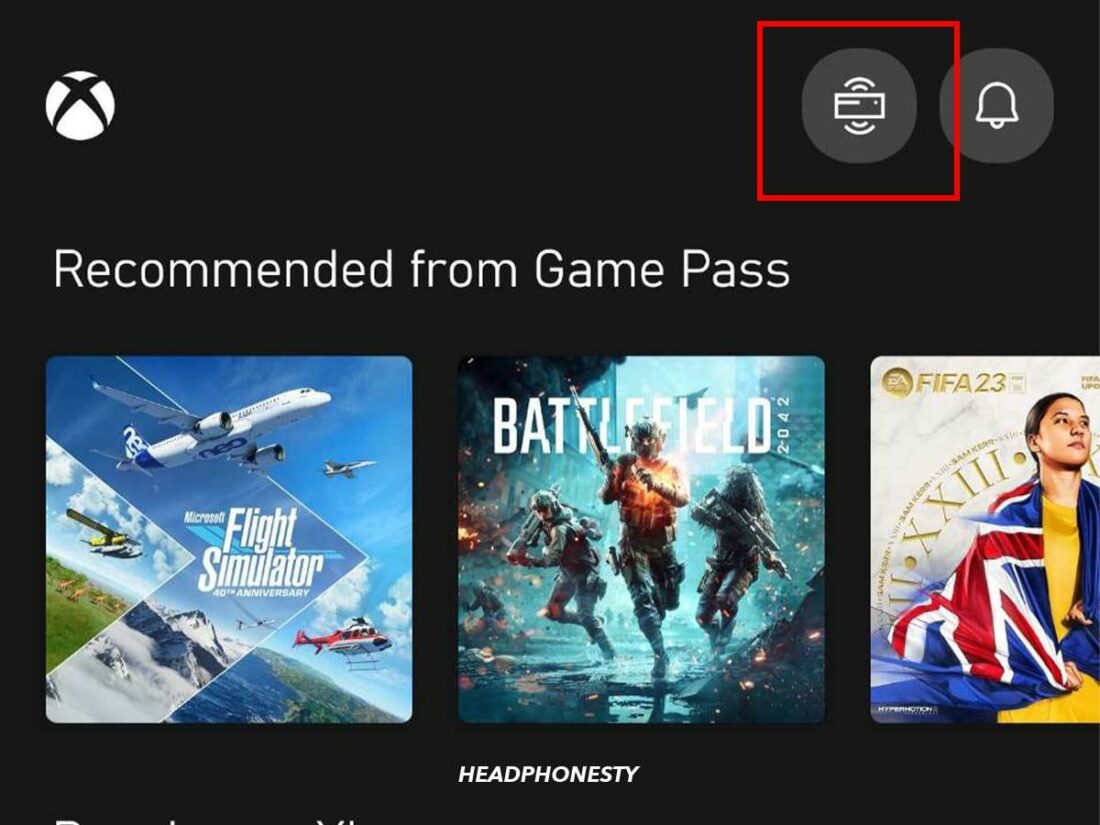
Open the Xbox app. - On the app’s home screen, you’ll see an icon that looks like an Xbox console in the upper-right corner. Tap on this icon.
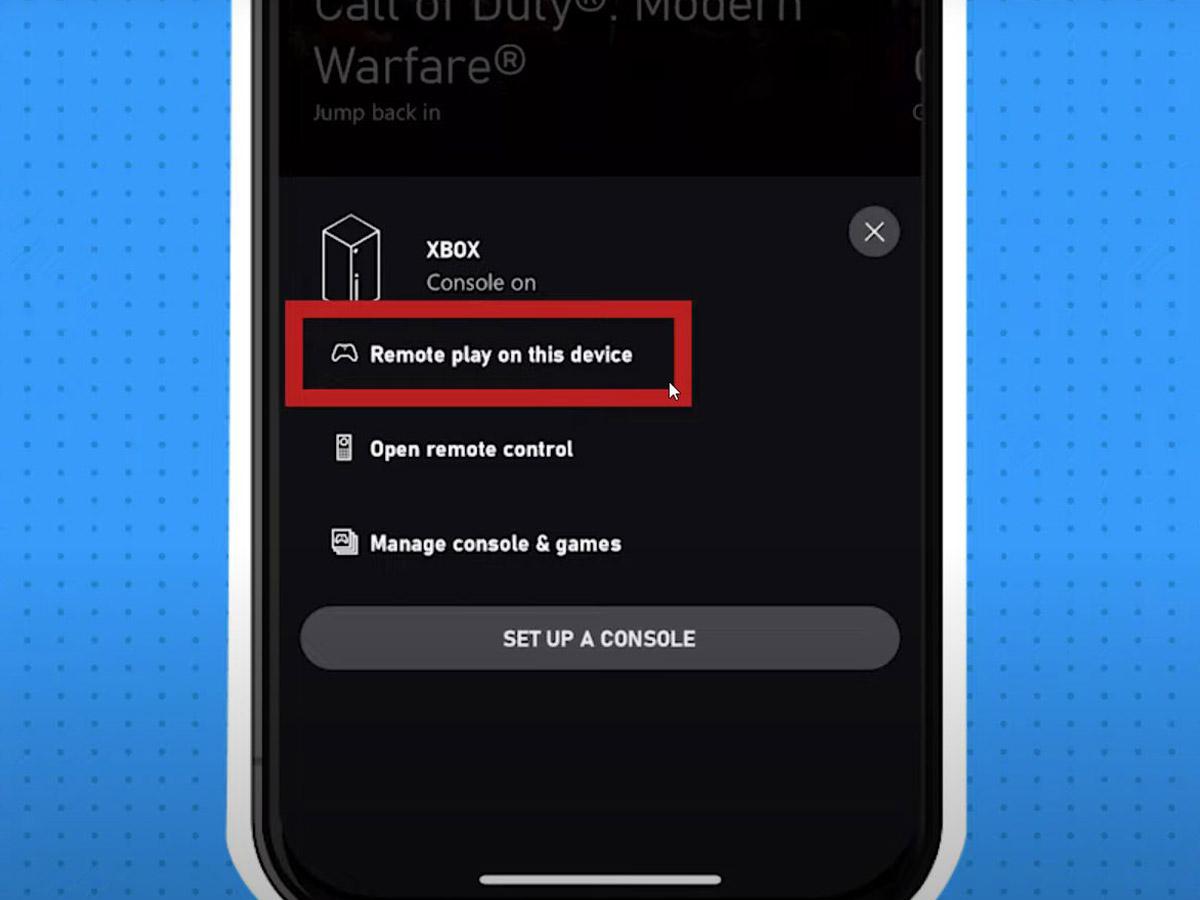
Tap icon that looks like an Xbox console in the upper-right corner. - A menu will appear. Select the option that says Remote play on this device.
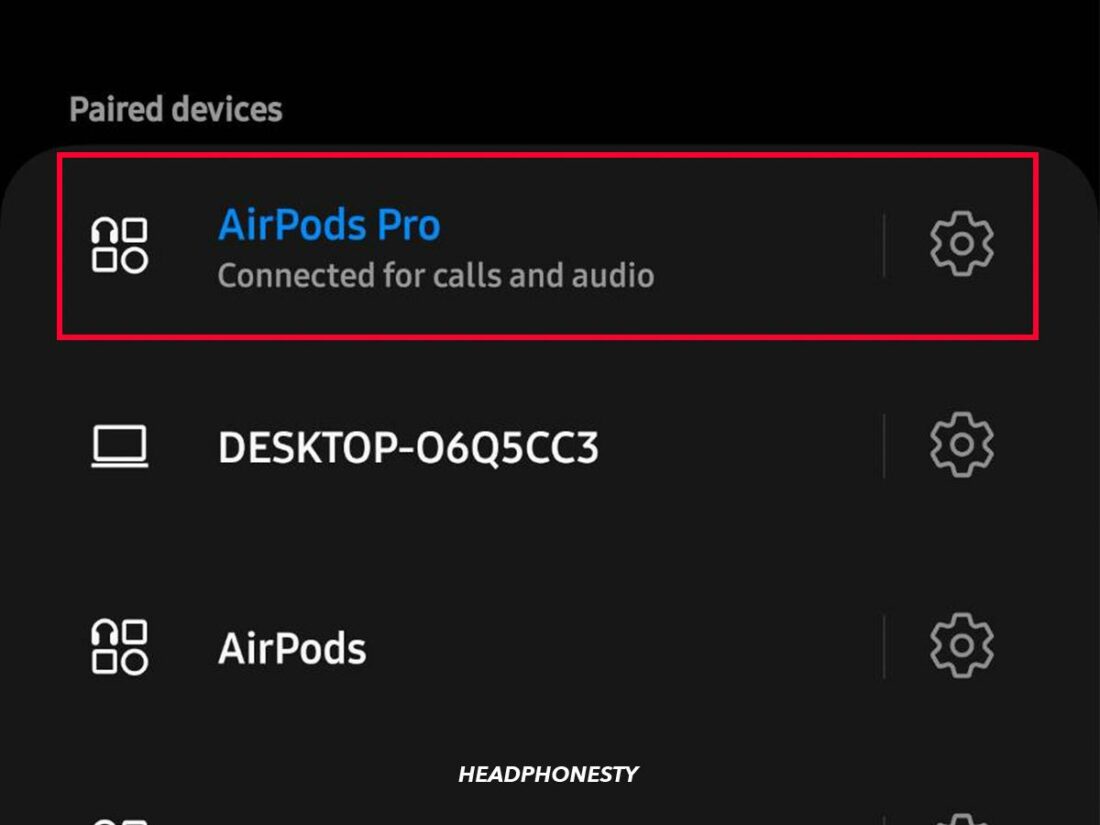
Remote play on this device option. (From: Youtube/Insider Tech) - Connect your AirPods to the device with your Xbox App.
Connect your AirPods to the device with your Xbox App. - Once the setup is complete, you can start playing a game on your Xbox. The game video will appear on your device’s screen, and the audio will be sent to your AirPods.
Conclusion
Now you know how to connect your AirPods to any device and can wirelessly stream high-quality audio without any issues. You might have learned a few shortcuts to streamline the process next time.
Which device did you use to connect your AirPods? Is there an easier shortcut that we missed? Make sure to tell us in the comments below!
I’d like to connect my EarPods to a Bluetooth JVC radio/ speaker/cd player.